Overview
Reports are one of many Designer Elements utilized throughout the Decisions environment. They are used as a method of data collection, filtration, and organization. The data from these Reports can then, in turn, be:
- Downloaded as a CSV File
- Converted into a PDF File
- Used as a Flow step
- Displayed as a Page in the Studio/Portal
- etc...
To create and design Reports, use the Properties tab in conjunction with the Data Sources, Filters, Data Fields, and Views functions. The following document discusses the default layout and tools provided by the Report Designer.
Default Designer View
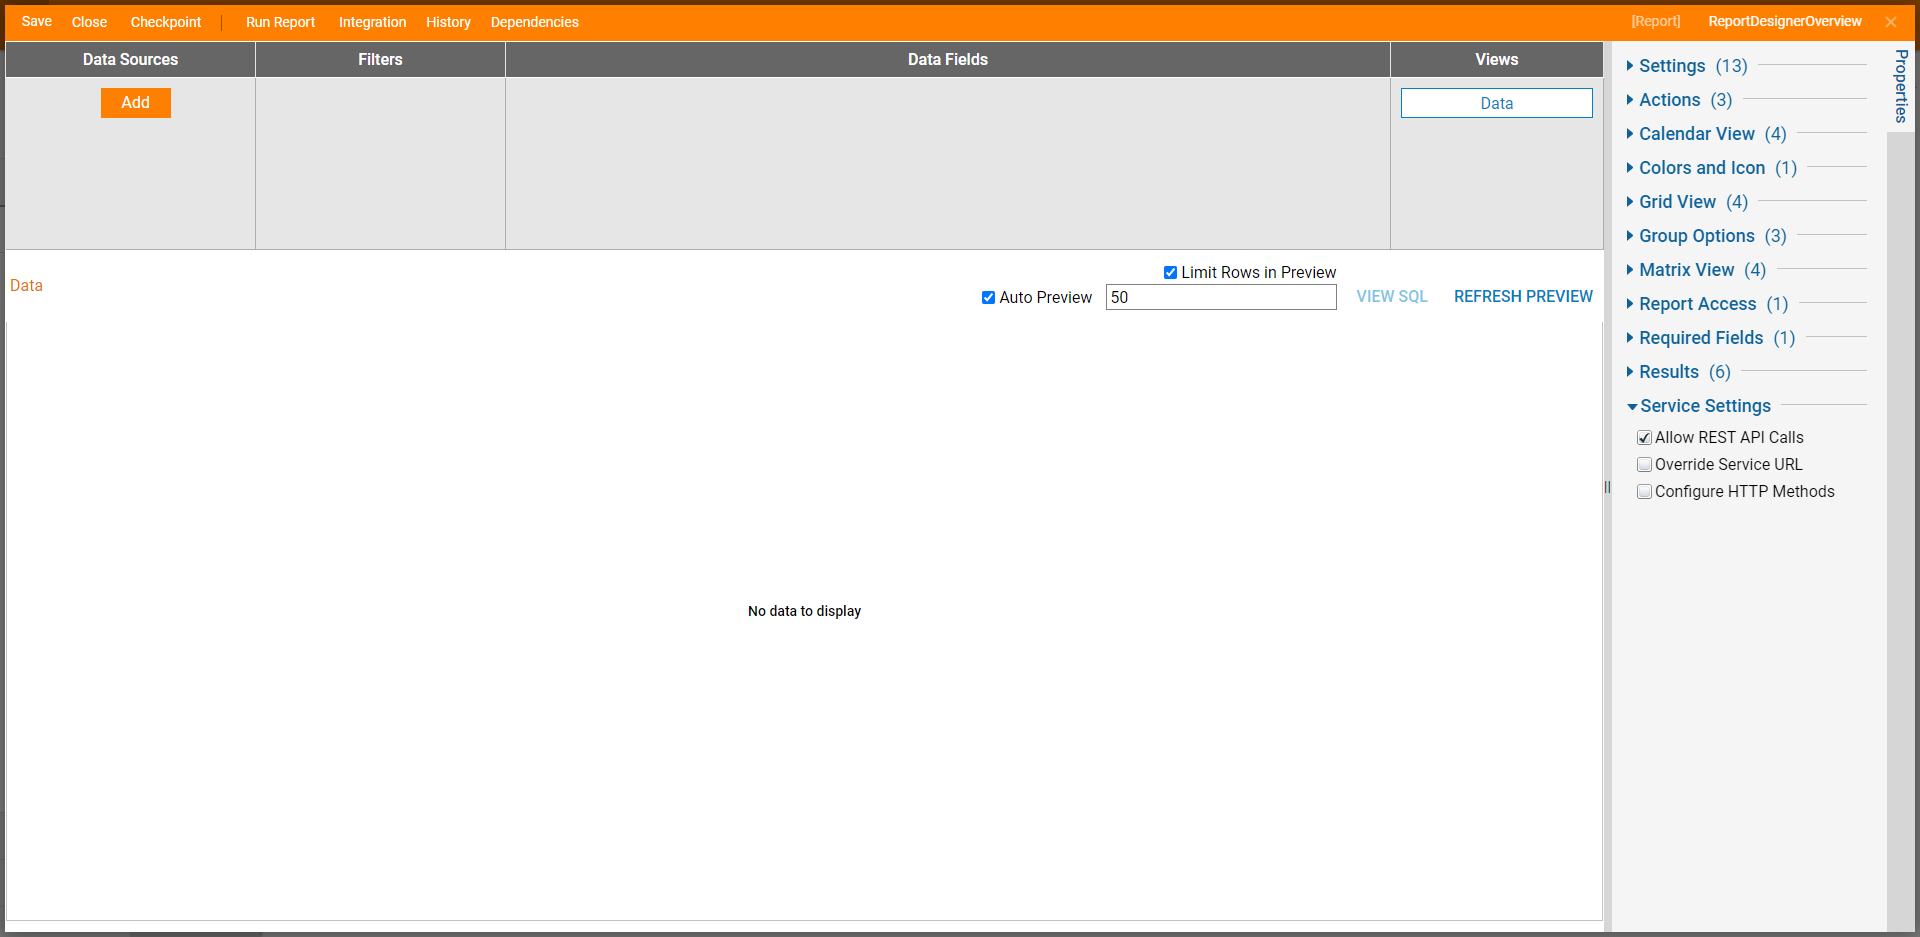
Upon creating a new Report, users are presented with the blank Report Designer screen. Above the blank Report, users can provide the desired data via the grey Data panel.
To edit various aspects of the Report and the data utilized by it, users may access the Properties tab to the right.

Data Source Panel
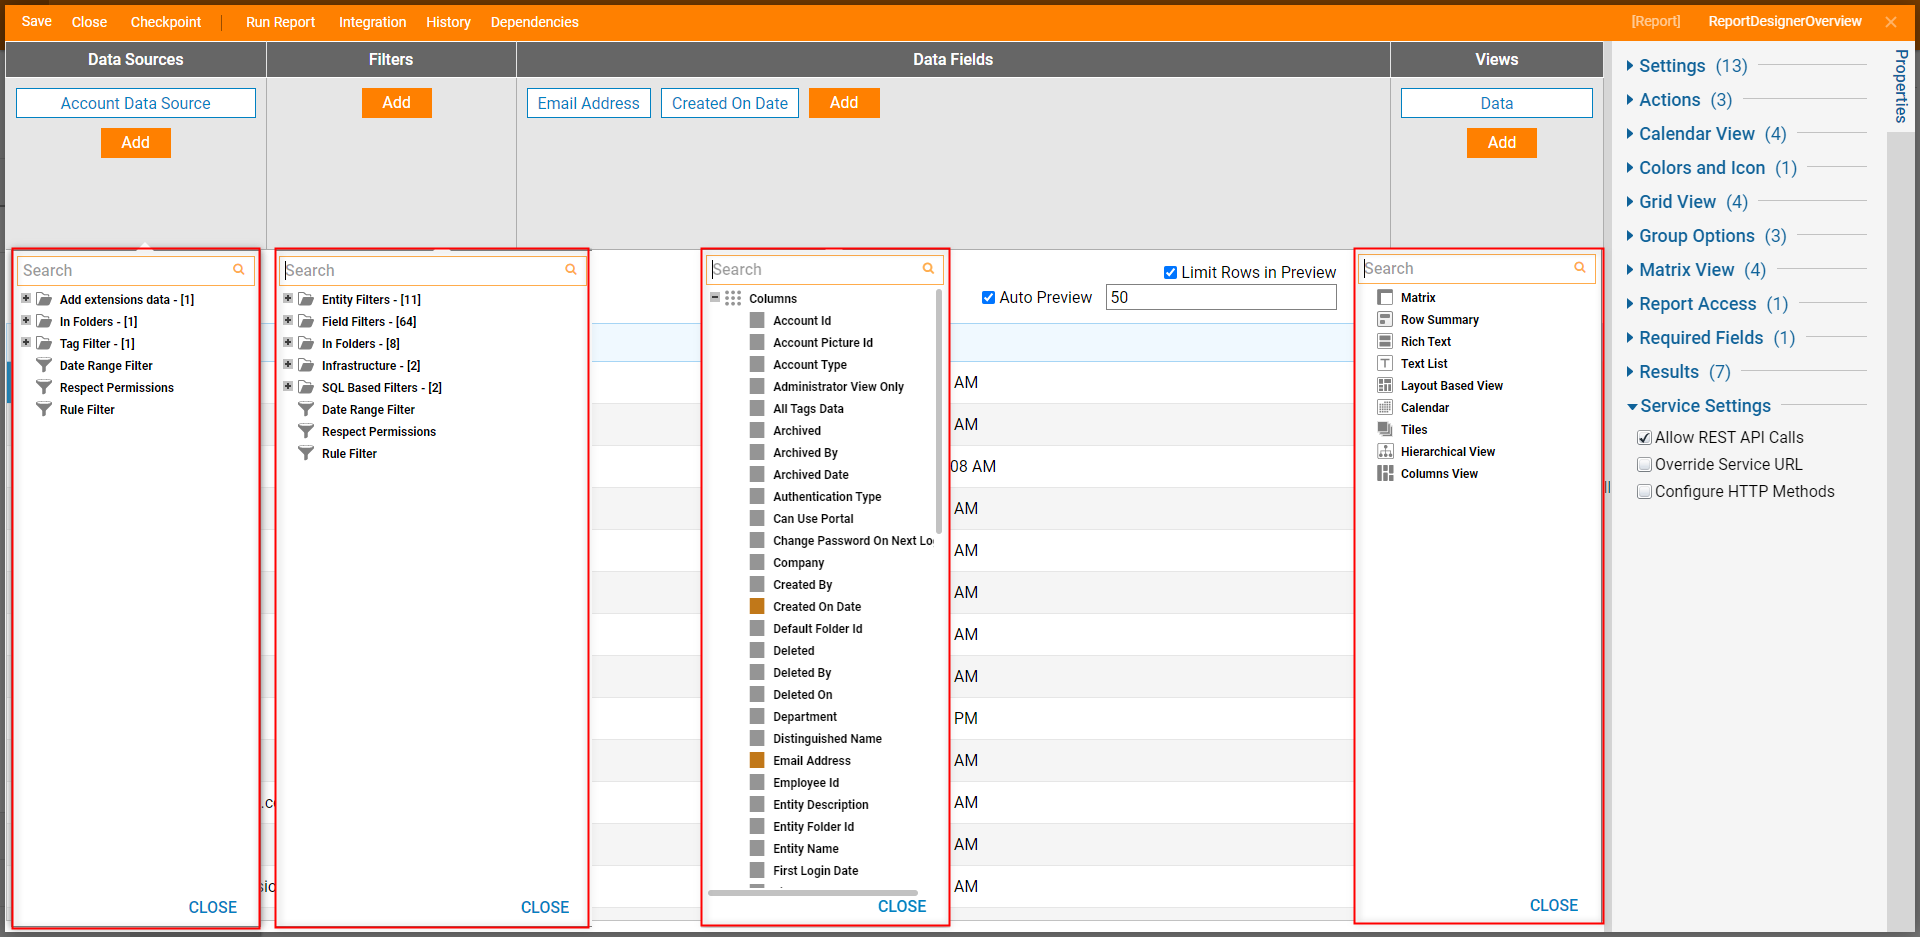
The Data Source panel is panel provides data to display on the Report. Selecting the Add button allows users to add each respective item/feature to the Report.
The panel is divided into four separate columns; each column and its function are as follows:
| Column | Function |
|---|---|
| Data Sources | Allows users to provide data for the Report. After being configured in the remaining columns, the data is then displayed on the Report. |
| Filters | Allows users to apply specific Filters to filter out data based on specific Properties. Such Filters include Rule Filters, Date Range Filters, Folder location Filters, and more. |
| Data Fields | Allows users to define which Data Field/Property of the Data Source is displayed on the Report. Note: at least one Data Field is required for the Report to display the Data Source. |
| Views | Allows users to display the data on the report in alternate layouts. These include Matrix, Row Summary, Rich Text, Layout Based View, Calendar, Tiles, Hierarchical view, and Columns View. |

Top Action Bar
The following chart provides information on the Actions provided by the Top Action Bar in the Report Designer. Additionally, some of these Actions can be performed using keyboard shortcuts (as notated).

| Action | Function |
|---|---|
| Save | Saves the Report without closing the Designer. This action includes a window to write notes for the current Save State if needed. |
| Close (X) | Closes the Report Designer; upon Close, users are provided the option to also Save the Page and provide Notes. |
| Checkpoint | Creates a Backup point for the Report at the point where the Checkpoint action is enacted, then stores it in the History Folder. This can be useful when making drastic changes that could affect the contents or design of the Report. For more information, please visit the Creating Checkpoints article. |
| Run Report | Runs the Report in a new window. The report will display as expected upon Runtime within a Page or Flow. |
| History | Displays the History and Documentation page for the Report. Displays each saved version of the Report and allows user; users can use this list of versions to Restore desired versions of the Report. |
| Integration | Opens the Integration Details page for the Report; this Page allows users to setup the Report for API and/or REST Integration. |
| Dependencies | Offers a breakdown of which Designer Elements the Page depends on, as well as which Elements depend on the Page. For more information on Dependencies, see Dependencies Overview. |