Overview
| Module Details | |
| Installation Location | Administration > Features |
| Restart Required? | No |
| Step Location | Integration > SharePoint |
| Settings Location | SharePoint settings need to be defined for each step/integration |
| Prerequisites |
|
The SharePoint Module allows Users to access and manage their SharePoint data through pre-built steps in the Flow Designer. By utilizing the module, Users can add, delete, or download documents or lists from their SharePoint sites.
Adding a SharePoint List
This example will demonstrate how to configure SharePoint and connect to a SharePoint list in Decisions.
In this example, a custom list was created in SharePoint named Customer Contacts.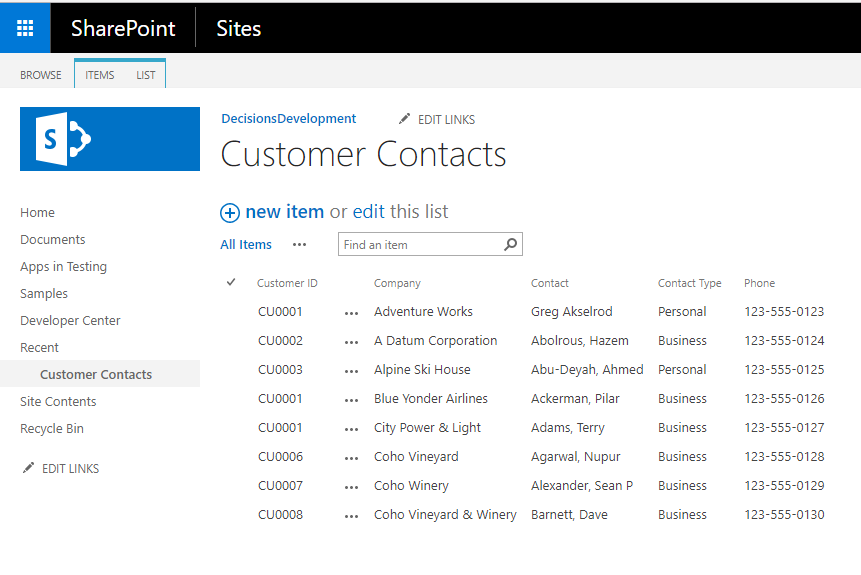
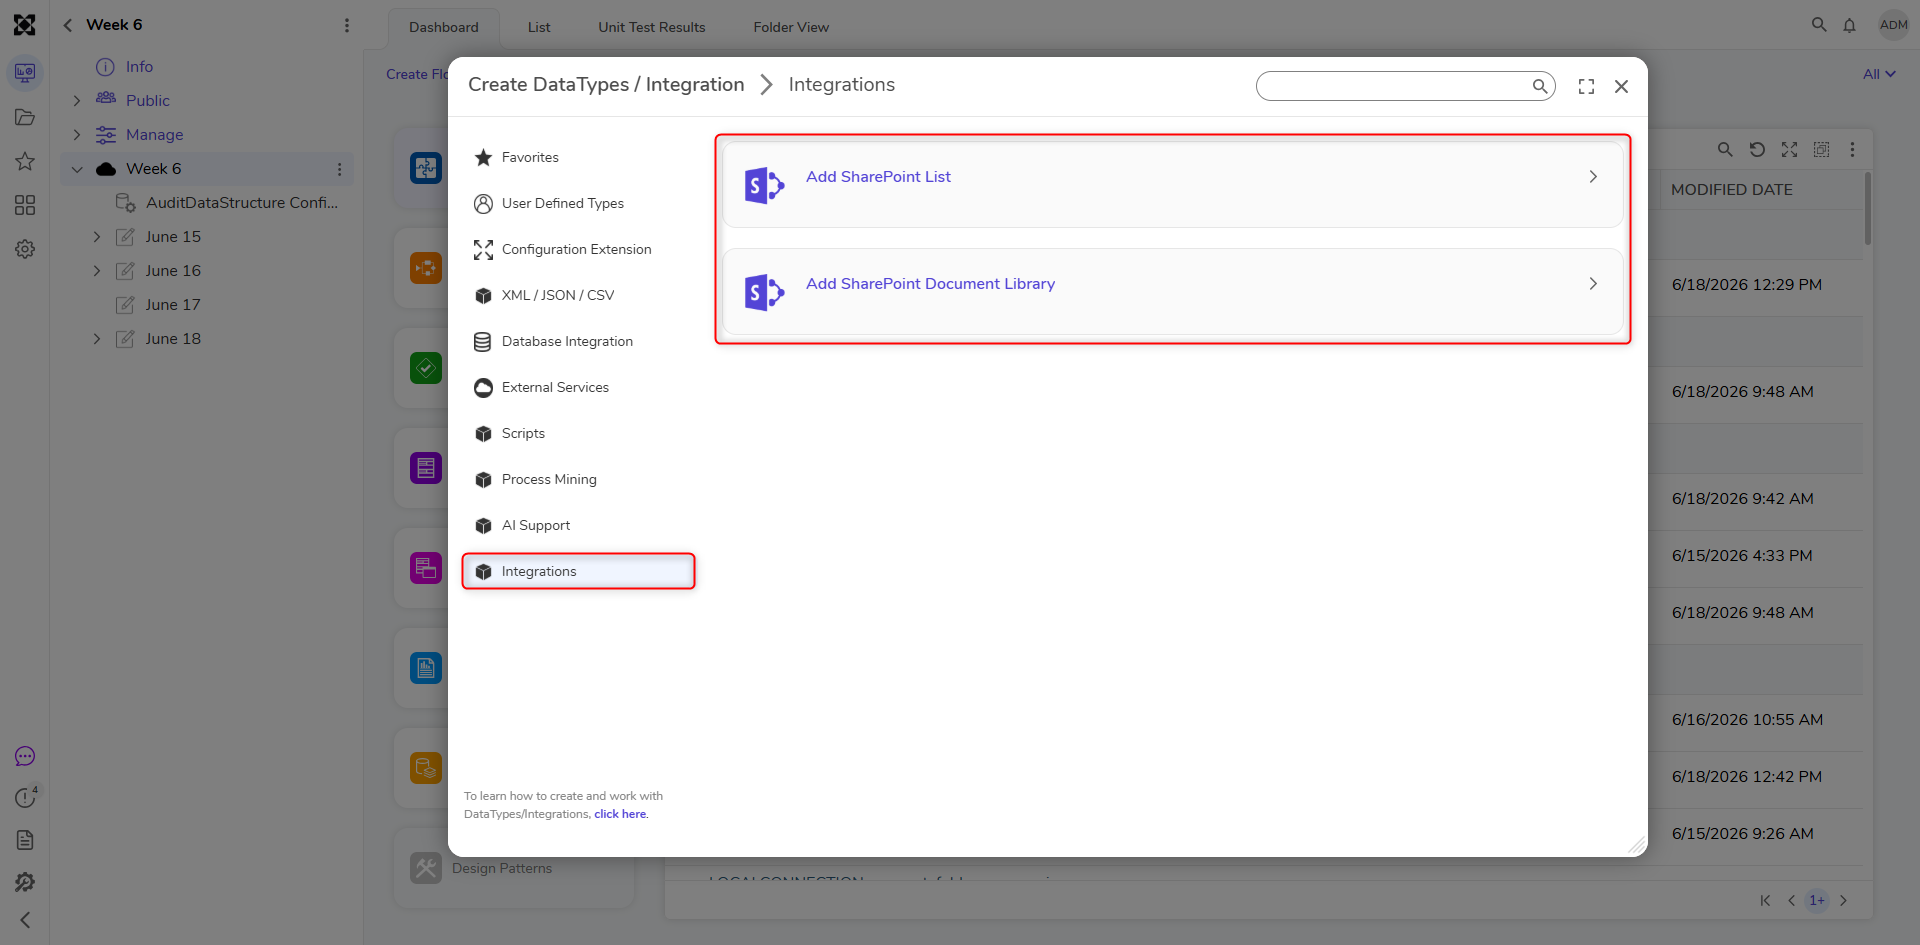
- In the Decisions platform, navigate to a Project. Then press Create DataTypes/Integration, select INTEGRATIONS. Then click ADD SHAREPOINT LIST.
- From the Edit Entity window, set the Category Name and List/Document Library Name. A description can also be added.
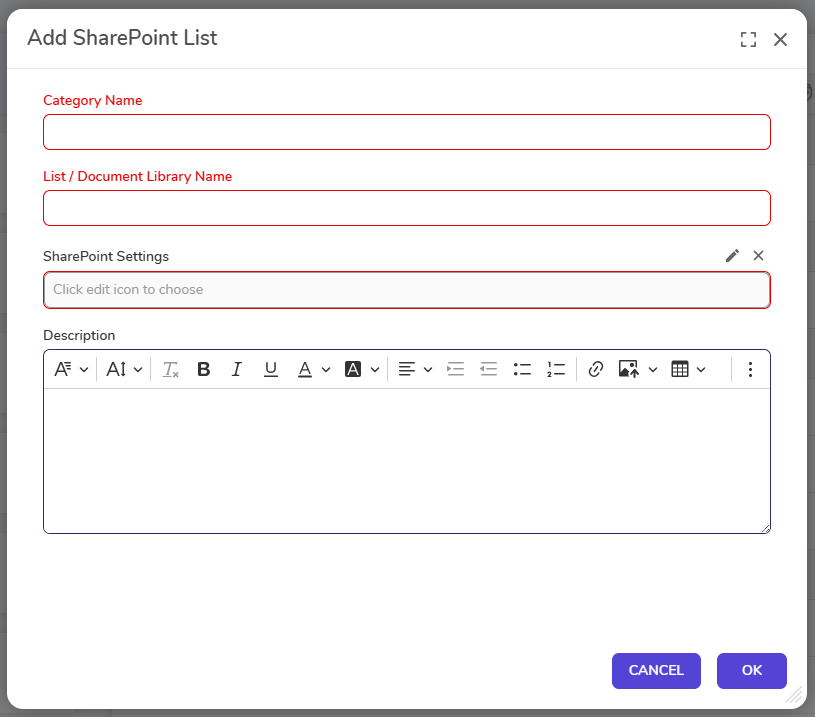
- Under SharePoint Settings, select the Edit icon to configure the connection to SharePoint. Click OK.
Proper SharePoint Integration requires the SharePoint Settings to be 100% accurate; these must match the details associated with the integrated document. Below is a list of settings that need to be defined:
| Configuration Option | Description |
|---|---|
| Authentication | Authentication to connect to SharePoint |
| Sharepoint Site | The SharePoint site URL, likely either "https://<domain_here>.sharepoint.com" or a self-hosted URL. If using SiteMinder, this is the SiteMinder URL. |
| OAuth Token | Token for connecting to the SharePoint site |
If using SharePoint Online, there are three additional options to configure:
- User Agent - String value of either ISV|CompanyName|AppName/Version (ISV Application) or NONISV|CompanyName|AppName/Version (Enterprise Application)
- Retry Count - Number of calls to retry
- Retry Delay (in seconds) - Time a retry will occur
After saving the information, the Configuration Data and a Decisions Defined Data Structure are auto-generated in the SharePoint Folder. Additionally, users will now be able to access steps in the step toolbox via Integrations > SharePoint.
Sharepoint Limitations
SharePoint has inherent limitations in its capacity to handle files. They are:
- Only 5,000 files can be displayed in a view.
- Only 300,000 files can be in a library before there are performance issues.
- Unique document permissions are limited to 50,000 items per list.
Available Steps (After Install)
| Step Name | Description |
|---|---|
| SharePoint Add Document | Allows Users to upload documents to SharePoint via Flow. |
| SharePoint Delete Document | Enables Users to delete a file from the SharePoint site utilizing a Flow. |
| SharePoint Get Document | Allows Users to obtain pre-existing documents from their site and access the information within a Flow. |
Available Steps (After Creating a Document Library)
| Step Name | Description |
|---|---|
| Add Document | Allows Users to add a Document to an integrated SharePoint Document Library. |
| Add Folder | Enables Users to add a Folder to an integrated SharePoint Document Library. |
| Delete Document | Enables Users to delete a document from an integrated SharePoint Document Library. |
| Fetch Documents | Enables Users to fetch documents from an integrated SharePoint Document Library. |
| Folder Exists | Determines whether a Folder exists within an integrated SharePoint Document Library |
| Get All Documents | Enables Users to retrieve multiple documents from an integrated SharePoint Document Library. |
| Get All Folders | Enables Users to retrieve multiple folders from an integrated SharePoint Document Library. |
| Update Documents | Enables Users to update multiple documents from an integrated SharePoint Document Library. |