Overview
The Designer Repository contains all shared Designer Projects that have been stored and saved within an environment. These Projects can be sent, imported, or added to the Decisions Repository. To take full advantage of the Repository Actions, Designer Elements can be grouped into a Designer Project, which can then be added to the Repository. The following document demonstrates how to use the Designer Repository from a connected environment. Within a Designer Repository, all stored Projects can be viewed and accessed within the Folder Tree. Selecting a Project Folder from the tree will display the Project Dashboard, providing an overview of the selected Project.
Project Actions
In the Actions Bar, Create Branch, Create Sub Project, and Delete Project actions will be shown. Additional actions can be found by right-clicking the Project Folder in the Folder tree. 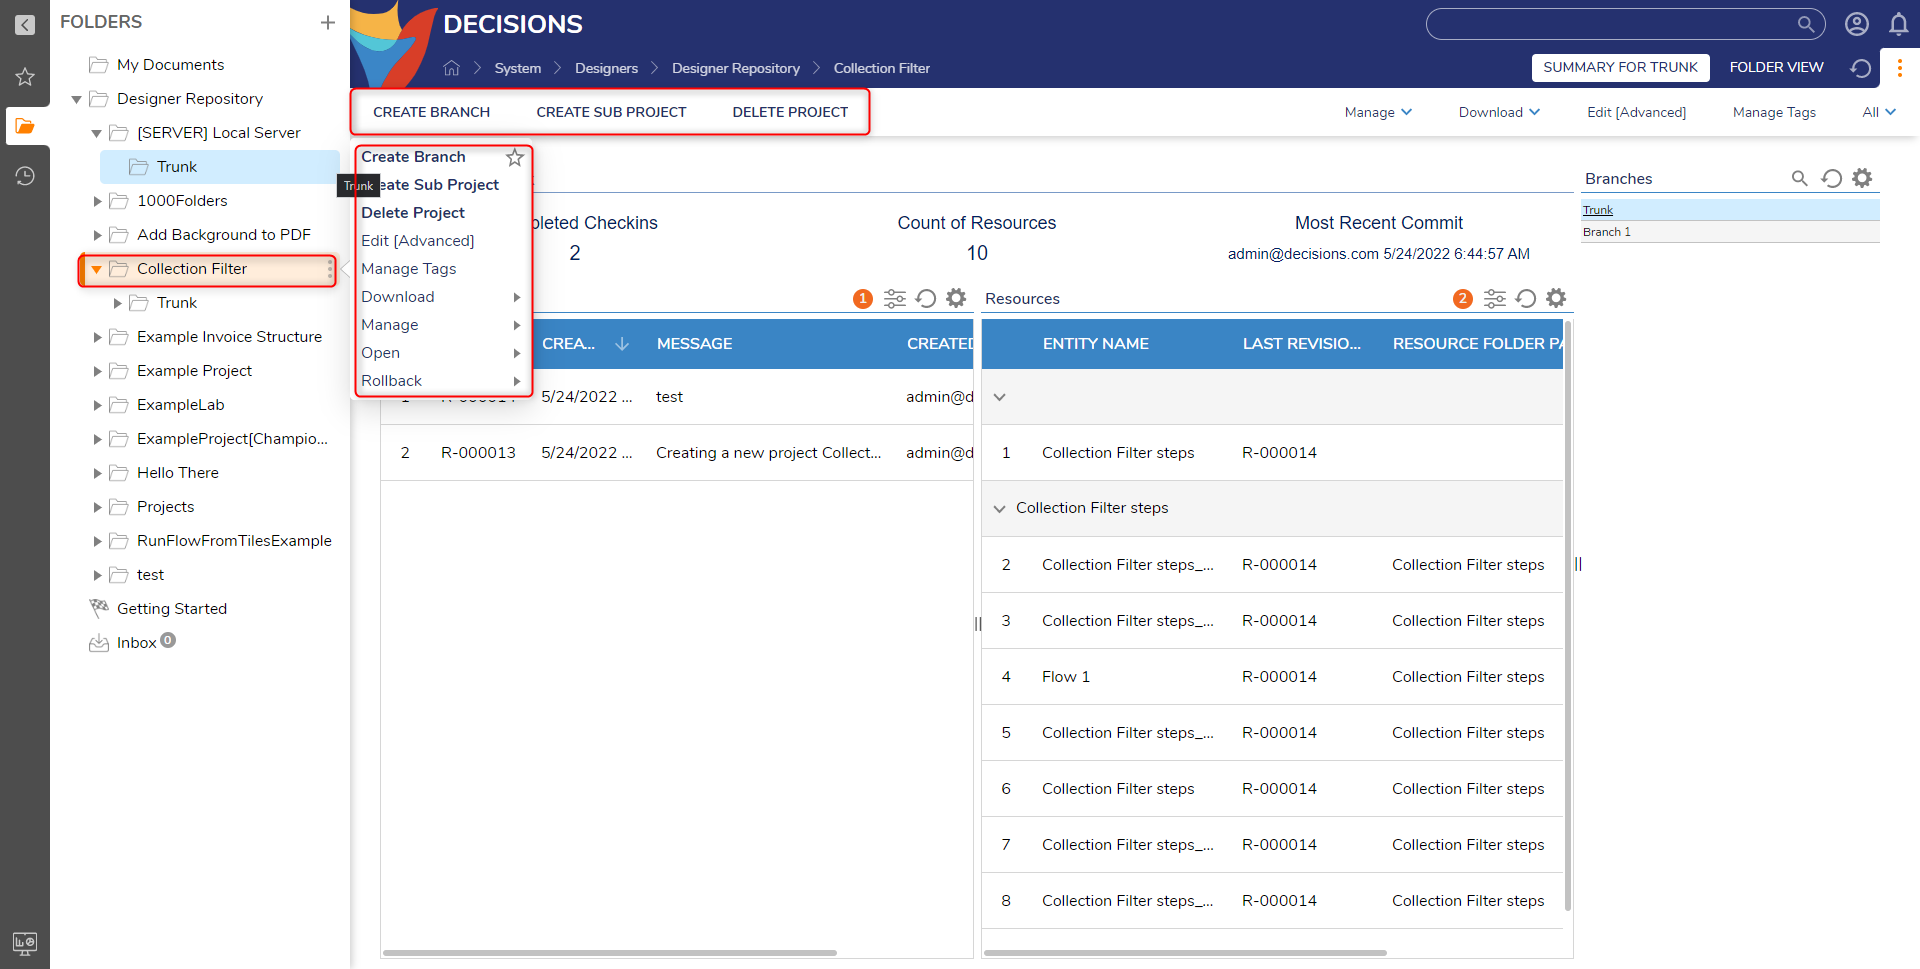
| Actions | Description | |
|---|---|---|
| Create Branch | Creates a new Branch of the project in the Repository. | |
| Create Sub Project | Creates a Sub Project within the currently selected Folder. | |
| Delete Project | Deletes the currently selected Project from the repository. | |
| Edit[Advanced] | Allows editing of project details, such as updating the Description for the Project. | |
| Manage Tags | Associates Tags to a Project. | |
| Download | ||
| Download as Project | Downloads the Project as a zip folder. | |
| Download as of Date | Downloads the Project at a specified Date. | |
| Download Specific Revisions | Downloads the Project at a specific revision. The Revision ID will needed. | |
| Manage | ||
| Manage Permissions | Folder Action used to manage permissions on a Folder. | |
| Open Containing Folder | Opens the Folder containing the Project. | |
| Permissions: Disable Permissions Inheritance | Disables Permission Inheritance on the Project Folder. | |
| Open | ||
| Open Folder | Opens a new tab containing the dashboard for the Project. | |
| Open Folder View | Opens a new tab displaying the list of Designer Elements in the Folder. | |
| Open Summary For Trunk | Opens a new tab displaying the dashboard for the Project. | |
| Rollback | ||
| Rollback Project to Date | Creates a new Revision for the Project. | |
| Rollback Project to Revision | Changes the currently stored project to use a specific Revision. | |
Create Project
There are multiple methods to create Projects in Decisions. One method is through using the Create Project action, which is available on the Designer Repository Folder. 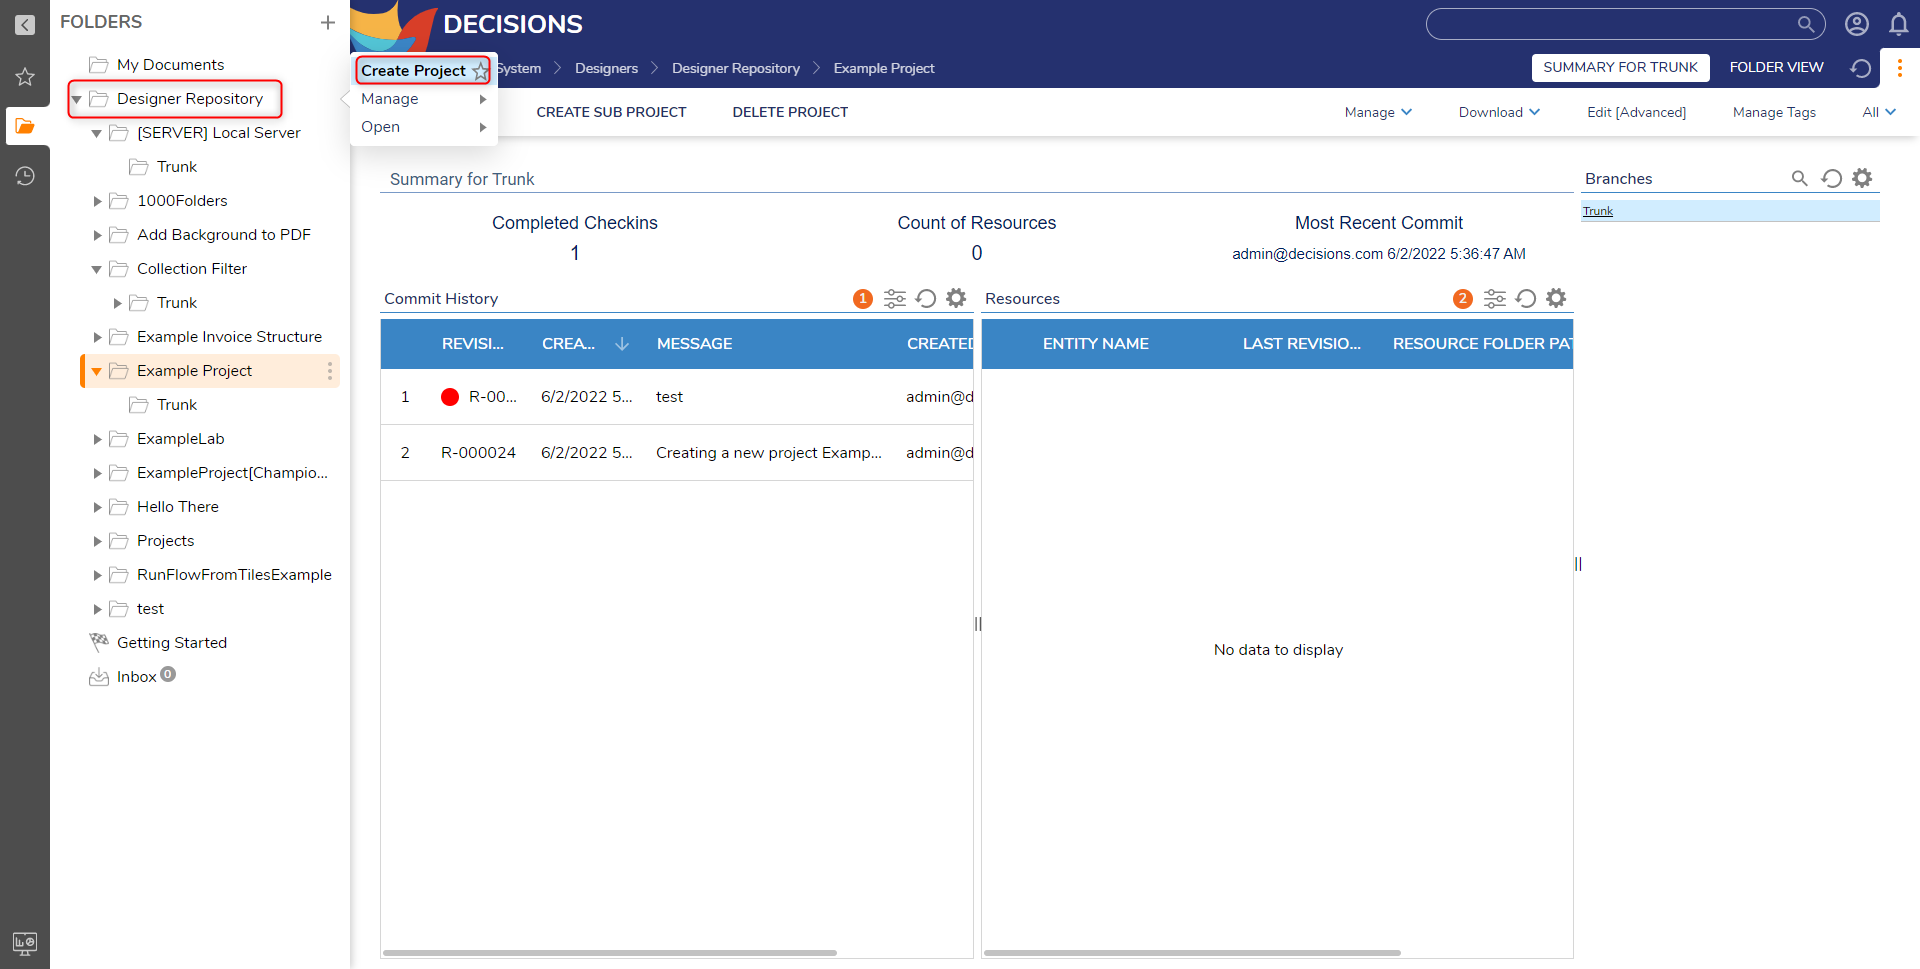
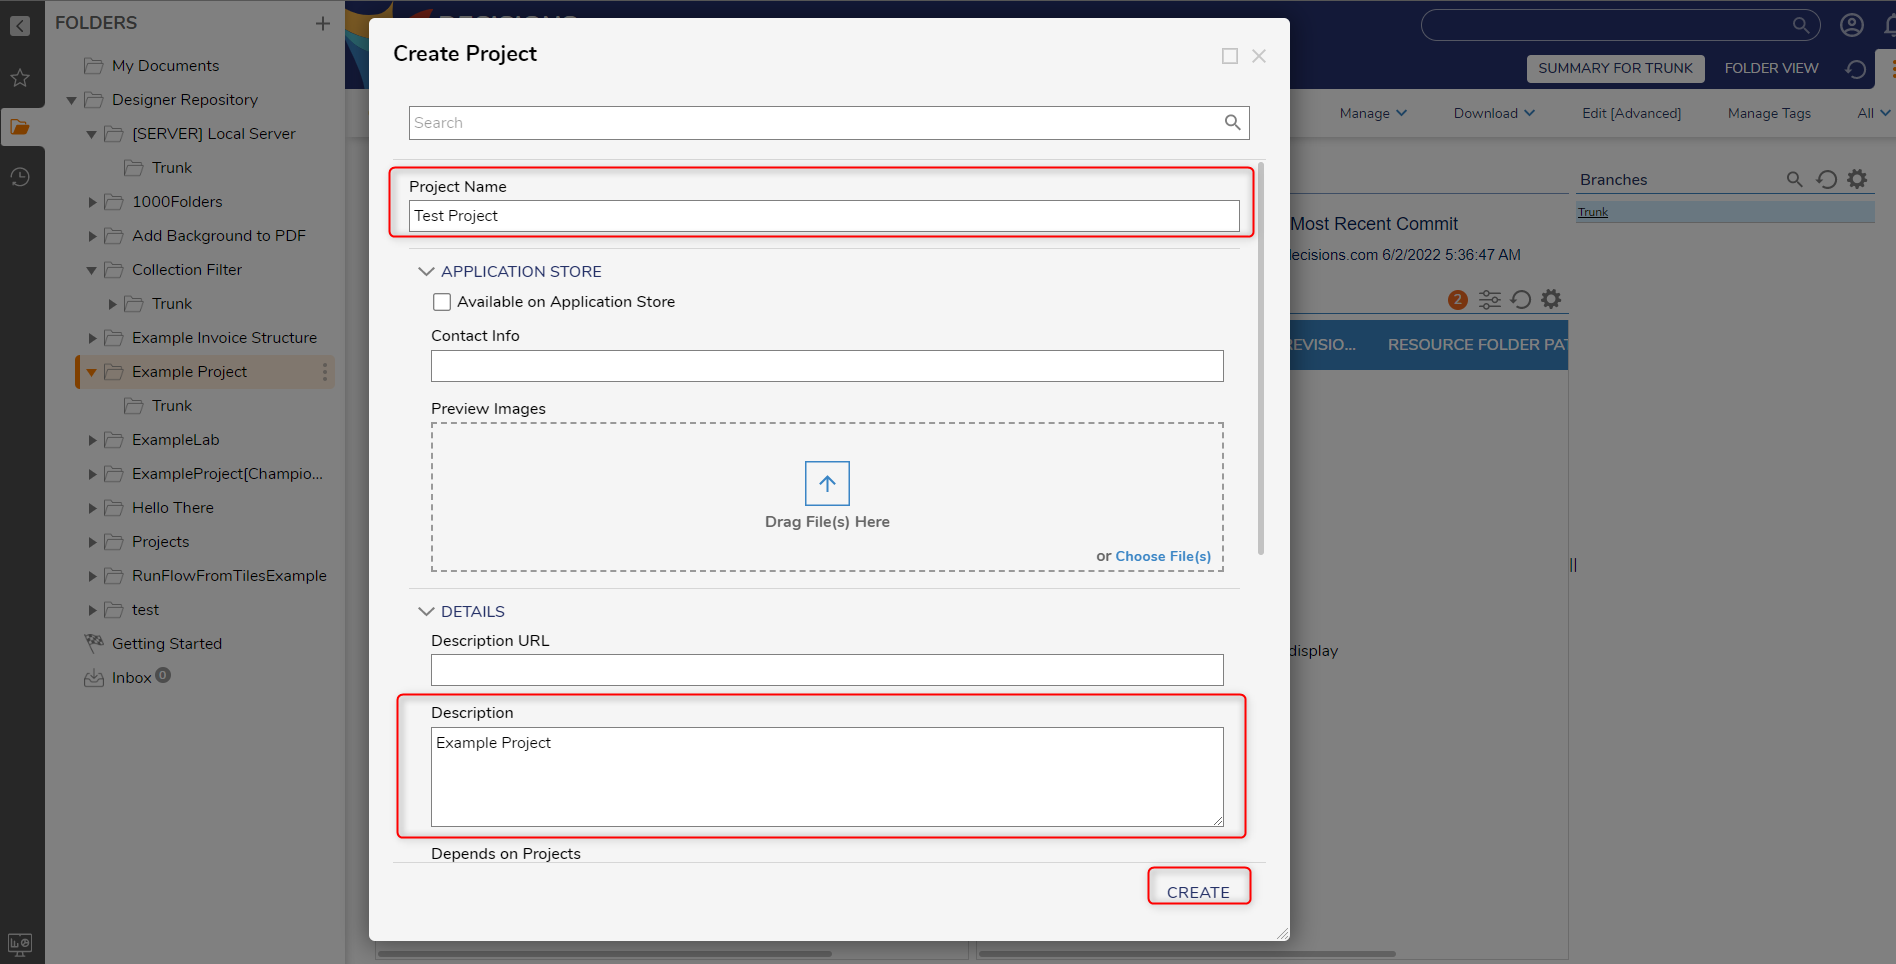
- Provide a Project Name, Description URL, and Description, then click CREATE. Note that the Description URL needs to be in a typical web address format.
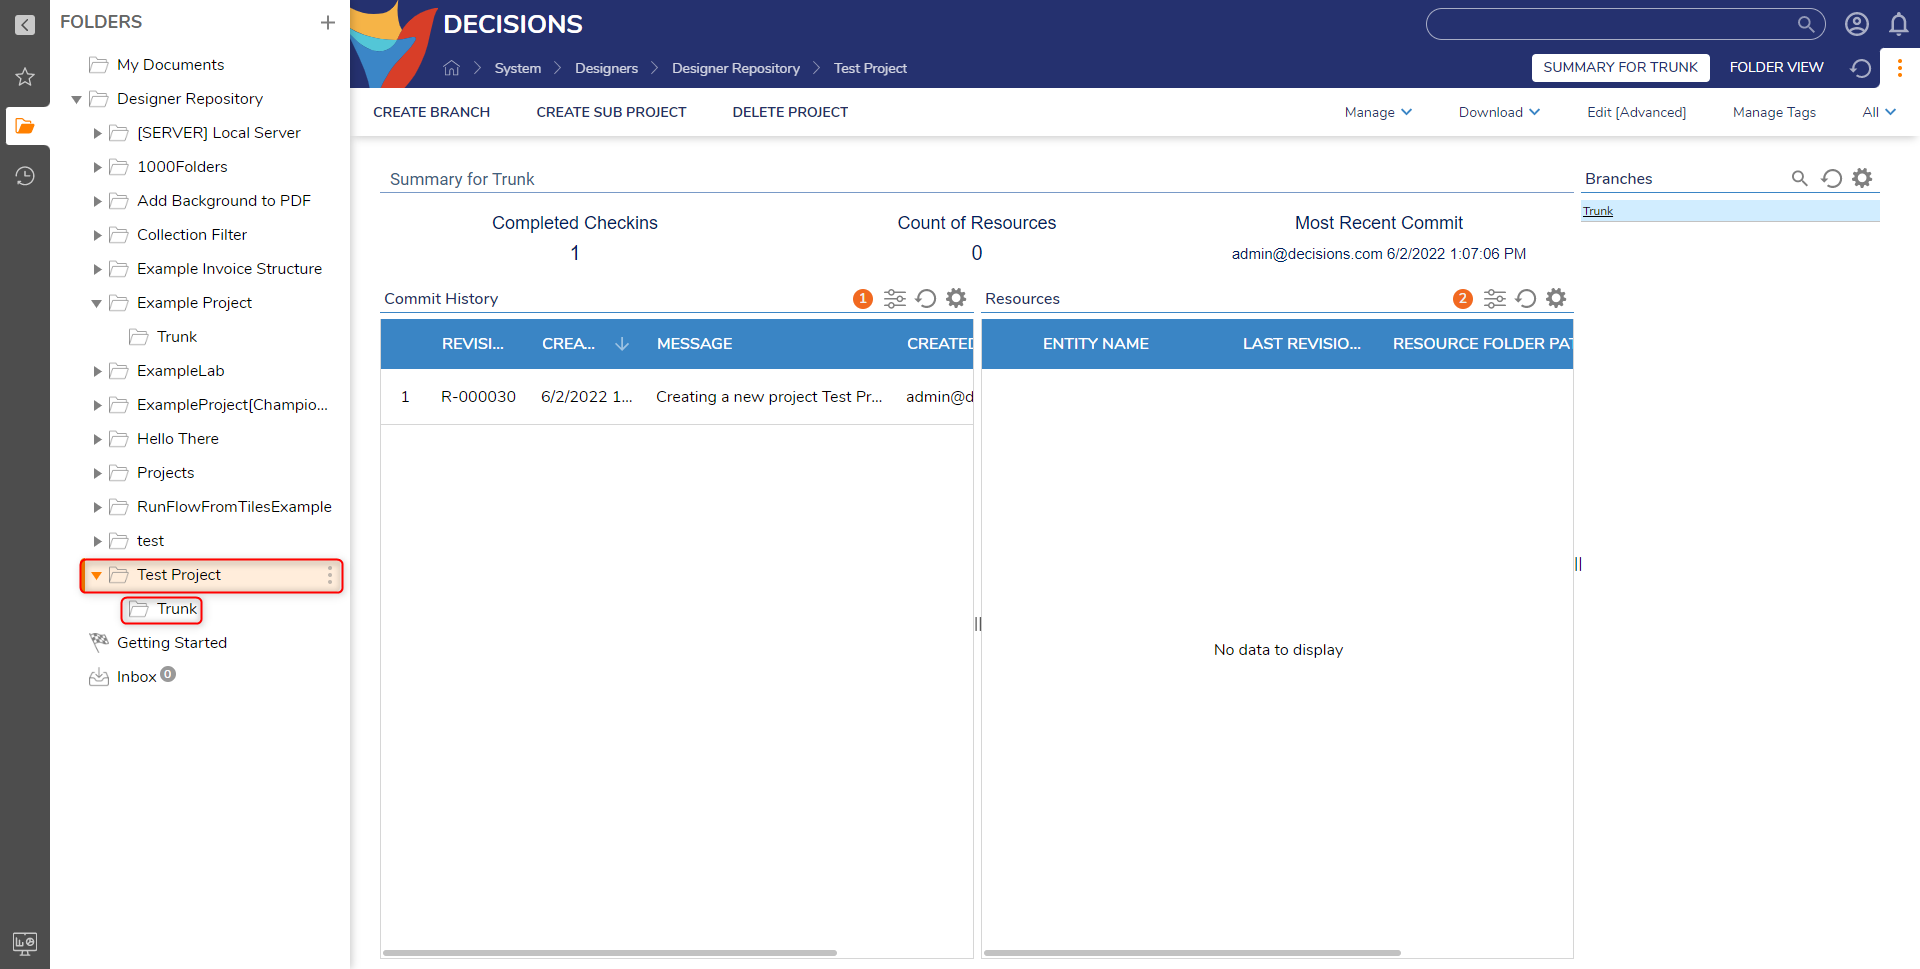
- The Project will appear in the Folder Tree. Selecting the Project will open the dashboard.
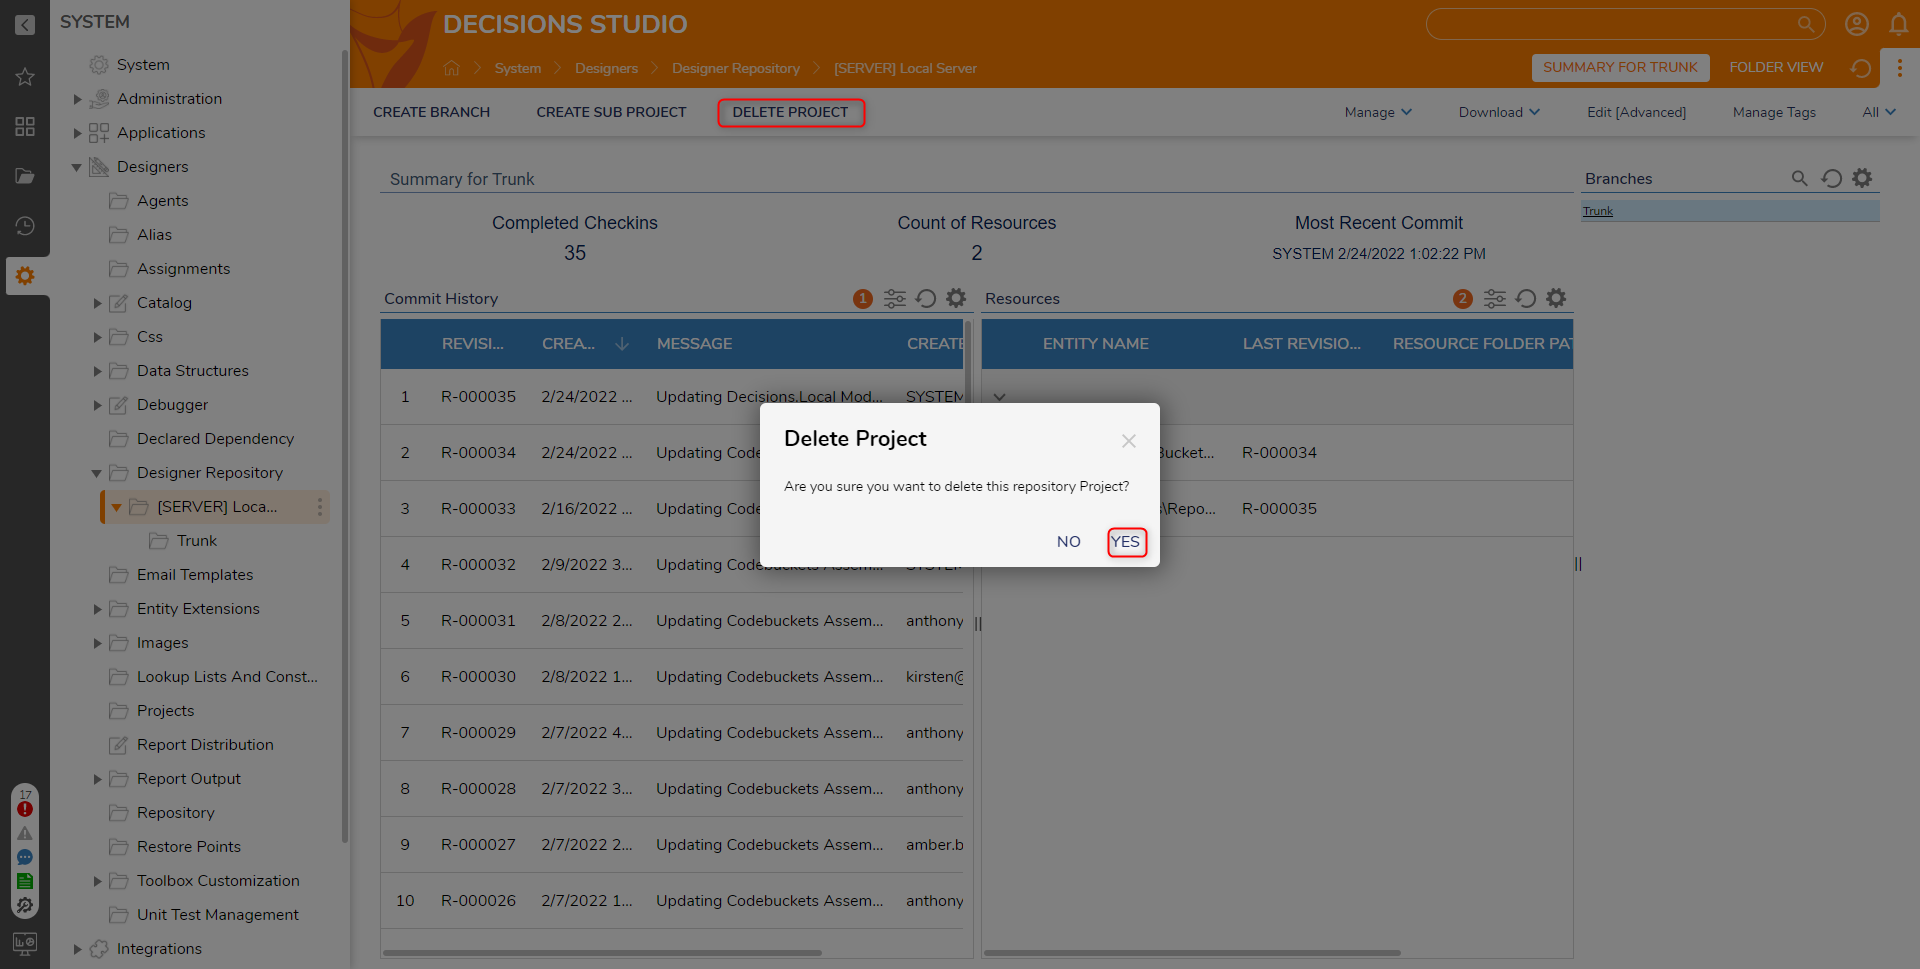
Delete Project
Projects can be deleted and removed from the Repository.
- Right-click the Project and select Delete Project.
- Click YES to Delete the Project.
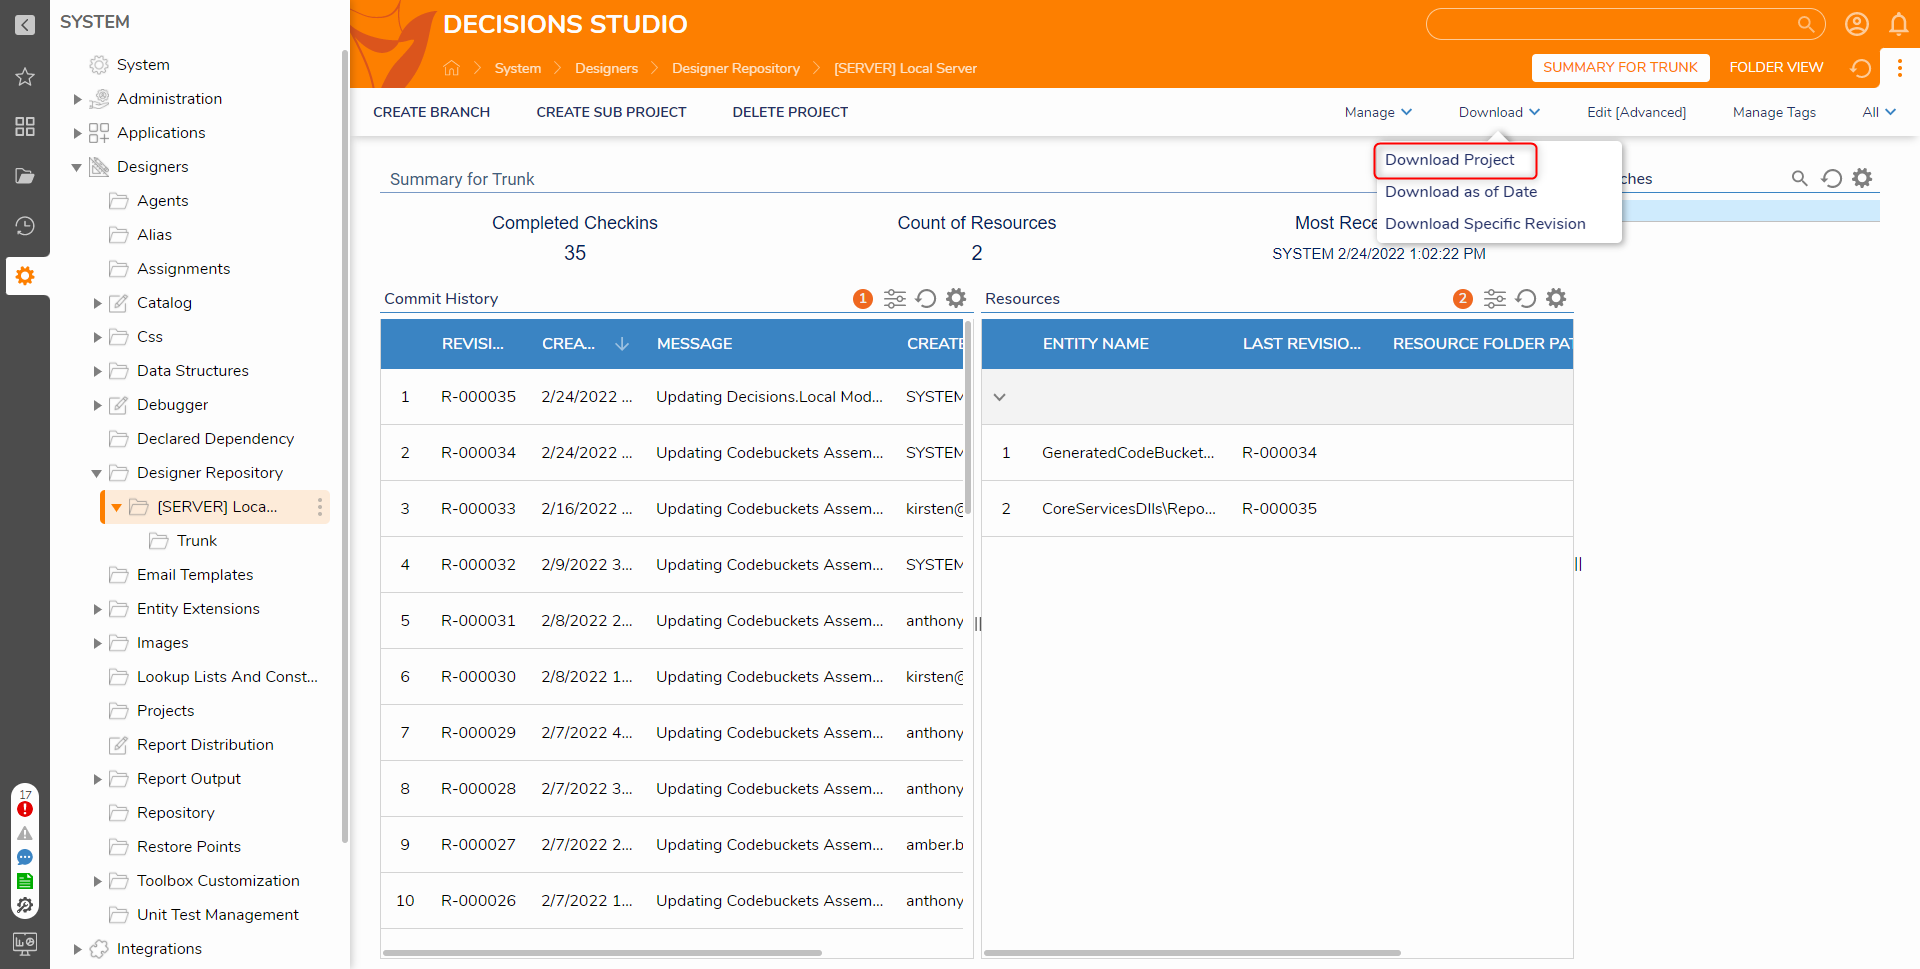
Download Project
Users can Download a Project to store it for later use or as a backup copy to restore back to.
- Navigate to the Project Folder.
- Select Download > Download Project from the top Action Bar.
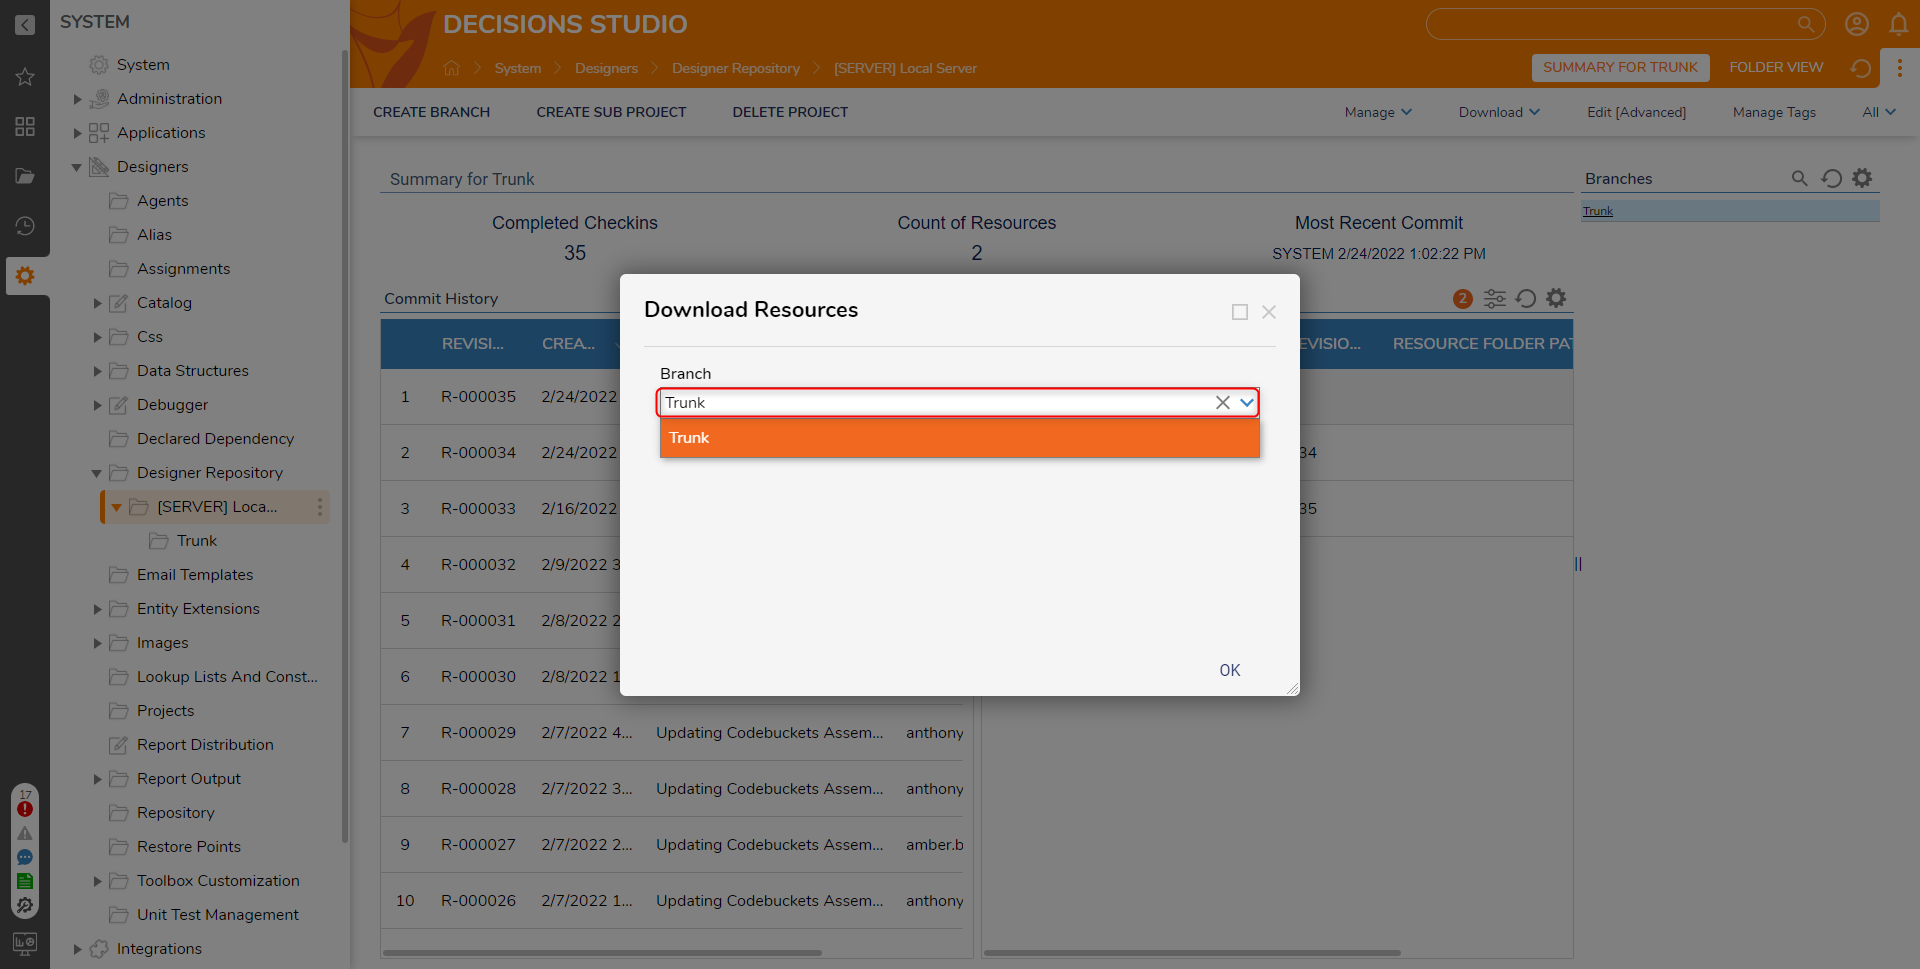
- From the Download Resources dialog, select the desired Branch then click OK.
- Click the Download link. The Download Resources box then displays the file path and name for the configured download. (for example: C:\Program Files\Decisions\Decisions Services Manager\Instances\Control\Repository\Downloads\MyFirstProject-MyFirstProjectDevelopment-12102018-050634.zip)
Selecting the Download link proceeds with the download process by downloading the Project in .zip file to the displayed file path. From here the .zip file is saved and acts as a version of the Project that can be referenced/rolled back to at any point.
Rollback Actions
The Rollback menu provides users with two options; Rollback to Revision (version) of the Project or Rollback to Date, which Rollback to whatever state the Project was at based on a specified moment in time.

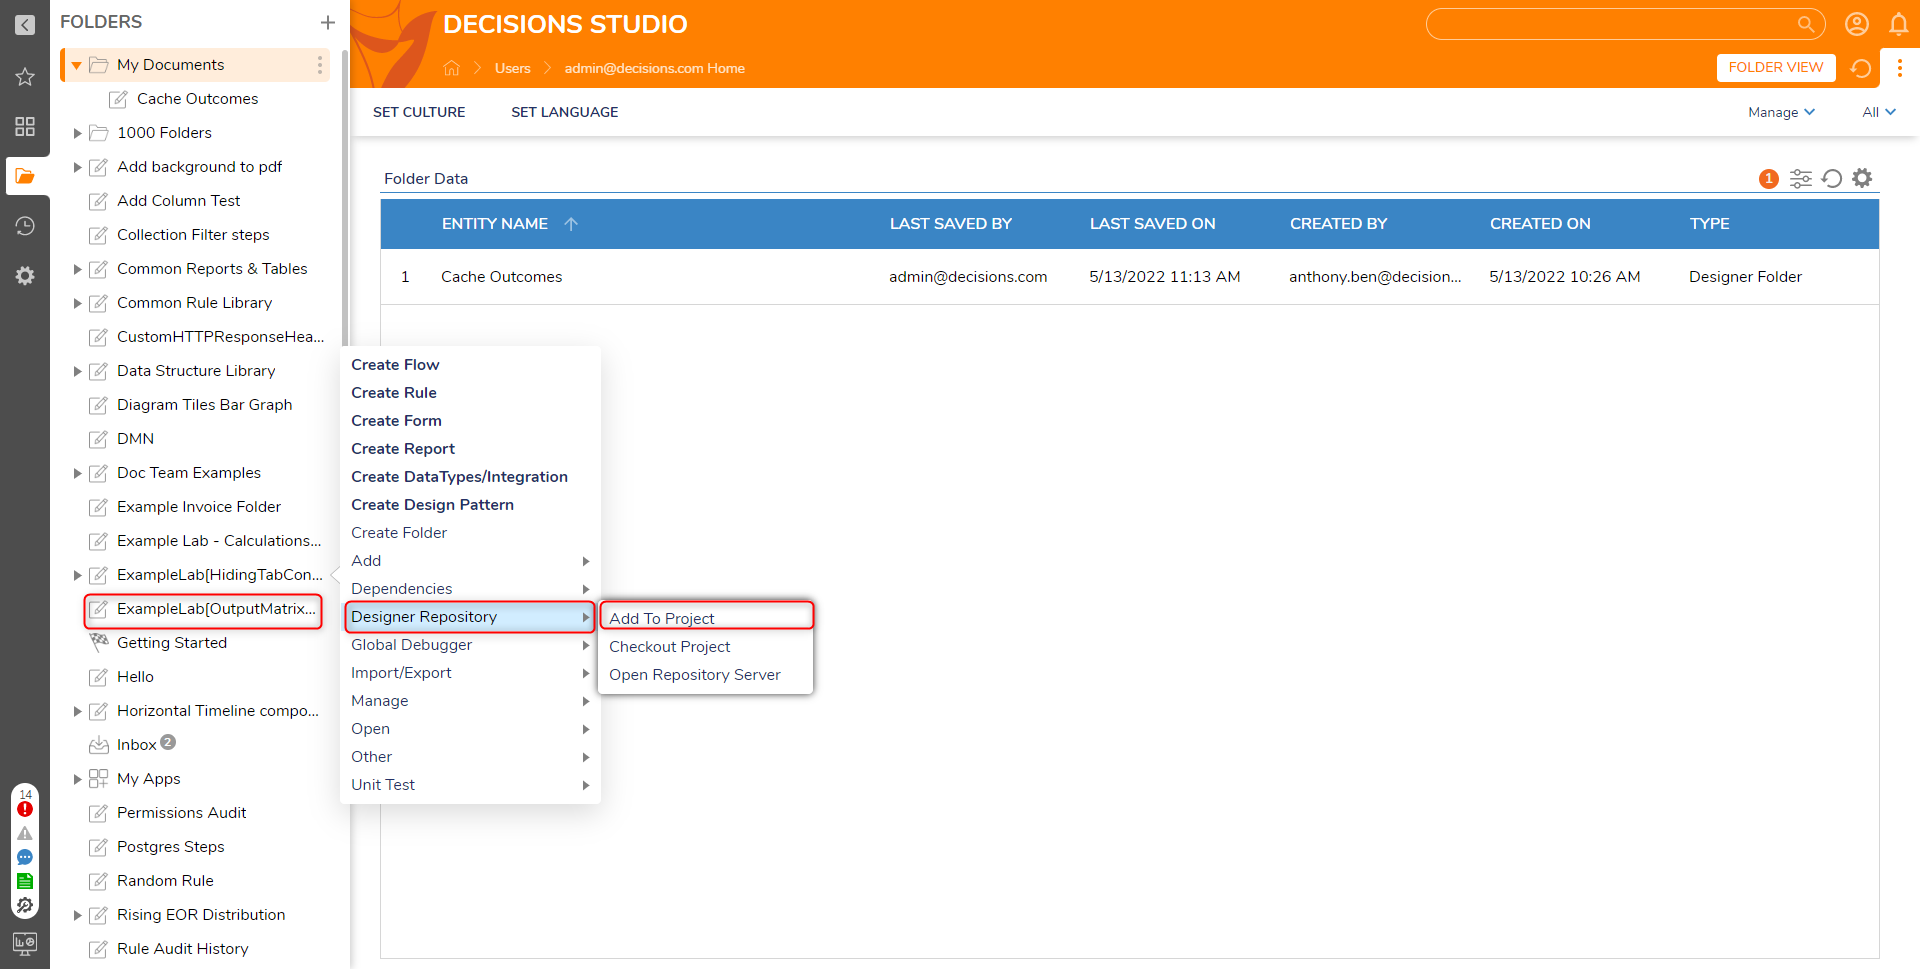
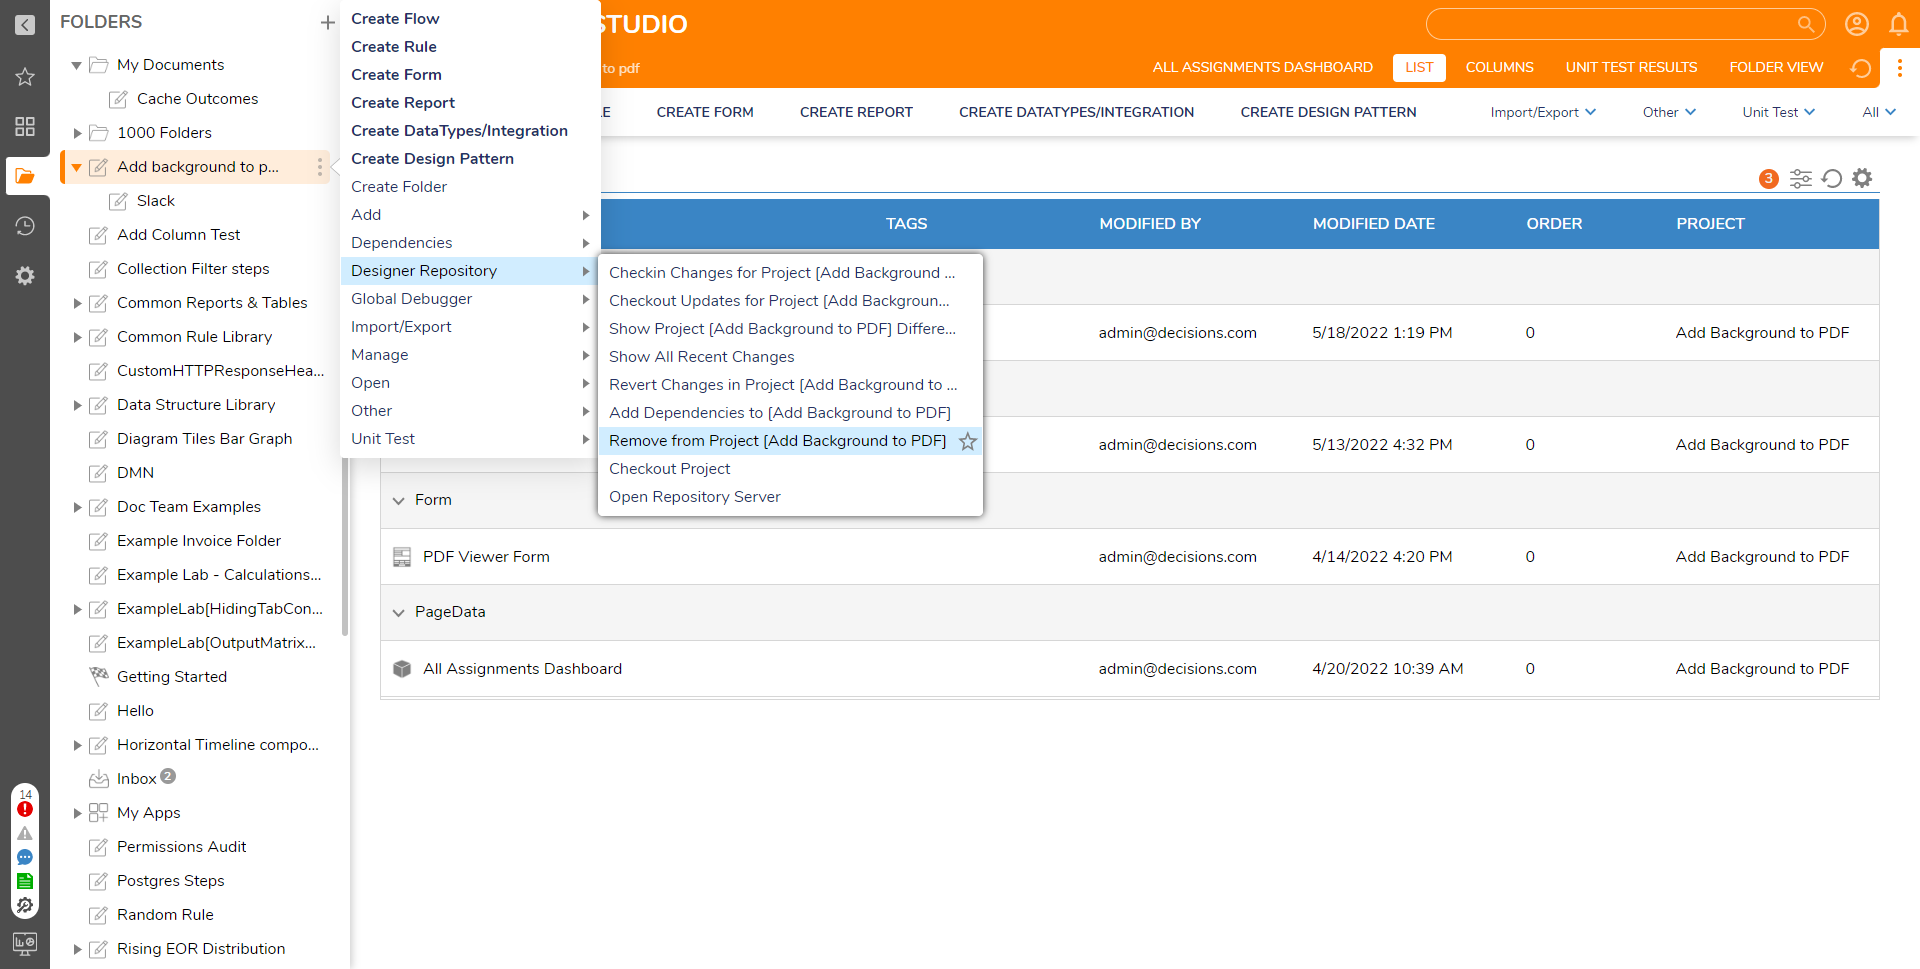
Add/Removing a Project to the Repository
The steps to add or remove a Project to a Repository is similar to adding/removing Designer Elements to a Project, with the key difference being what category to run the action. To add a new Project to the Repository:
- Right click the project > Designer Repository > Add to Project
To remove a Designer Element from a Project in the Repository:
- Right click the Designer Element > Designer Repository > Remove from Project [Project Name]
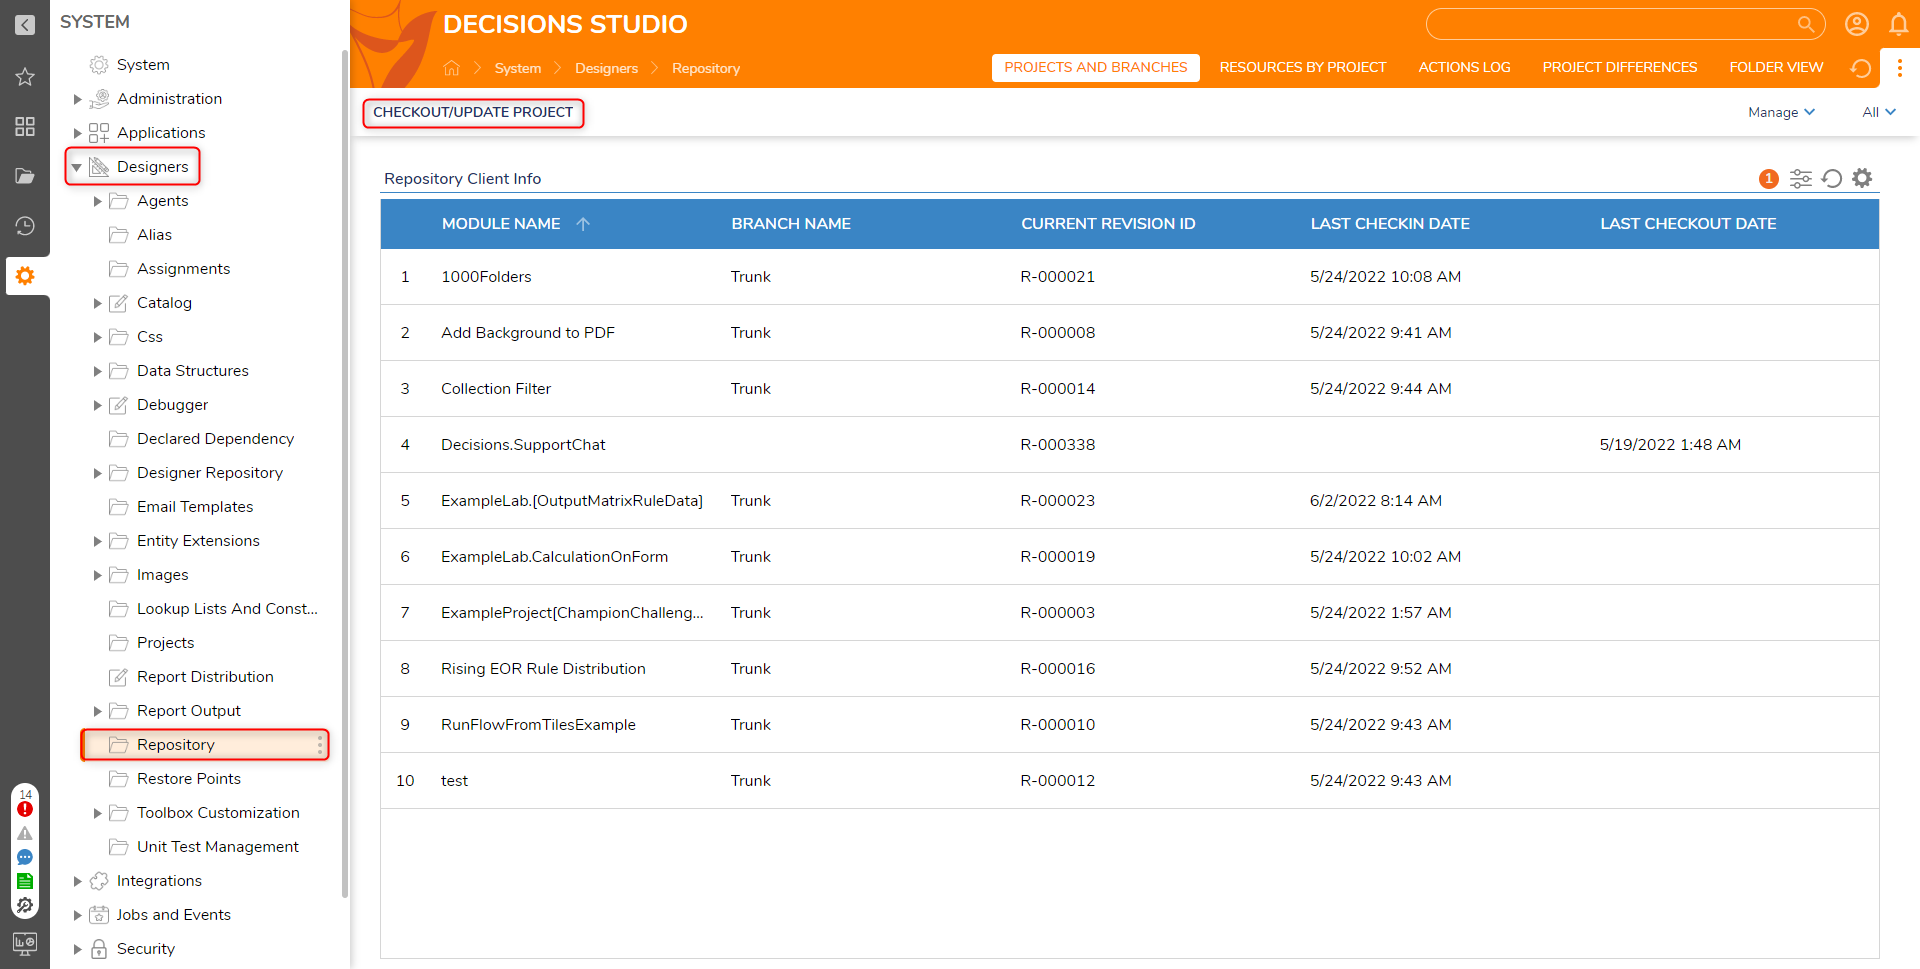
Checkout/Update Project from Repository
Below is a list of terms used for the Action state on the checkout screen:
| Action | Meaning |
|---|---|
| Added | Item was newly added to the project. |
| Deleted | Item was removed from the project. |
| Need Merge | Item was modified on the local instance and there is an updated version on the Repository. |
| Updated | Item exists within the project and was changed. |
- Navigate to System > Designers > Repository.
- Select the CHECKOUT/UPDATE PROJECT button from the top Action bar.
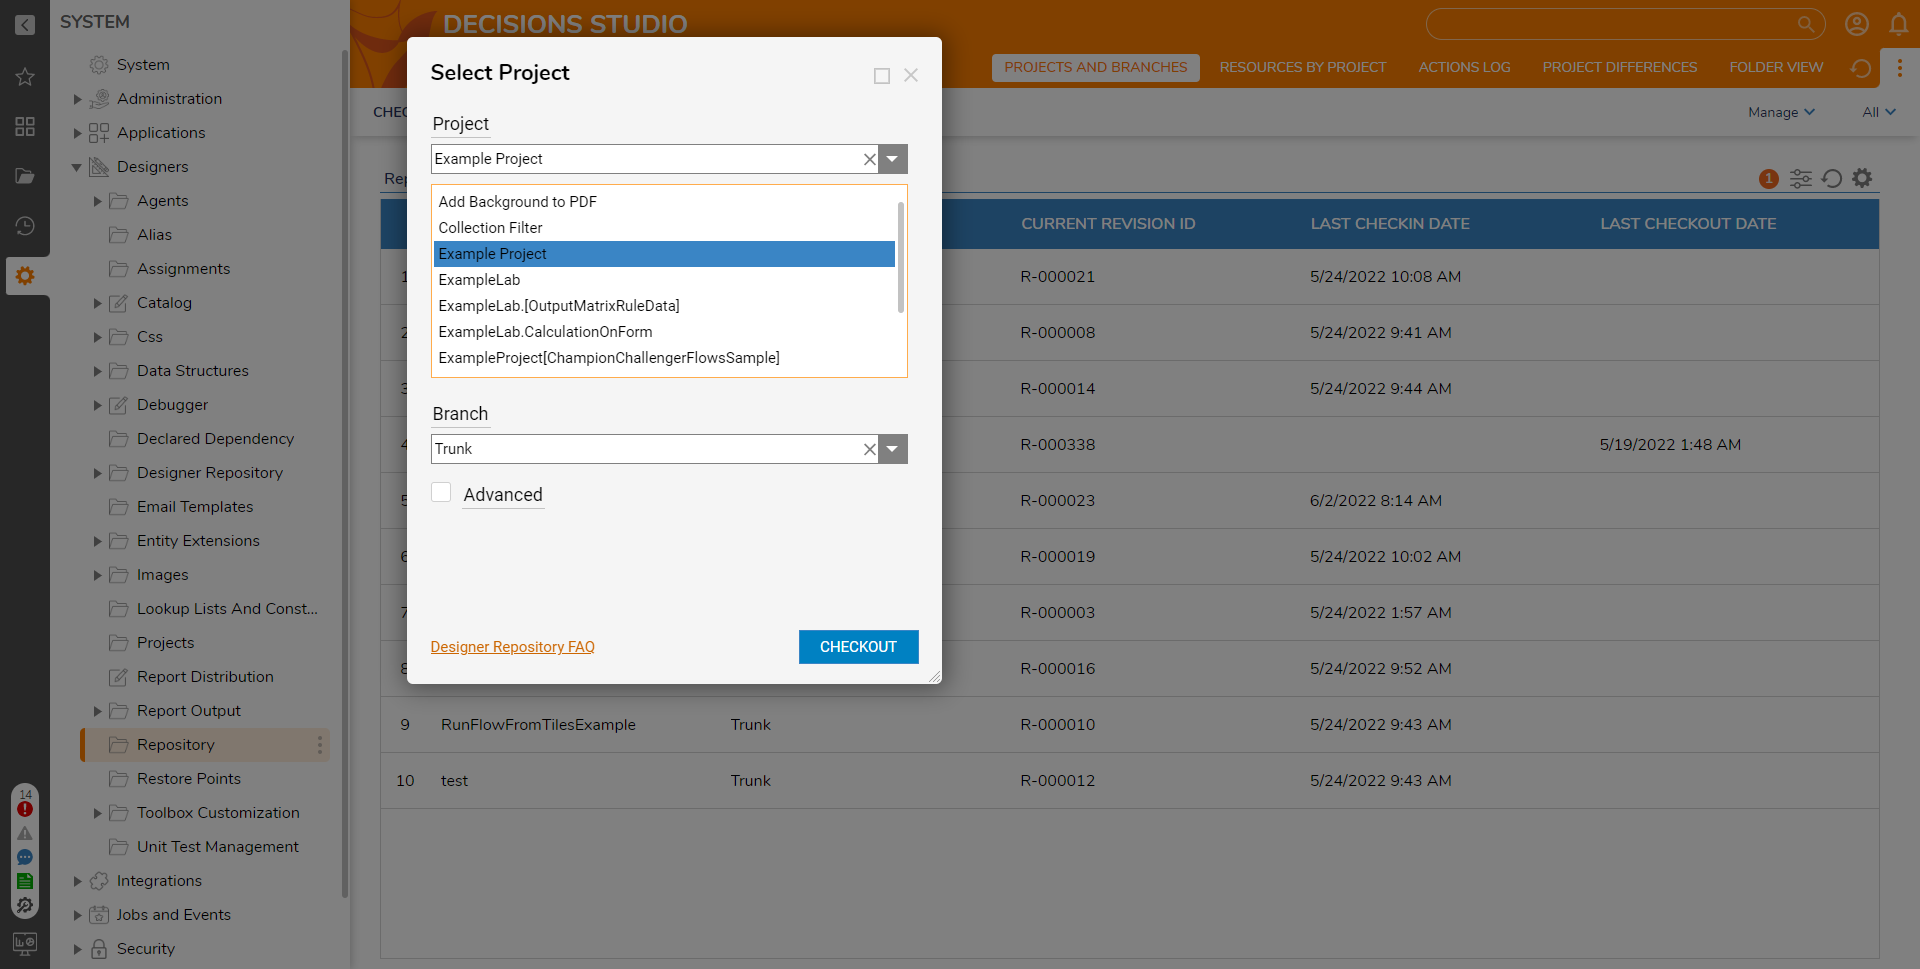
- Search for and select the Project, and Branch, then click CHECKOUT. If Advanced is checked, a specific Revision can be used instead.
- If any items require updating, select UPDATE, if not, close out the window via X.
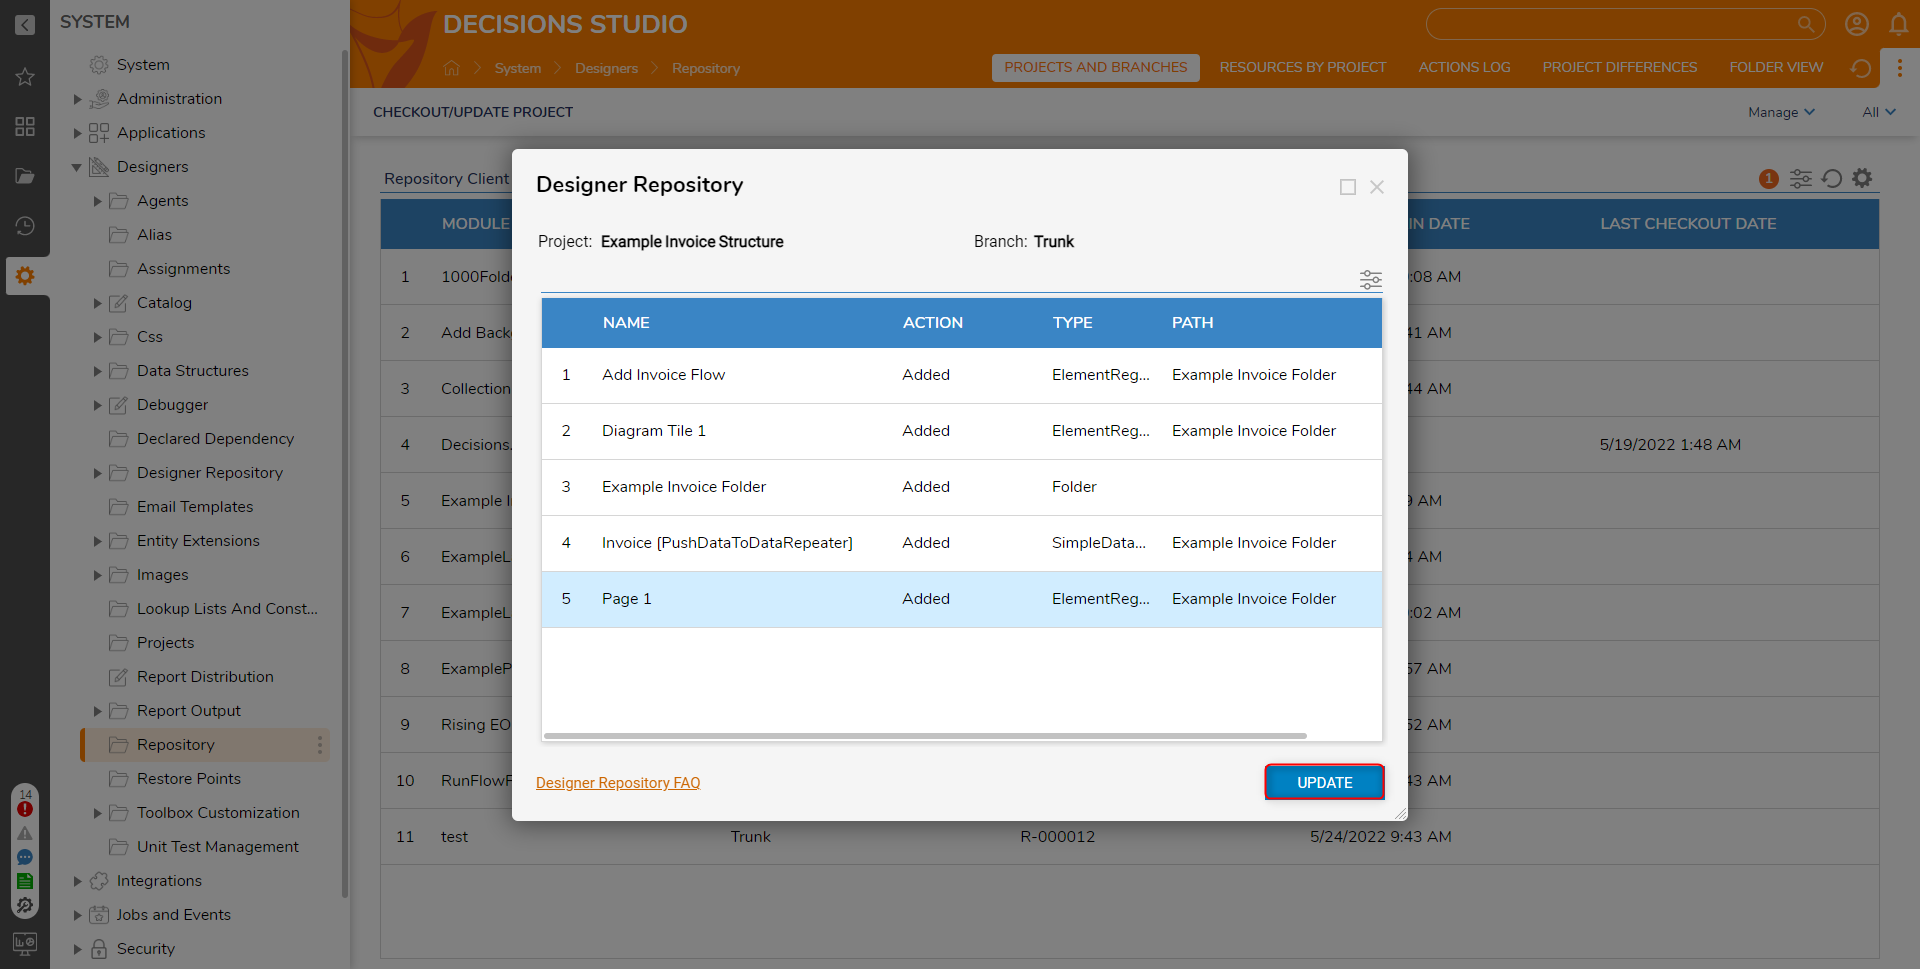
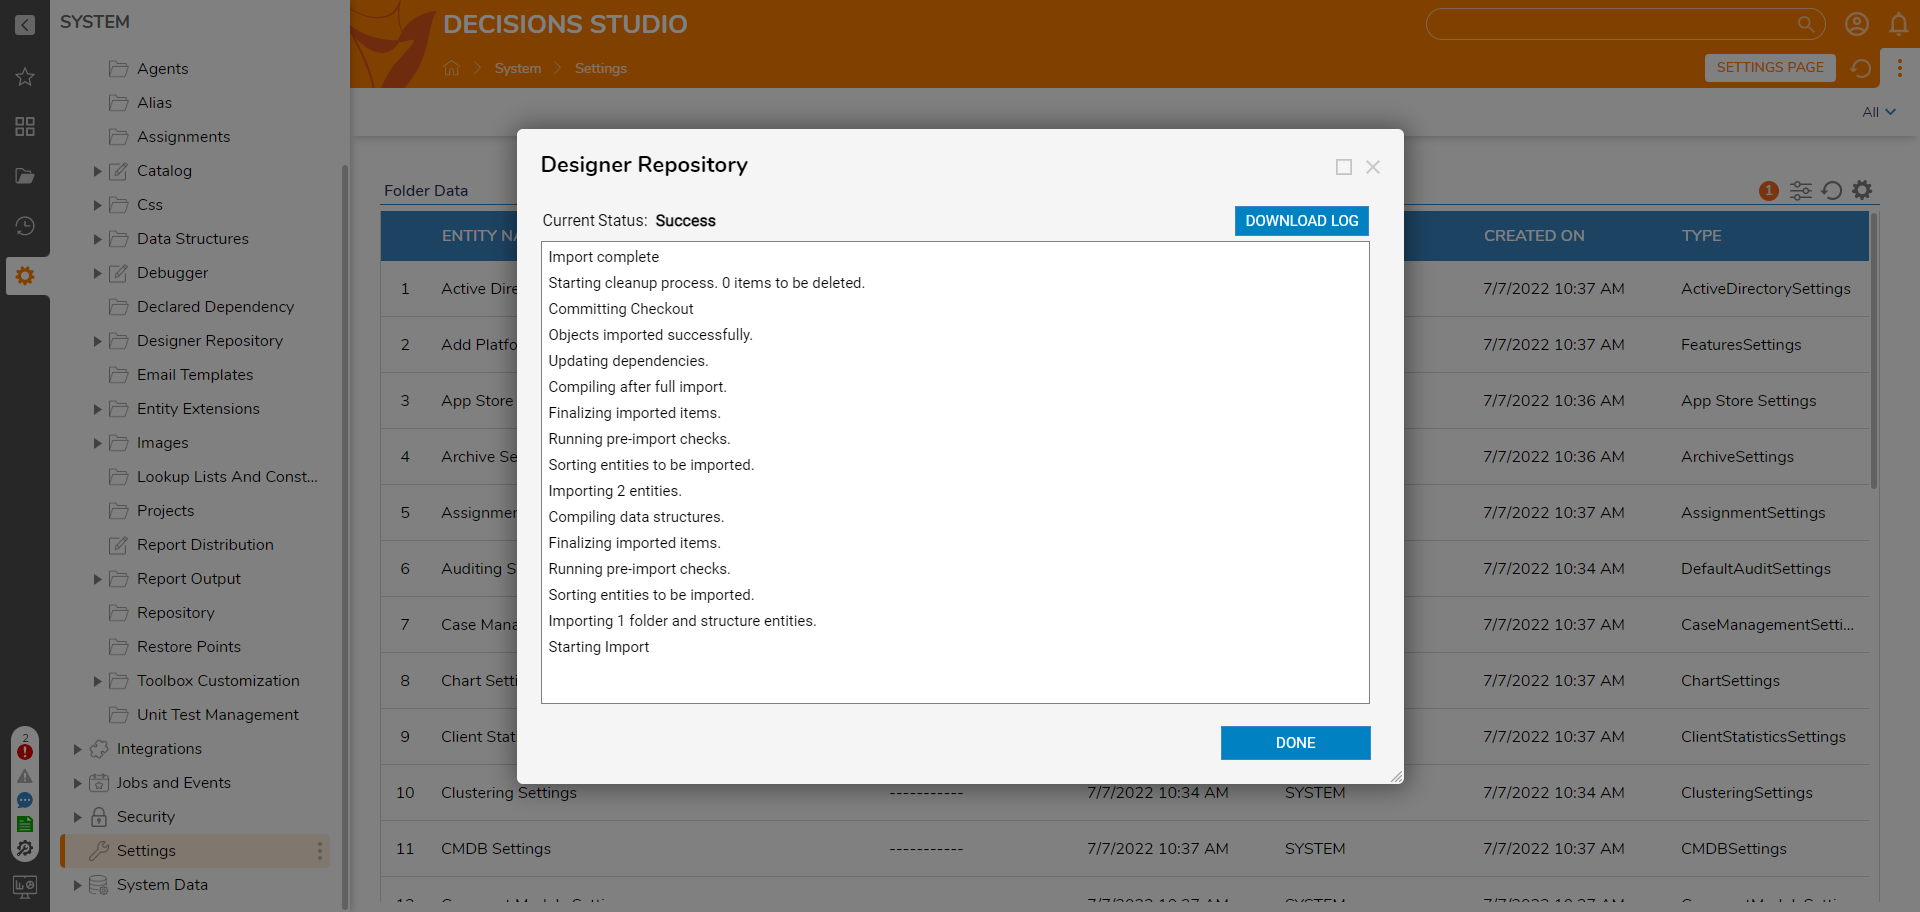
- The Project will begin to download and begin to update the locally stored version of the Project. Once the Project has finished downloading, select Done. Any errors found can be downloaded using the Download Log button.
- The Import Resolution Screen will appear if there are validation issues after importing the project. Certain resolution actions will not be available depending on the Designer Element. Once the import completes, the Project will be available in the Folder Tree.

Committing/Sending Project Changes To Repository
Any changes to a Project can be checked into the Designer Repository. To check in a single Element (such as a Flow, DataStructure, etc...) to a Repository, it must be assigned to a Project. This Project may be either one created specifically for the element or as part of a pre-existing Project.
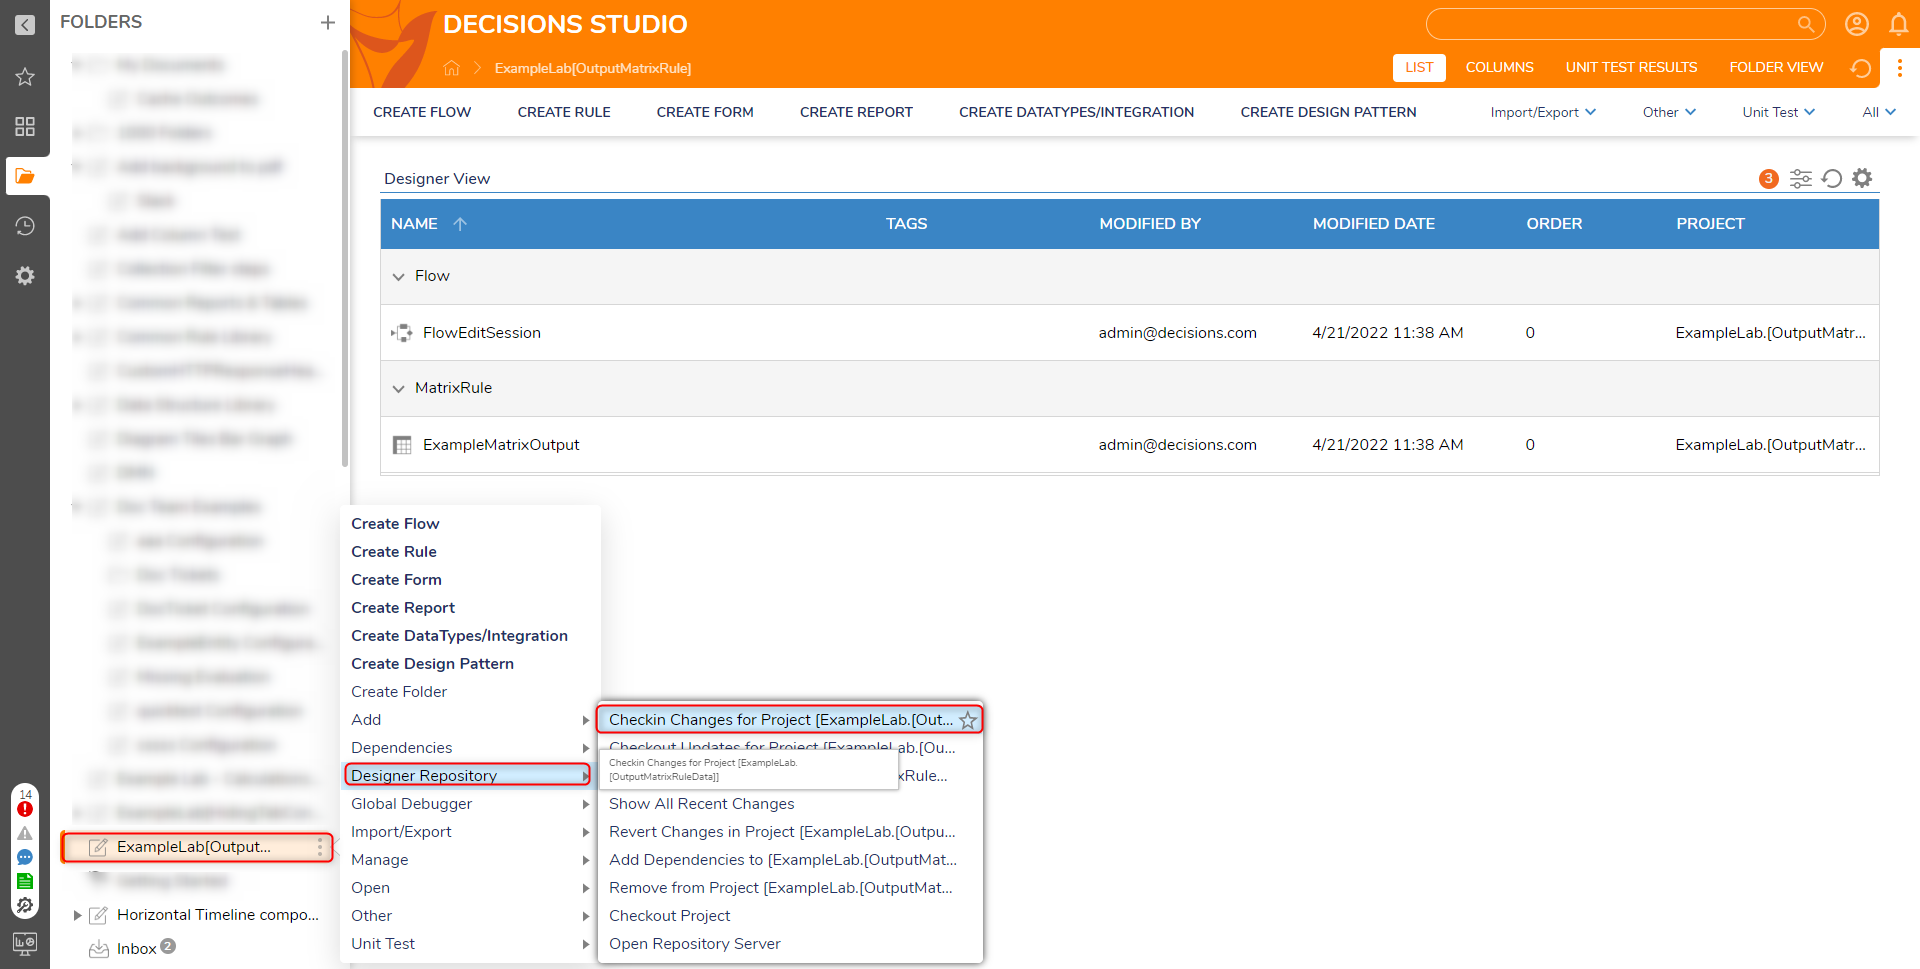
- Right-click the desired Entity or Project.
- Select Designer Repository > Checkin Changes for Project [Project Name].
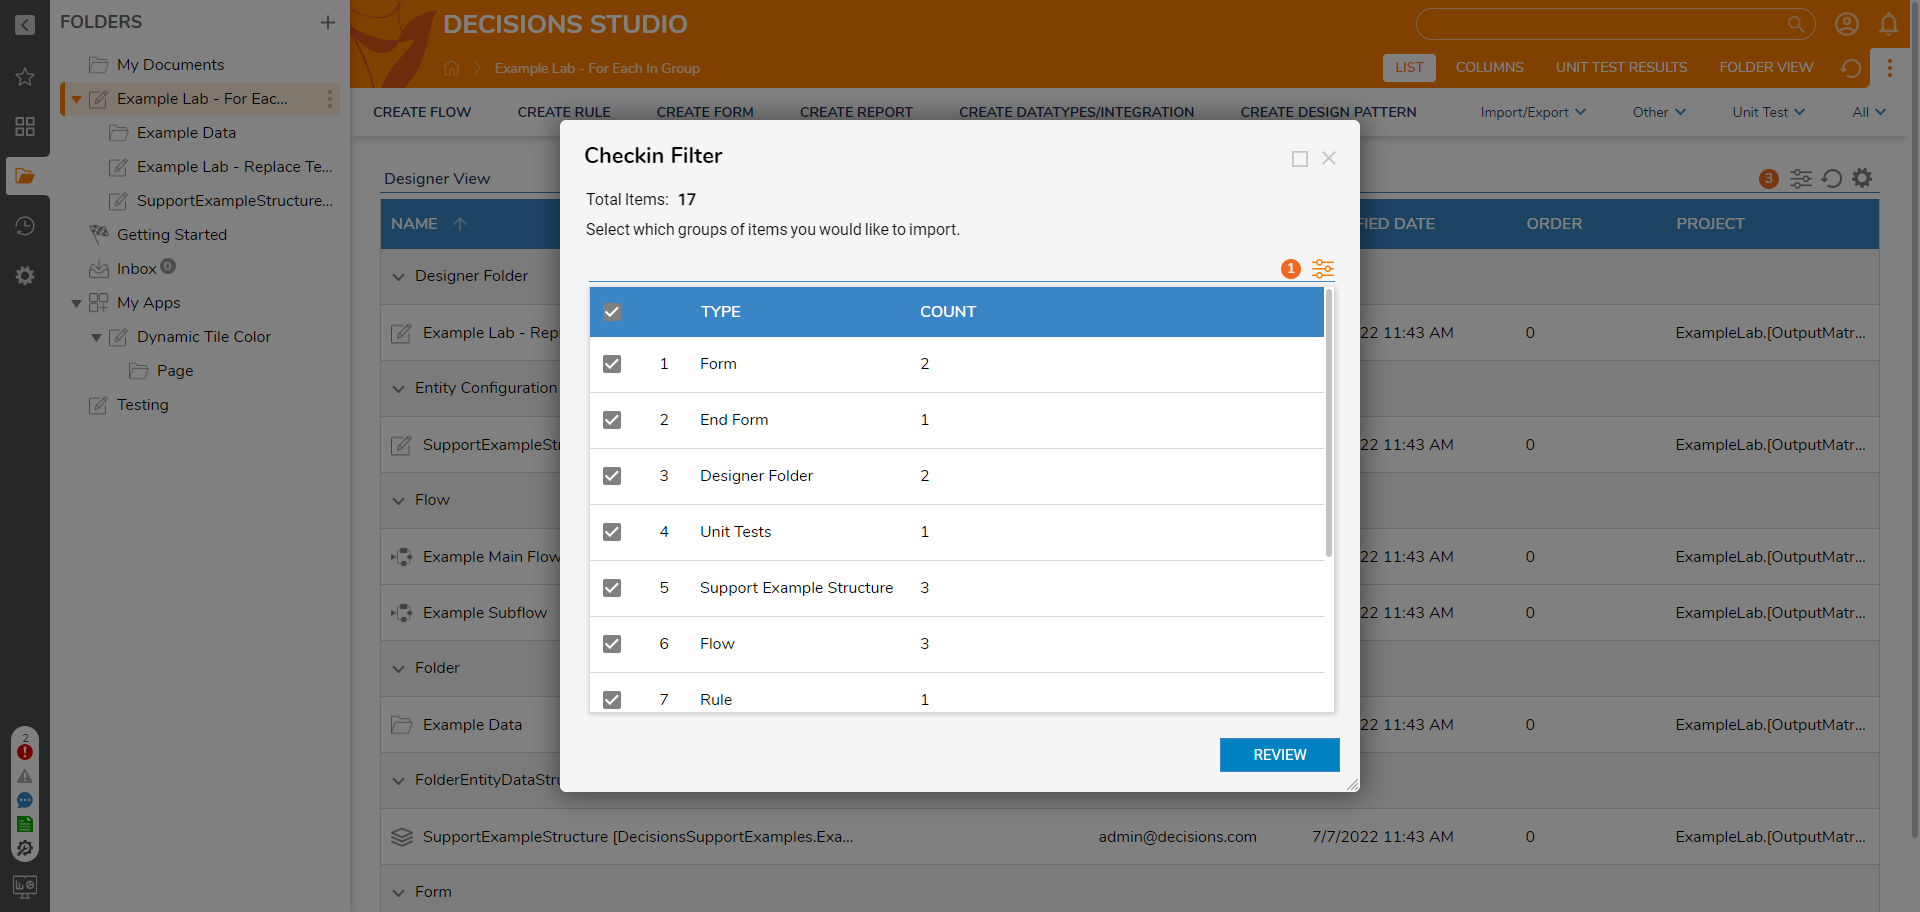
- If the resource count for checked-in items is greater than the value defined in the Repository Settings, a Form will open, displaying the count of the Designer Elements. Select Review
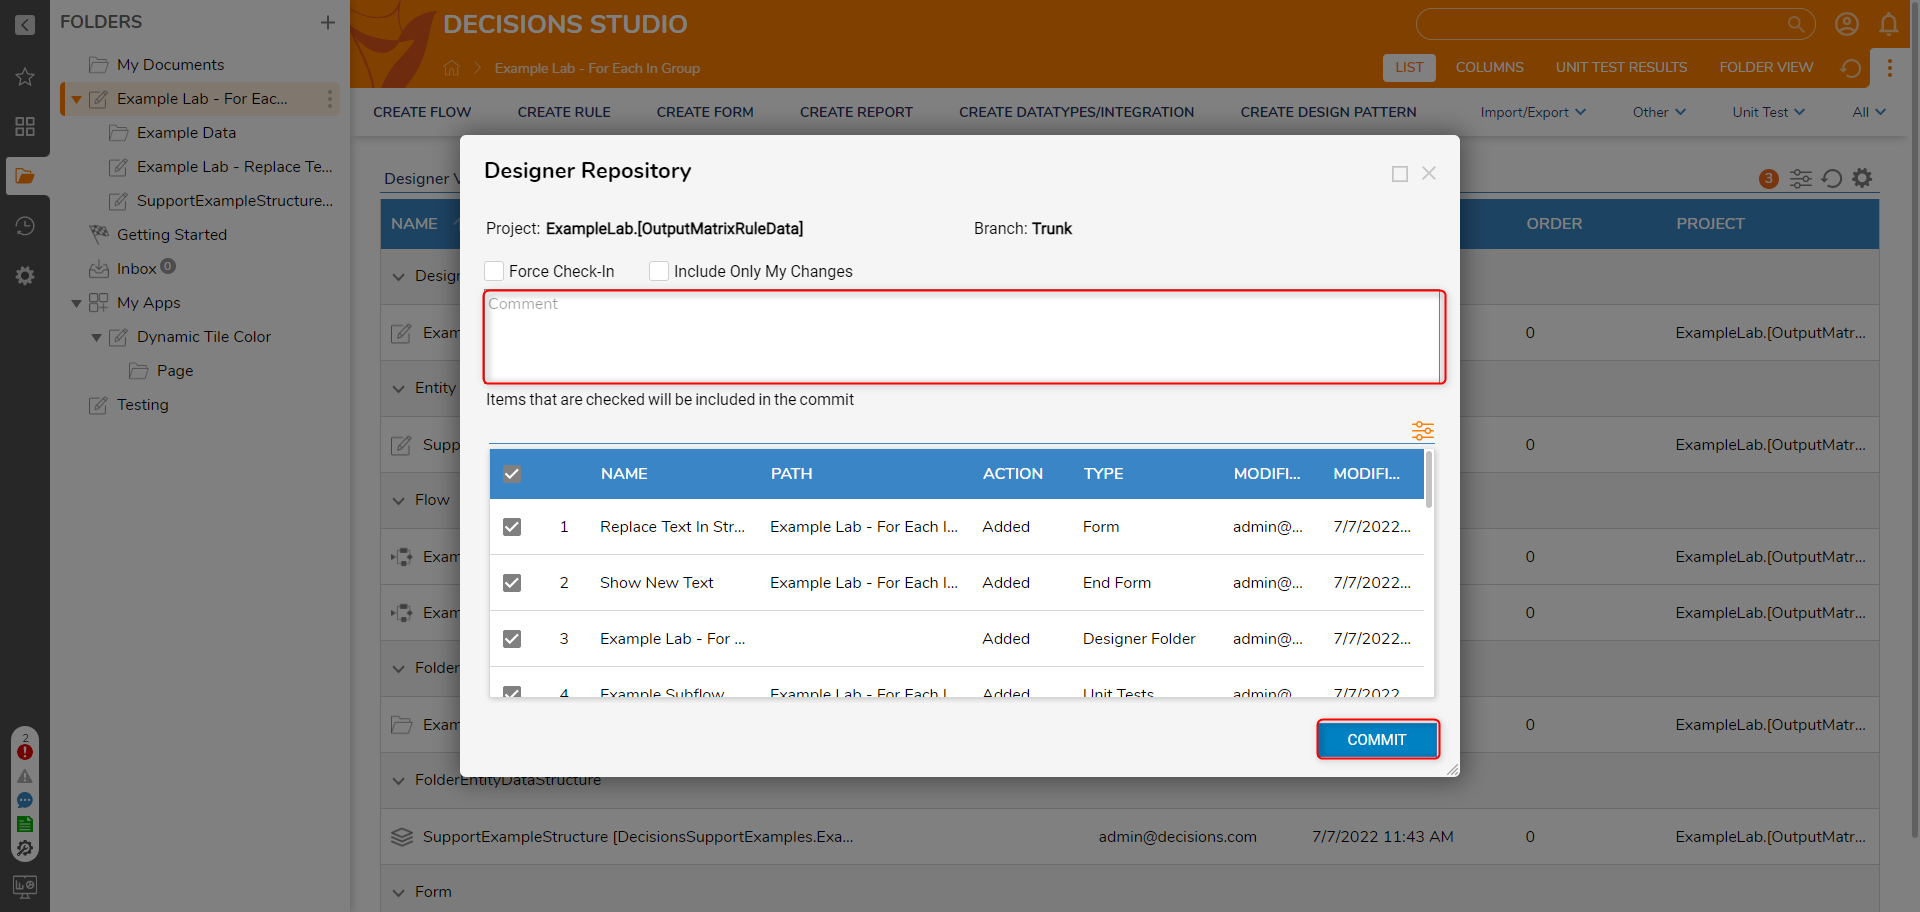
- A new Form will open. Any items that are checked will be included in the commit. Once the items have been verified, provide a comment and click on Commit.
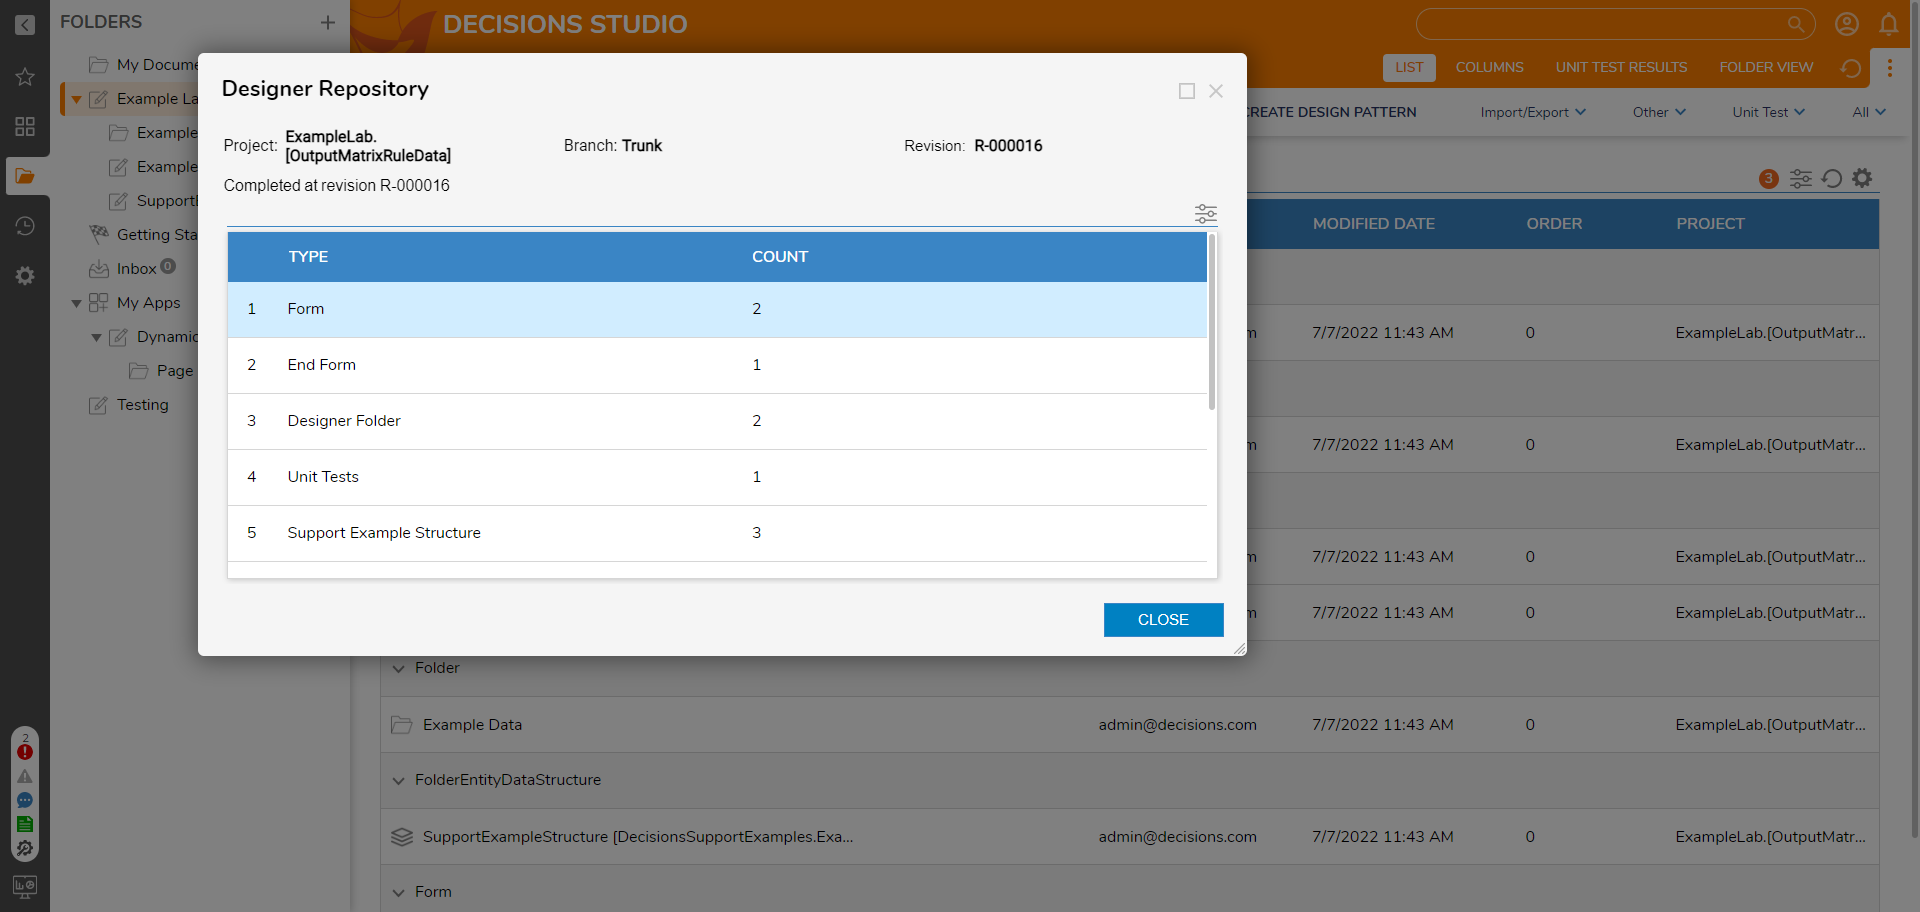
- Items will then begin to be checked into the Repository. Any errors during the check-in will be shown in the following Form. A Revision Number will be provided once the check-in has been completed. Select CLOSE after confirming that the changes were committed.
Reverting Changes to a Branch
The Revert Revision action allows the user to revert a branch in a Project to the current revision. This action is available on the Designer Repository.
- In the Designer Repository, locate and select the Project.
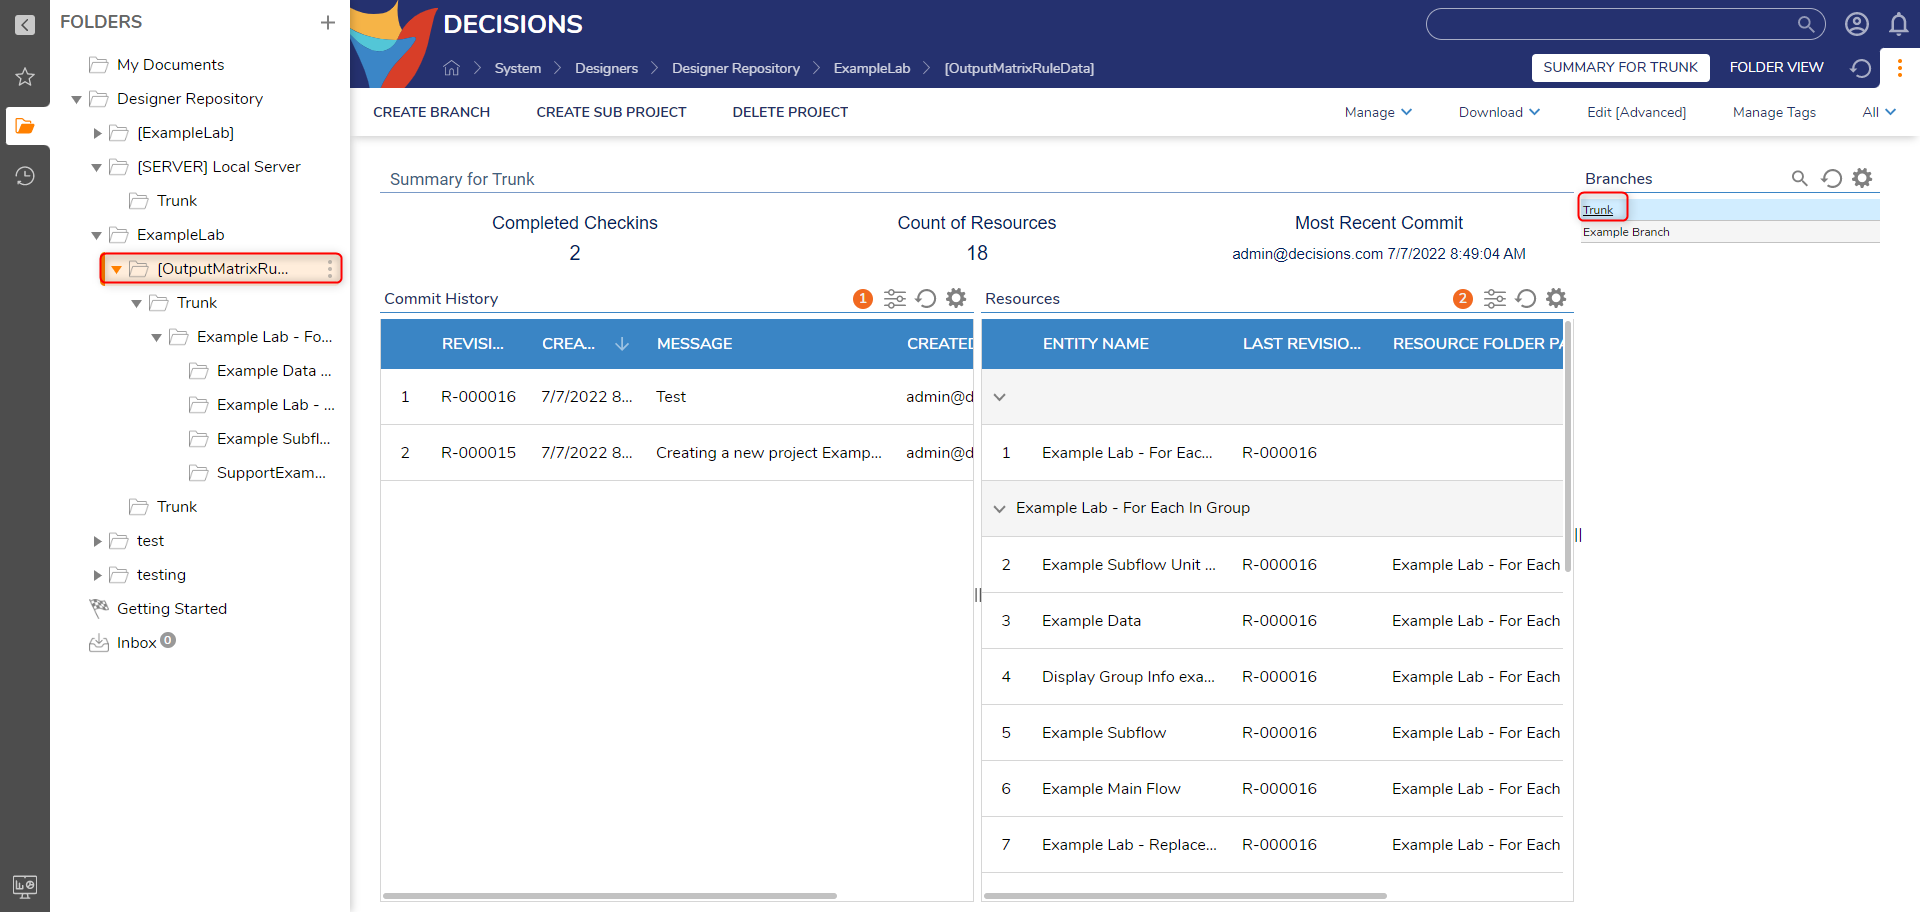
- On the Repository Dashboard for the Project, select the name of the branch in the Repository.
- The Branch Summary Page should appear. Right click the latest Revision in the branch and select the Revert Revision action.
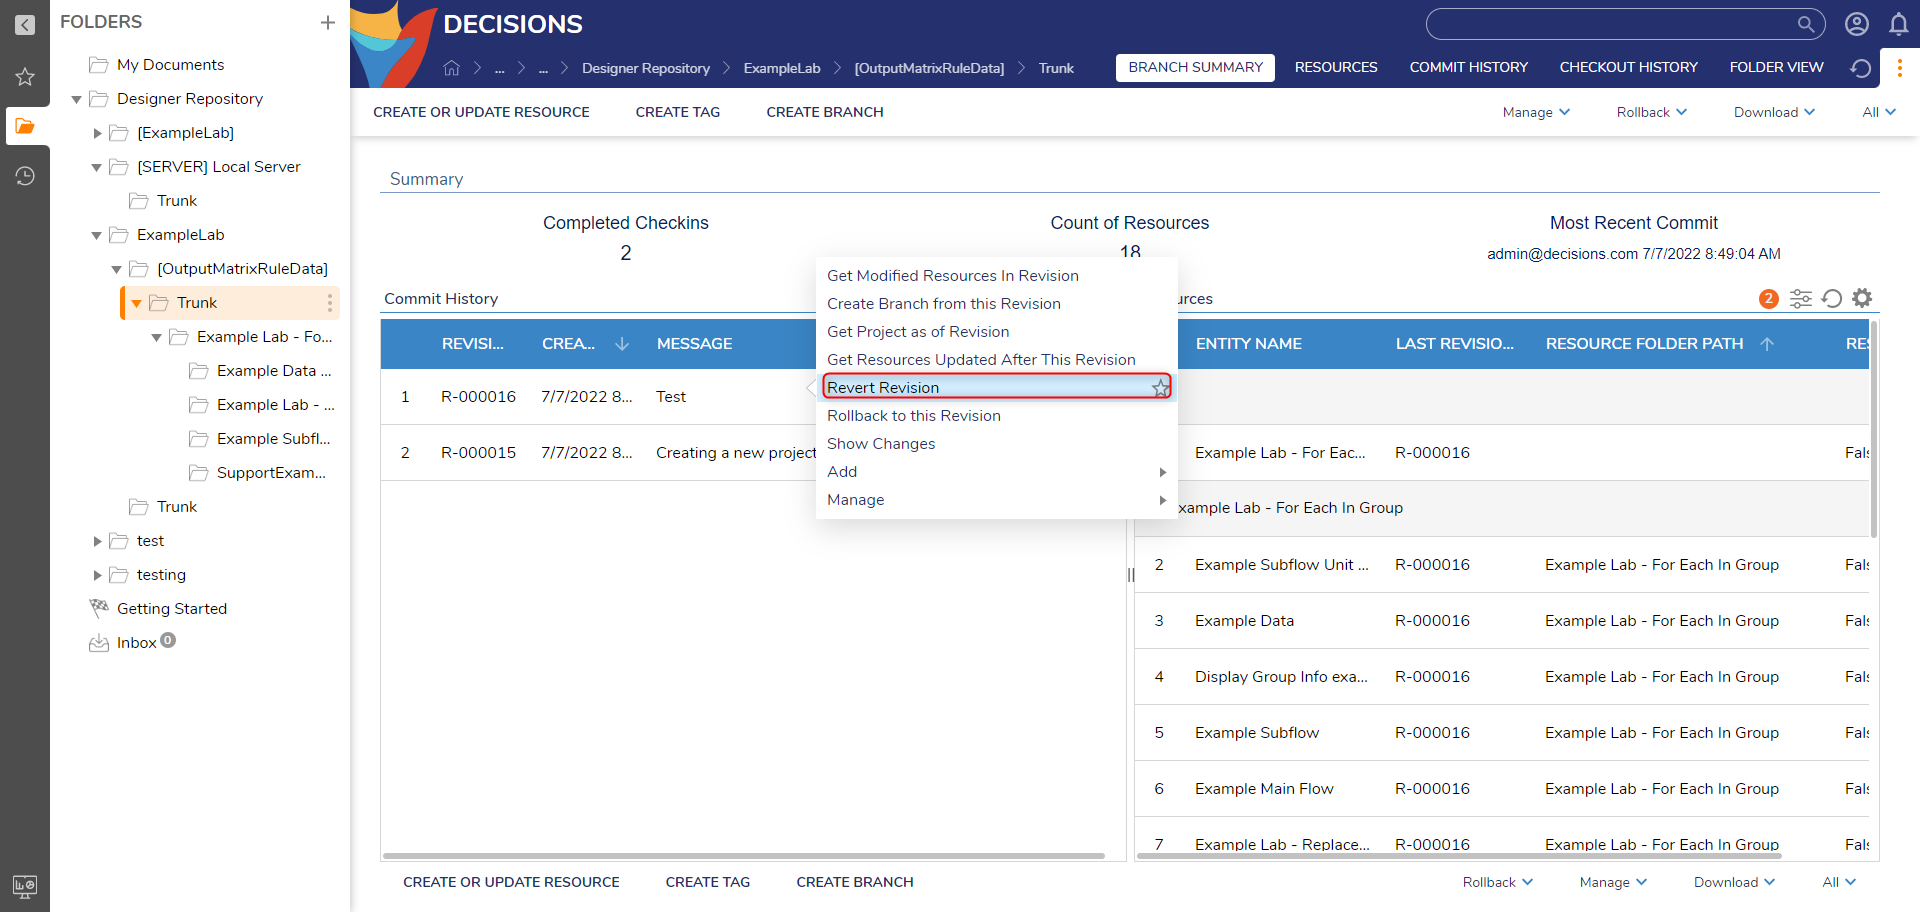
- Right-click the desired Revision ID and select Revert Revision.
- Confirm with OK. The Repository environment may need to be restarted to apply changes.
Configuring a Repository Username and Password
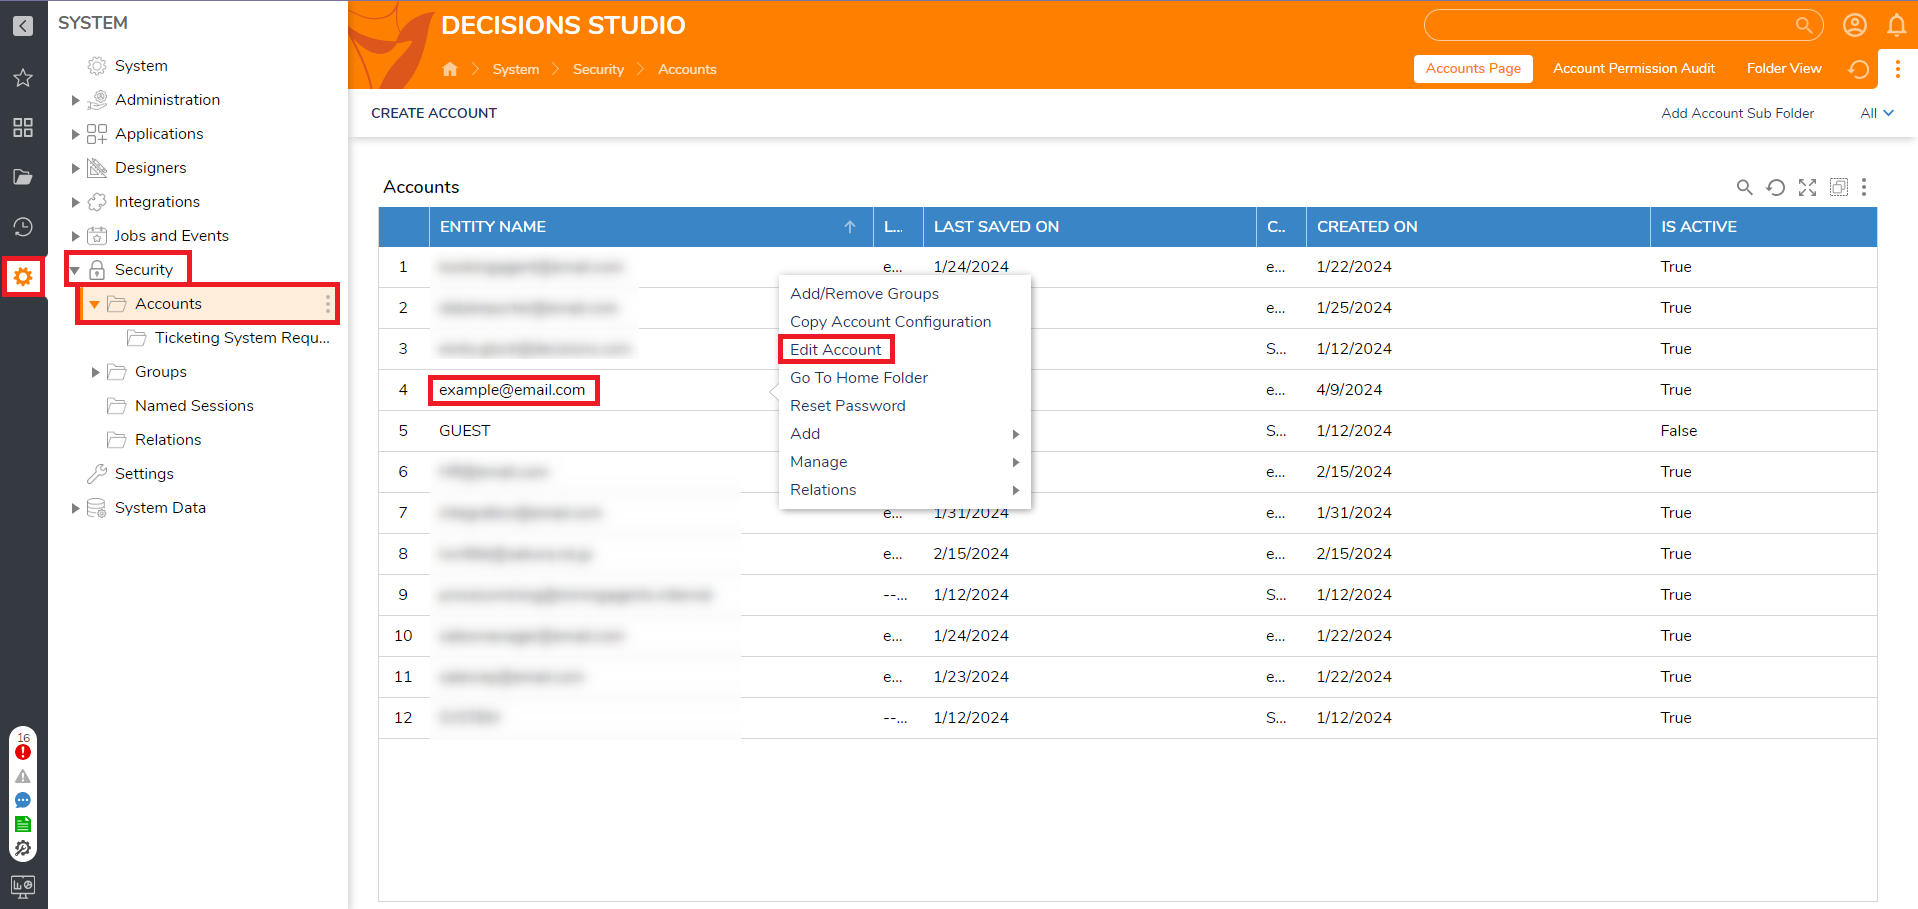
- Users can configure username and password credentials for use of the Repository for your local accounts. First, navigate to System > Security > Accounts. Right click on the desired Account, and then click Edit Account.
- Once the Edit Entity window appears, scroll down to the OTHER CONTACT DETAILS section and then click ADD under Other Contact.
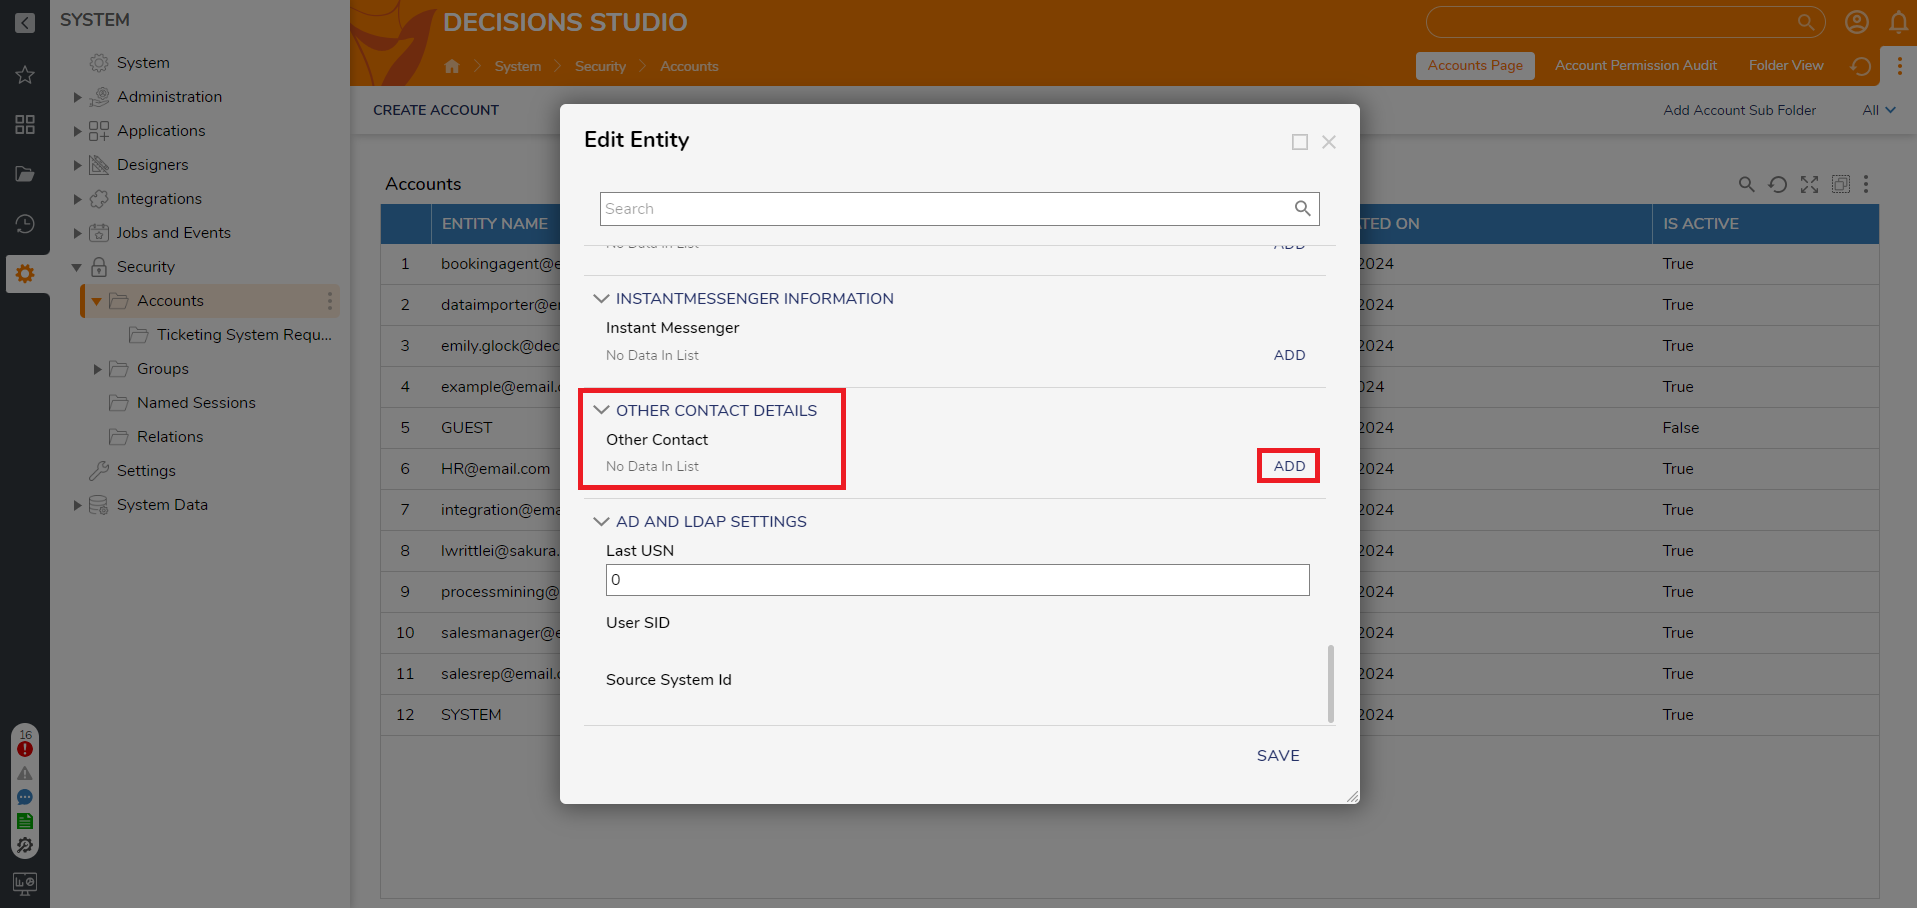
- Select PICK under Other Contact Type and then select Decisions Repository. Then input the Account and Password information. Once that is complete, click OK. Then click SAVE to exit out of the Edit Entity window.
.png)