Sub Projects in Decisions are used to assist with organizing files in a large project in a Repository. Functionally, it achieves this by creating Folders inside the parent project. Creating Sub Projects is useful when specific Designer Elements need to be included in multiple projects.
Creating a Sub Project
Method 1
A Sub Project can be created by checking in a new Project to the Repository with dot notation. For example, {Parent Project Name}.{Sub Project Name}.
Method 2
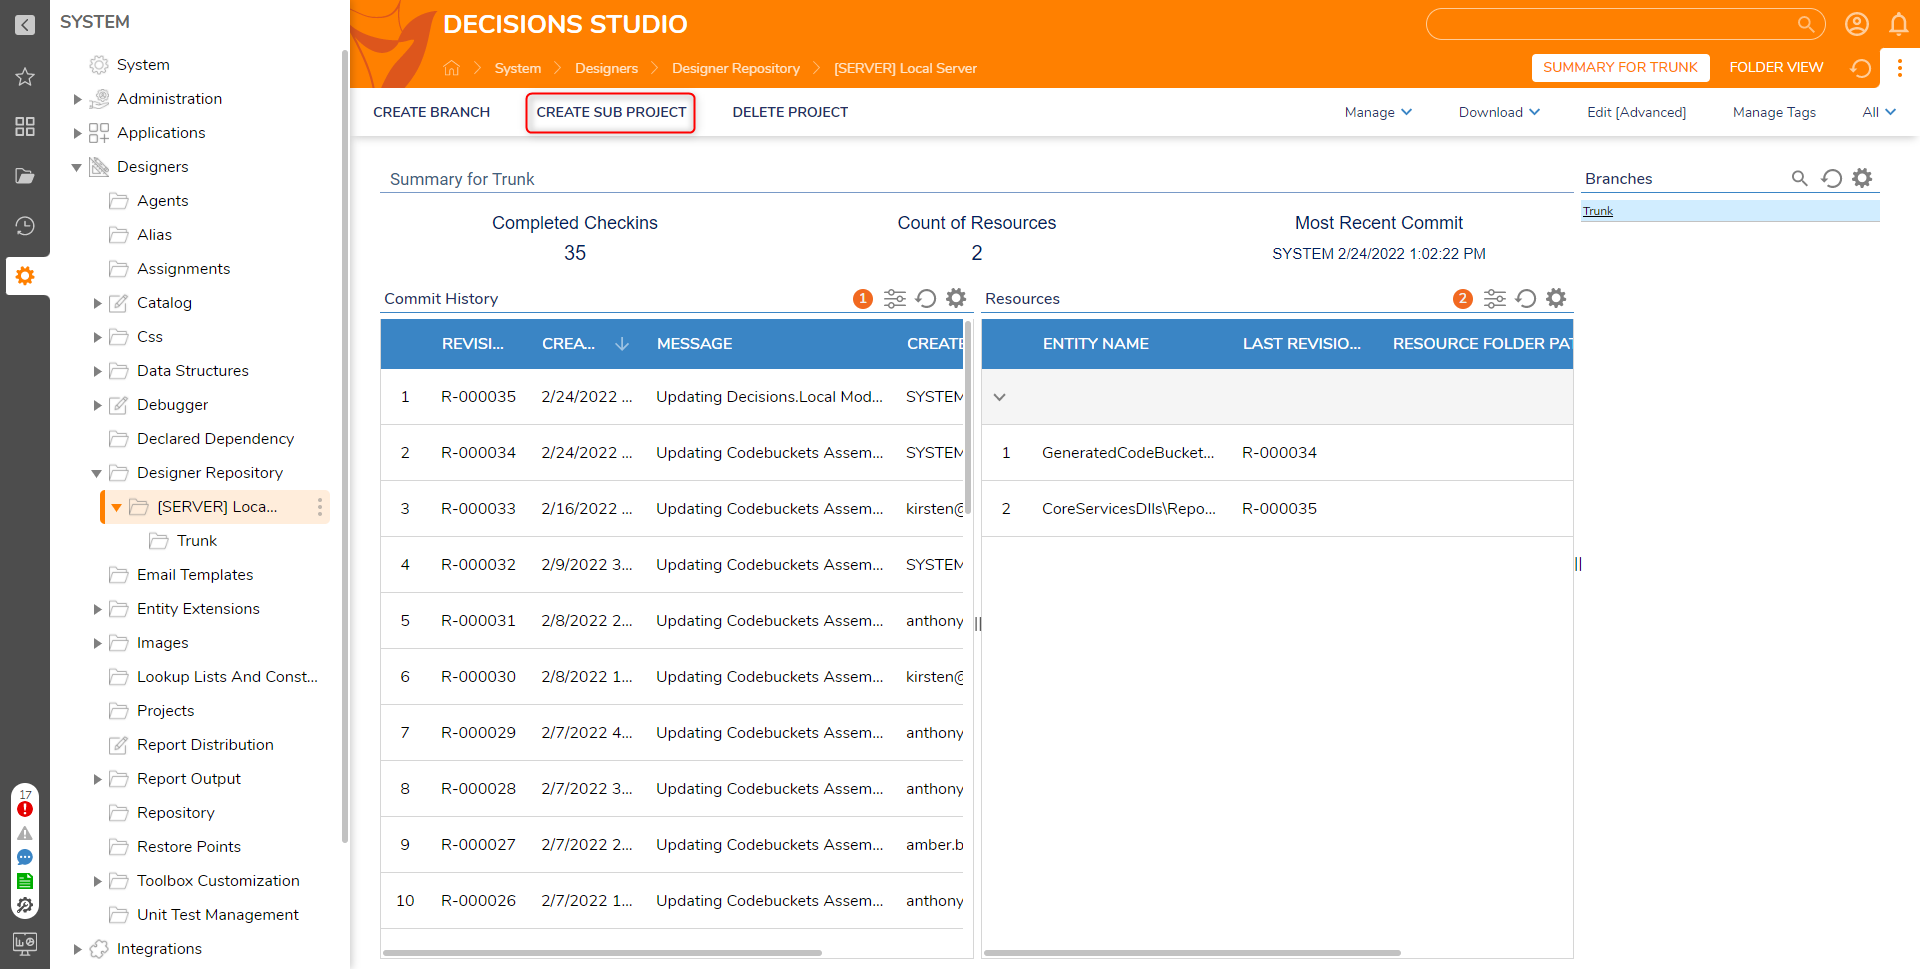
- Select CREATE SUB PROJECT from the Project Folder of the main project.
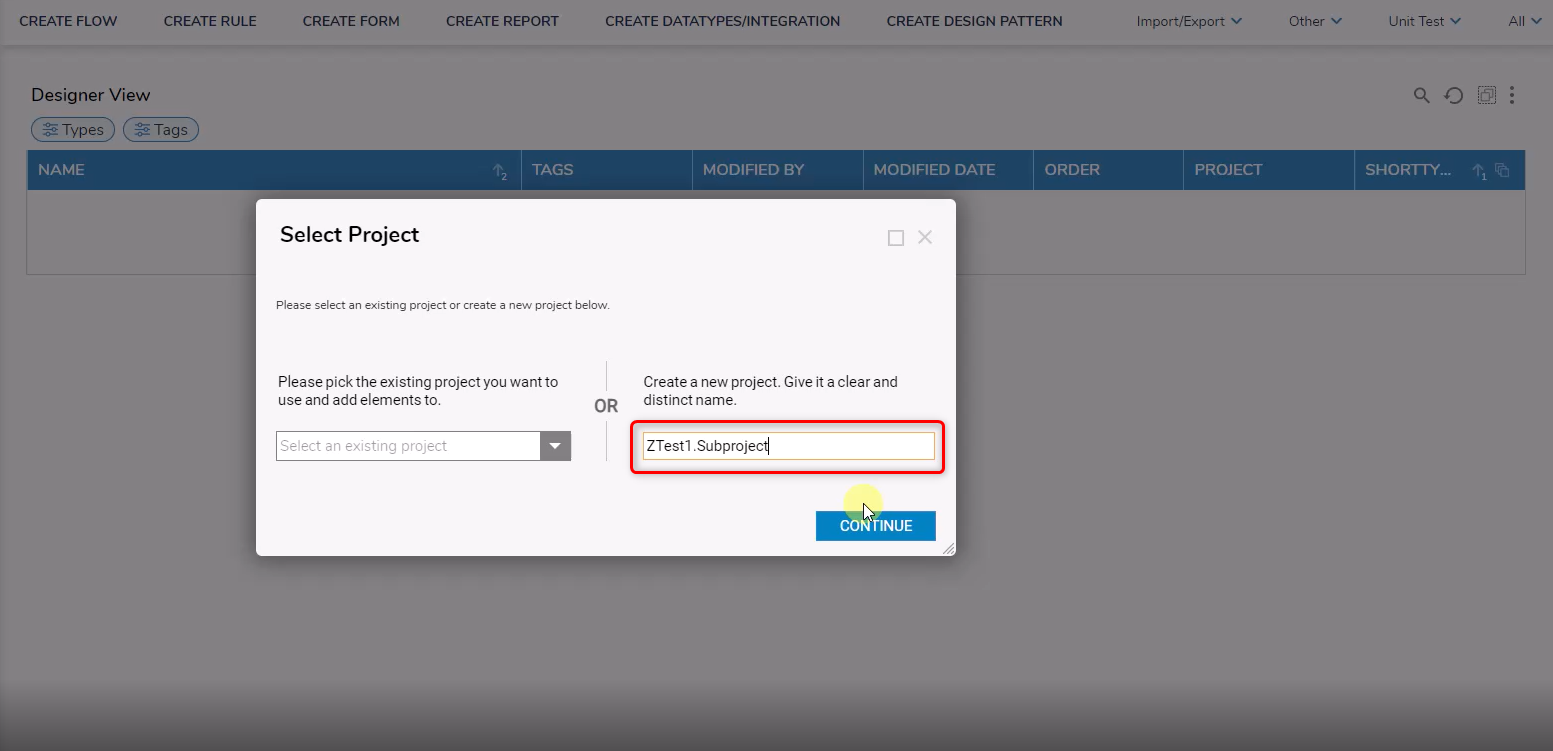
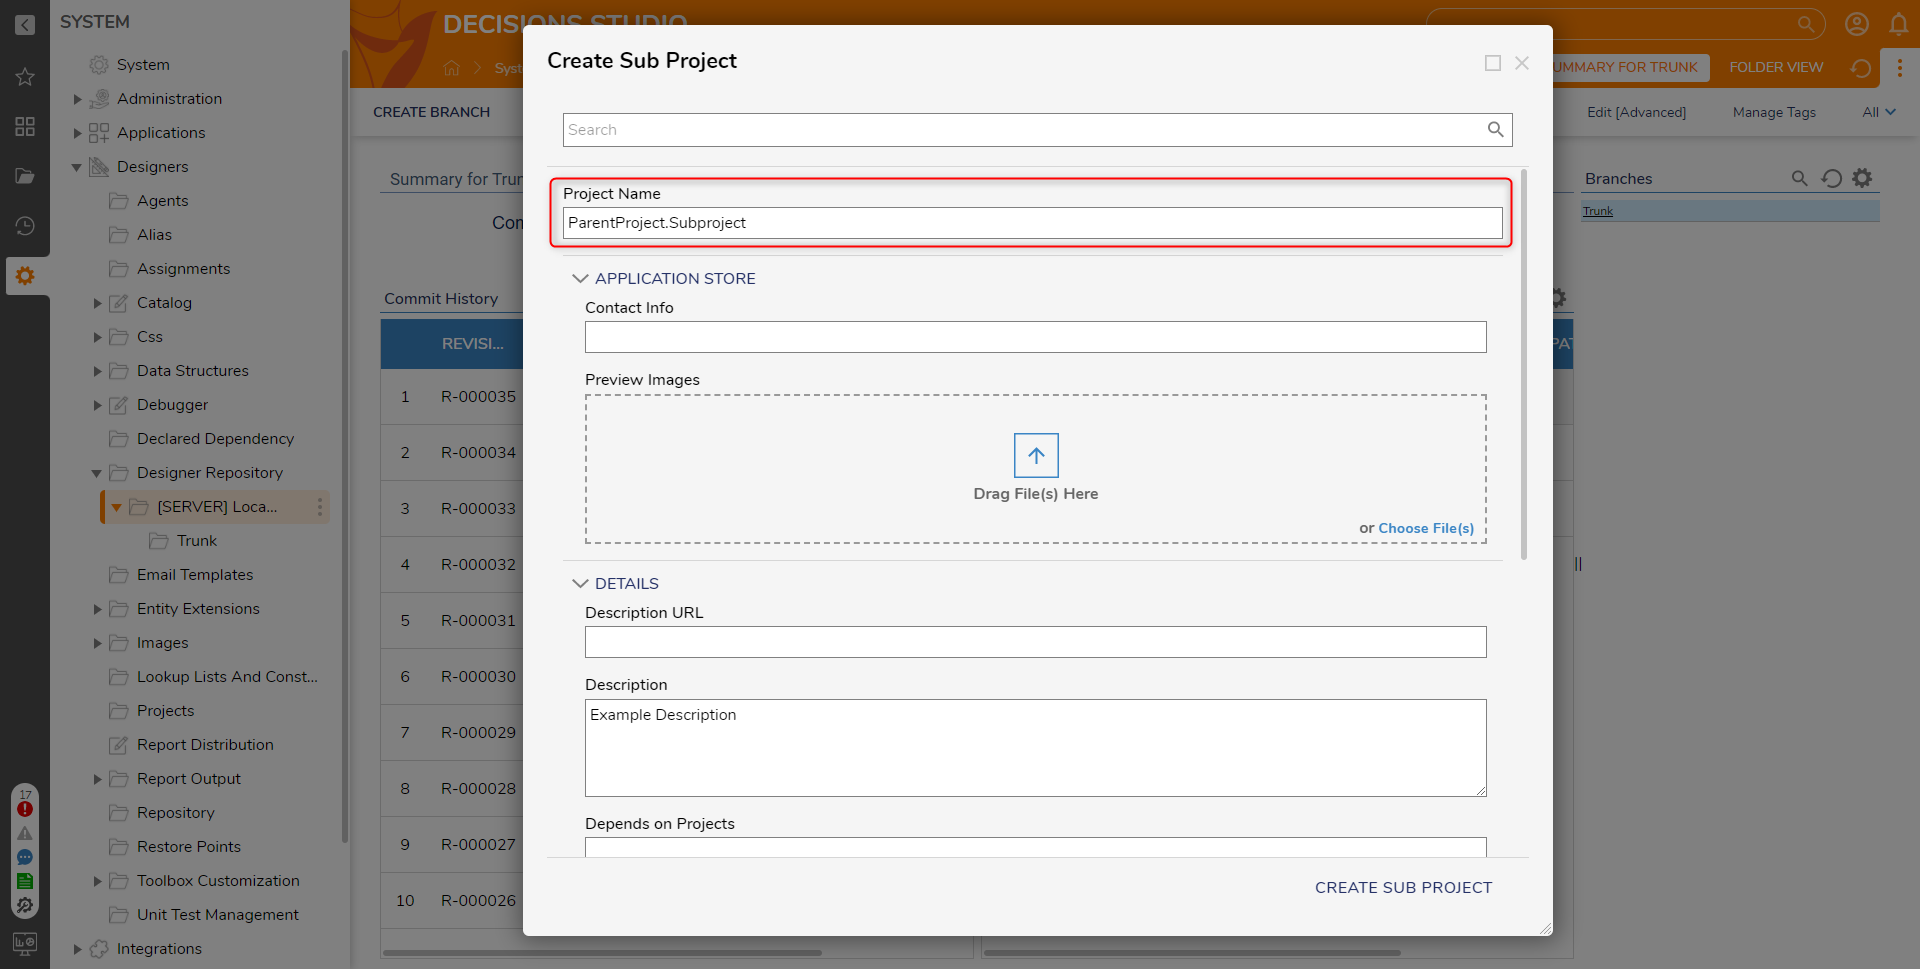
- Similar to creating a regular Project, provide a Project Name and Description URL.Use dot notation when Naming the Sub Project. For example, ParentProject.SubProject. The Description URL should be the URL to a website explaining the Project; use this method if pictures and other resources are desired for the description.
Managing Sub Projects in a Repository
Once a Sub Project has been created, a new Folder with the Sub Project's name should appear in the folder directory under the parent project. Sub Projects have the same functionality as a regular project, meaning the project can be checked out or checked in from the Repository. Branches and Revisions can also be created for the Sub Project.
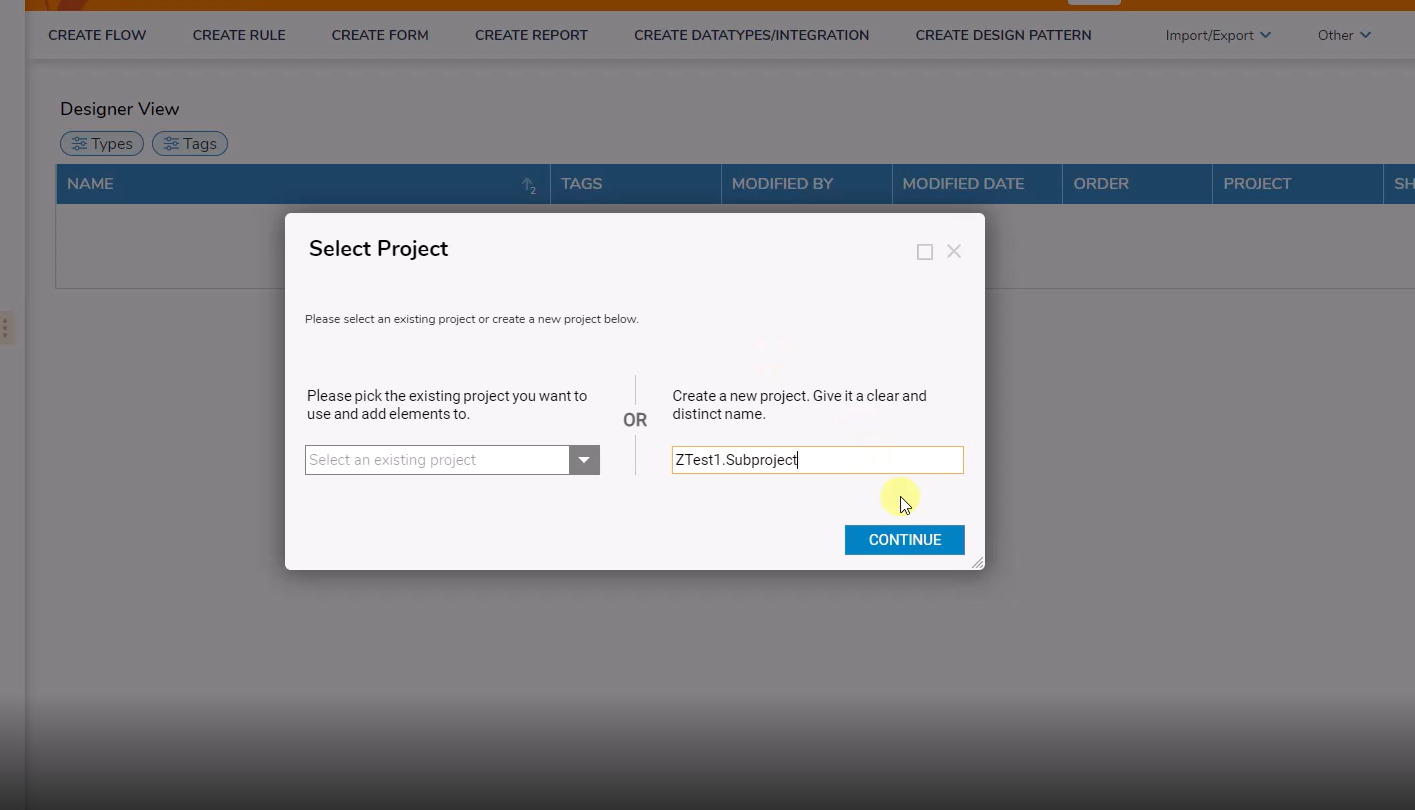
Add to Project
- Right-click on the project, select Designer Repository, and select Add to Project.
- Select a Project or enter the name of a new project. Click CONTINUE.
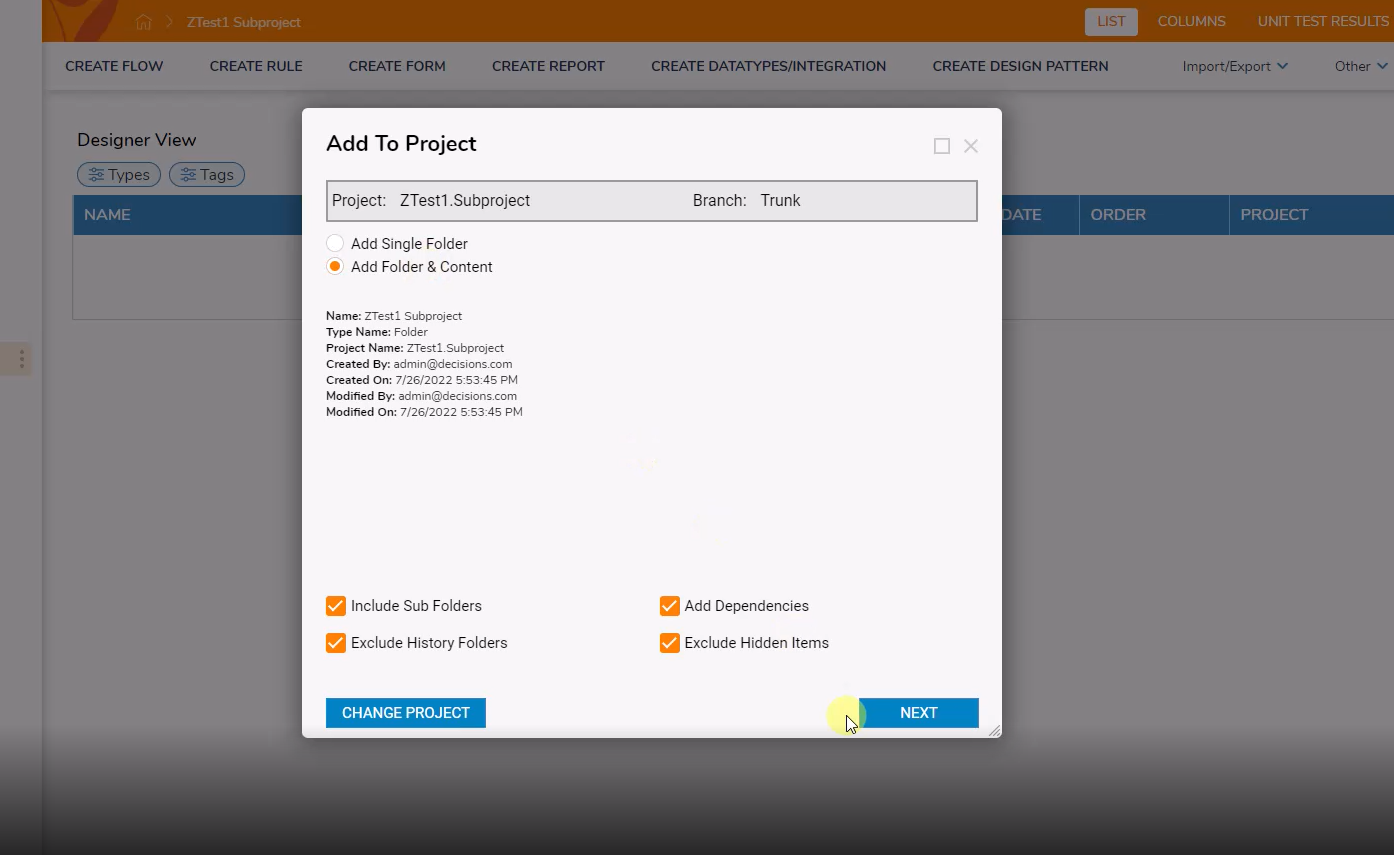
- Select Add Folder & Content and click NEXT.
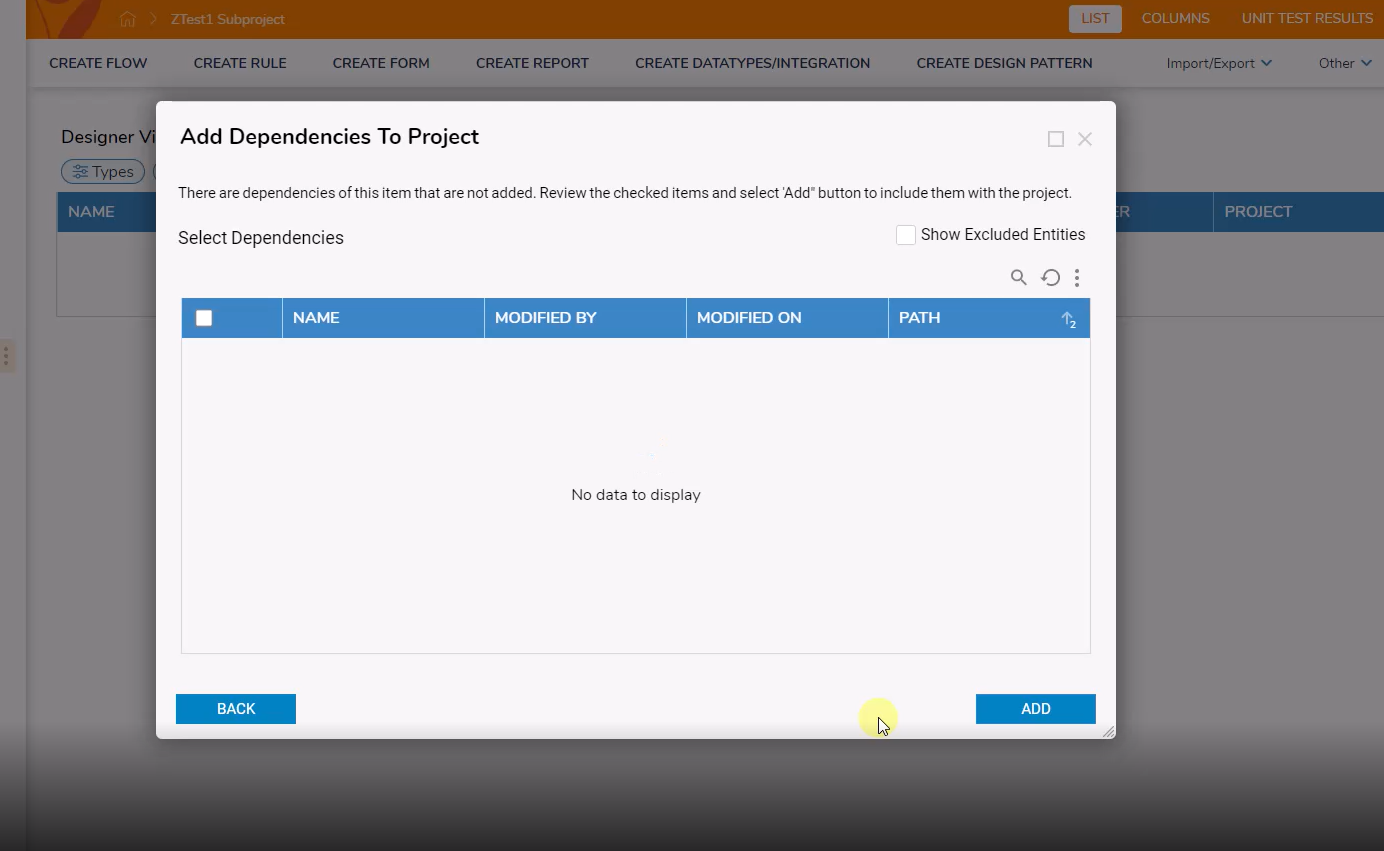
- On the Add Dependencies To Project window, select the desired dependencies and click ADD.
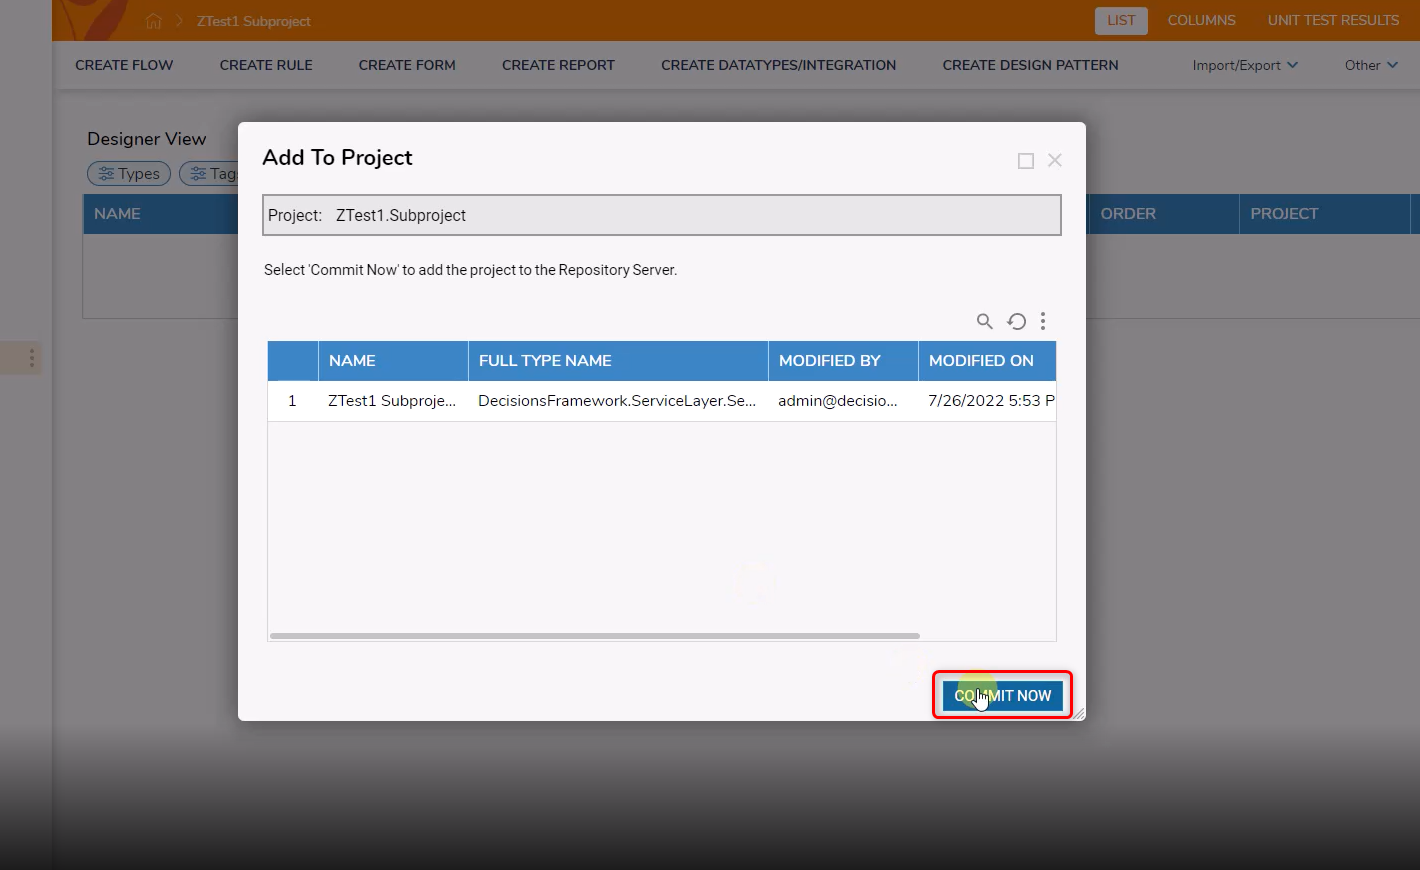
- On the Add To Project window, click COMMIT NOW to add the project to the Repository Server.
- Click COMMIT.
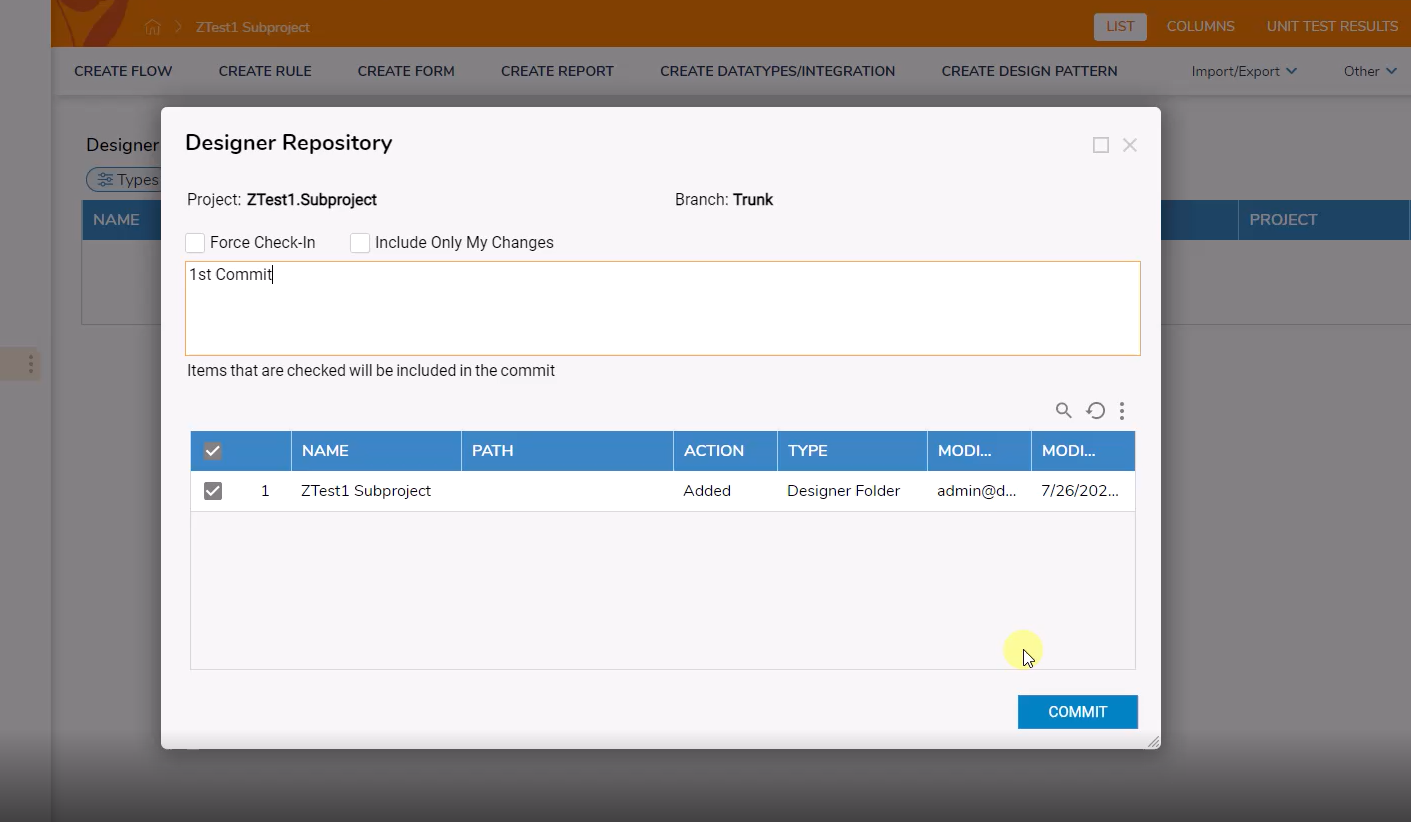
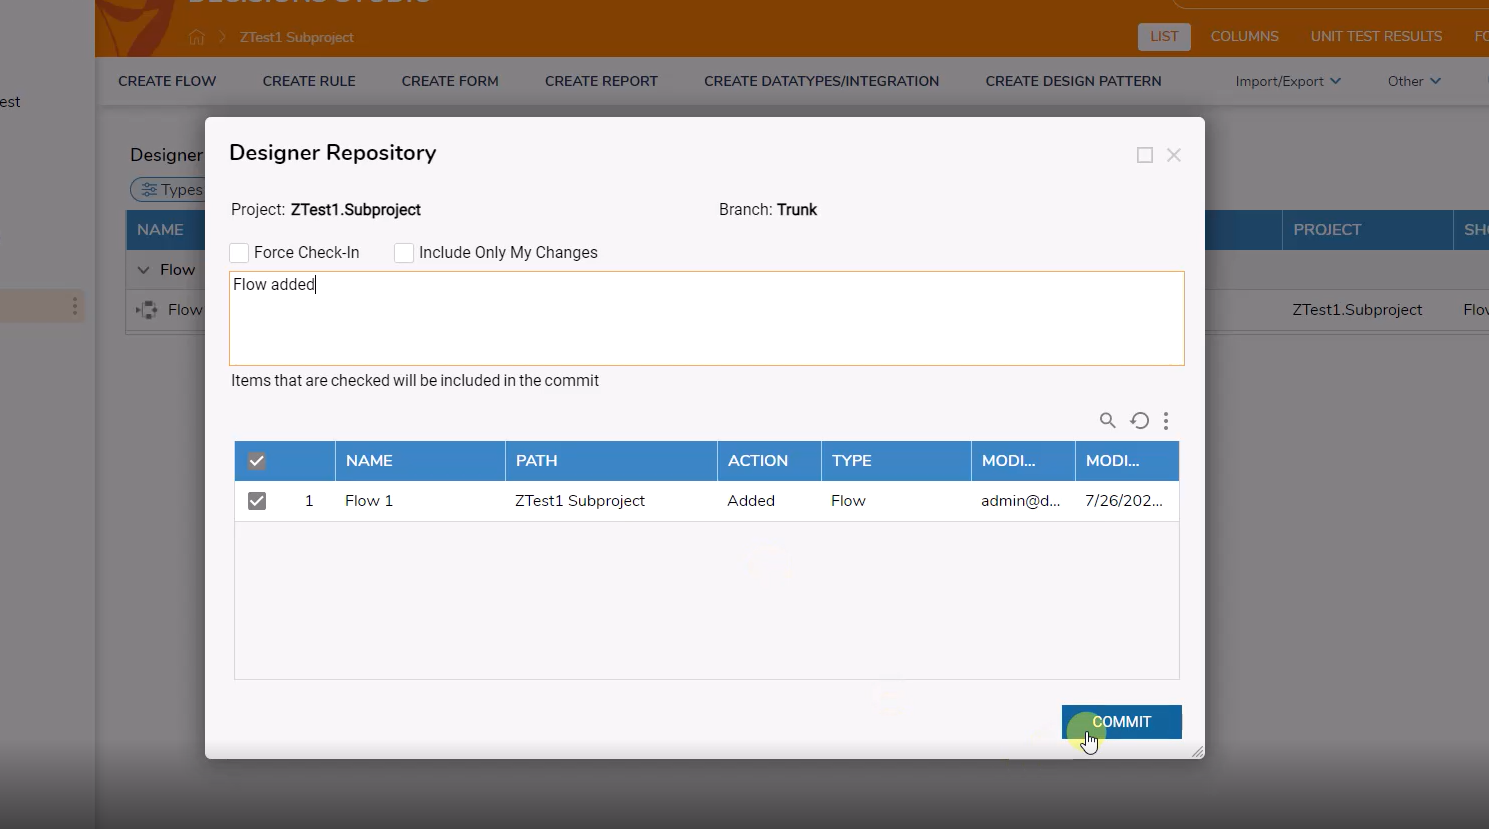
Checking In Changes to a Sub Project
- Right-click on the project, select Designer Repository, and select Checkin Changes for Project [Project Name. Sub Project].
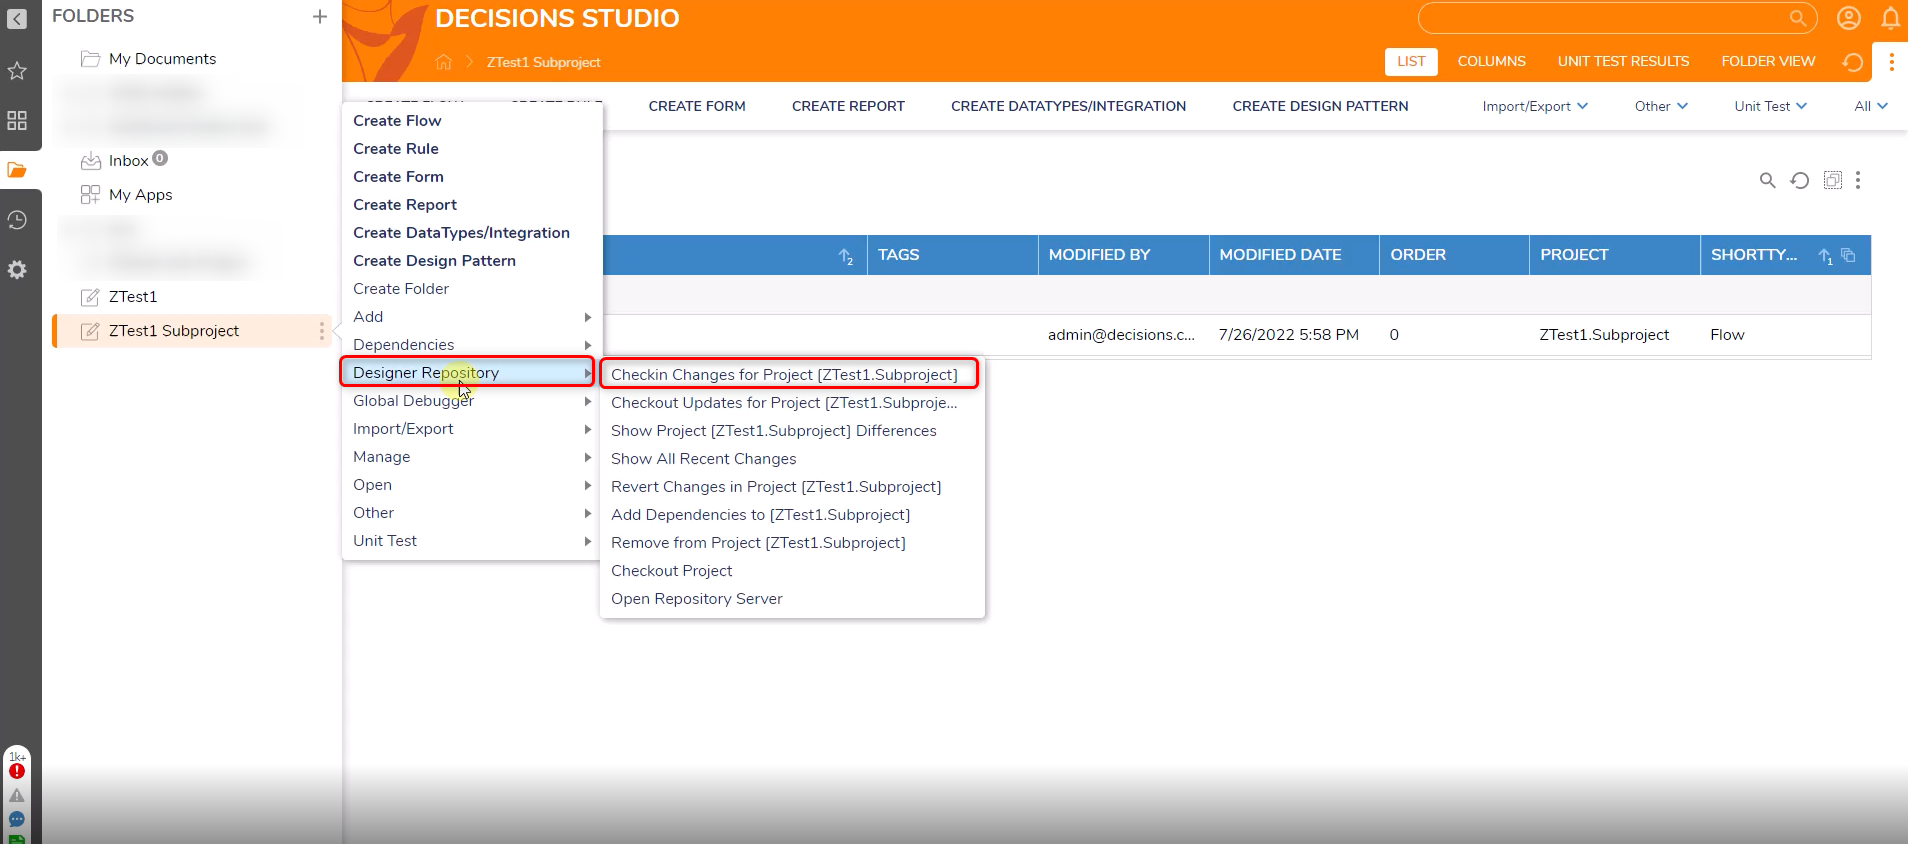
- Click COMMIT.
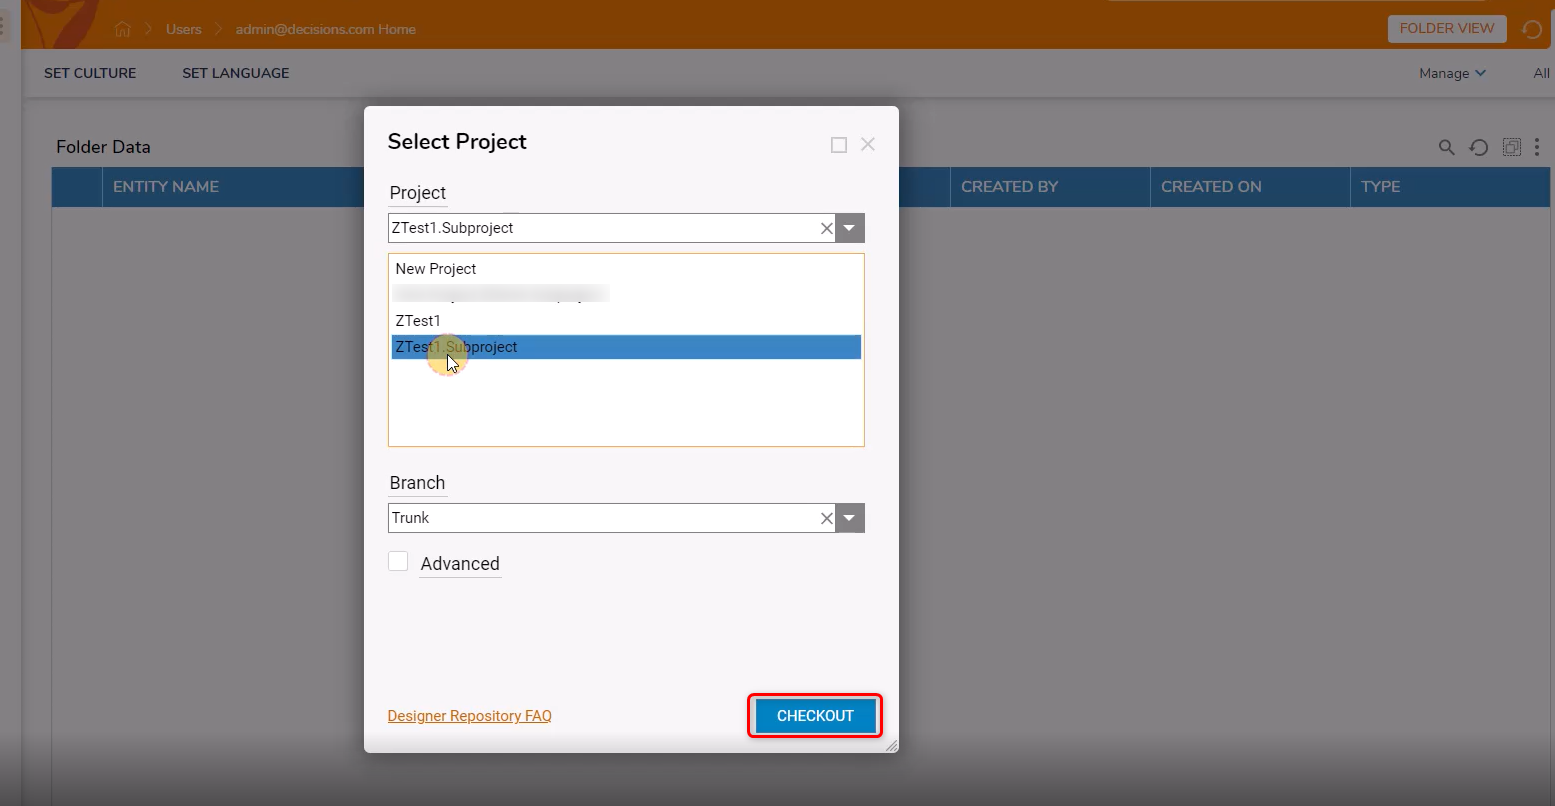
Checking Out a Sub Project
- Right-click on the project, select Designer Repository and click Checkout Project.
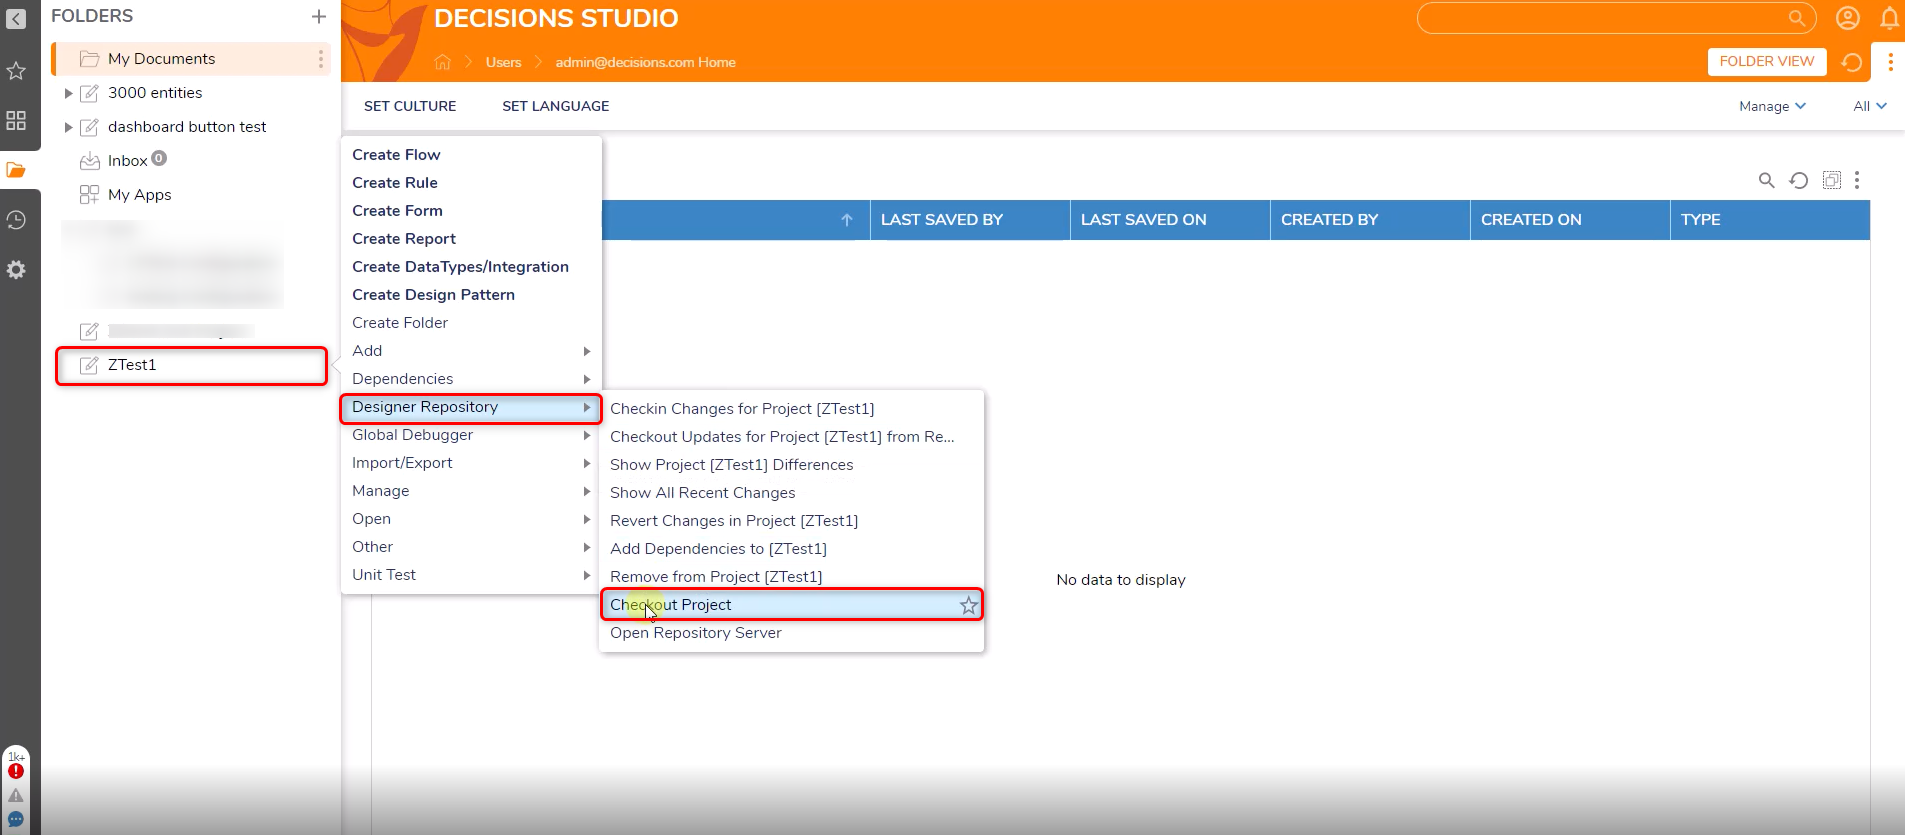
- Select the desired project and click CHECKOUT.
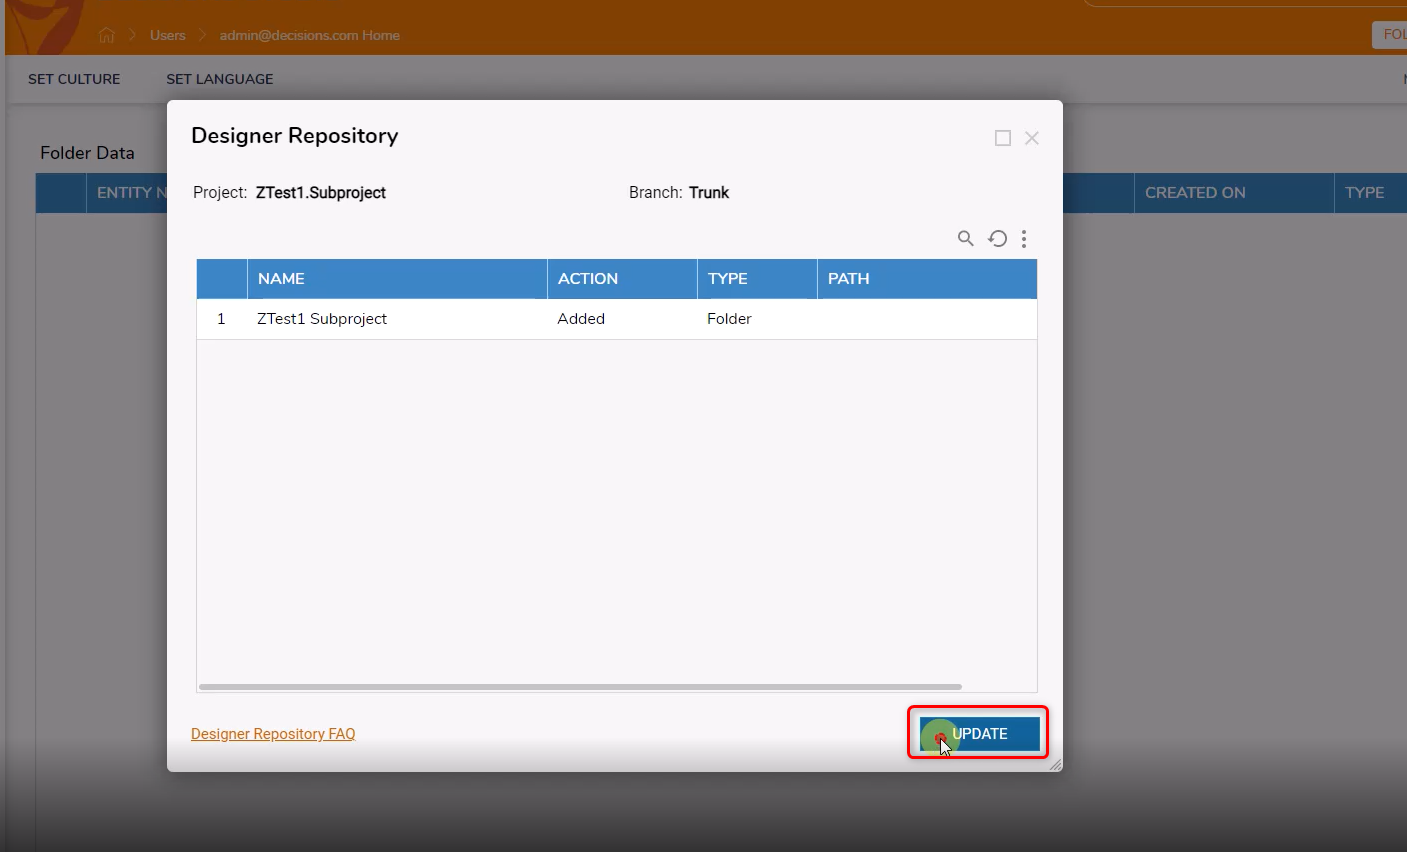
- On the Designer Repository window, click UPDATE.
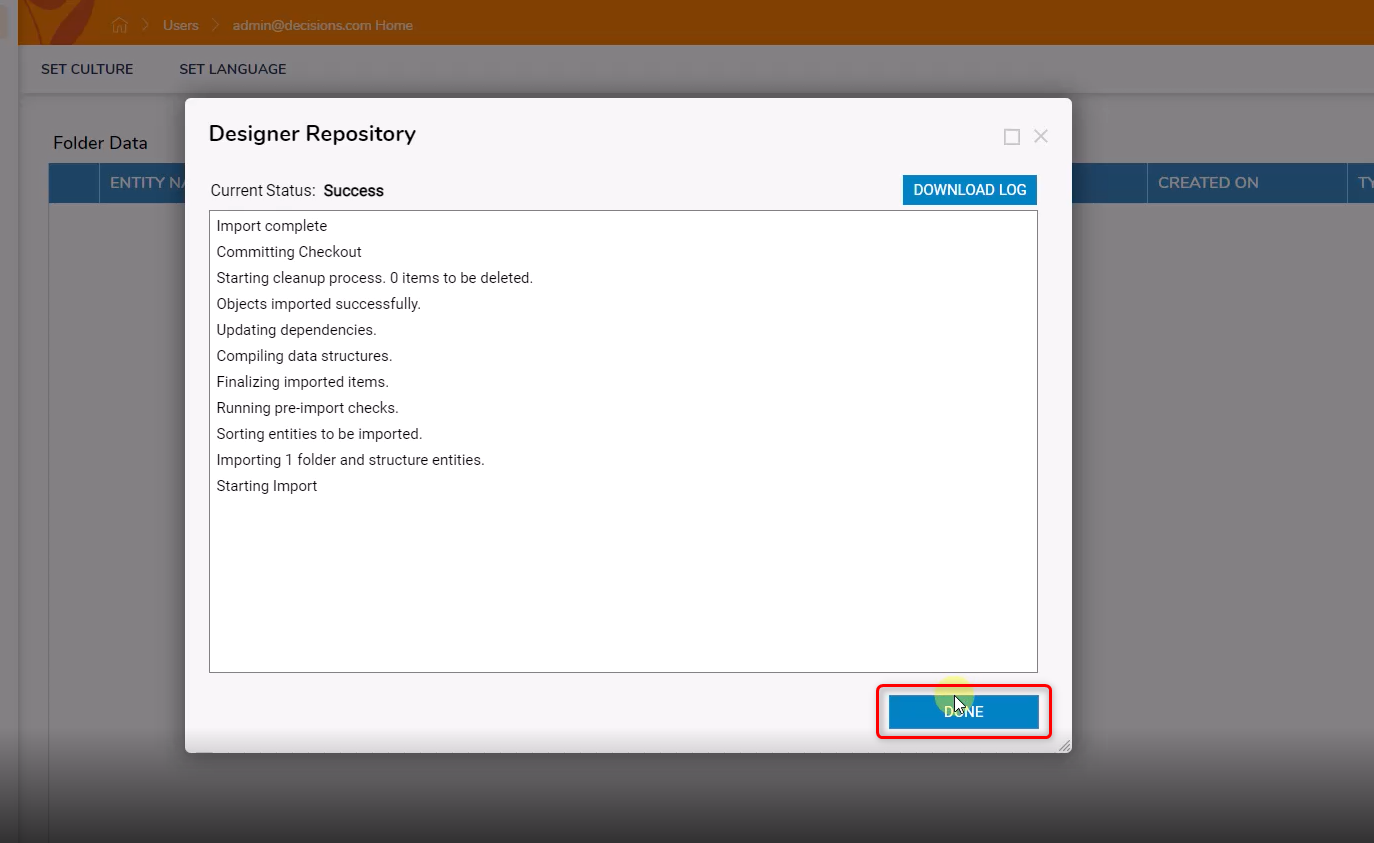
- Click IMPORT.
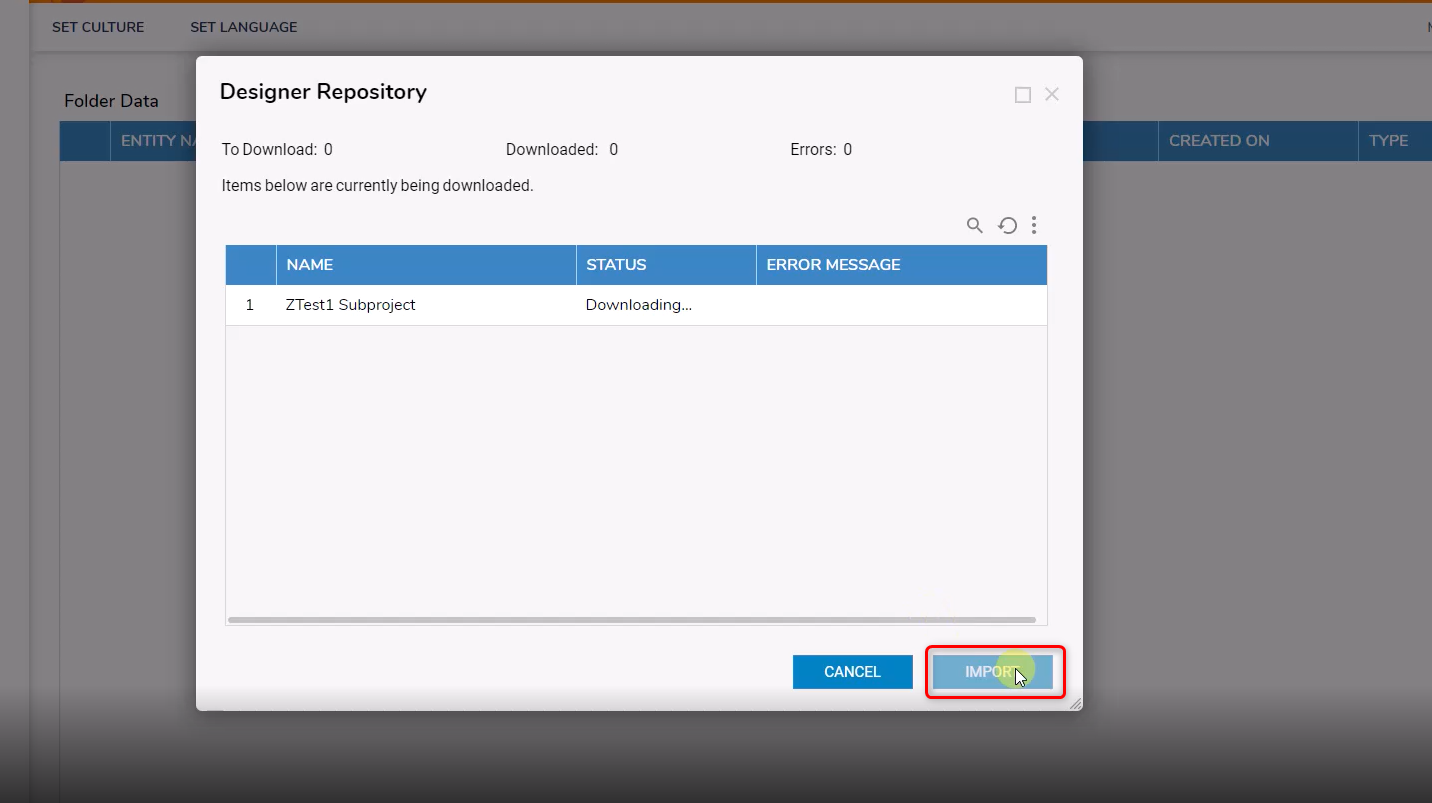
- After the process has ended, click DONE.