- Running v7 and v8 with the same database is NOT supported.
- Upon upgrading to v8, downgrading back to v7 is NOT supported.
- v8 Web Service Integrations requires the installation of the .NET Core 6.0 SDK and a machine restart for proper configuration.
- Upgrading clustered environments requires deploying a Redis server for external caching. Refer to Redis External Caching for more information on deploying and configuring a Redis Server.
- For upgrades to 8.5 and newer versions:
- As part of the change included for the DT-035693, the storage location for LESS files will be moved. This will cause custom LESS files to be lost upon upgrading. It is recommended that users create a backup of any custom LESS files.
- Changes that were made using the Theme Editor will persist upon upgrading.
- For upgrades to 8.9 and newer versions:
- Download and install the latest versions of the following from the .NET Microsoft site:
- ASP.NET Core Runtime 7.x.x (x64).
- .NET Desktop Runtime 7.x.x
- ASP.NET Core Runtime 7.x.x (Hosting Bundle).
- For v8.9, download and install the latest MySQL connector version 8.0.33, and the recommended .dll file to be used for the MySQL connector is from .NET 7.0. For more information, refer to Connect to MySQL.
- Download and install the latest versions of the following from the .NET Microsoft site:
- For upgrades to v8.10 and newer versions:
- The ID system for identifying design elements changed from GUIDs to ULIDs. This may cause issues in places that reference GUIDs specifically.
- SQL Requirements
- Decisions v8.12 to v8.19 requires SQL Server 2016 or newer.
- v8.20 to v8.22 requires SQL 2017 or newer.
- For more information, refer to Installation Requirement.
- .NET Requirements
- Decisions v8.9 to v8.16 requires .NET 7.
- Decisions v8.17 to v8.22 requires .NET 8.
Overview
The following article provides instructions for upgrading from Version 7 to 8 and troubleshooting potential upgrading issues.
Backing up the Previous Installation
It is highly recommended to back up the v7 installation and its affiliated database before upgrading.
While it cannot be used as a substitute for v8's Settings.xml, the v7 Settings.xml is a valuable reference to ensure the necessary variable match when upgrading.
- Back up the Database noting the DB Server and DB name (or Connection String).
- Navigate to C:\Program Files\Decisions\Decisions Server, and copy and paste the Settings.xml file into the desired location.
- Navigate to C:\Program Files\Decisions\Decisions Server\Instances\Control.
- Copy and paste the Keys.dat file to the desired location.
- Navigate to C:\Program Files\Decisions\FileStorage.
- Back up the FileStorage Folder and reference the v7 Settings.xml file, copied above, to re-configure the exact path later in the v8 Installer.
Downloads, Selecting Installation Type, and Database Setup
- Fulfill all v8 Prerequisites before beginning installation.
- Download the Decisions 8 Installer from Download Decisions webpage.
- Right-click the installer, then select Run as Administrator.
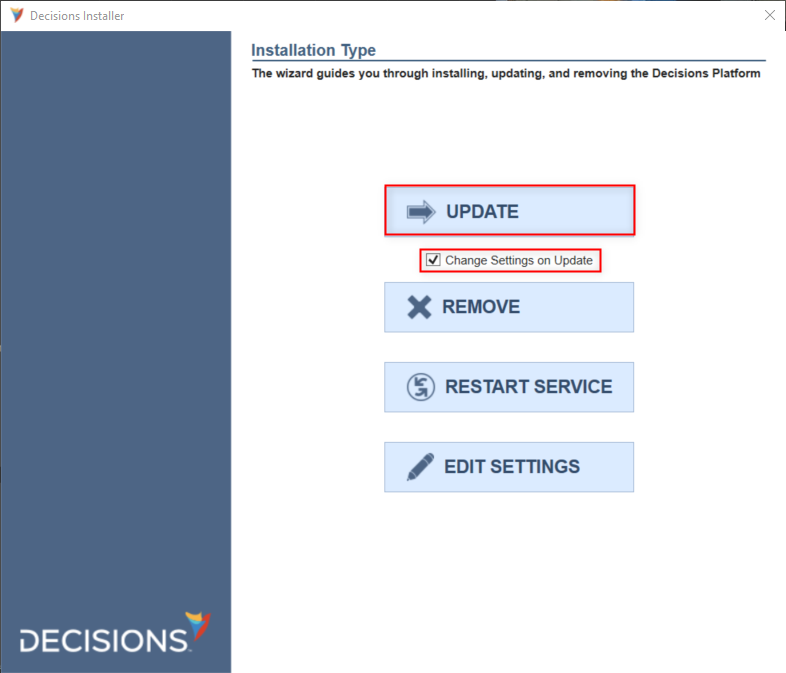
- From the Decisions Installer, enable Change Settings on Update, then click UPDATE.
- Review the terms, check the I accept the terms of the License Agreement box, and then click Next to proceed.
- For the installation type, select the desired server type. This example chooses a Standard server. Select Next to continue.
- Upon reaching the Settings screen, click Next.
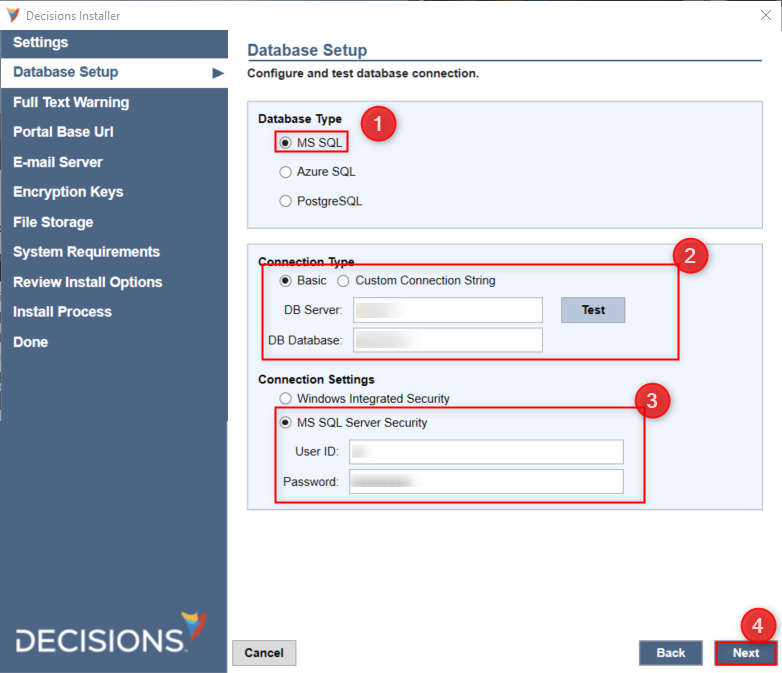
- On the Database Setup screen, select the appropriate Database Type, and match the Connection Type and Connection Settings for the new v8 database. Click Next.
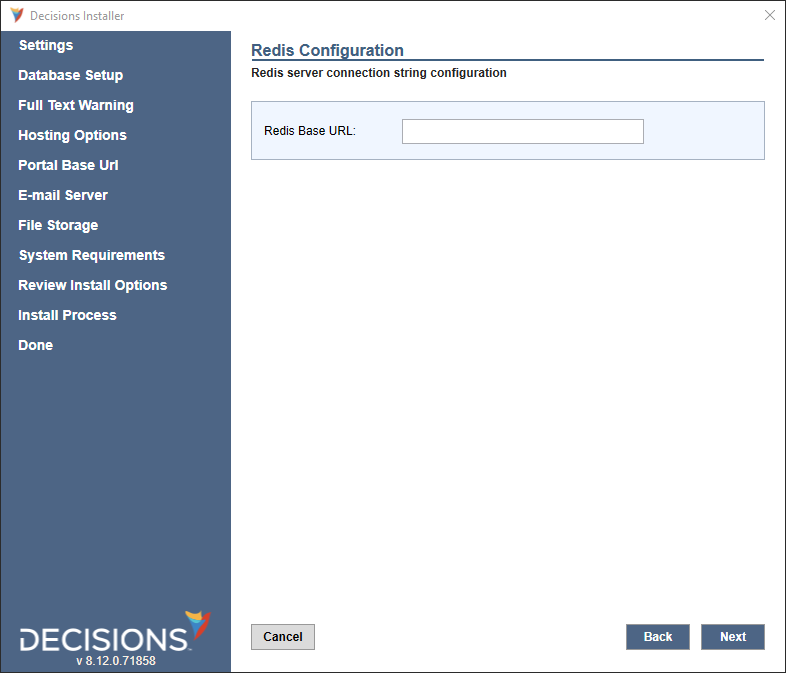
- If upgrading a clustered environment, the installer will prompt users to enter the Redis Base URL. Enter the Redis Base URL for the clustered environment. For more information, refer to Setting Up Redis External Caching.
- Continue past the Full-Text Warning screen.
Portal Base URL
Set up the Portal Base URL based on the chosen Hosting Option. It is recommended to maintain the same URL in the prior version if possible.
To ensure previously emailed v7 task links resolve correctly, reference the v7 Settings.xml file to configure the matching values during the v8 installation.
Email Server, Encryption Keys, and File Storage,
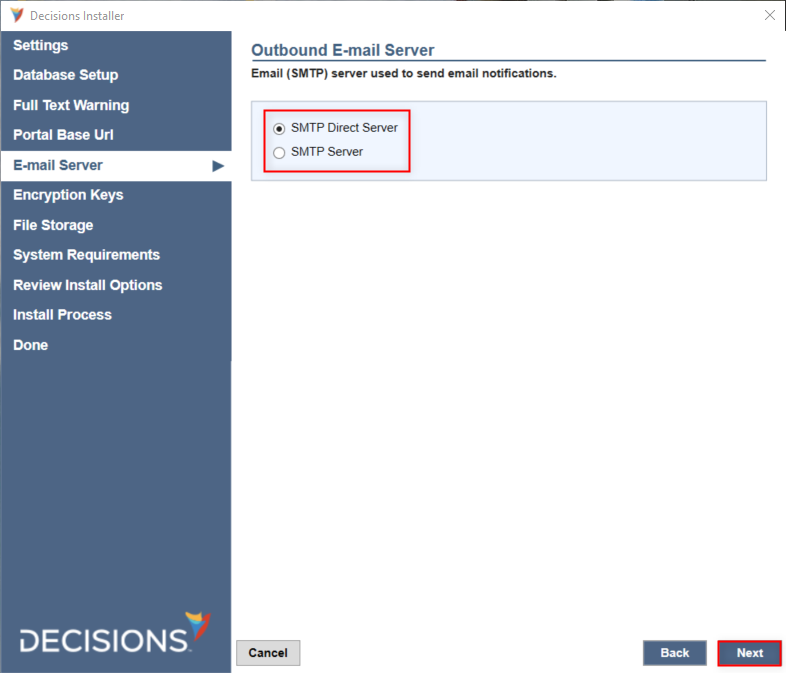
- Select the Outbound E-mail Server option previously used in v7, then click Next.
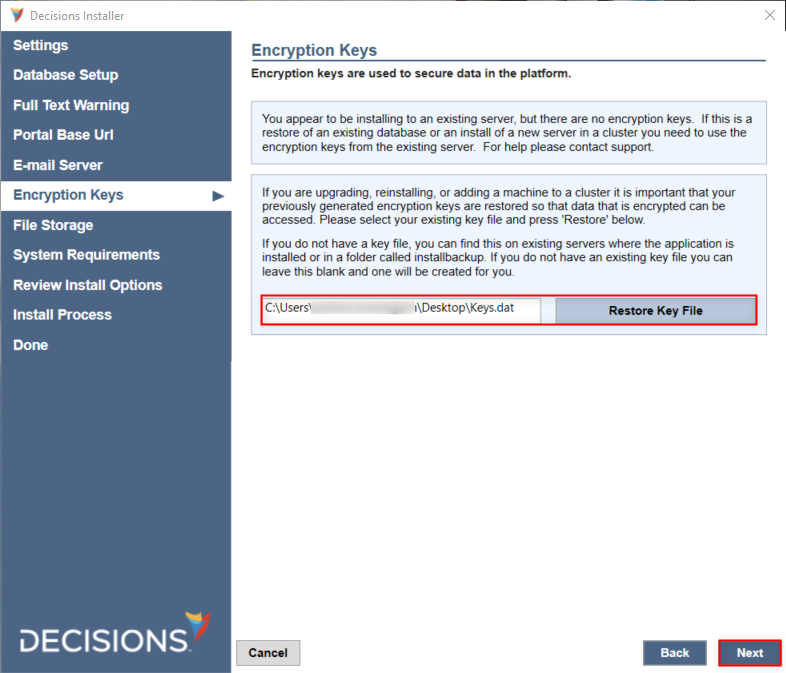
- If database encryption was used, click Restore Key File to upload the copied v7 Keys.dat, then click Next.
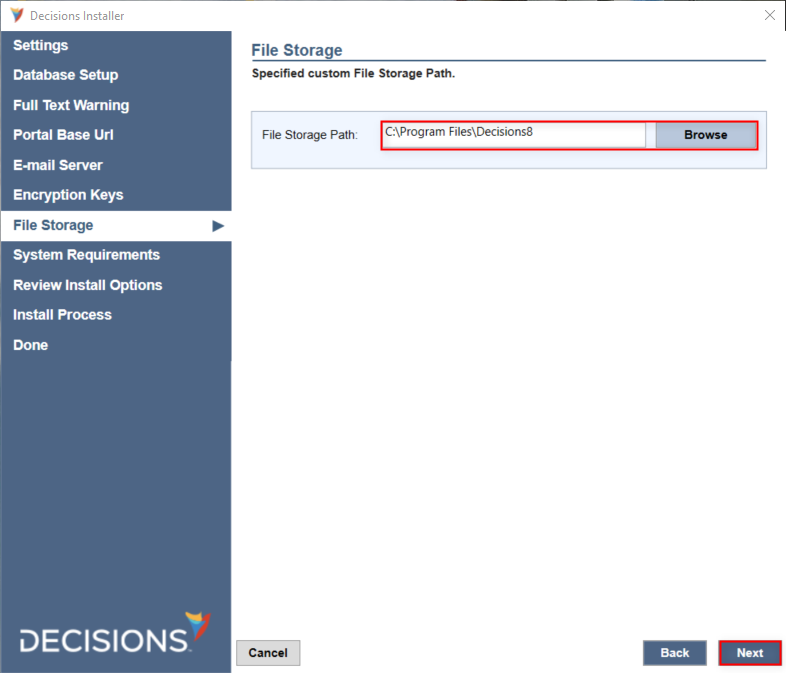
- Define a new v8File Storage location or select the original one. Then, click Next.
- This ends any upgrade-specific changes from the standard installation. Proceed with the installation as detailed in the Installation Guide.
Manually edited .LESS Conflicts
Direct edits to the custom .less files made outside the Theme Editor may cause errors in the Portal UI.
Upgrading from v7 automatically overrides the .less files, but a conflict file is generated once this error occurs. The conflict file contains the old .less file's information.
To resolve this issue:
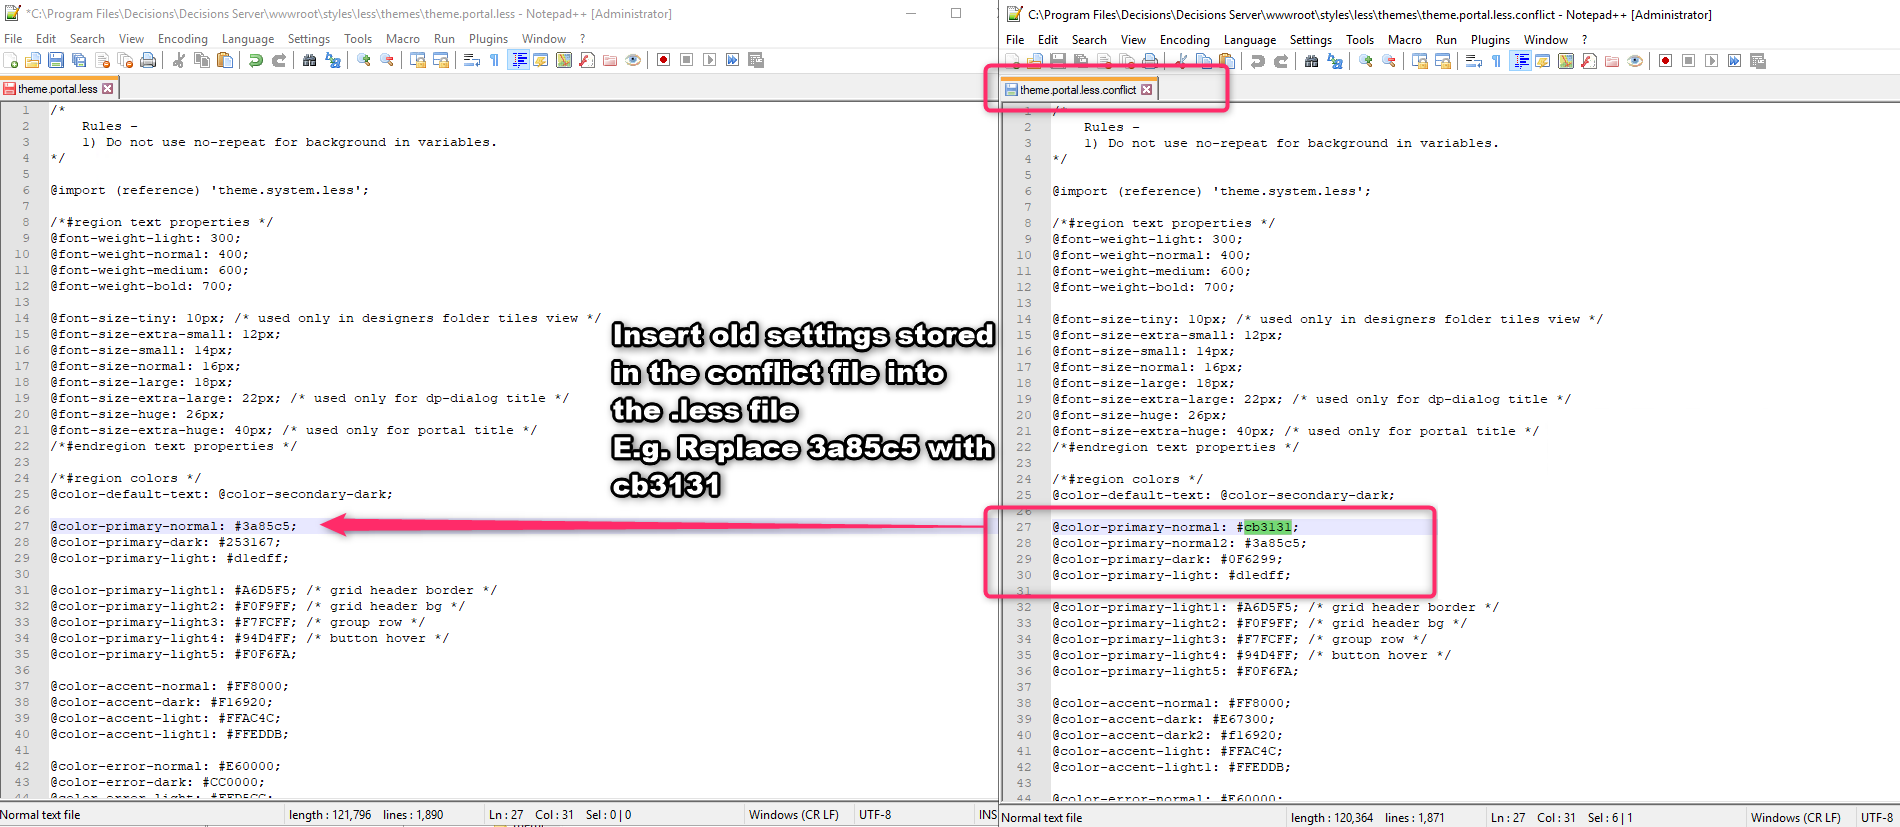
- Open the provided conflict file named e.g. "theme.portal.less.conflict" found in the same folder as the .less files.
- Open the .less file associated with the conflict file. Matching the example above, this would be the "theme.portal.less" file.
- Replace each changed value in the .less file with the value shown in the conflict file.
- Restart the Decisions server to apply changes.
Upgrading Multiple Servers
It is recommended to update servers in the following order:
- Development Server
- Repository and Test
- Production
Once Development has been upgraded, projects cannot be deployed to Repository or Test servers until they have been upgraded. It is possible to upgrade Development, Repository, and Test at the same time. Deploying to Production is also blocked until it has been upgraded.
Feature Changes
| Description | Version | Date | Developer Task |
|---|---|---|---|
| Added Redis Check And Ability to Specify Connection String Into Installer | 8.12 | June 7, 2023 | [DT-037794] |