Overview
In Decisions, the platform needs a way to record issues that are encountered with the platform to logs that are saved in the Decisions program file. In a Flow that follows a certain execution path, a Log Step can be useful to create logs for when that particular path is hit. The category, level type, and message that are attached to logs created with the Log Step can be customized by the user.
Example
Begin in a Designer Folder, click the Create Flow button located on the Action Bar at the bottom of the screen.

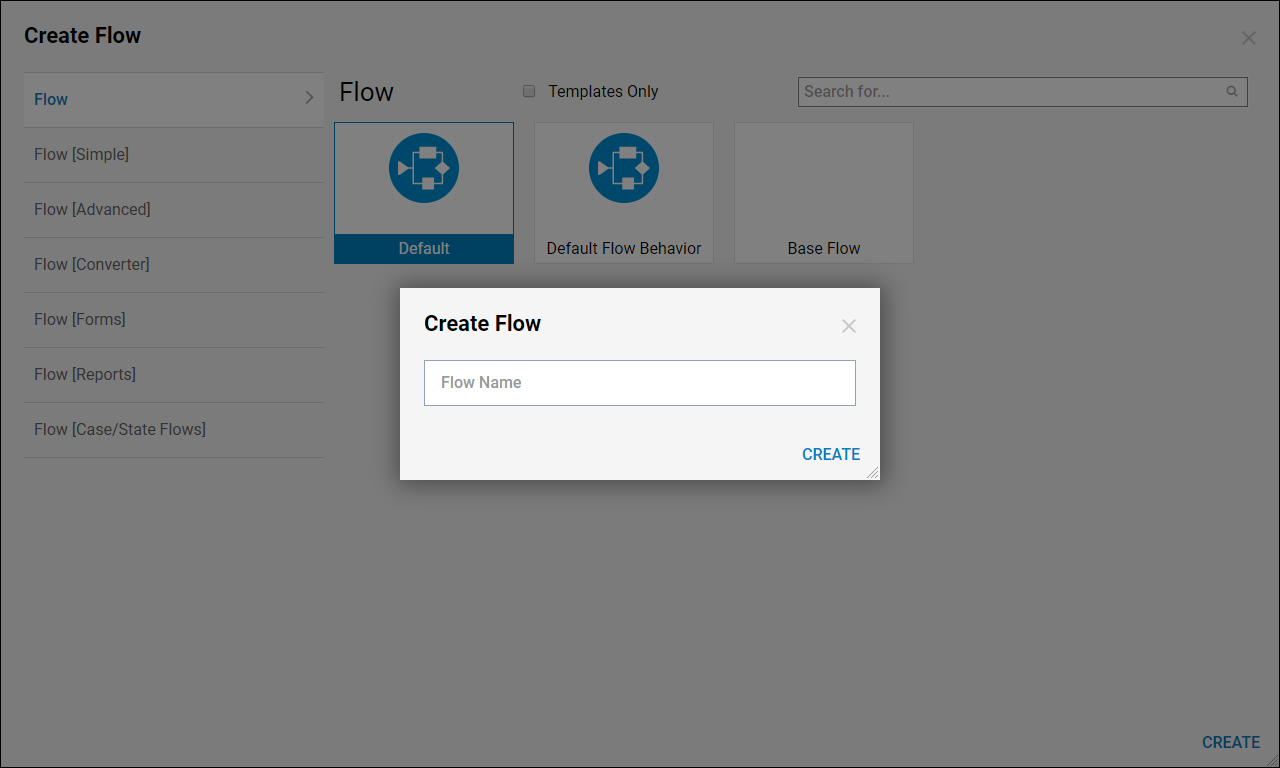
Select 'CREATE' to use the default Flow template, name the Flow on the next screen, then select 'CREATE' again. Decisions will now redirect to the Flow Designer.
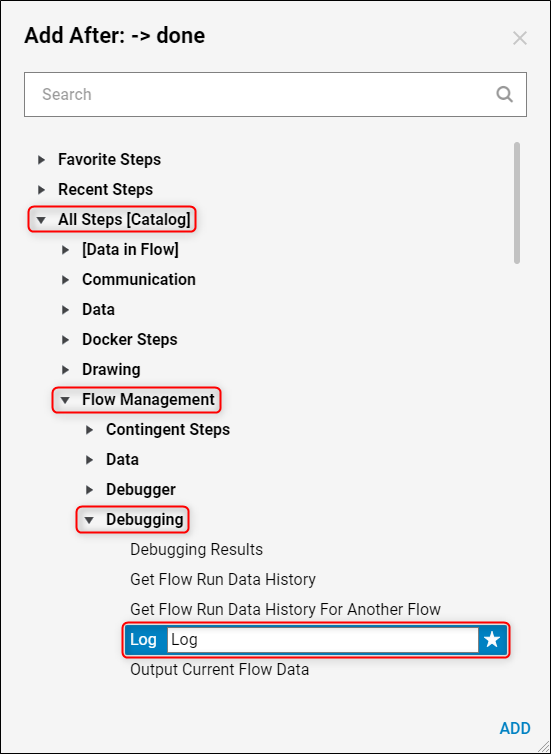
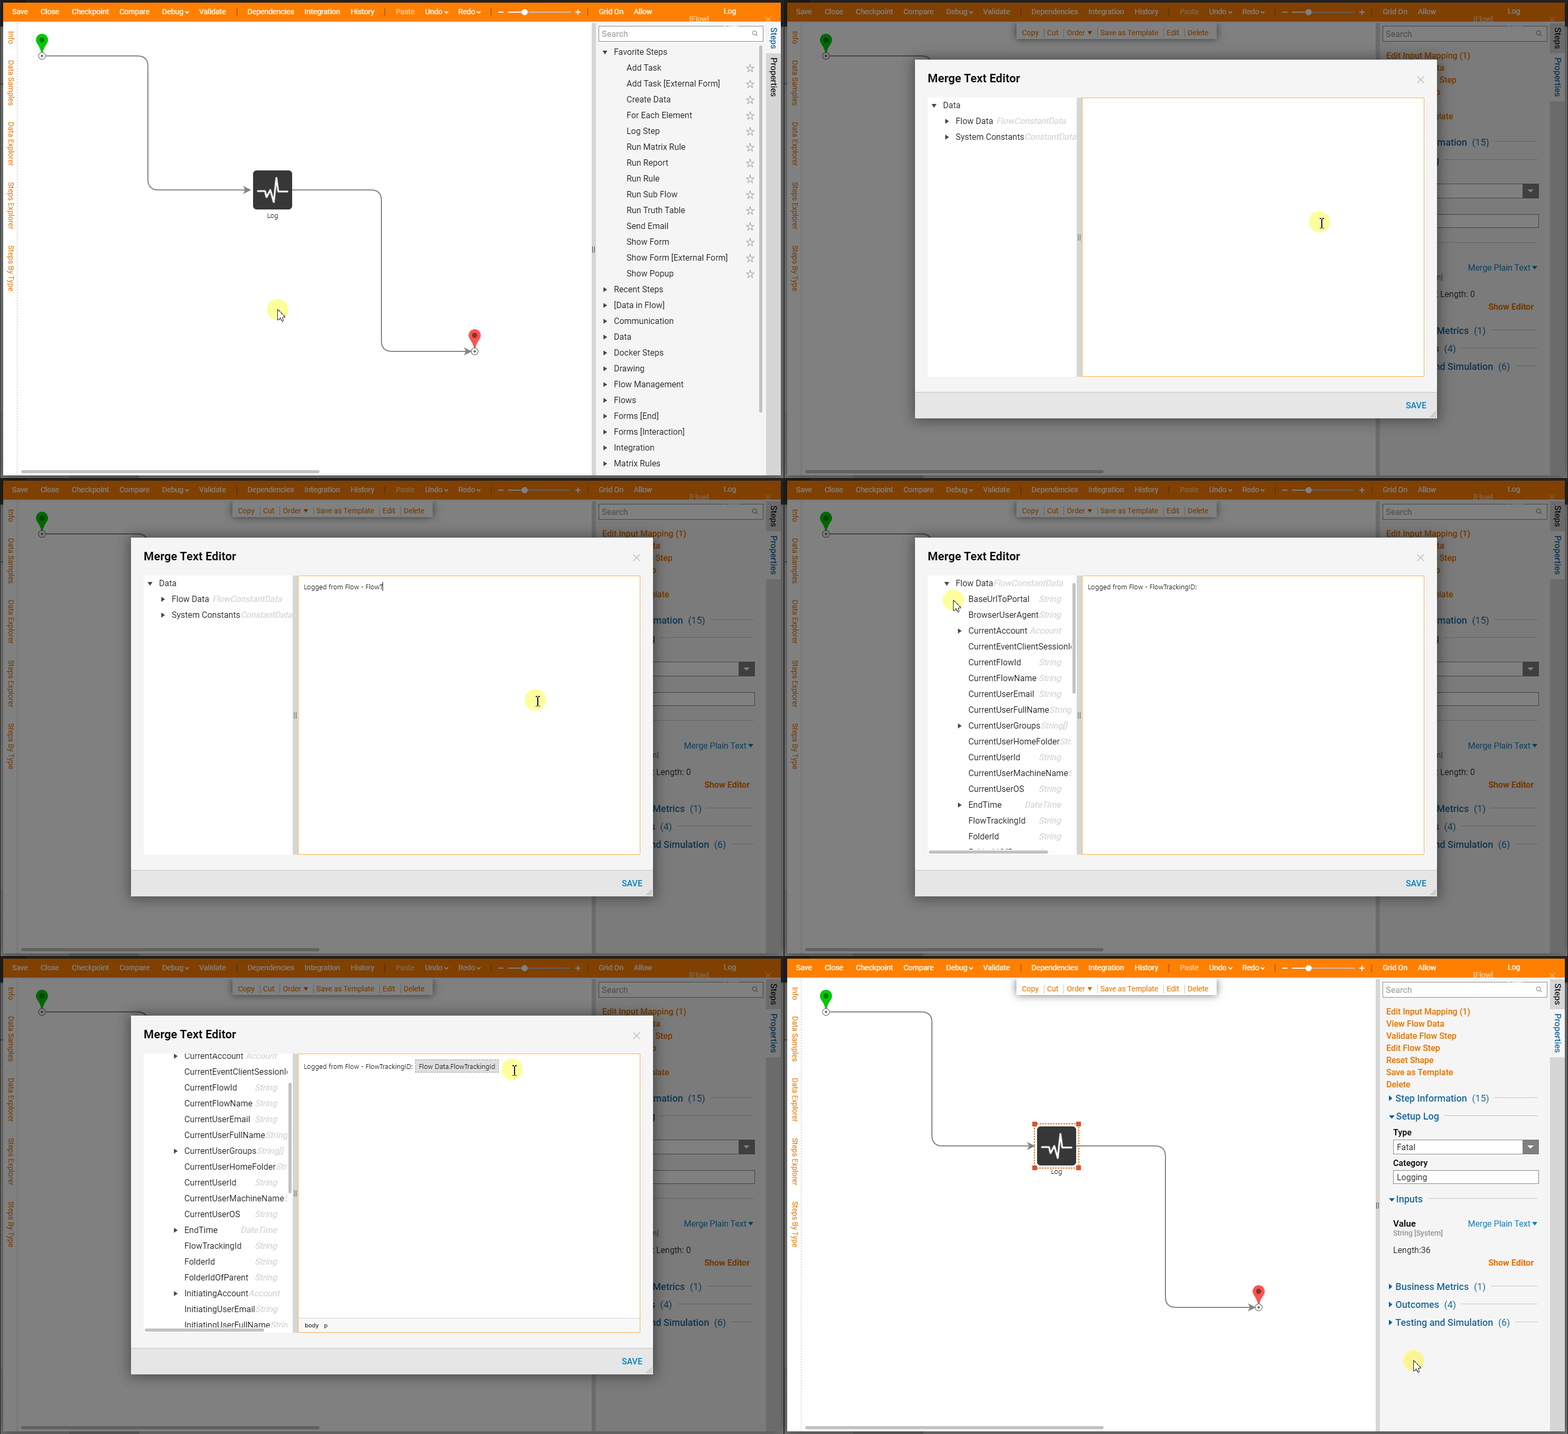
In the Flow Designer, click the 'Done' path coming from the Start Step. When the 'Add After' window appears, navigate to All Steps [Catalog] > Flow Management > Debugging and select the Log Step. Rename the Step in the text box next to it, then click 'ADD'.
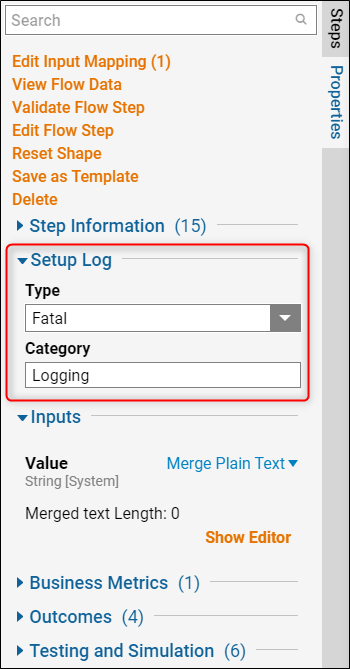
Connect the 'Done' path of the Log Step to the End Step. Click the Log Step and locate the properties for it on the right side. The Type dropdown in the Setup Log section has configurable levels for the critical nature of the log that is produced when this Step is hit.
Decisions logging is configured by default to the only record Warn, Error, and Fatal type logs. The Info and Debug type logs can be recorded by changing a value in the Settings.XML file, although it is not recommended as it produces a large number of logs that can hinder performance. For the purpose of this example, the Type is set to Fatal.
The Category text-box is a space where a custom category can be configured to easily identify logs. The best practice is to use the name of the Flow or project for the category.
In the Inputs section, the Value property can be configured to show a message with content about the log. The default mapping type is Merge Plain Text, select the Show Editor option to configure the message. The message for this example reads, "Logged from Flow - FlowTrackingID:", where FlowTrackingID is mapped into the message from the Flow Data dropdown on the left.
Close the Flow Designer and save the Flow. Back in the Designer Folder, right-click the Flow to show the Action Menu for this element, then select the option to Run Flow. After the Flow has run, a notification should appear in the top right corner that the Flow was complete. Navigate to System > Administration > System Tools > Logging and notice that the Log added when the Flow was executed has the same Category, Level, and Message as configured in the Log Step.
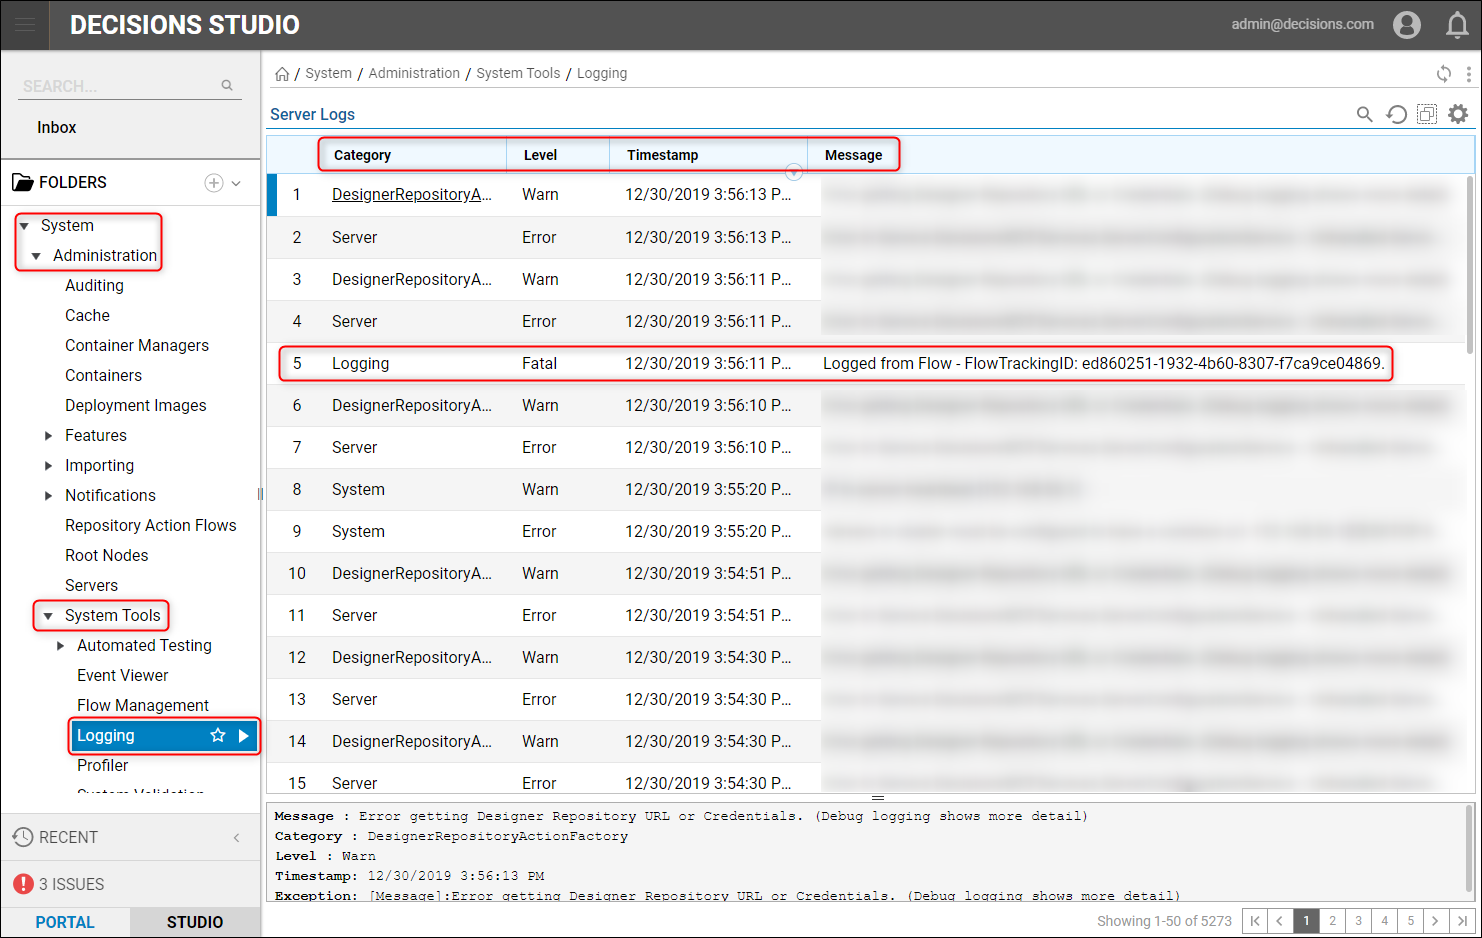
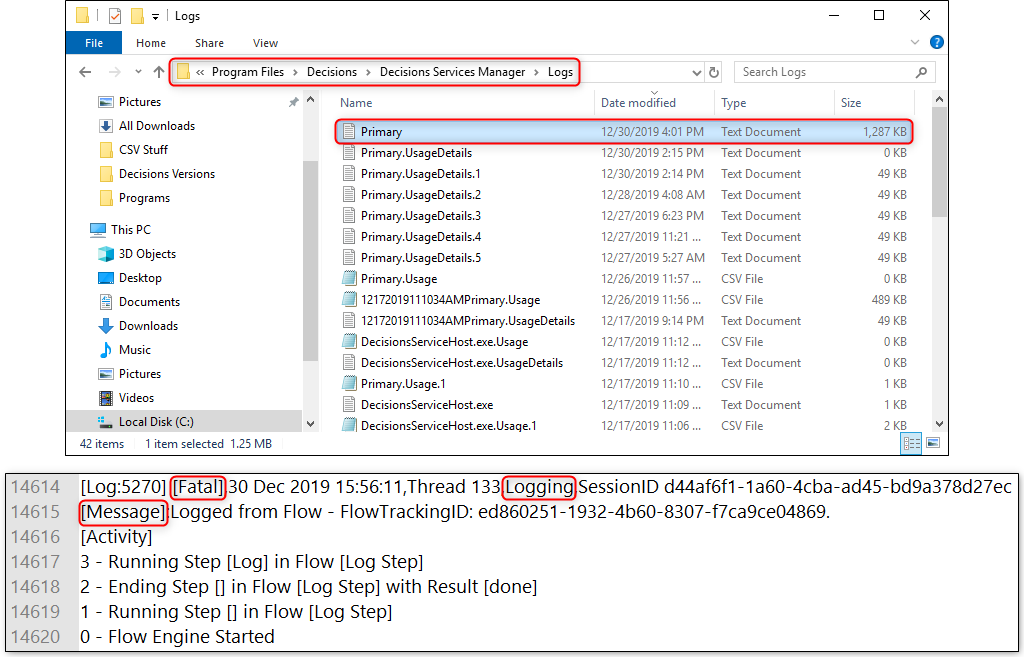
The same log is also recorded in the File System at C:\Program Files\Decisions\Decisions Services Manager\Logs, in the Primary.txt file. Upon opening this file with a text editor, notice that the Log added when the Flow was executed has the same Category, Level, and Message as configured in the Log Step.
