Overview
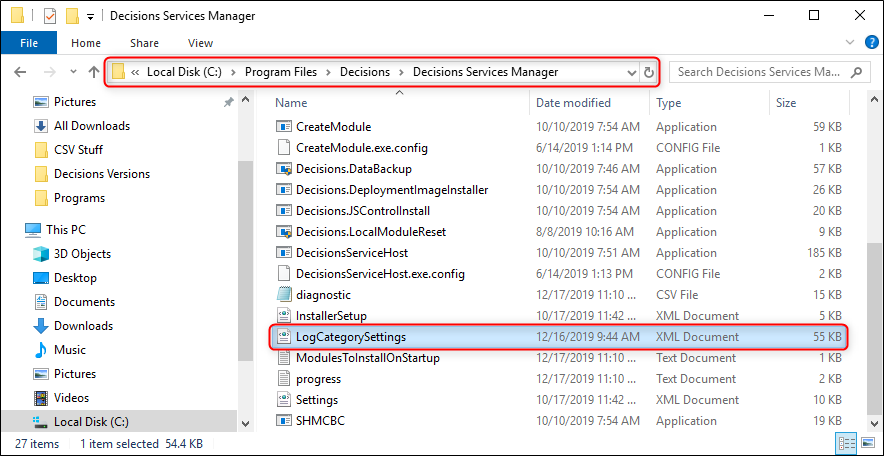
In the File System is the LogCategorySettings.xml, which can be found at C:\Program Files\Decisions\Decisions Services Manager. This file is important because when a new log category is created, it is added here with a list of log notification options pertaining to the category. For example, if the user wants Fatal and Error logs for a particular category, this is the XML file where the values are configured to enable those logs. This also helps when managing multiple projects where files need to be segmented, customers can have their own specific error files organized.
Example
The example in the Using The Log Step article sets up an example where using a Log Step in a Flow creates a custom log category called "Logging". This example will show the created category added to the LogCategorySettings.xml, along with the options available to configure.
In Windows File Explorer, navigate to C:\Program Files\Decisions\Decisions Services Manager and locate the LogCategorySettings.xml file, then open the file with a text editor.

When the file is opened in a text editor, there are multiple lines written of LogCategorySettings for each available log category, including new categories that are added using the Log Step in a Flow. Once the custom 'Testing Logs' category is located in this file, the settings for that category will be listed.
  <LogCategorySetting>
    <CategoryName>Job Schedule Worker</CategoryName>
    <LogFatal>false</LogFatal>
    <LogError>false</LogError>
    <LogWarn>false</LogWarn>
    <LogInfo>false</LogInfo>
    <LogDebug>false</LogDebug>
    <LogToOwnFileName>false</LogToOwnFileName>
  </LogCategorySetting>
Referencing the above excerpt, line 770 through line 774 have values indicating that these warnings will not be recorded in a log for this category. If these false values are changed to true, then logs with these enabled error types (under the Logging category) will now be recorded. In addition, if the value of LogToOwnFileName is changed to true, the logs in this specific category can be recorded in a separate file.
<LogToOwnFileName>true</LogToOwnFileName>
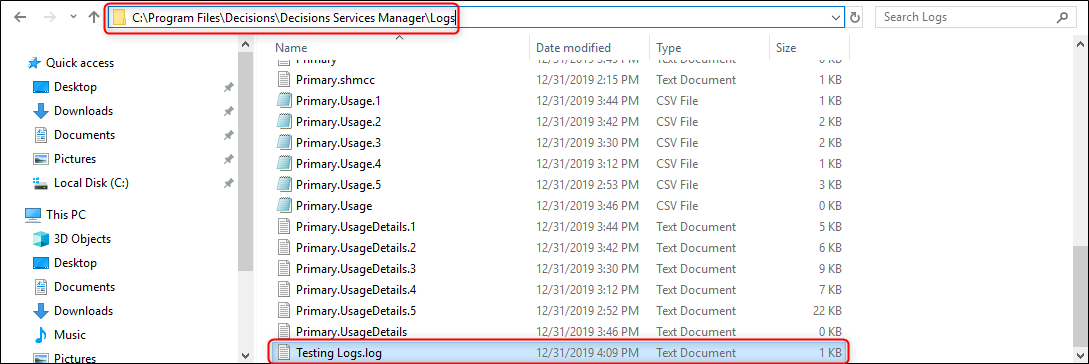
After saving the LogCategorySettings.xml file with the value change for LogToOwnFileName, a Service Host Manager restart is needed. Once the SHM restart is complete and service is restored, go back into the Designer Folder and run the Flow containing the Log Step. After the Flow is executed, a new log file will appear in C:\Program Files\Decisions\Decisions Services Manager\Logs as the name of the custom category with a .log extension.

When the newly added Testing Logs.log file is opened, it will show the recorded log of the error that was hit when the Flow executed, along with the message that was configured in the Log Step of the Flow.
[Log:6] [Fatal],31 Dec 2019 16:09:40,Thread 42,Testing Logs,SessionID fde4ec1a-90a0-4e8f-8d37-a5ba671ef623
[Message]:Logged from Flow - FlowTrackingID: b8ce19a6-c23d-4122-9093-23760b732da3.
[Activity]
3 - Running Step [Log] in Flow [Create Log Flow]
2 - Ending Step [] in Flow [Create Log Flow] with Result [done]
1 - Running Step [] in Flow [Create Log Flow]
0 - Flow Engine Started
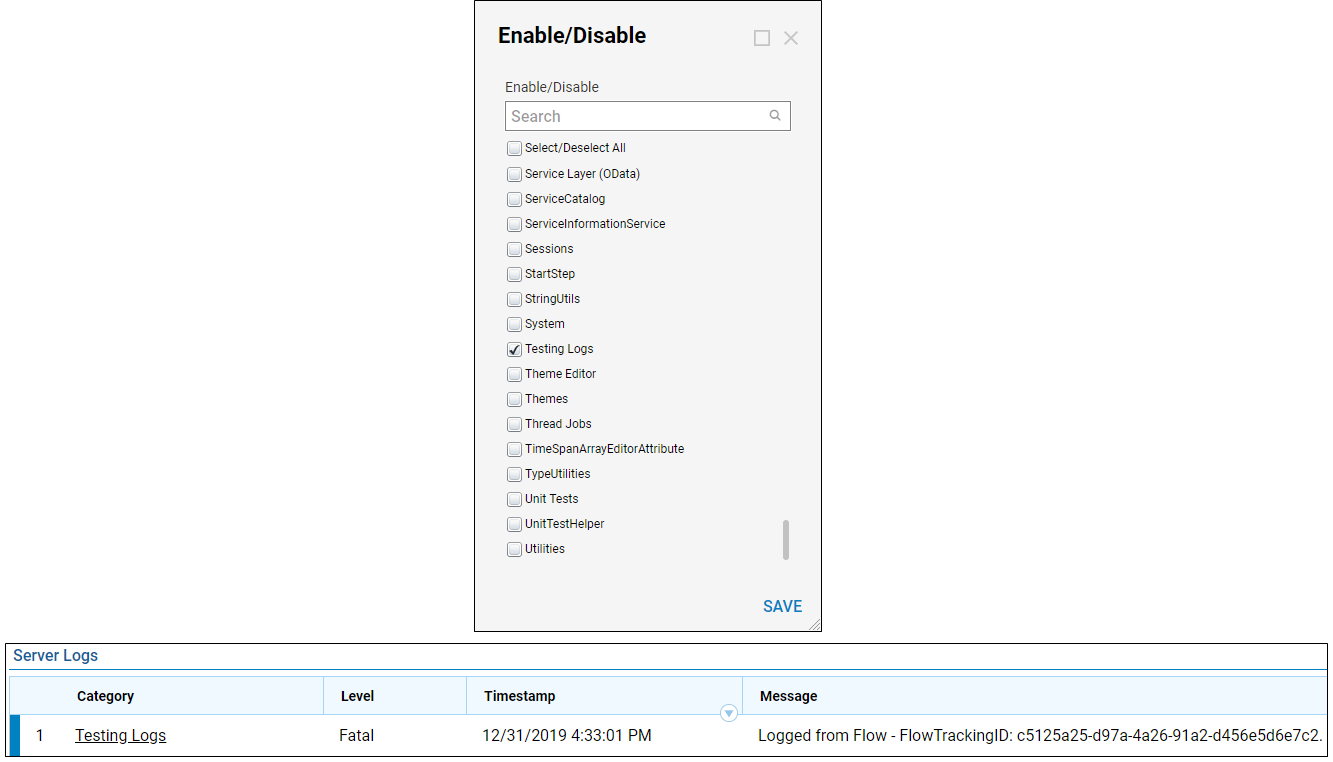
To take a look at logs in the Designer Studio, navigate to System > Administration > System Tools > Logging. All of the logs that are enabled to be recorded are here by default, however other log categories can be enabled or disabled for global view in this report.
Open the Action Menu for the Logging folder and navigate to Server Log Categories > Enable/Disable. A window will appear where all of the default and custom log categories appear. Check the box next to the name of one of these categories and refresh the Logging report to see the log recorded in this section of the Designer Studio.

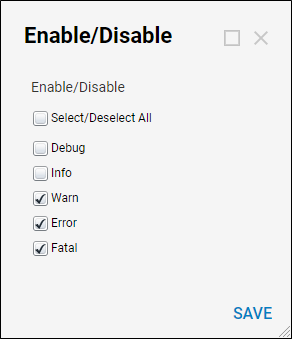
In addition, the Log Levels can be filtered out of this report as well by selecting Server Log Level > Enable/Disable from the Logging folder Action Menu. Items that are not checked will not record in the logs.
