Overview
The Data Grid Form control displays a list of data objects in a grid, where each row in the grid represents an object, and each column represents an object property.
Example
This example will populate a Data Grid with a list of accounts from the Portal.
Below is a downloadable example to import into Decisions.
- In a Designer Project, create a new Flow.
- On the Toolbox panel, navigate to INTEGRATION > INTERNAL SERVICES > ACCOUNTSERVICE and attach the Get All step to the Start step.
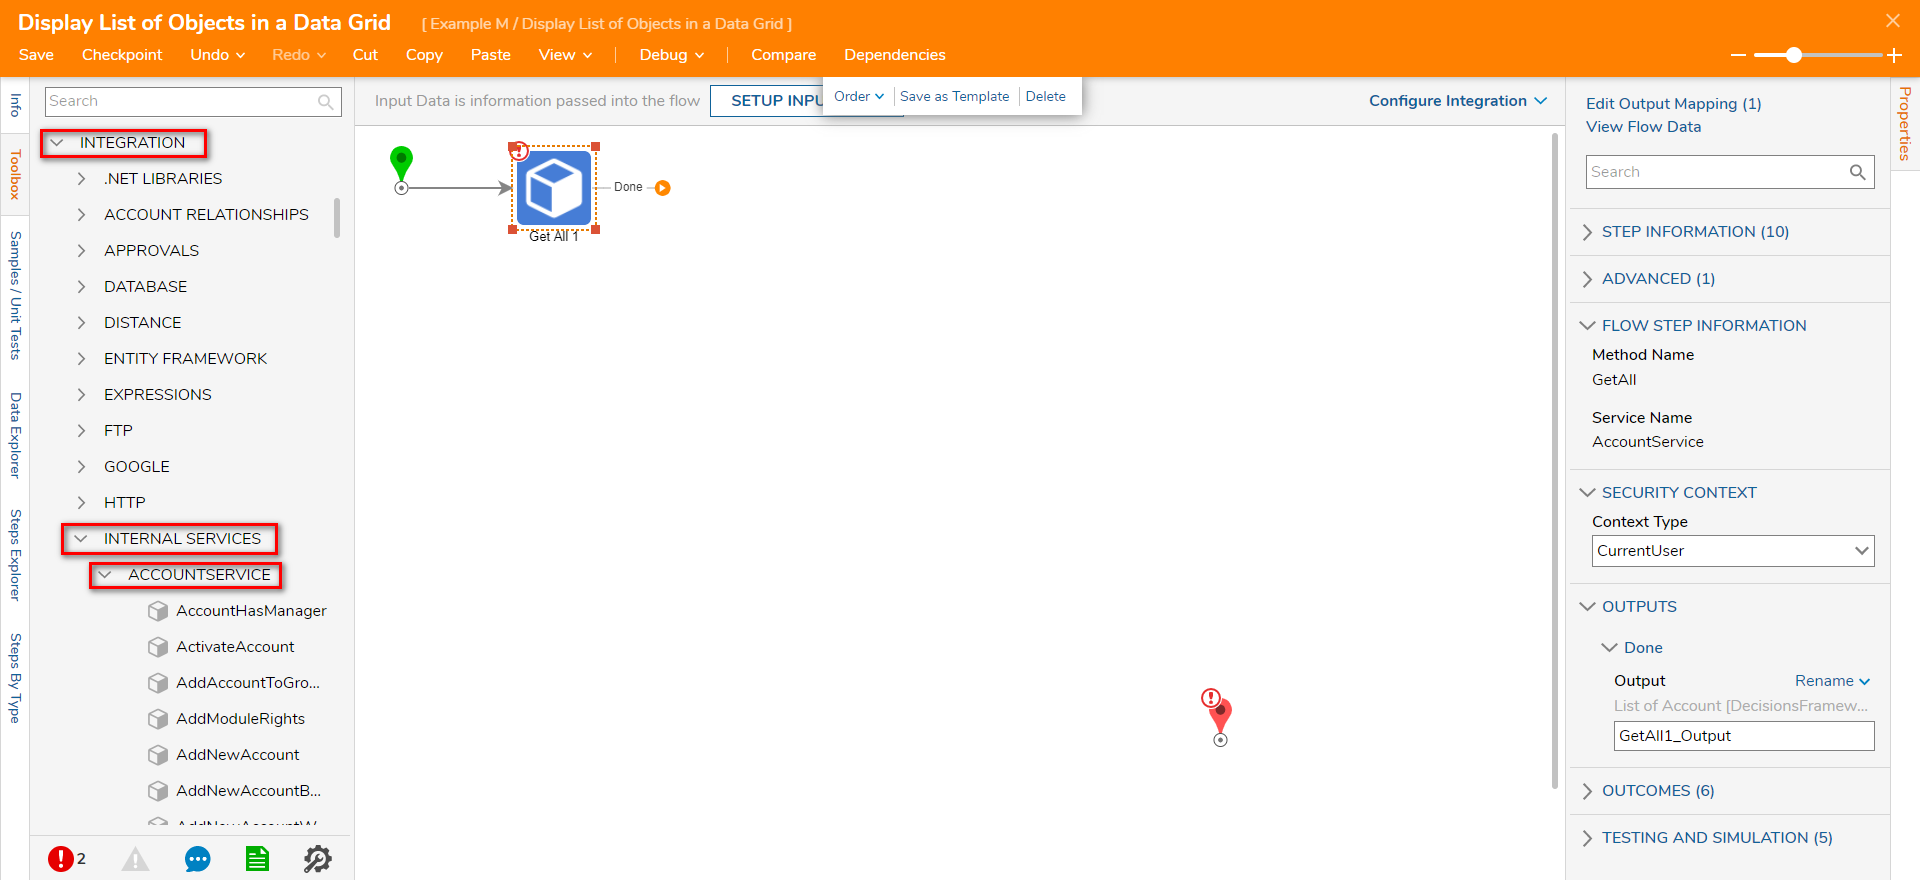
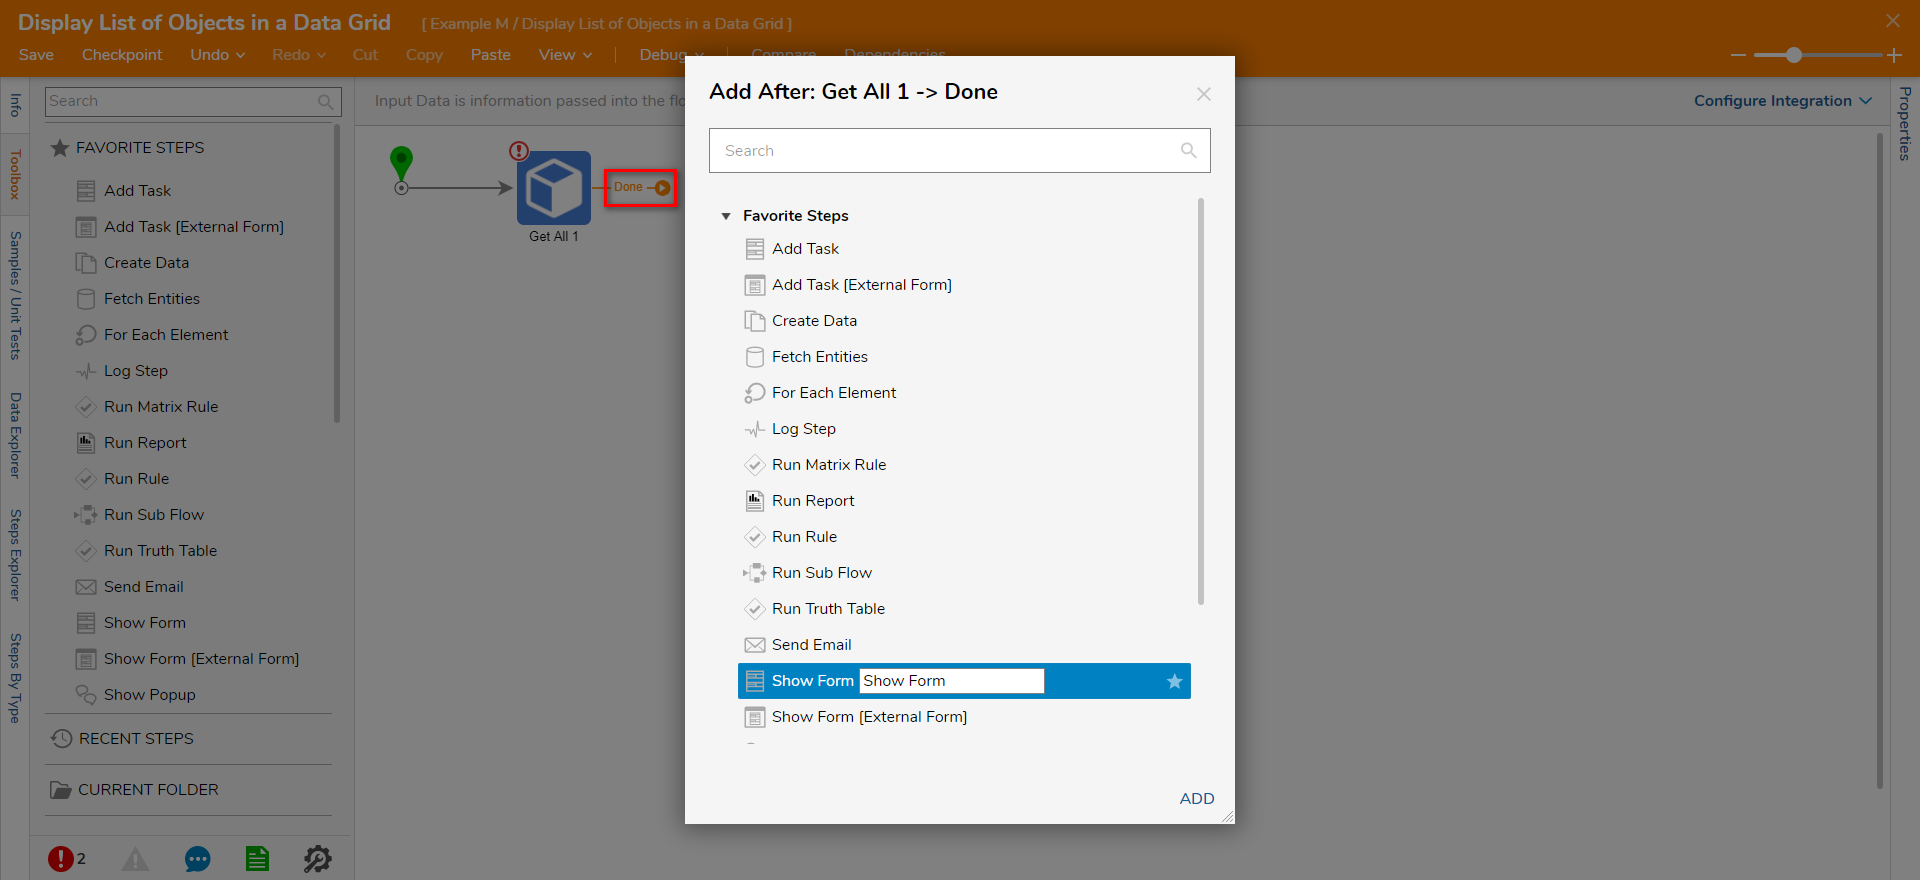
- Next, click the Done path. On the Add After dialog window, select the Show Form step and click ADD.
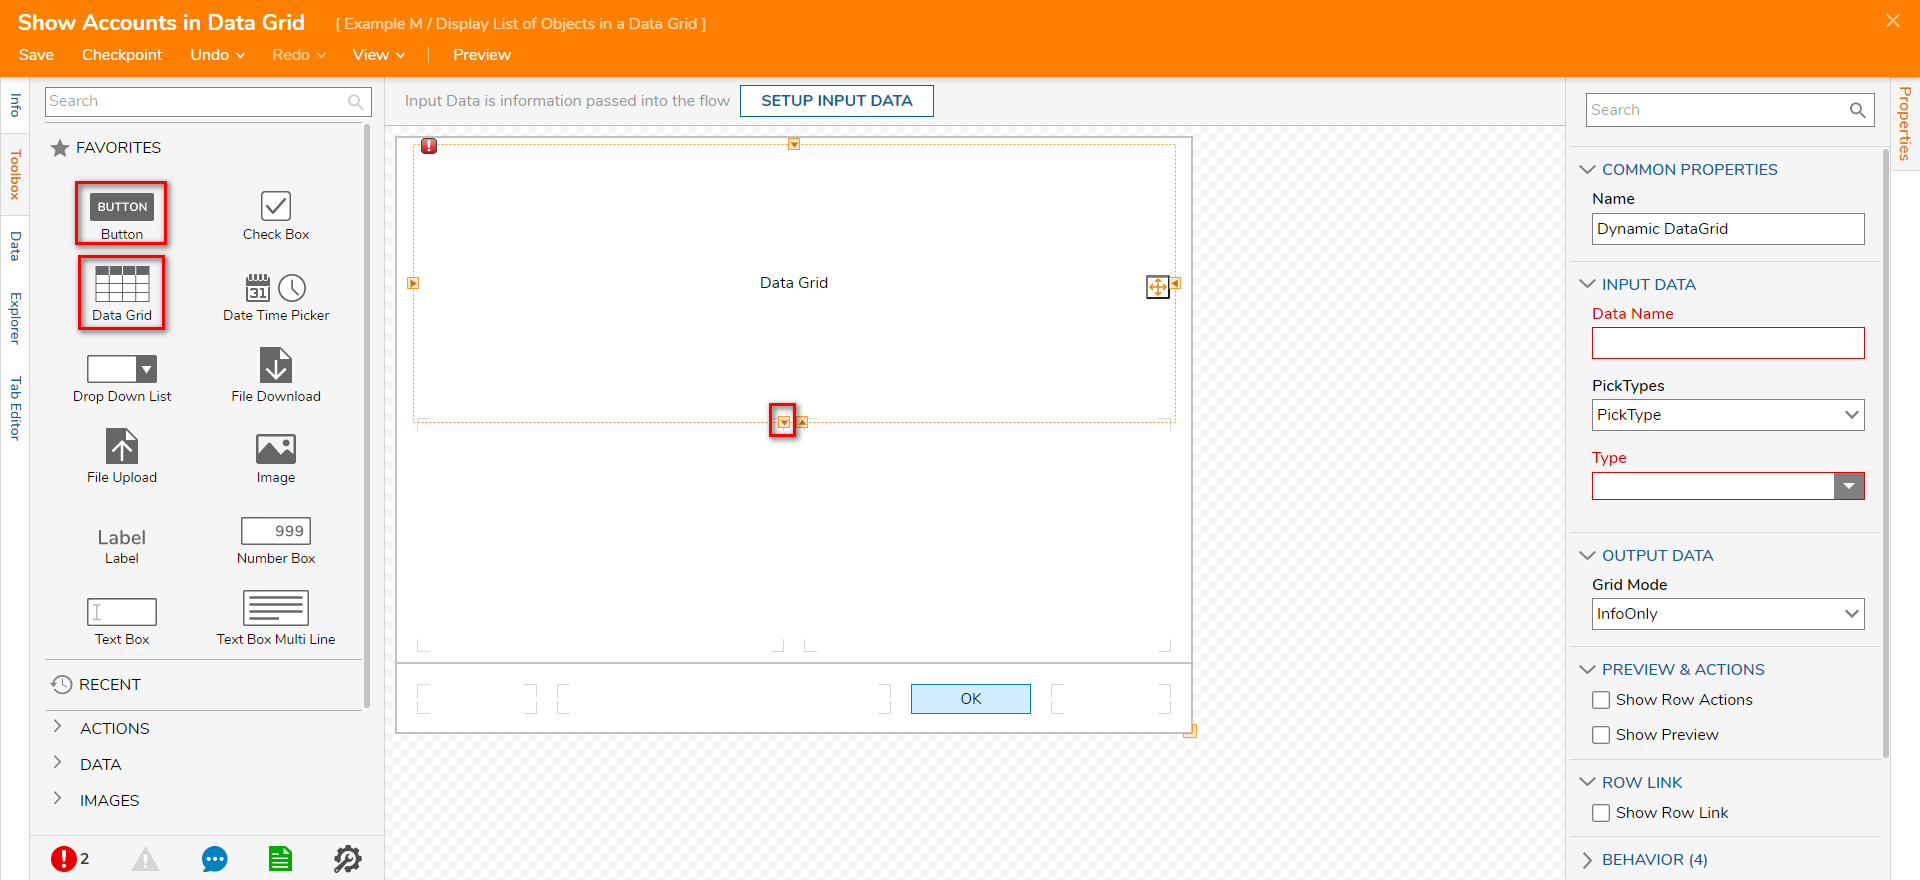
- On the Properties panel, click PICK OR CREATE FORM and create a new Form. On the Form Designer, click and drag the Data Grid control and a Button control (OK) to the Form.
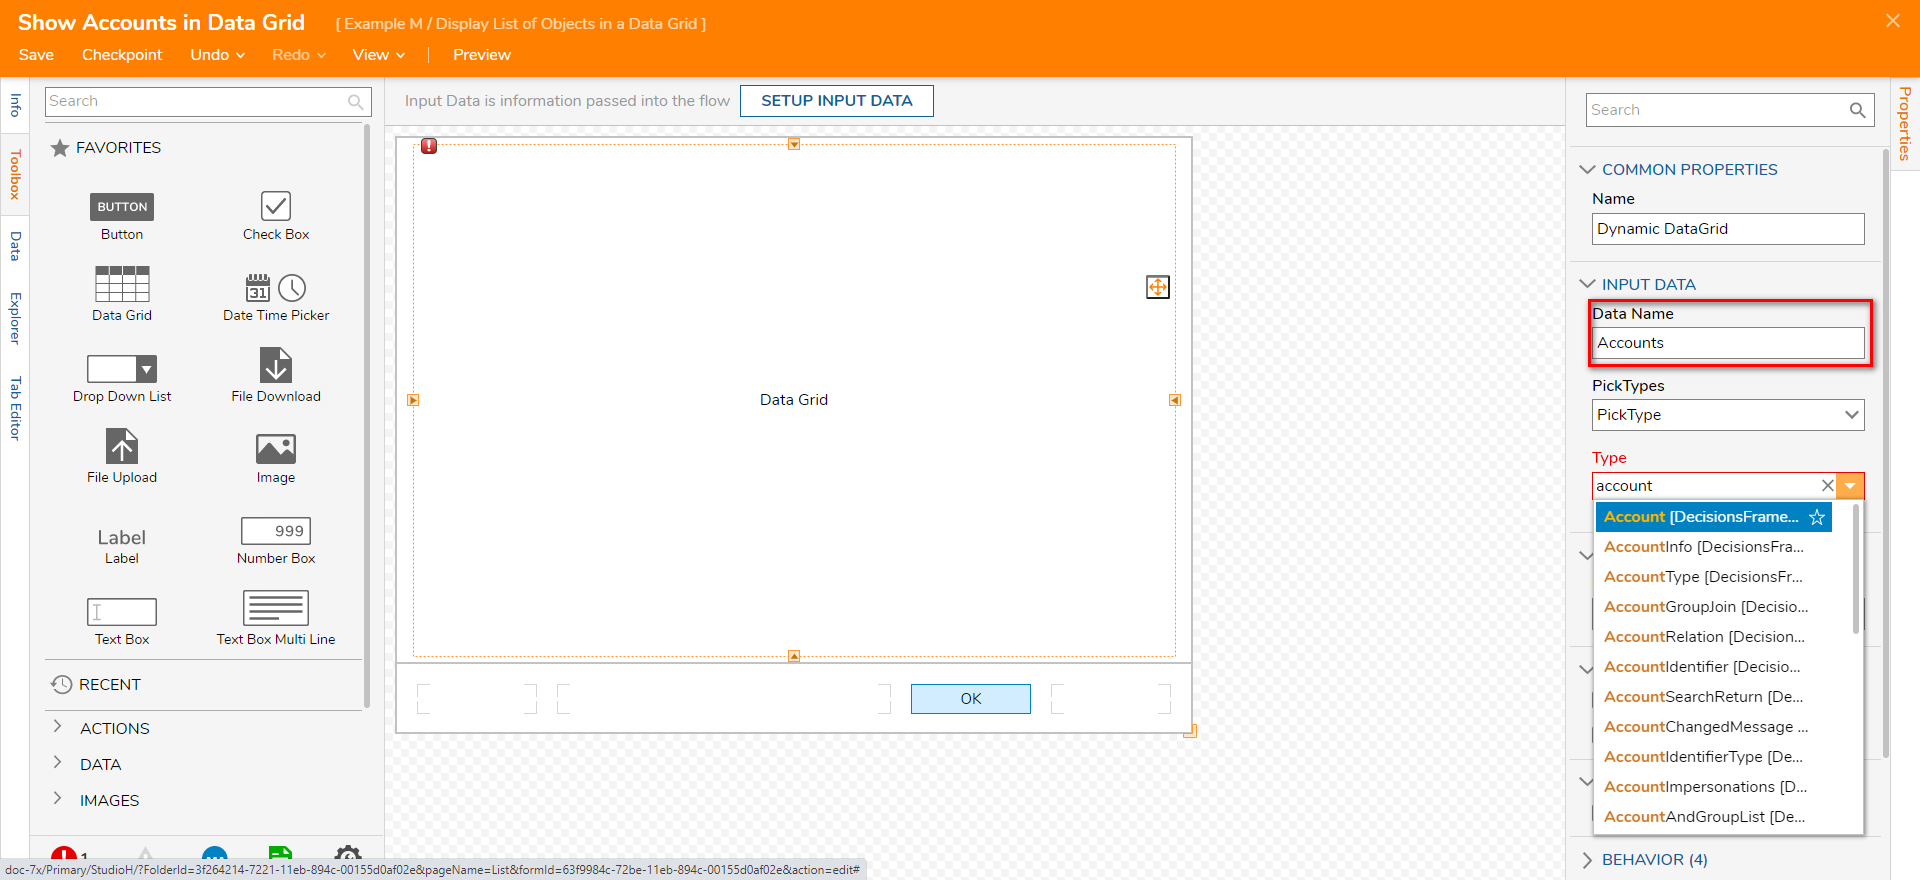
- Next, select the Data Grid control. Under INPUT DATA on the Properties panel, enter "Accounts" in the Data Name field. Then, in the Type field enter "account" and select Account [Decision.Framework...].
- When the Input Data is set, the COLUMN INFORMATION category will display in the Properties panel. Users can remove, add, and sort the different fields in this section. Select the pencil icon to edit a column and click the arrows to reorder the column. Click Save and then close the Form Designer.
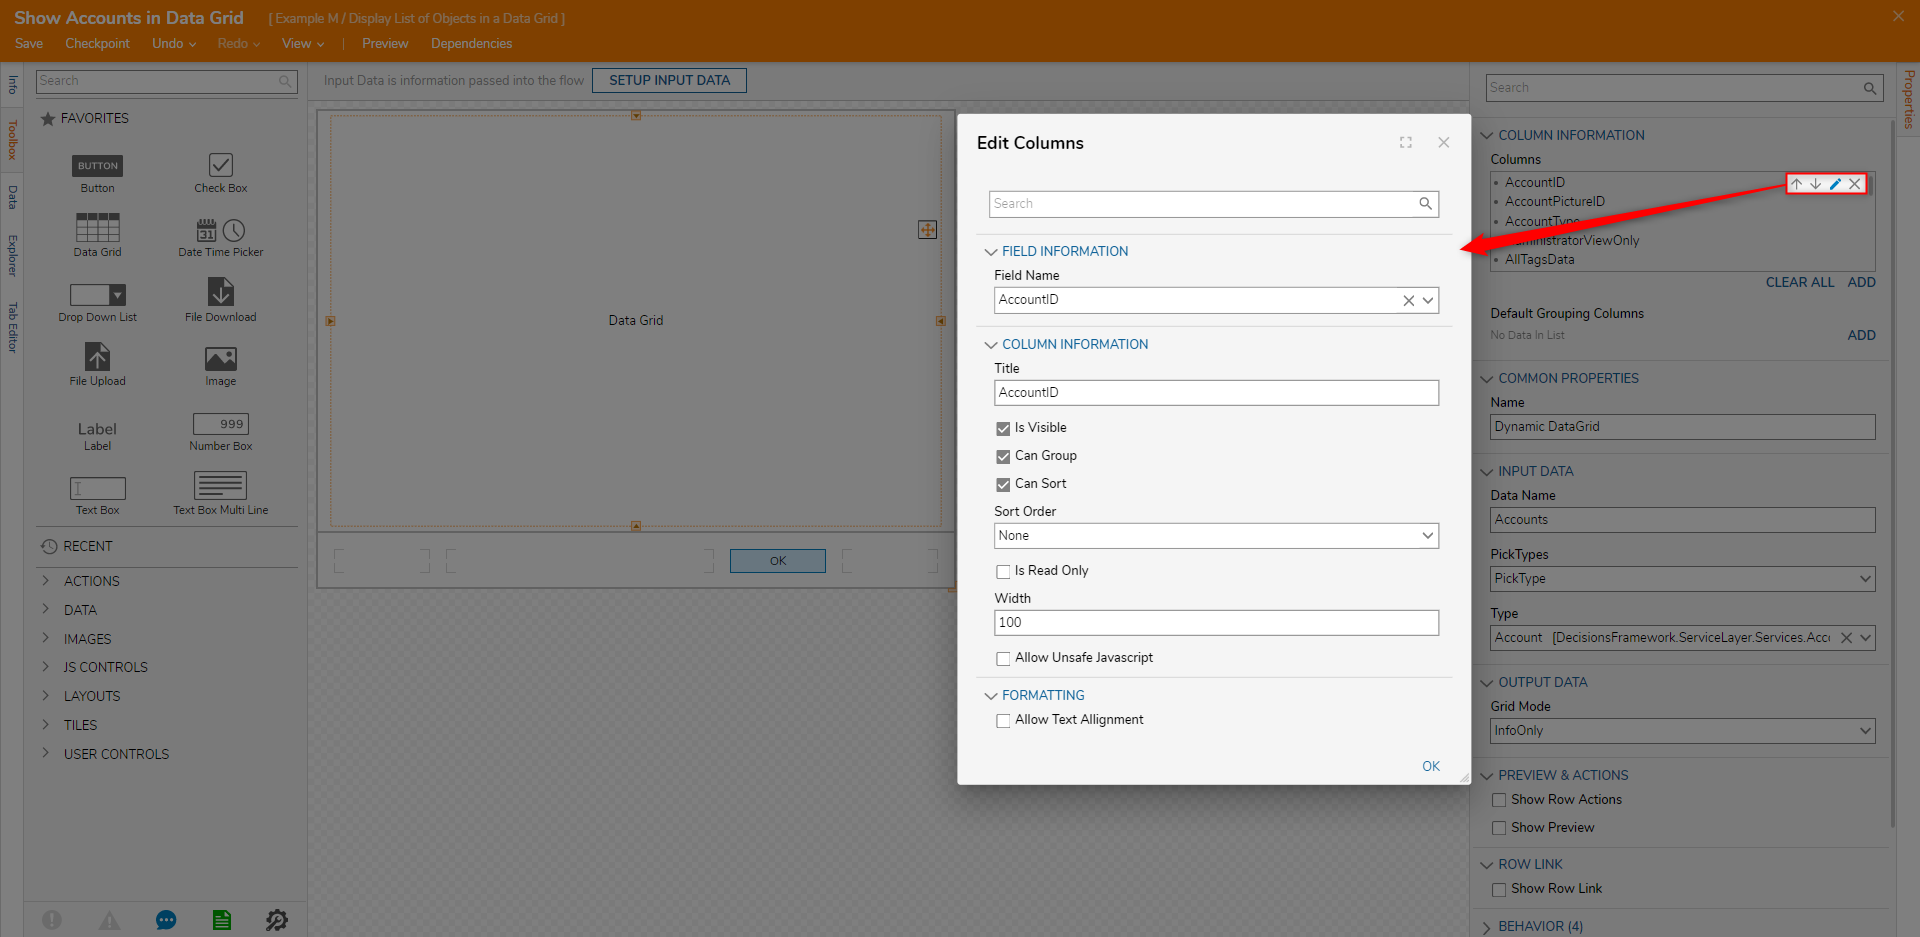
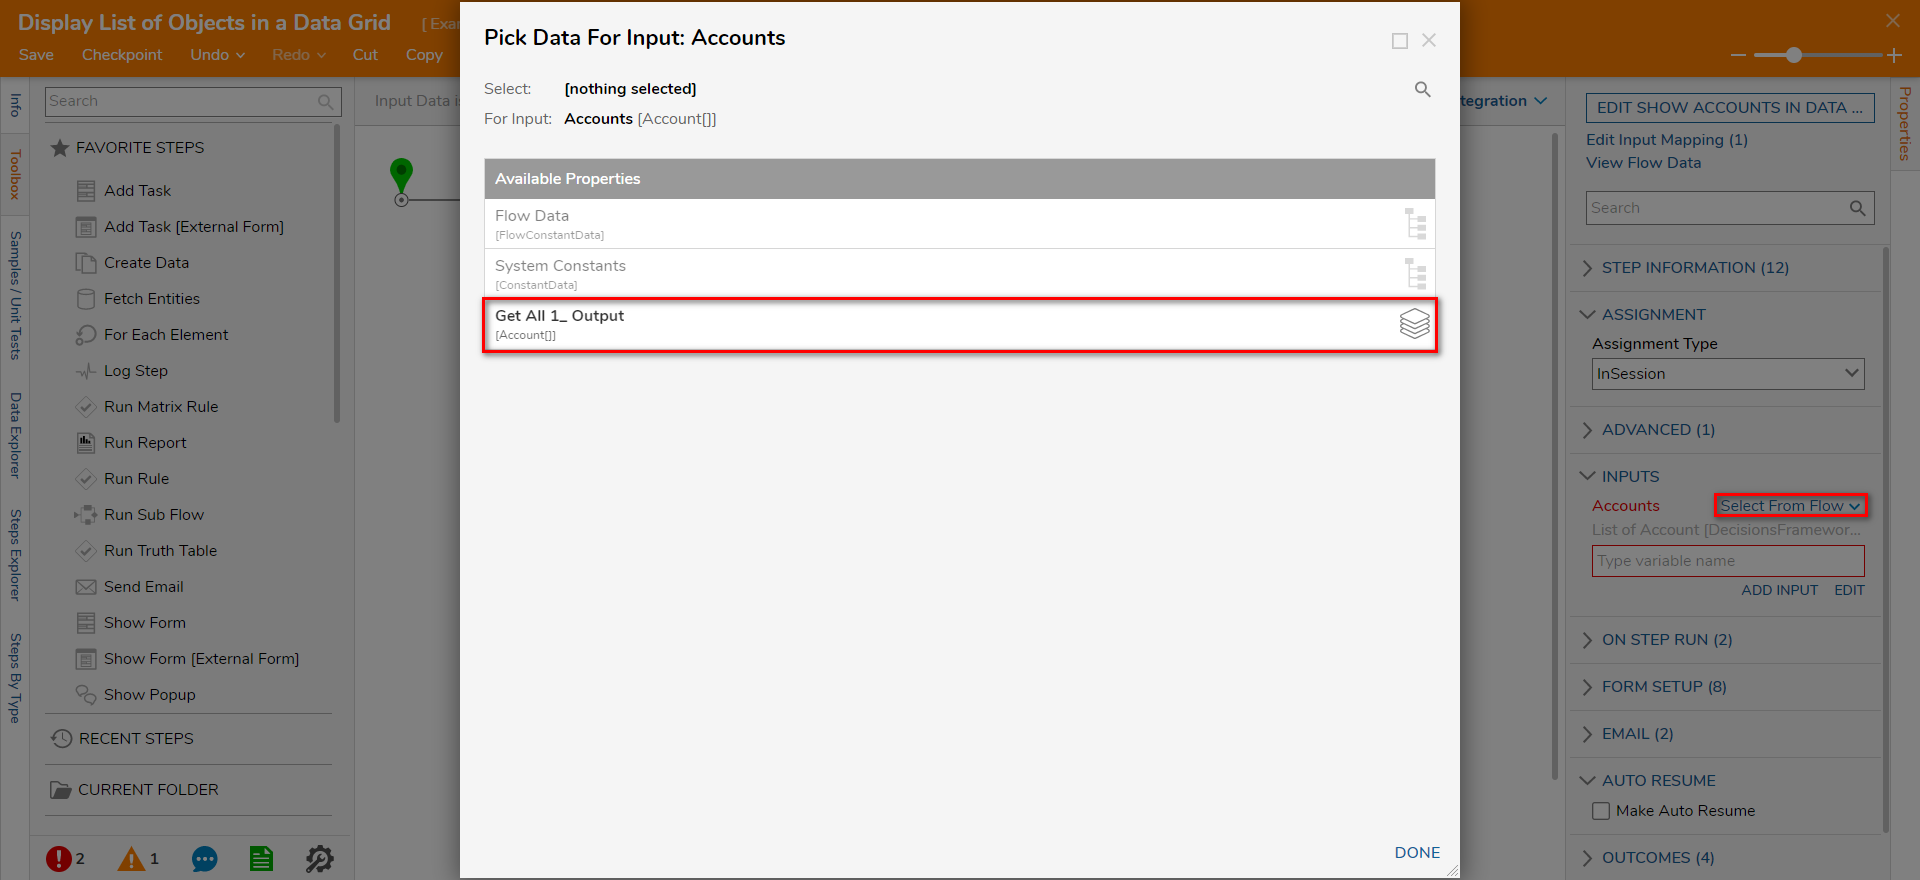
Field Name Description Is Visible Automatically visible if set to true. Can Group Able to group by this field. Can Sort Able to sort by this field. Sort Order Ascending or Descending order. Is Read Only Will not be able to copy/edit this field if set to true. Width Set the width of the column Allow Text Alignment Will display the options to align the text in the column to be left, center, or right-aligned. - Next, select the Form, and under the INPUTS category, click Unknown next to Accounts. Then, click Select From Flow. On the Pick Data For Input dialog, choose the output for the Get All step (Get All 1_ Output) and click DONE.
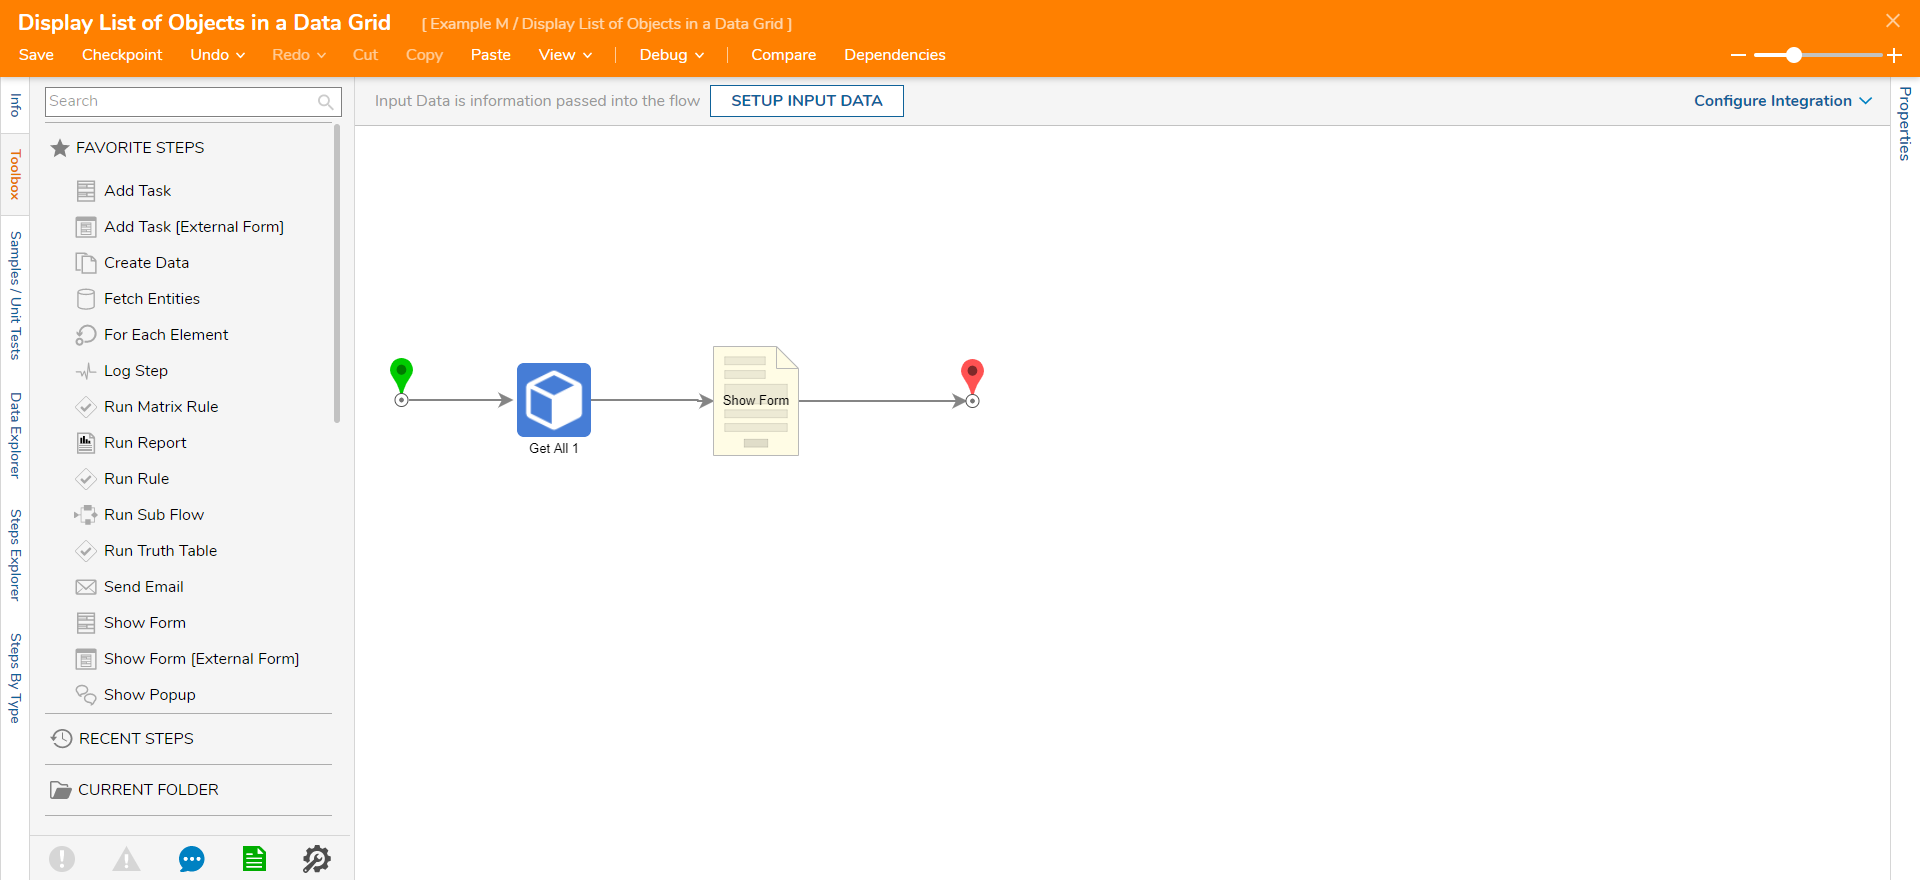
- Connect the OK path to the End step. Click Save to save changes to the Flow.
Debug
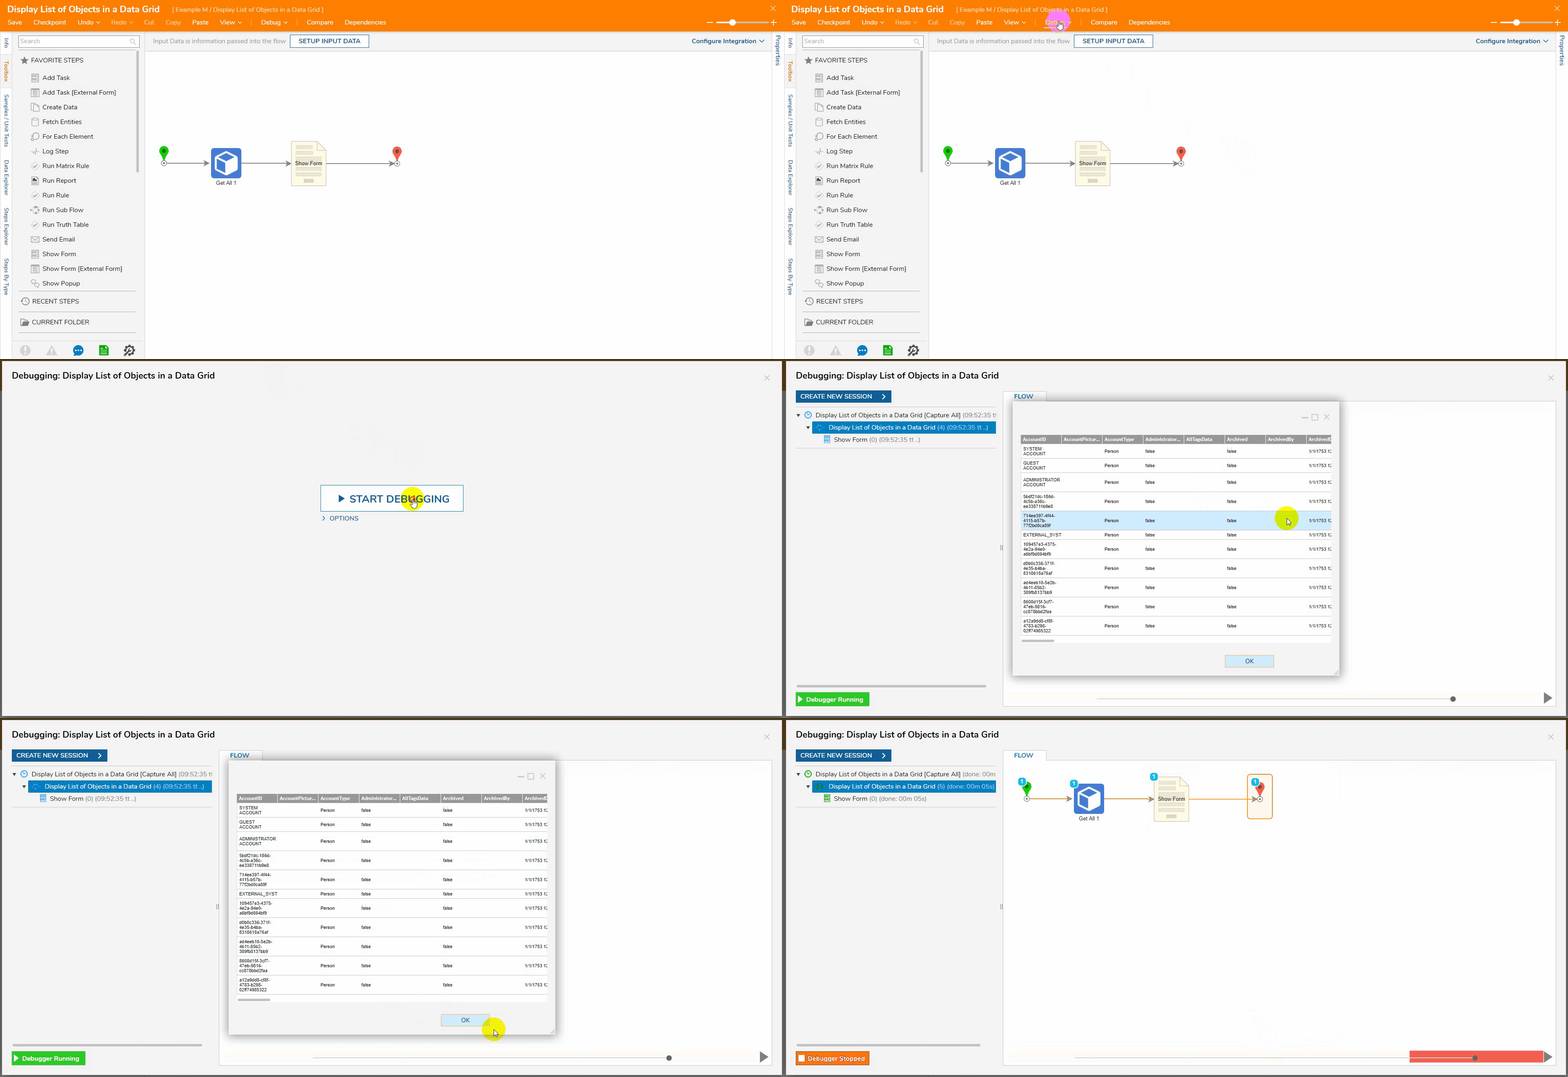
- On the top action bar, click Debug.
- Click START DEBUGGING.
After the Debugger runs, the Form will display a data grid of accounts.
For further information on Forms, visit the Decisions Forum.