Overview
This article walks Users through the process of migrating data from the Repository Server to the Deployment Tower. This process is mentioned in Upgrading Dev Environment from v9 to v10. For more information on upgrading a Development environment, please refer to: Insert link here when doc is published.
Legacy Projects
Legacy projects are not migrated automatically. During the Repository Server to Deployment Tower migration process, any legacy projects that have not been migrated to the v9 Project structure are skipped, even if items from those projects have been checked into the Repository Server.
To continue developing and promoting changes from these projects using the Deployment Tower in v10, you must first:
- Migrate the legacy projects to the v9 Project structure.
- Check the migrated projects in the Repository Server.
- Check the projects out to each target environment so they are converted to the new project structure.
These steps must be completed before upgrading the Repository Server to v10. Projects that remain in the legacy format will not be eligible for continued development or promotion through the Deployment Server.
For more information on migrating Legacy Projects to v9, please refer to: Legacy Projects and Upgrading to v9
Calling Check-Out Flows via API
Users who are calling the Check-in/Check-out Flows via API should note that they will break upon upgrade (from Repository to Deployment Tower). The Deployment Tower now utilizes embedded code instead of Decisions Flows.
External CI/CD will also break upon upgrade. In future releases, Decisions will add OOTB configuration for External CICS platforms like Azure DevOps.
Prerequisites
- Databases must be backed up before migration.
- The Repository Server must be upgraded to v10 before utilizing the Migration Tool.
- Confirm that the machine running the migration tools can access the Repository Database.
- Before migrating the Repository Server, review the branches in each Project.
- The migration process only allows a single branch from a project to be selected.
- Customers must determine which branch contains the desired project state after migration.
- Users must determine which branch to use as the Project's stable branch before migration.
- Users who are on v8 must upgrade from v8 to v9 and then from v9 to v10. Upgrading from v8 to v10 is not supported.
- Users must restart the server after migrating from the Repository to the Deployment Tower.
Considerations
- Regardless of the Decisions hosting type, the tool must be executed on a Windows machine. The system running the tool must be able to establish a connection to the Repository Server database.
- Stabilizing the Branches:
- Users must determine which branch to use as the Project's stable branch before migration.
- This setting is required because the Repository Migration Tool supports migrating only one branch per project. The selected stabilizing branch serves as the source for the migration. Any unmerged or undeployed changes that exist in other branches will not be migrated automatically and must be manually exported and imported if they need to be preserved.
- This process may involve utilizing the Merge to Branch action to merge changes from one branch into another. For example, there are changes in Trunk, and additional changes in a Prod Branch. Required changes can be merged into a single branch, which then becomes the selected branch during migration. For more information on branches, please refer to our documentation on Repository Branches.
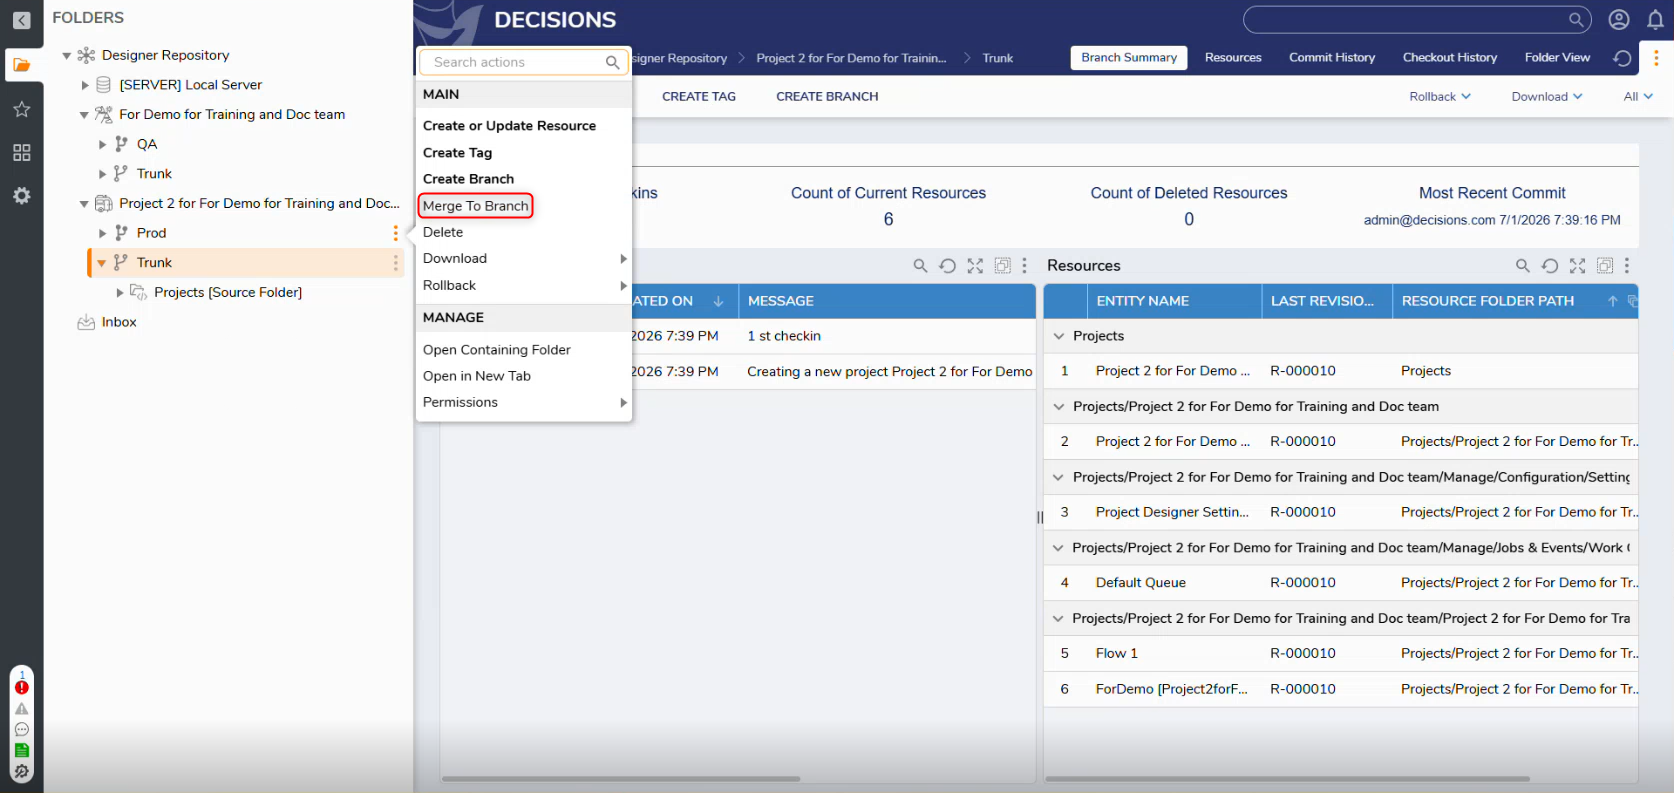
- This process may involve utilizing the Merge to Branch action to merge changes from one branch into another. For example, there are changes in Trunk, and additional changes in a Prod Branch. Required changes can be merged into a single branch, which then becomes the selected branch during migration. For more information on branches, please refer to our documentation on Repository Branches.
If a Project has no custom branches other than Trunk, there is no need to designate a stabilizing branch. In these cases, Trunk serves as the default stabilizing branch.
- This setting is required because the Repository Migration Tool supports migrating only one branch per project. The selected stabilizing branch serves as the source for the migration. Any unmerged or undeployed changes that exist in other branches will not be migrated automatically and must be manually exported and imported if they need to be preserved.
- Users must determine which branch to use as the Project's stable branch before migration.
Steps to Migrate from the Repository Server to the Deployment Tower
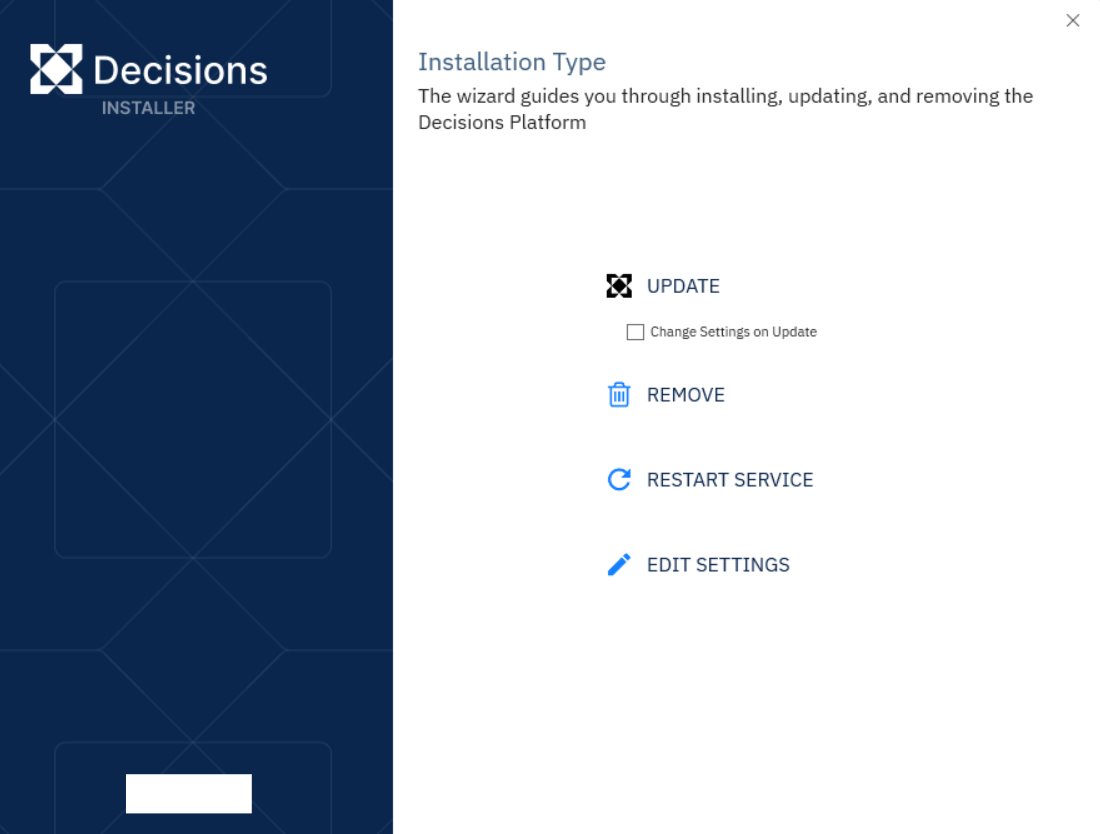
Upgrade the Repository Server to v10
Please refer to Upgrading Decisions Server from v9 to v10 for more information on upgrading v9 environments to v10
Post-Upgrade Configuration
Verify UI Update
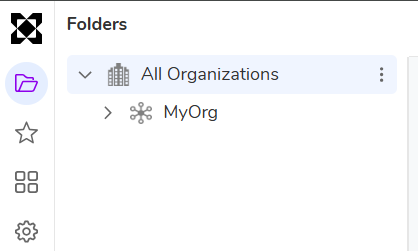
- After upgrading, Users will see an Organization Folder and will no longer see the Repository structure. Users can still refer to this structure by navigating to Systems > Designers > Designer Repository.
- Users can also perform branch stabilization if anything was missed in the previous steps or changes need to be made.
 Create a New Organization
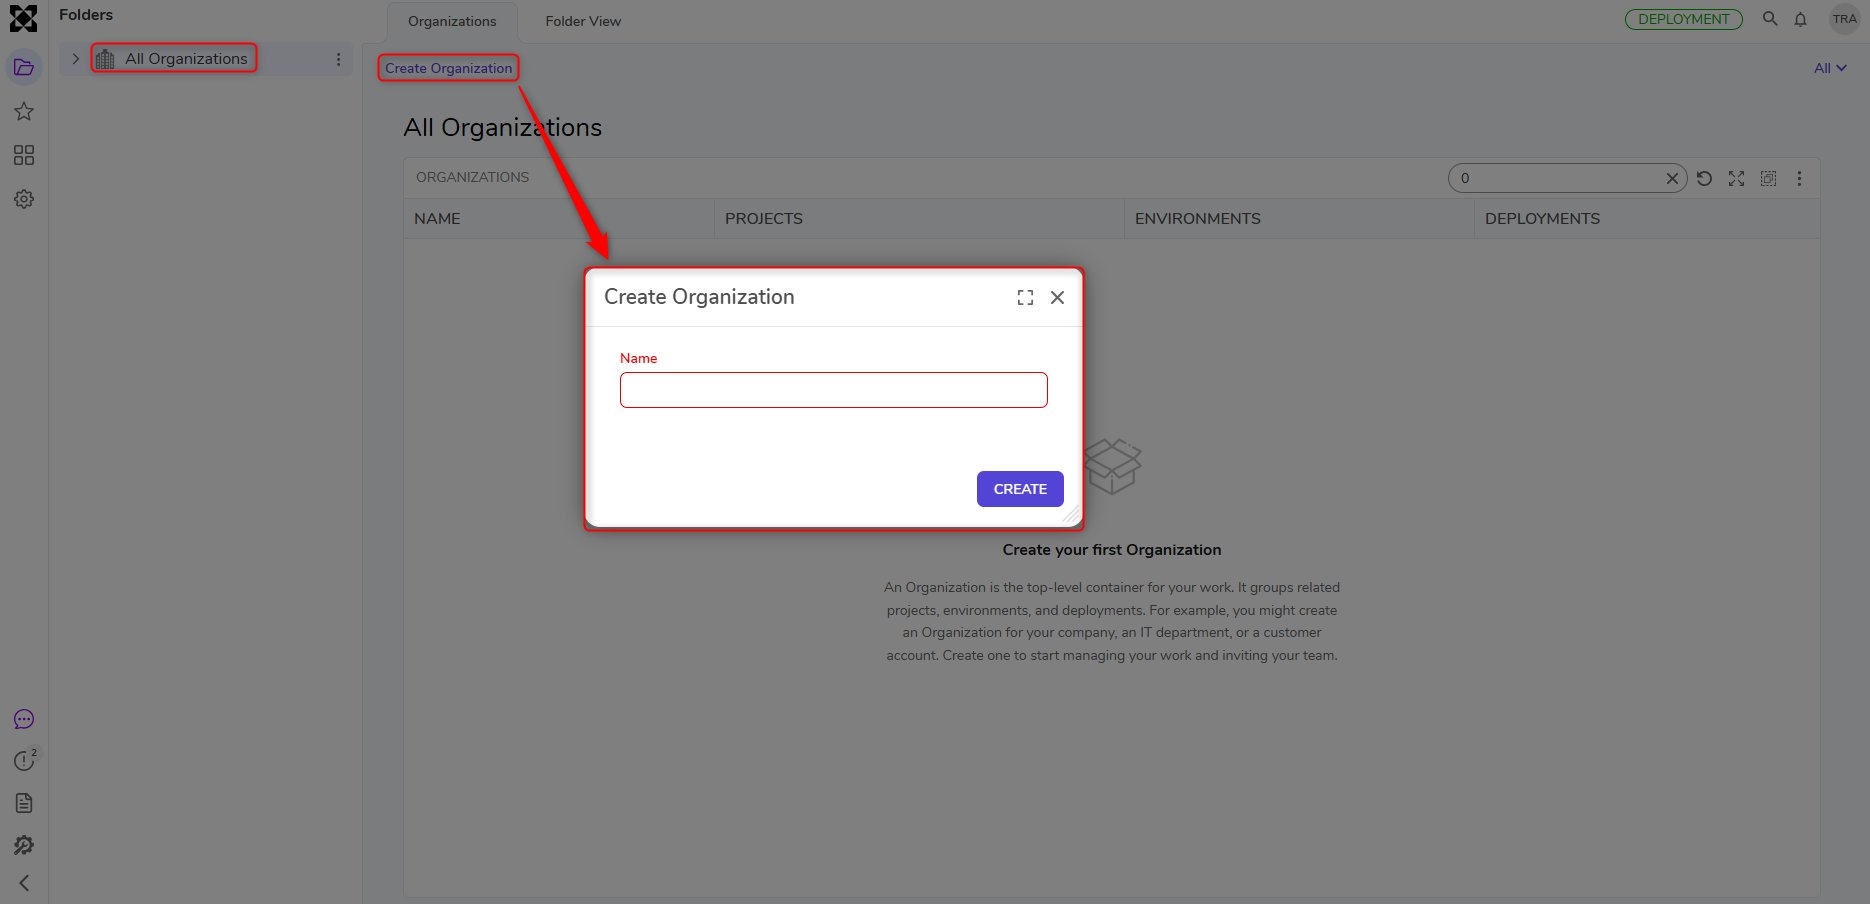
 - Right-click inside the "All Organizations" tree to create a new Organization.
 Prepare Migration Tool
 - Navigate to Download Decisions | Intelligent Process Automation and click Download Repository Migration Tool on the Version 10.0.0 download page.
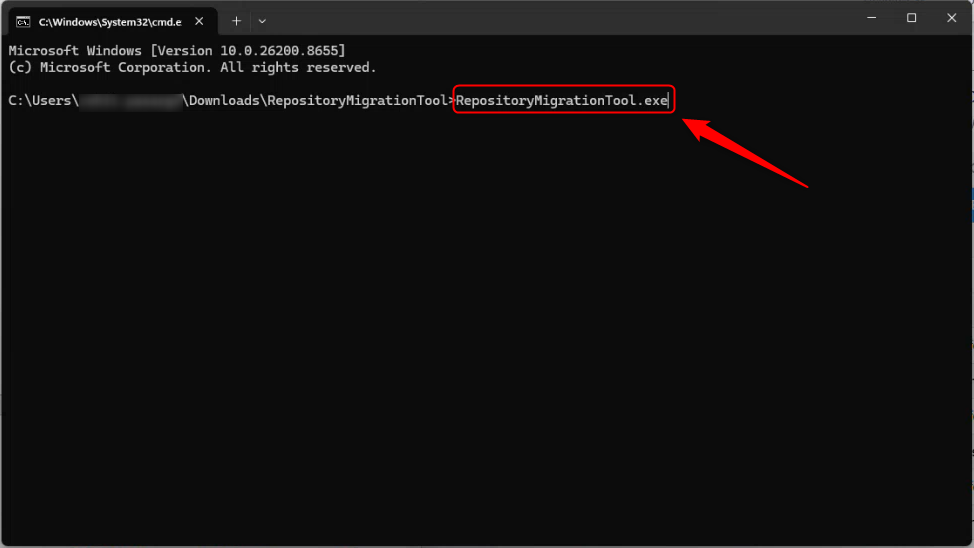
- Run the utility from an elevated command prompt as an administrator. (Required)
- Considerations:
- The tool must be run on a Windows Machine.
- The machine running the tool must be able to connect to the Repository database.
- If the database is hosted remotely, VPN access may be required.
 Configure Migration Settings
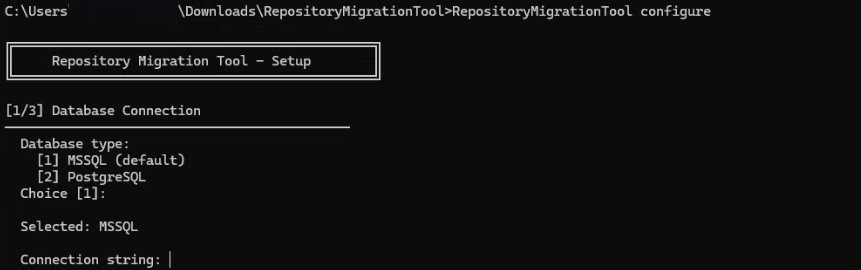
- RepositoryMigrationToolconfigure:
- Select the Repository Database type and enter the Repository Database connection string.
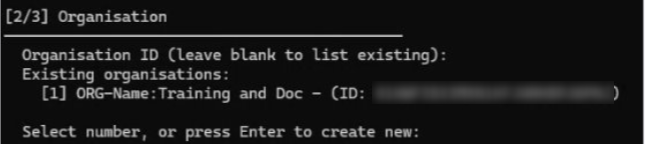
- Provide the Organization ID.
- Select the Projects that will be migrated.
- Select the branch to migrate for each Project.
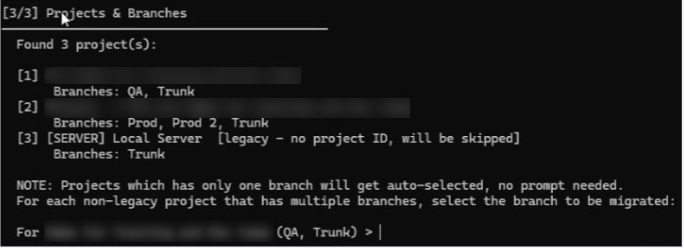 Note for Selecting Branches for ProjectsProjects with only one branch can use that branch automatically. Projects with multiple branches require manual branch selection.
- Select the branch to migrate for each Project.
- Select the Repository Database type and enter the Repository Database connection string.
- RepositoryMigrationToolrun:
- Open the extracted migration-config.json in a text editor (e.g., Notepad).
- Provide the following:
- DB Connection String
- Organization ID
- Database Type
- Save the file.
- Run the Migration Tool
- Configuration data can be changed before running the tool if anything was missed. If everything is configured as desired, proceed to the next steps:
- Launch RepositoryMigrationTool.exe.
- After choosing which command to run, the tool will begin migrating all Repository Projects to the selected Organization.
- Wait for Migration Summary
- Once the migration completes, a summary will be displayed.
- Review the output to confirm successful project transfers.
- Configuration data can be changed before running the tool if anything was missed. If everything is configured as desired, proceed to the next steps:
- Restart Decisions Service
- After migration completes, restart the Decisions Service to finalize setup.
Post Migration Considerations
- One branch is selected for each Project.
- The selected branch is converted into a Legacy User Story.
- A Legacy User Story is created for each migrated Project.
- The selected Project state is added to a Deployment Package.
- Ensure the respective Project with the respective Branch's latest commit is added to the Deployment Package.
- The migration utility generates a log file in the Migration Tool folder that can be used for troubleshooting.
Additional information can be found in our documentation for Connecting an Environment to the Deployment Tower.