Overview
A branch refers to version control that allows users to work on different versions of a project simultaneously. The purpose of a branch is to enable users to make parallel changes to a project without affecting the main project.
Different users can work on separate branches and later merge their changes back into the main project, making it easier for users to work together on complex projects.
This document demonstrates the following topics:
Creating a Branch
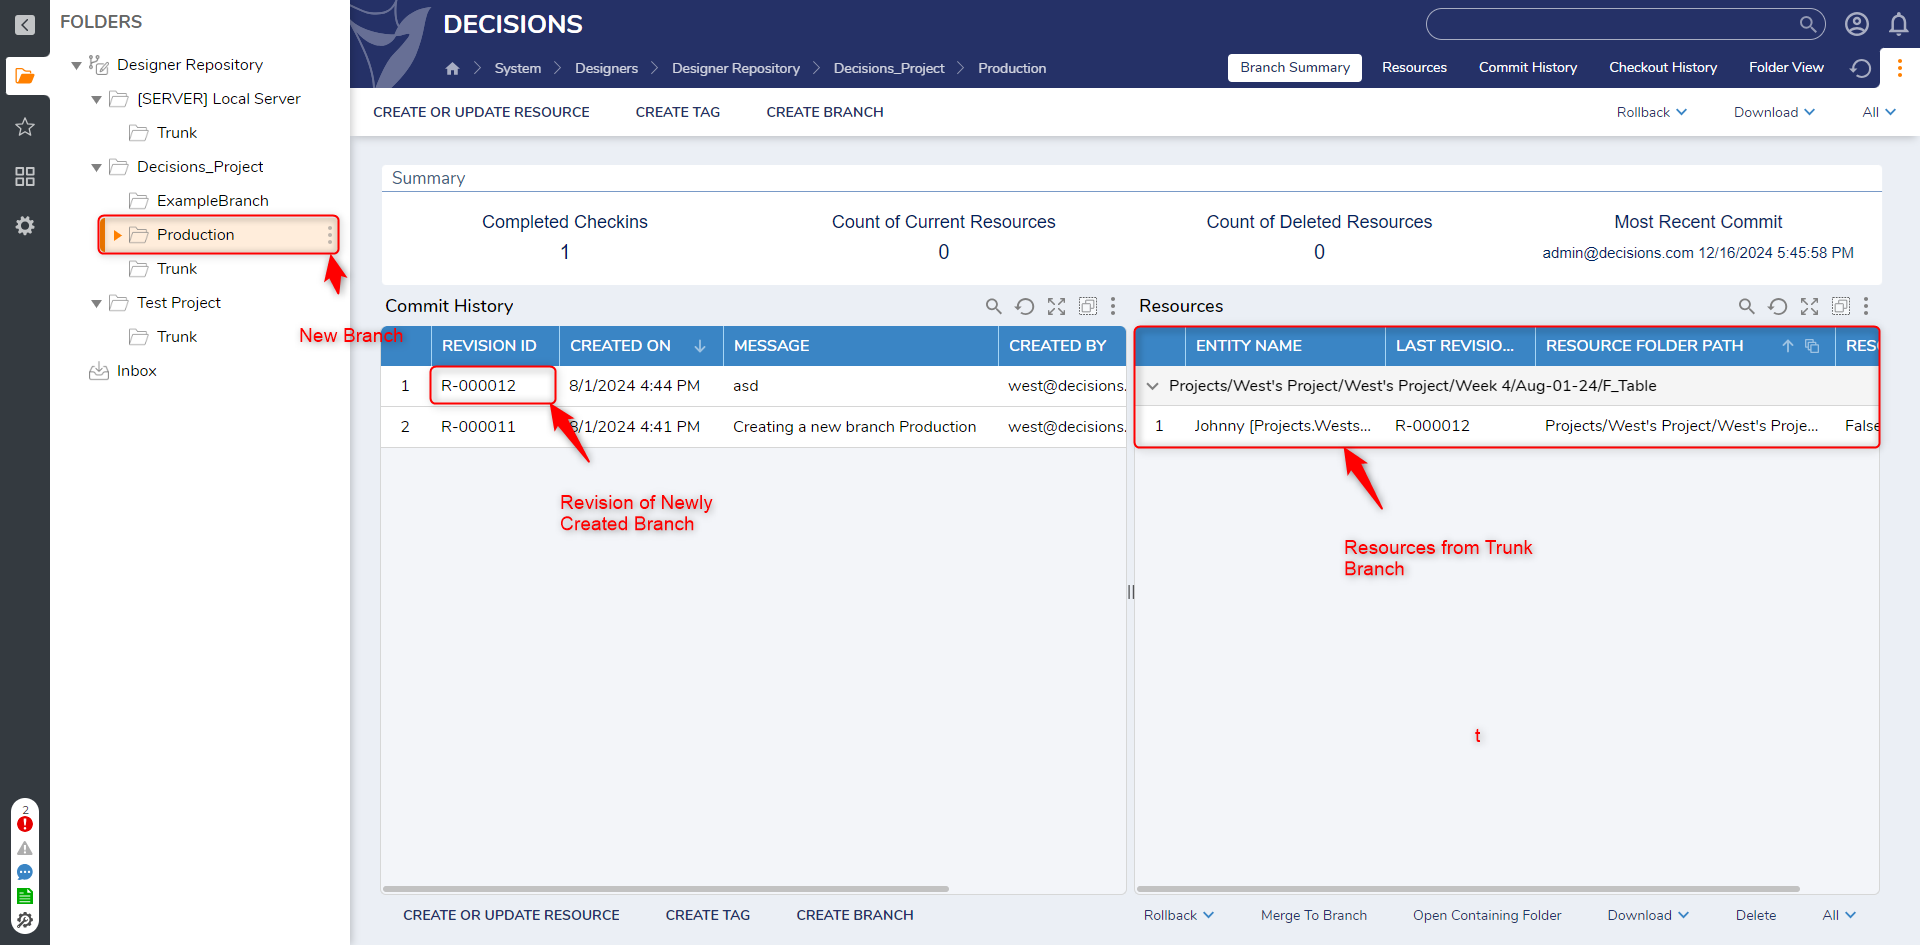
When a new branch is created, it includes all the entities from another branch that was utilized as the base to create the new branch.
- Navigate to the Designer Repository server. Select the Project Folder to create the branch. Click on the CREATE BRANCH button in the top Action bar.
- From the drop-down, select a branch (in this case, Trunk). Define a Branch Name and click on Create Branch.
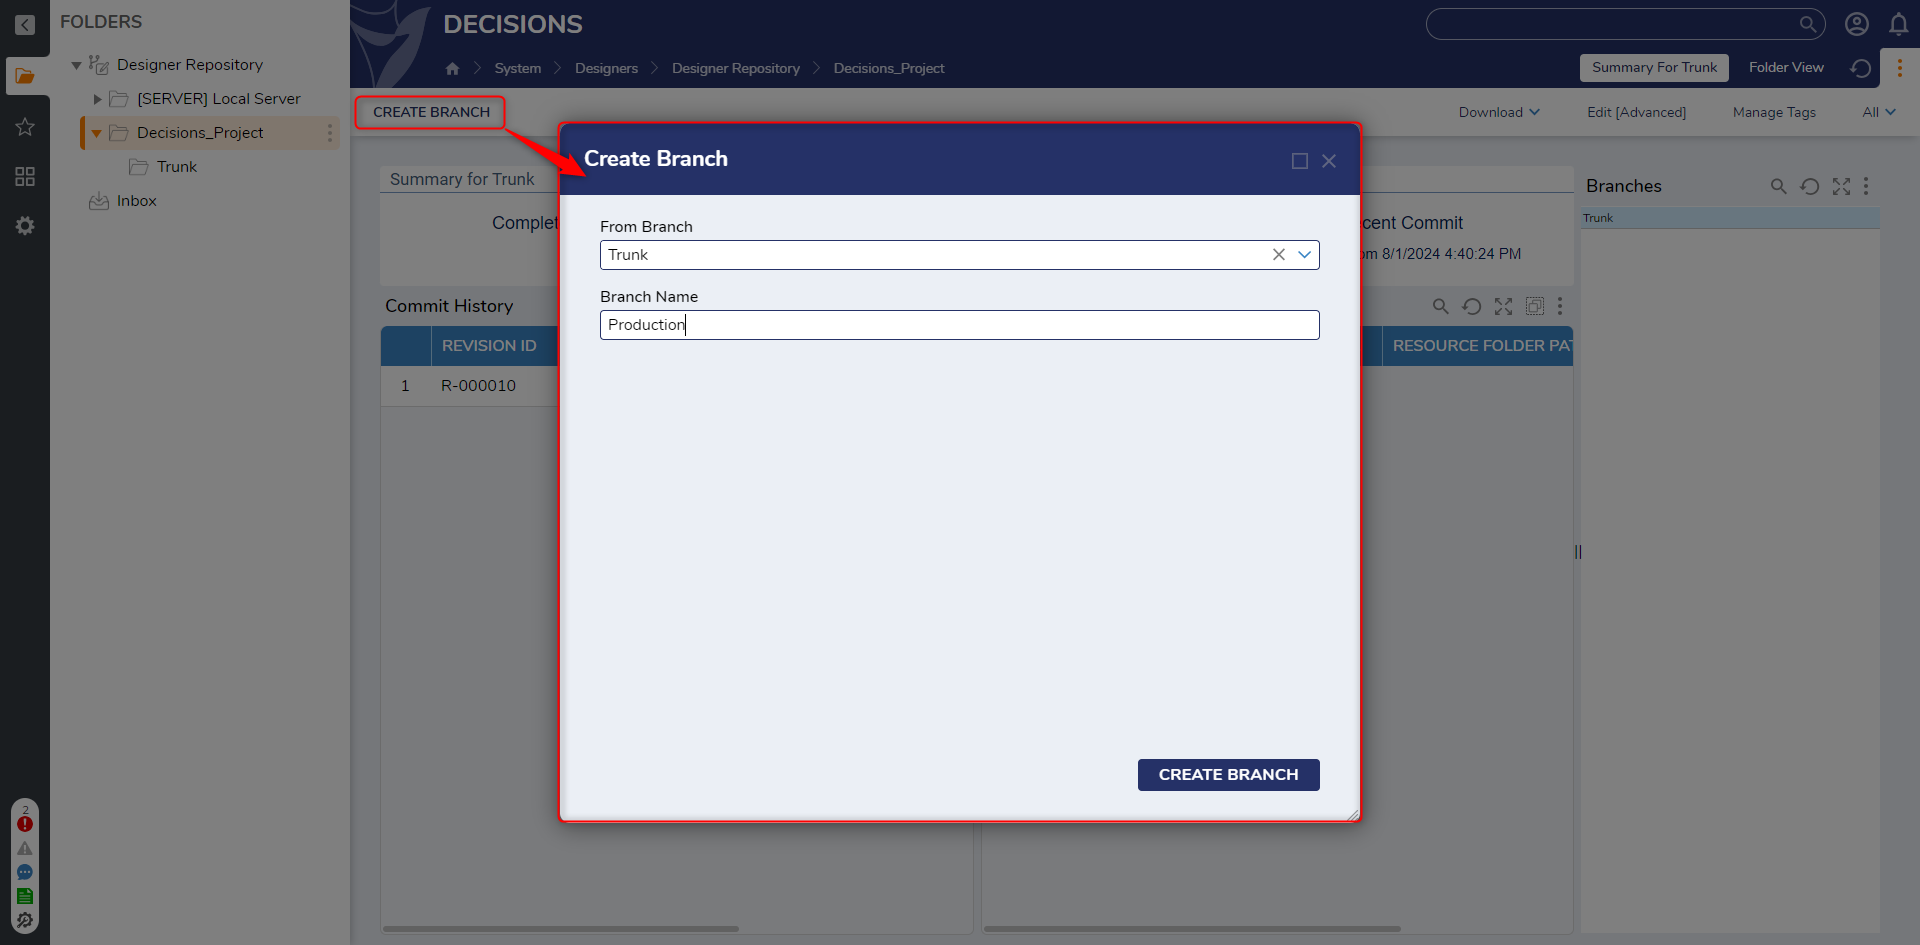
- Refresh the browser after creating a new branch.
- The branch will be created by the given name within the Project Folder. Refer to the following image.
User Actions on the Branch
The following section demonstrates the actions that can be performed on a Repository Branch. Navigate to the Designer Repository > Select the Project > Right-click on the Branch.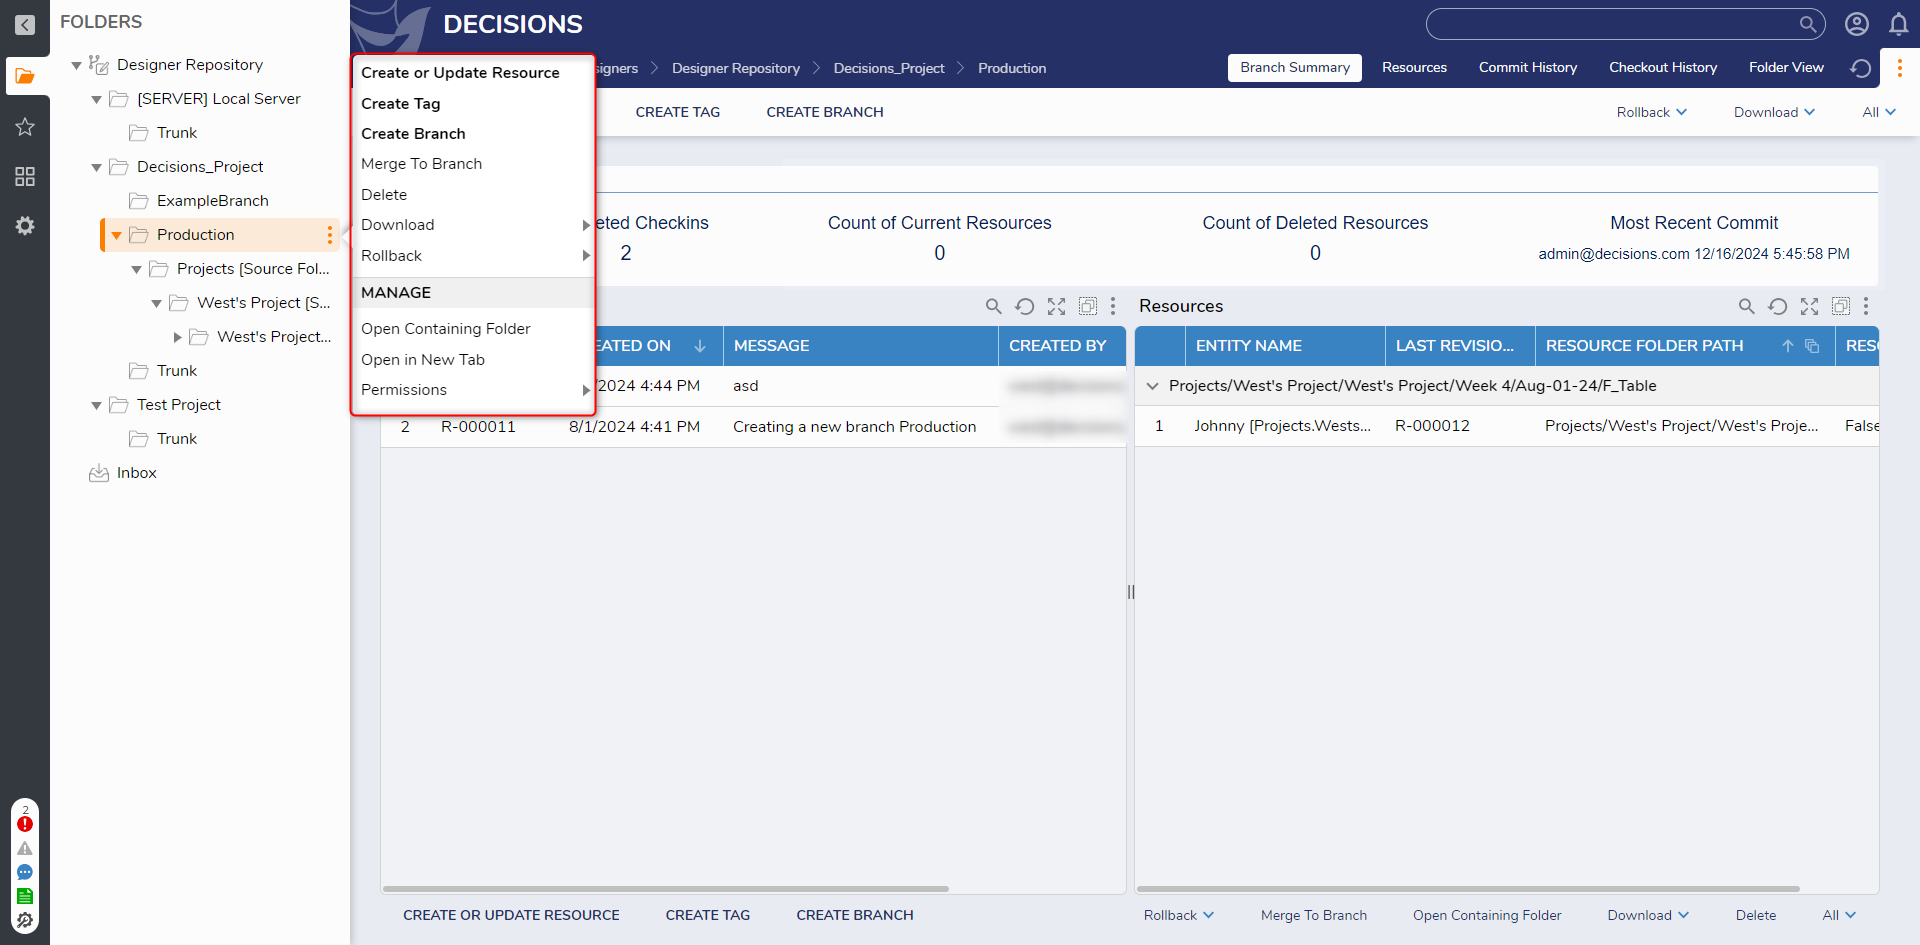
| Setting Name | Configuration | |
|---|---|---|
| Create or Update Resource | Allows adding a separate entity to the project. Only accepts one file (.decOBj) at a time. | |
| Create Tag | Append the revisions of the Branch with the given message. | |
| Create Branch | Creates a new branch using this as a base. | |
| Merge to Branch | Allows merging entities into another branch. | |
| Delete | Deletes the Branch | |
| Download | ||
| Download Project | Downloads the project in a Zip file. | |
| Download as of Date | Downloads the Project that was committed at a specific Date and Time. | |
| Download Specific Revision | Downloads the Project of a specific revision. Revision ID should be specified. | |
| Manage | ||
| Manage Permission | Allows to Manage the Permissions on folder. | |
| Open Containing Folder | Opens the Parent Folder Dashboard (Project Folder). | |
| Permissions: Disable Permissions Inheritance | Disables Permission Inheritance on the Project Folder. | |
| Open | All actions under this category will open in a new tab. | |
| Open Branch Summary | Opens the dashboard of the Branch | |
| Open Checkout History | Opens the Checkout History | |
| Open Commit History | Opens the Commit history | |
| Open Folder | Opens the Dashboard of the current Branch | |
| Open Folder View | Opens the branch in a Folder view with all entities listed | |
| Open Resources | Shows all the resources from the branch | |
| Roll Back | ||
| Rollback Project to Date | This will Rollback the project to the selected date with the latest revision. | |
| Rollback Project to Revision | This will Rollback the project to the selected revision. | |
Merge to Branch
Merge to Branch is an action available on the Designer Repository that allows branches to be merged together.
- Navigate to the Branch you wish to Merge. Right-Click on the Branch > Merge to Branch.
- Select the Destination branch to merge. In this example, QA is been merged with Production.

- There are two available options at the bottom of the dialog box for merging entities into a branch. These options are:
Select From all Entities
This option will show all the latest entities from all the revisions of the branch and allows users to manually select the entities they wish to merge. Clicking on Merge will merge the selected entities.
Select Based on Revisions
This option will show all the Revisions IDs associated with each commit.
- When a revision is selected, all entities from that revision and its subsequent revisions will be selected unless the ‘Merge Entities from Selected Revision only’ is Enabled.
E.g. When revision R-000140 is selected, all entities from R-000140 through R-000143 will be automatically selected. However, if the user wishes only to select entities from R-000140, they should enable the 'Merge Entities from Selected Revisions only' option.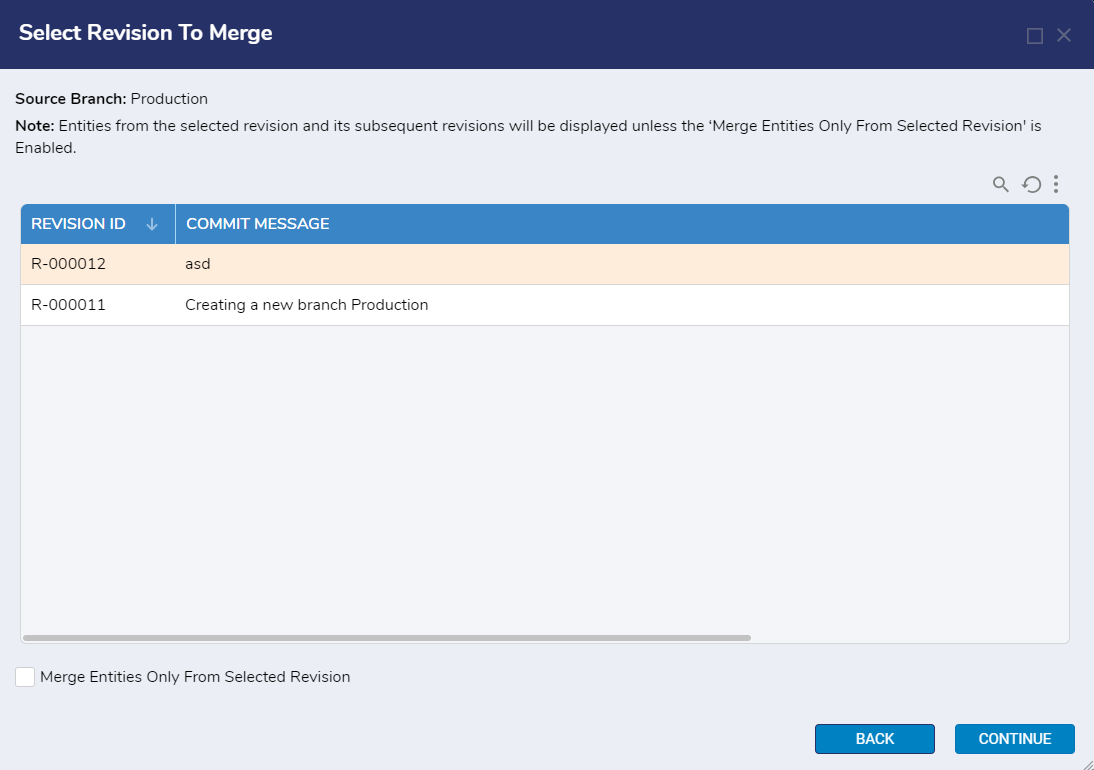
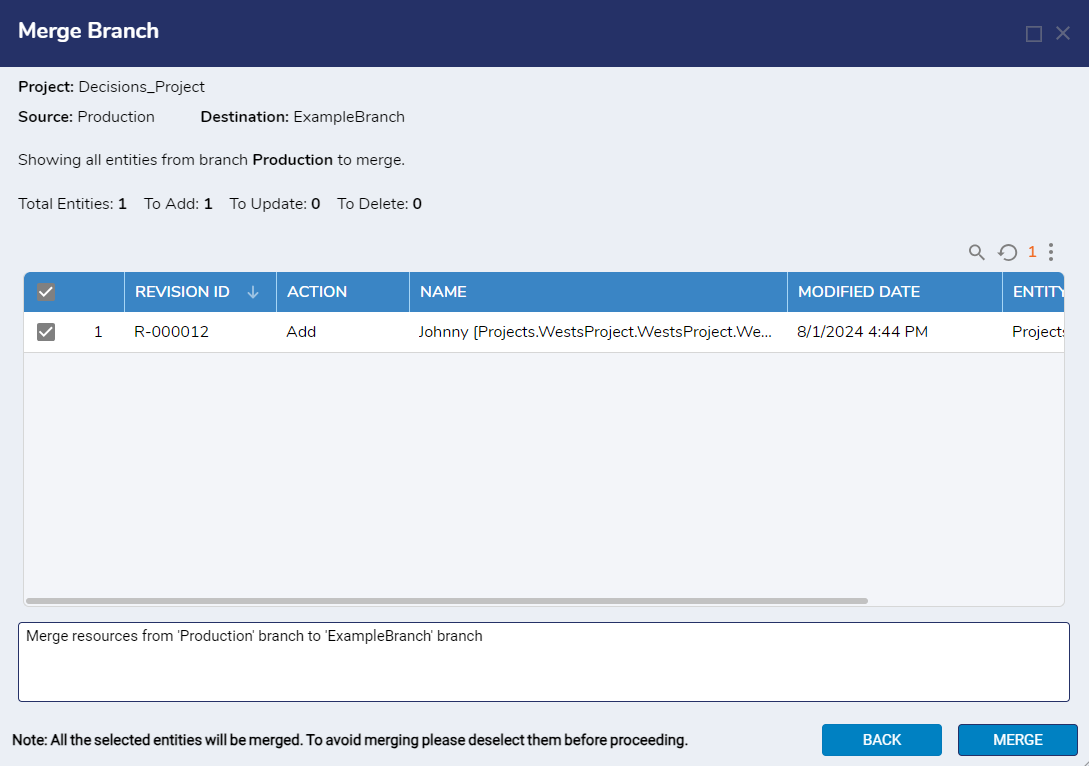
- All the entities from the selected revisions will be displayed in the next window-'Merge Branch', which allows users to manually select the entities they wish to merge. Clicking on Merge will merge the selected entities.
Confirming the Merge
After completing the merge, navigate to the merged branch folder. On the Branch Summary dashboard, a new Revision with the latest date under the Commit History section should be visible. The commit message for this revision should indicate that resources from one branch were merged into another branch, such as Merge resources from [BranchName] branch to [BranchName] branch.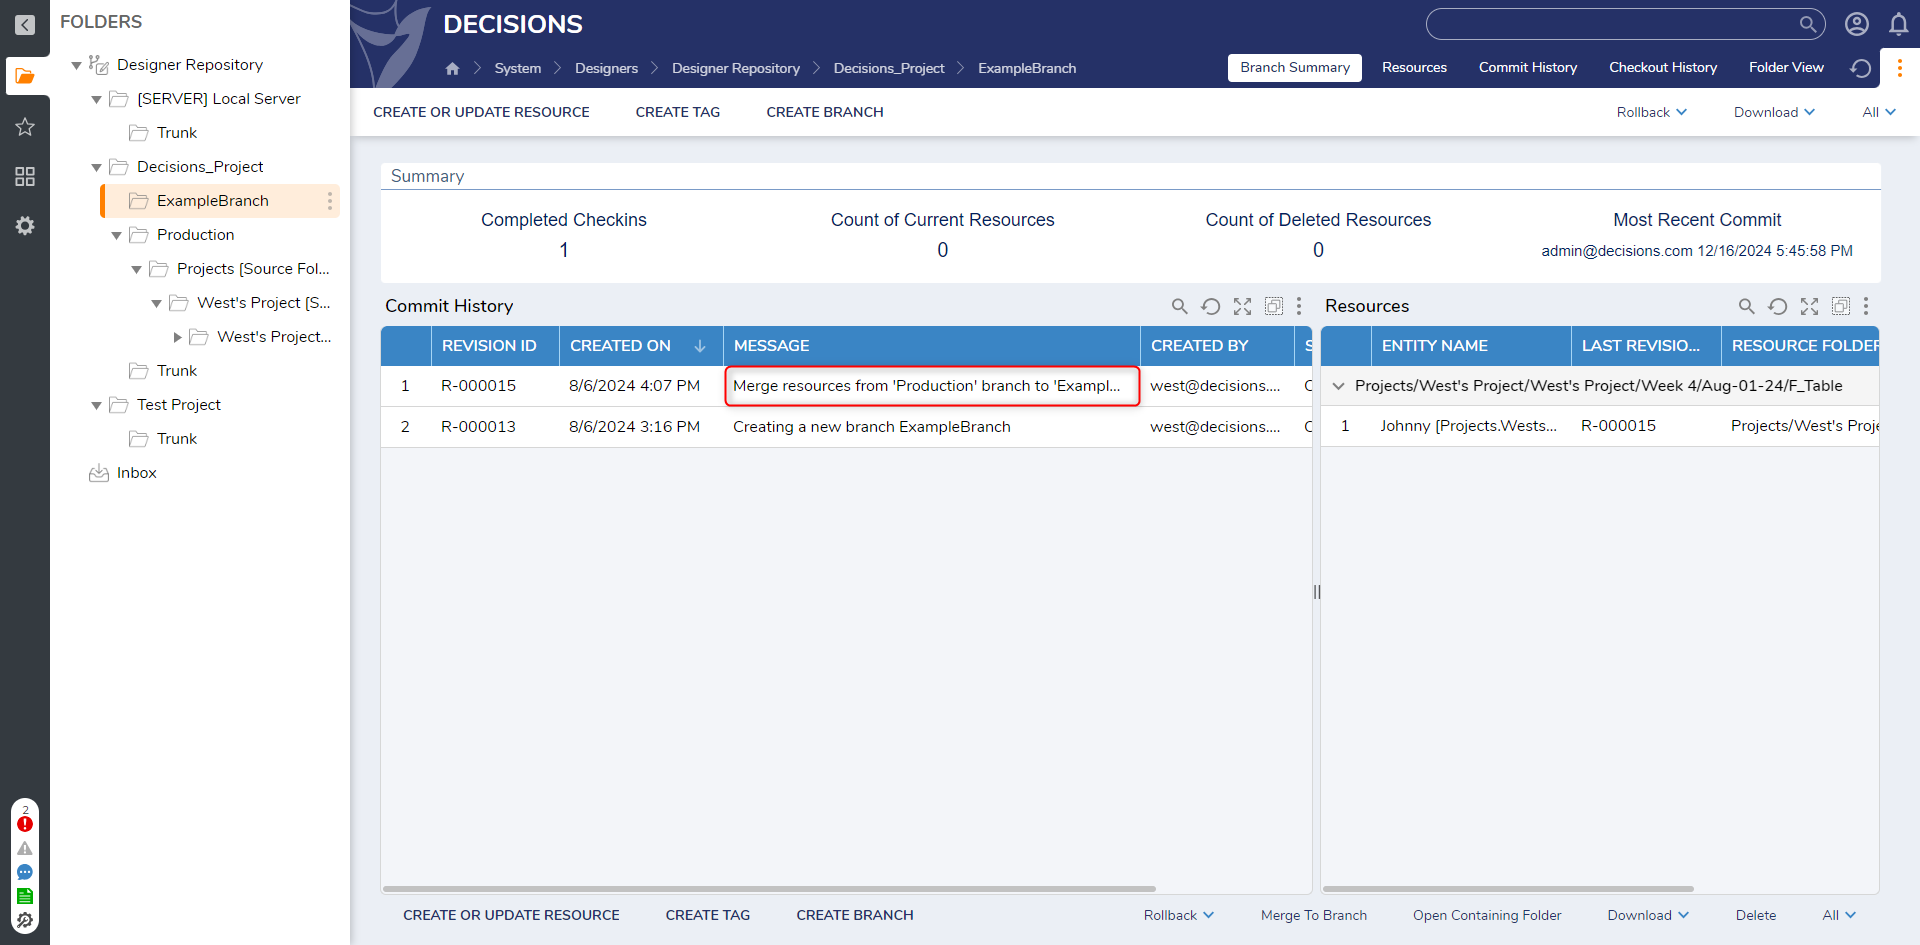
Feature Changes
| Description | Version | Release Date | Developer Task |
|---|---|---|---|
| Added two more counts to the Branch Summary tile. | 9.6 | January 2025 | [DT-042982] |