Overview
Module Details | |
| Core or GitHub Module | Core Module |
| Restart Required | No |
| Steps Exposed | Yes |
| Step Location | Integration > Okta |
| Settings Location | Settings > Okta Settings |
| Prerequisites |
|
The Okta Module allows Decisions to integrate with Okta and adds new Okta-specific steps. This lets Decisions create and modify Okta accounts through Flows created in Decisions, along with enabling single sign-on (SSO).
The Okta Api Token can be retrieved from Okta's platform by navigating to Security > API > Tokens > Create Token. The Okta module uses the SAML module; therefore, changing the Okta settings actually passes the values through to the SAML settings. Okta is a single specific provider, whereas SAML is the protocol that is used by hundreds of different providers.
Note that, unlike most modules in v9, Okta and other identity provider modules can be found and installed from System > Security > Identity Providers.
Settings Configuration (Okta)
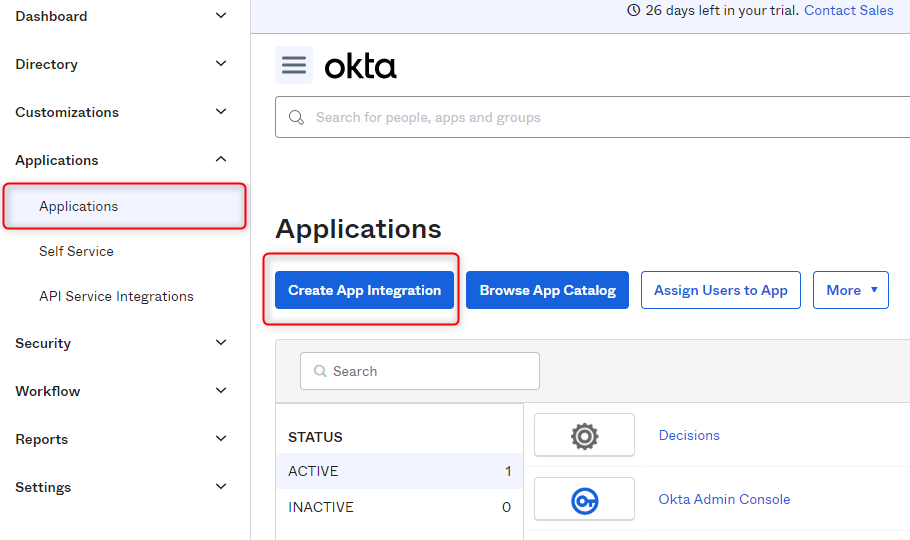
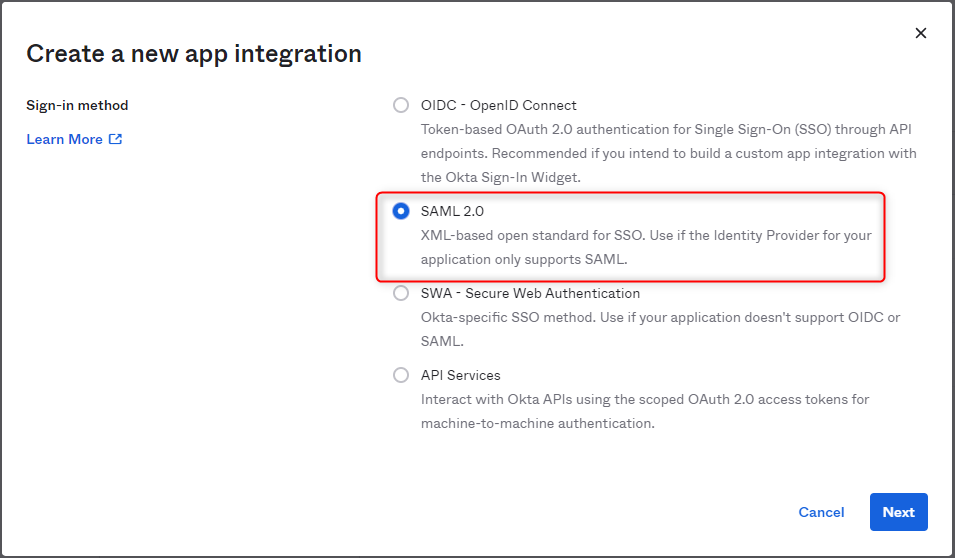
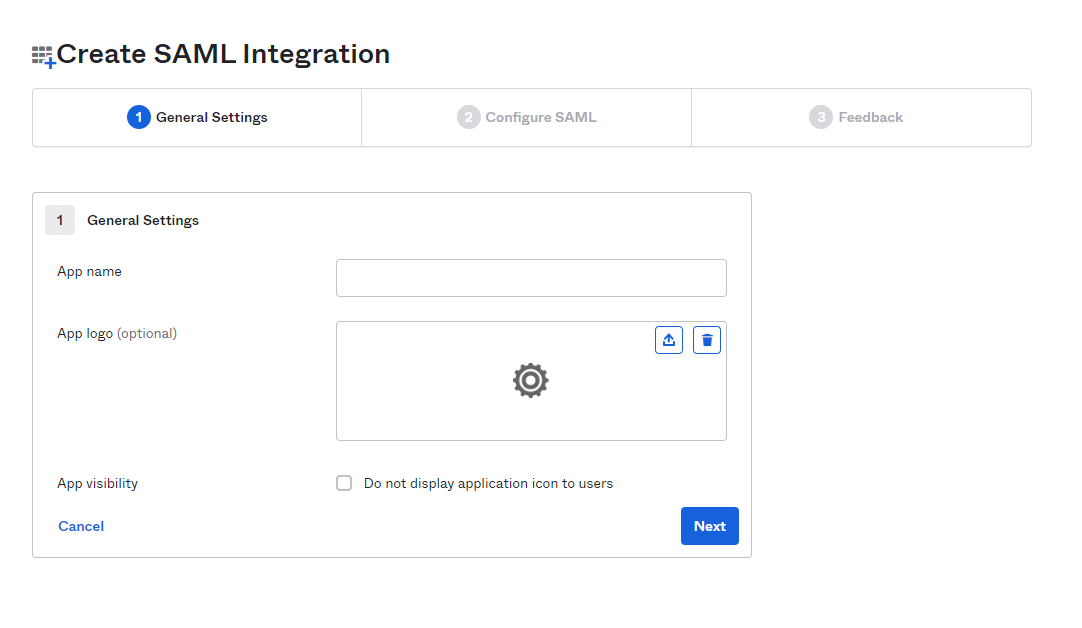
1. Create a new application. Select SAML 2.0.
2. After the app is created, configure the endpoints.
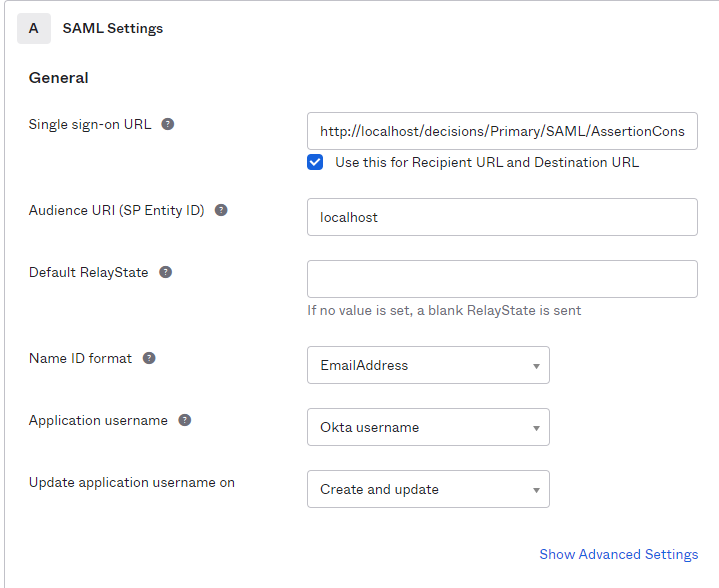 For this screenshot, an example SSO URL is used. Users should follow one of two templates, depending on whether they are self-hosted or IIS hosted.
For self-hosted installation, use this template: [base]:[port]/SAML/AssertionConsumer
For IIS installations, use this template: [base]/{virtual directory}/SAML/AssertionConsumer
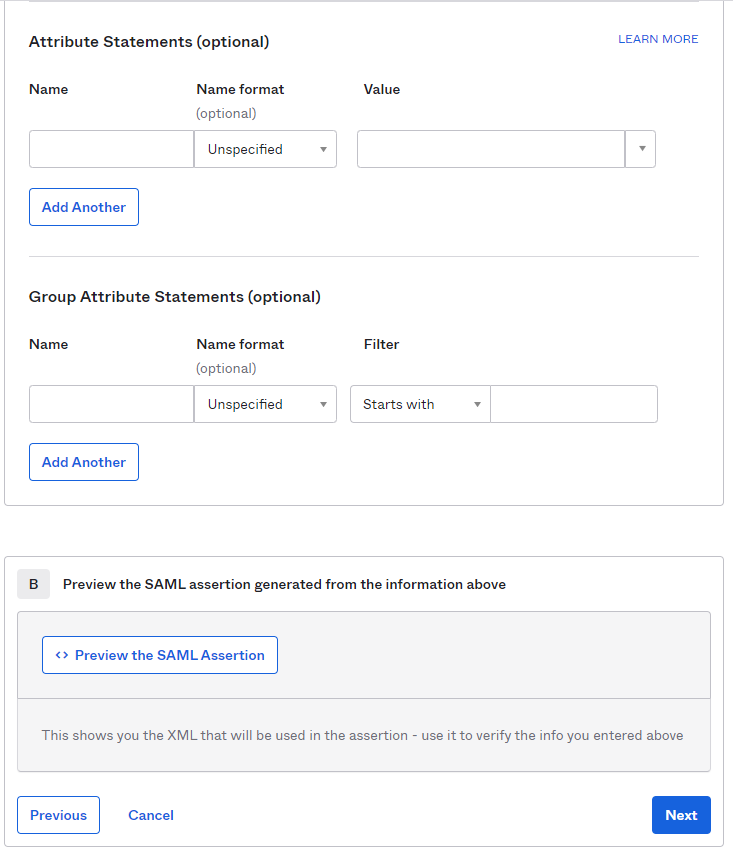
3. The Attribute Statements and Group Attribute Statements are optional and do not need to be filled out.
.png) 4. Options on tab 3, Feedback, do not affect Decisions integration.
4. Options on tab 3, Feedback, do not affect Decisions integration.
Settings Configuration (Decisions) - OKTA MANAGEMENT SETTINGS
The Okta Settings within Decisions have two components - OKTA MANAGEMENT SETTINGS and OKTA SSO SETTINGS
Once Okta settings are configured within Decisions, the SAML module will also be updated.
- Navigate to System > Settings. Click Okta Settings and select Edit.
.png)
- On the Edit Okta Settings window, add the Okta Subdomain or URL and Okta Api Token. After configuring all necessary options, click SAVE. Everything under OKTA MANAGEMENT SETTINGS is used for the Okta Sync Flows that come with the module. This section is not required for the SSO Login process.
Setting Description Okta Subdomain or URL The Okta Subdomain or URL used to return SSO requests. Okta Api Token The Okta API Token is used to authenticate requests. Sync Okta User Flow A Flow designed with the Okta Sync User Flow behavior used to sync and create new Decisions accounts based on data retrieved from Okta. Sync Okta Group Flow A Flow designed with the Okta Sync Group Flow behavior used to sync and create new Decisions groups based on data retrieved from Okta. Sync Only Chosen Groups Syncs only specific groups retrieved from Okta. The group list will display after the other settings are complete. Enabled If enabled, allows SSO settings to be defined for the Okta integration. These settings will overwrite the settings defined in the SAML module. .png)
OKTA SSO Settings
1. Check the “enabled” checkbox. This will display the settings.
2. Enable “Quick Configuration with Metadata”. This will allow the use of a meta URL from Okta to get the configuration data automatically.
- In Okta, navigate to the Application. Go to the “sign-on” tab.
- Right-click the “Identity Provider Metadata” link and copy the link. Paste that into the Metadata URL field.
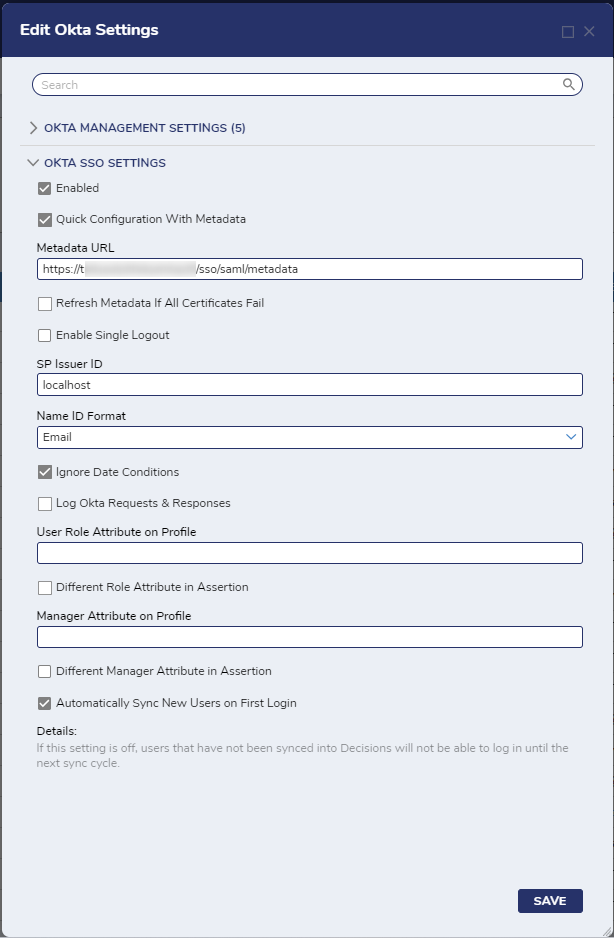
3. Fill out the following settings:

SP Issuer ID: This will be the "audience URL (SP entity ID)" from the Okta Application Setting within Okta. This must match exactly.

Name ID Format: By default, this will be set to Email. If using persistent/transient, then change that from the drop-down. This will be the "Name ID Format" setting from the Application Setting on Okta.

Related Flows
The Okta module adds four Flows to the System > Designers > System Defaults folder. Three of them are Subflows used in the Flow Sync Okta Users, Groups, and Roles. Setting the Sync Okta Users, Groups, and Roles to be a scheduled job daily is highly recommended. This will keep accounts in Okta and Decisions coordinated without extra work.
Related Steps
| Step Name | Description |
|---|---|
| Activate User | Activates an Okta user account synced to Decisions. |
| Add User To Group | Adds an Okta user account to a defined Okta group. |
| Create Group | Creates a new group within Okta |
| Create User | Creates a new Okta user account |
| Deactivate user | Allows the deactivation of an Okta user account. |
| Expire User Password | Allows an Okta user account's password to be expired. The user will need to reset their password at the next login. |
| Get All Deprovisioned Users | Retrieves all of the Okta user accounts in the deprovisioned state. |
| Get All Groups | Retrieves all the Okta user groups available |
| Get All Users | Retrieves a list of all available Okta users. |
| Get Custom Attribute From User | Retrieves attributes from Okta user accounts. Attributes are found under the user account profile page on Okta and include personal information like name, title, phone number, and more. Custom attributes can be assigned to an Okta user account through Decisions during the Create User Step. |
| Get Group By Id | Retrieves an Okta group based on its ID. The Okta group ID can be found in the System Log section of a group. |
| Get Group By Name | Retrieves an Okta group according to its name in Okta. |
| Get Groups For User | Retrieves the Okta groups that a particular Okta user is assigned to. |
| Get Groups To Sync | Creates a list of Okta groups that the user would like to sync between servers. |
| Get Sync Group Flow Id | Provides the user with the flow ID for the flow in which a group of Okta accounts will be synced. |
| Get Sync User Flow Id | Gives the user the Flow ID (in GUID format) of the flow that is syncing Okta user accounts. |
| Get User By Id | Will retrieve an Okta user account based on its ID. |
| Get User By Username | Will retrieve a user by their Okta username. |
| Get Users In Group | Will retrieve all of the Okta user accounts within a specified Okta group. |
| Remove User From Group | Removes a desired Okta user from an Okta group they belong to. |
| Reset User Password | Causes an Okta user account's password to be reset. |
| Should Sync Okta Group | A preset rule that can be used to determine if an Okta user group should be synced between the user's servers. |
| Should Sync Okta User | A preset rule that can be used to determine if an Okta user account needs to be synced between servers. |
| Suspend User | Causes a chosen Okta user account to be suspended. |
| Unlock User | Can be used to unlock Okta user accounts that are in the locked state. |
| Unsuspend User | Suspended Okta users will be unsuspended. |
| Update Group | Allows the user to update the description and name of an Okta group of user accounts. |
| Update User | Allows an Okta user account to have its various attributes changed. This can include the user's password, email, and contact information. |