Overview
Groups are collections of user accounts that share similar responsibilities or system access permissions. They allow Admins to better organize Accounts in an environment by designated Role or administrative hierarchy.
For example, an environment may contain four groups of users: Tests, Developers, Marketing, and Admins. By sorting these users into Groups, applying specified permissions, and creating group-specific Pages and Dashboards, Admins can create a more uniform and specified work environment.
The following document demonstrates how to create a group and how to add/remove accounts from them.
What changed from V8 to V9?
Version 8 | Version 9 |
|---|---|
Groups were configured at the System level and were visible across the platform. | Groups are now Project-level and are visible only within the Project. |
Create a Group
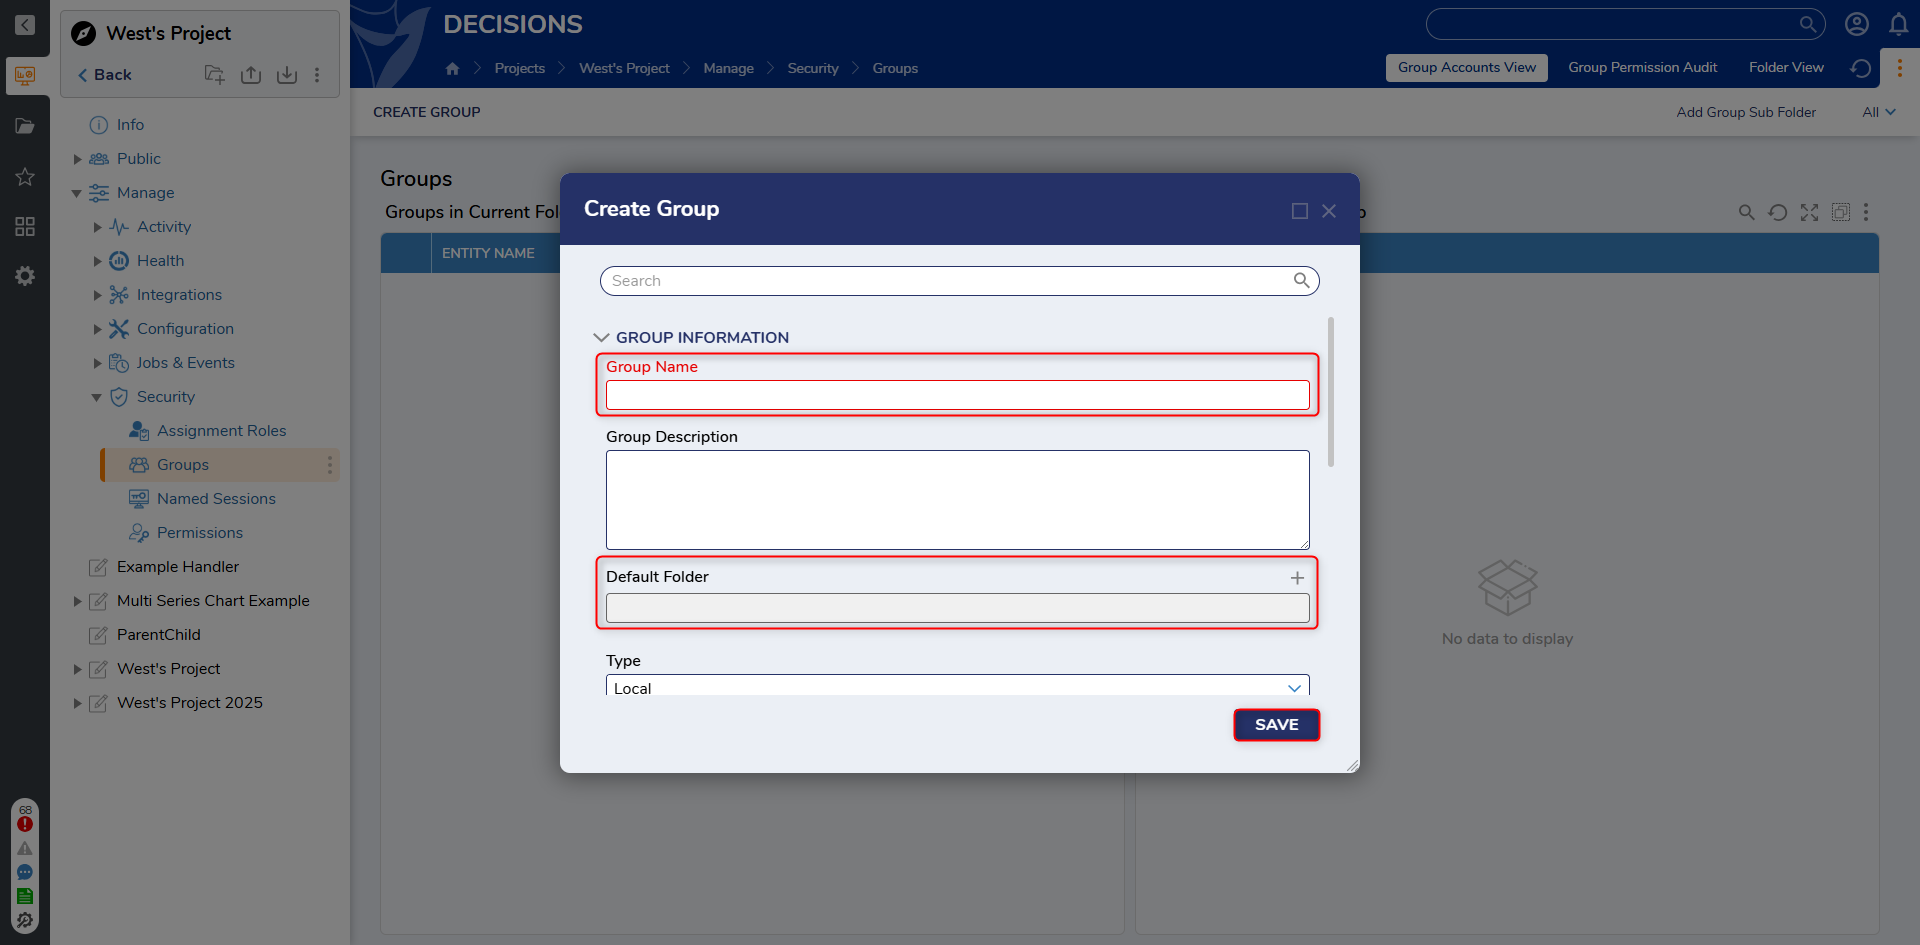
- Within the desired Designer Folder, navigate to Settings > Security > Groups. Click CREATE GROUP on the Global Action Bar.

- In the Create Group window, provide a Group Name.
- Add a Default Folder; this will be the "Landing Page" for anyone in the Group. Then click SAVE.
 If an Account belongs to multiple Groups, the last configured Default Folder will override the previously configured Groups. If an Account has a Default Folder set on their individual Account Settings, this will override any Group Default Folder.
 - Confirm that the new Group appears in the Groups in the Current Folder Report; selecting it will display any associated Accounts under Accounts In Selected GroupReport.
| Group Settings | Descriptions |
|---|---|
| Group Name | Name of the Group. |
| Group Description | Describe the use of the Group. |
| Default Folder | This will be the folder Decisions opens when users in this Group log in. |
| Type | Available types are Local and Remote. Local is for Groups created within Decisions. Remote is for Groups that were created through Active Directory. |
| Specify Sync Group | Syncs accounts within another group to this group. Provides additional options to add, remove, and unhook groups and accounts. |
| Specify Linked Groups | Applies permissions from one group to another group. |
| Default URL Parameters | Change the view of the Portal/Studio for the Group. |
Add/Remove Accounts from a Group
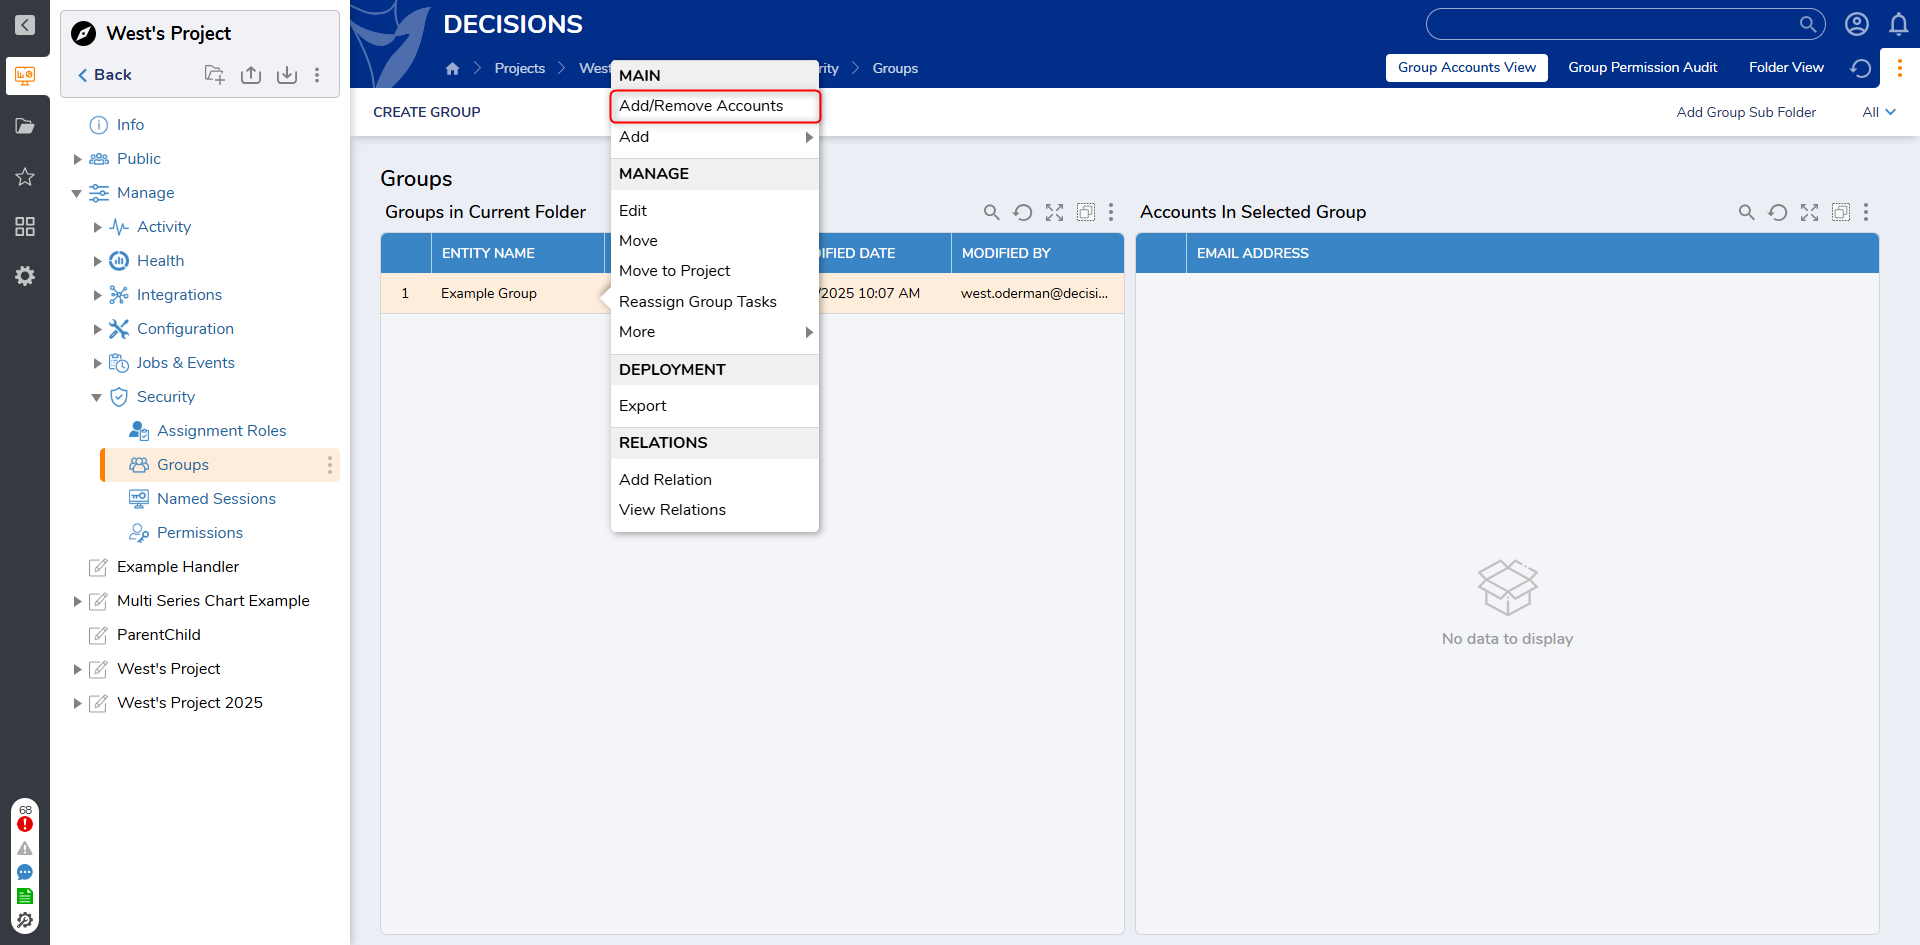
- From the desired Designer Folder, navigate to Settings > Security > Groups, right-click the desired Group, then select Add/Remove Accounts.
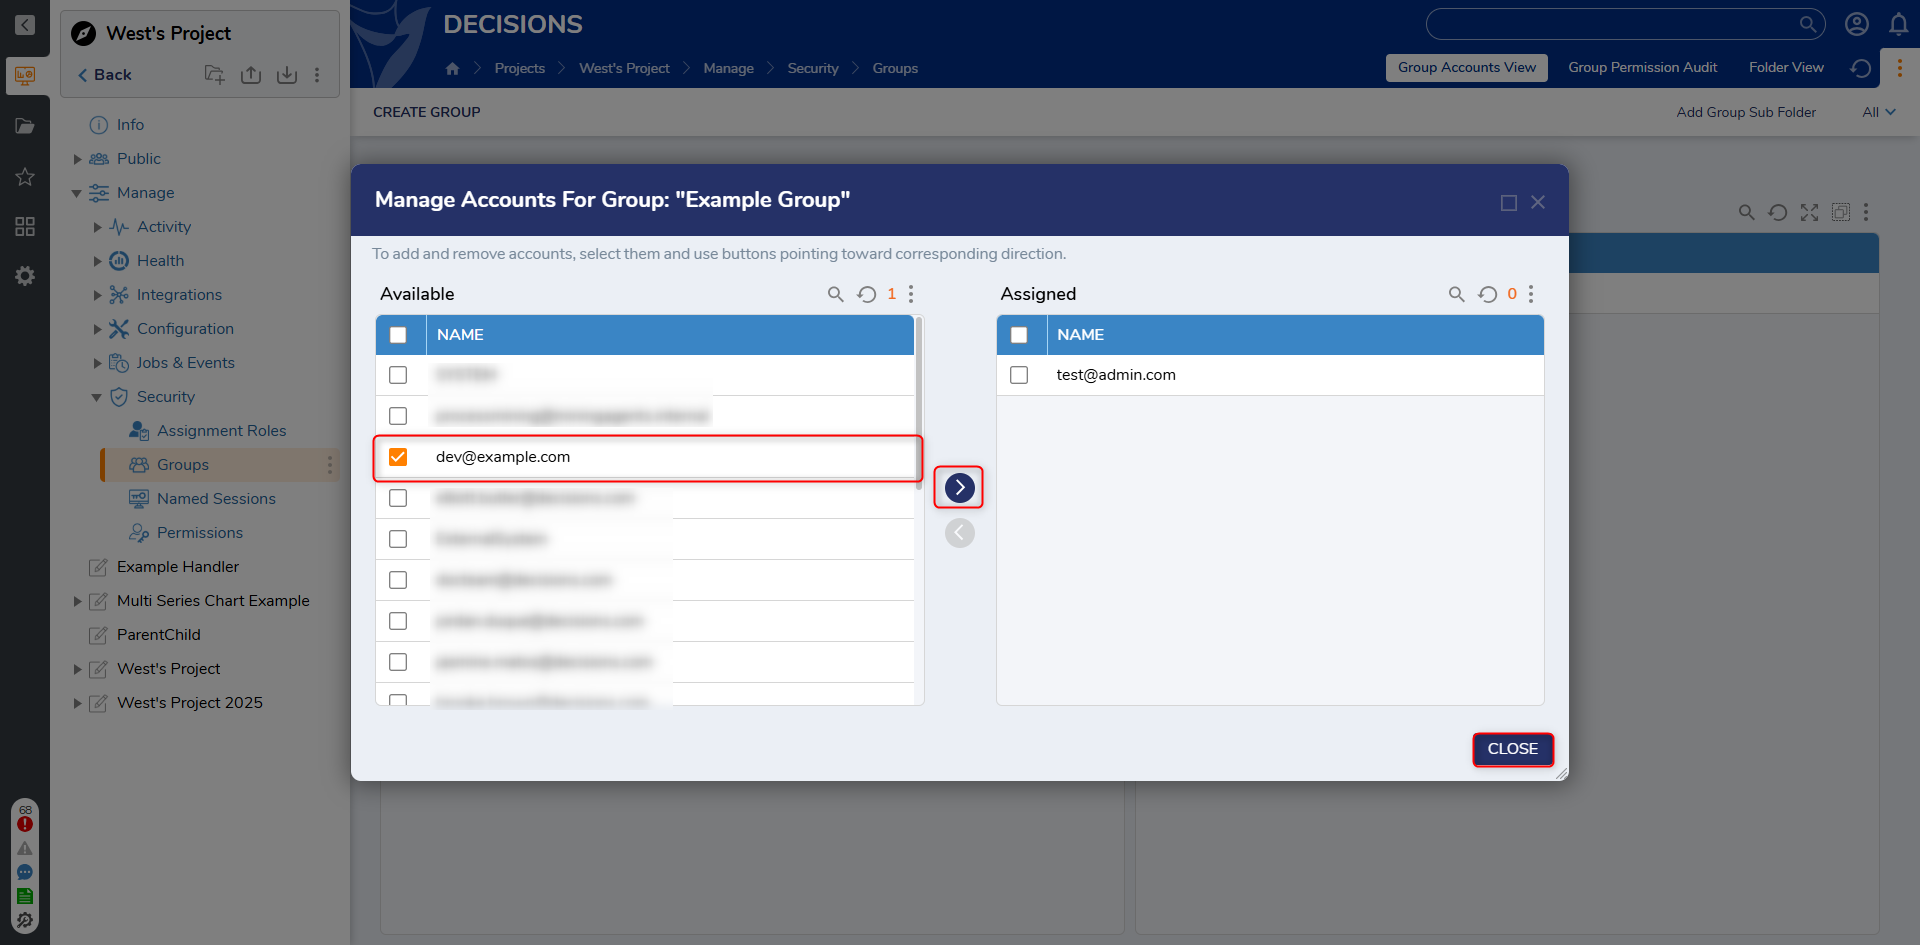
- From the resulting window, Manage Accounts from Group: [GroupName], users will see two reports:
- Available: This Report shows all the accounts that are not assigned to the selected Group.
- Assigned: This Report shows all the accounts that are already assigned to the selected Group.
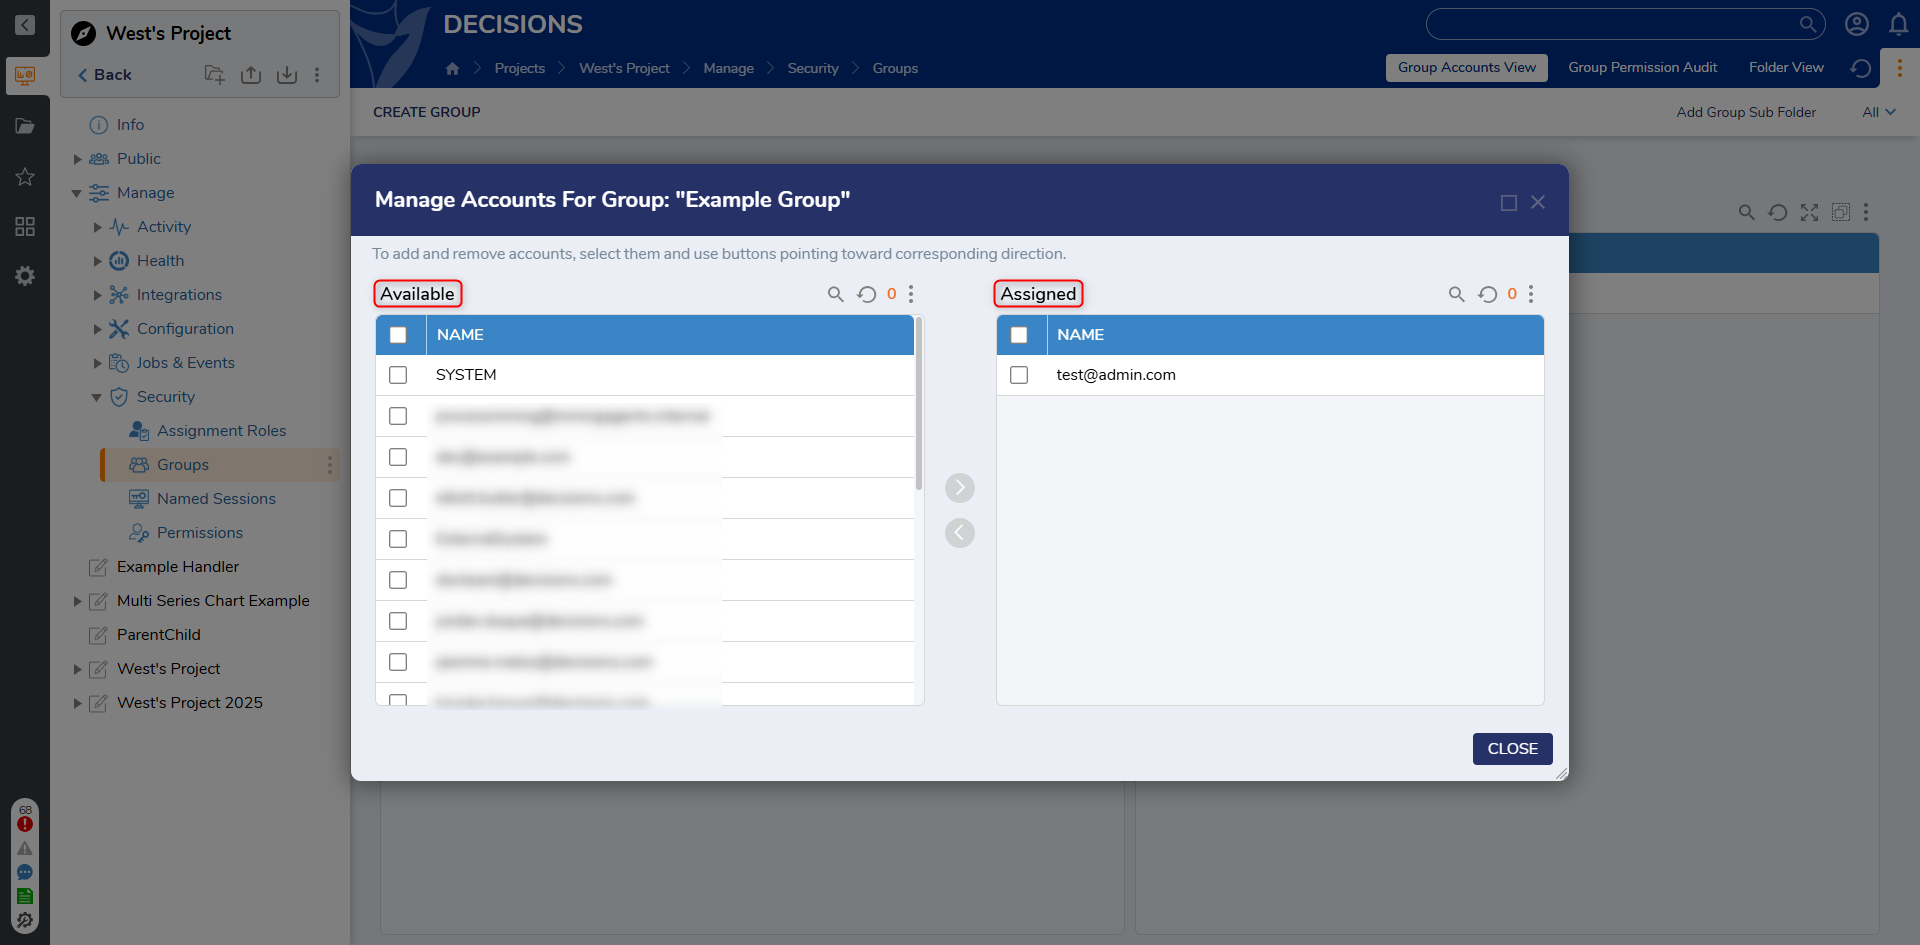
- Select account/s from the left Report and click on the Right Arrow > button. This will move the accounts from the Available to the Assigned section, and the account will be added to the particular Group. When desired changed have been made, click CLOSE.
- Similarly, to remove the accounts from the Group, select account/s from the Right Report (Assigned) and click on the Left Arrow < button. This will move the accounts from the Assigned to the Available, and the account will be removed from the Group. When desired changed have been made, click CLOSE.
.png)
Add/Remove Groups Assigned to an Account
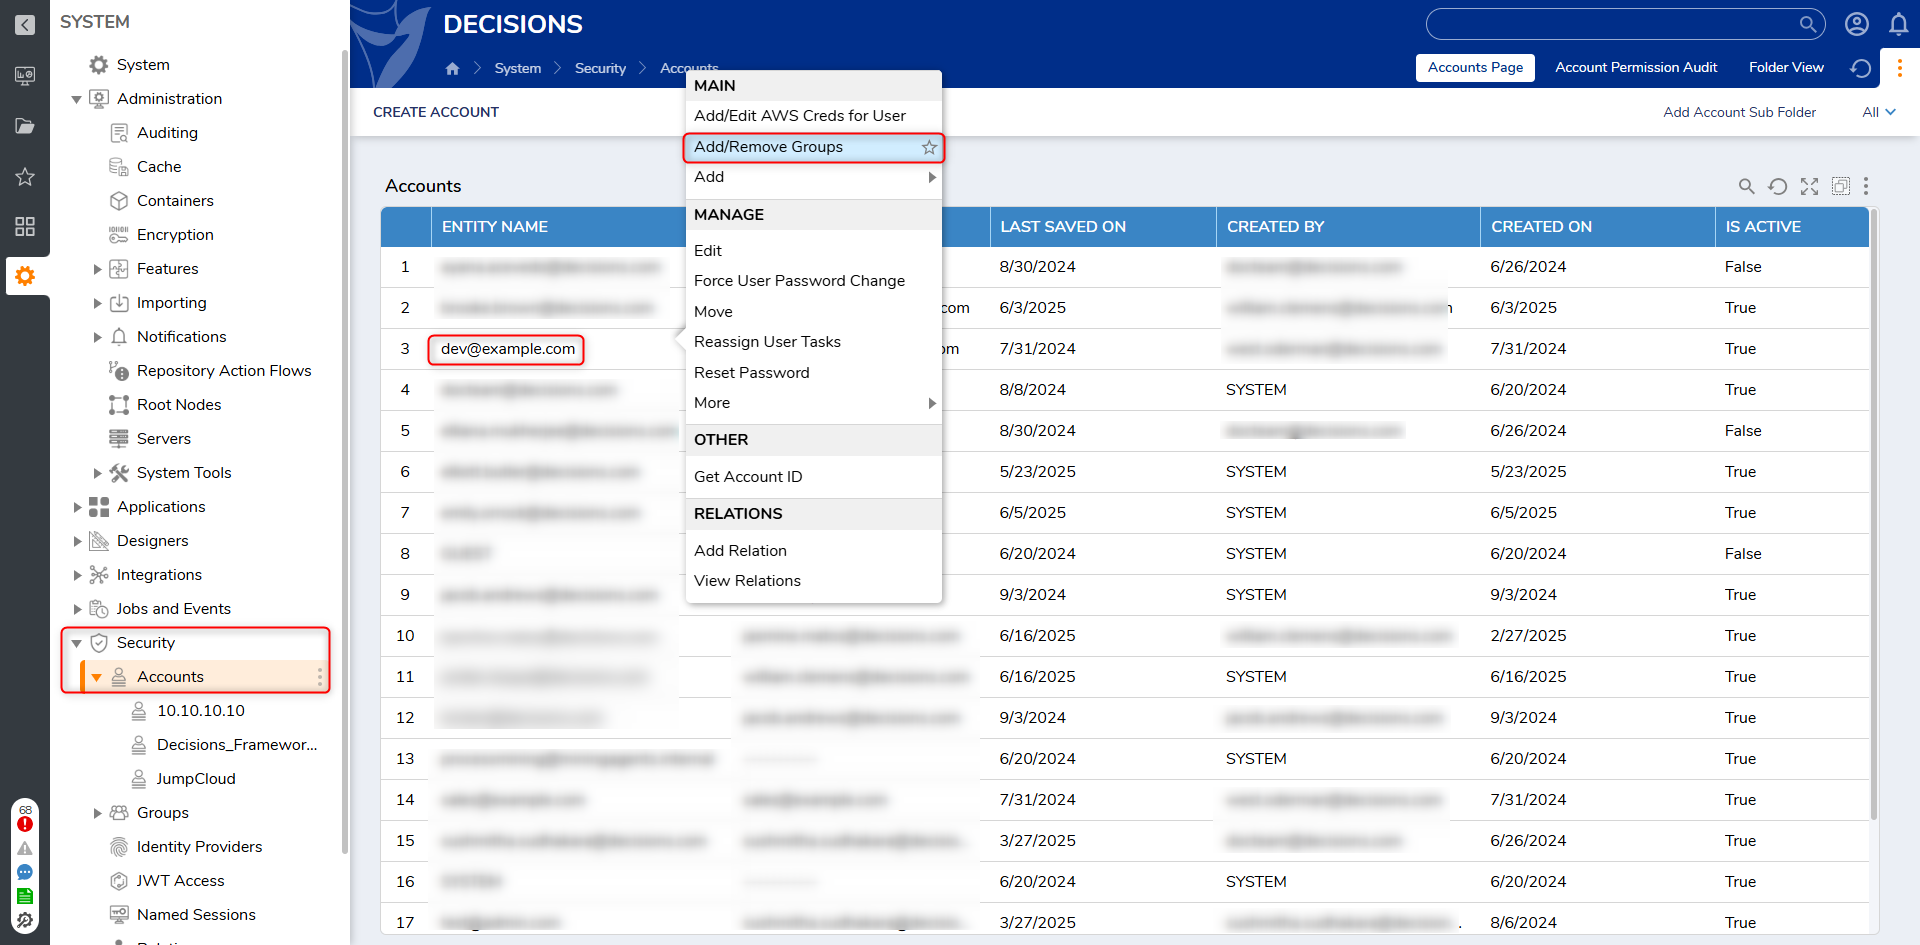
- From System > Security > Accounts, right-click the desired account, then select Add/Remove Groups.
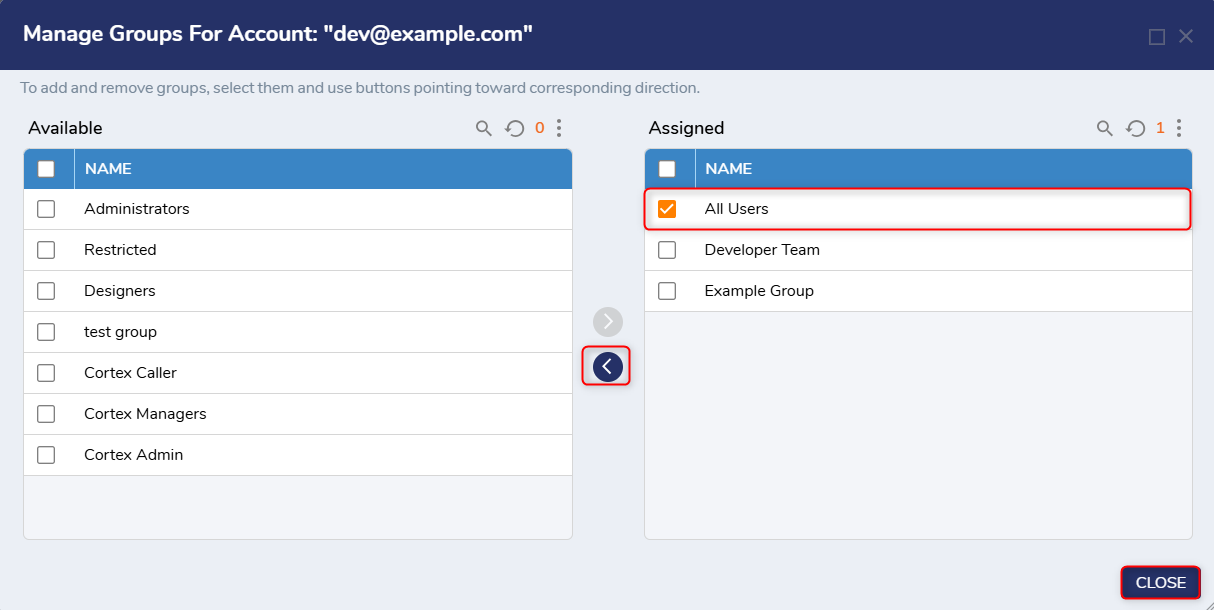
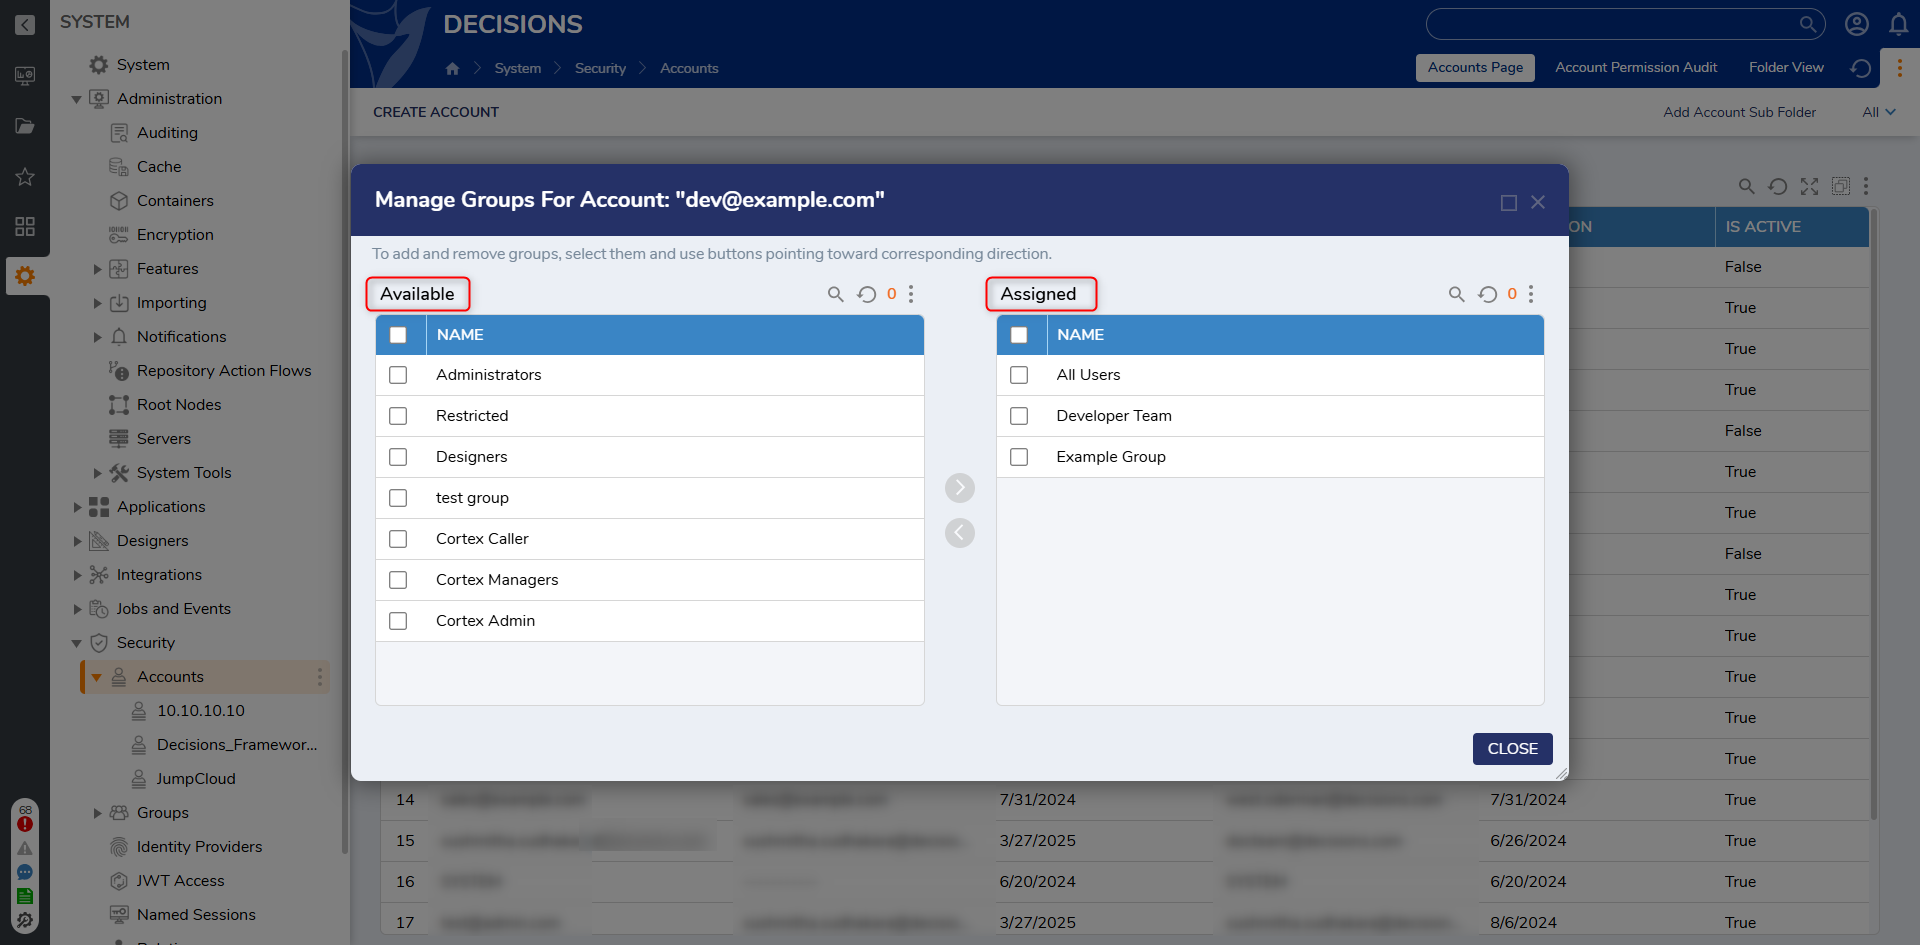
- From the resulting window, Manage Group for Accounts: [AccountName] users will see 2 reports:
- Available: This Report shows all the Groups that are not assigned to the selected Account.
- Assigned: This Report shows all the Groups that are already assigned to the selected Account.
- Select Group/s from the left Report (Available) and click on the Right Arrow > button. This will move the Group/s from the Available to the Assigned section, and the Group will be assigned to the account. When desired changed have been made, click CLOSE.
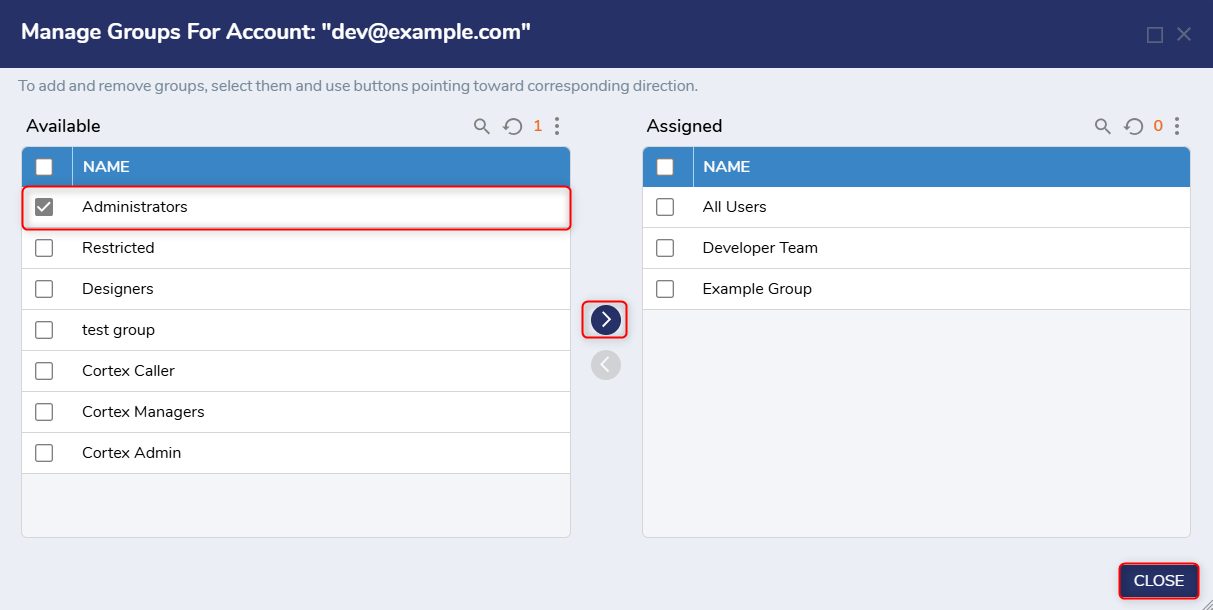
- Similarly, to remove an assigned Group from the account, select Group/s from the Right Report (Assigned) and click on the Left Arrow < button. This will move the Group/s from the Assigned to the Available section, and the Group will be disassociated from the account. When desired changed have been made, click CLOSE.