Overview
The Multiple File Upload/Download control provides a convenient solution for end-users to upload or download multiple files during runtime. The inputs can be mapped as either FileData or a File References datatype, by default these are set to File Reference.
It's important to note that Decisions currently lacks a native scanning mechanism to verify the safety of uploaded files. As a precautionary measure, certain file types can be excluded to mitigate potential risks and bolster the overall security of Decisions. Please refer to Securing a Decisions Installation for further details on securing a Decisions installation and ensuring a safe file-handling environment.
- File Upload/Download
- File Upload Area
- Multiple File Upload/Download Area
Use Cases
Below are some real-world use cases where this functionality proves to be a valuable asset.
| Potential Use Cases | Description |
|---|---|
| Document Submission and Verification | Clients often need to submit various documents like identification proofs, income statements, and bank statements. Using the Multiple File Upload control, clients can easily upload multiple files in one go, streamlining the document submission process. A financial institution can then use the uploaded documents to verify the client's information and process applications efficiently. |
| Secure File Sharing | Institutions can mitigate potential security risks with the ability to exclude certain file types, such as executable files or scripts. This enhances the overall security and ensures that only authorized and safe files are uploaded and shared. |
| Patient Records Management | Healthcare facilities often handle numerous documents related to patient records, medical history, test results, and more. The Multiple File Upload/Download control allows healthcare professionals to upload and organize multiple files associated with each patient's profile. This simplifies storing and retrieving important medical information, leading to more efficient patient care. |
| Medical Imaging and Reports | Medical imaging files and diagnostic reports are essential for diagnosing and treating patients. With the multiple file upload feature, medical practitioners can easily access various medical images and reports within the platform. This accessibility facilitates collaboration among healthcare professionals and ensures a comprehensive view of a patient's medical condition. |
Multiple File Control Properties
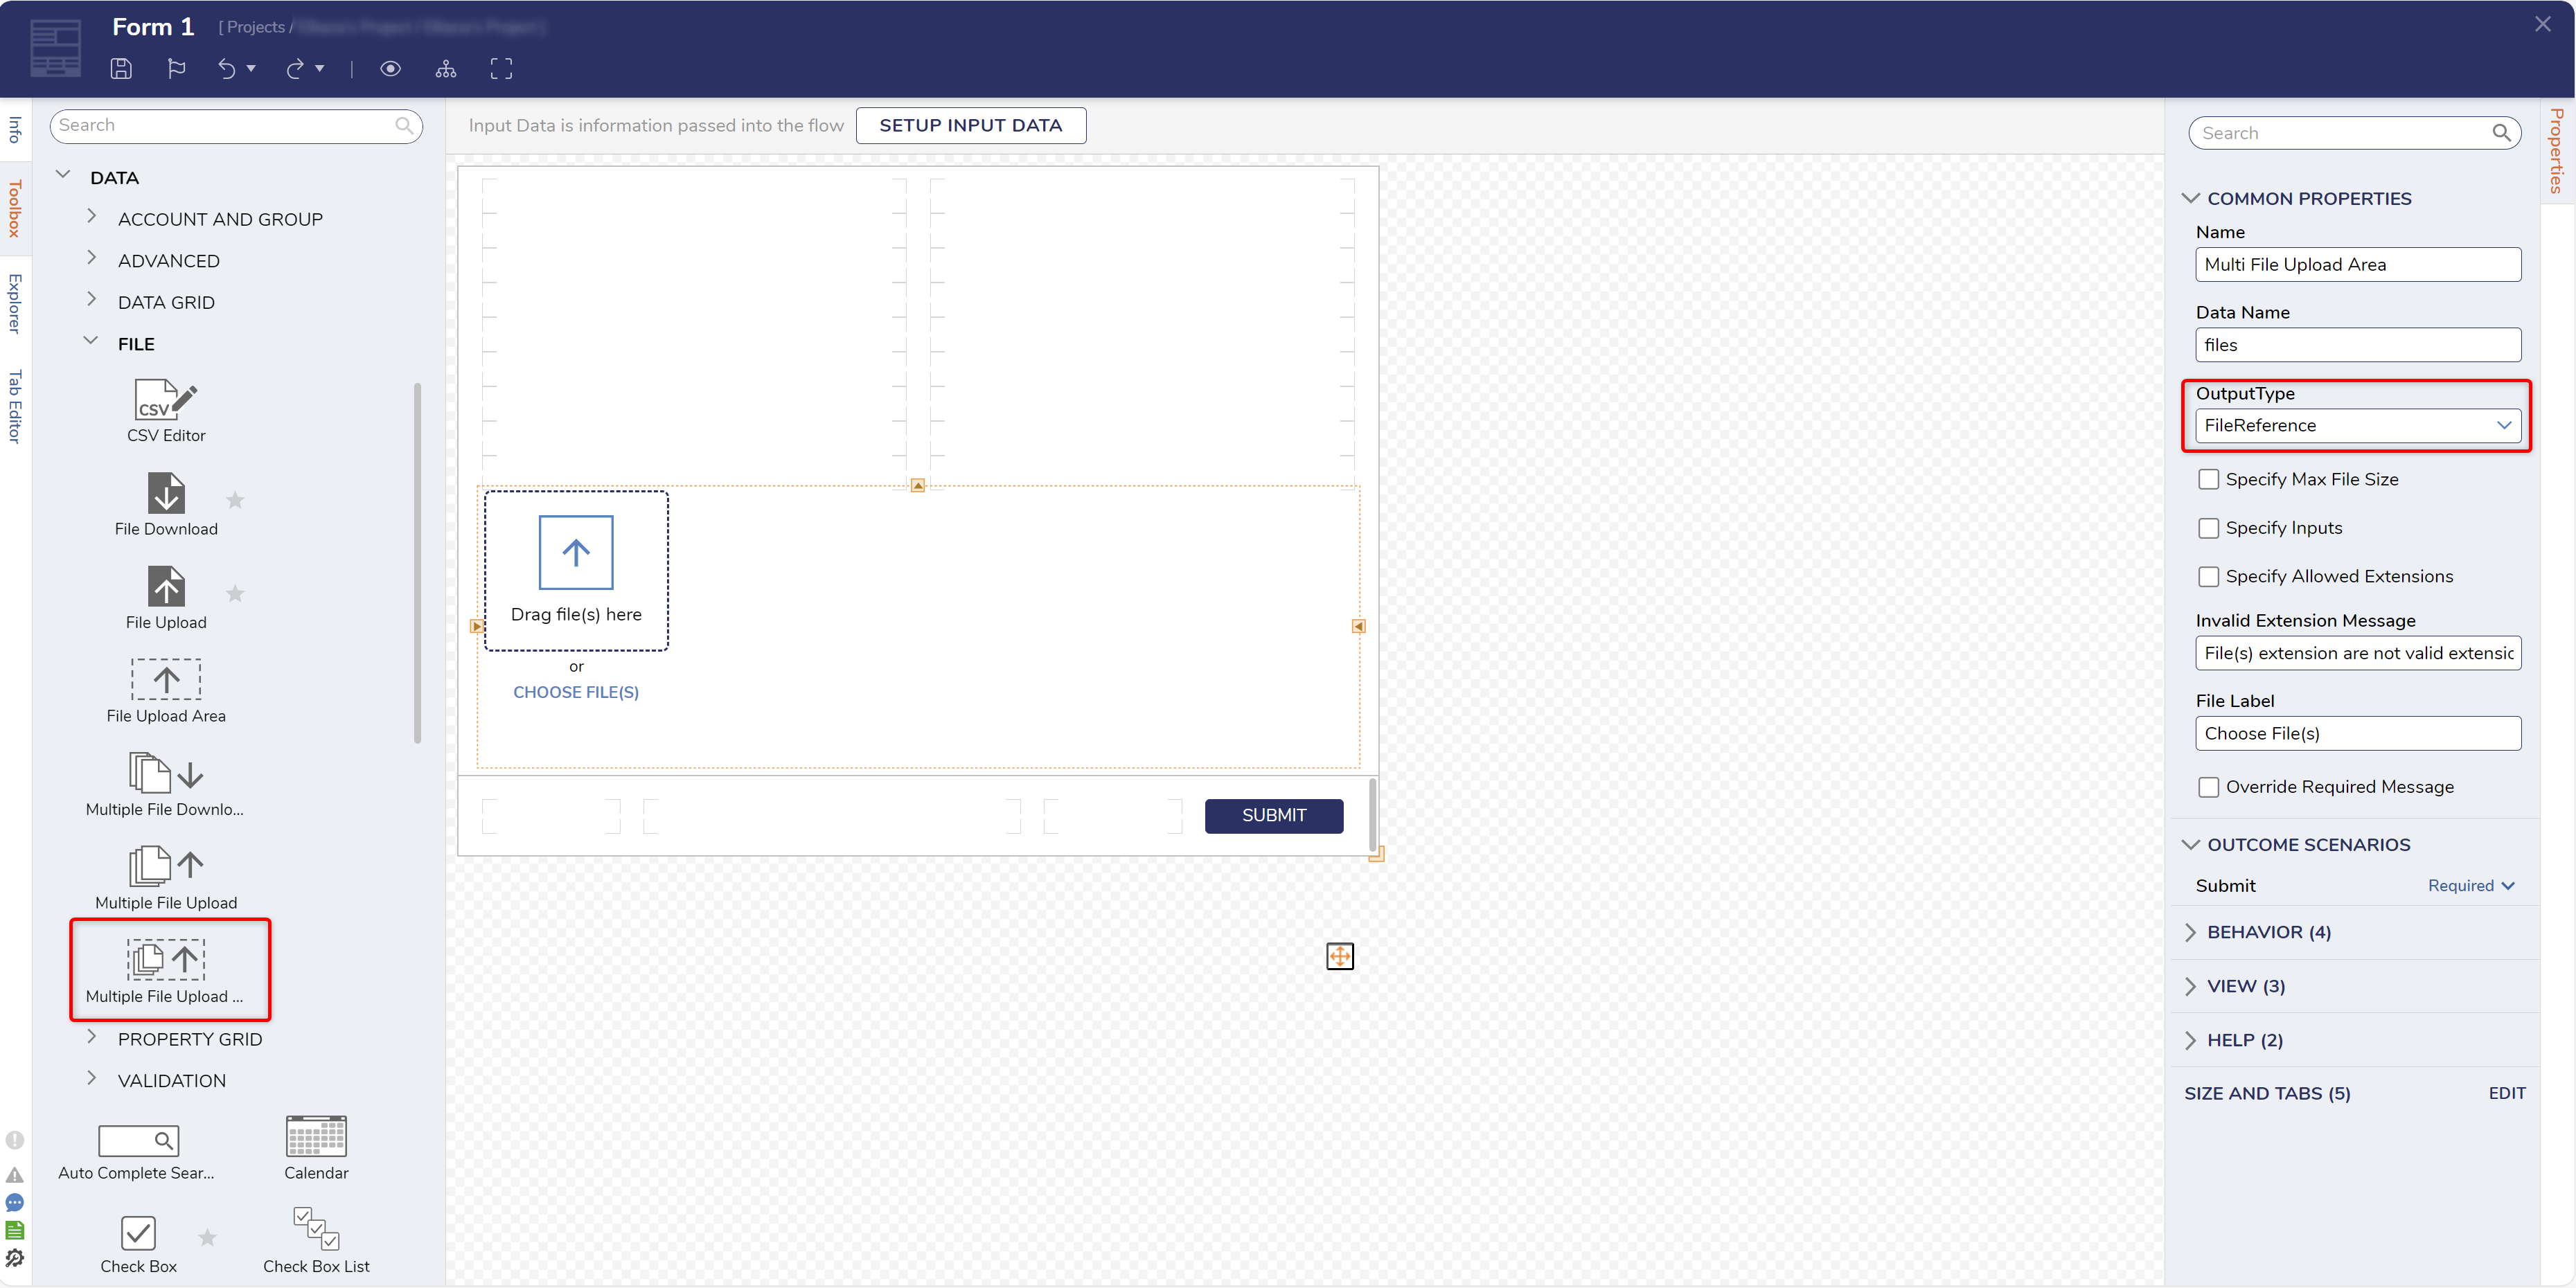
Below is an overview of the Common Properties section for the control. Most of the properties found here are shared between File Upload and File Upload Area controls.
| Settings | Description | |
|---|---|---|
| Name | The name for the control when added to the Form. This is used in the Tab Editor section to locate the control on the Form. | |
| Data Name | The name of the data source used by the control. This will appear as an output to the Form step. | |
| Output Type | The OutputType of the uploaded file. This will determine what items will be passed out of the Form step. The default setting is File Reference. For more information, refer to File Type Overview. | |
| Button Type | Allows to set the UI of the control. The default is set to Button, but users have the option to choose from the Link, Button, and Clip. | |
| Specify Max File Size | If checked, an option to set max file size will be available. | |
| Max FileSize | Sets the max file size for the control. | |
| Specify Inputs | Allows inputs to be specified for the control. This exposes an input property to the Form when used in a Flow designer giving the ability to dynamically pass the File. | |
| Specify Allowed Extensions | If checked, controls what file extensions are allowed to be passed/used by the control. | |
| Specify Extension From Flow | If checked, it provides an option where only certain extensions can be passed to the control. | |
| Allow Extensions Data Name | Specifies the object used to retrieve the data that will be passed to the control. If an object matches the OutputType, it can be selected using Pick From Data. The Pick From Data option will be available for Data Flows if an output matches the OutputType. The name must be manually added to the textbox for Active Form Flows. | |
| Invalid Extension Message | Specifies the text displayed when an invalid extension is passed to the step. | |
| File Label | Defines the label text that appears on the control | |
| Override Required Message | If enabled, allows the required message to be overridden. | |
Configuration
- In a Designer Project, create a Flow.
- Attach a Show Form step to the Start step in the Toolbox panel. Click PICK OR CREATE FORM on the Properties panel and create a Form.
- Configure the Form with a Button (Submit) and a Multiple File Upload control (files). On the Properties panel, change the OutputType field to FileReference.

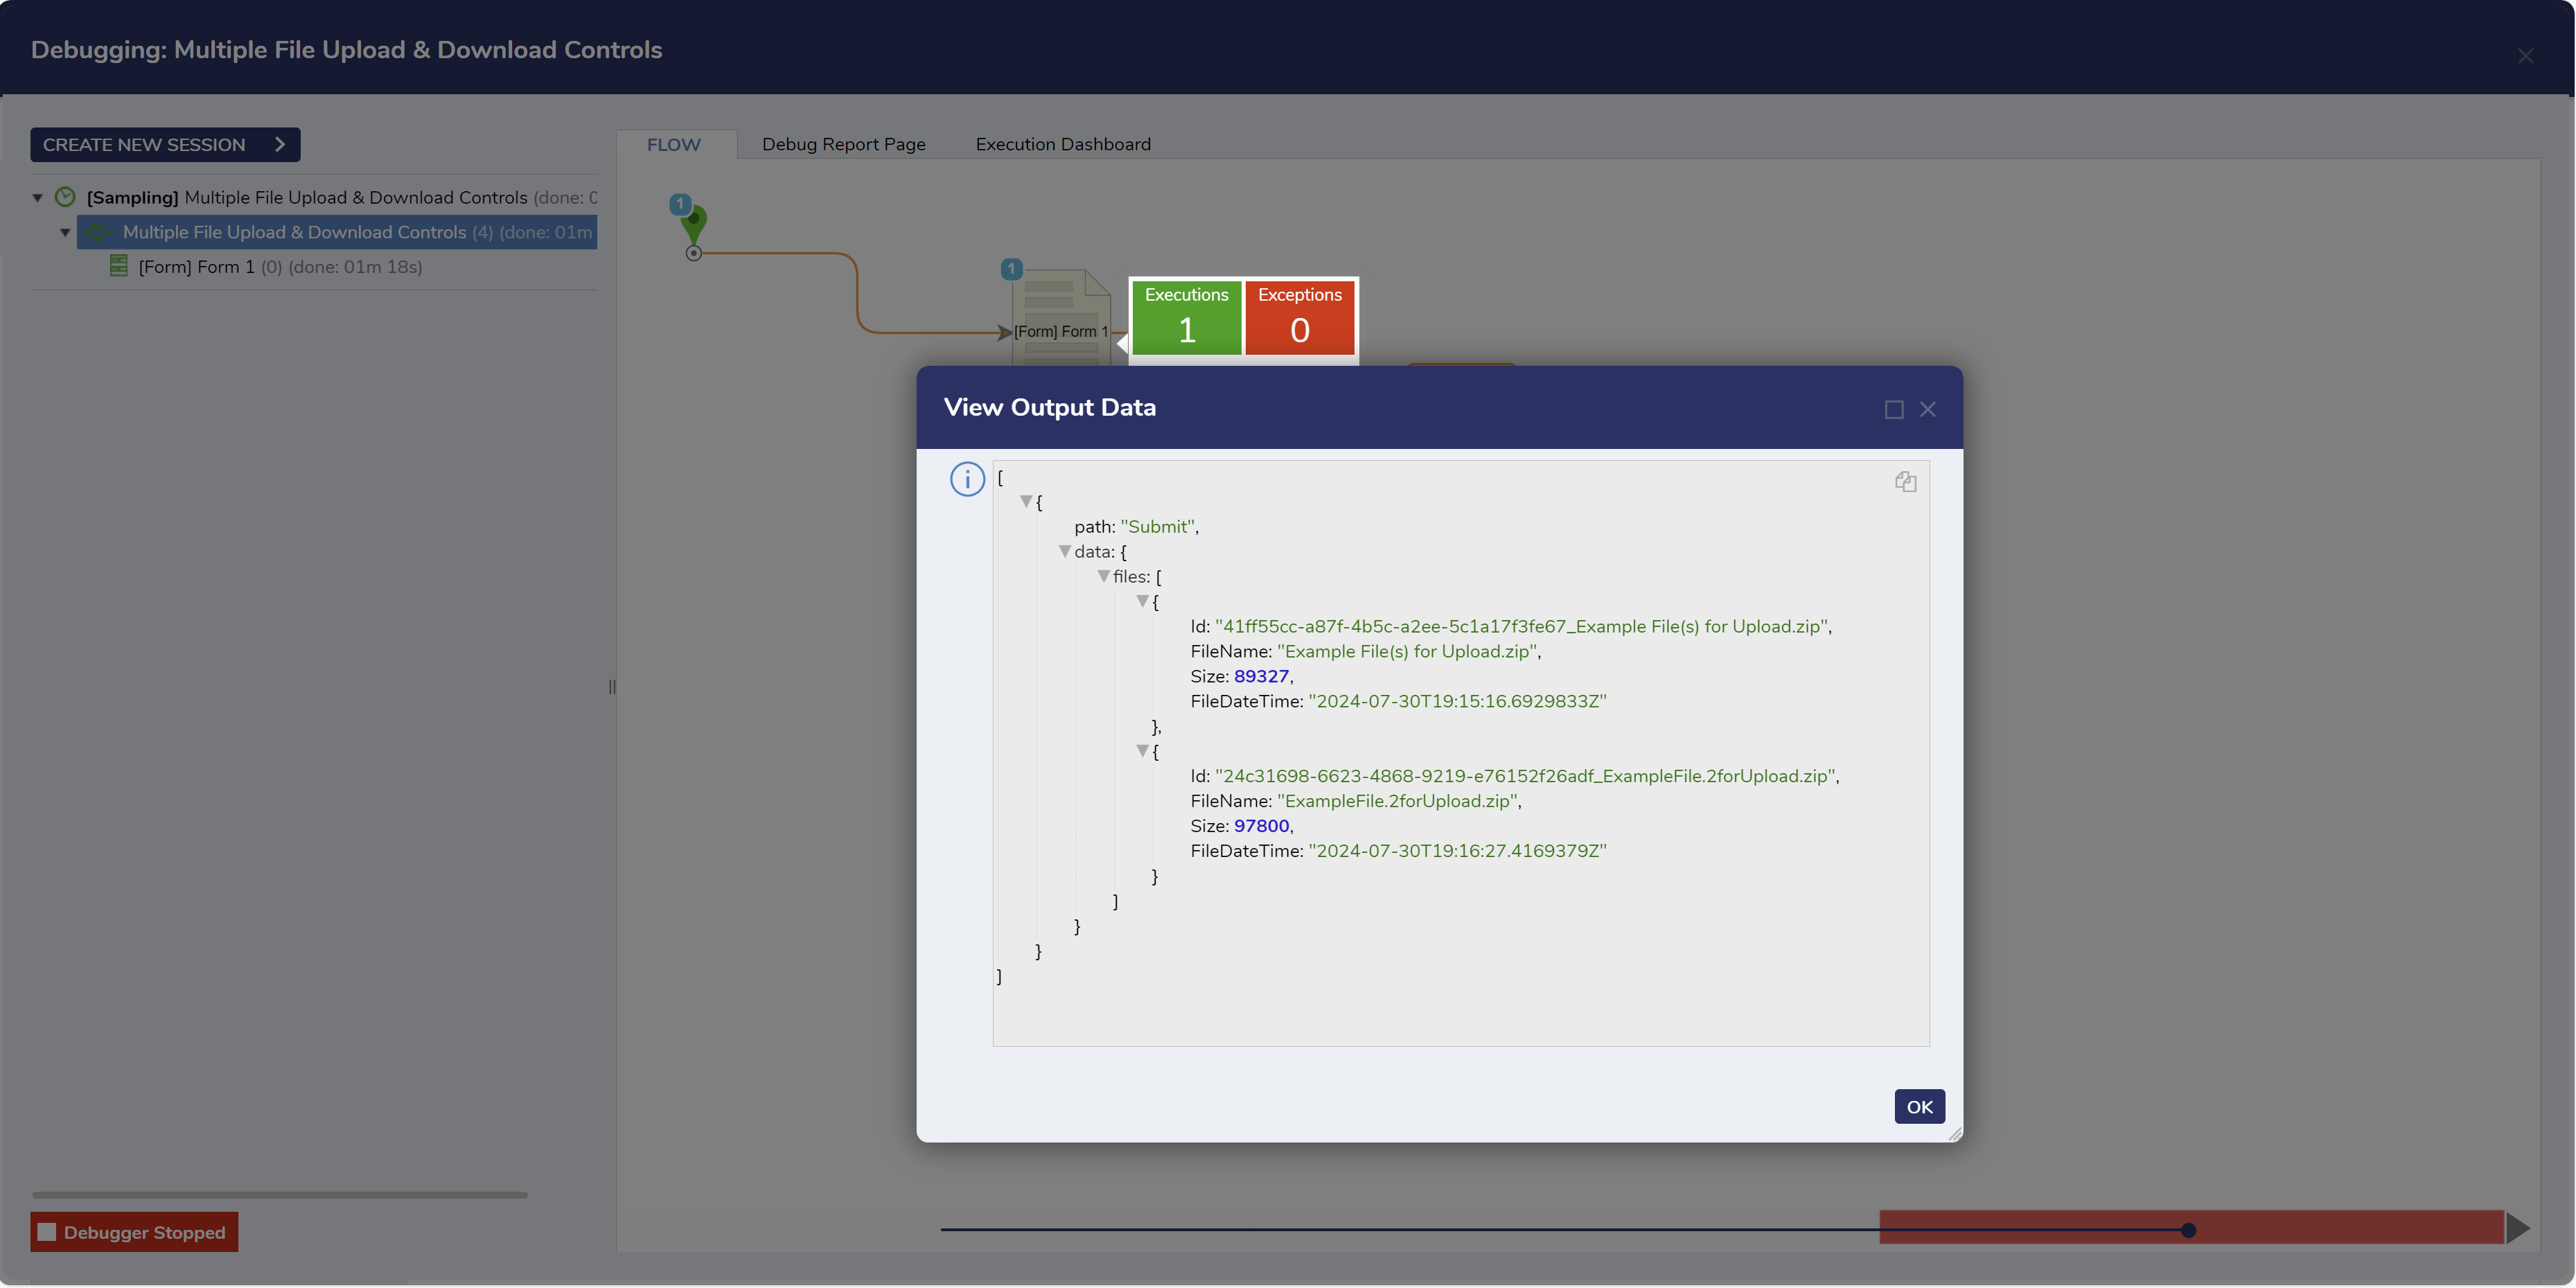
- Click Save and close the Form Designer, then Debug the Flow. Pass in example files; any files passed in will have their name outputted from the step.

Feature Changes
| Description | Version | Release | Developer Task |
|---|---|---|---|
| Users have the ability to specify input for File Upload and Multiply File Upload Controls, enabling the option to upload dynamic files. This feature allows mapping to File Upload Controls in both regular and simple forms. | 8.13 | August 2023 | [DT-038278] |
| File Upload and Download controls default to File Reference rather than File Data. | 9.5 | November 2024 | [DT-042500] |