Editing Settings
Use extra caution when adjusting the Decisions Settings to avoid errors in the Decisions environment.
Make a backup copy of Settings.xml before making any changes, to provide a point of backup in case of error.
Make a backup copy of Settings.xml before making any changes, to provide a point of backup in case of error.
The following article demonstrates how to enable the Multi-Tenancy via the Server Type setting. Enabling MT allows the ability to:
- Register a Customer and their desired Modules; note that designated Modules must be installed to the Decisions Server, before registration.
- Add Database and Hosting definitions
- Add individual Instances, or copies of the Host Server
Change Server Type
The first step in establishing Multi-Tenancy is changing the Server Type from Standard to Hosted. This can be accomplished via either the Settings.xml file, or the DecisionsServerInstaller.
Settings.xml
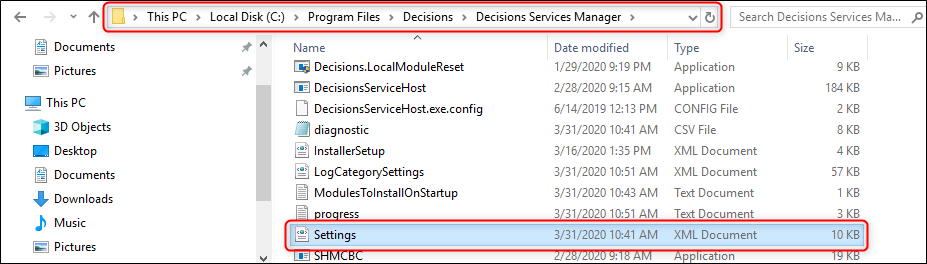
- From the Local File System, navigate to C:\Program Files\Decisions\Decisions Services Manager, then open Settings.xml in a Text Editor.
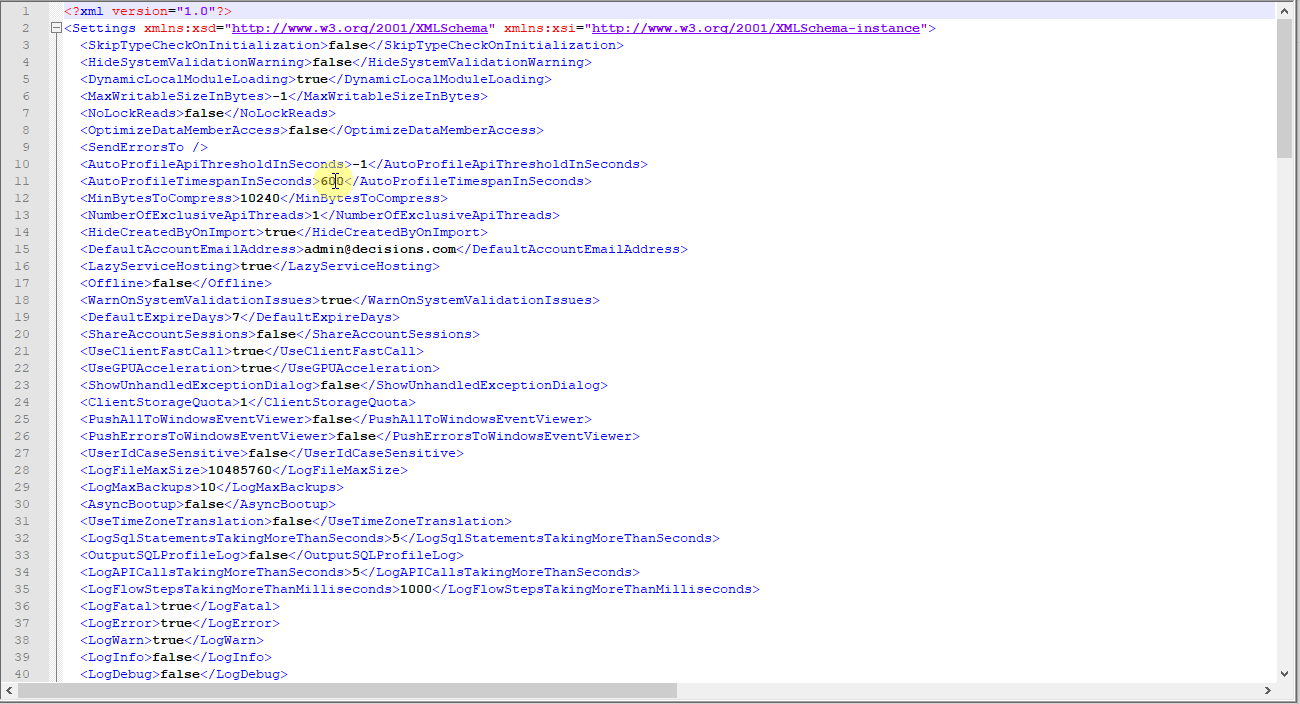
- From the Text Editor, press 'Ctrl + F'. then input "ServerType". Once located, change the value between <ServerType></ServerType> from "Standard" to "Hosted".
- Save changes to the file, then close via X.
- Restart Service Host Manager.
Installer Settings
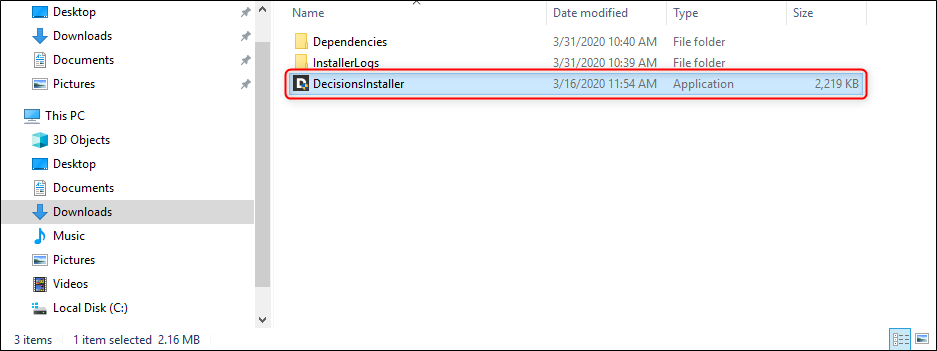
- From the Local File System, Run DecisionsServerInstaller.exe, as administrator.
- From the Installer, click EDIT SETTINGS.
- In the resulting window, locate ServerType, and change Standard to Hosted.
Then click Save.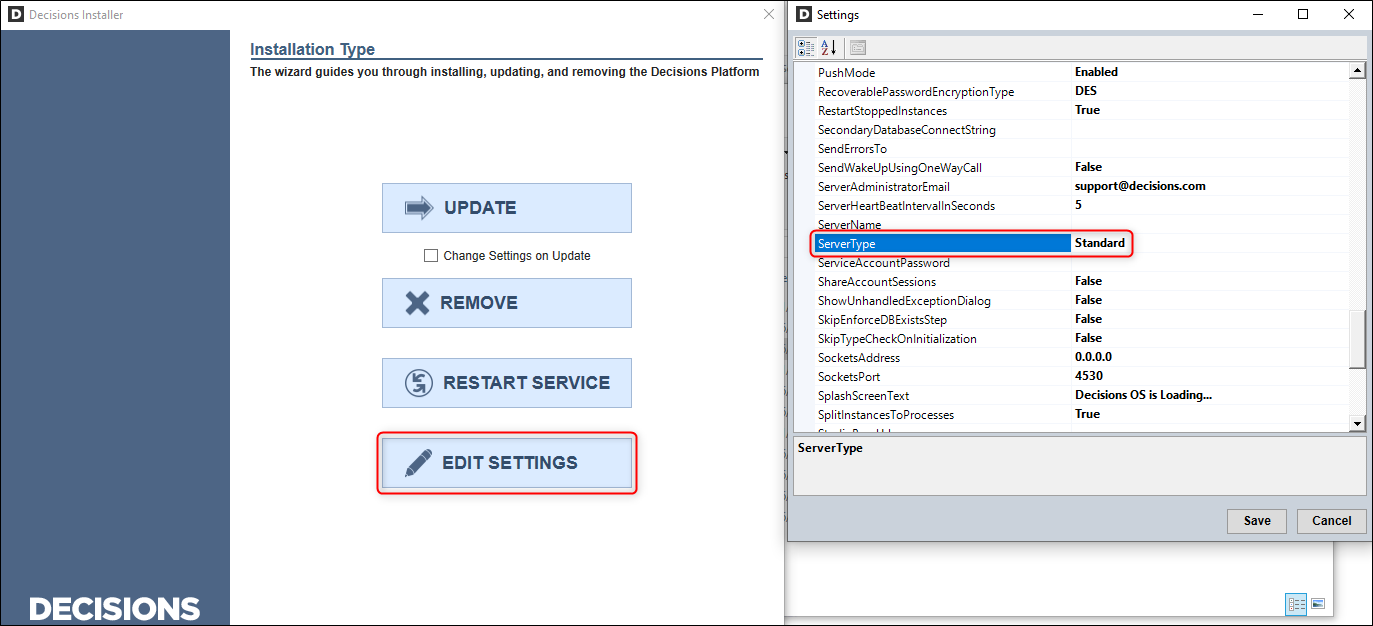
- Restart Service Host Manager.
Verify Server Type
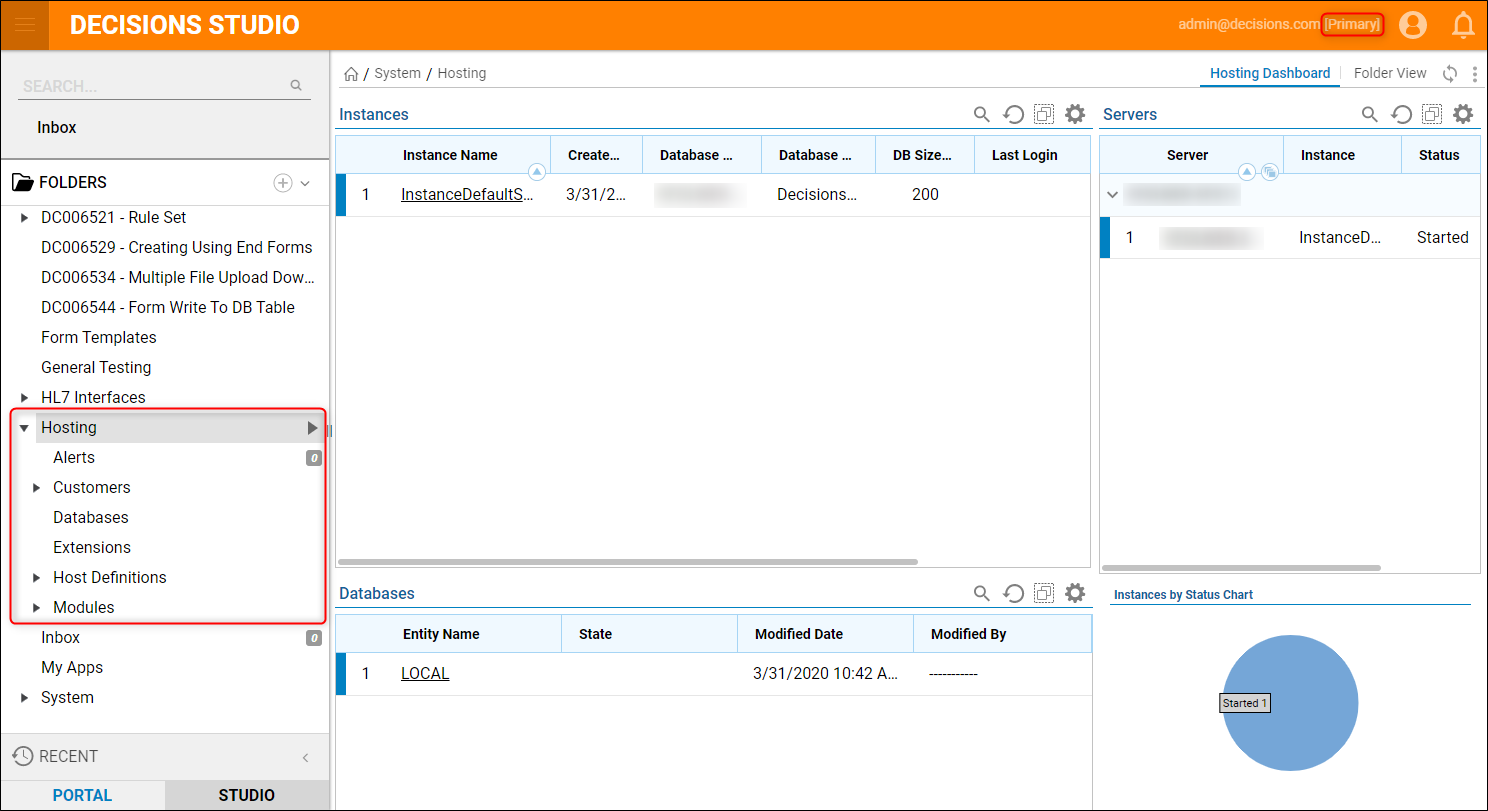
Log back into the Decisions Studio and confirm that the Hosting Folder now appears and that "[Primary]" appears next to the logged in Account in the top right.
If these changes have taken place, the Decisions environment is now enabled for Multi-Tenancy.
For further information on Multi-Tenancy, visit the Decisions Forum.