Overview
At this point in the Multi-Tenant environment configuration, the Server Type should be set to Hosted to enable Multi-Tenancy, a customer should be registered, a Database should be connected, and a Hosting Definition must be added.
This overview will cover the next step in the setup, adding an Instance to a Hosting Configuration so that the registered customer can access the environment.
To configure a Multi-Tenant environment, please start from About Multi-Tenancy article and proceed with the rest of the series, starting at Multi-Tenancy: Setup.
Example
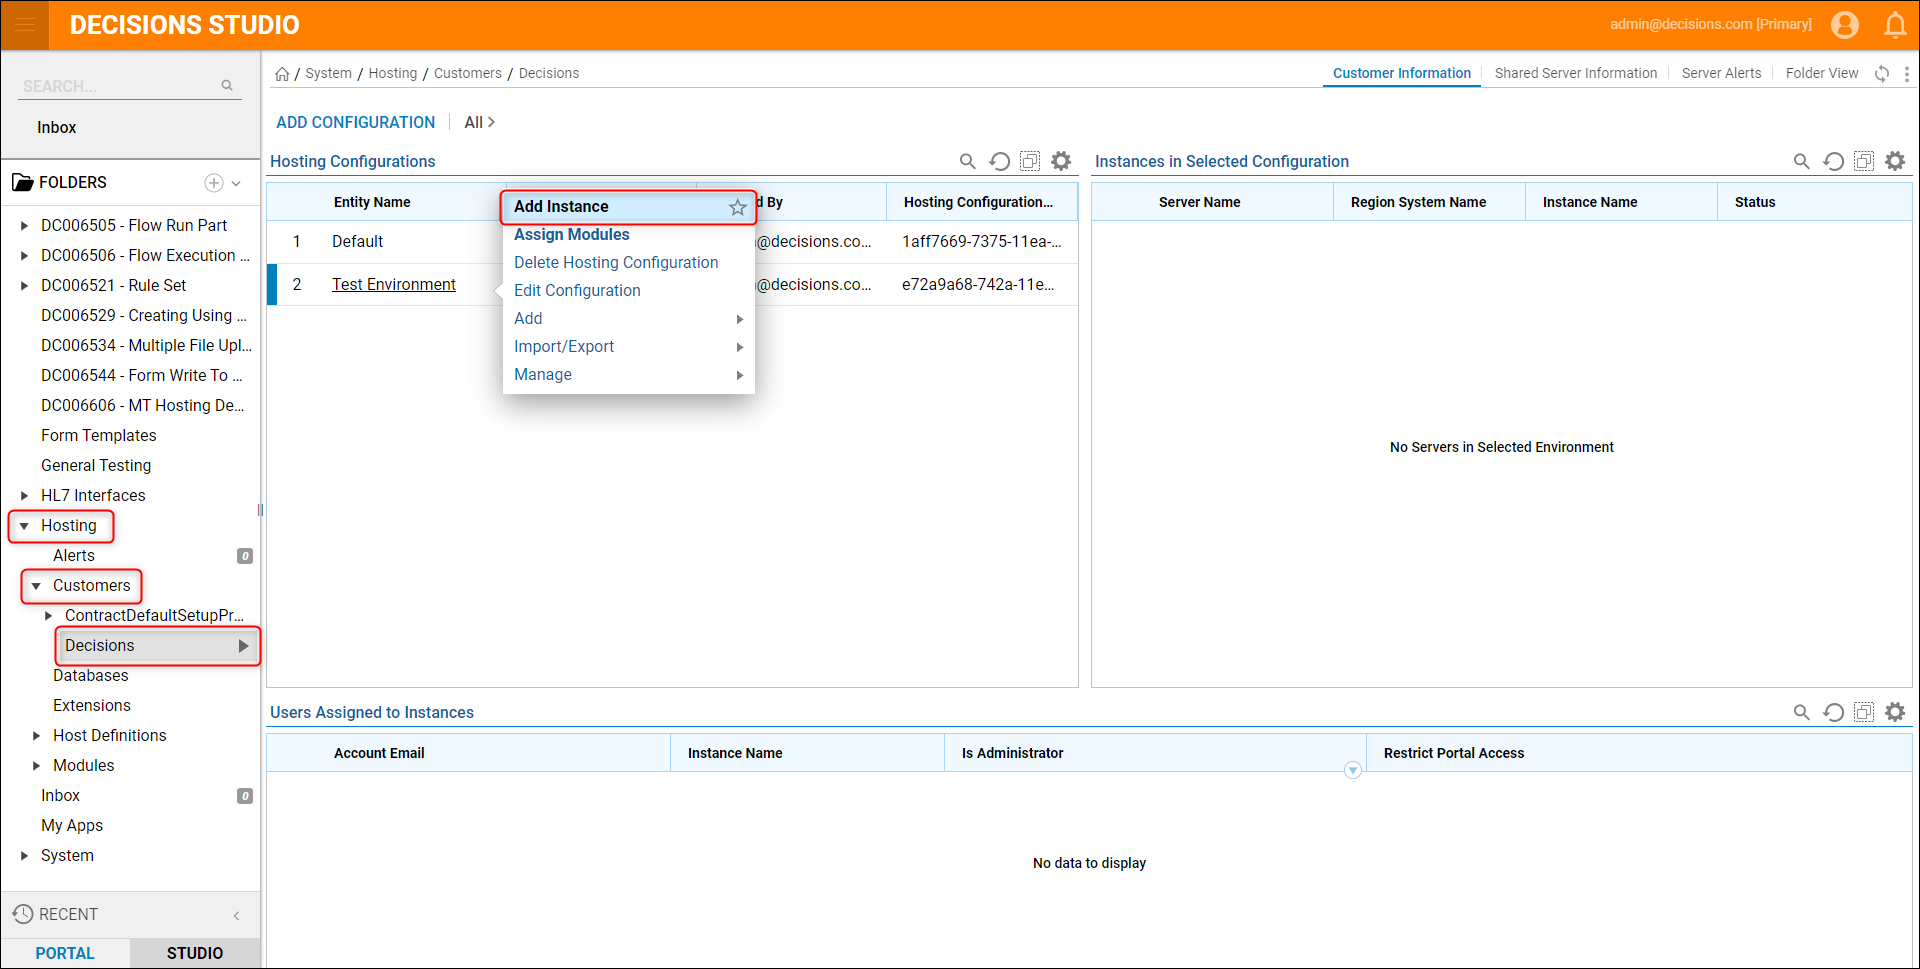
In the Designer Studio, navigate to Hosting > Customers > [Customer Name] and right-click the designated Hosting Configuration, then select Add Instance from the Action Menu.

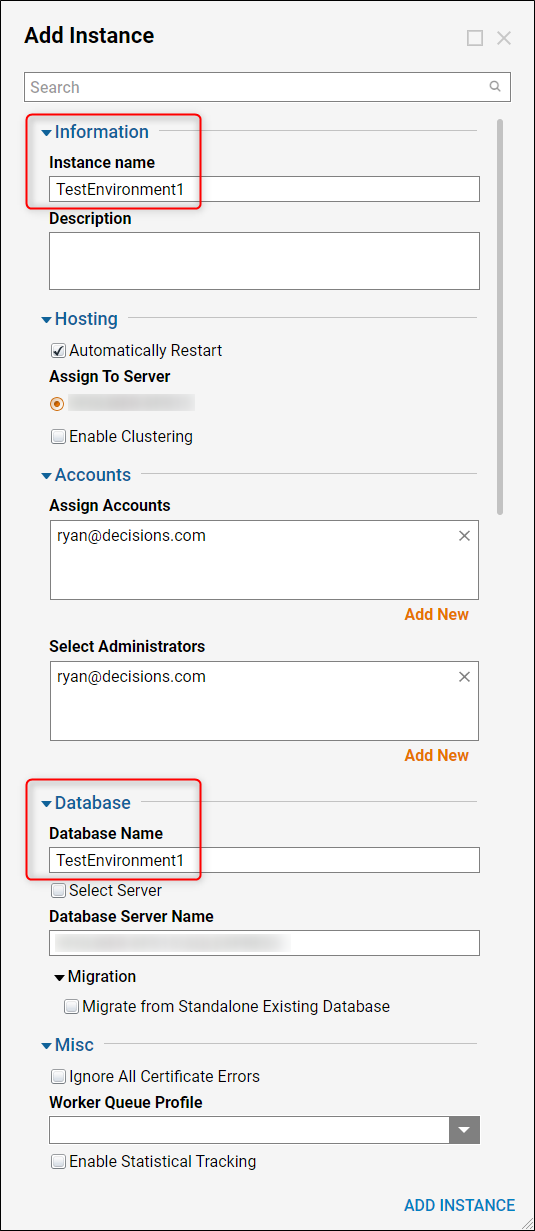
When the Add Instance window appears, locate the Information section and enter an Instance Name in the text box provided. A description of this Instance can be added in the designated text box.
The Hosting options are left at their default configuration for this example, although in an alternate use case, clustering can be enabled for this Instance using the corresponding checkbox. Optionally, other email accounts that need access to this Instance can be configured here, using the corresponding Add New buttons.
Provide a name for the database that will be created for this Instance. This name will reflect in the database maintenance software as well. Select the Add Instance button when the configurations are complete.

In a use case like converting a standalone database into a Multi-Tenant database, check the box labeled Migrate from Standalone Existing Database. A Migrate Accounts and Migrate Modules option will appear, these should remain checked by default. The Database Name field will need to be an exact name match of the existing database that is being converted.
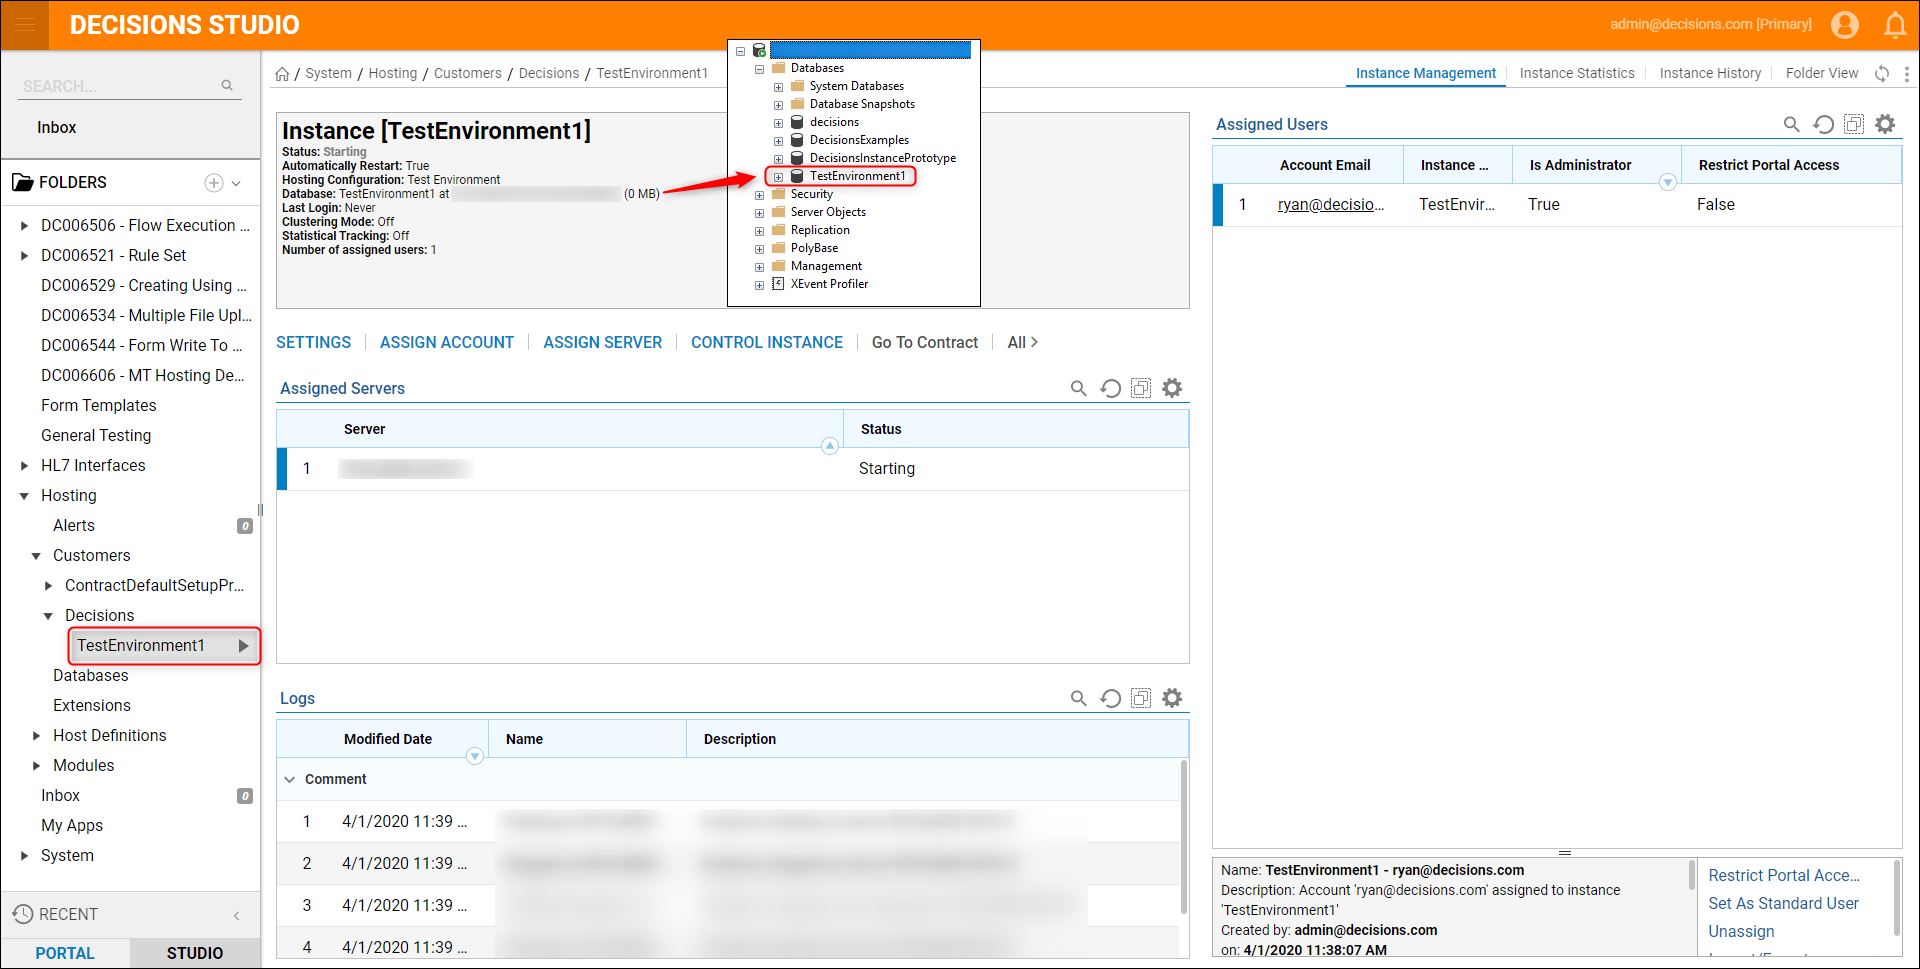
Now that the Instance has been added, select the TestEnvironment1 (Instance Name) folder that has appeared under the Decisions (Customer Name) folder. The Instance folder provides Pages for Instance Management, Instance Statistics, and Instance History. Elaborate details about the Instance are shown on the default Instance Management Page, where configured parameters, database details, assigned users, assigned servers, logs, and more can be managed.

On the System Administrator side, once the Logs have indicated that the Instance is up and running, the assigned users of this customer can login to the environment created for this Instance. The Instance Name will be in brackets in the top-right corner, next to the current user of the environment.
This is now an operational Hosted Decisions environment with a registered customer and an assigned Instance.
