Overview
Enabling multi-tenancy automatically creates a database connection and a Default Hosting Definition, this document will cover how to add both of these in the Decisions environment. Hosting Configurations are where modules and instances are added for the customer (tenant). After the Hosting Configuration is added, the instance will be added so that the tenant can login to their environment.
To configure a Multi-Tenant environment, please start from About Multi-Tenancy article and proceed with the rest of the series, starting at Multi-Tenancy: Setup.
Example
Adding a Database
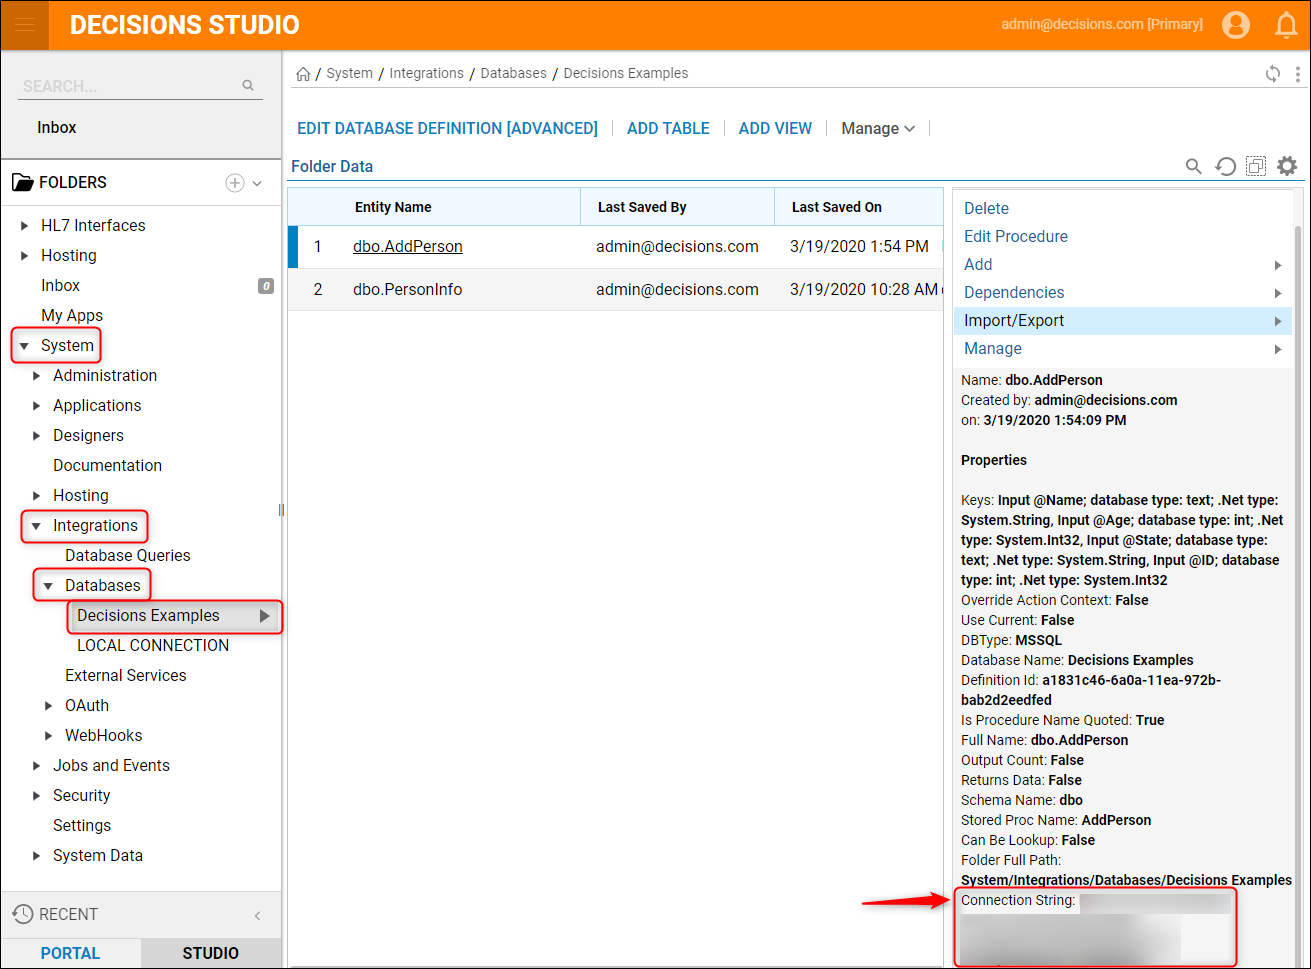
To add a different database to the Hosted environment than the one that it automatically connects to (DefaultConnectionString in Decisions Settings), navigate to System > Integrations > Databases and select the folder for the desired database to be added. Select a line item in the database folder and copy the Connection String from the Properties panel of the line item on the right.
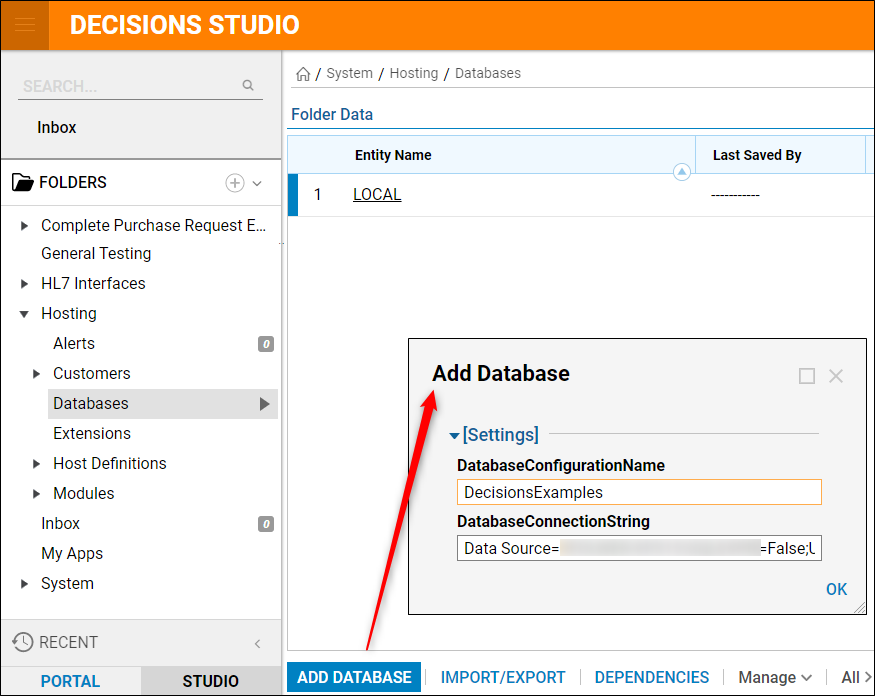
Now navigate to Hosting > Databases, and select the Add Database button from the bottom Action Bar. When the Add Database window appears, provide a corresponding Database Configuration Name and paste the Connection String in the DatabaseConnectionString box, then select OK. The database will now be added to the Hosted environment Databases folder.
Adding a Hosting Configuration
Since the database connection is made automatically when multi-tenancy is enabled, the connection string does not need to be configured when creating a Hosting Definition.
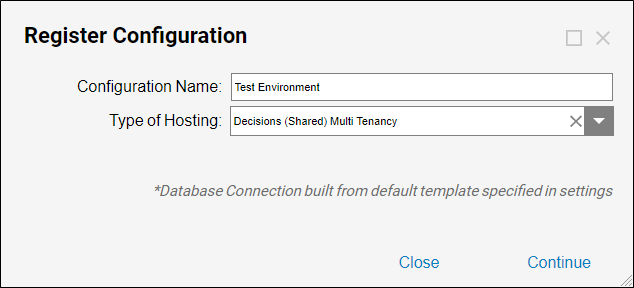
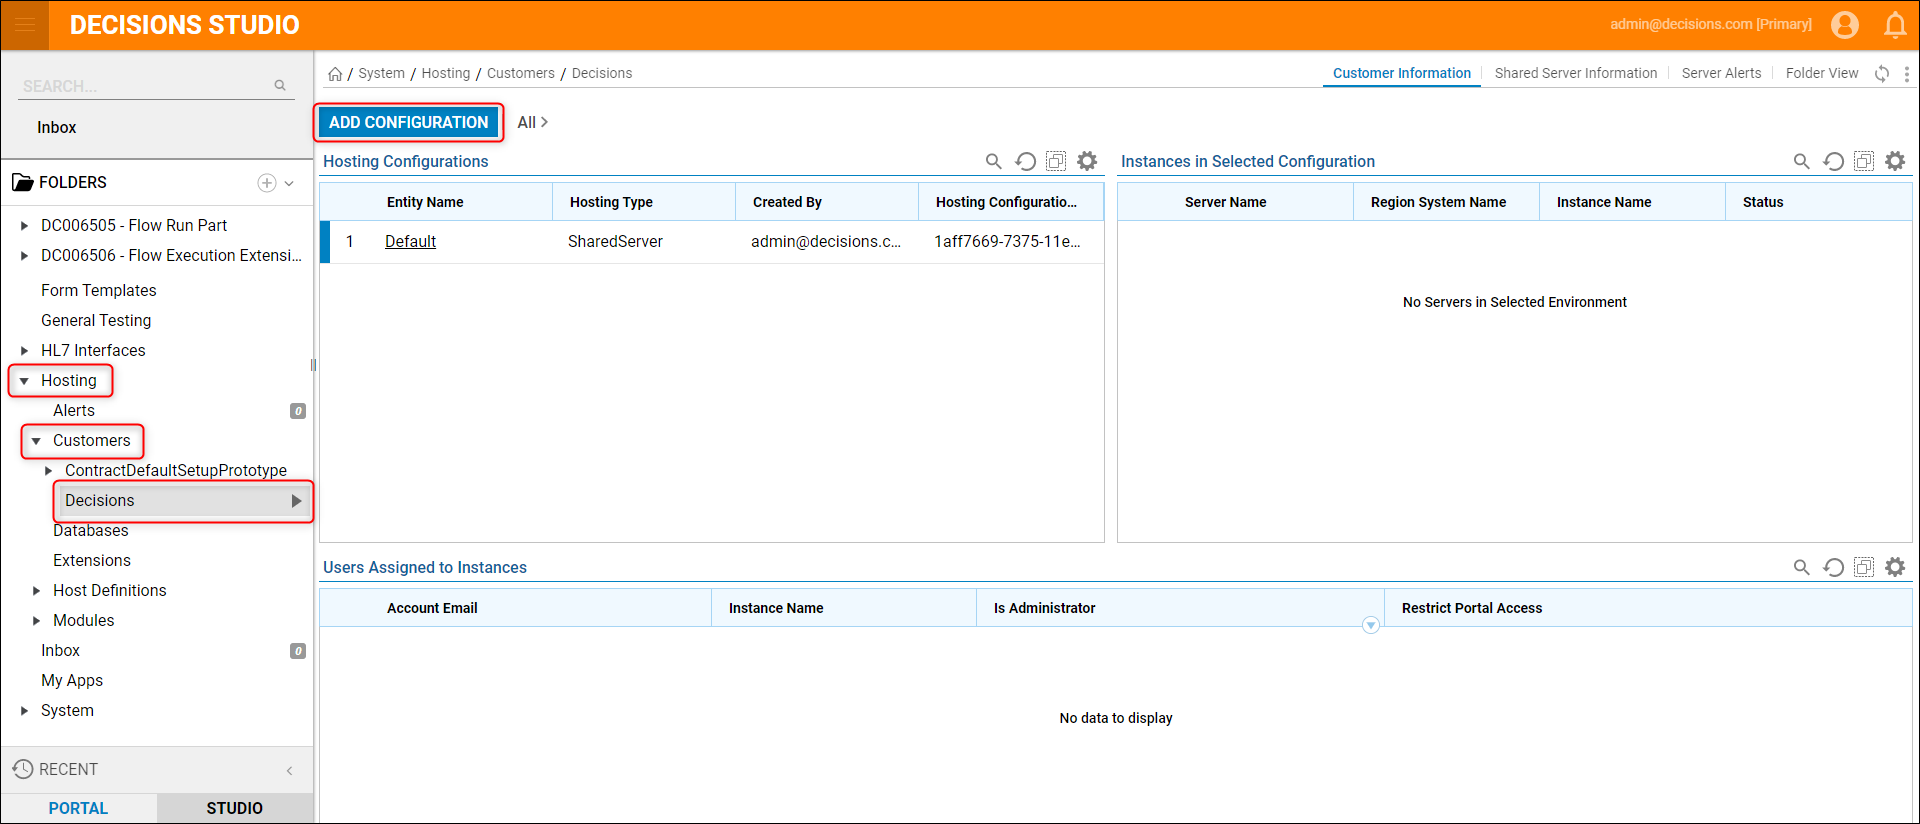
In the Designer Studio, navigate to Hosting > Customers > [Customer Name] and select the Add Configuration button at the top of the page.
Add a Configuration Name for this Hosting Definition, then choose the appropriate type of hosting. Click Continue once the configuration is complete and this definition will now be added to the Hosting Configurations list.