Overview
A project or application comprised of Designer elements (Flows, Reports, Folders, etc.) can be exported from a Decisions environment as Decisions object (.decObj) files and compressed within a .zip file. The .zip file can be imported to another Decisions environment (typically one for development) or checked into a Repository server. For more information on the Decisions Repository server, please visit the Repository Overview article.
When a project or application moves from one environment to another, that would be a change of management from one administrator to the other. Account privileges should be monitored so that the appropriate accounts are given administrator access.
Please note that large project size, various entity locations, complex data structures, or other various configurations can cause errors or affect the entire import/export process as a whole.
Import/Export Settings
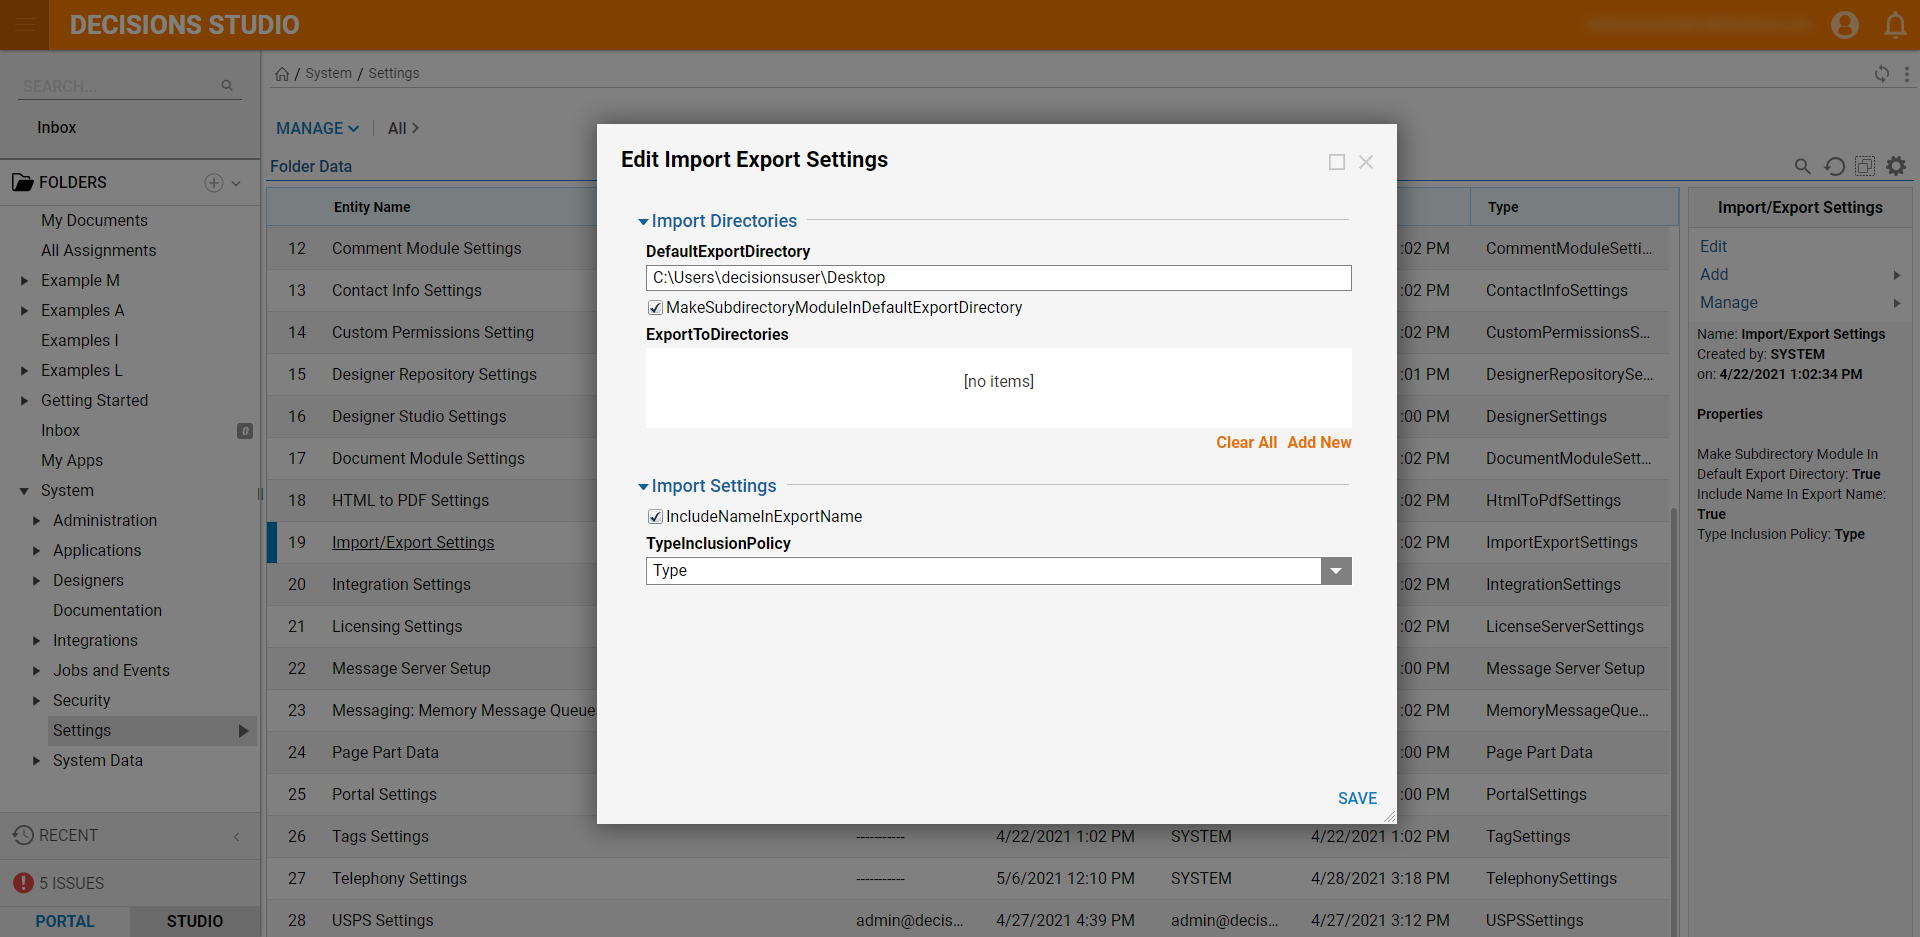
To adjust the location for where exported files are stored or the Type of information stored for Import/Export, users may utilize the Import/Export Settings.
Example
Select the .zip file below, which contains an exported Designer Folder with several .decObj that includes a Flow, Form, Report, and Rule. This .zip file will be downloaded to the designated Windows File Explorer location (Windows 'Downloads' by default) and used later in the example.
Sample Import Export Entities.zip
Import
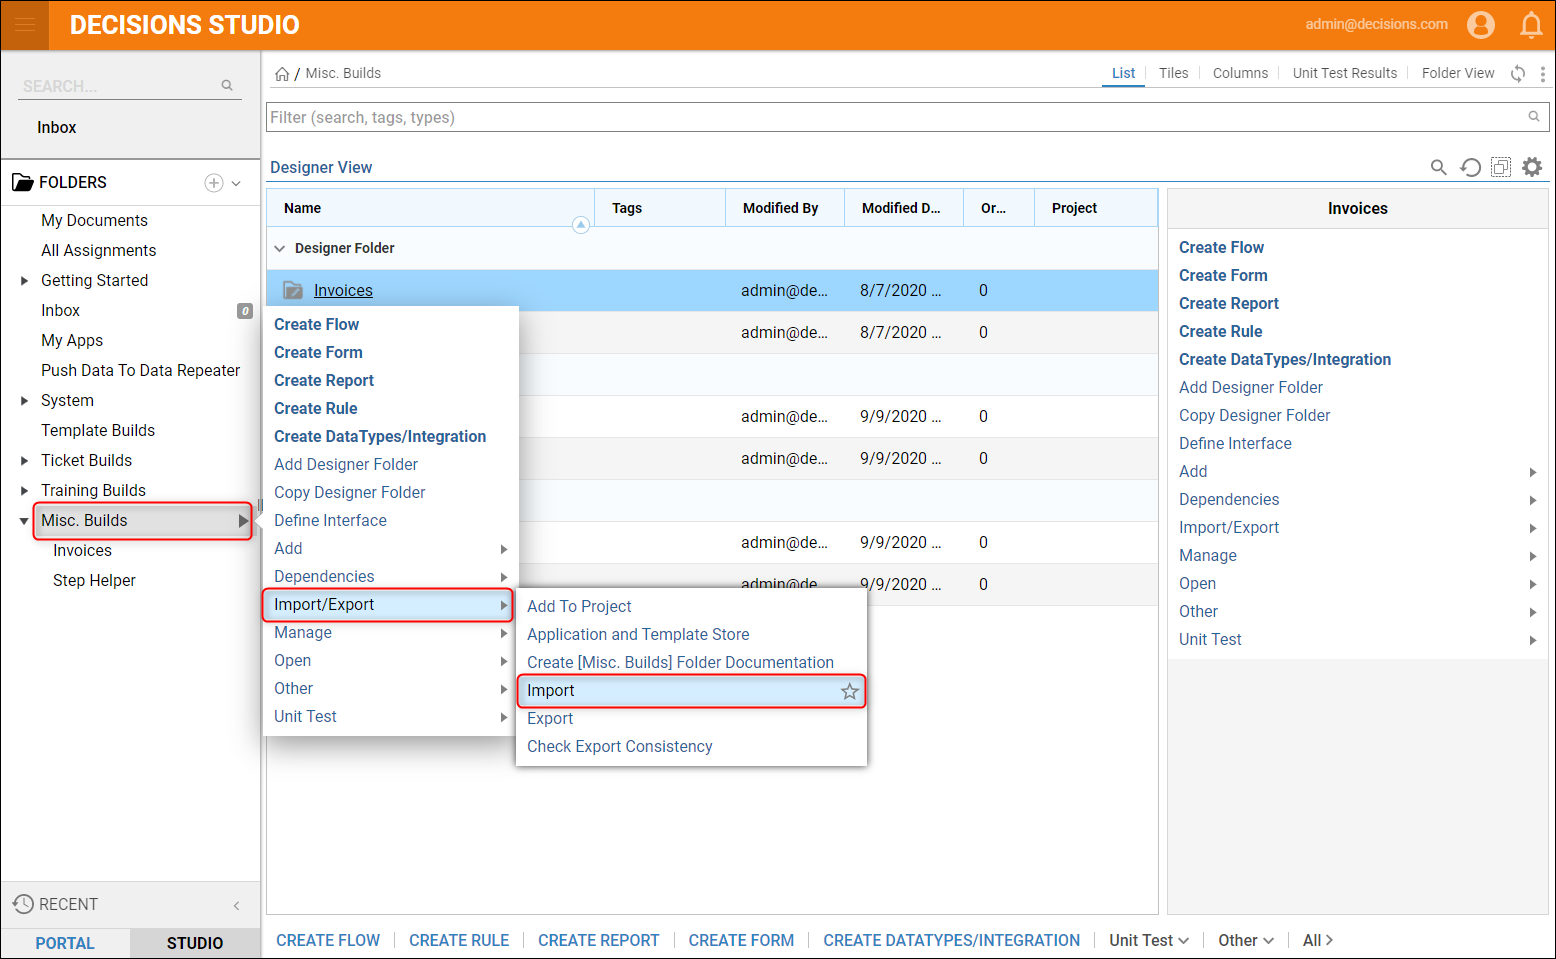
- In the Designer Studio, click the arrow to the right of any Designer Folder name or right-click the name to show the Action Menu for that particular folder. Select Import/Export, then select the Importaction.
The Action Menu does not need to be specific to a folder for the import; on completion of the import, the project will have its own folder.
- In the Import Entities window, the Upload File To Import asks for the desired file for import. Use the CHOOSE FILE button to bring up the local file explorer. Select the entire .zip file containing the previously exported project or select a single .decObj file from the unzipped project. Alternatively, click and drag the .zip file from the file explorer into the Decisions environment.
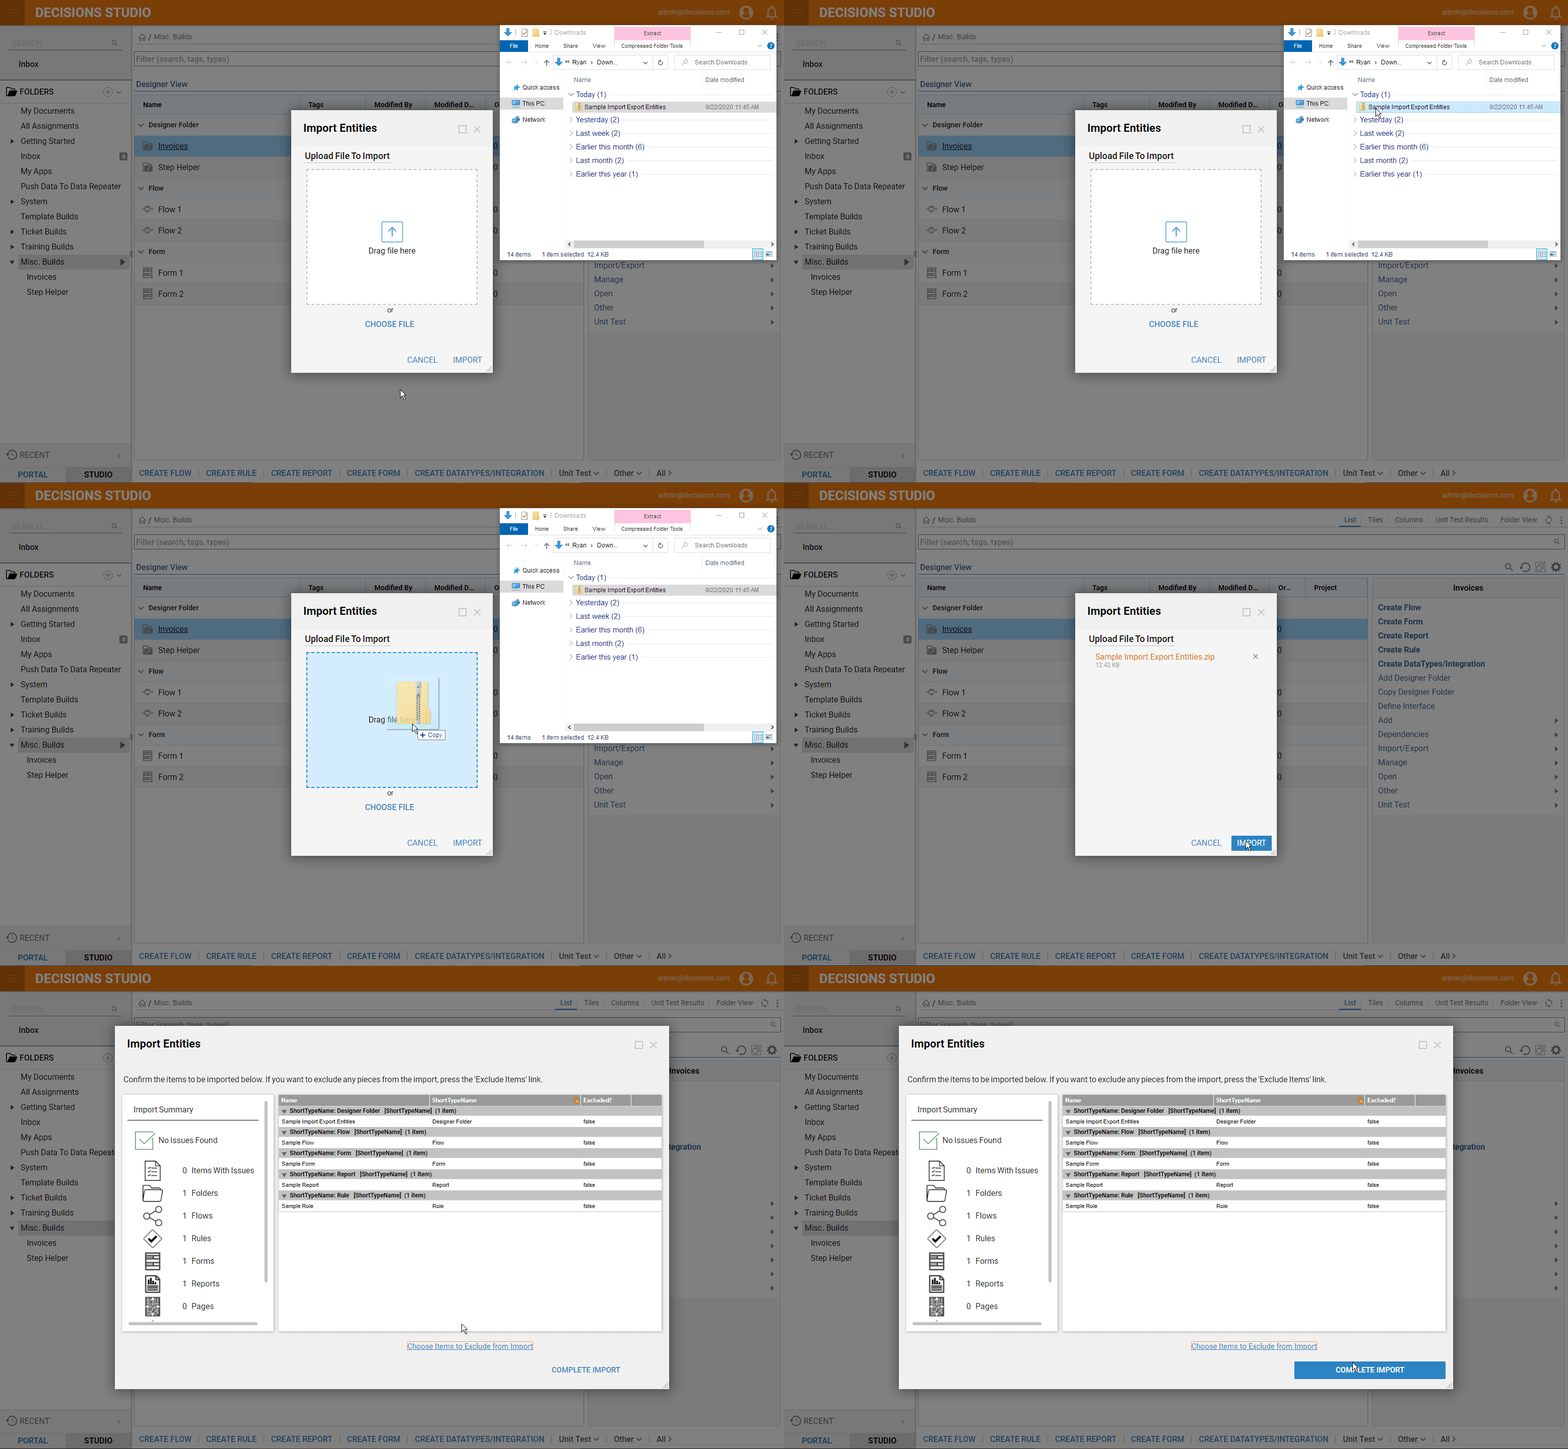
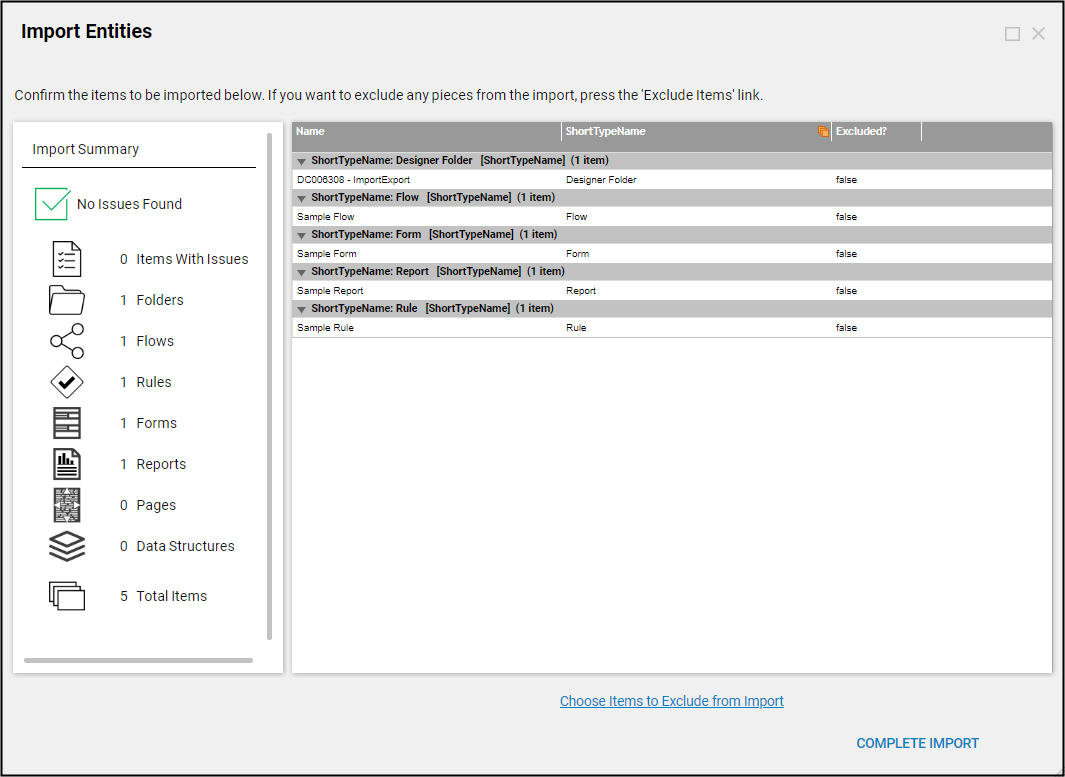
- The last screen of the 'Import Entities' window contains a report that shows the count of each categorized entity. The report also shows the name and what kind of Designer element the entity is. There is an option to Choose Items to Exclude from Import, similar to the project export; click this link to check which entities will not be imported. If there is an issue with one of the entities during import, this report will help the Designer to resolve these issues before importing. Once all is in order, select the COMPLETE IMPORT action to finalize the import.
Export
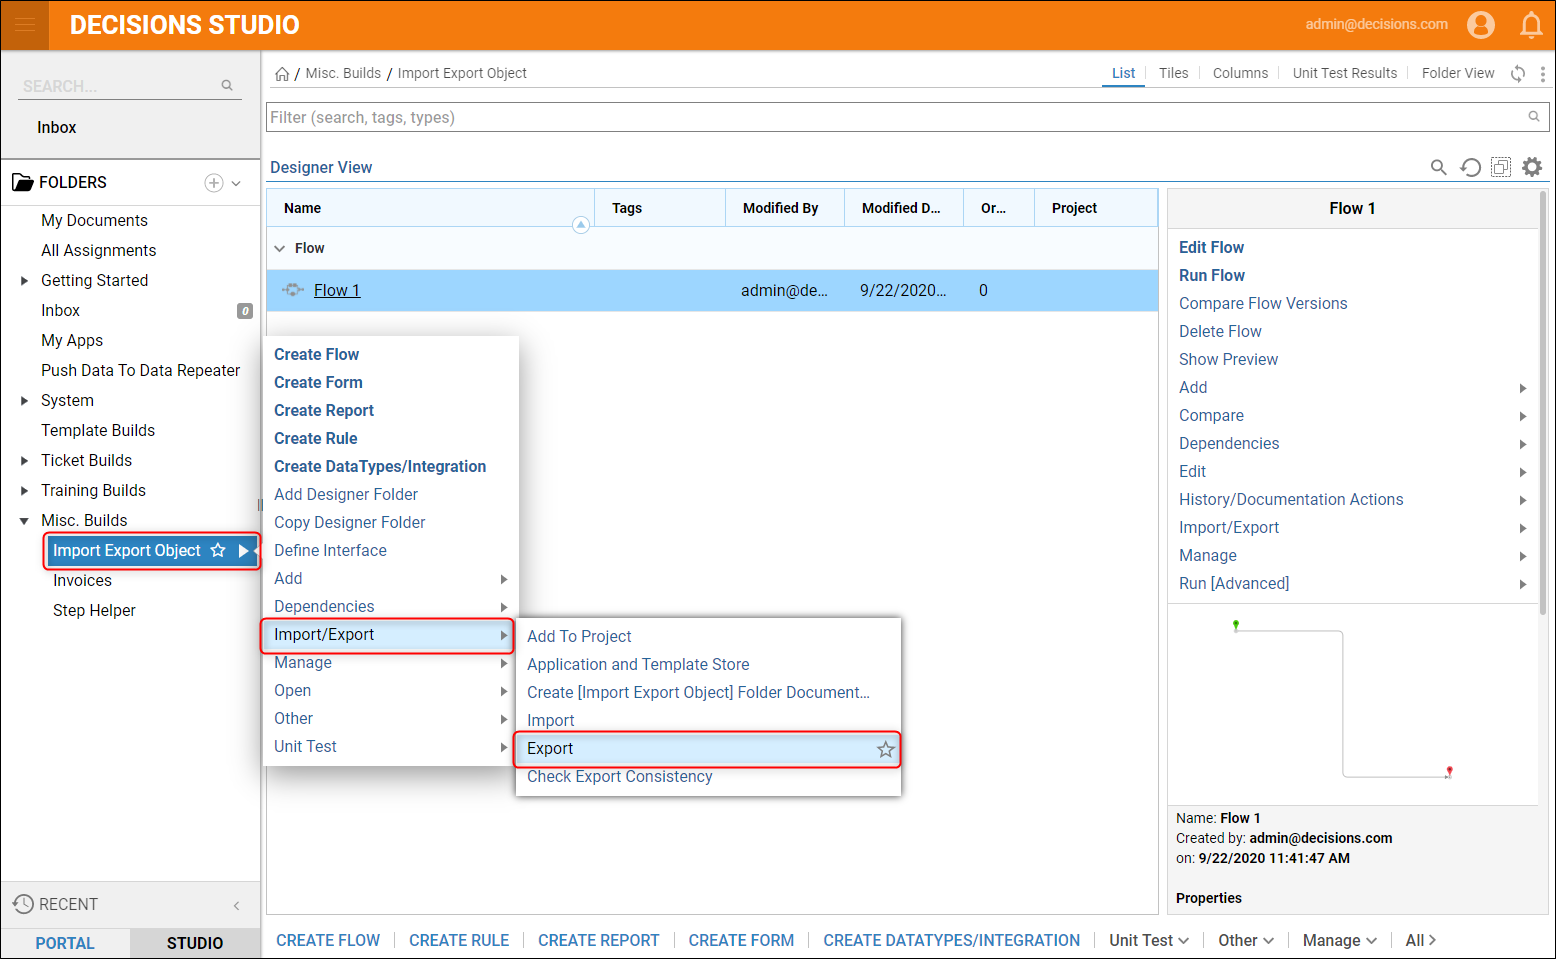
- In the Designer Studio, find the folder to be exported from the FOLDERS list on the left side. Click the arrow to the right of the folder name or right-click to show the Action Menu for that particular folder. Select Import/Export, then select the Export action.
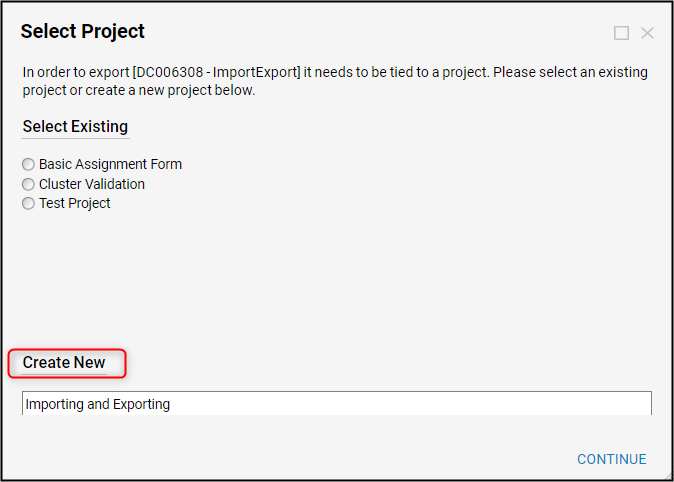
- The Select Project window will appear, stating that the folder must be tied to a project before it can be exported. The option is available to select an existing project or create a new one. For this example, enter a name in the text box under Create New, then click CONTINUE.
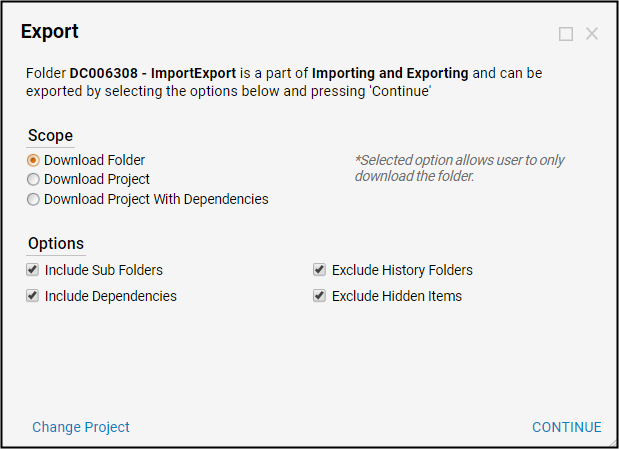
- The Export window will show Scope options, which defines whether the Designer wants to export the folder, the project, or the project with all of the dependencies (even if those dependencies are in other locations). The Options section offers the ability to include Sub Folders and/or Dependencies or to exclude History Folders and/or Hidden Items. For this example, keep the default configuration, then click CONTINUE.
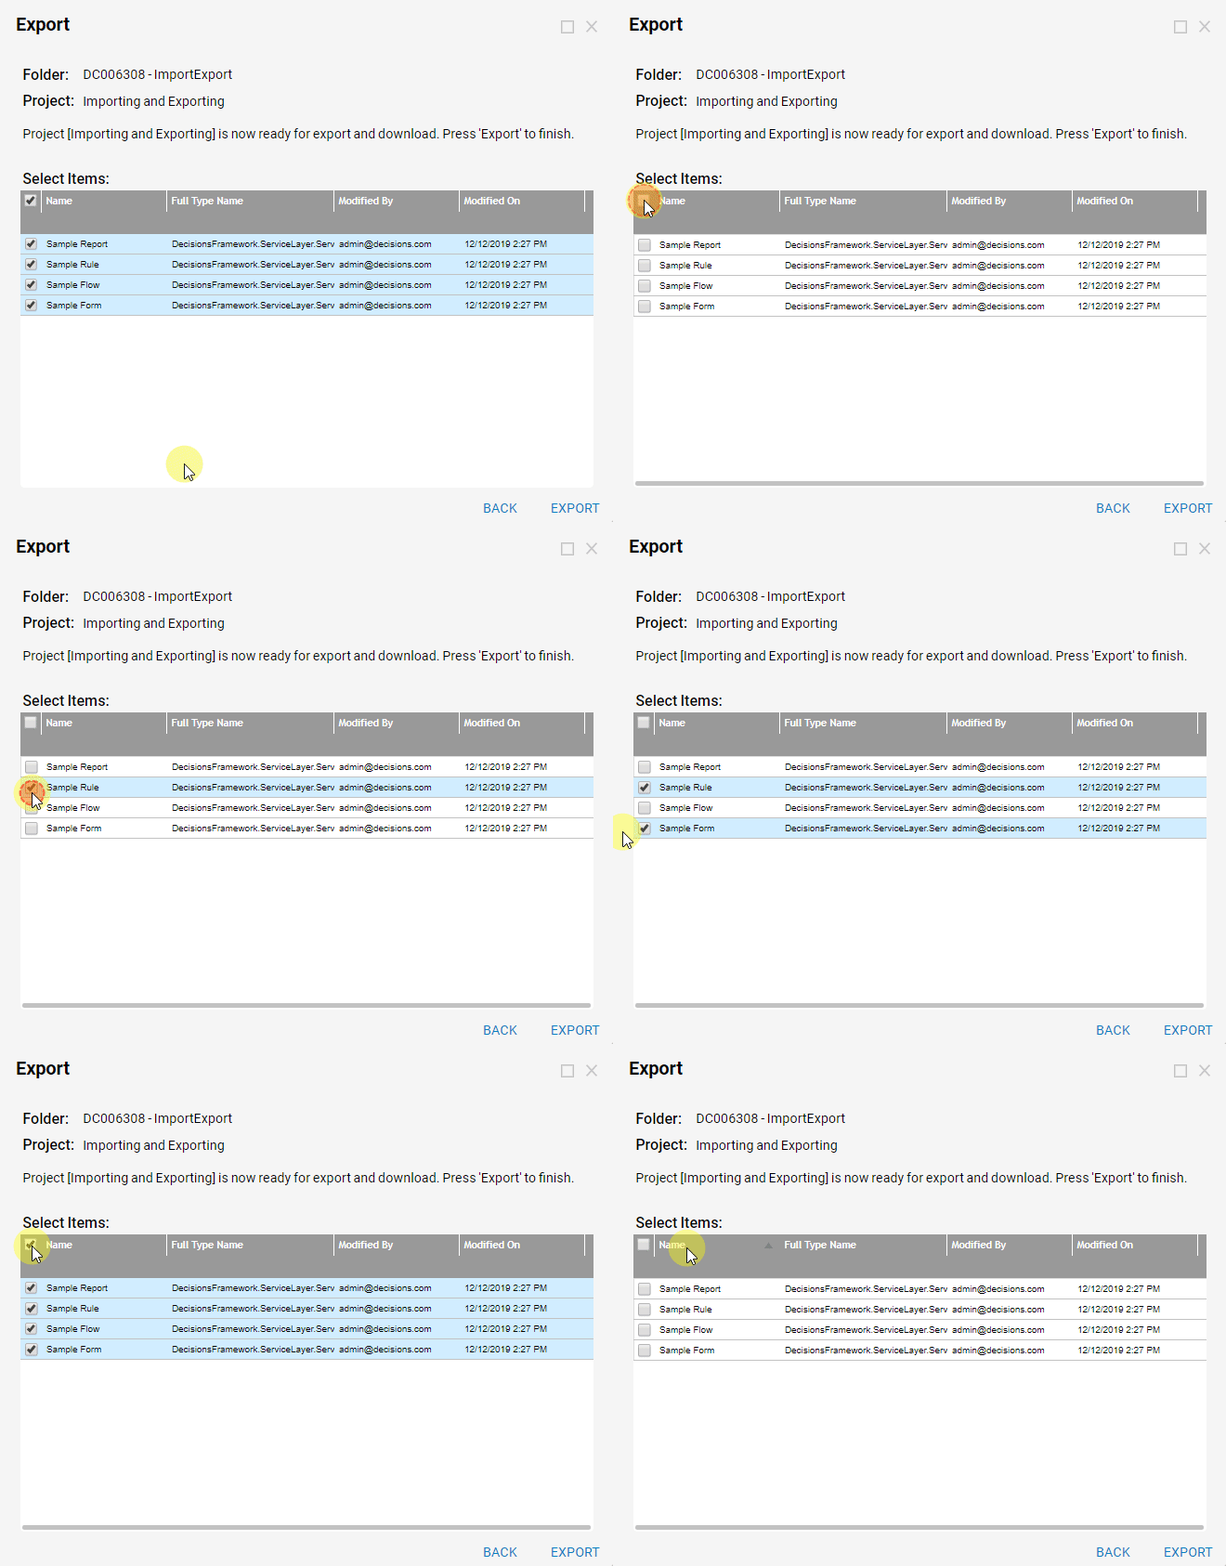
- On the next screen of the 'Export' window, the Select Items section shows a list report of all the available objects to export. The check-box in the top left corner acts as a toggled Select/Deselect All option. The Designer can select all of these objects to export, some of them, or none of them. For this example, make sure that all objects are selected, then click EXPORT.Single entities can be exported as opposed to the entire project. To do this, navigate to the Designer Folder where the single entity lives and then bring up the Action Menu for this entity, select the Import/Export option from the menu and then select Export.
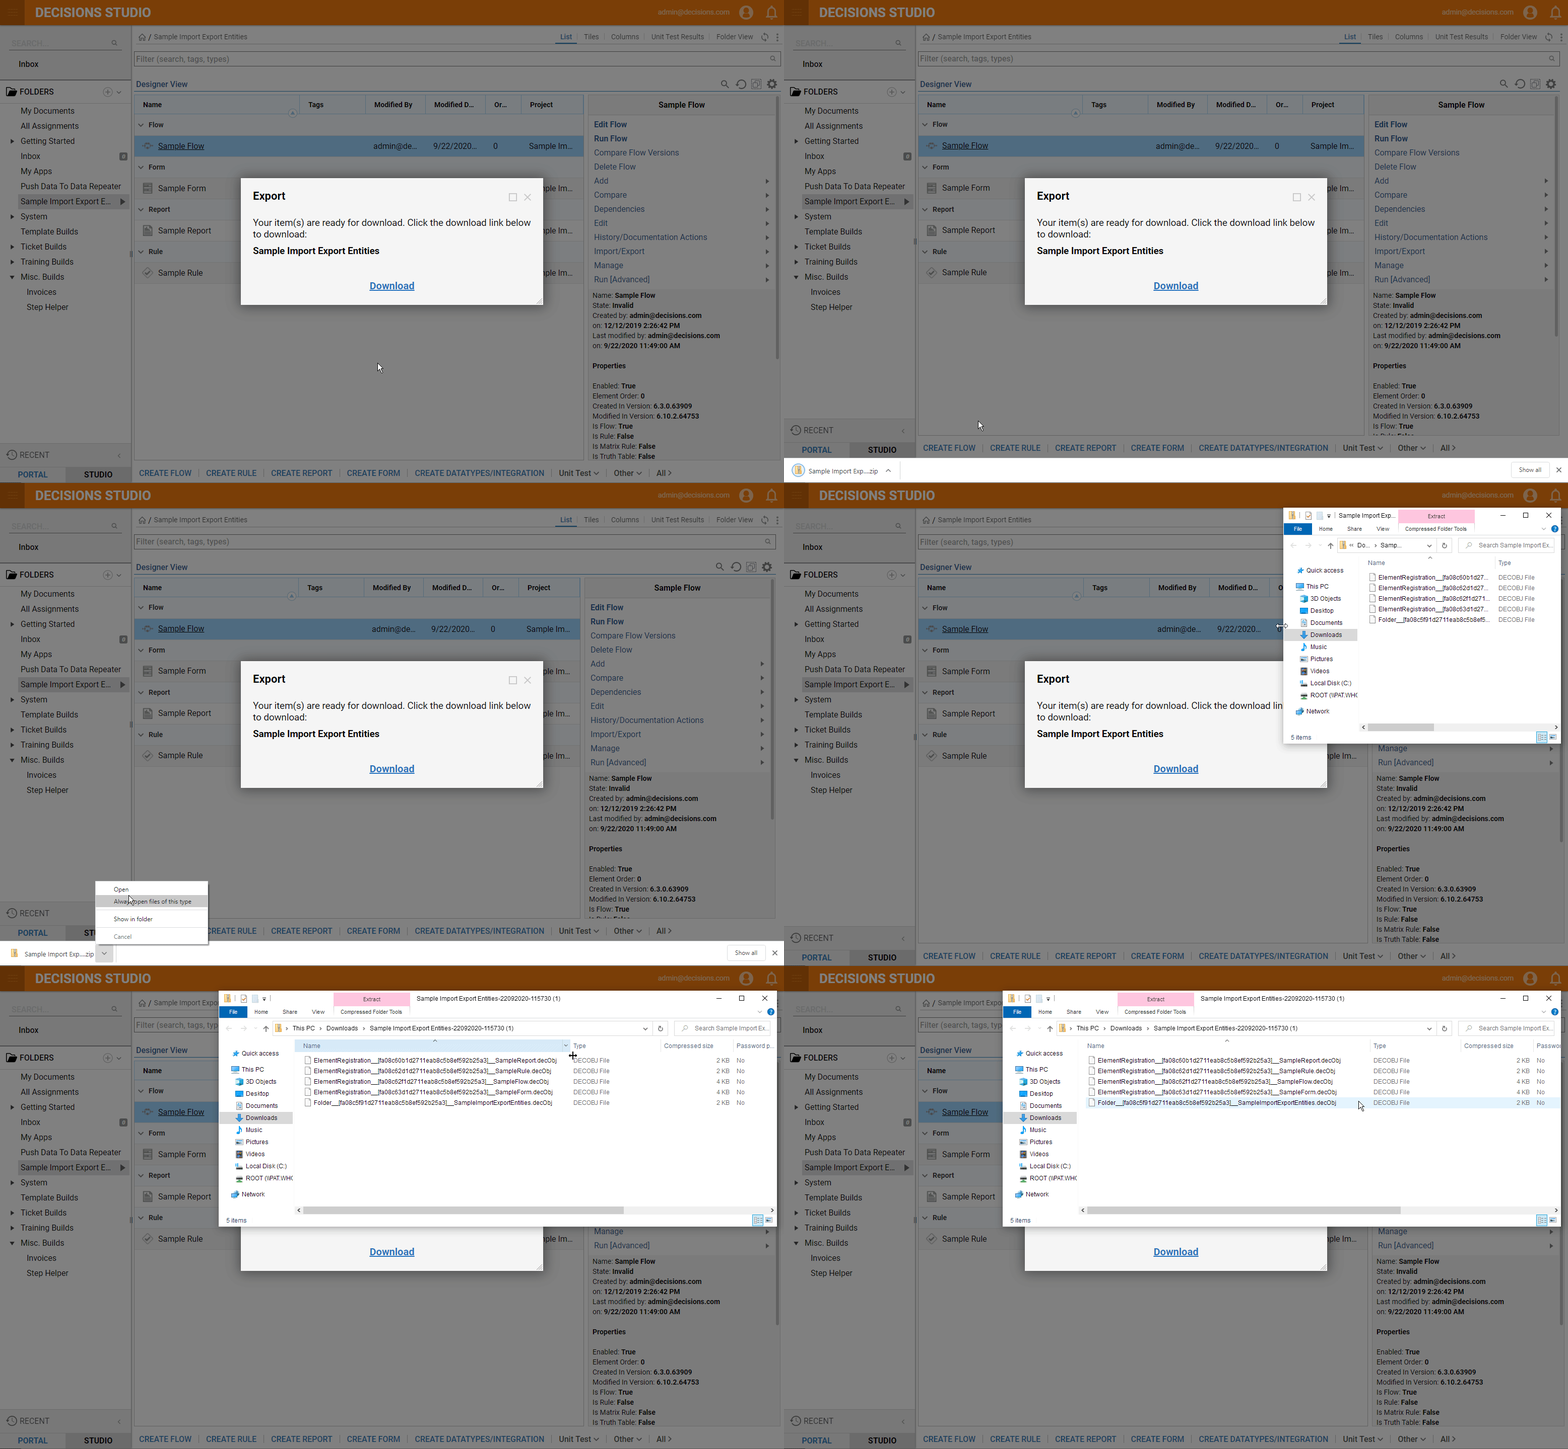
- On the last screen of the 'Export' window, select the Download link, and the project will be compressed into a .zip file and downloaded to the 'Downloads' folder of the local machine. Unzip the project to find all of the entities separated as single .decObj files in the folder.
