Overview
Adding documents to the Decisions Portal makes them available to use throughout Decisions by giving the Document an ID and a URL. The ID/URL is then mapped to specific objects within Decisions that function to call on the intended document.
Example
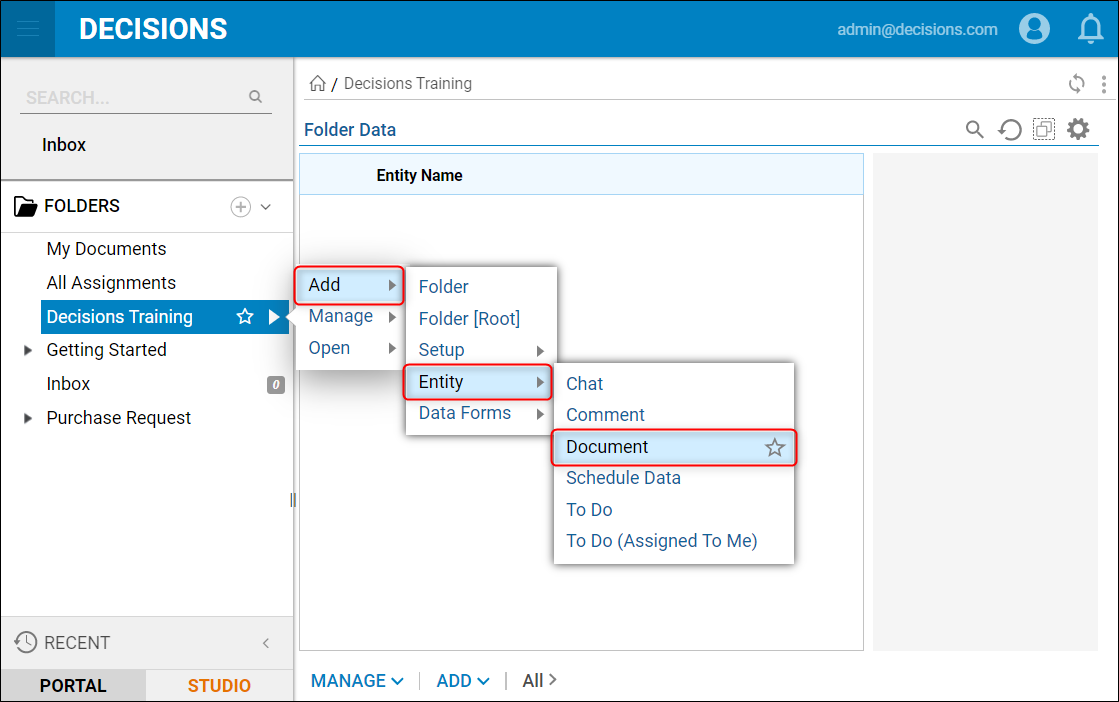
- In the Decisions Portal, right-click the name of a Designer Folder under the Folders list on the right to show the Action Menu for that folder.
- Navigate to Add > Entity from the menu and select Document.
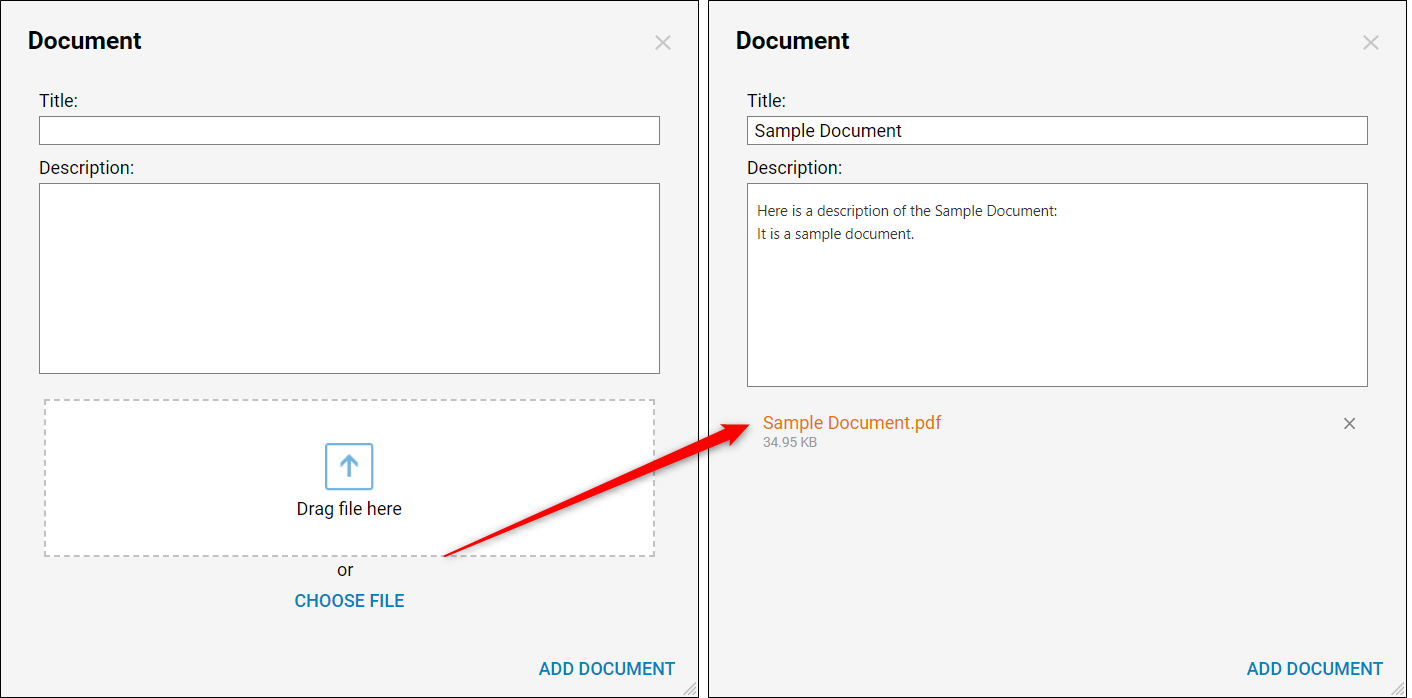
- Provide a Title in the text box that Decisions will use to show the document in a report.
- Drag the document from the location folder into the dotted area or use the Choose File button to select the document from the location folder. A description can be provided outlining the details of the document, this description will be shown in the Folder Data report on the right side when the corresponding line item is selected.
- Once the document is added, it can be seen in the default Folder Data report of the folder it was added.

Drag and Drop
An alternate method of adding a Document to the Decisions Portal is by dragging the document into space in the Designer Folder from the location of the document in the file system
- Navigate to the desired Designer Project.
- Navigate to the file's location in the local computer.
- Drag and drop the document from its location in the local computer into the empty space of the Folder.
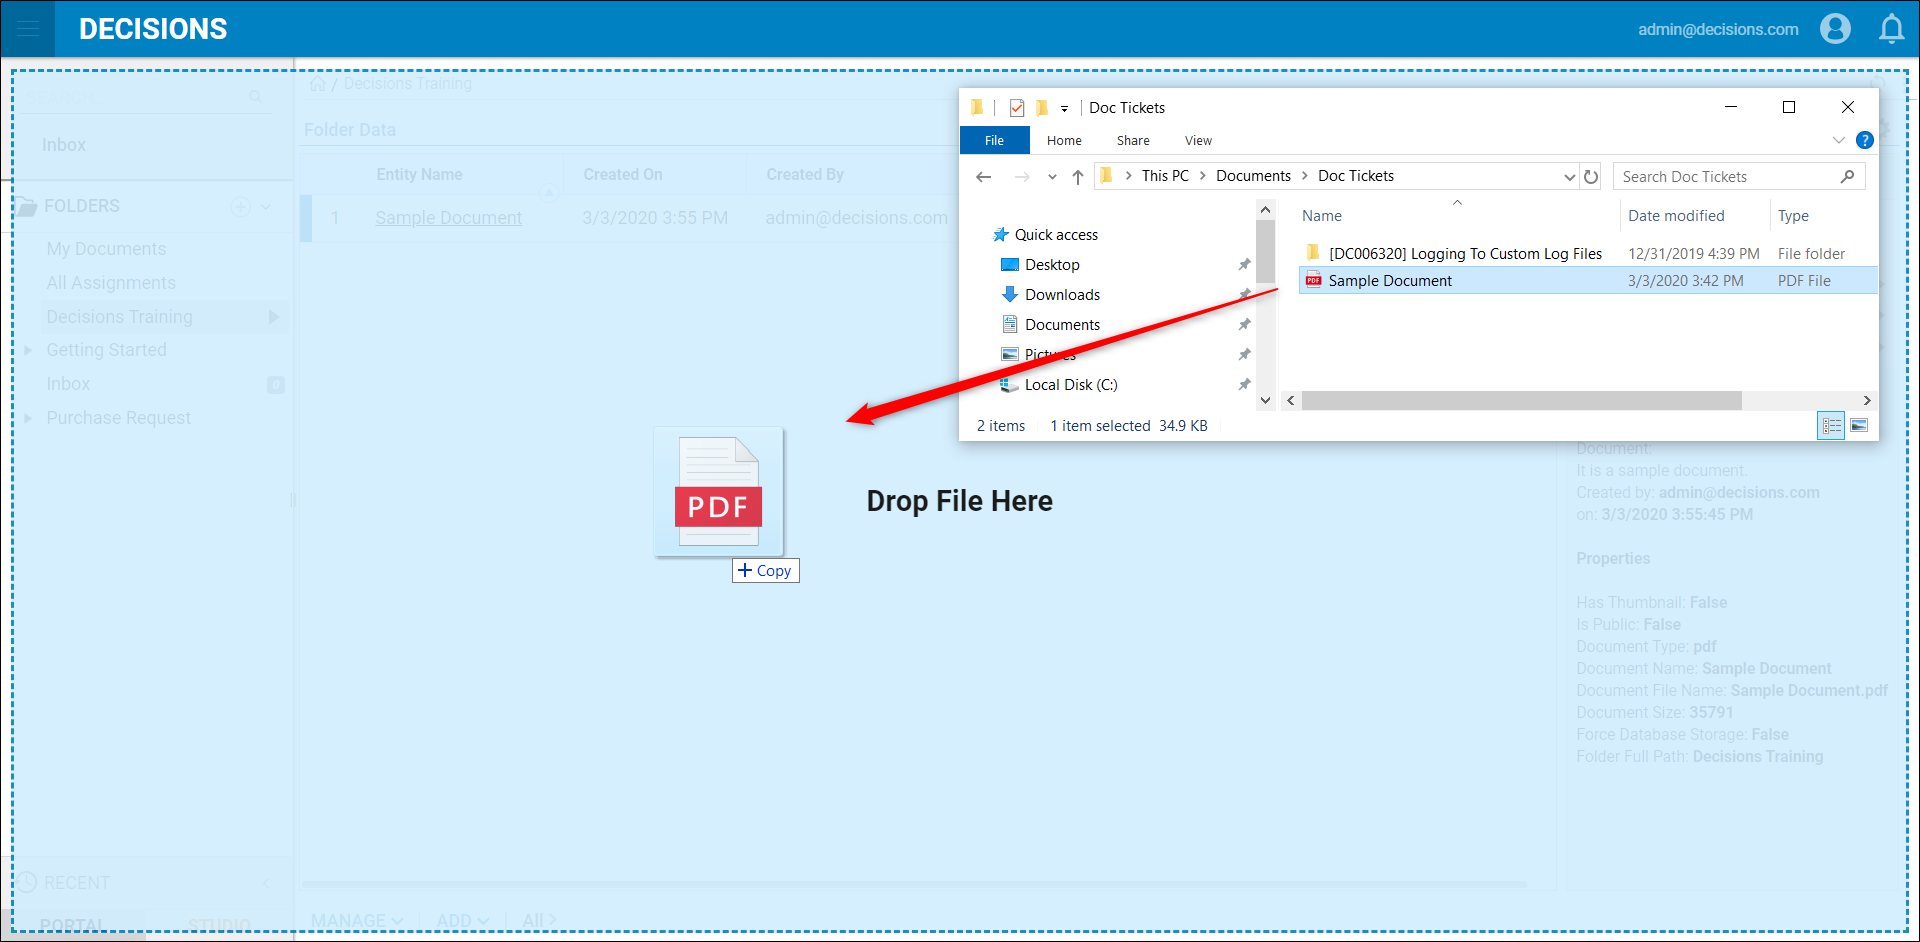
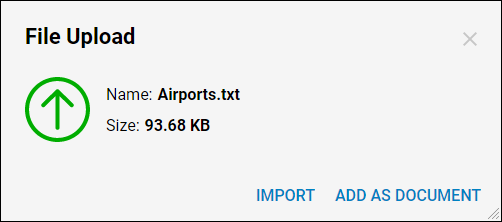
- When the File Upload box appears, confirm that the correct document is being added, then select Add As Document.
- Once complete, the document will appear in the Folder Data report as shown above.
Open in Internal Viewer
The Internal Viewer allows users to view a File without having to download it first. This setting must be changed for each file type.
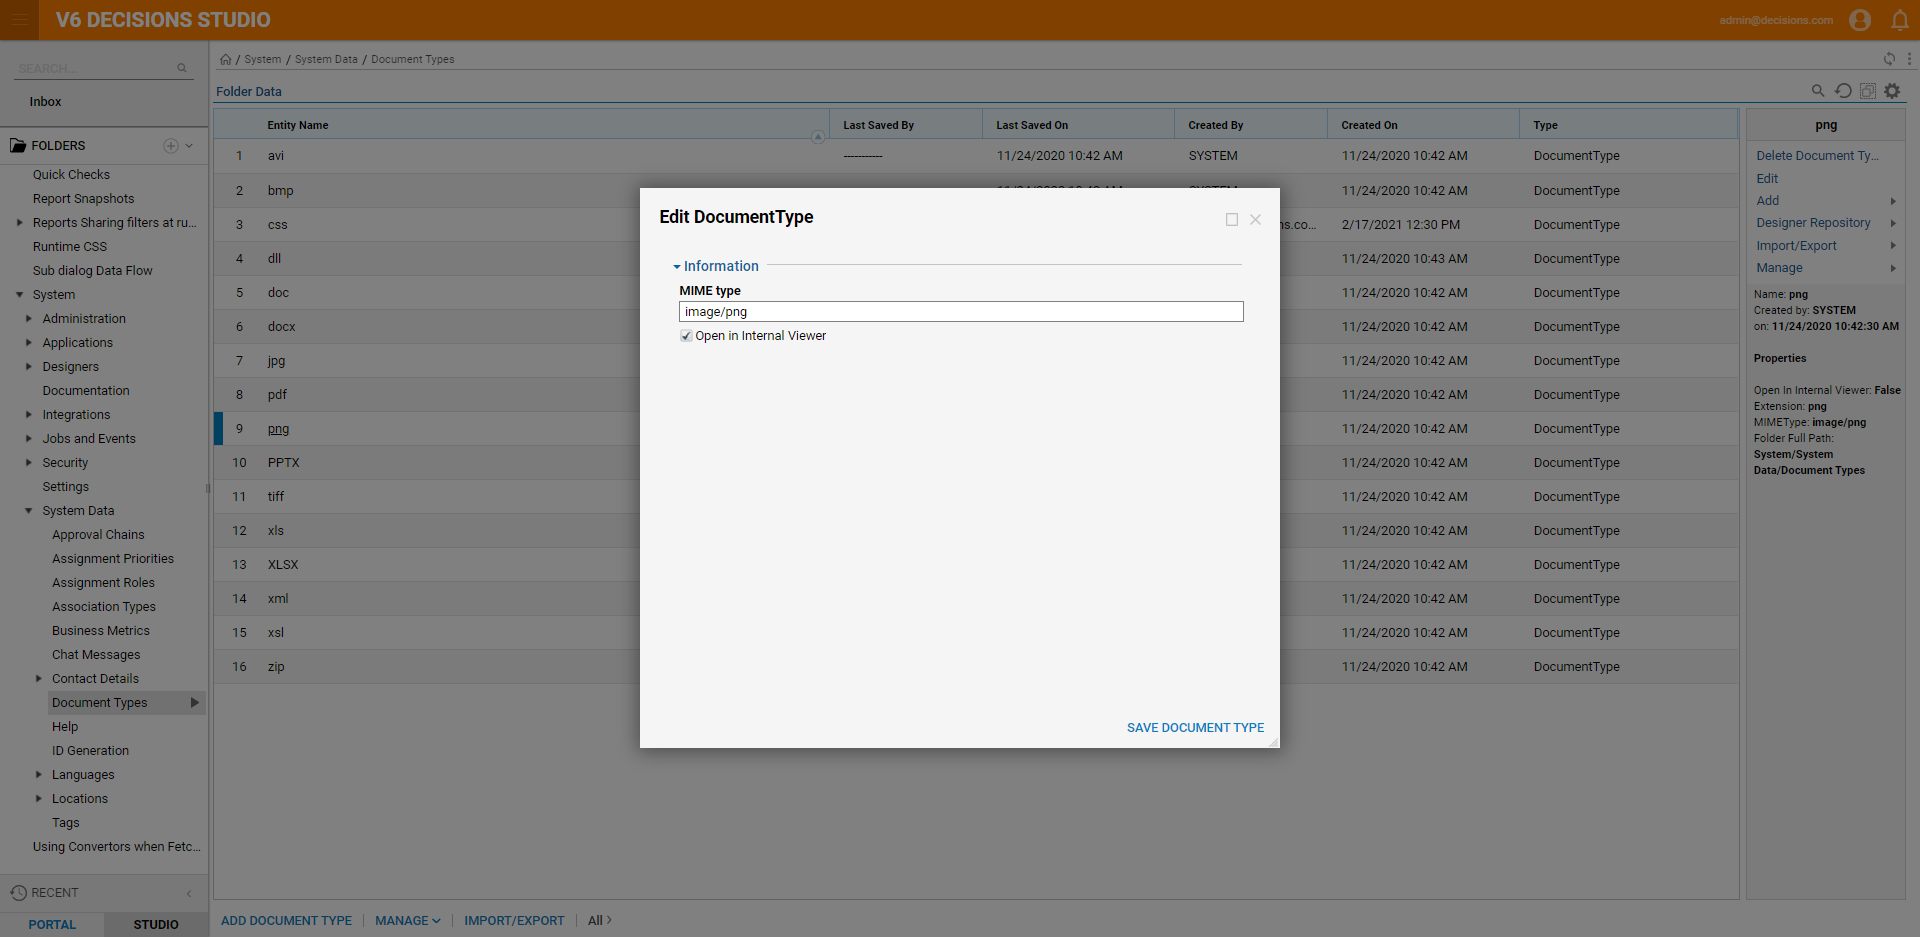
- Navigate to System > System Data > Document Types, choose a Document Type, and select Edit in its action menu.
- In the Edit DocumentType dialog, set Open in Internal Viewer to true.
- Select SAVE DOCUMENT TYPE.
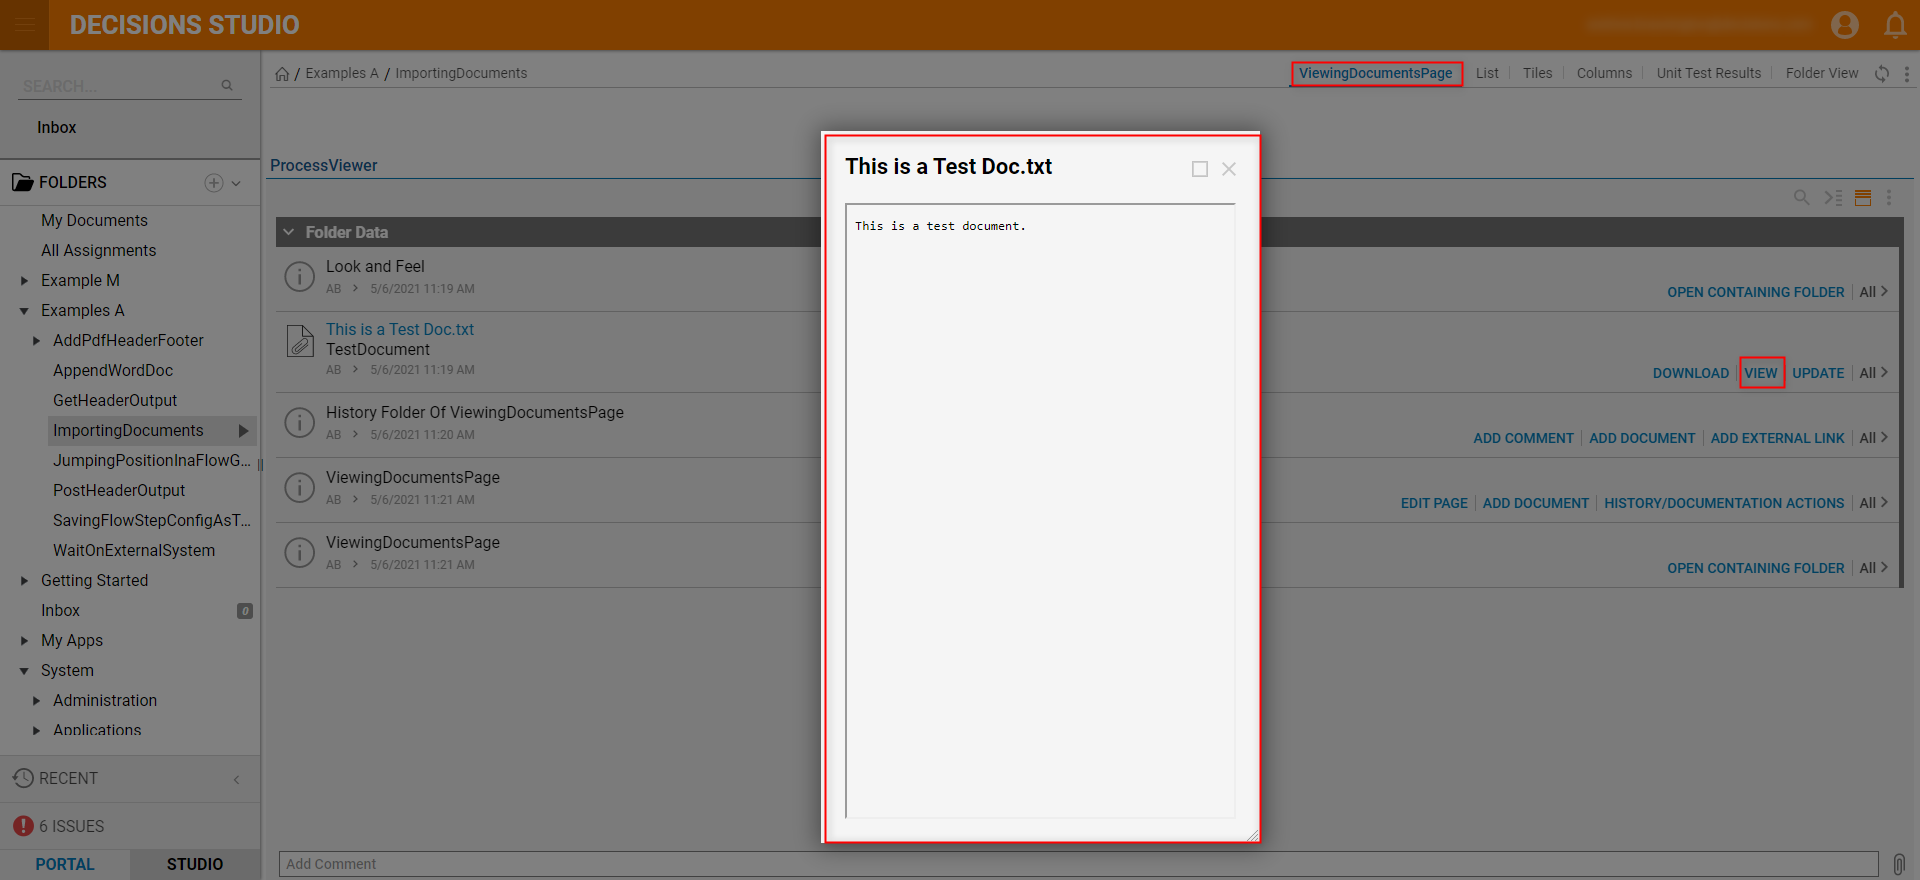
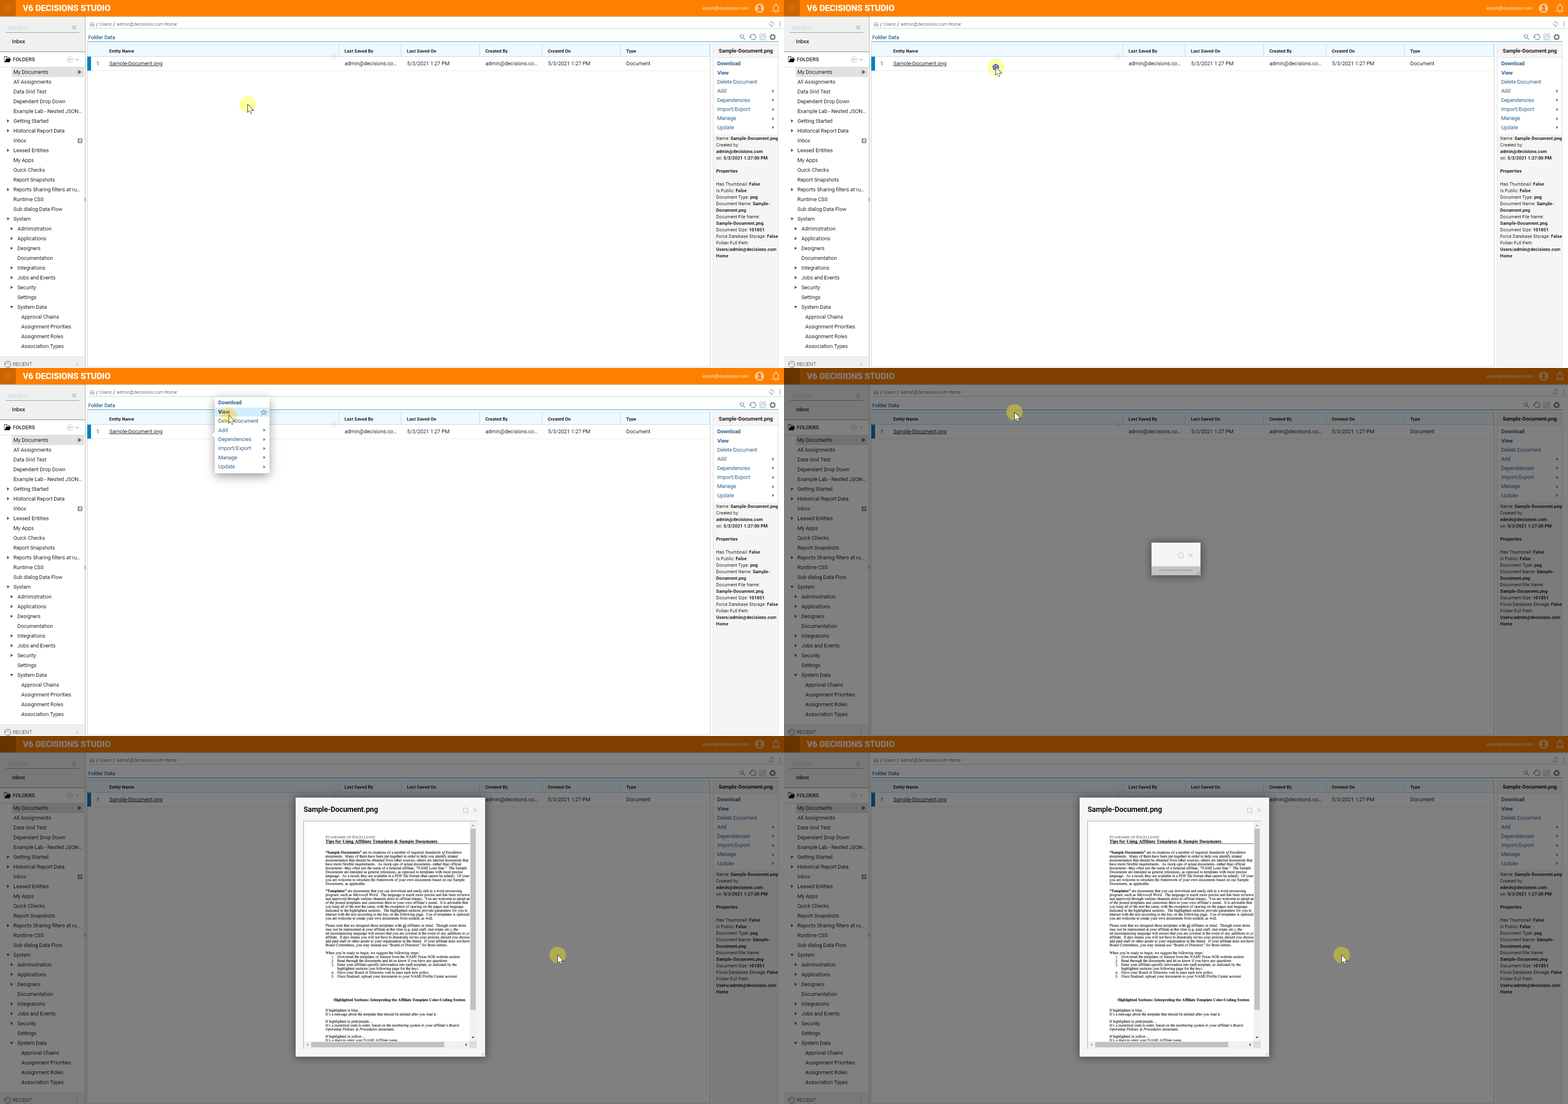
- Select a file, choose View in the action menu to view the file in the Internal Viewer.
Viewing via Folder Activity Panel
After enabling a DocumentType in the Internal Viewer, users may view their added documents from a Page via a Folder Activity Panel component.
These Panels display each stage within process workflow logic and are based on State configurations. This can be especially helpful for demonstrating stages within a Process Folder.
To add a Folder Activity to a Page and View an added document file from it:
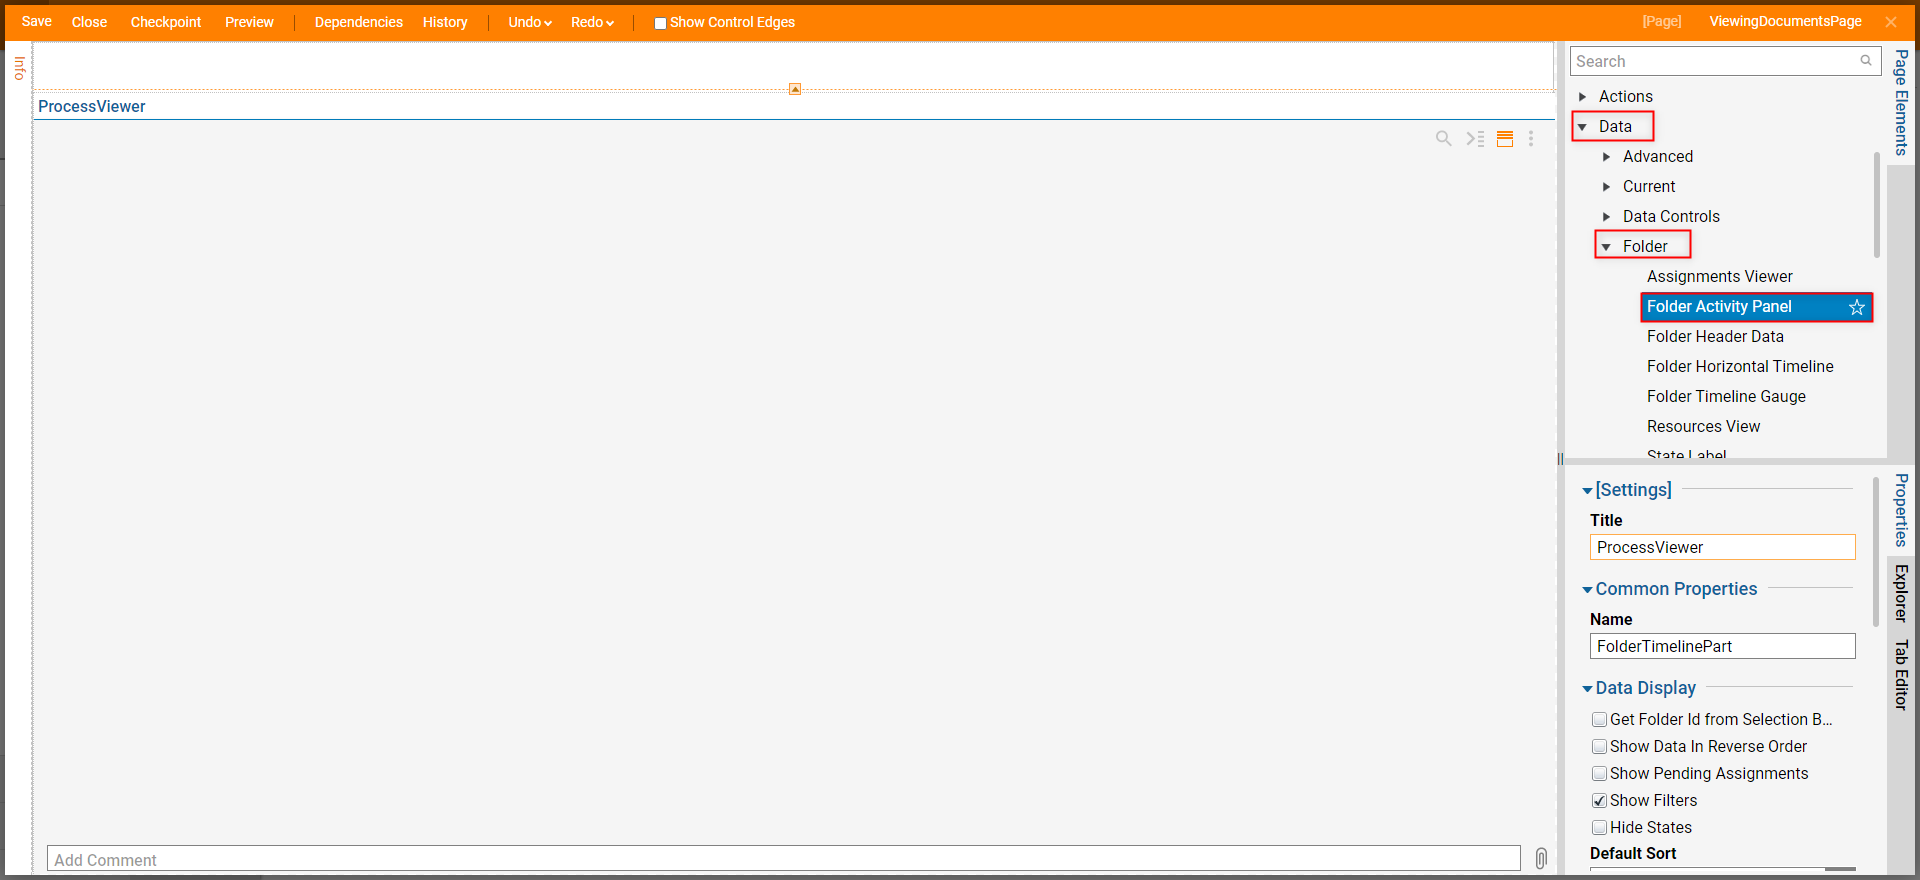
- From the Page Designer, drag in a Folder Activity Panel component from Page Elements > Data > Folder.
- Save and Close the Page Designer.
- From the Decisions Studio, right-click the desired Folder in the Folder Tree, select Manage > Page/Dashboard > Add Page/Dashboard, and PICK the Page containing the Folder Activity Panel.
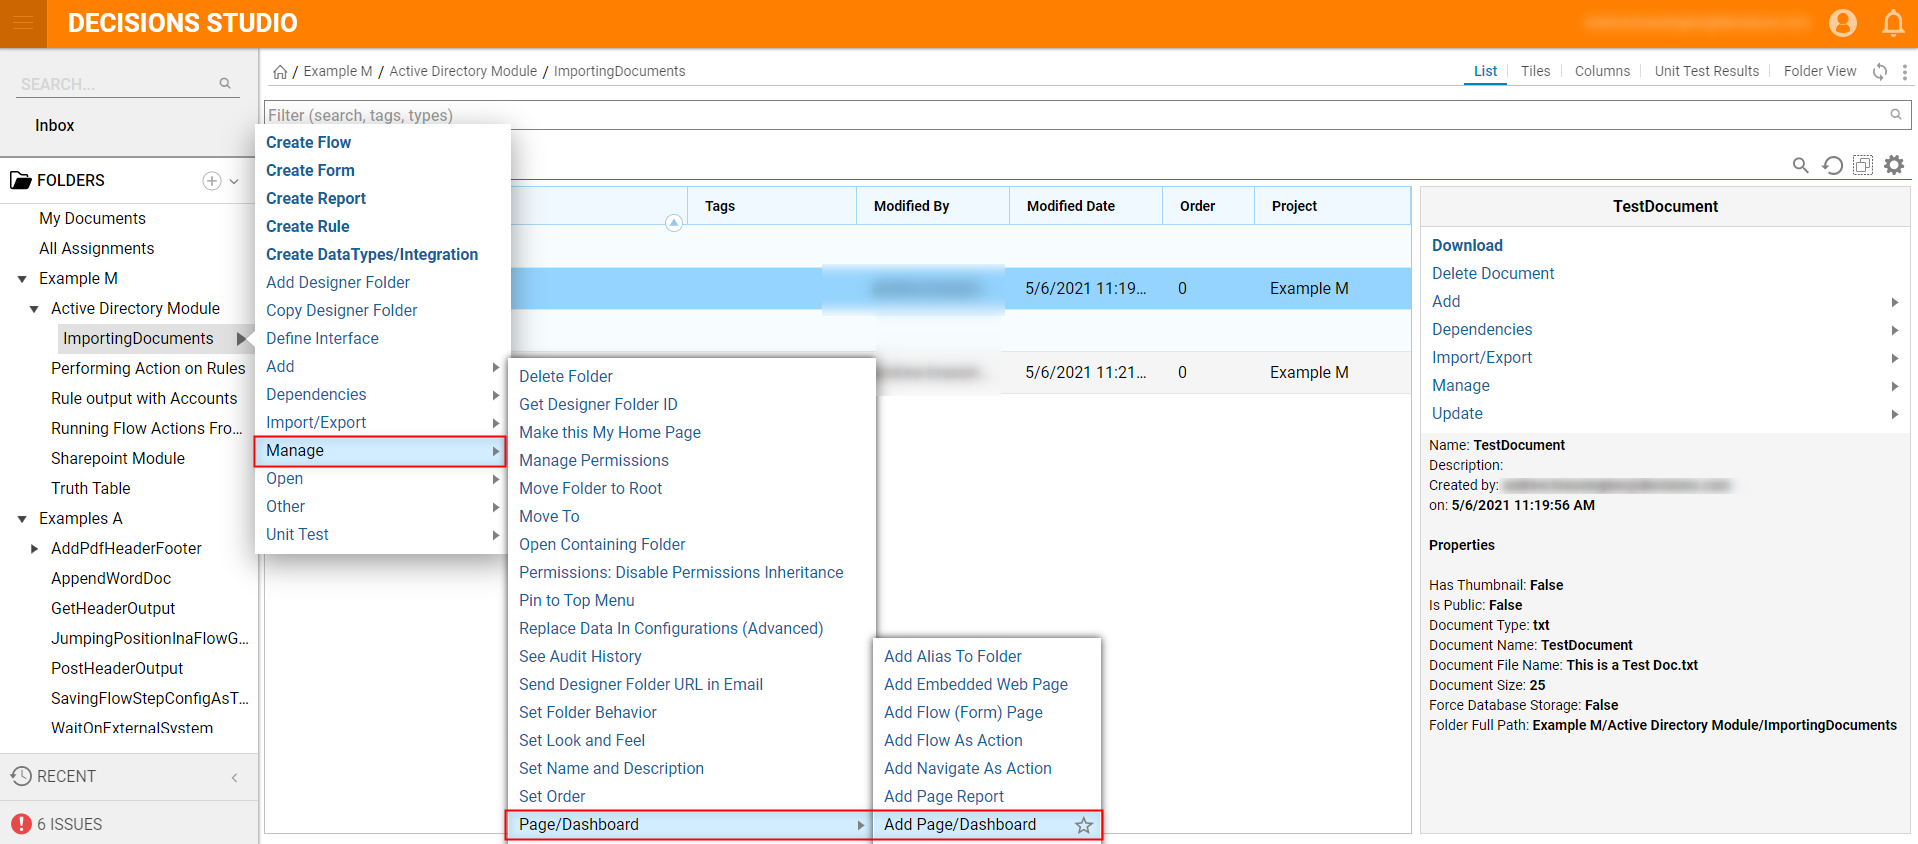
- After adding the Page, navigate to its tab within the Folder, locate the added document and click VIEW.Note on Viewable DocumentsNote that the document MUST be enabled as openable in the Internal Viewer.
