Overview
After adding a chart to a Portal Page, the user can customize the colors for each column on the chart.
Example
The purpose of this example is to add a chart to a Page and to set its custom chart colors.
When customizing chart colors, select the chart in the Page Designer workspace. In the Properties panel, click the Use Custom Color checkbox, then define the colors using the Pick Color dialog. Some chart types will not allow separate custom colors.
- To begin, navigate to a Designer Folder, and in the top bar, click the three vertical dots, and navigate to Manage > Page > Add Page/Dashboard button
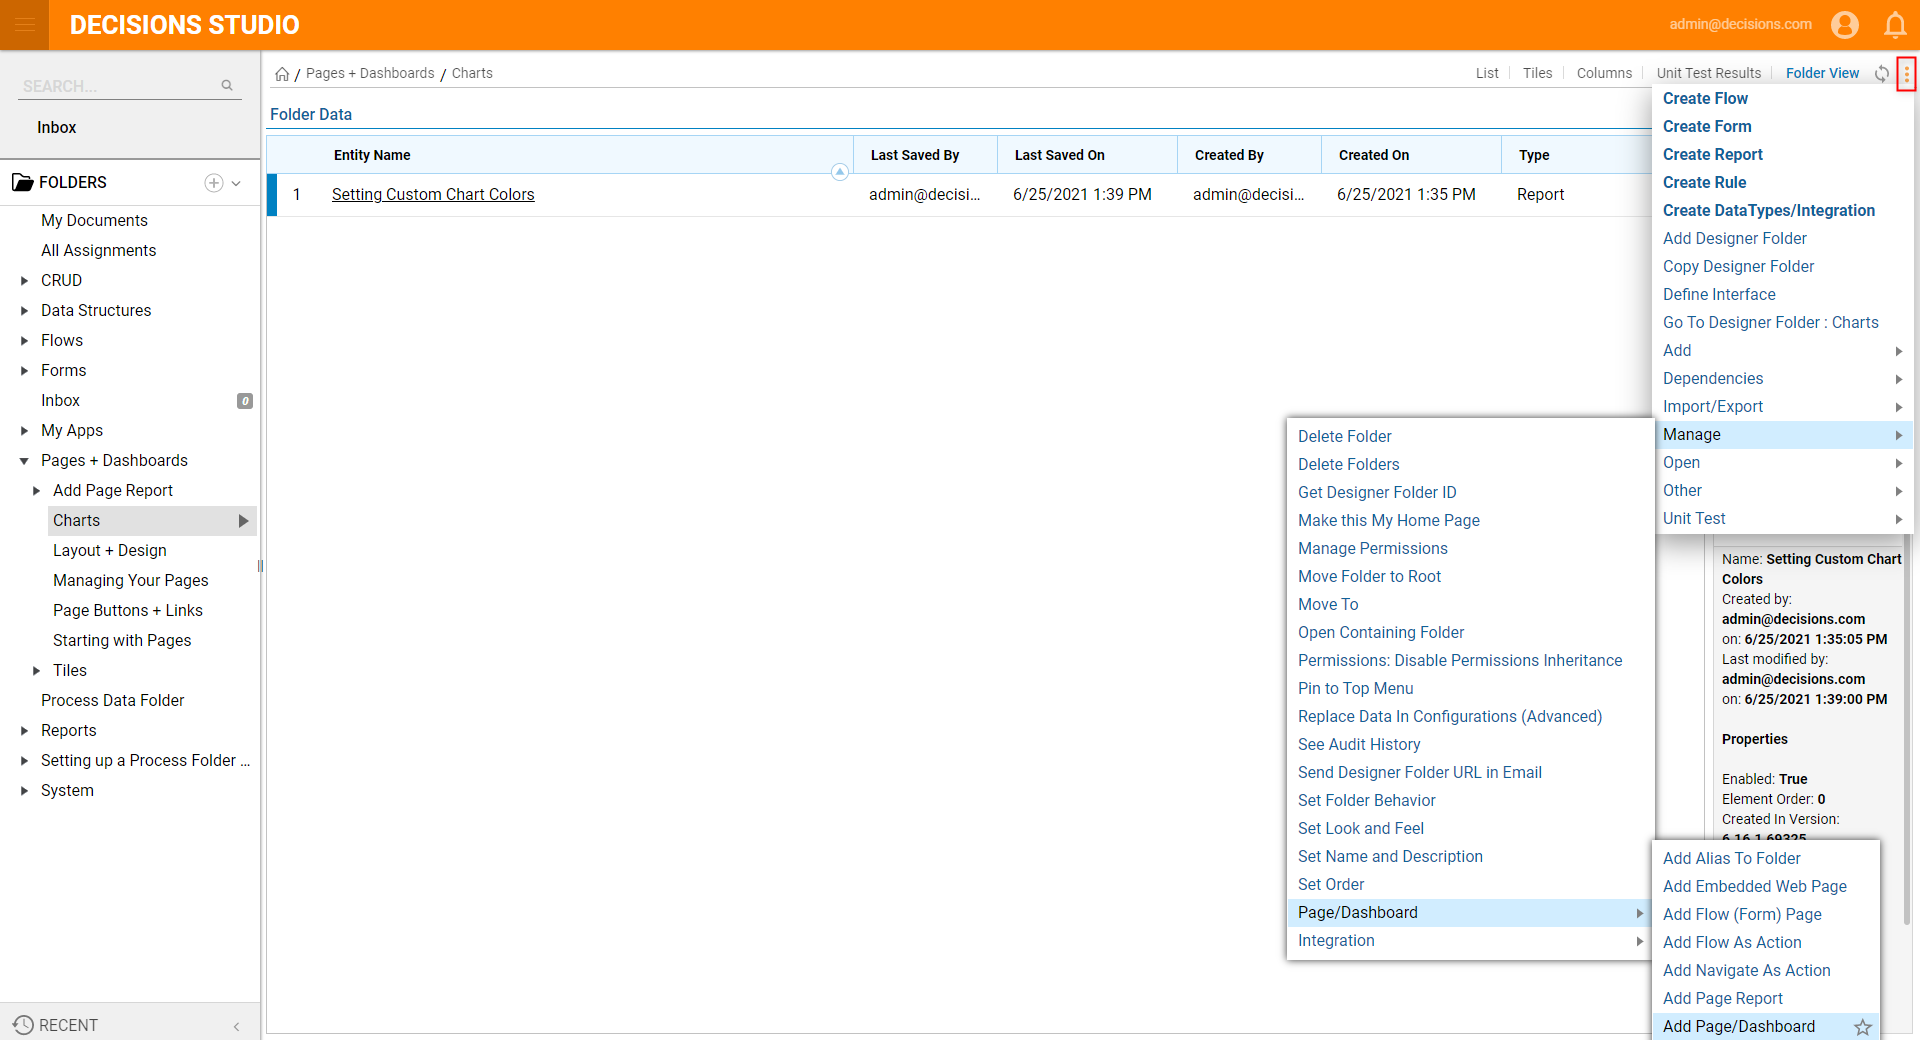
In the resulting Add Page/Dashboard dialog, select Create under Page Data > Page.
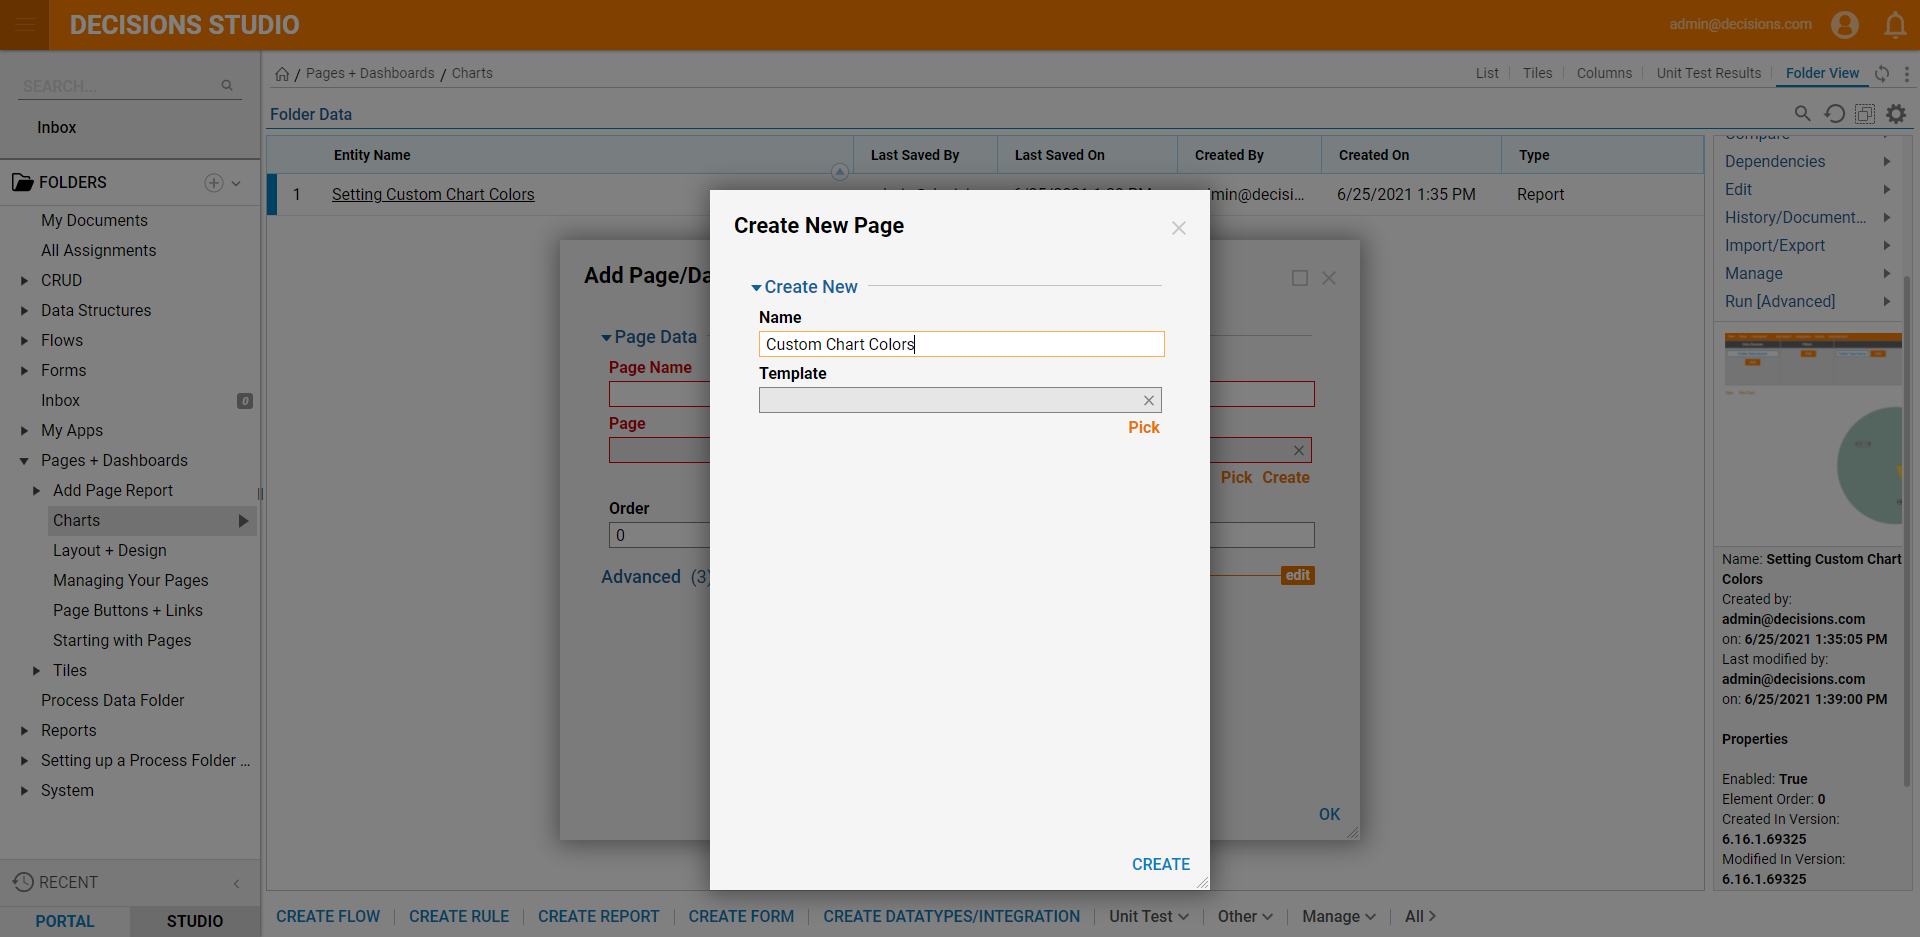
Next, in the Create New Page window, name the Page and click CREATE. In this example, the Page will be named Custom Chart Colors.
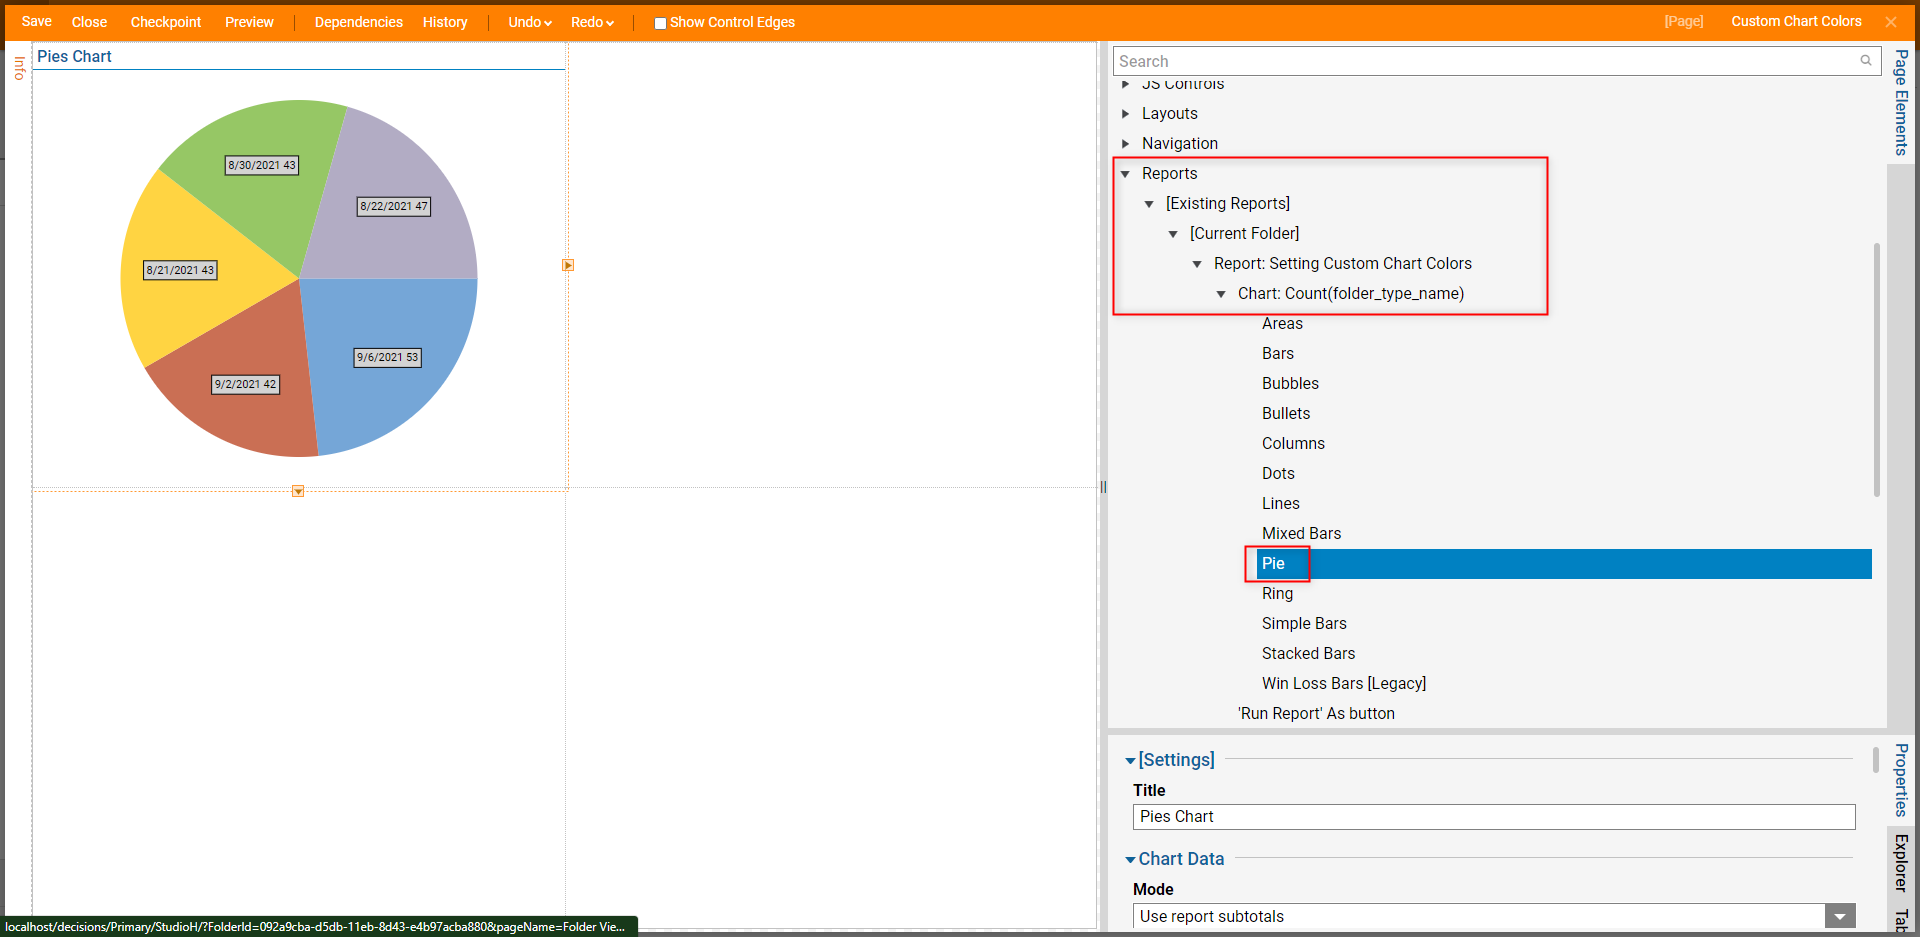
In the Page Designer, begin by dragging a Pie chart component to the workspace from the category Reports > [Existing Reports] > [Current Folder] > Report: Setting Custom Chart Colors > Chart: Count(folder_type_name).
In the Properties panel, in the Chart Settings section, check the Use Custom Colors boolean.
Notice that User Defined Colors appears, underneath it click Add New.

- In the Add User Defined Colors dialog, near Color and click the horizontal three dots. This will result in the Pick Color dialog.
- In the Pick Color dialog, select a color and click PICK. The user can also define a custom color by selecting Advanced. Name the color and select OK to finish assigning this value a color.The name of the custom color and the label from the Report should correspond or the custom color will not be displayed. It is also case-sensitive.
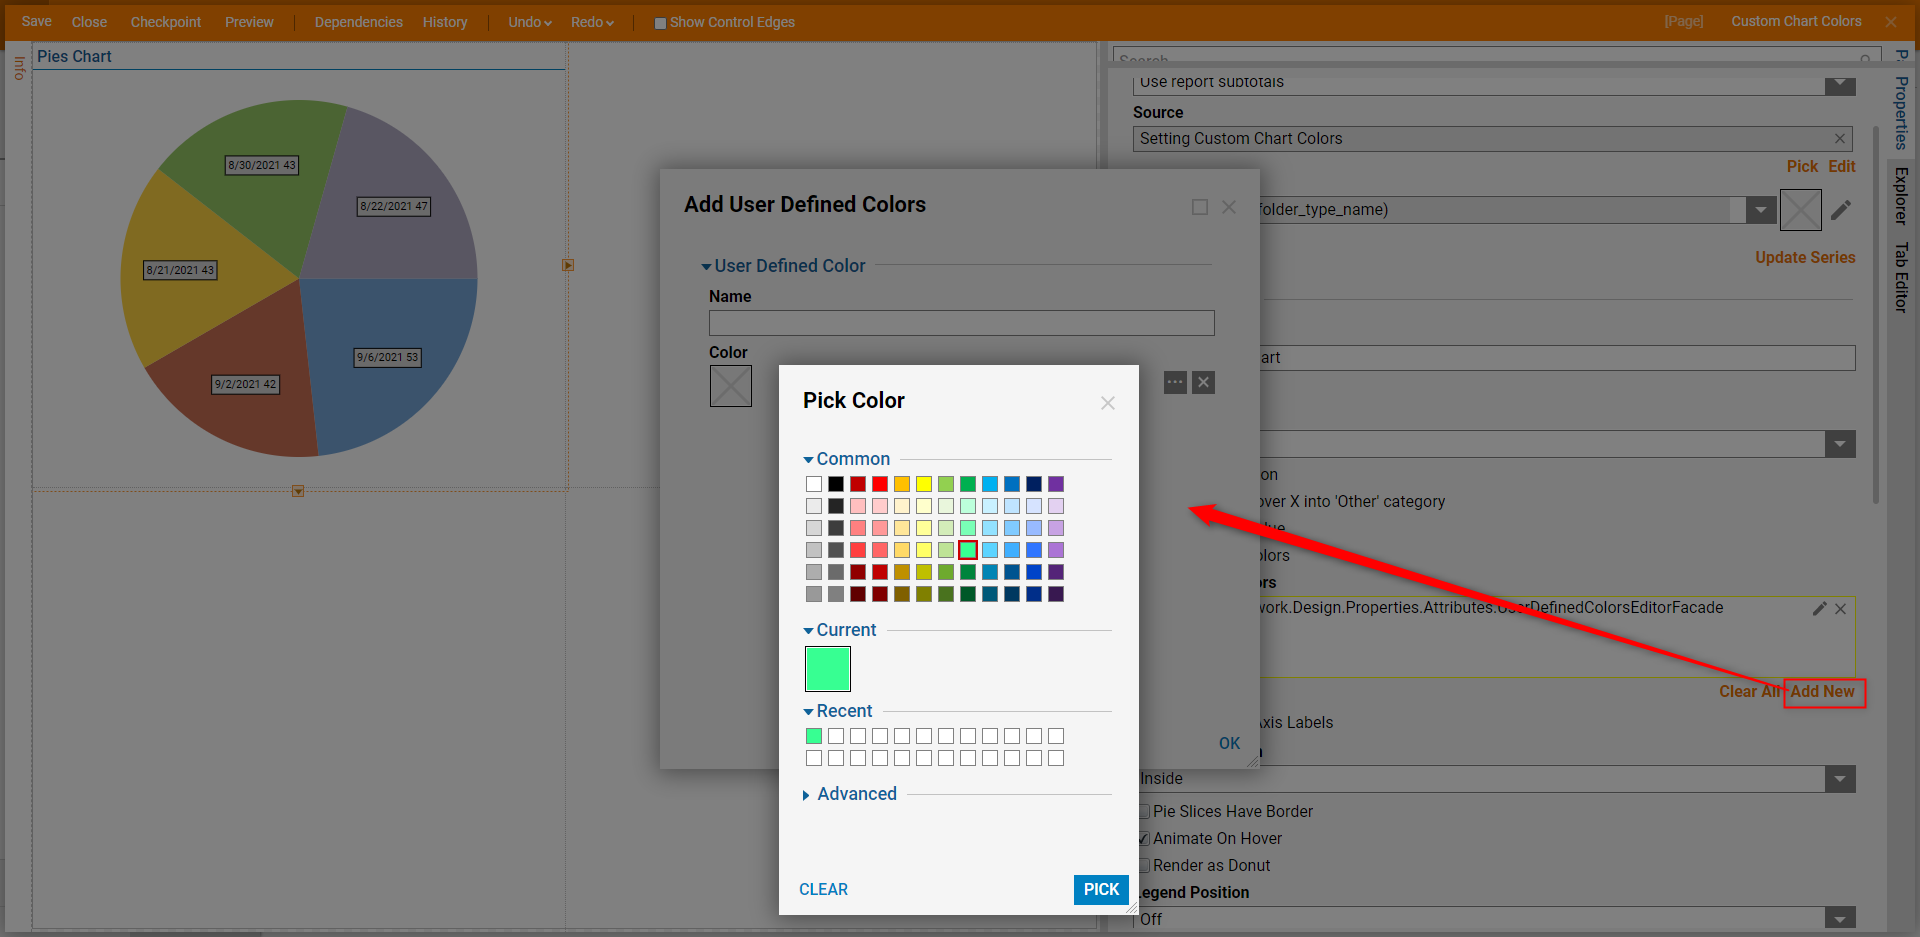
- In the Properties panel under User Defined Colors assign more colors to specific values.
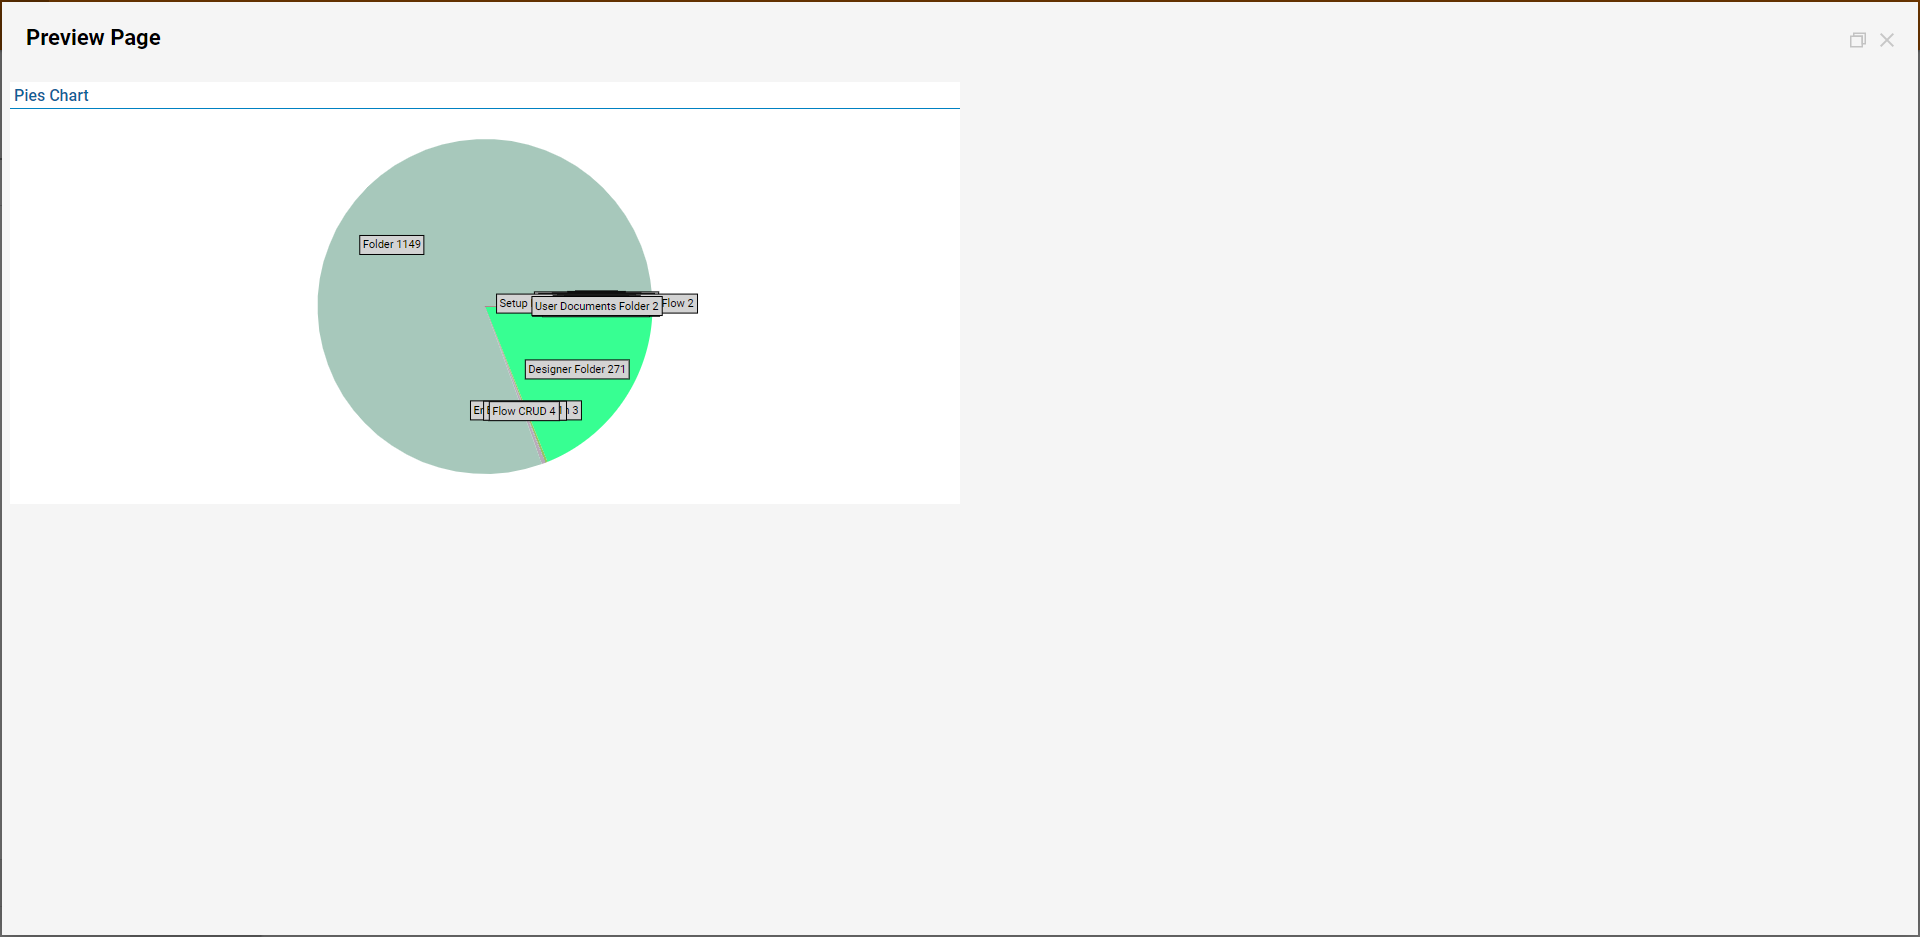
- The custom color chart is complete and able to be seen from the Page Designer.
- Save and Close the Page Designer.