Overview
The Portal has options for allowing a user to self-register. This allows the user to create an Account and log in to the system. The administrator enables this feature (it is disabled by default). This will enable self-registration, and a Register button will appear on the Portal login screen. That button takes the user to a Form that requests Account information and requires agreement to the terms of use.
The Portal can also be configured to require a self-registering user to confirm their email address before granting the new Account access to the system. A self-registered user has limited access to Portal functionality and is a member of the most restrictive All Users group by default.
Portal Settings
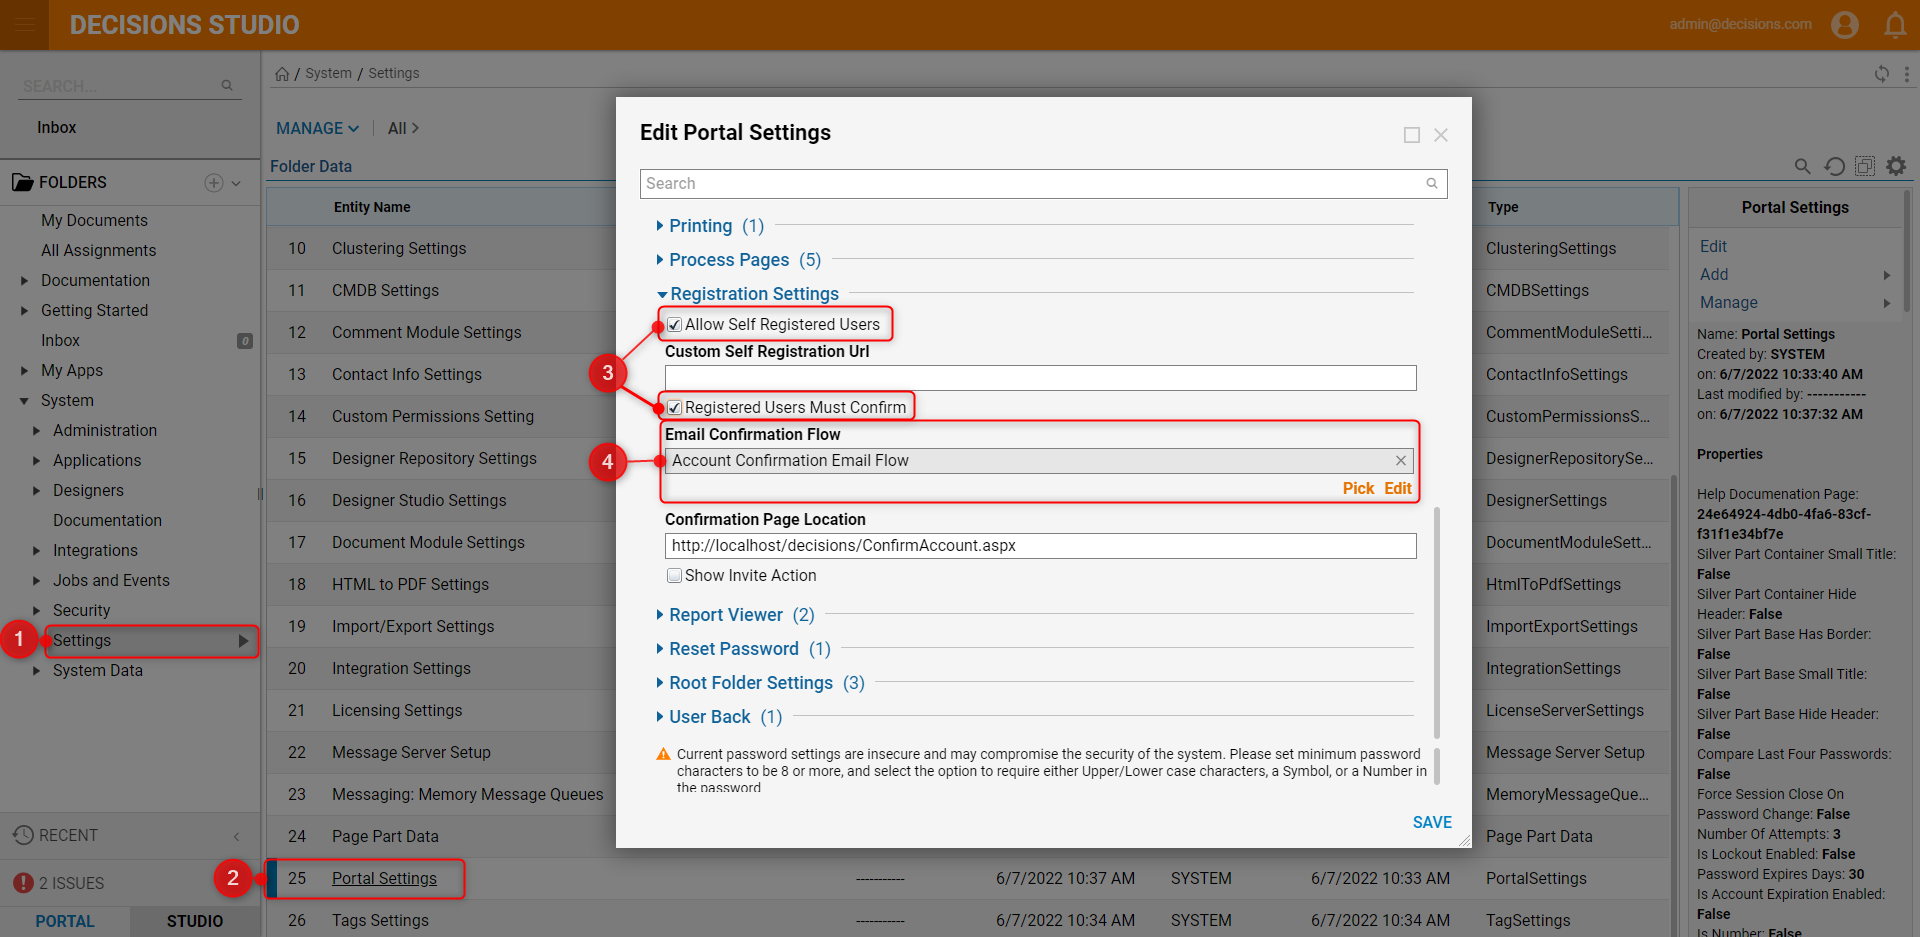
- Navigate to System > Settings > Portal Settings. Under Registration Settings, enable the Allow Self Registered Users setting.
- Enable the Registered Users Must Confirm setting to require users to provide and confirm a valid email address.
- By default, an Account Confirmation Email generates an email message.
To modify the email message, navigate to the Account Confirmation Flow, found under System > Shared Designer Defaults. - As another option, create a new Flow to handle email confirmation and specify that Flow here.
Self Registration
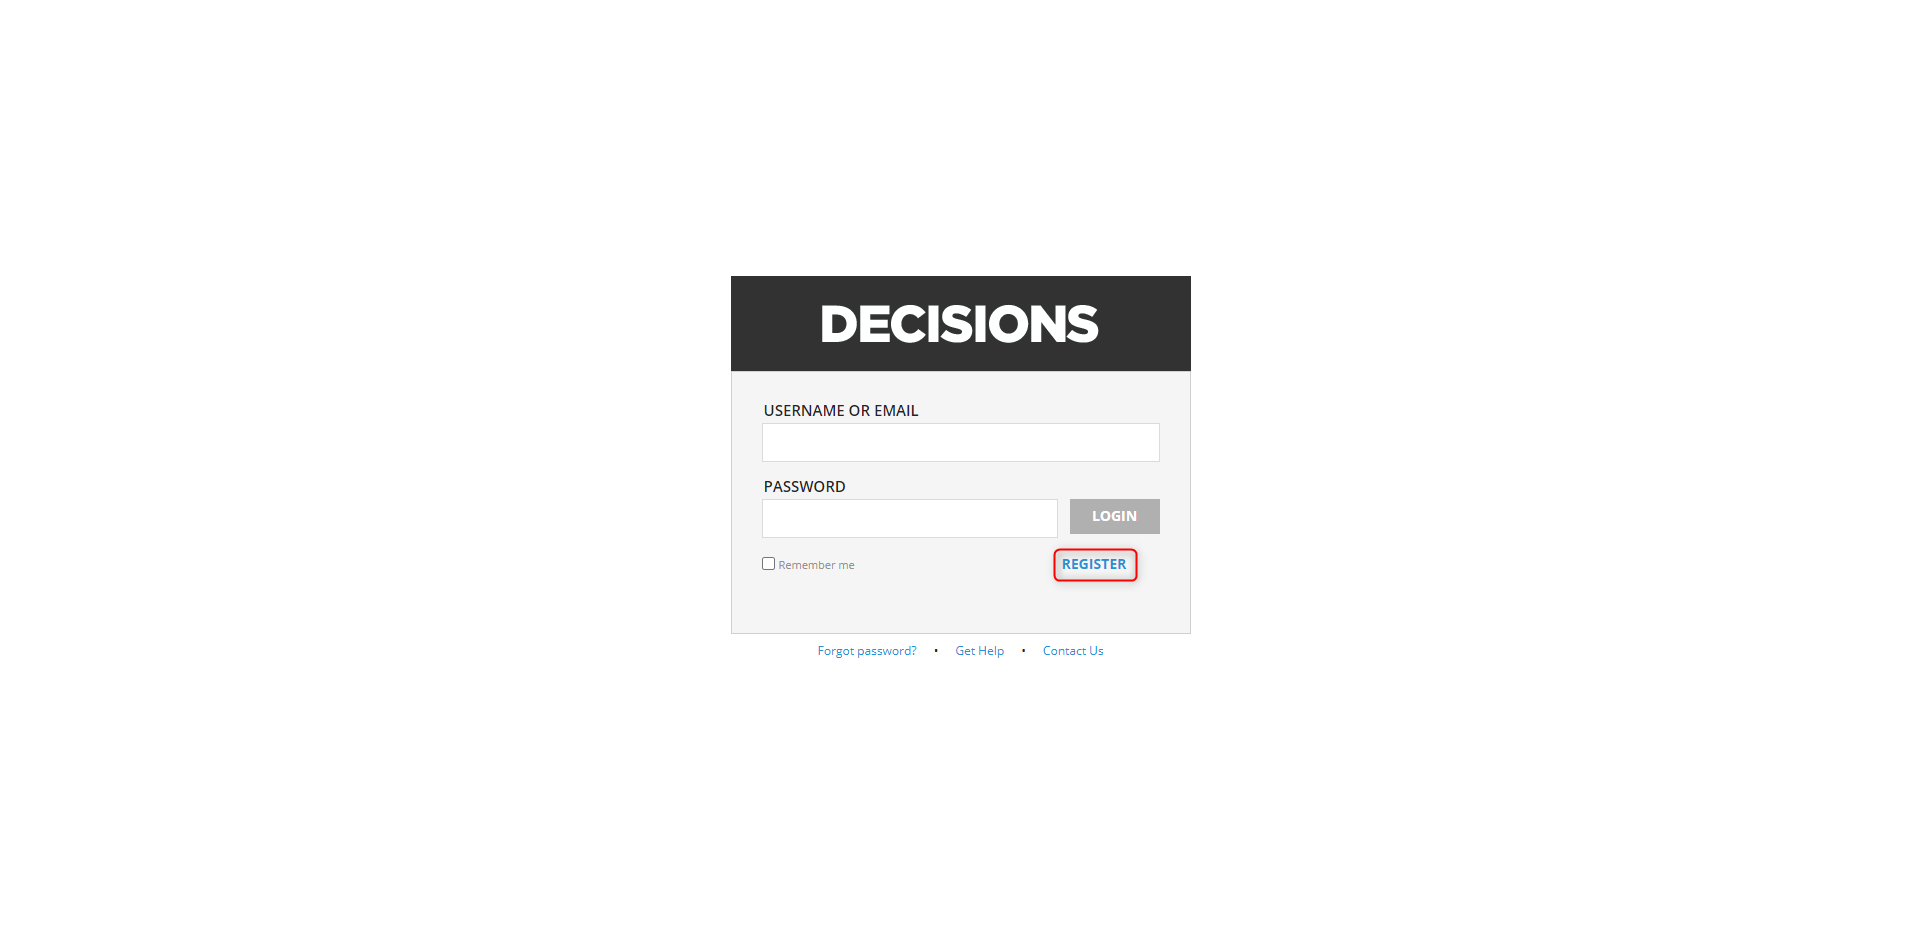
- After enabling the necessary settings, return to the login screen of the instance and select the new REGISTER button link.
- Enter the required fields marked with an asterisk (*) for user-registration.
- While not required, enter any optional contact information for the user account to register.
- Enable the Terms and Services then select REGISTER.
Once submitted, the new account will be created under the default All Users group. The account's groups can be changed once created.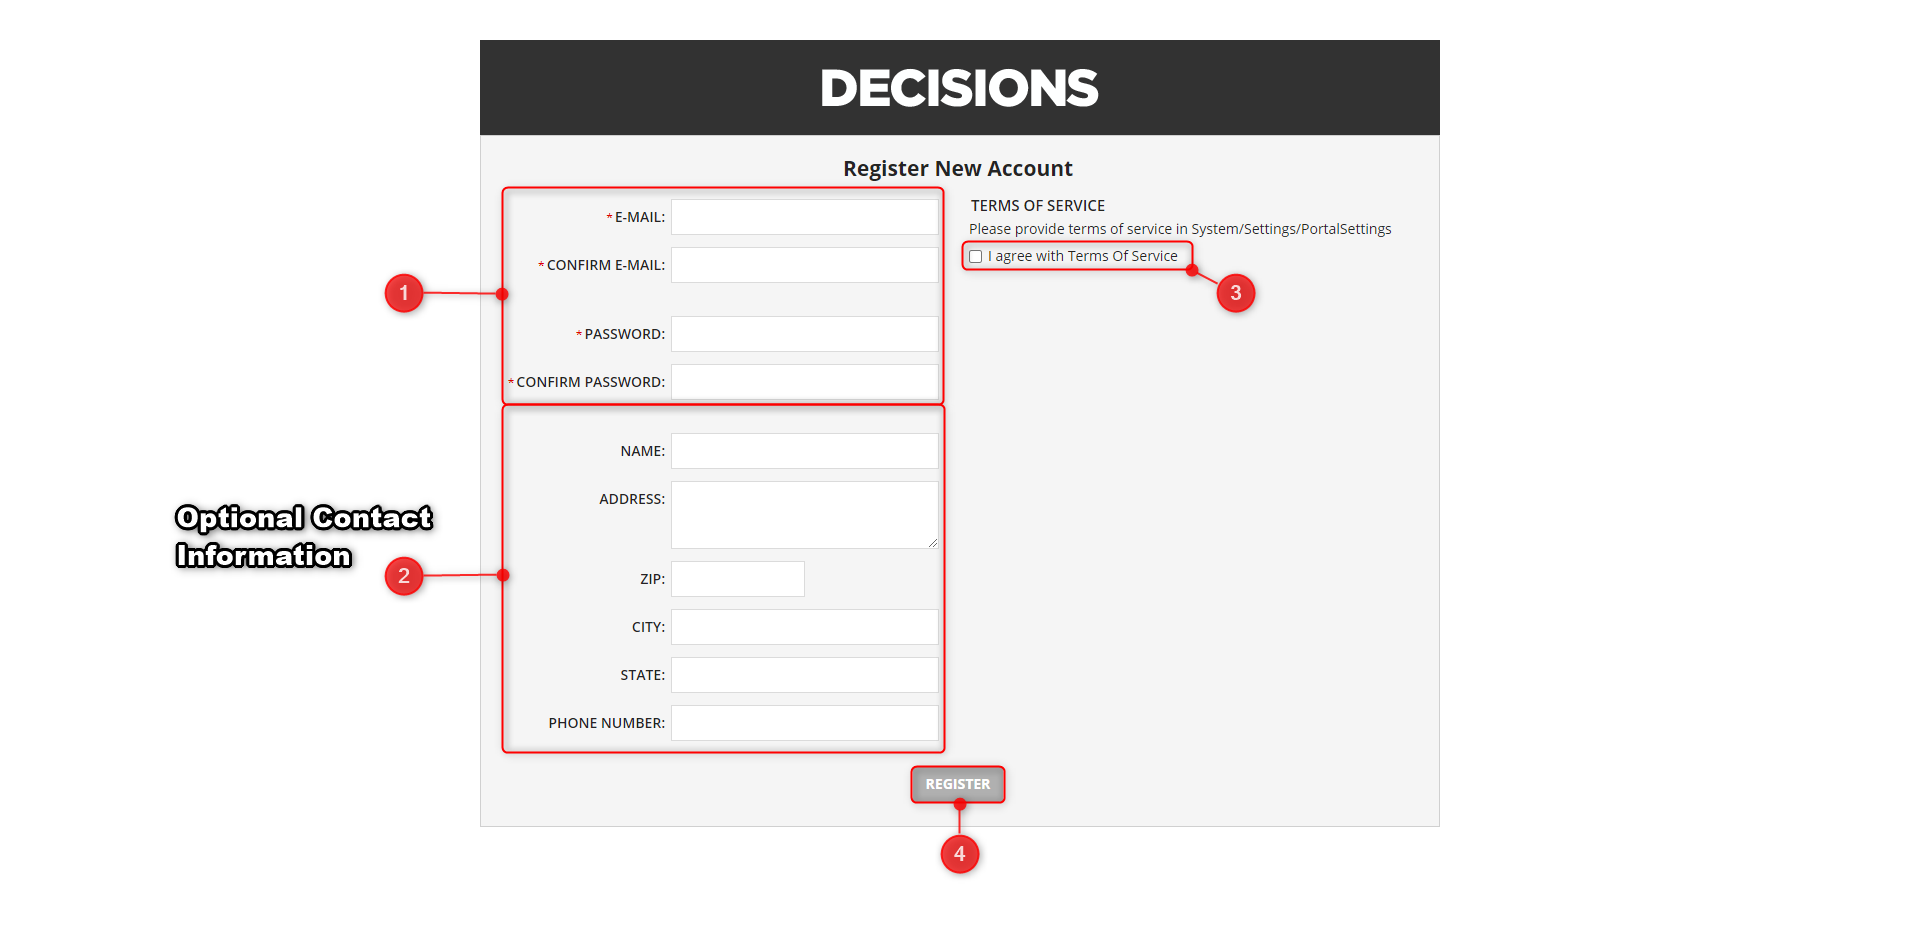
- Open the email account of the entered email during registration. Open the new email sent by the instance and select the confirmation link to open the Portal thus registering the account.
To modify the contents of this email, edit the Send Email step in the Account Confirmation Email Flow found under System > Shared Designer Defaults or open the Flow via the Registration Settings category in the Portal Settings.
Show Invite Action
The Invite User button allows an Administrator to invite a user to register for using the Portal.
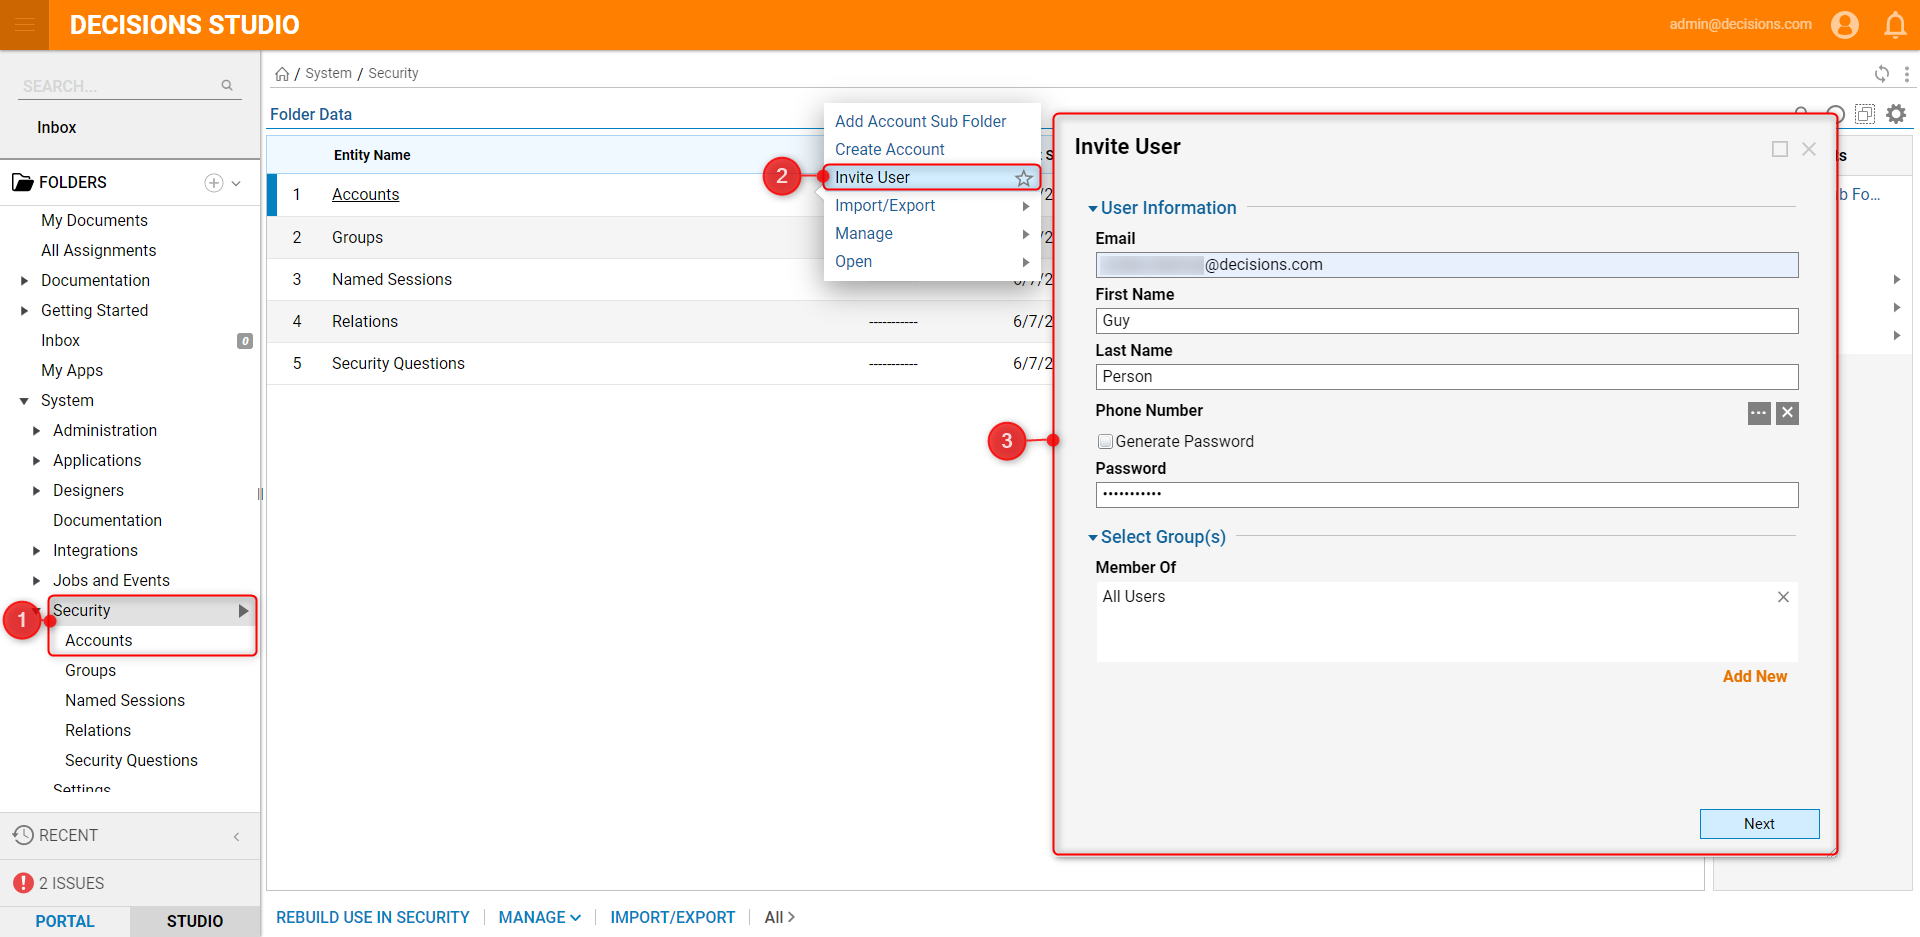
- The Show Invite Action setting, when enabled, creates an Invite User option at the Security > Accounts folder menu.
- To invite a user to register, select the Invite User option.
- Complete the User Information with the invited user's details. Add which group(s) the new account will be under via Select Group(s) and then select Next.
- Configure the email subject and message as desired, and click Finish.
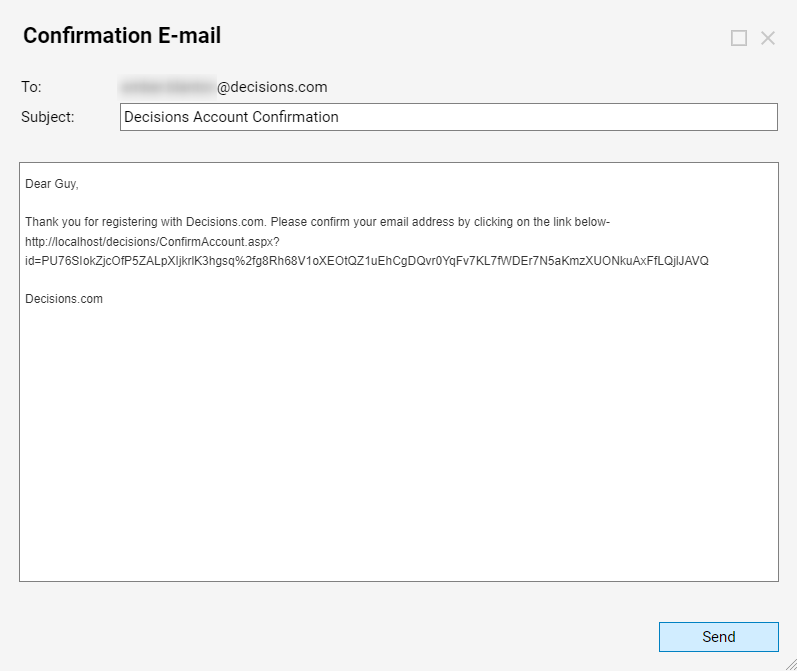
- The invited user will receive an email and must confirm the Account before logging into the Portal.