Overview
Alternate Access Pattern can be used to speed up data retrieval by allowing more customized procedures. This is like using an index, where it points to data in a table. This is very useful for databases with massive amounts of data.
This tutorial demonstrates how to use the Alternate Access Pattern for a database table. Alternate Access Pattern generates a step that can be used in the workflow to retrieve information from the integrated table based on input fields that are defined at the time of Alternate Access creation.
Go through the following document to avoid SQL Server Database Permissions errors: SQL Server Database Permissions
The following link will guide you through the same functionality by writing a SQL Query: Parameterized Queries
Users can use their default Decisions database or can integrate with another database. For more information on integrating a database, see Integrating an External Database with a Flow
Example
In this example, users will add a table to the database, create an Alternate Access to the Table, and test Alternate Access Pattern in the Flow.
The example below uses the Local Decisions Database. Users can use any database they have integrated with to add Alternate Access Patterns.
Adding Database Table
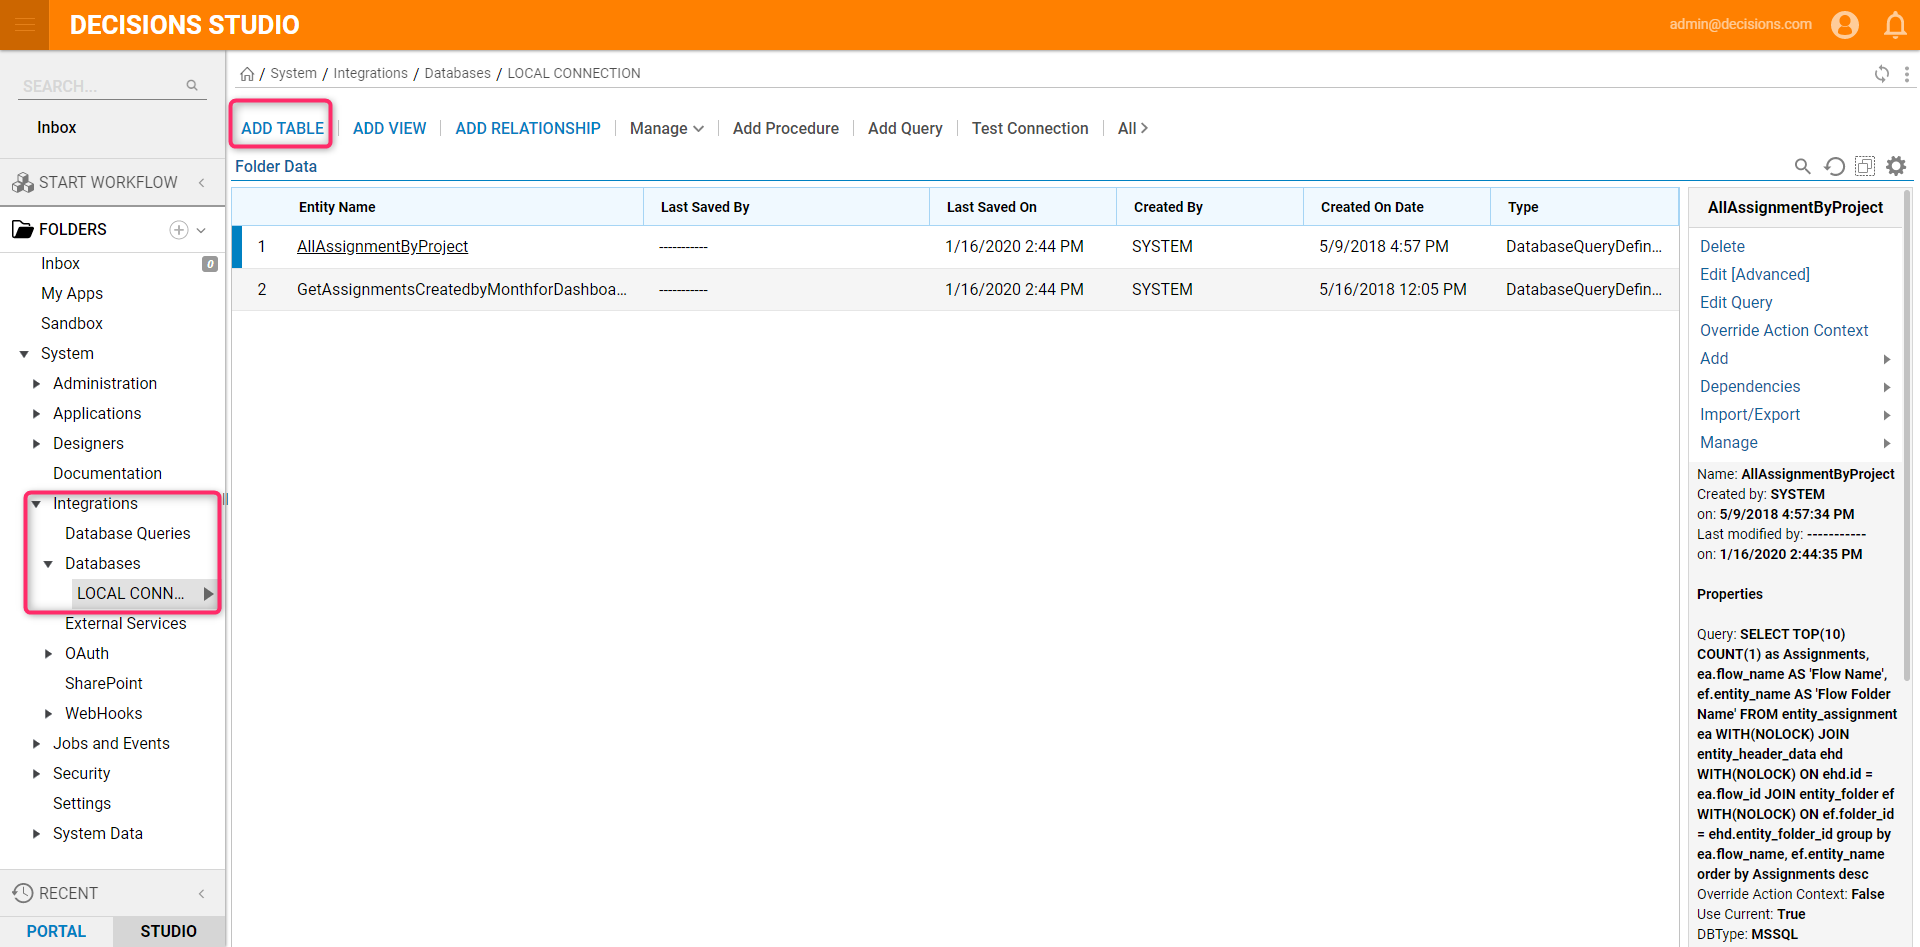
Navigate to the System > Integrations > Databases > Local Connection (This should be the database the user is using).
Then, click 'Add Table' on the Folder Actions Panel.
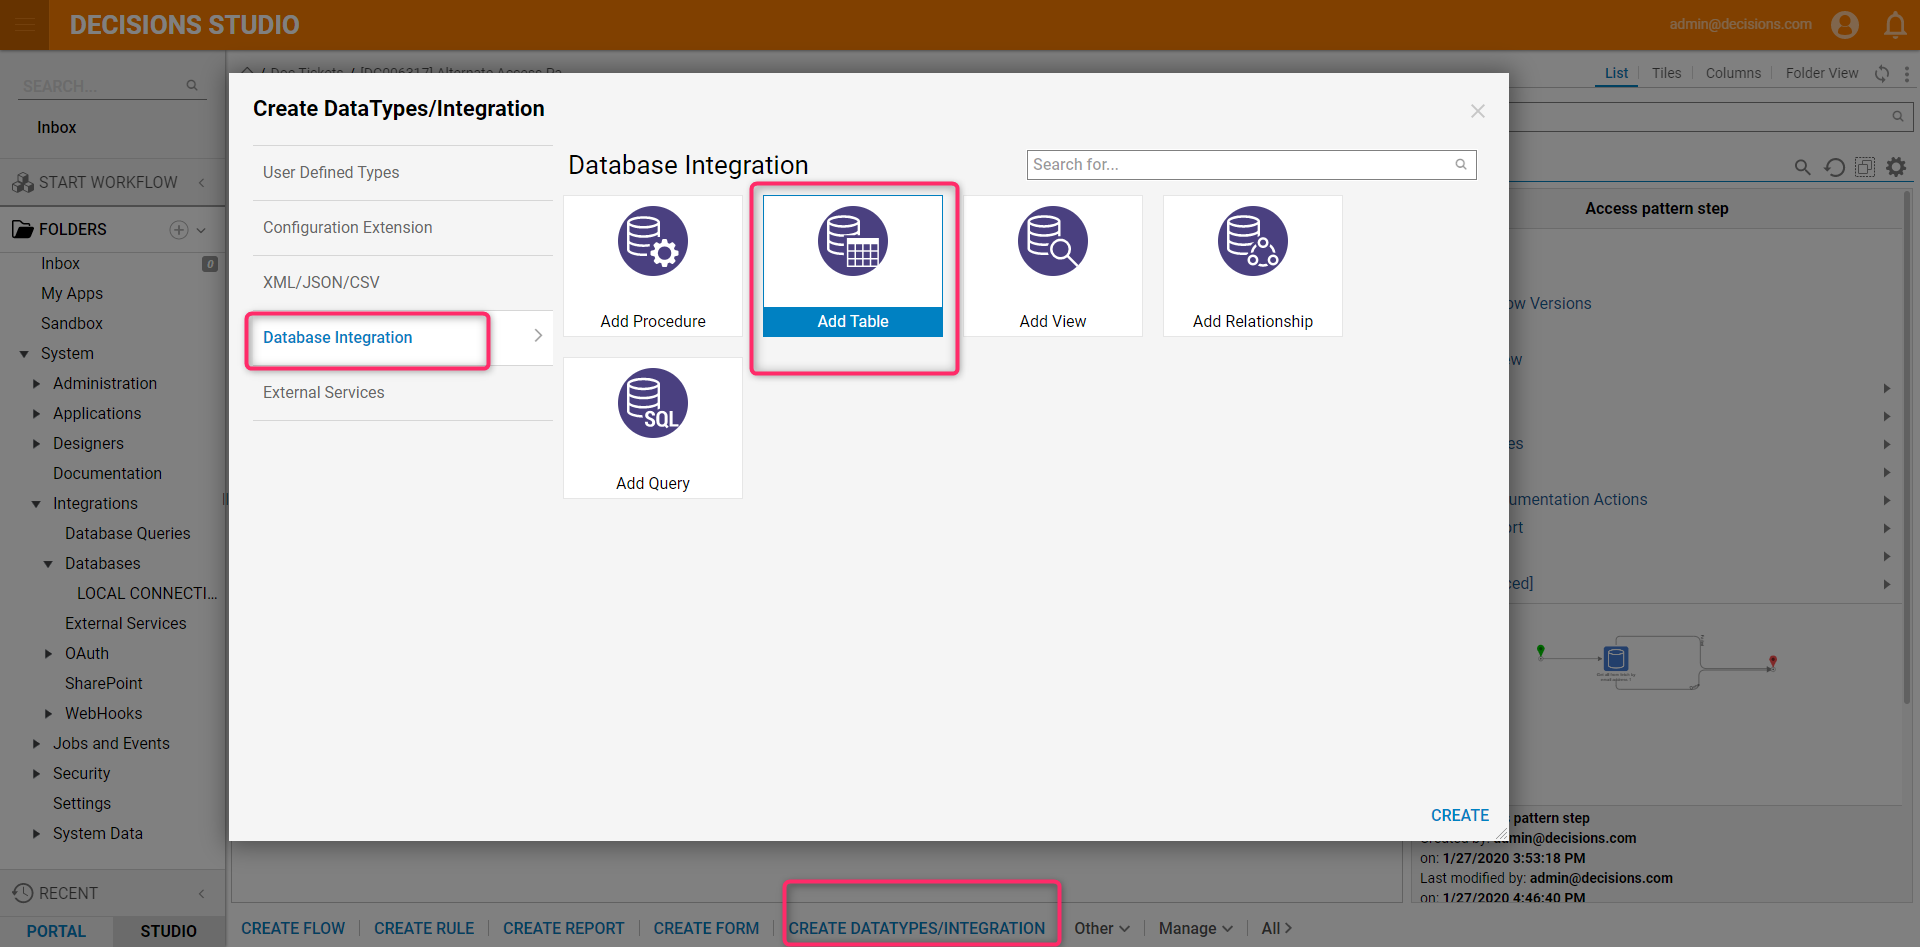
In any designer folder navigate to Datatypes/Integrations > Database Integration > Add Table.
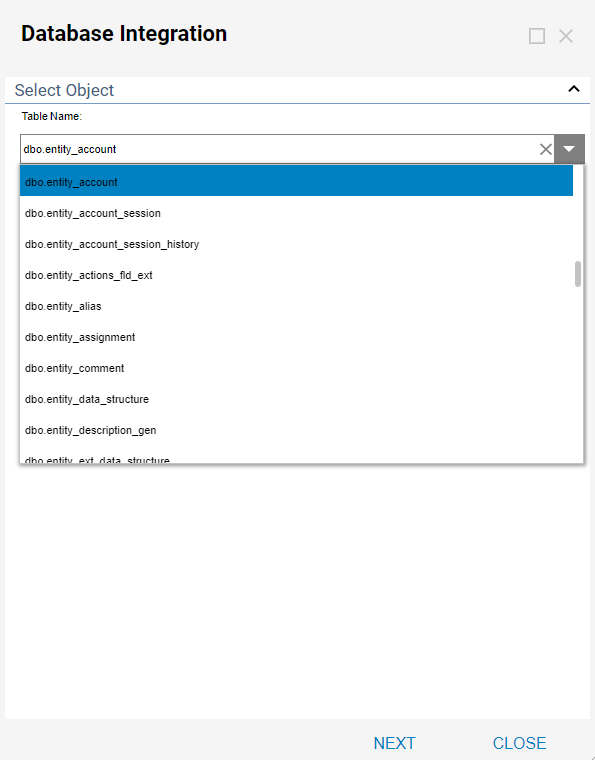
In the Add Table pop-up window pick available table from the Table Name dropdown list.
For this example, add in the "Entity_Account table.
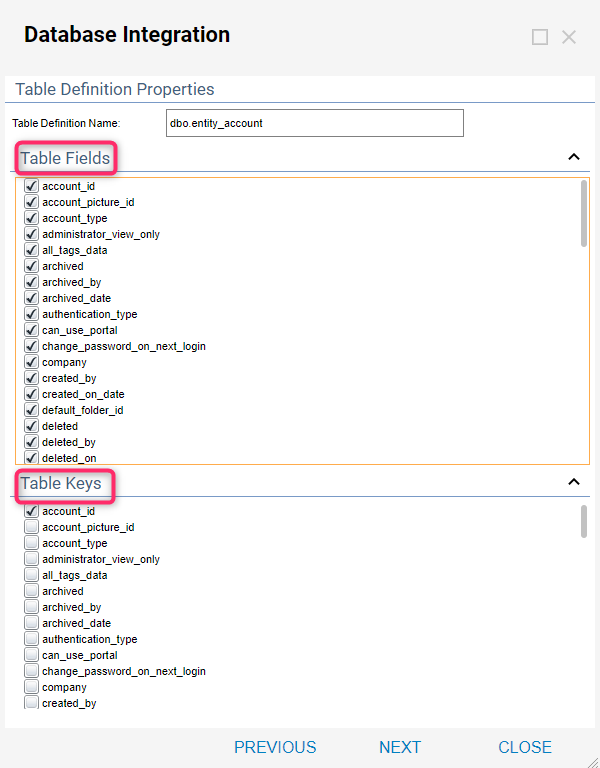
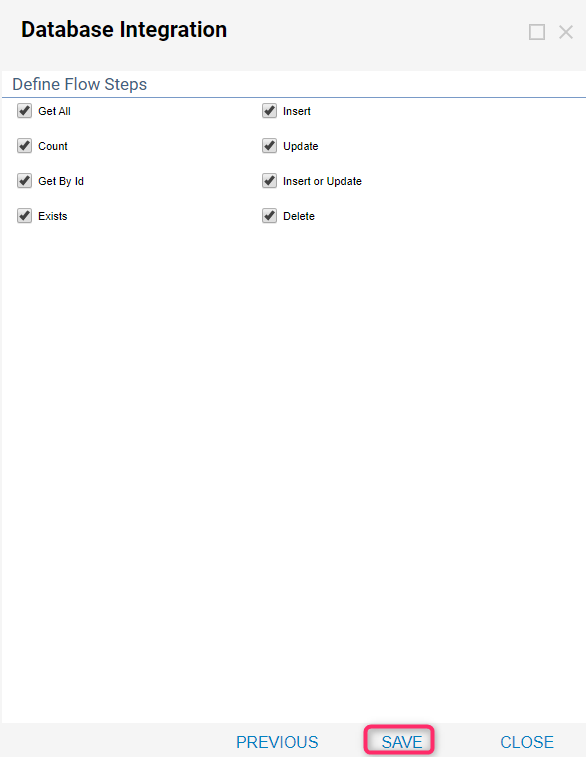
Pick Table Fields that will be available for this integration, Table Keys, and Steps to be generated by the System for working with this table. Click 'Ok' to save the integration.
Add Access Pattern
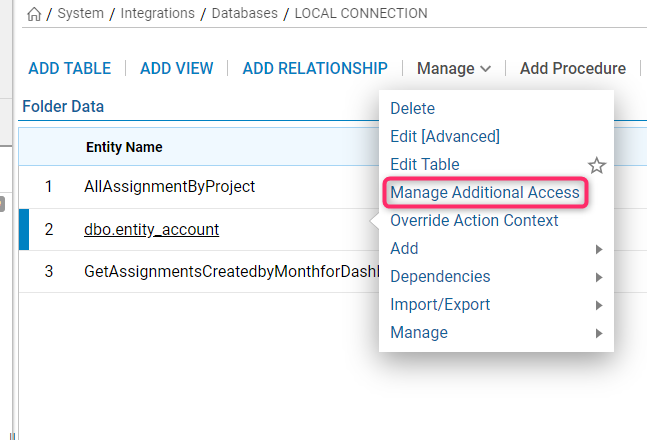
Navigate to System > Integrations > Databases > [Database Name] > [Table Name]. Select the Table Integration and select Manage Additional Access action.
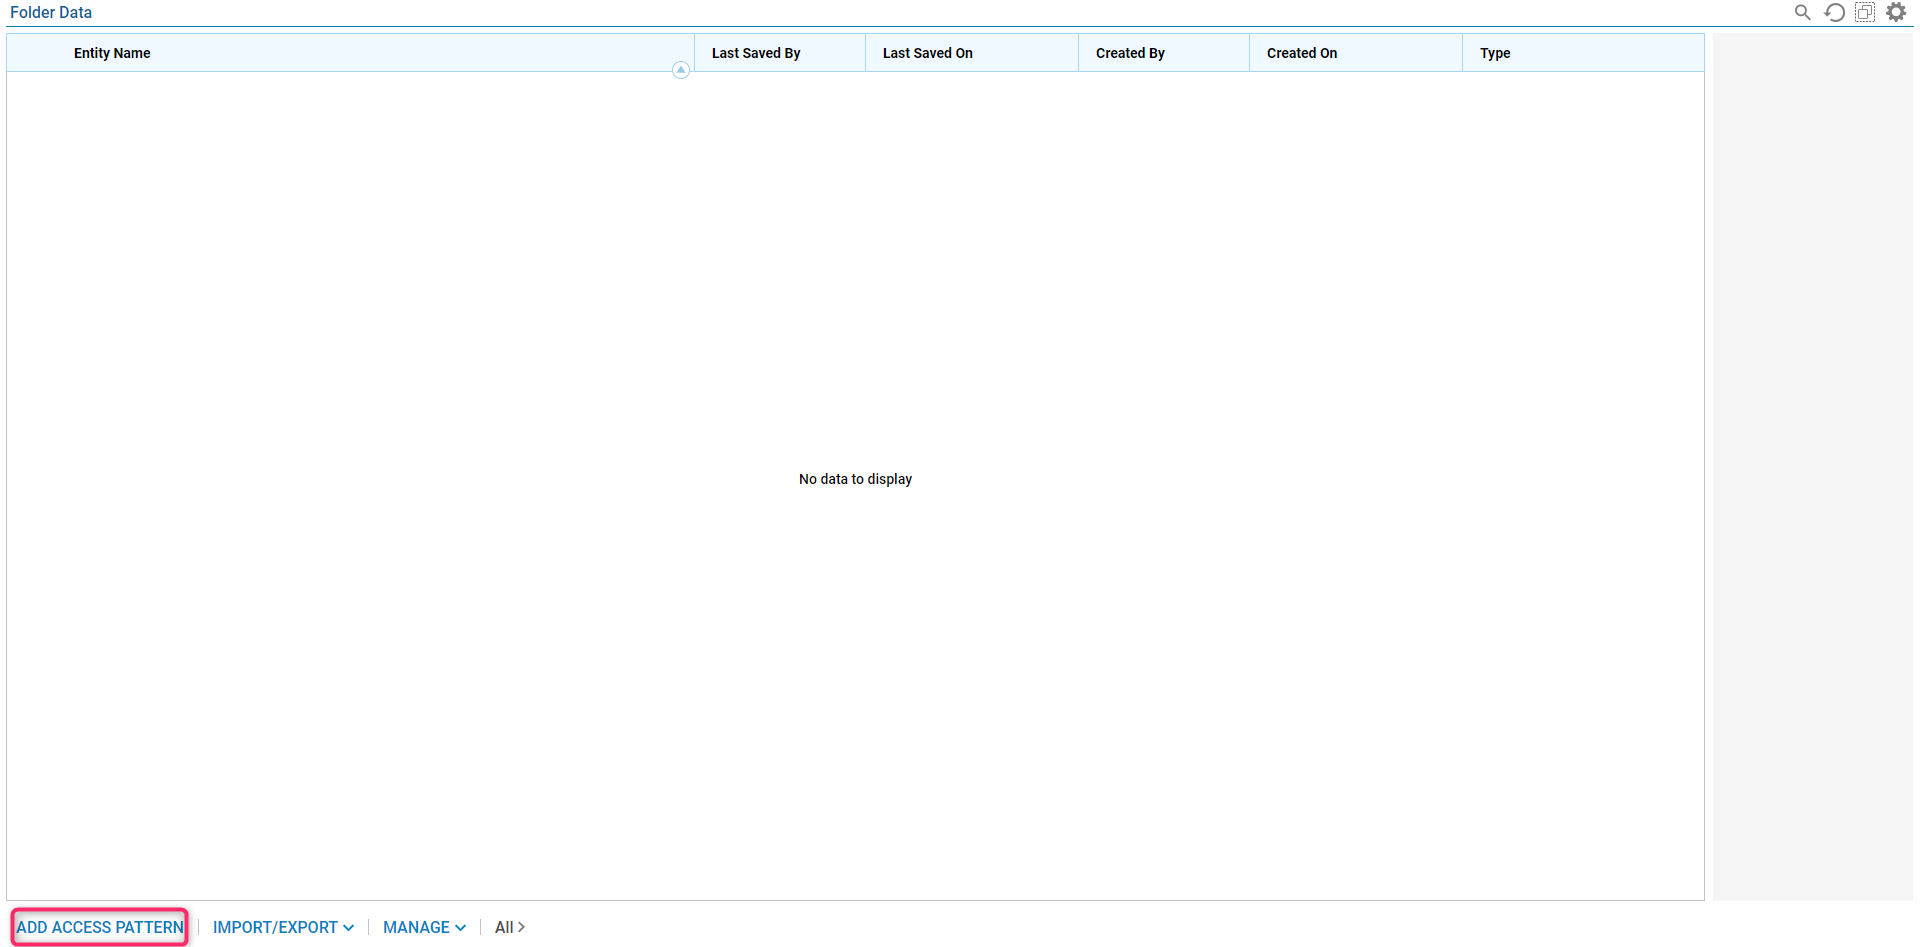
In the resulting folder, click Add Access Pattern button on Folder Actions Panel.
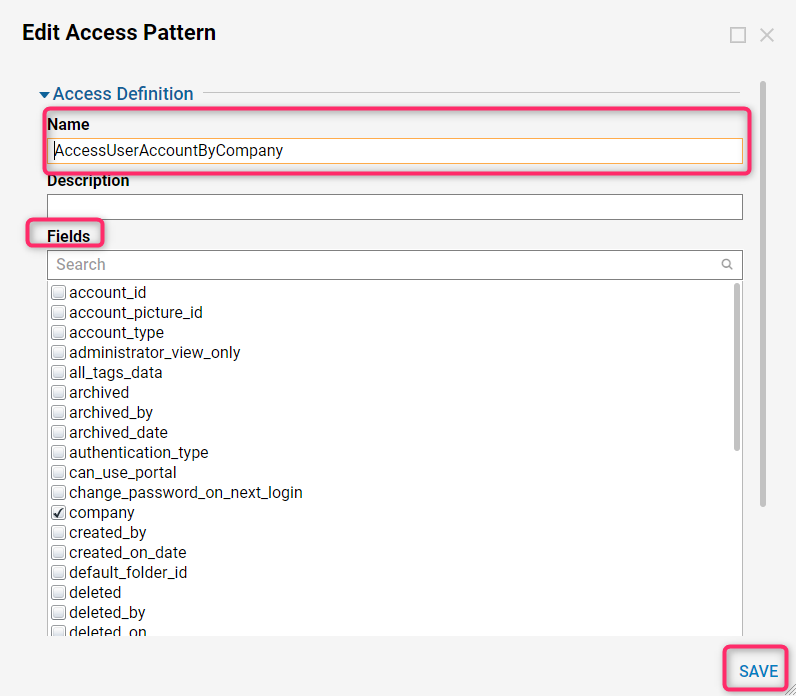
In the Add Access Pattern configuration window, Name the Access Definition and pick what Fields should be Inputs for the step that will be generated by the System. Click 'Ok' to save and continue. For this example, choose the "Company" for the Field.
The Additional Access Pattern is created. The step that was generated in this case will work as a query for the Accounts table that should pull all Accounts where Account. Company equals Input to the step. Close the folder.

Using the New steps in a Flow
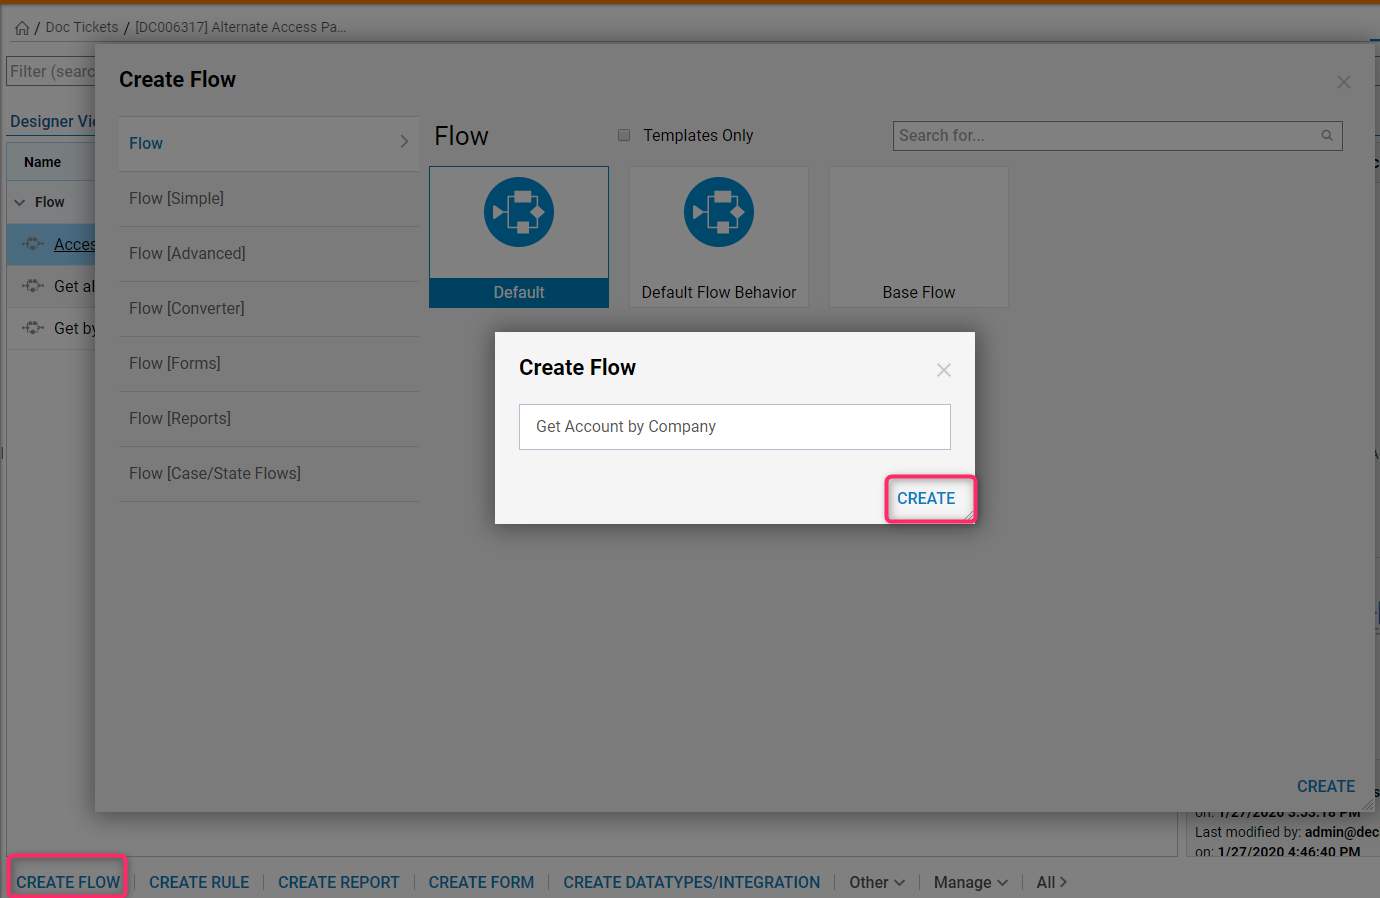
Navigate to a Designer Folder and click Create Flow from the Folder Actions Panel. In the resulting pop-up window Name the Flow and click Create to proceed to the Flow Designer.
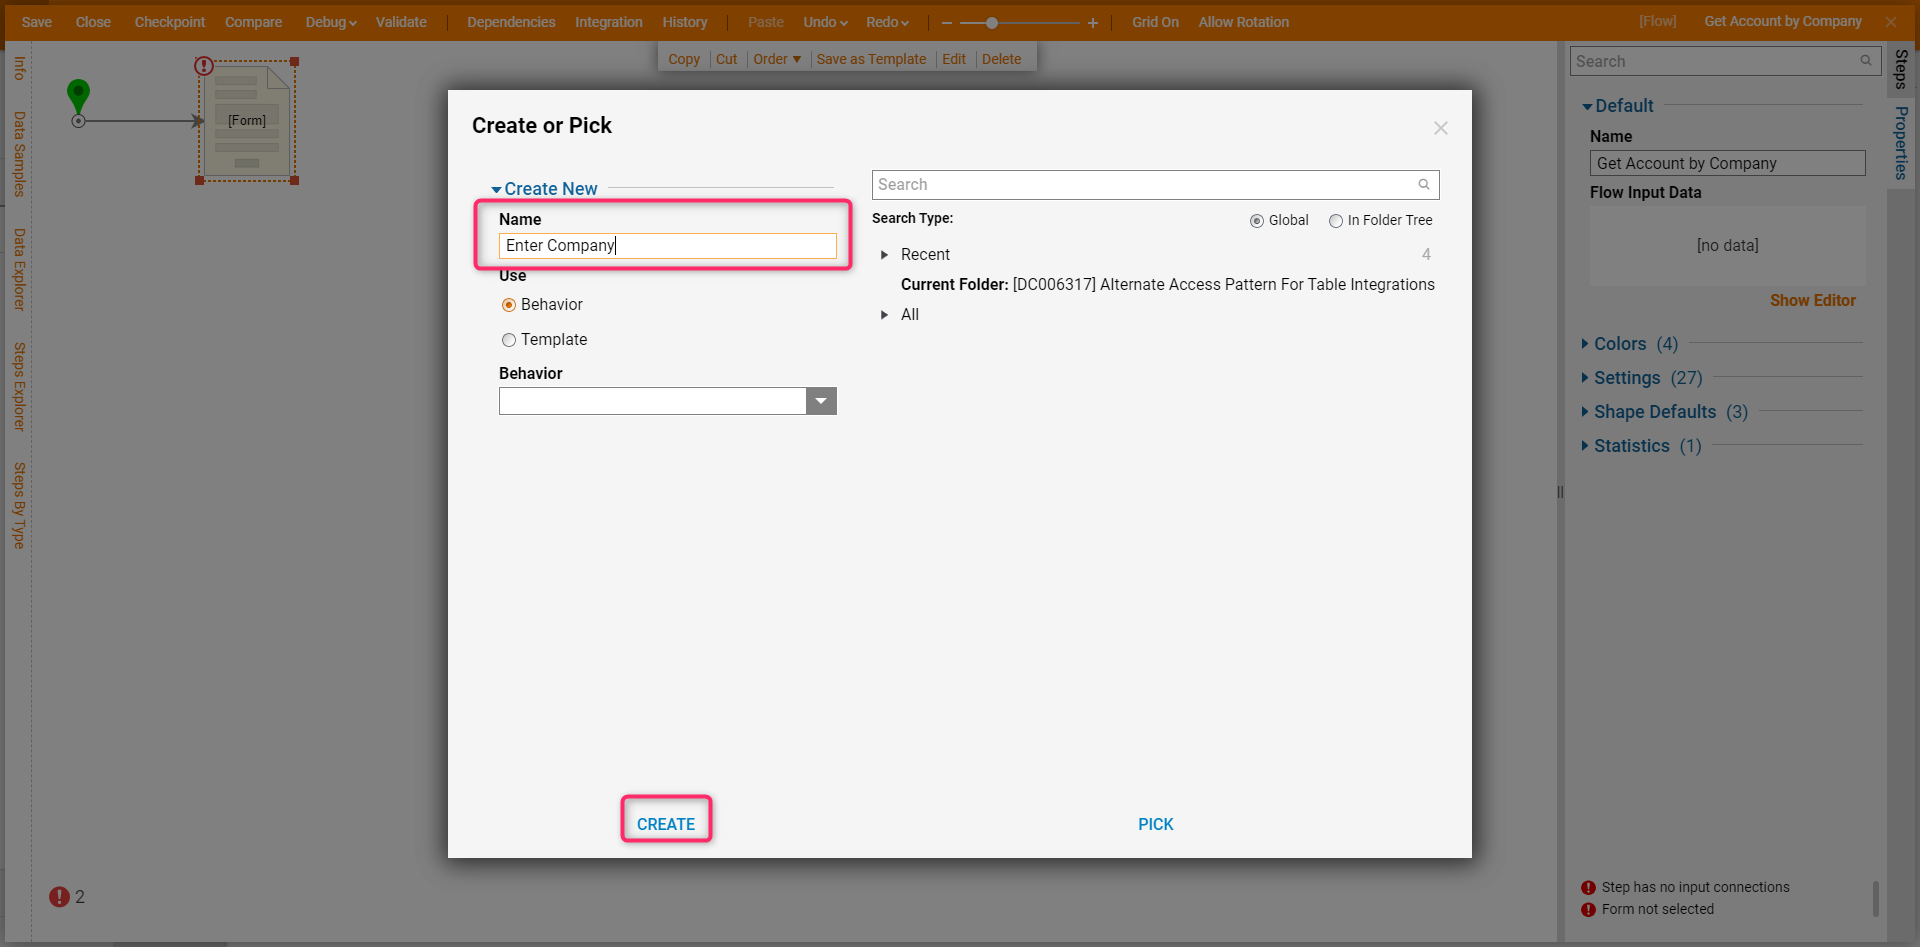
In the Flow Designer, add Show Form step from Steps category. This Form will serve to grab the user’s input.
In the resulting window Name the Form and click 'Create' to proceed to the Form Designer.
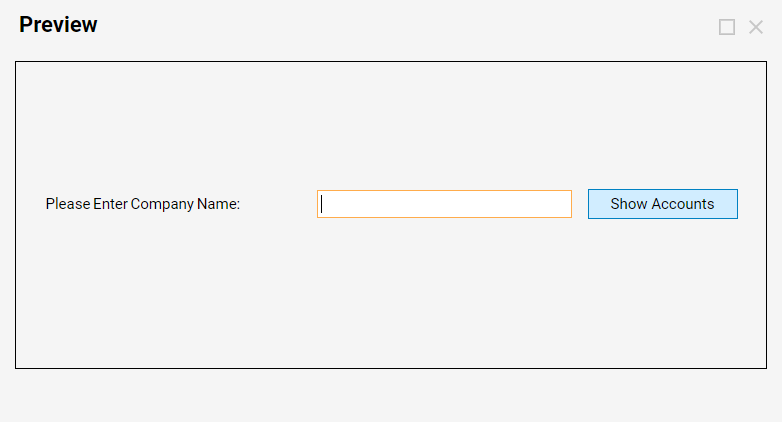
In the Form Designer simply add Label, Textbox, and Button to the workspace.
For this example, this Form asks the user to input "Company" and submit to display results on the next Form. Save the Form and close Form Designer.
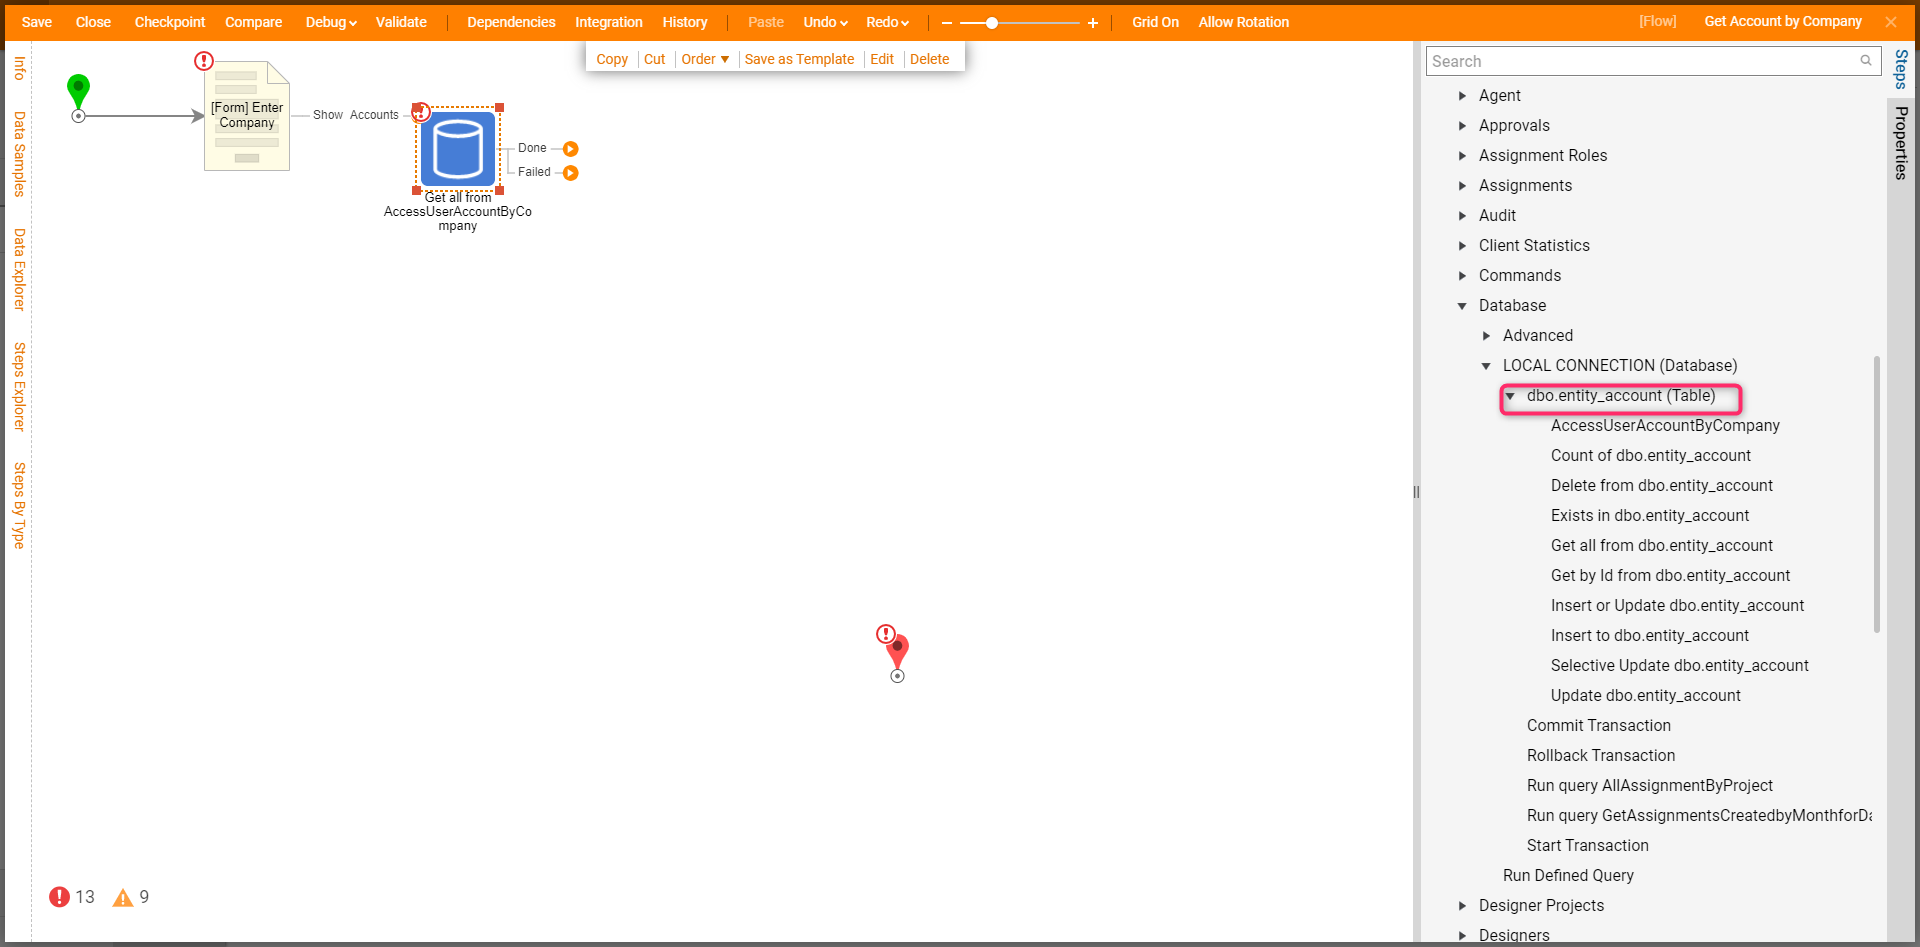
Any place that "AccessUserAccountByCompany" is used, users should replace that with their step they created if using a different table.
Add the Created Step
In the Flow Designer, add the Step that was created through the Access Pattern. For this example,
AccessUserAccountByCompany step was used in this Flow that was generated by the Additional Access Pattern from the Integrations > My Integrations > Database > Local Connection category.
On the Done outcome from the AccessUserAccountByCompany step add another Show Form step from the Steps tab. This Form should be designed to display the result of the AccessUserAccountByCompany step. Name the Form and click 'Create' to proceed to the Form Designer.

In the Form Designer, add a Button to the Form. Next, add a Data Grid component from the List category. In the Input Data section enter the Data Name, then using the Type picker pick LOCALCONNECTION_dboentity_account type from the Table Definition Types.
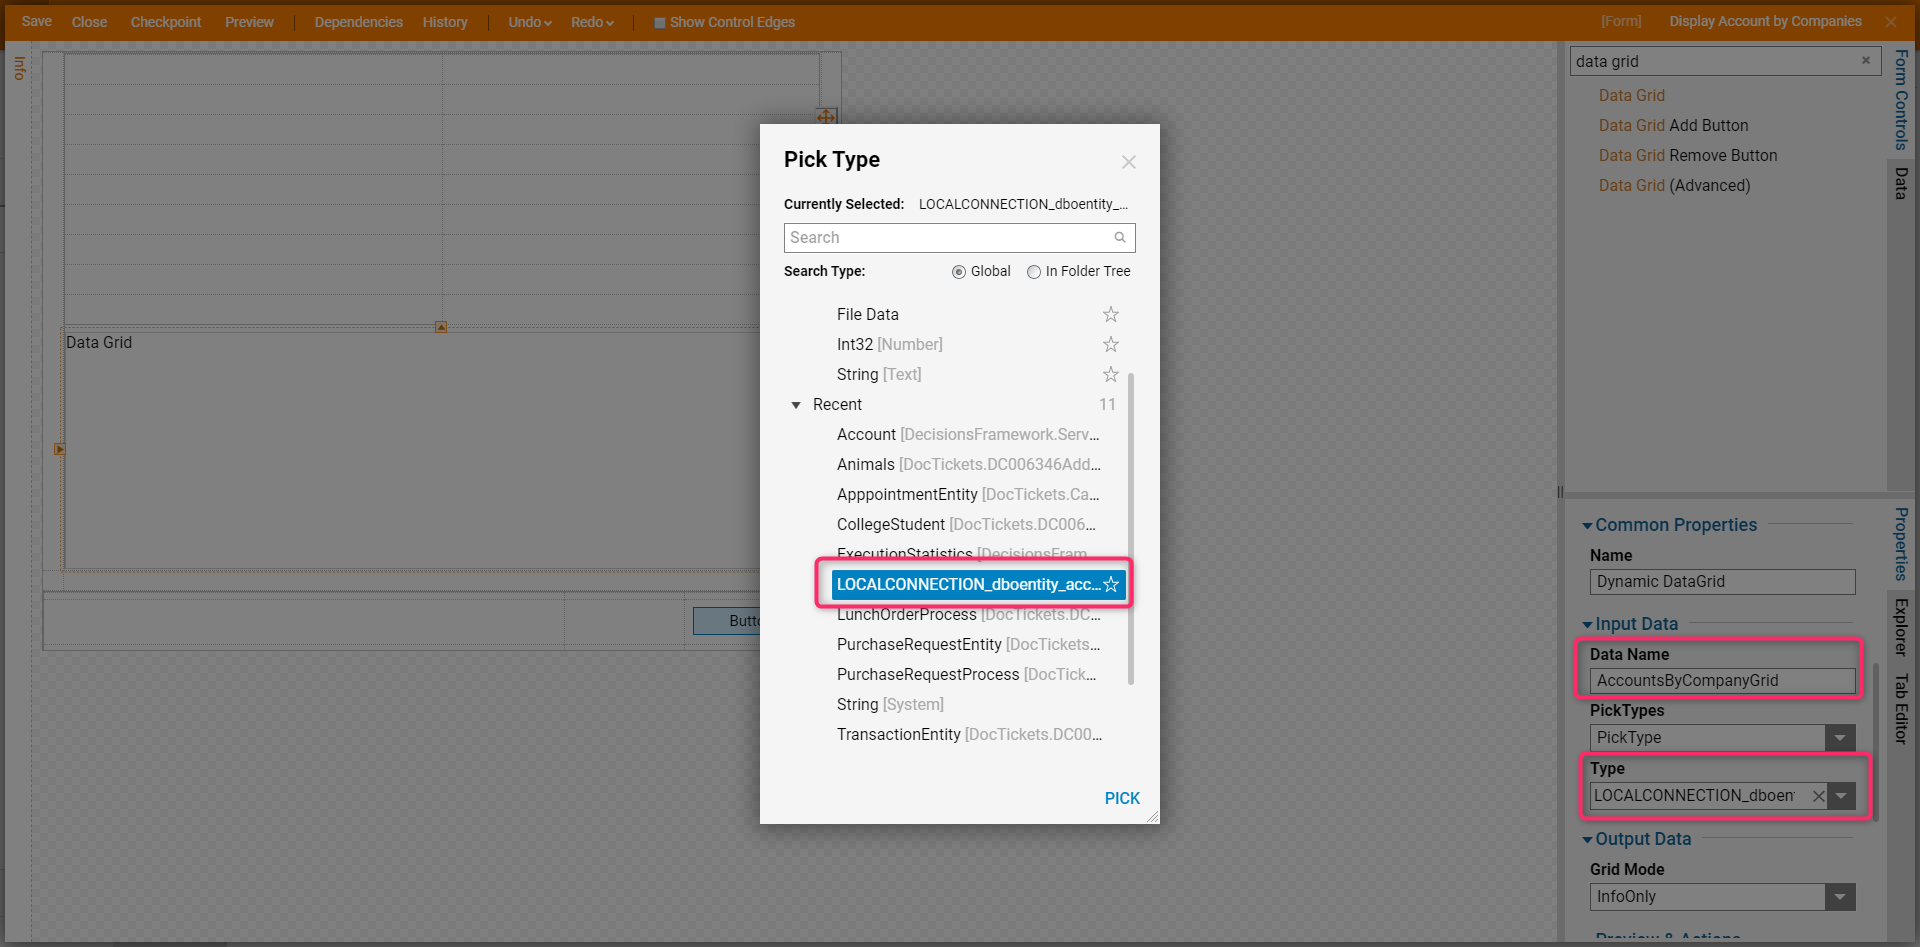
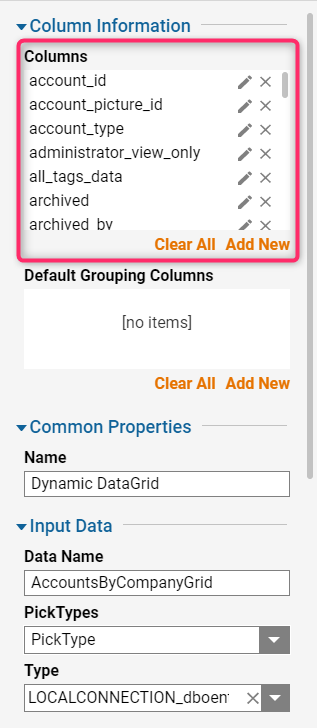
Data Grid creates Columns that will represent fields in our Table. Users can change their order or remove any of them to prevent them from displaying them on the Data Grid component. This completes the second Form design. Save the Form and close Form Designer.
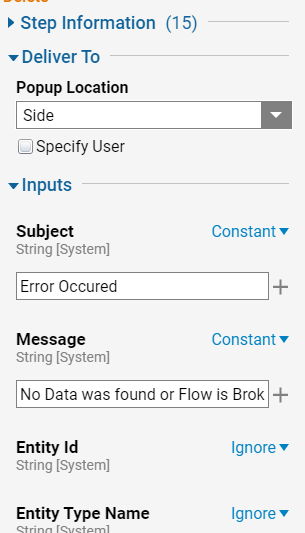
Back in the Flow Designer add Show Popup step from the Steps Tab category on the Failed outcome from the AccessUserAccountByCompany step. This pop-up will alert the user in the case if the AccessUserAccountByCompany step fails for some reason (like failed connection).

Next, configure the Subject and Message for the Pop-up step and click 'Add'.
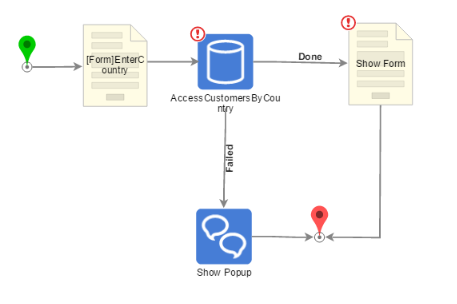
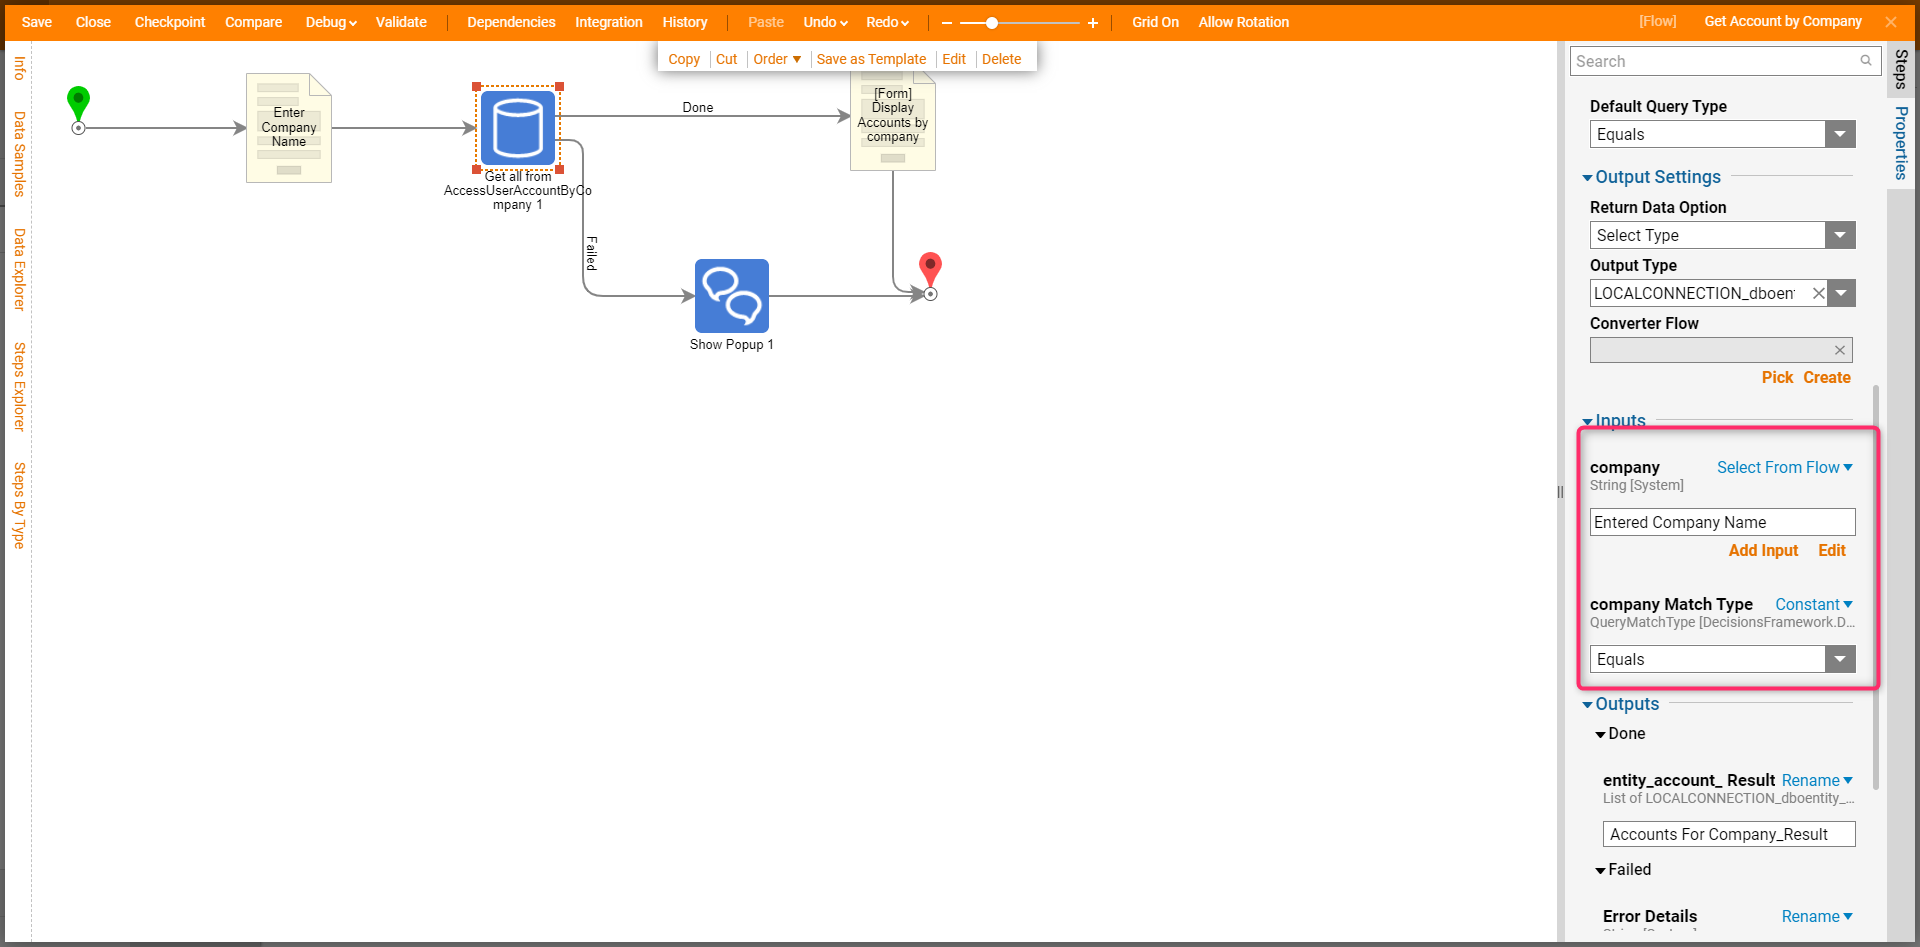
Then, connect the steps in the Flow. When all steps in the Flow are connected, select AccessUserAccountByCompany step on the workspace to configure it.
Locate the input configuration. For the Company input, the Select Value Mapping type is used and Entered Company Name data from the Textbox on the First Form is picked.
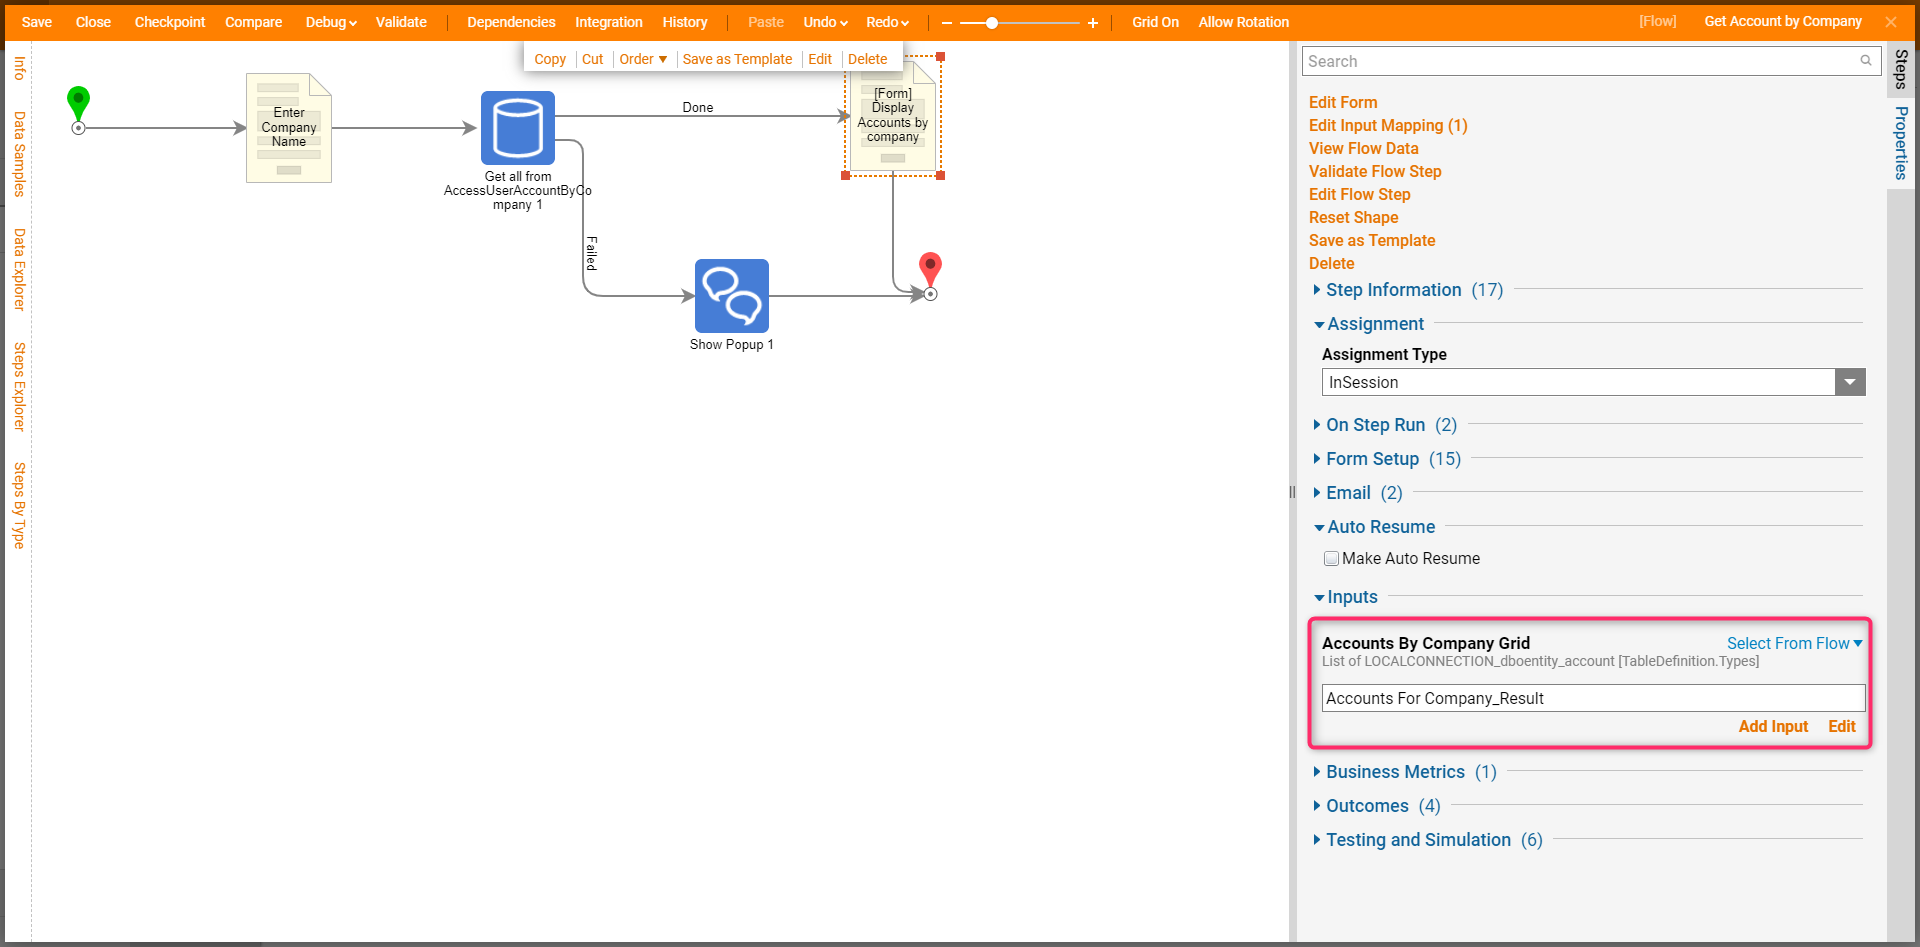
Select the Second Form step on the workspace and locate Inputs configuration. In this example, for AccountsByCompanyGrid element on the Form Select Value Mapping type was used and Accounts For Company_Result output from the AccessUserAccountByCompany step was picked.
Testing
This completes the Flow Design. Save and Close the Flow. Run the Flow to test it out.

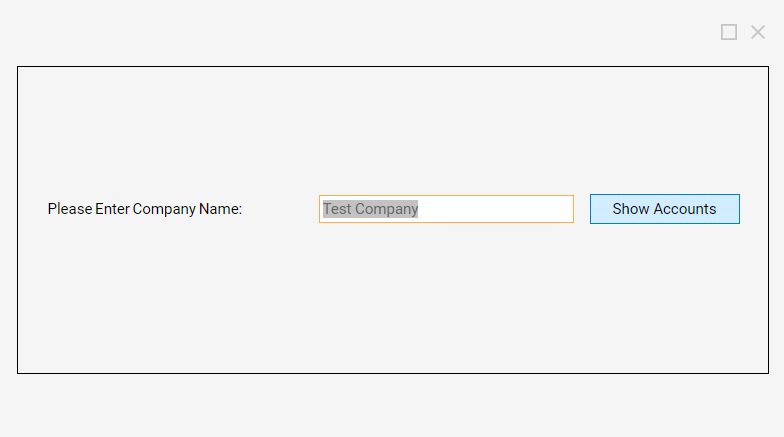
The first Form opens in the user enters Company in the text box and clicks Show Accounts. in this example, the user searched the company "Test Company".
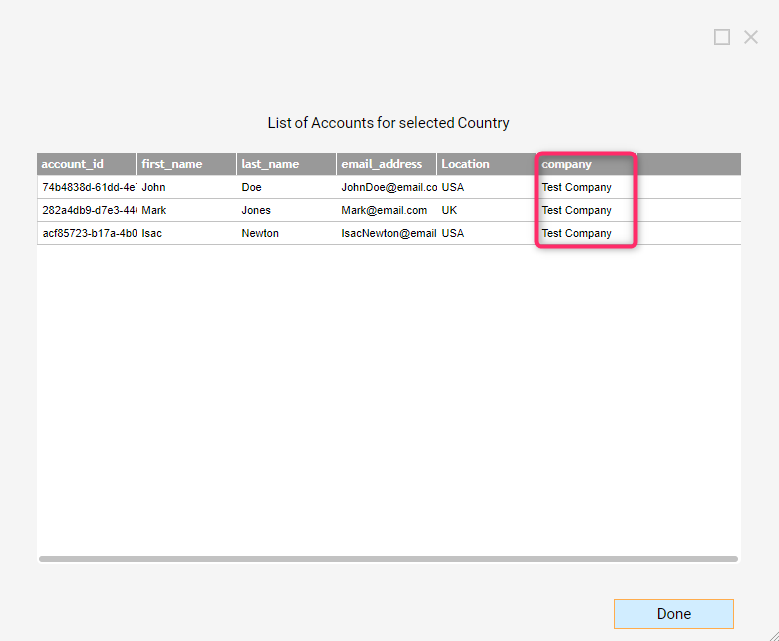
The second Form opens with all Accounts for the company "Test Company" displayed. Click 'Done'.
Get By ID & Get All Steps
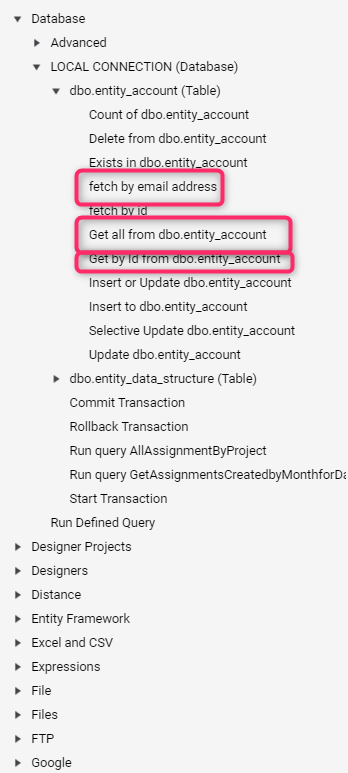
When a table is added, it creates a list of steps that can be used with it. The example below added the database table "dbo.entity_account". It also creates a step "Fetch by email address" by using the Alternate Pattern Access. The main difference between these steps is the inputs and the flexibility with the configuration. The output of these steps is the same: "dboentity_account_Results", "Error Details", "Error Message".
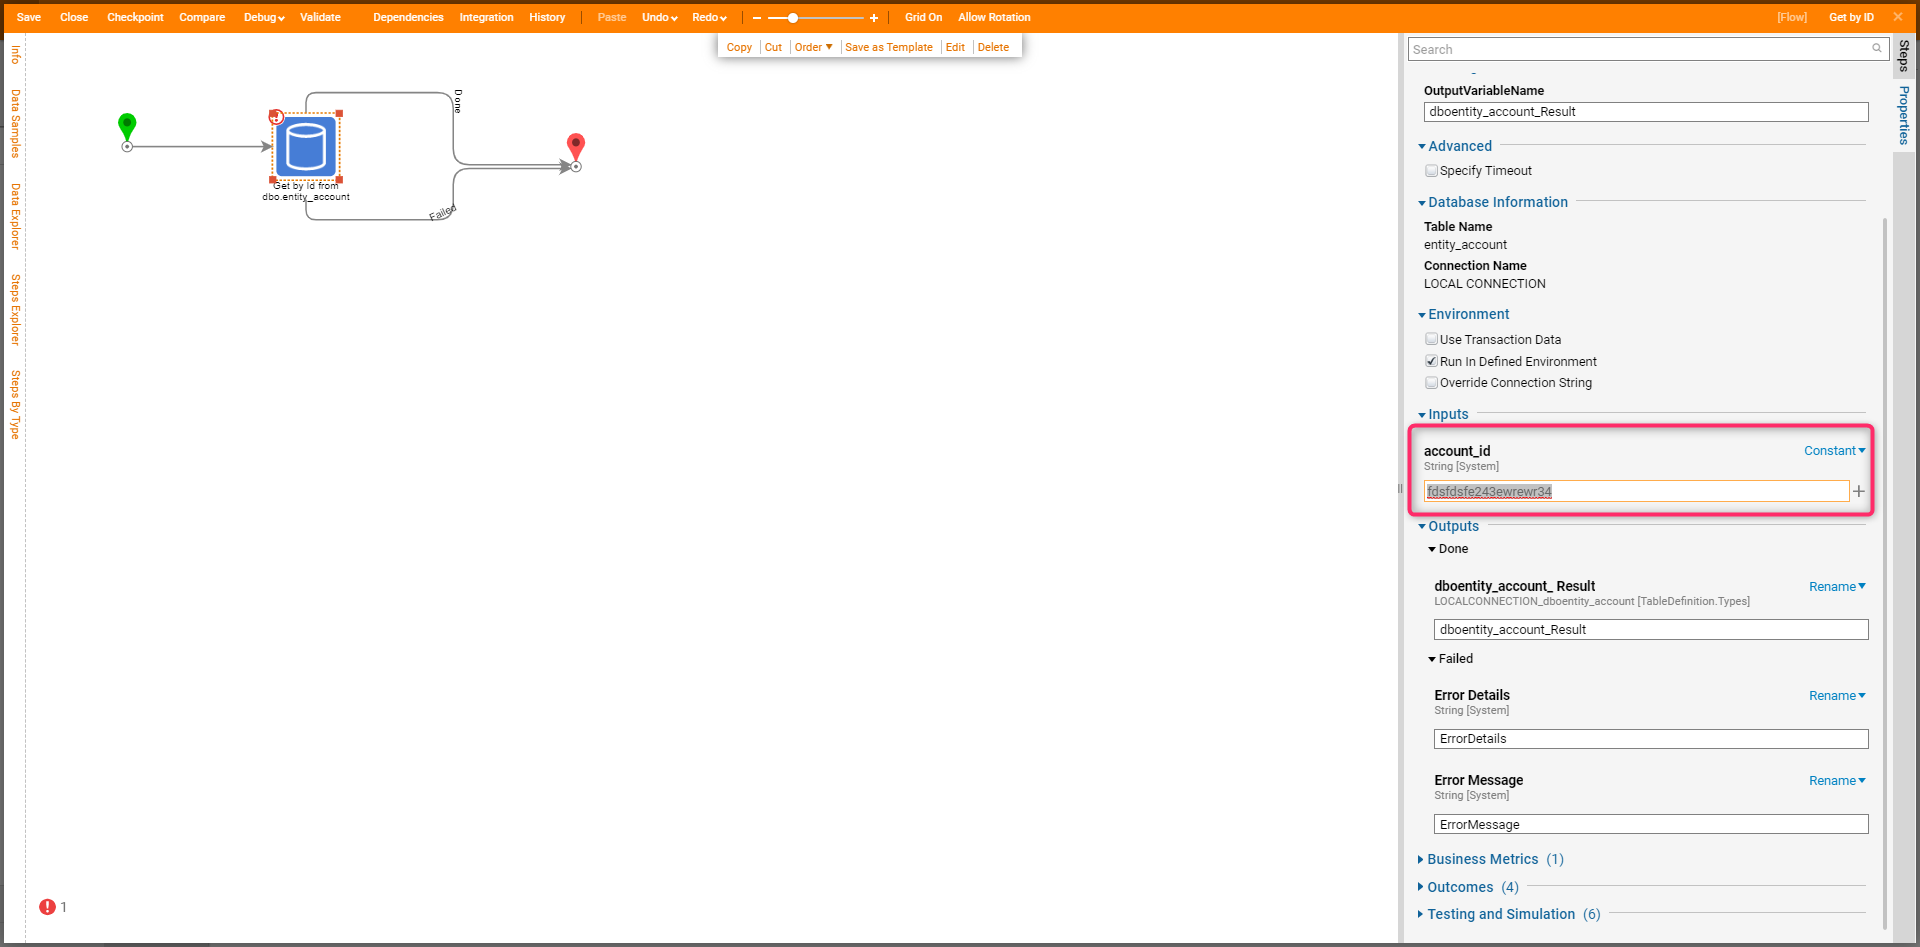
Get By ID Step
This step only requires the input of a single "Account ID". It will display all data relating to any accounts found with that ID.
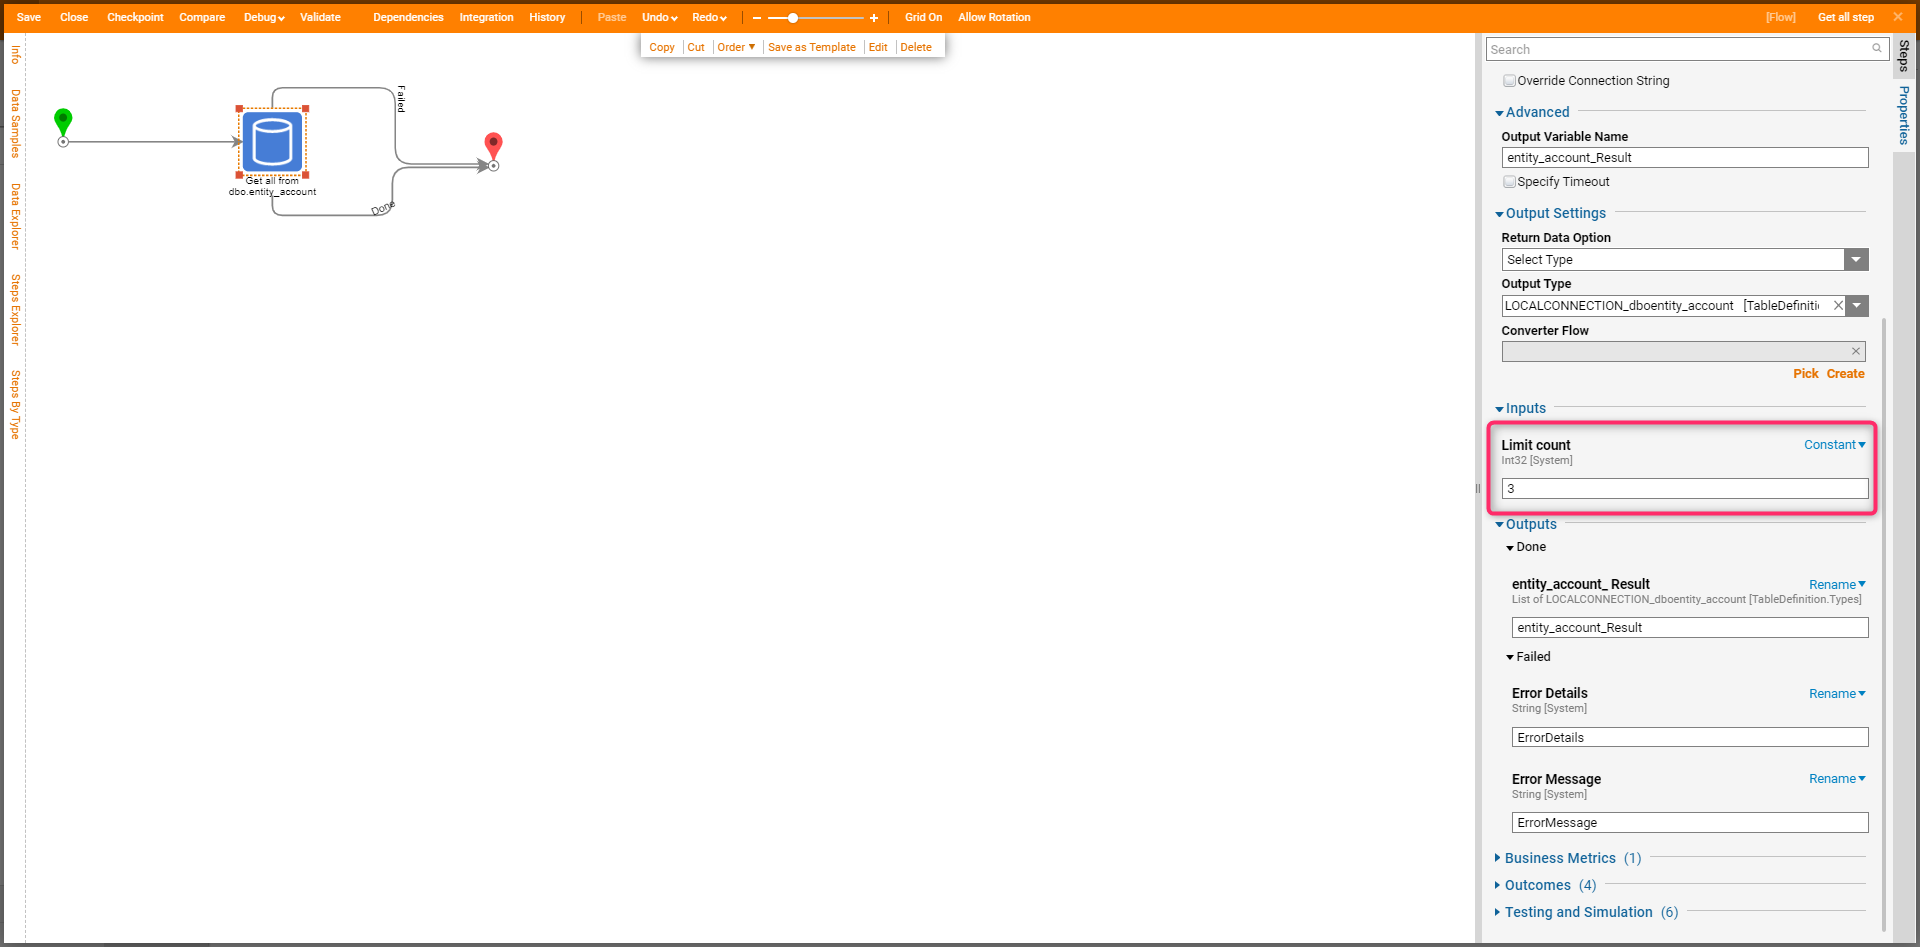
Get All Step
This step only requires the input "Limit Count". This value will limit the number of results that are displayed. This step will get all the data in the table. In this case all the accounts and their information.
Access Pattern step: Fetch by Email Step
This step provides more flexibility compared to the other two. The number of inputs can be varied for this step. In the example, this step has three inputs: "Email Address", "Modified date", and "Never expires". Each of these steps is paired with the "Match type" input.
Match Type constant values are:
- Equals
- DoesNotEquals
- IsNotEqual
- IsNull
- GreaterThanOrEqualTo
- LessThanor EqualTo
- GreaterThan
- LessThan
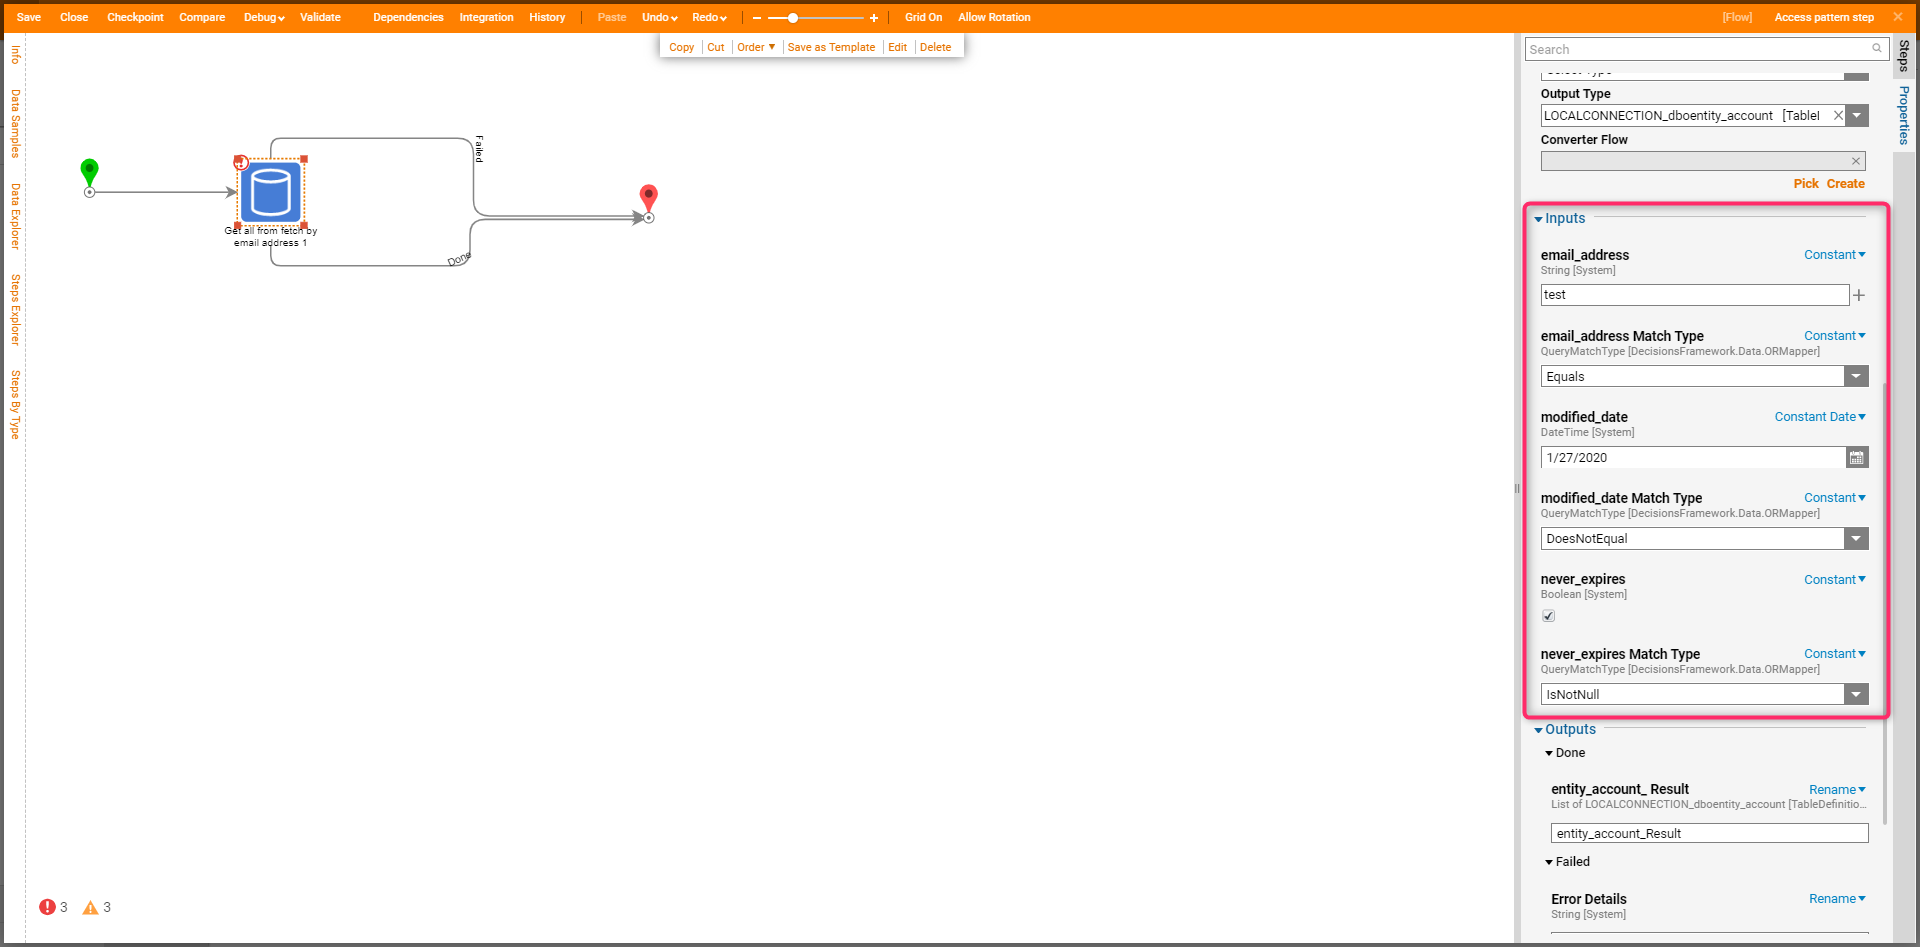
This step will have a more restrict/narrow search and outcome. This would be an ideal method for tables with a large amount of data.