Overview
After an External Database has been created and integrated into Decisions, use specific Flow Steps to integrate the external data into the Flow. When integrating with a Database in Decisions, use Flow Steps to Update, Delete and Insert steps that interact with the integrated Database in the Flow. Display data from an integrated database using a Data Grid component on the Form.
Example
External Database Flow Steps
- Create a Flow and use the Insert, Update and Delete steps against the Database that was just integrated.
- Navigate to the Designer Folder and select the CREATE FLOW button from the Folder Actions Panel.
- Name the Flow (Insert Update Delete Steps Flow), and select CREATE to proceed to the Flow Designer.
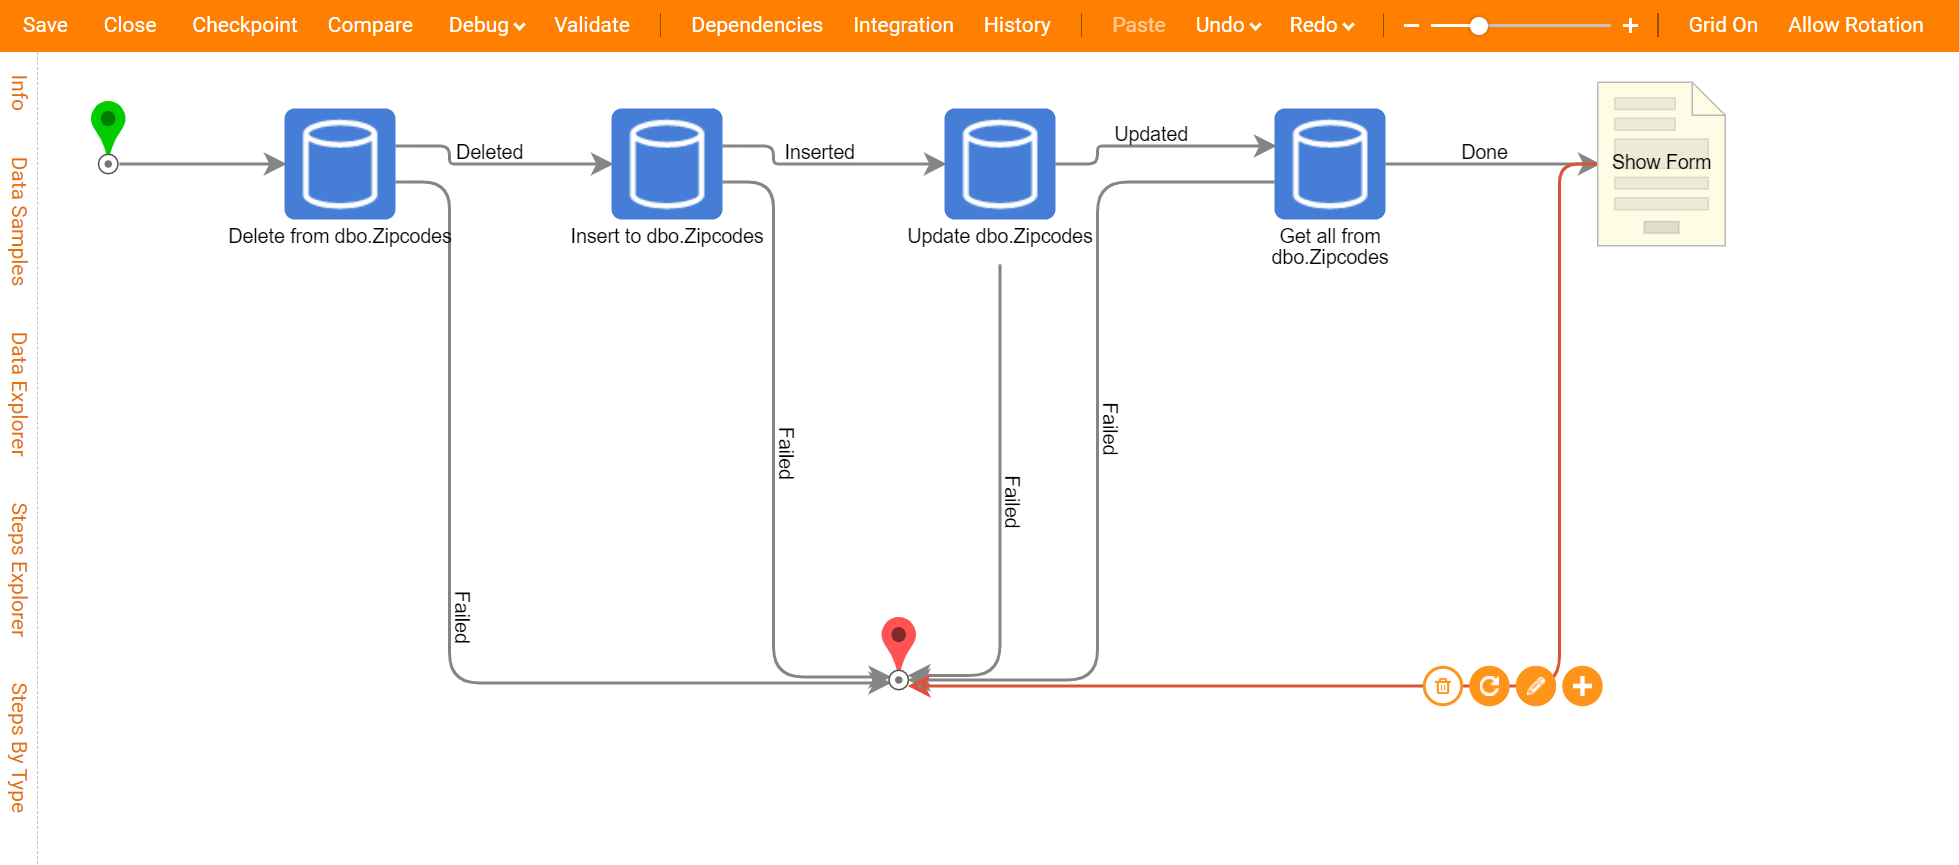
- In the Flow Designer, expand the Integrations > My Integrations > Database > Integrated Db Name(Database) > integrated table name category.
- First, add the Delete [table name] step.
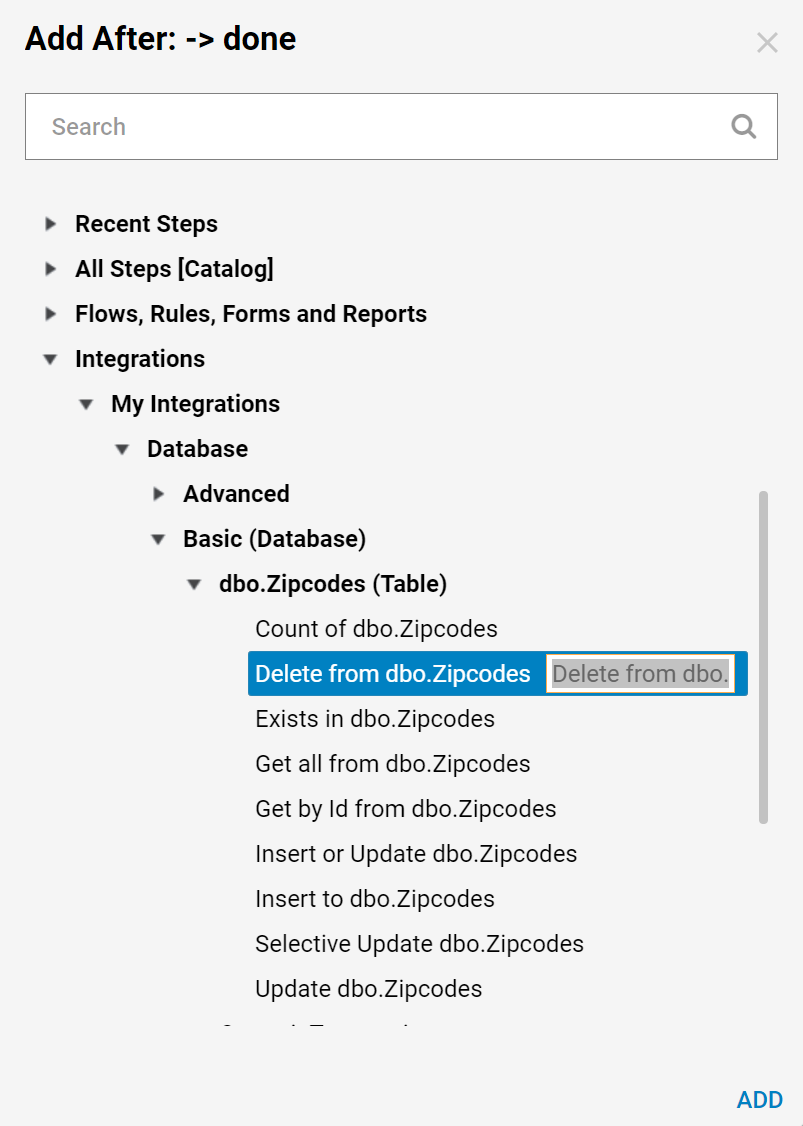
- Connect the Failed outcome from the Delete step to the End step in the Flow.
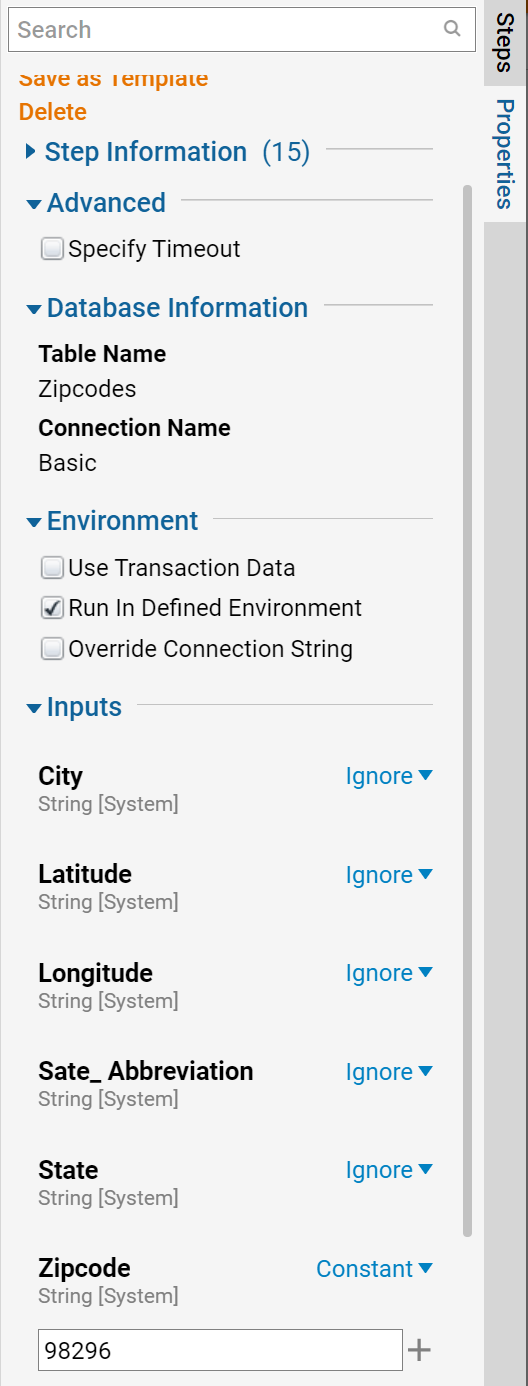
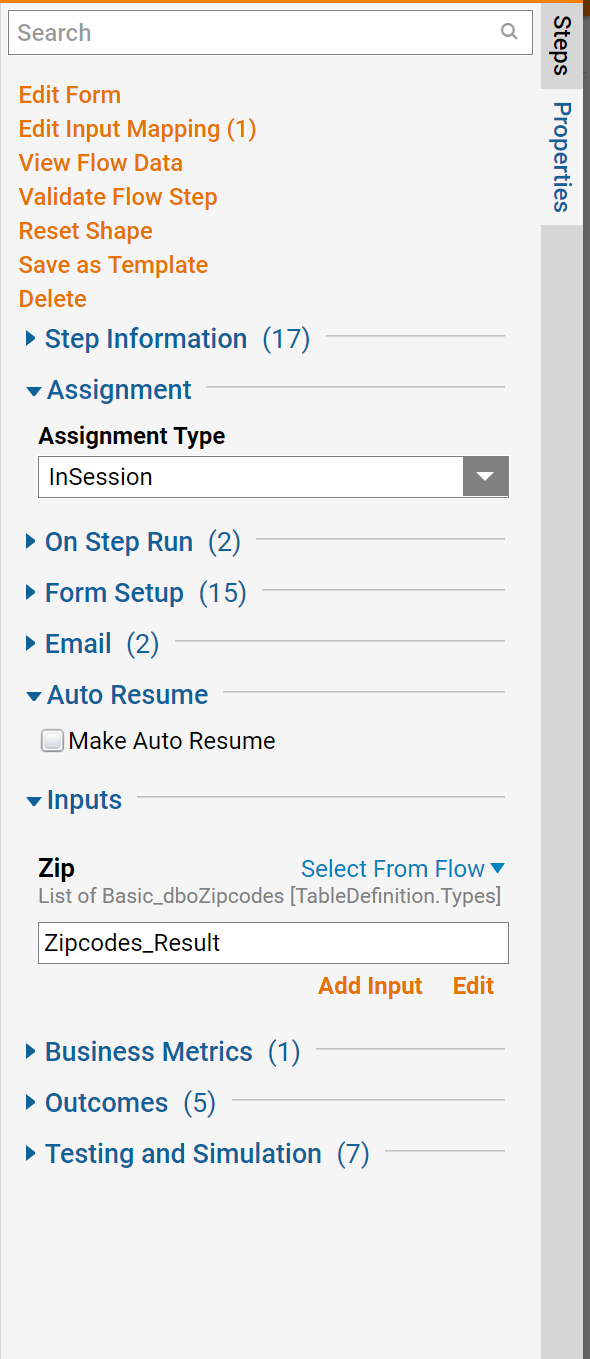
- Select the Delete step in the Flow Designer and locate the step properties (Figure 9).
- The record that will be deleted with this step should be identified by the Primary Key ID from the table (in this case UnitID is a primary key in the integrated table).
- For the UnitID, select Constant Mapping type and provide a desirable Value.
- Then, click Add Step.
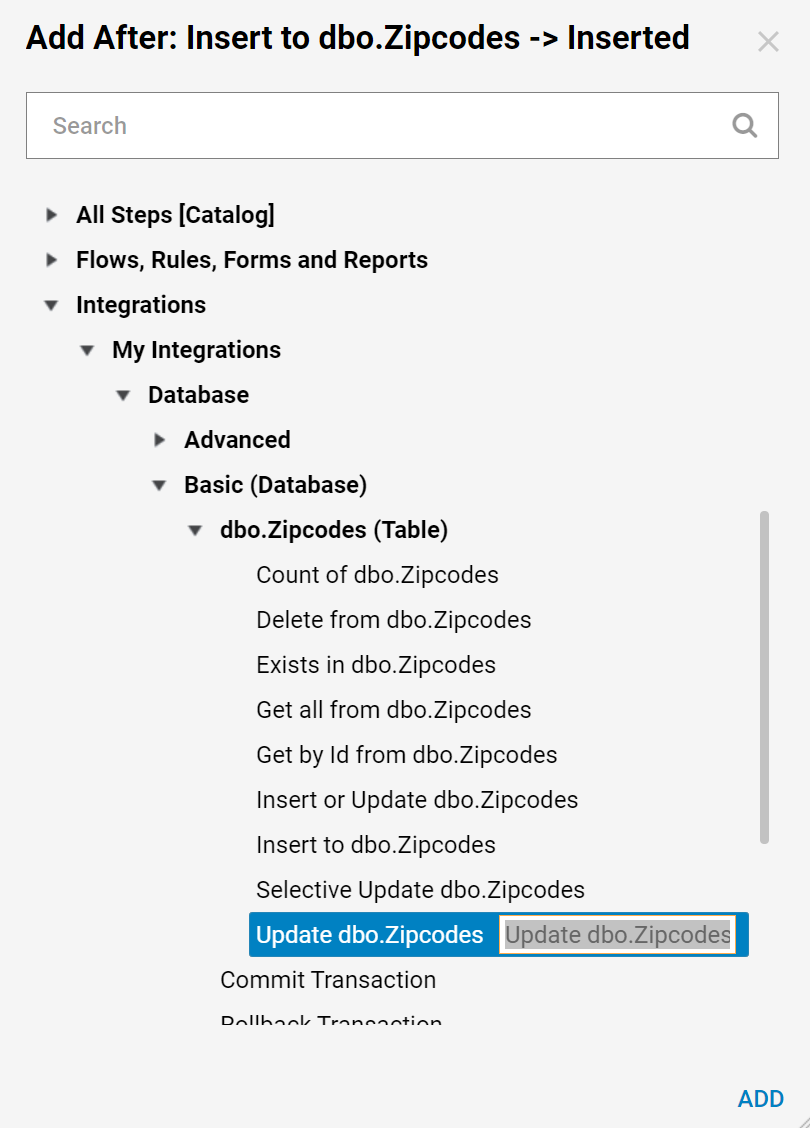
- Add an Insert to [table name] step from Integrations > My Integrations > Database > [DATABASE_NAME] > Insert to dbo.zipCodes [integrated table name].
- Connect the Deleted Outcome pathway from the Delete step.
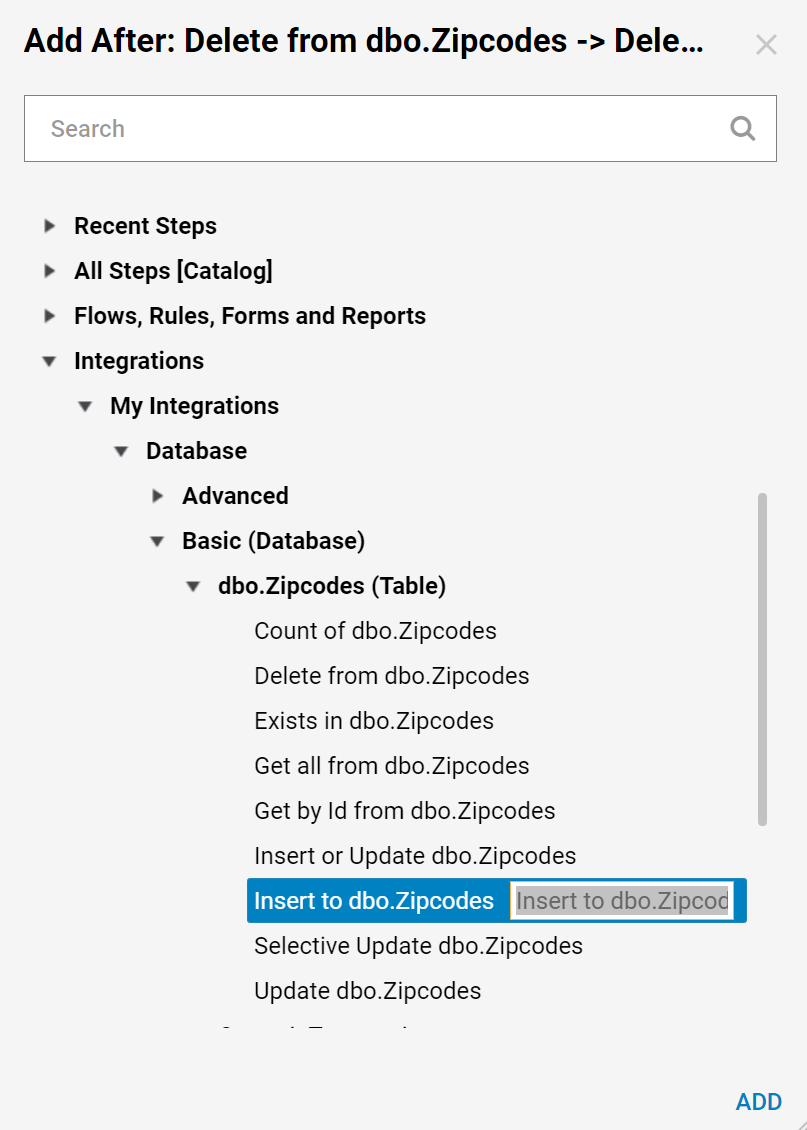
- Just like with the Delete step, get the Failed Outcome step from the Insert step and connect it to the End step.
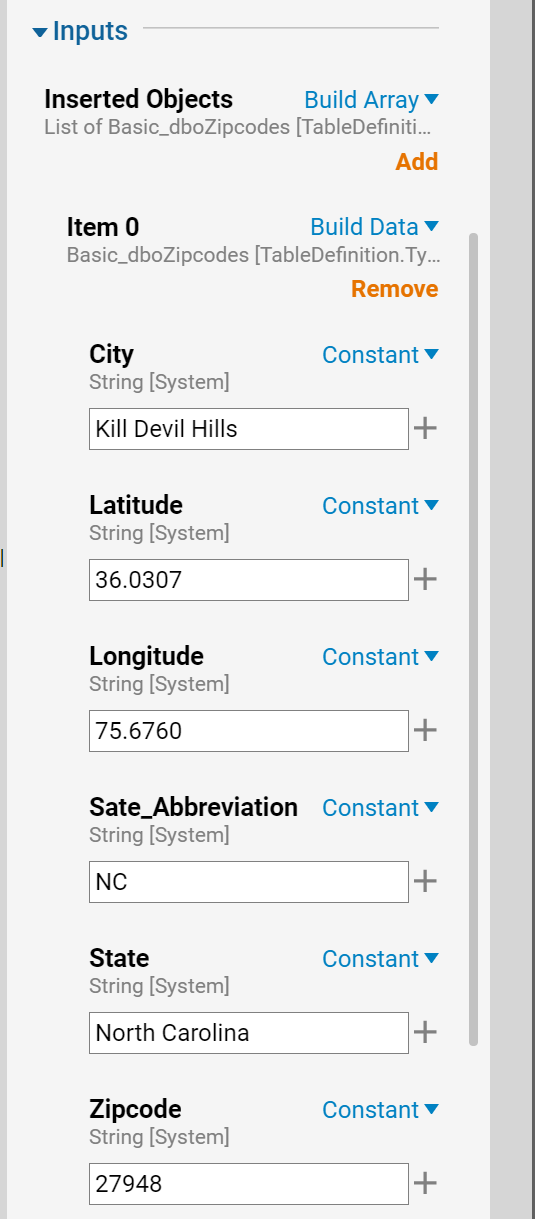
- Select the Insert step in the Flow designer and set the properties of the step.
- This step is able to insert an Array of records into the table.
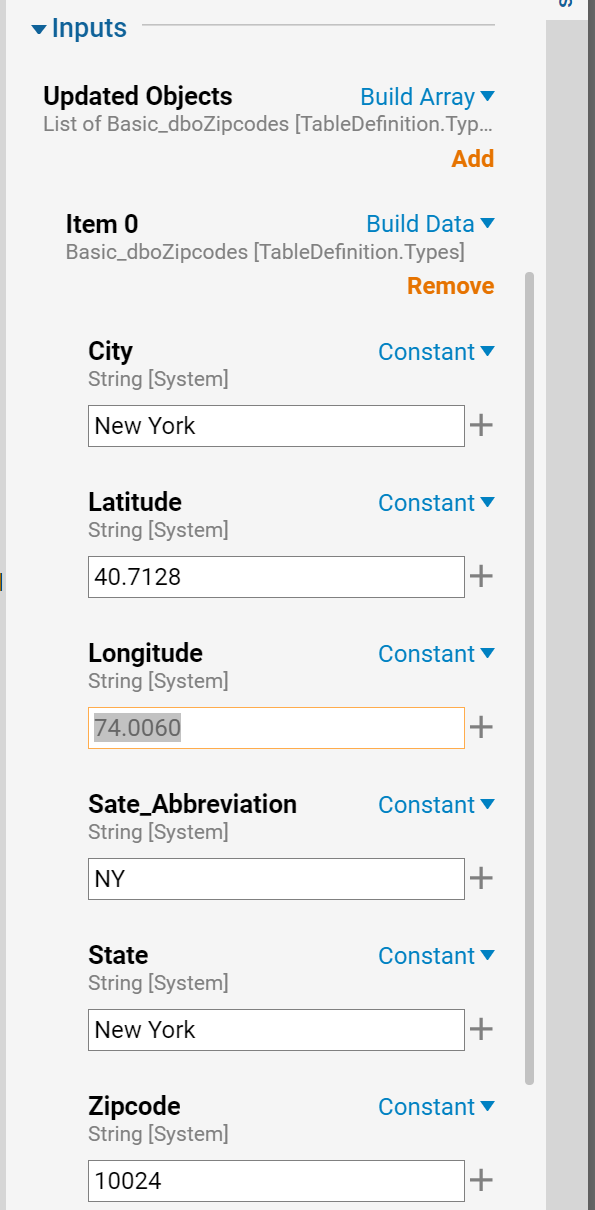
- In the properties tab under Inputs, select the build Array option for Inserted Objects.
- Then for the first record (Item 0) in the Array, select Build Data and create a Record by filling in each field with Constant Values.
- In the Flow Designer, add an Update [table name] step from the Integrations > My Integrations > Database > Integrated Db Name(Database) > Update dbo.zipCodes [integrated table name] on the Inserted Outcome from the Insert step.
- Connect the Failed outcome from the Update step to the End step in the Flow.
- Edit the Step Properties Tab.
- Under Inputs, configure the data for this step in the exact same manner as the Insert step.
- To display data from the table, query it first.
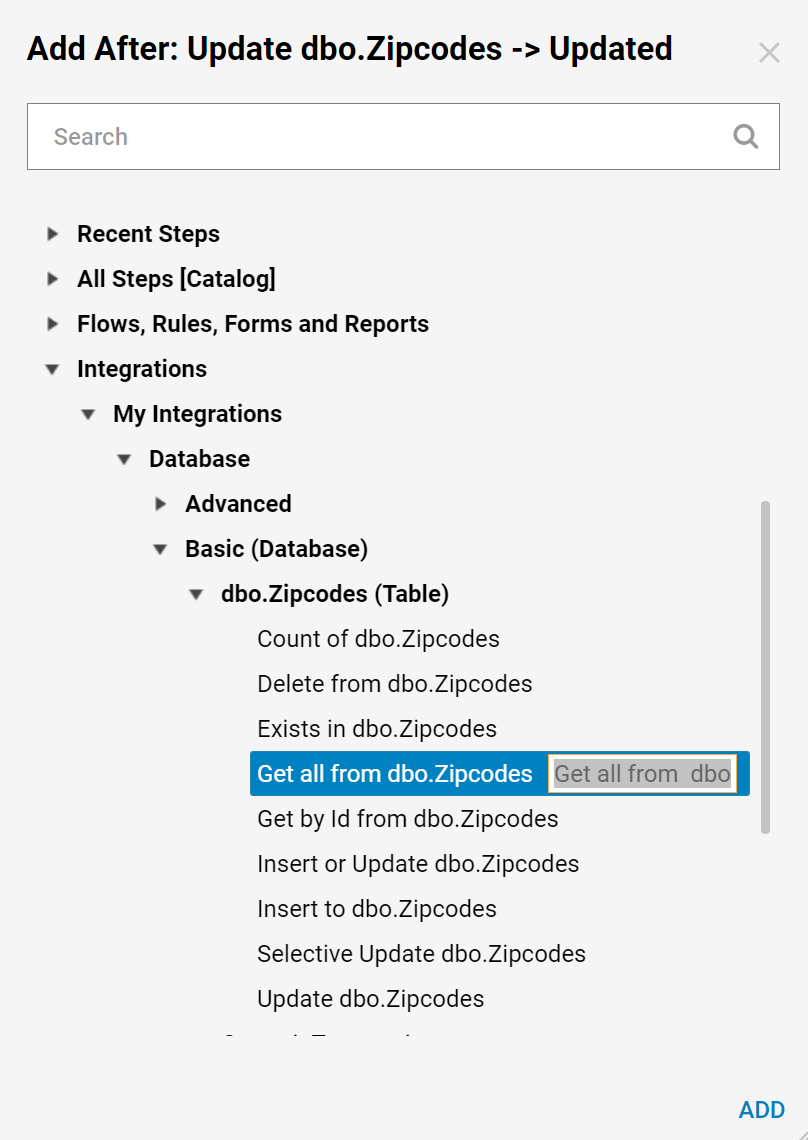
- To obtain data from the table, first add a Get all from [table name] step tab to the Flow.
- In the Steps tab, locate Integrations > My Integrations > Database > Integrated Db Name(Database) > Get all from dbo.zipCodes [integrated table name] and connect the Updated Outcome pathway to the step (Figure 9).
- Connect the Failed outcome from the Get all from [table name] step to the End step in the Flow and edit the step properties.
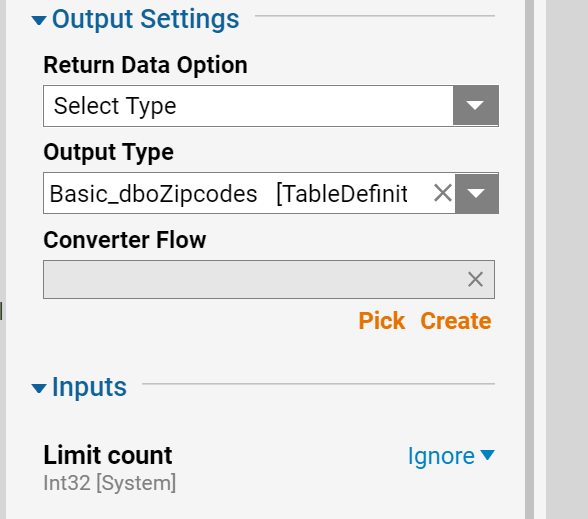
- This step does not require a specific Input configuration. The only input that is configured is the Limit of Records.
- In this case, ignore this Input (Figure 10).
- Select Add Step to add the final step to the Done outcome from the Get All step.
- Create a Form to display all records from the table in the Grid. Add a Show Form step from the Favorite Steps category and Name the step.
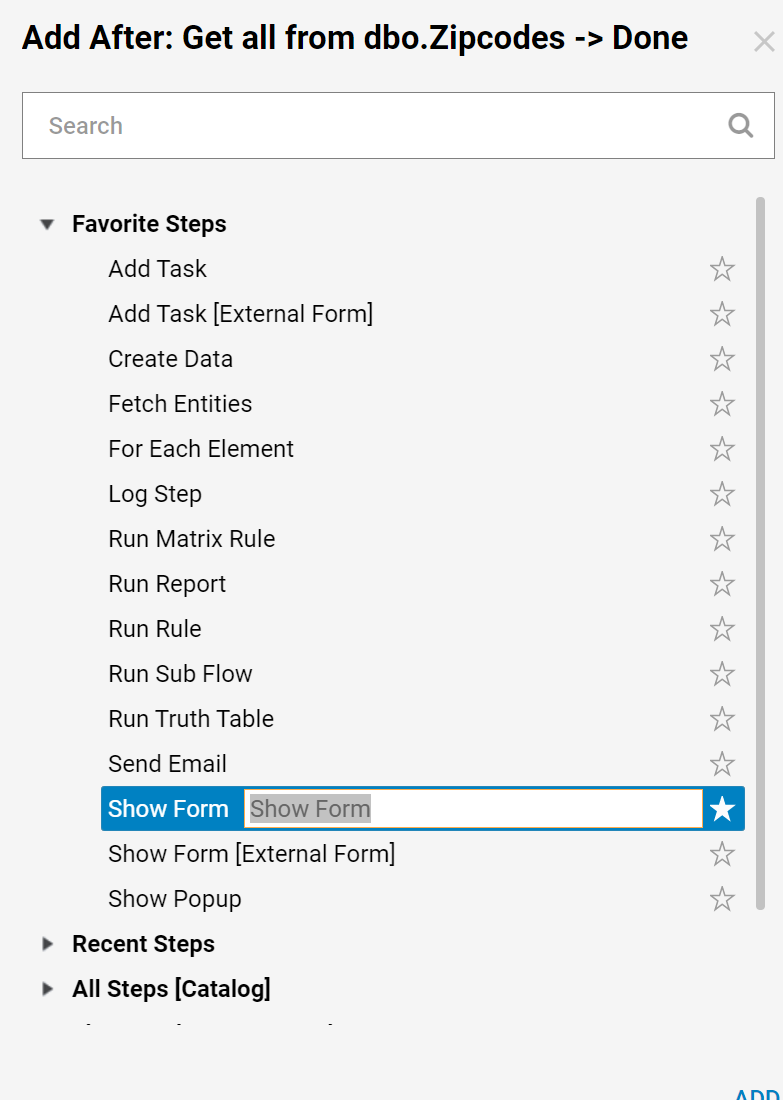
- Name the Form and click CREATE to proceed to the Form Designer. Each Form should have at least one outcome.
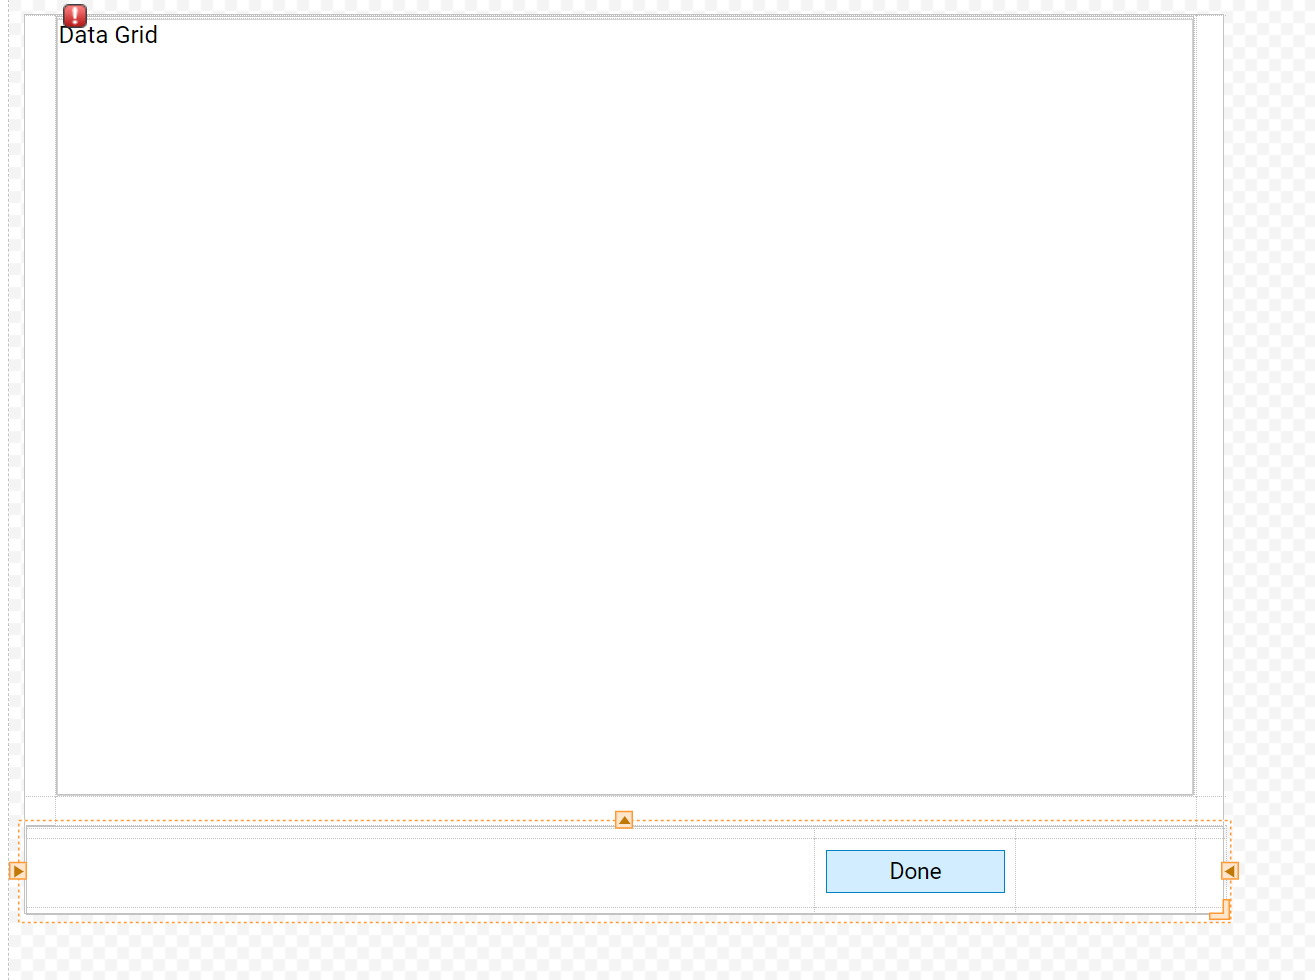
- Add a Button component from the Actions category in the ToolBox to the Form.
- Then, name the text on the Button, “Done."
- Use a Data Grid component to Display data from the table.
- Locate Data Grid in the components under Favorites.
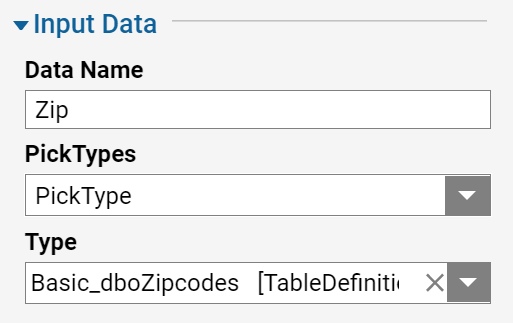
- Configure the Data Grid component. In order to display data from the integrated table, configure Data Grid component to accept the appropriate Type.
- In this case, the Type should match the Data Type that is coming out of the Get All step (dbo.ZipCodes).
- Locate this Type in the Table Definition Types category using the Type picker.
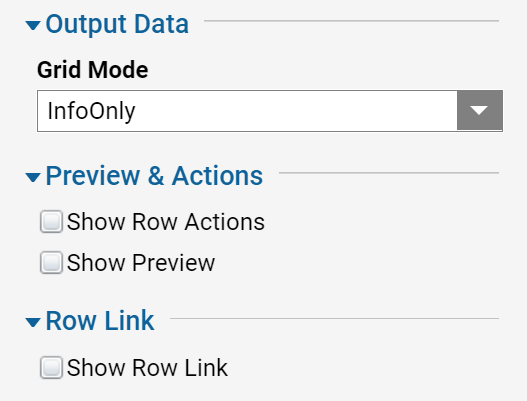
- After the Data Grid properties are defined with a name and the dataType, define the columns that will be displayed on the grid, under column information.
- Under Output Data select the output mode. For this example, the InfoOnly mode will be selected from the drop down selection.

- Row Actions and Row Links can also be added to the Data Grid component (Figure 15).
- When finished with the Data Grid component, Save and close the Form Designer.
- In the Flow designer, connect the Outcome from the Form to the End step.
- Then click on the Form step and select the Show Mapping Editor option.
- In the Mapping Editor, map the outcome data from the Get all step to the Data Grid component Name in the Form.
- Then, click OK to close Mapping Editor.

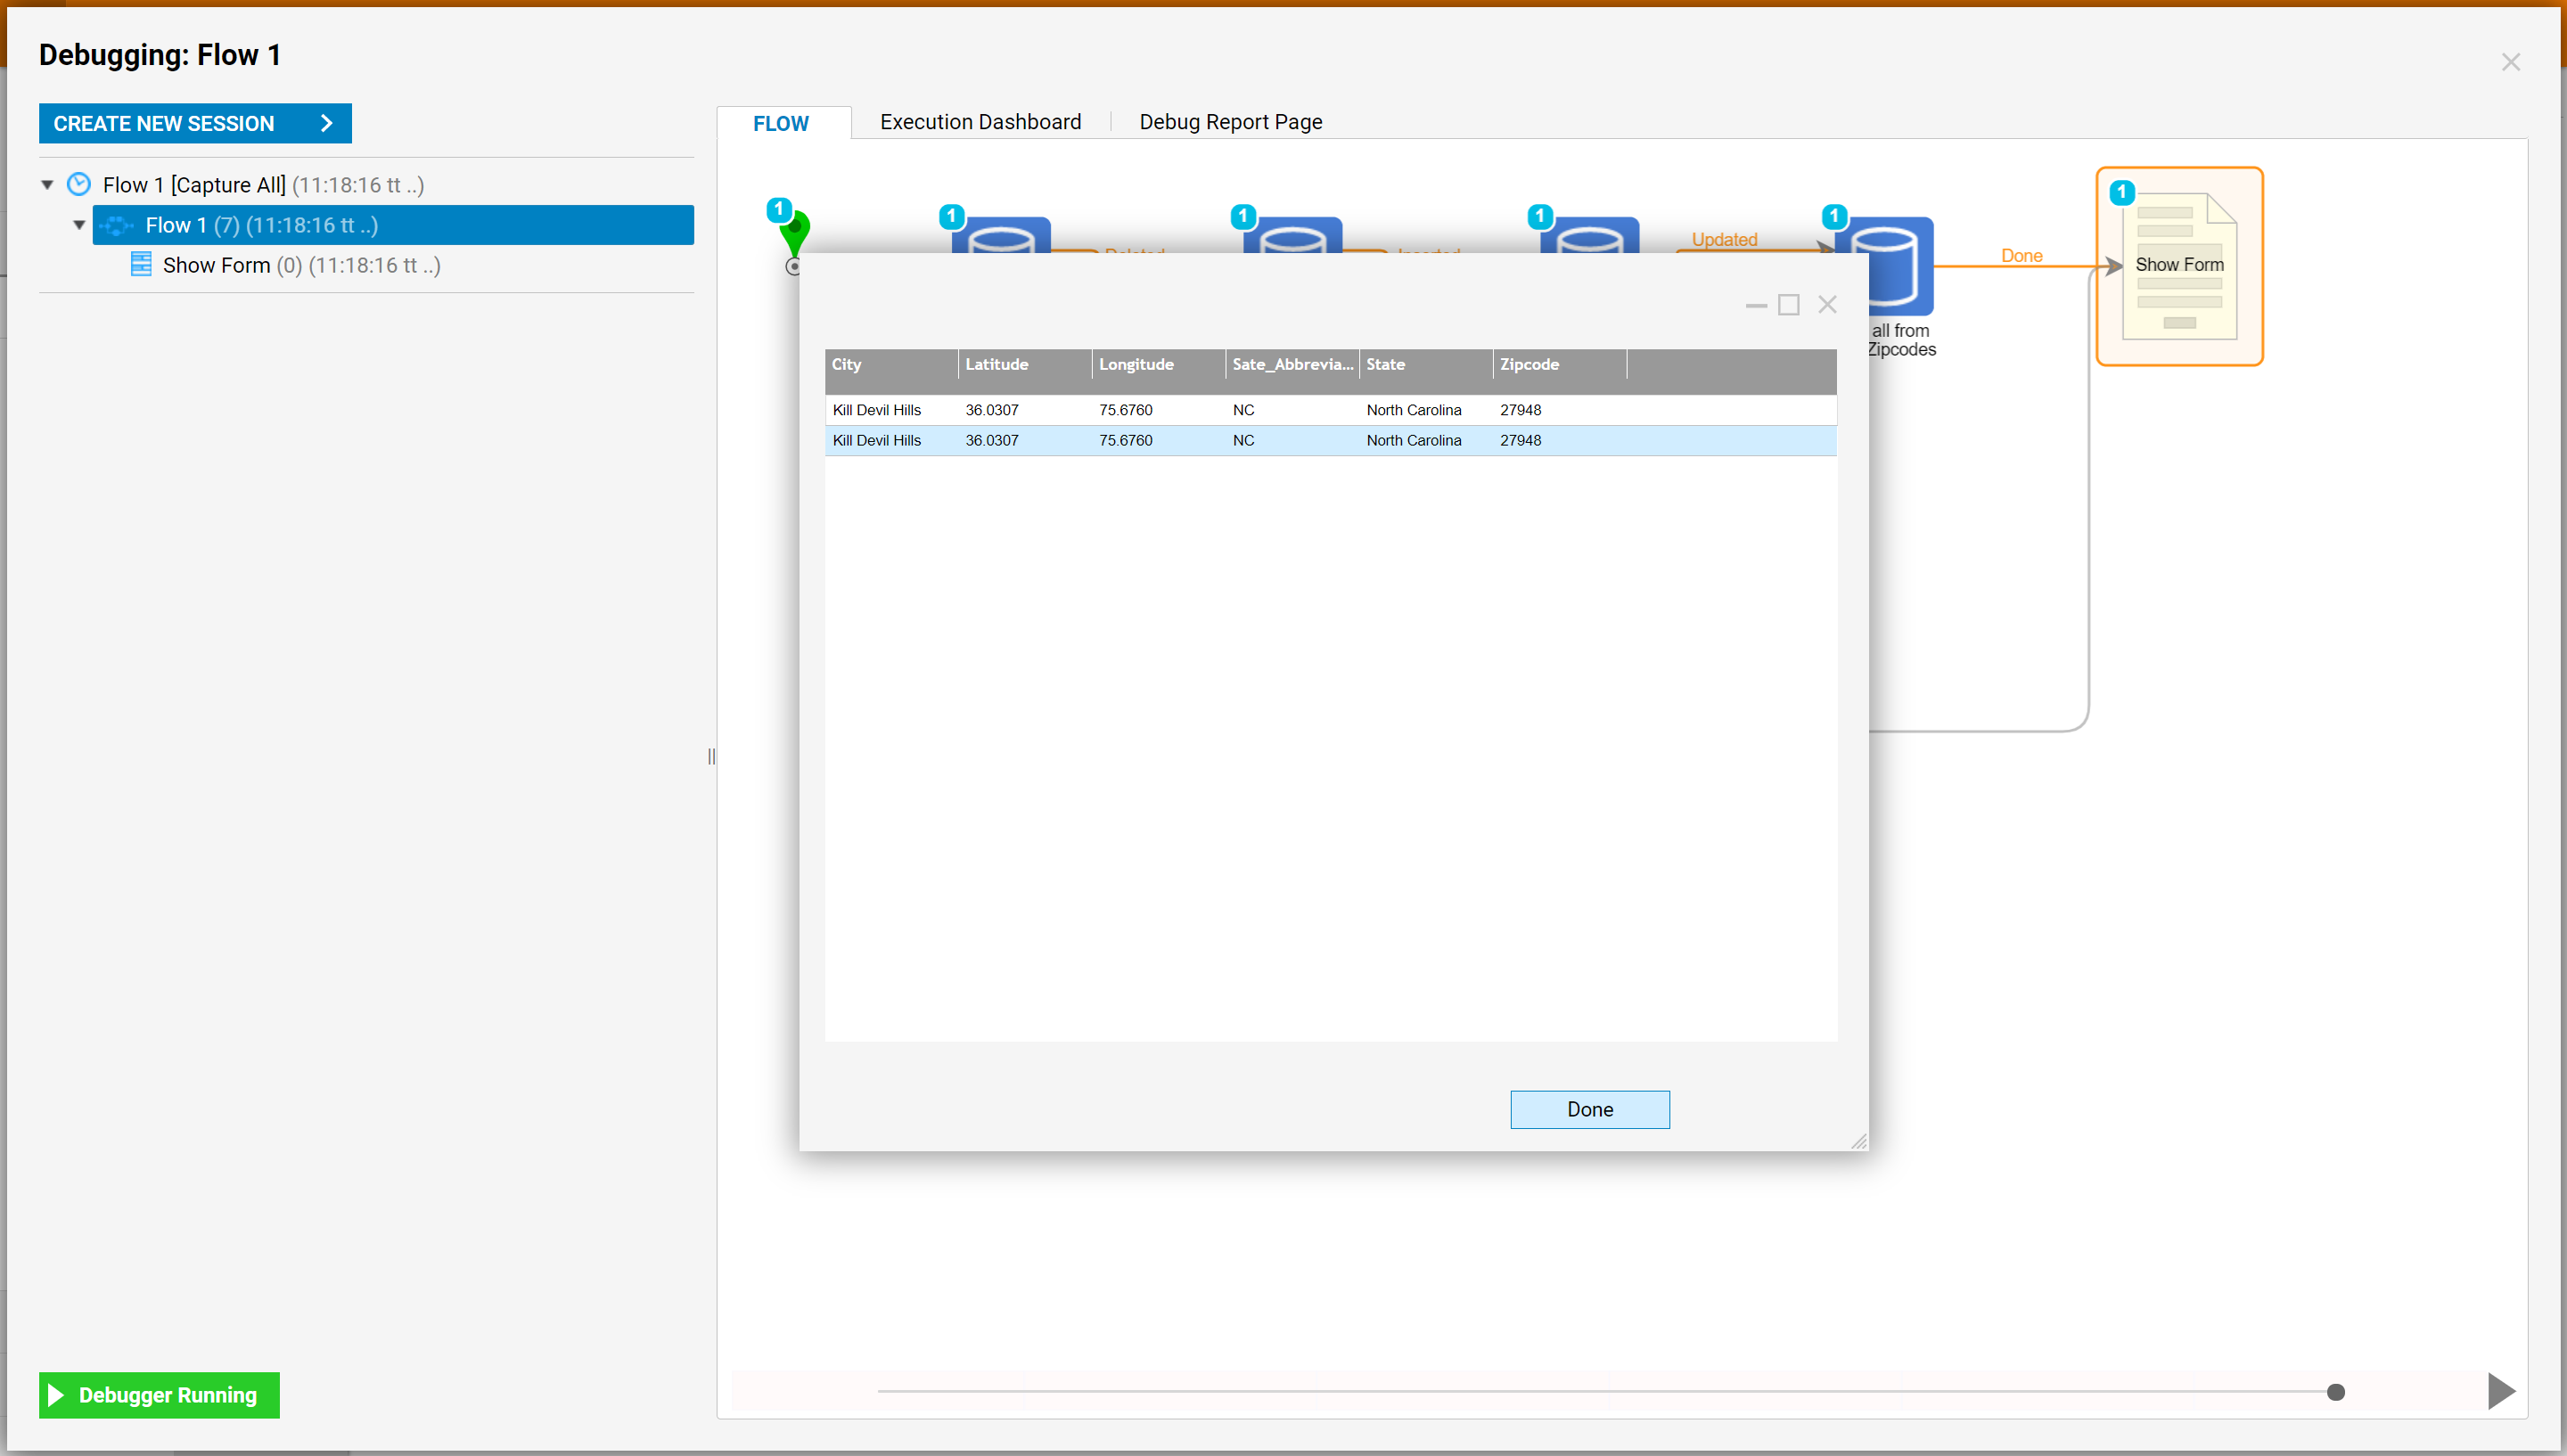
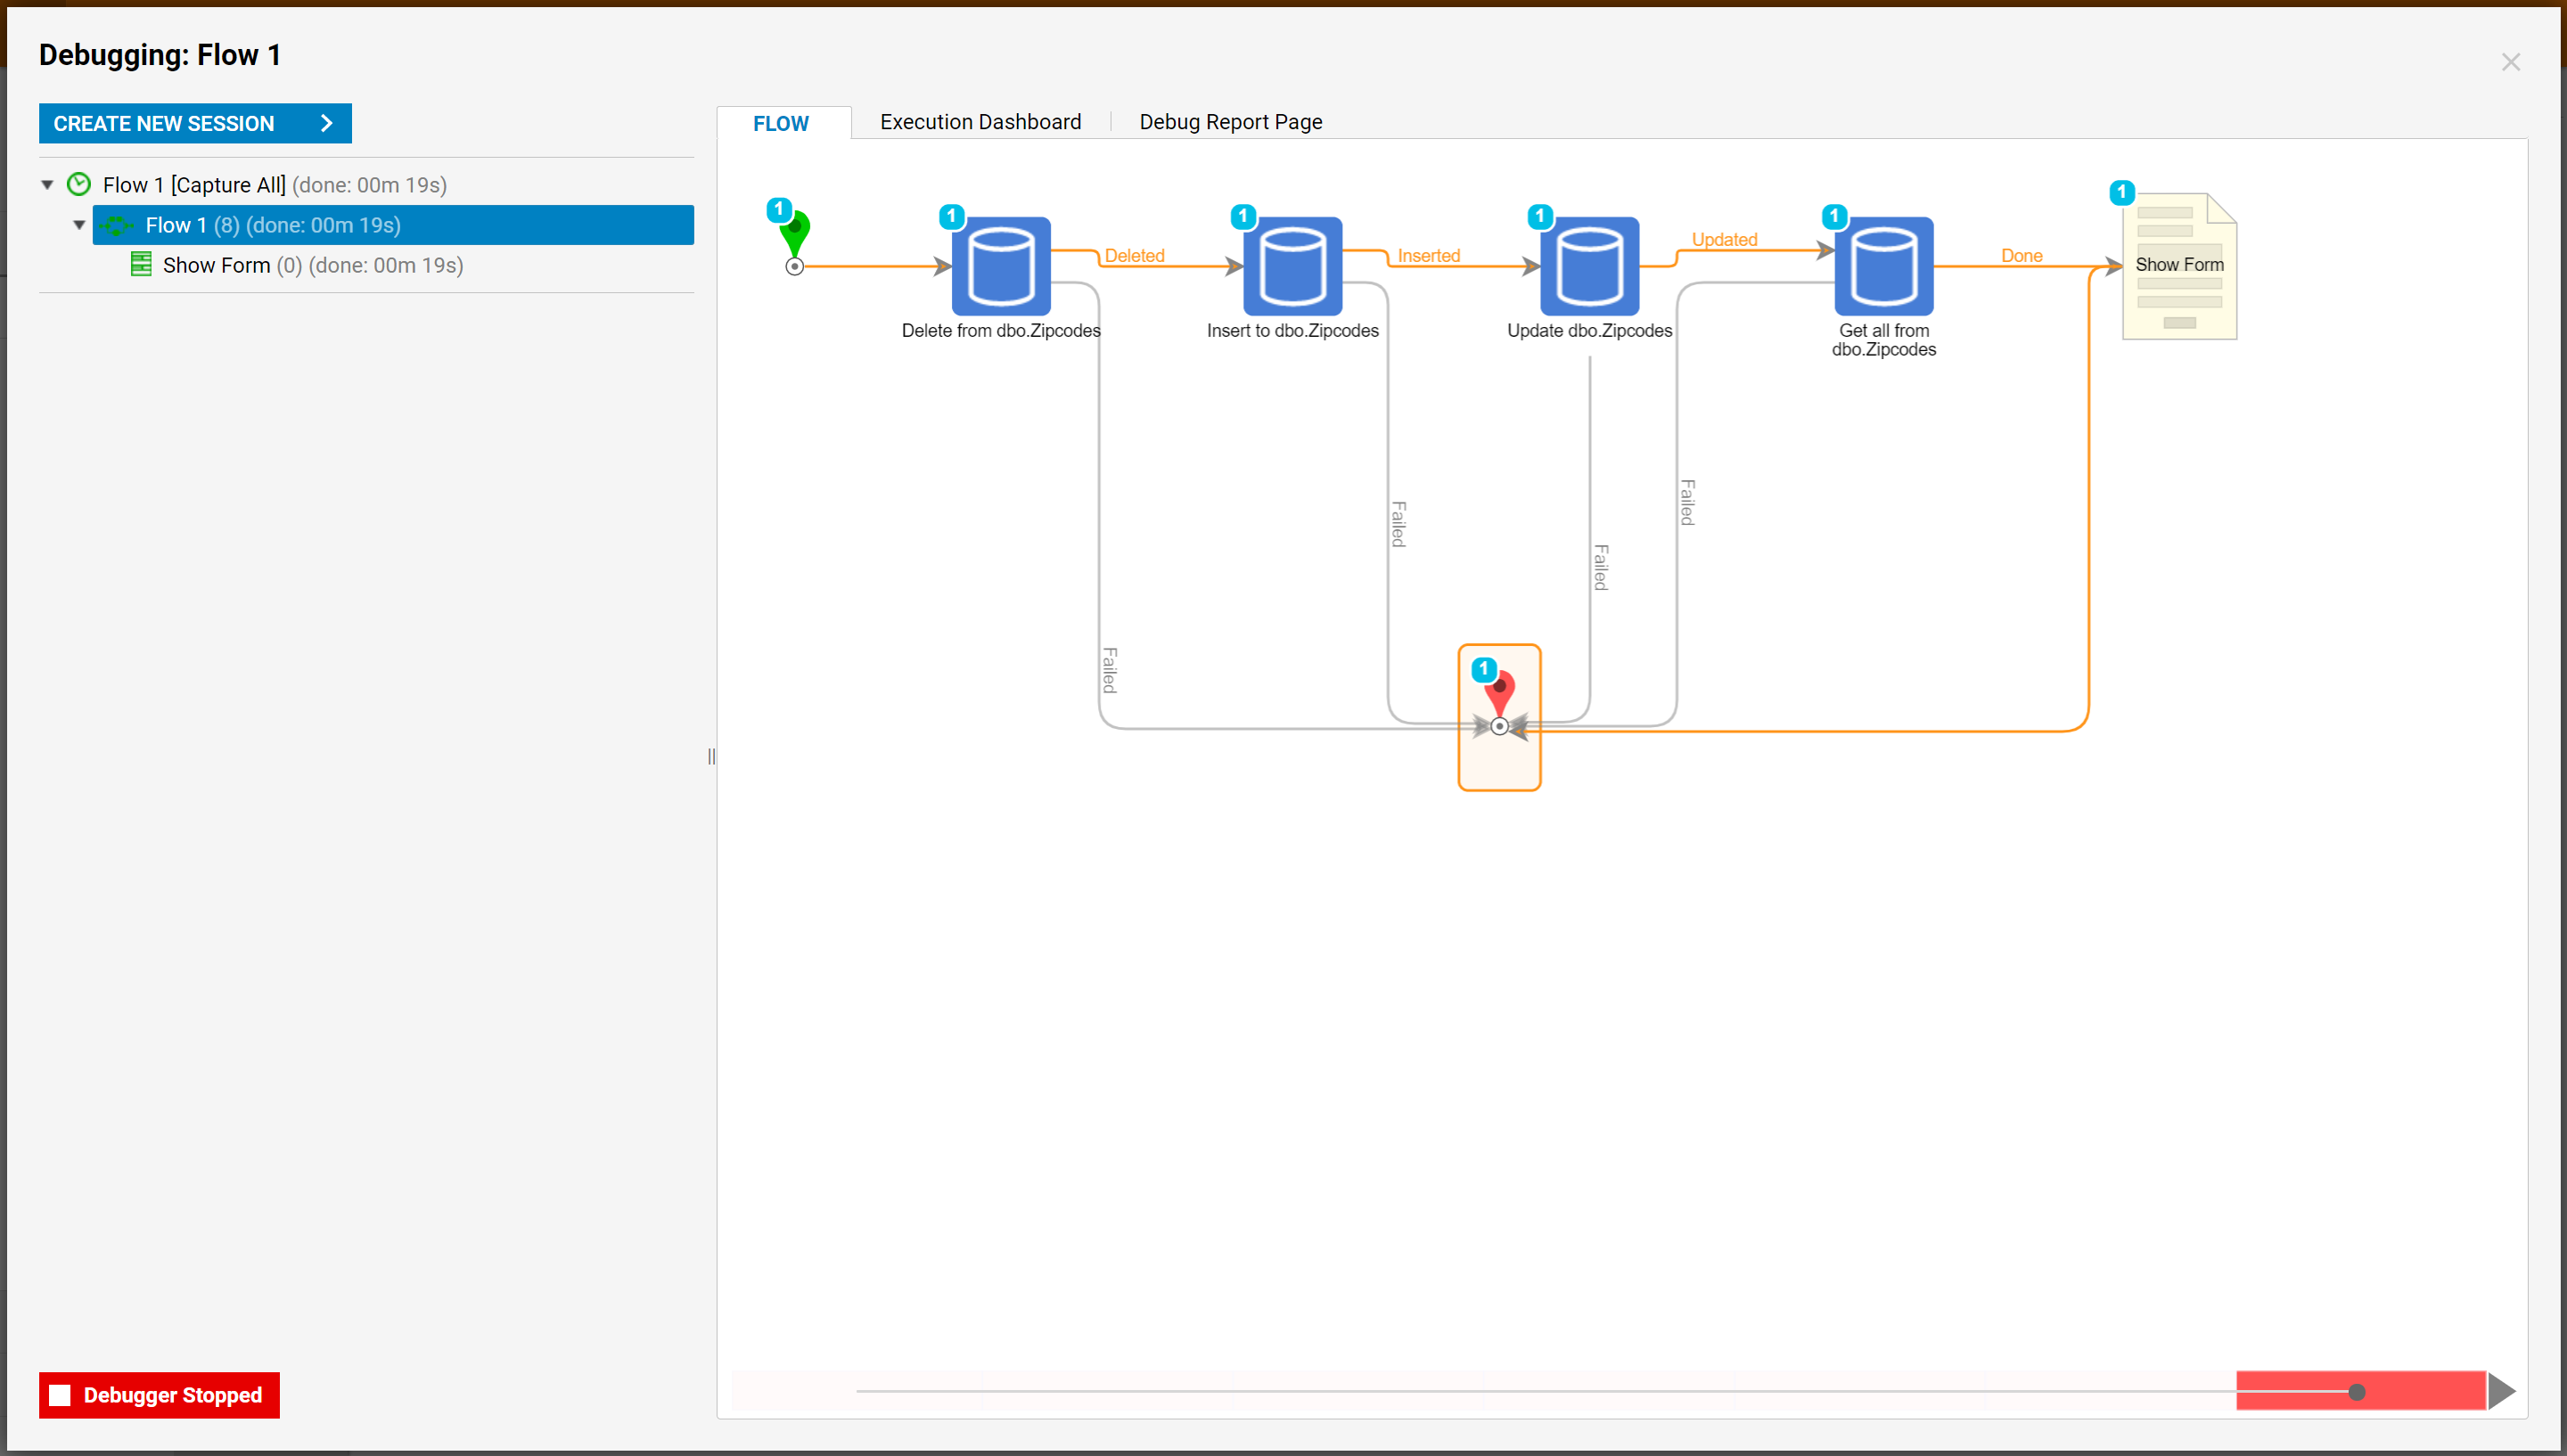
- This completes the Flow. To test it, click Debug on the top panel of the Flow Designer.
- The Flow runs as designed, and the Form displays the records from the database table with the changes that were done by the Flow.
- The Debugger indicates that the Flow ran with no errors.
- Check the original database to confirm that the Flow did design changes to the table.