Overview
Stored Procedures are queries that are set to run in MSSQL with an EXEC command. These Stored Procedures can perform queries against the database table that could Update, Add, Delete, Select, or Edit the data. Decisions allows these Stored Procedures to be integrated with the platform along with the database. When this happens, new steps will appear in the Flow Designer that can execute the Stored Procedure and move the input values from the Flow to the database table.
Example
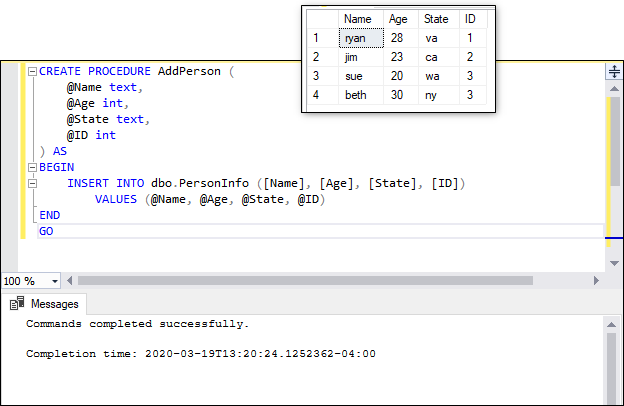
For this example, a sample database has been created as well as a Stored Procedure that, when executed, adds a new person in the specified database table. The table in this database has four entries of PersonInfo with Name, Age, State, and ID fields. This database table will be referenced again with the addition of the data from the Stored Procedure at the end of the example.
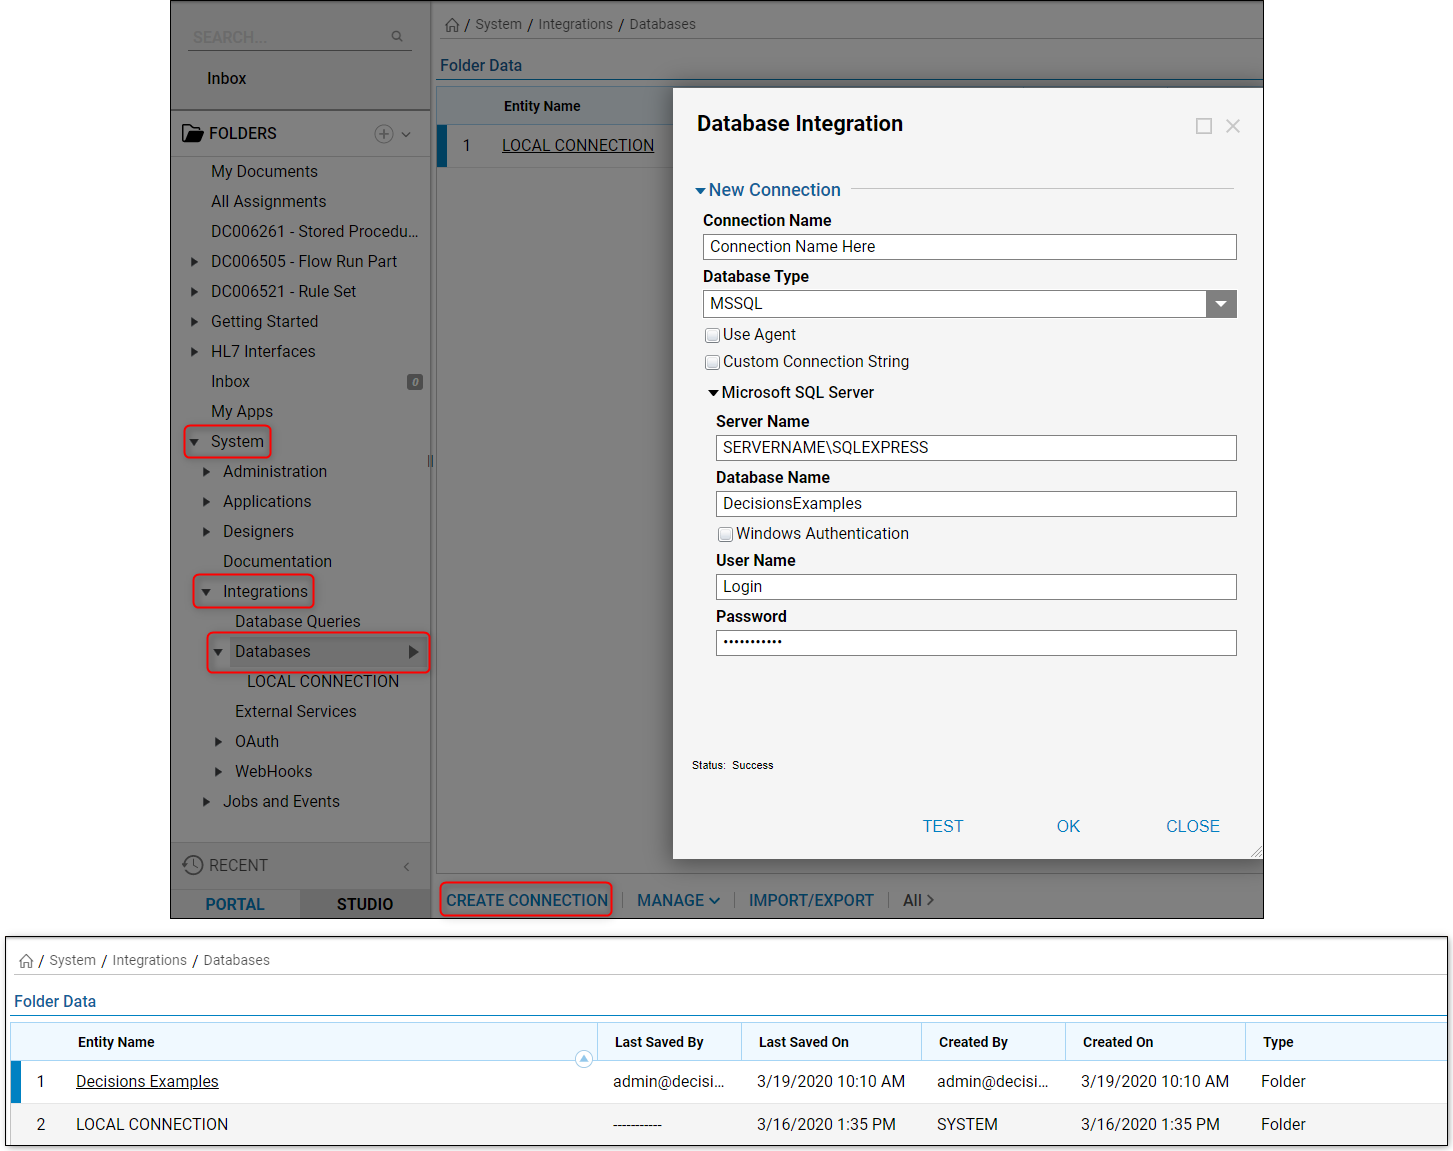
- In the Designer Studio, navigate to System > Integrations > Databases and select CREATE CONNECTION from the bottom Action Bar.
- The Connection Name serves as a way to identify the connection. For example, Local Connection appears by default since it is the database connection for a local Decisions environment.
- The appropriate Server, Database, and Login parameters will need to be added so that Decisions can make the connection to the external database.
- Use the TEST action to see if Decisions can successfully connect.
- If the connection is successful, press OK to run the Database Integration so that it appears in the Databases Folder.
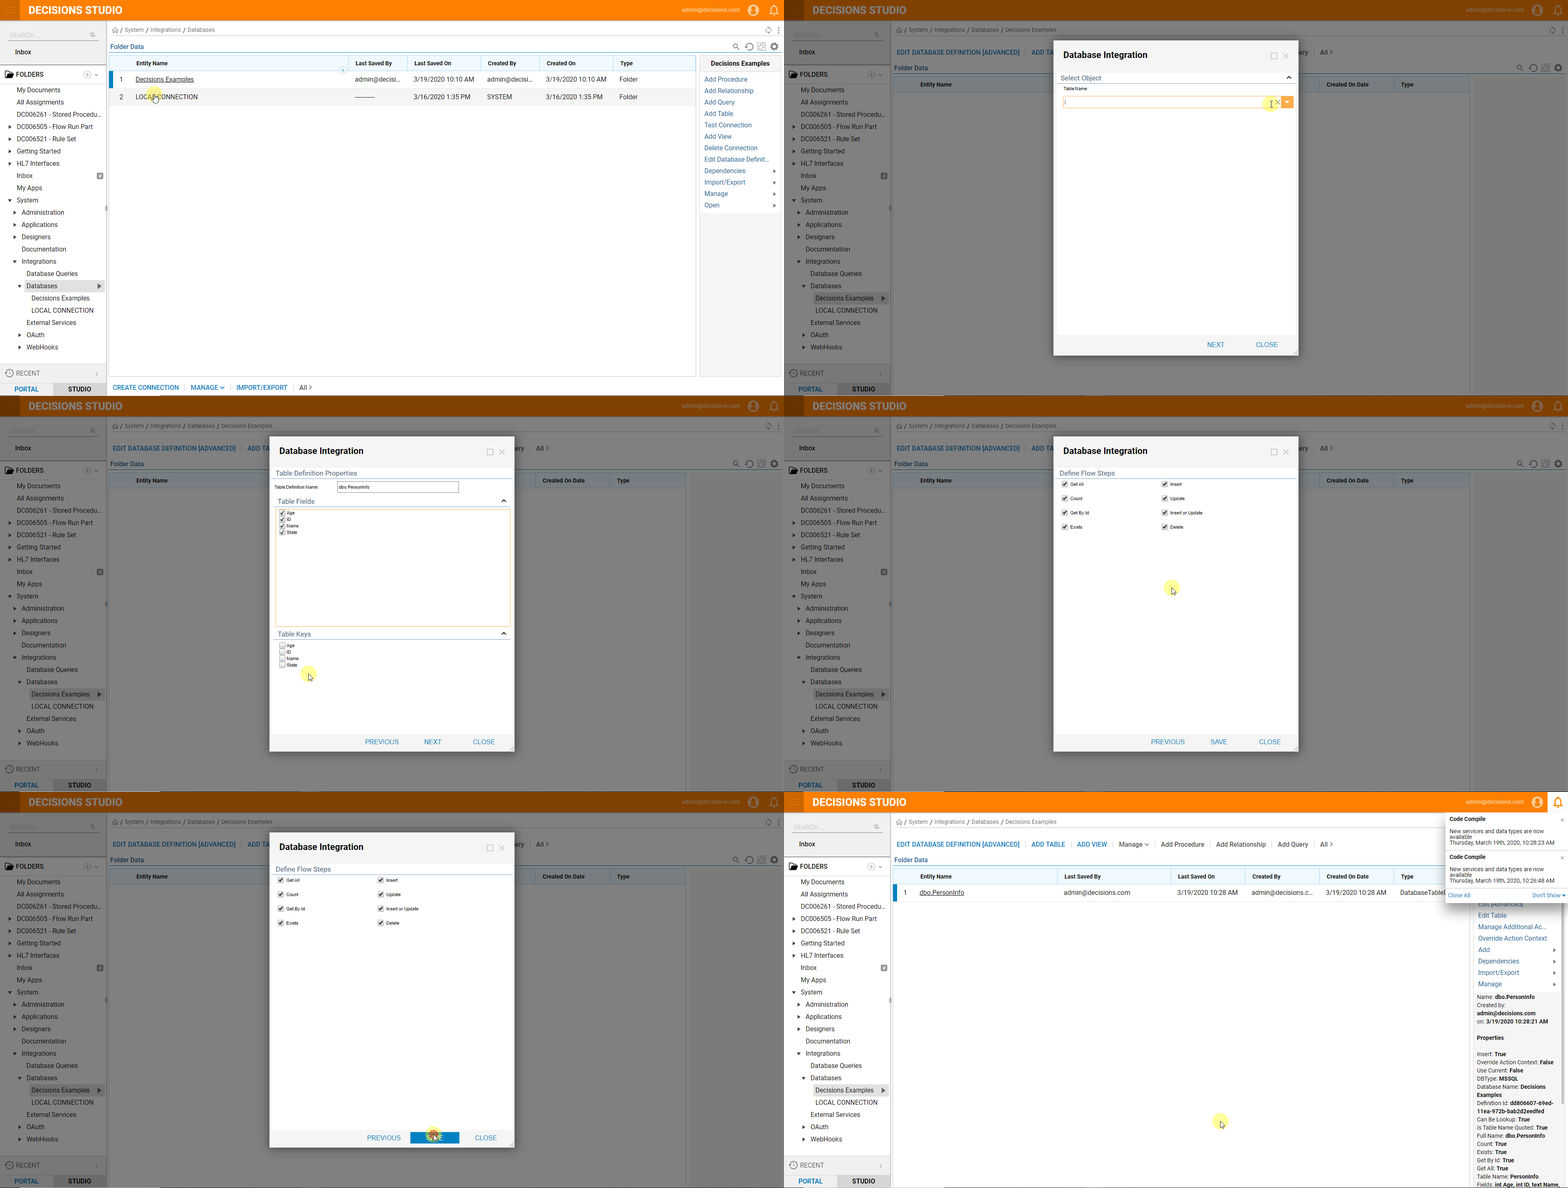
- Click the connection name of the new database to open its containing Folder in Decisions.
- Select the option to ADD TABLE from the top Action Bar.
- When the window appears, choose the desired table to add, then click Next.
- Check the box for each Table Field that can be worked and designate a Table Key to utilize Create/Edit/Delete actions for this table from within a Flow.
- Click Next once the appropriate checkboxes have been selected.
- Check the box for each action that can be defined for each function of the table data.
- In this example, all of the boxes can stay selected although they will not be used since the Stored Procedure will be called specifically.
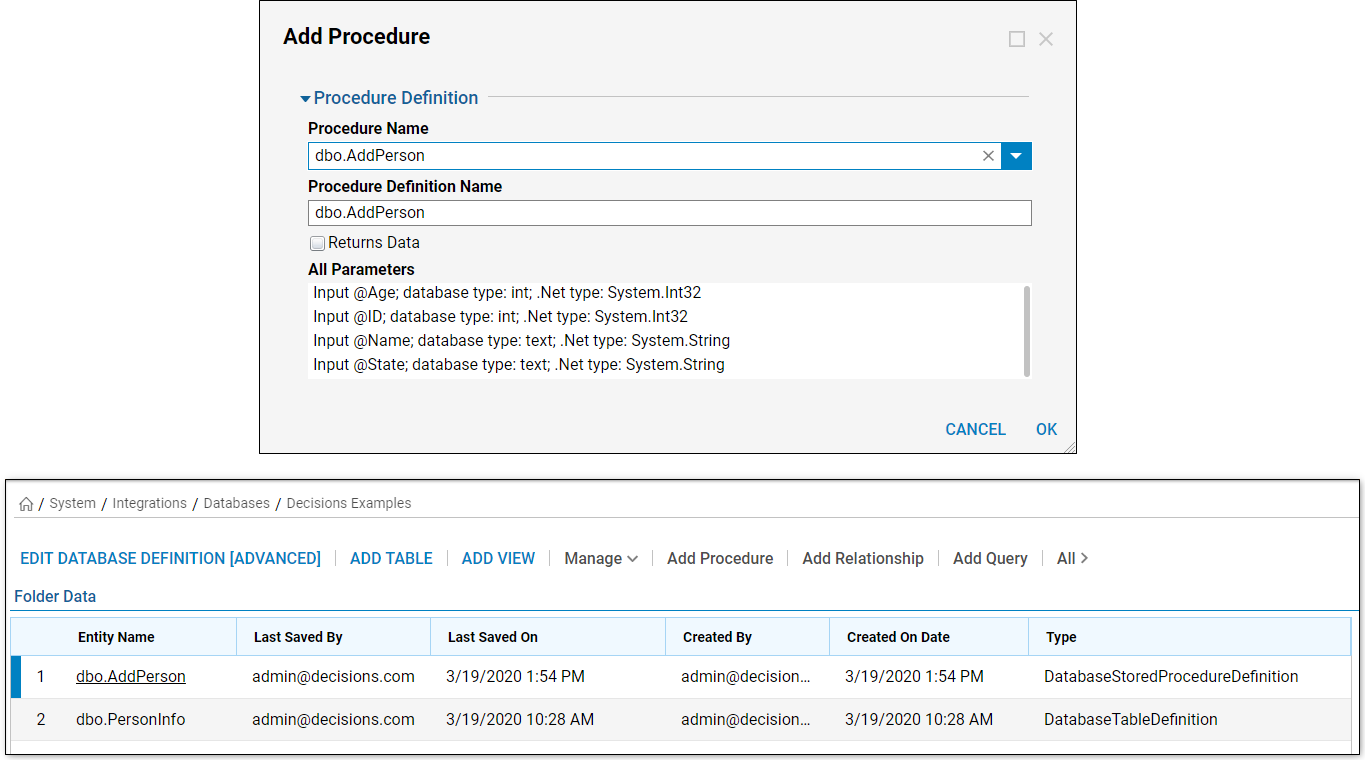
- Select ADD PROCEDURE from the top Action Bar.
- When the Add Procedure window appears, choose the appropriate Procedure Name from the drop down menu.
- the Procedure Definition Name should automatically populate.
- Notice that in the All Parameters window, inputs appear as they were configured in the Stored Procedure, where the data type of the expected value also appears.
- Select OK on this window once the configuration is complete. Returns DataOptionally, the Returns Data box can be checked to add Input parameters for creating a Data Structure when the Stored Procedure is run.
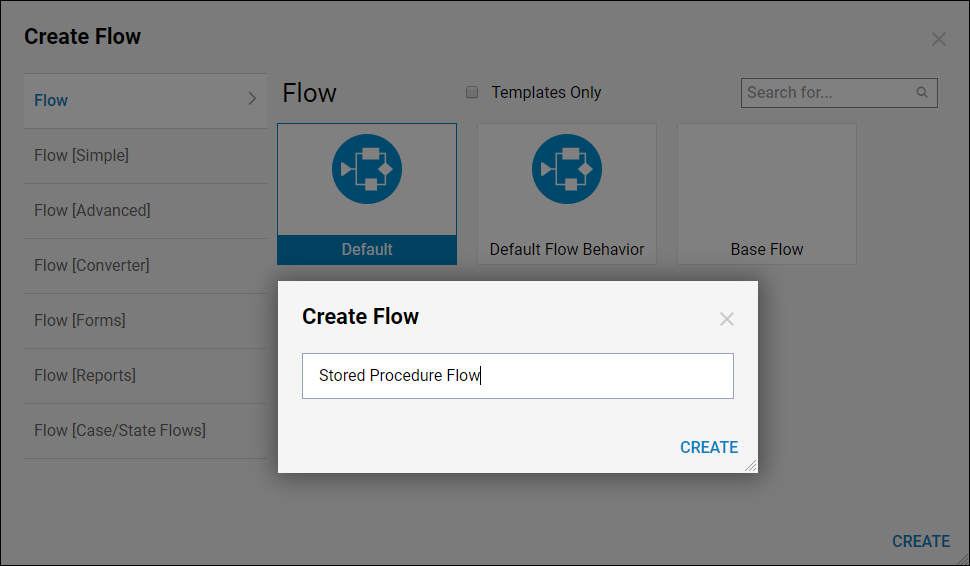
- Navigate to a Designer Folder in the Decisions Studio and select CREATE FLOW from the bottom Action Bar.
- Choose the Default template for the Flow and click CREATE.
- Provide a Name for the Flow, then click CREATE again.
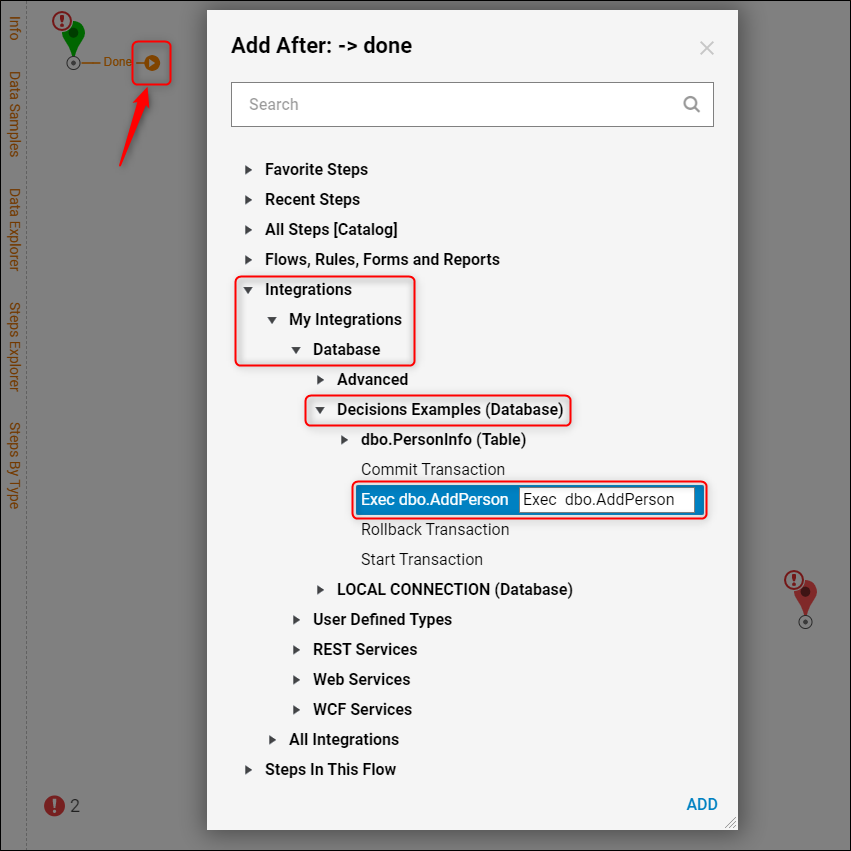
- In the Flow Designer, click the orange arrow at the end of the Done outcome path from the Start Step.
- When the Steps Catalog window appears, navigate to Integrations > My Integrations > Database > Database Name (Database) and select the Exec dbo.ProcedureName step.
- Then click ADD to insert this step into the Flow.
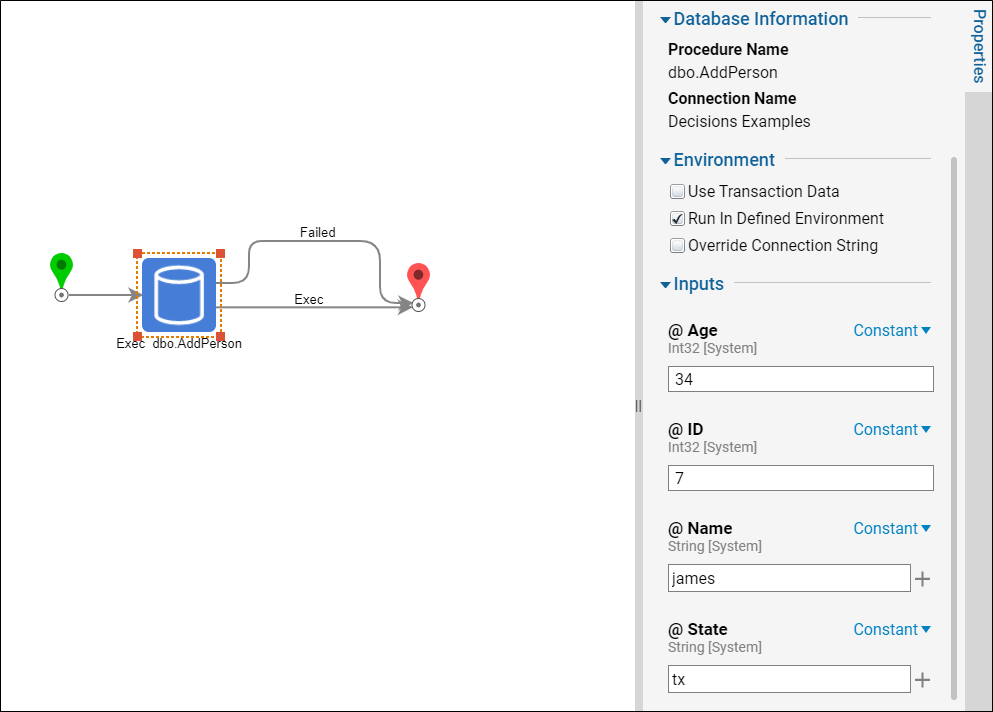
- Once the step is in the Flow, connect both of the outcome paths to the End Step.
- Select the icon of the step to populate the Properties for it on the right side.
- Navigate to the Inputs section of the properties and click the Unknown mapping type for each input, then choose Constant from the menu.
- Define the values of each input in the provided text box that appears with the Constant mapping type.Advanced Use CaseThese Flow steps can be used in more complex ways, where data can be provided by administrators or end-users using different functions of various Flow designs. This example was created to show the basic functionality of writing to the database table via Stored Procedure from Flow steps.
- Click off of the step and into blank space to save the Properties configuration.
- Click the Debug button from the top Action Bar in the Flow Designer and when the Debugging window appears, click the Full button with the play icon.
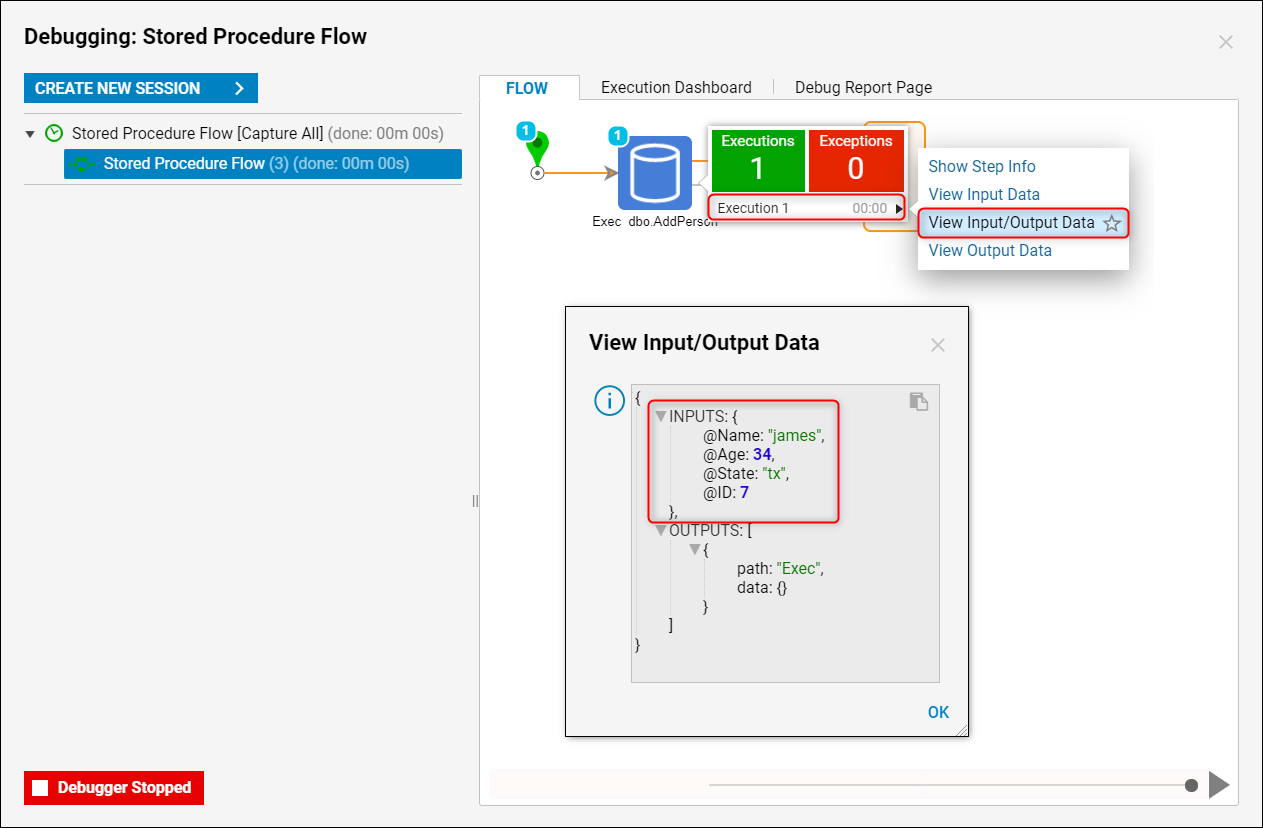
- Click the Exec dbo.ProcedureName step icon followed by Execution 1, then select View Input/Output Data from the menu.
- The View Input/Output Data shows the inputs with the data defined as Constant values in the step properties.
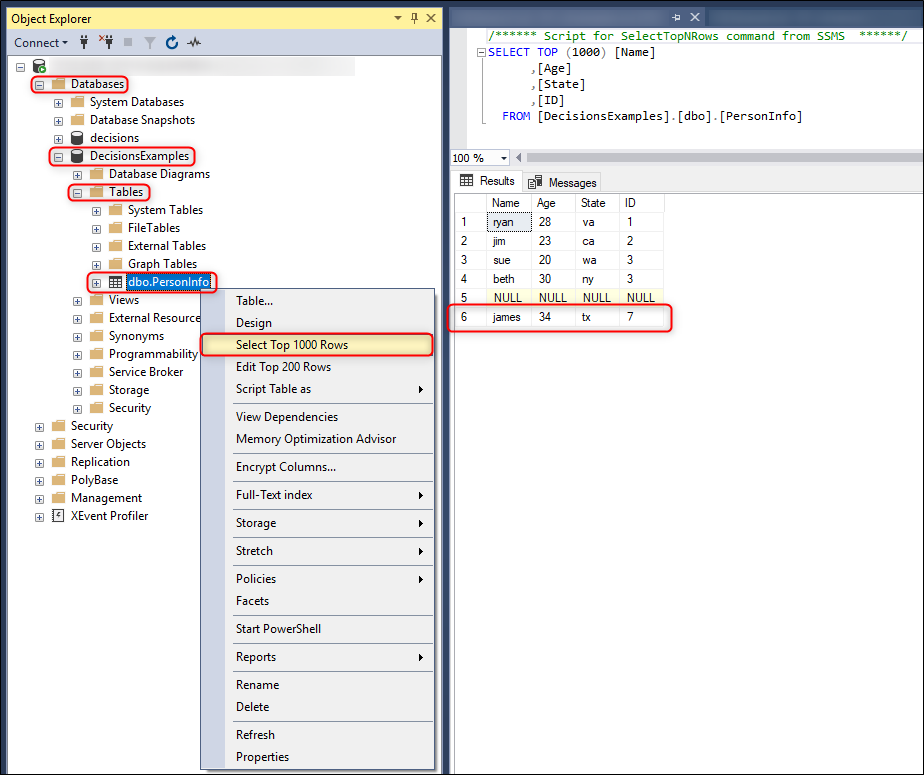
- Open MSSQL and use a select statement or the menu command to show the updated PersonInfo database table.
- As expected, the inputs mapped to the Exec Flow step recorded to the database table as the Stored Procedure was called from the Flow.
