Overview
Cache Steps enable users to store and retrieve data values in memory for a defined time. In Decisions, there is the ability to define different types of cache. While trying to store some value in the cache, define an Instance of the cache, the cache type, and a key to access the current value. Because of the custom nature of this set-up, this is referred to as "Bespoke Caching".
Before using cache steps within a Project, make sure to set cache Instances and Cache Definitions.
Put in Cache
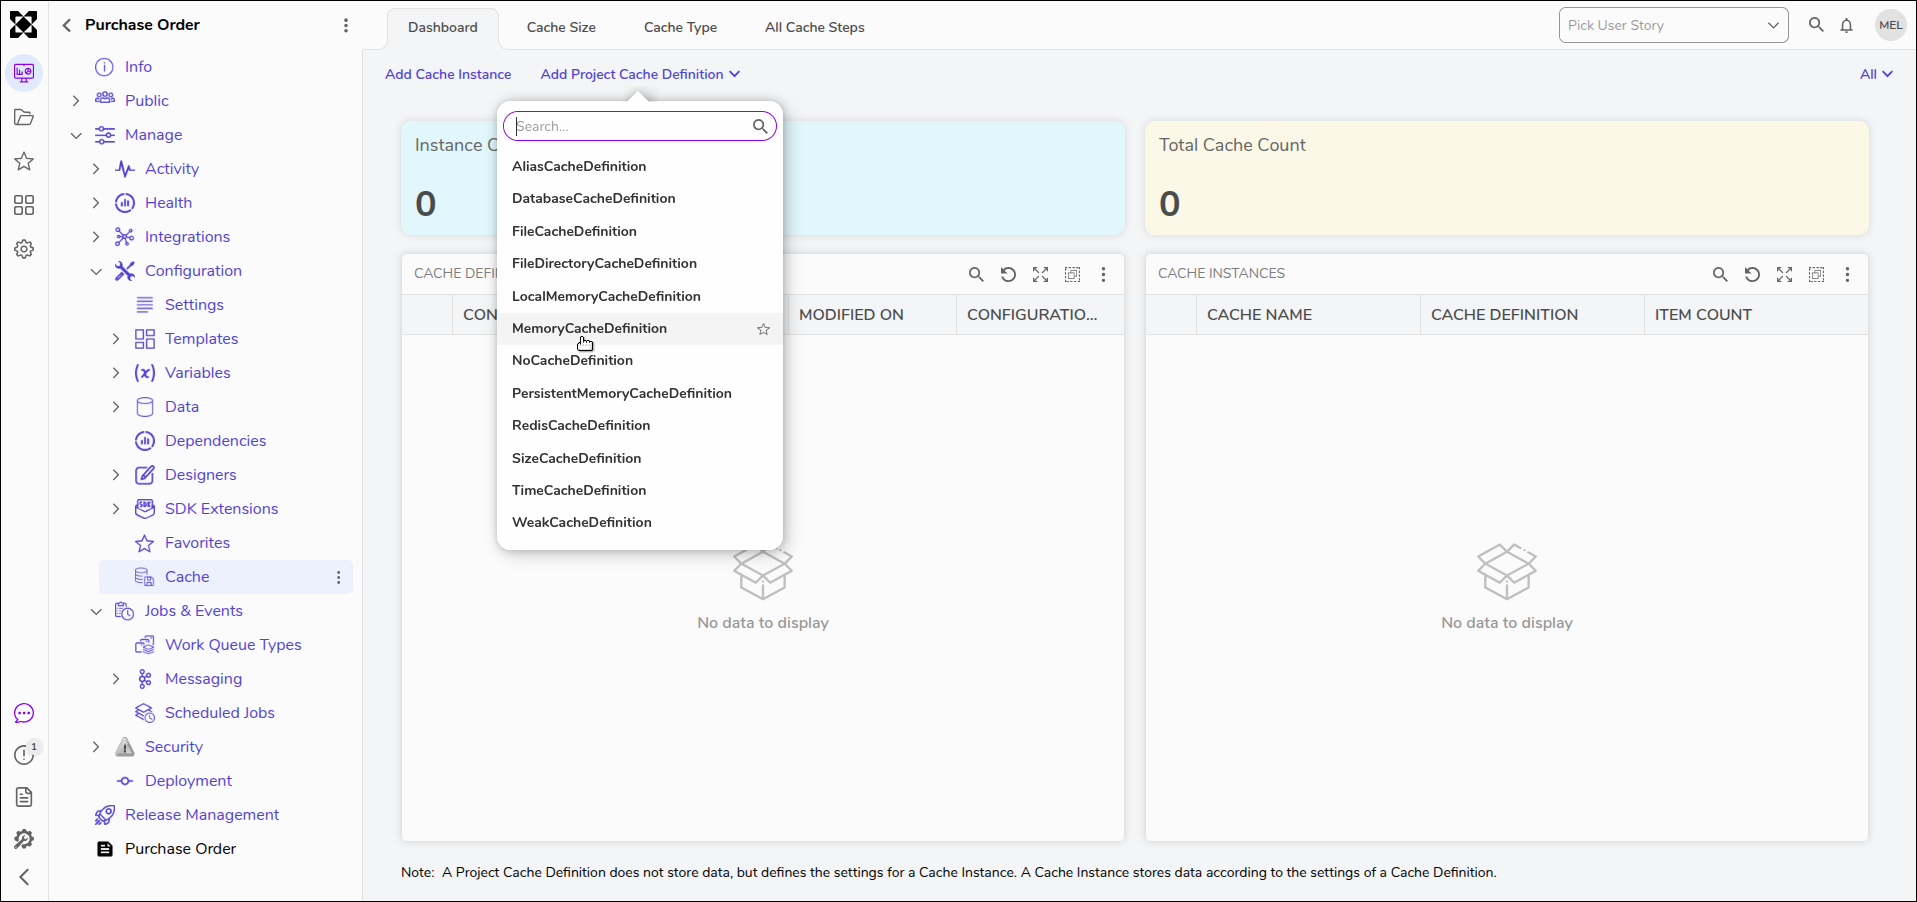
- In a Project, navigate to Manage > Configuration > Cache and click Add Project Cache Definition. Select MemoryCacheDefinition.
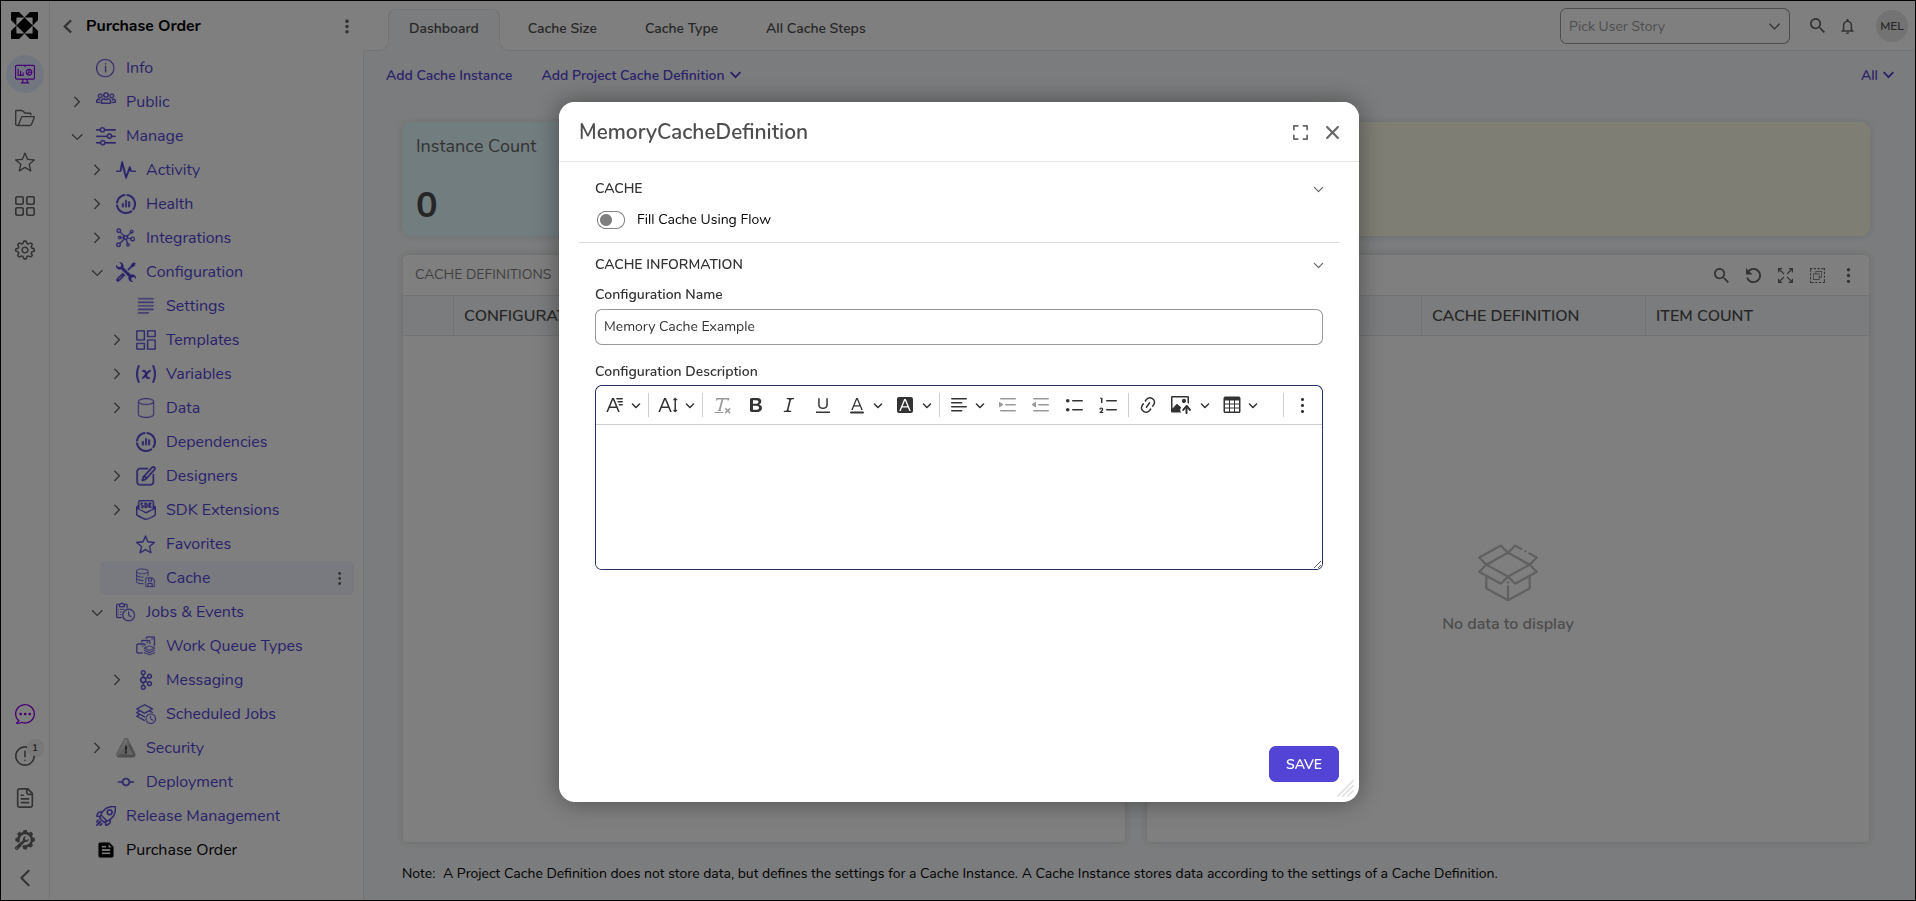
- From the MemoryCacheDefinition window, provide the desired Configuration Name and Description. Click SAVE.
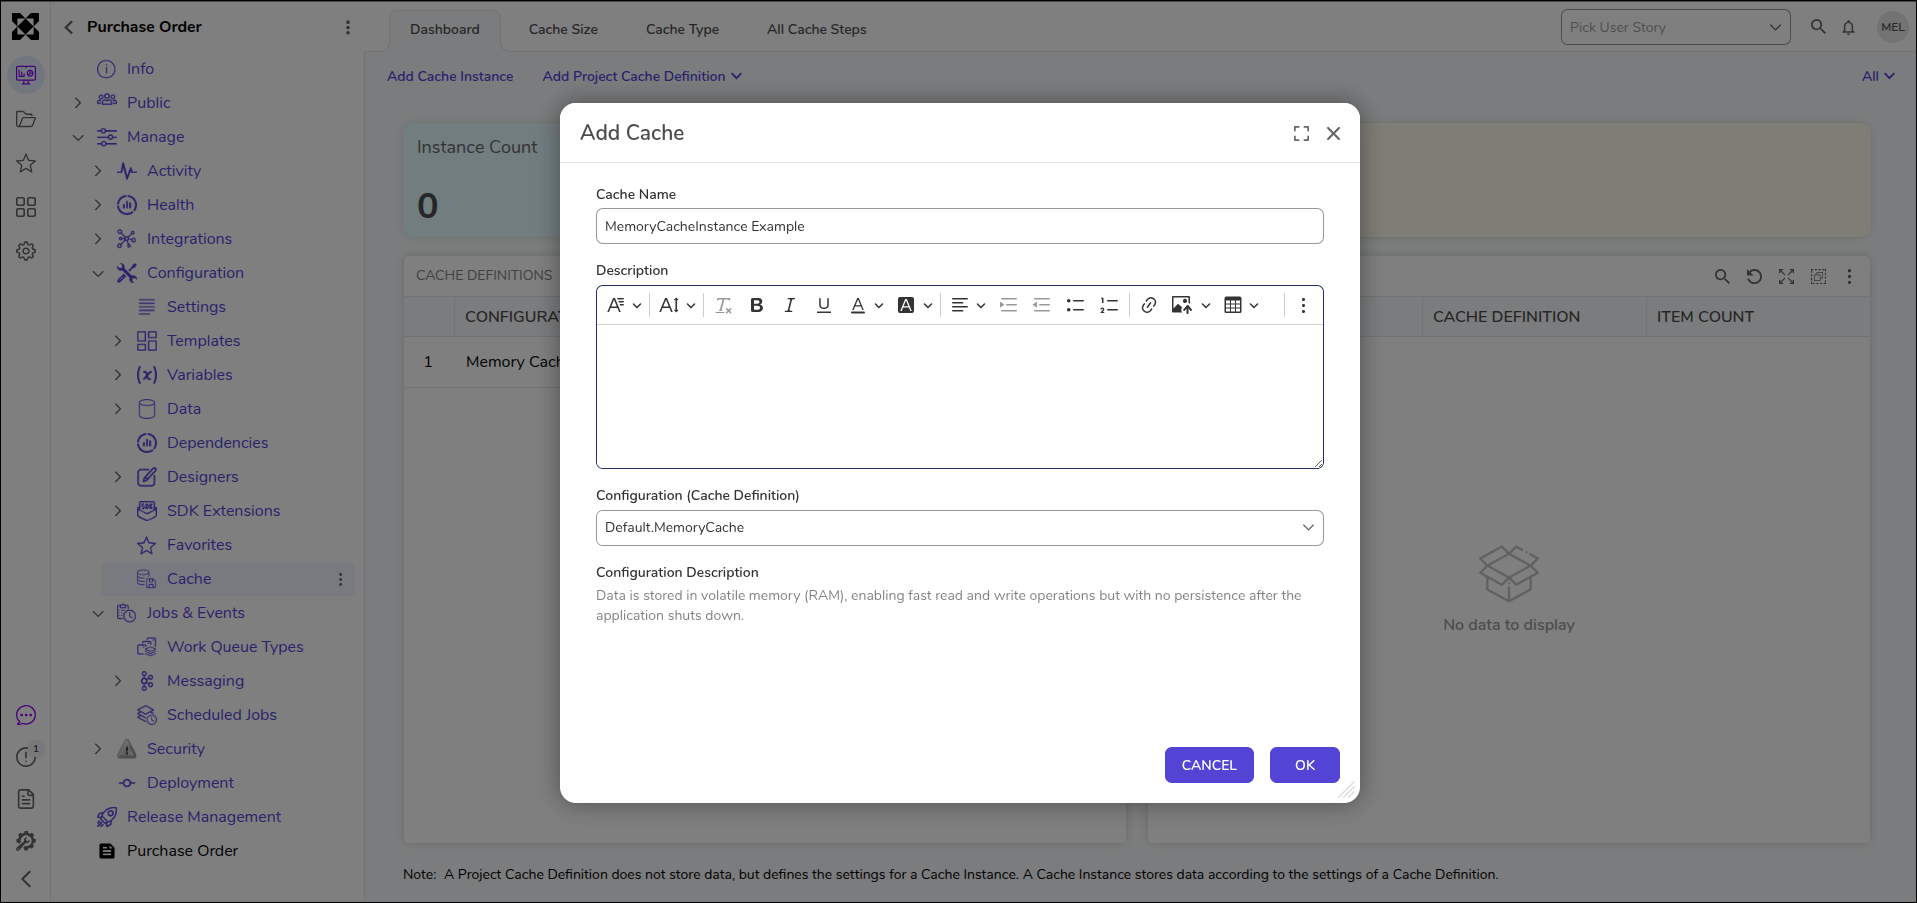
- Next, click ADD CACHE INSTANCE. Write a cache Name and select a cache definition in the dropdown list under Configuration. A cache instance is required for the cache steps to work correctly.
- From a Designer Folder, select CREATE FLOW from the Global Action Bar. Select Flow, name the Flow, and click CREATE.
- On the Toolbox panel, navigate to All > SYSTEM > CACHING and attach a Put In Cache between to the Start and End steps.
.png)
- In the Cache Name dropdown list, select "MemoryCacheInstance Example".
- Enter "1" in the Key field and "admin@decisions" in the Value field. Additional Info on KeyThe Key Input is used as an identifier for the Value being placed in the cache. It is used to both organize the Value in the cache and can be used to later locate and pull the cache via additional steps.
- Click Save to save changes to the Flow. Click Debug from the top action bar. Click START DEBUGGING.
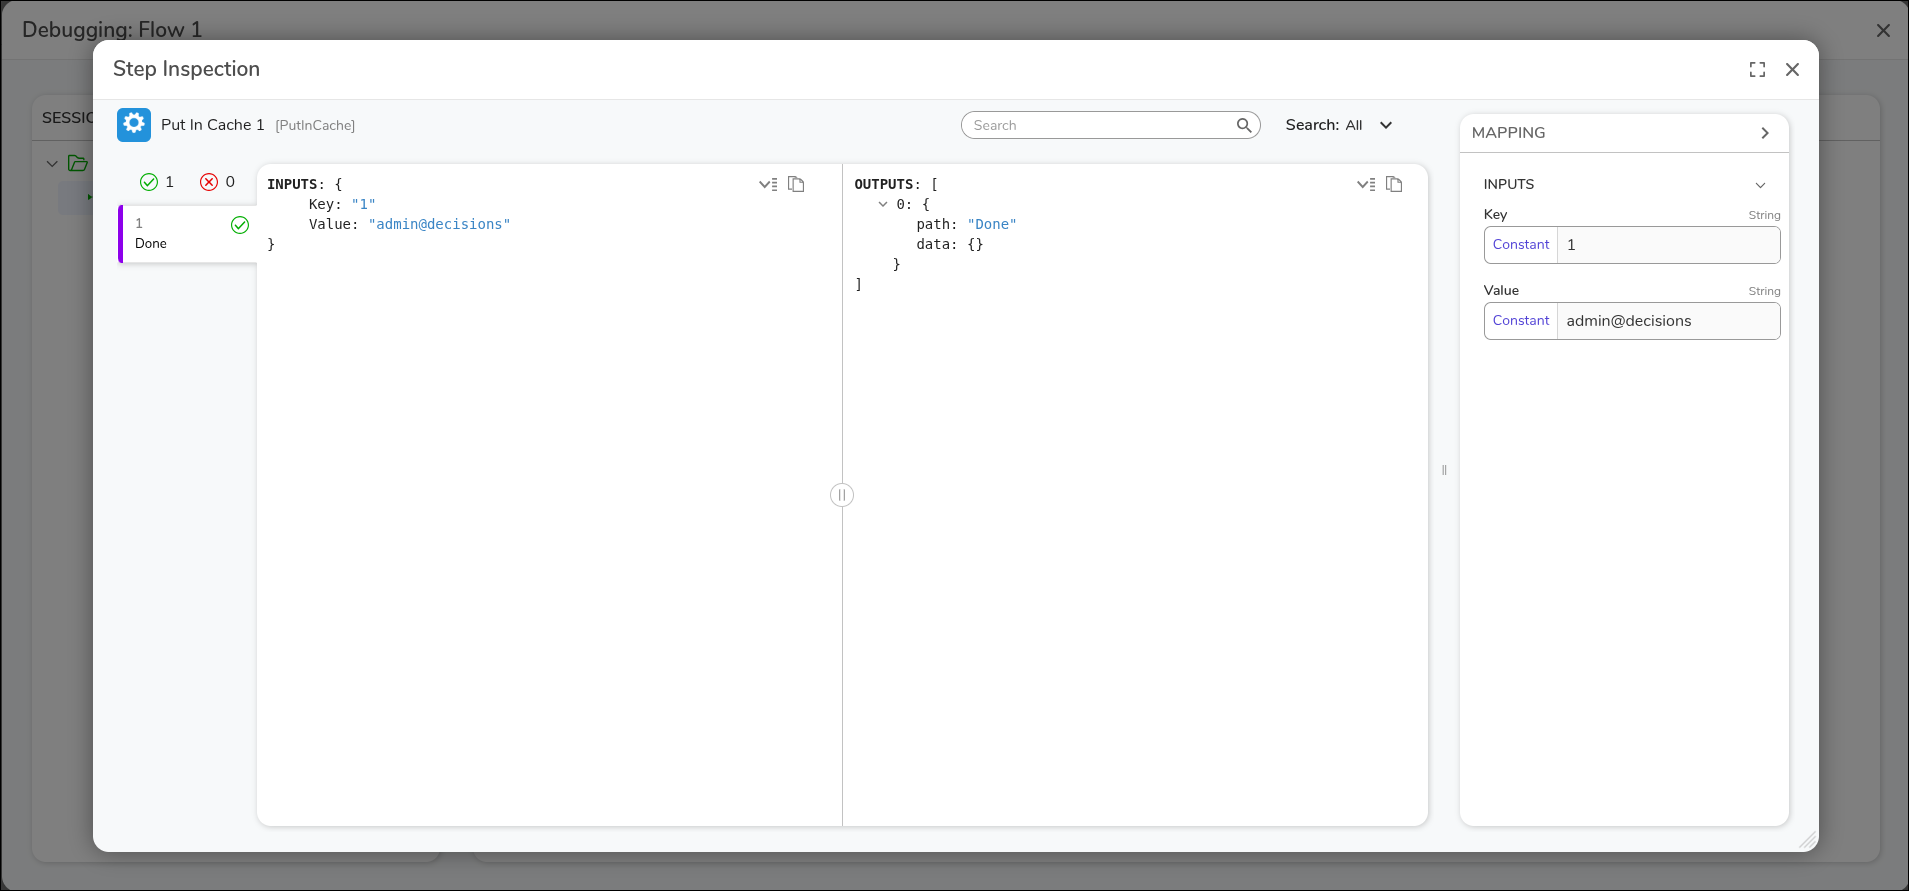
- After the Flow runs, select the Put In Cache step. In the Step Inspection modal, you can verify that the value was stored in the cache.
Get From Cache
The following example demonstrates how to pull an email address from an email Cache via a Flow.
- In a Designer Project, click CREATE FLOW. Select Flow, name the Flow, and click CREATE.
- In the Flow Designer, attach a Get From Cache step from the Toolbox panel under All > SYSTEM > CACHING between the Start and End steps.
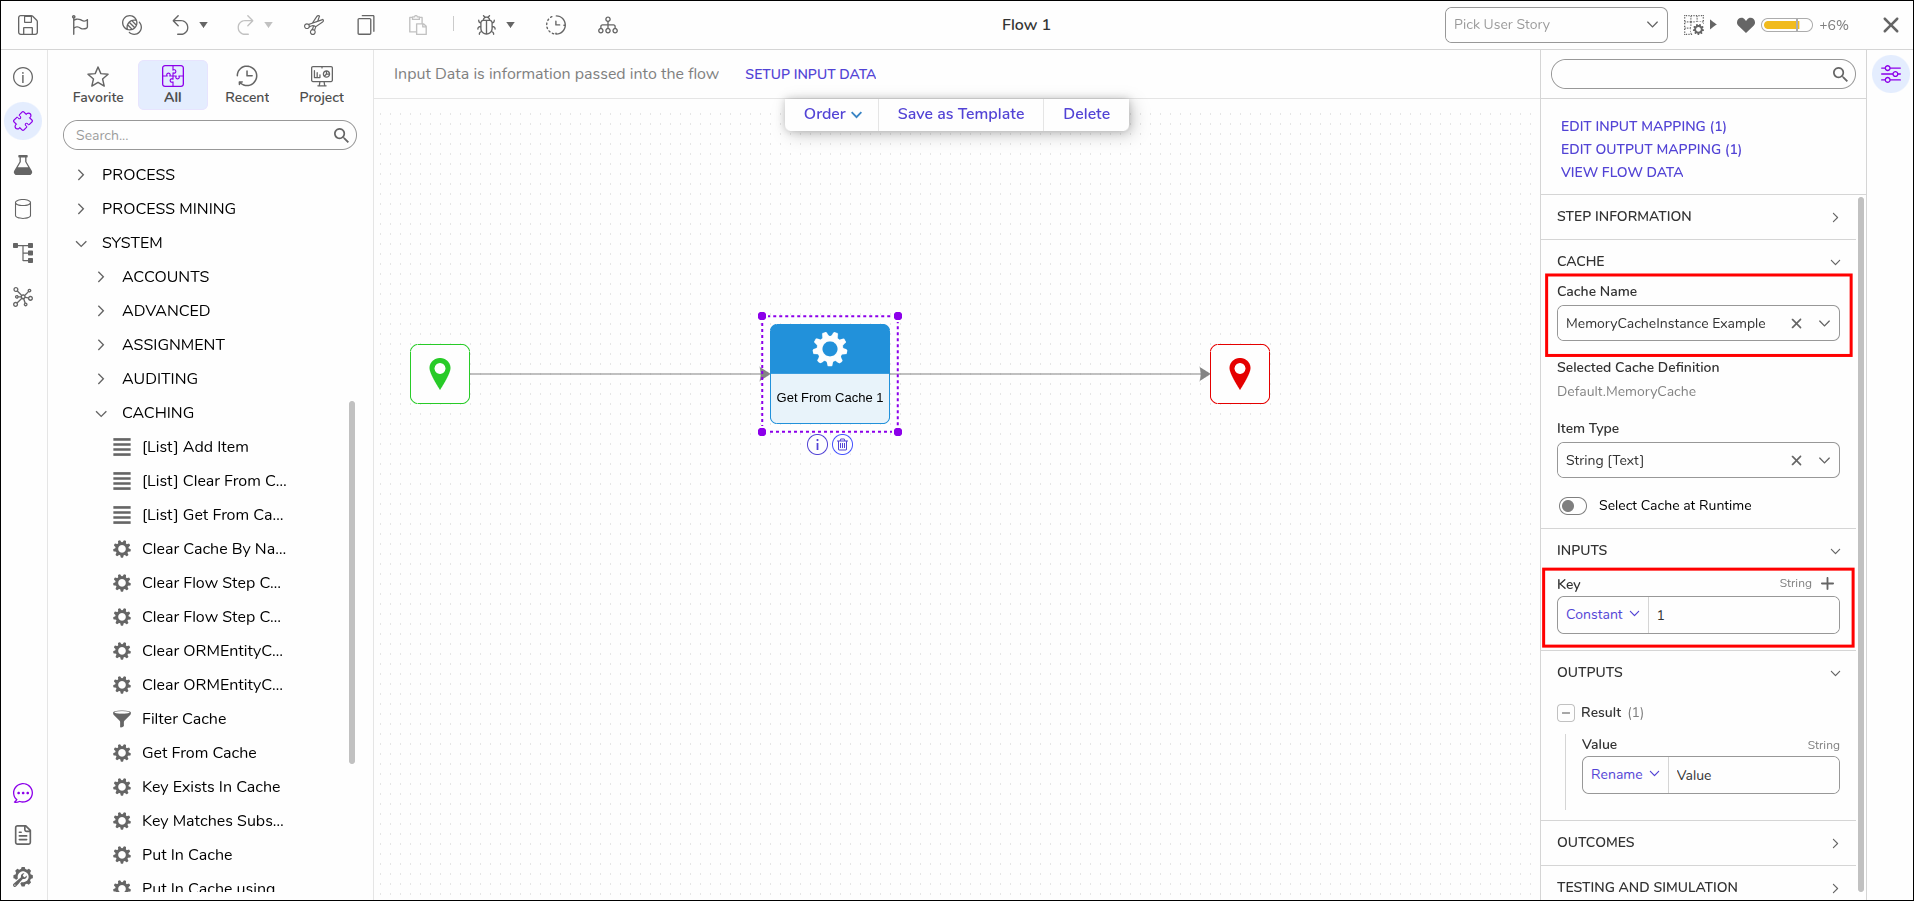
- In the Cache Name dropdown list, select "MemoryCacheInstance Example".
- Enter "1" in the Key field.
- Click Save to save changes to the Flow.
- Click the Debug on the top action bar, then click START DEBUGGING.
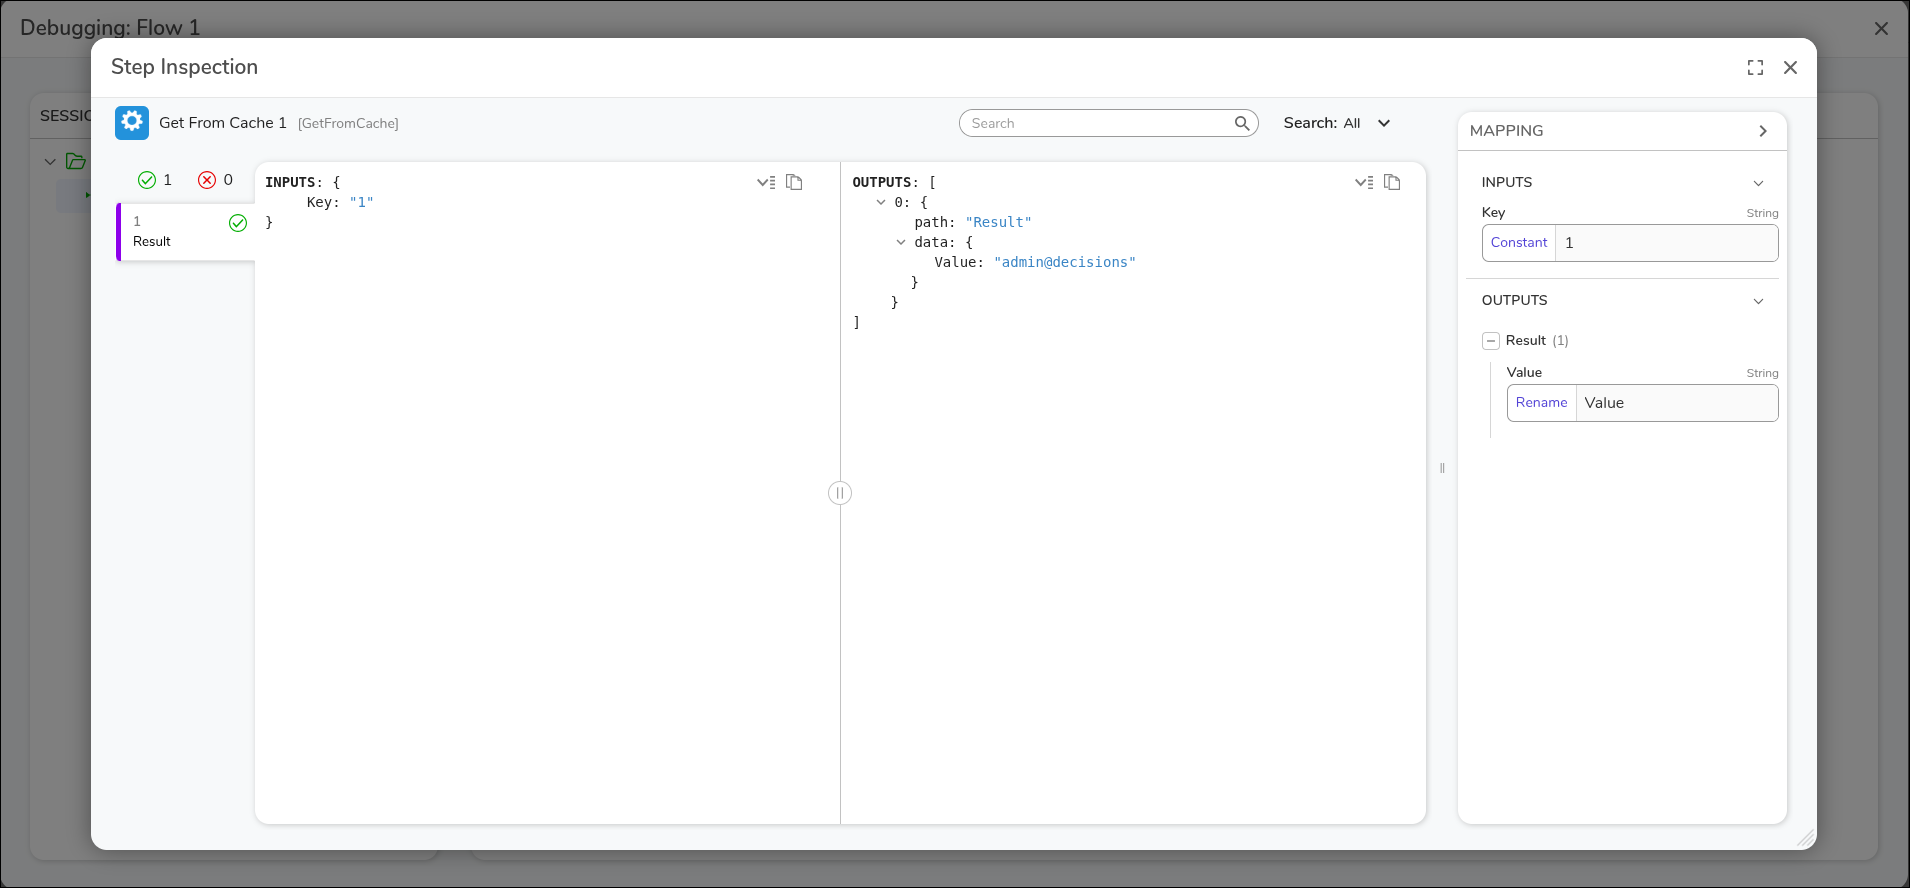
- After the Flow runs, click the Get From Cache step. In the Step Inspection modal, you can verify that the retrieved email matches the one that was added previously to the cache.
Adding Multiple Items to Cache
The following example demonstrates how to add multiple items to a cache compiling Admin Emails via a Flow.
- In a Project, click CREATE FLOW. Select Flow, name the Flow, and click CREATE.
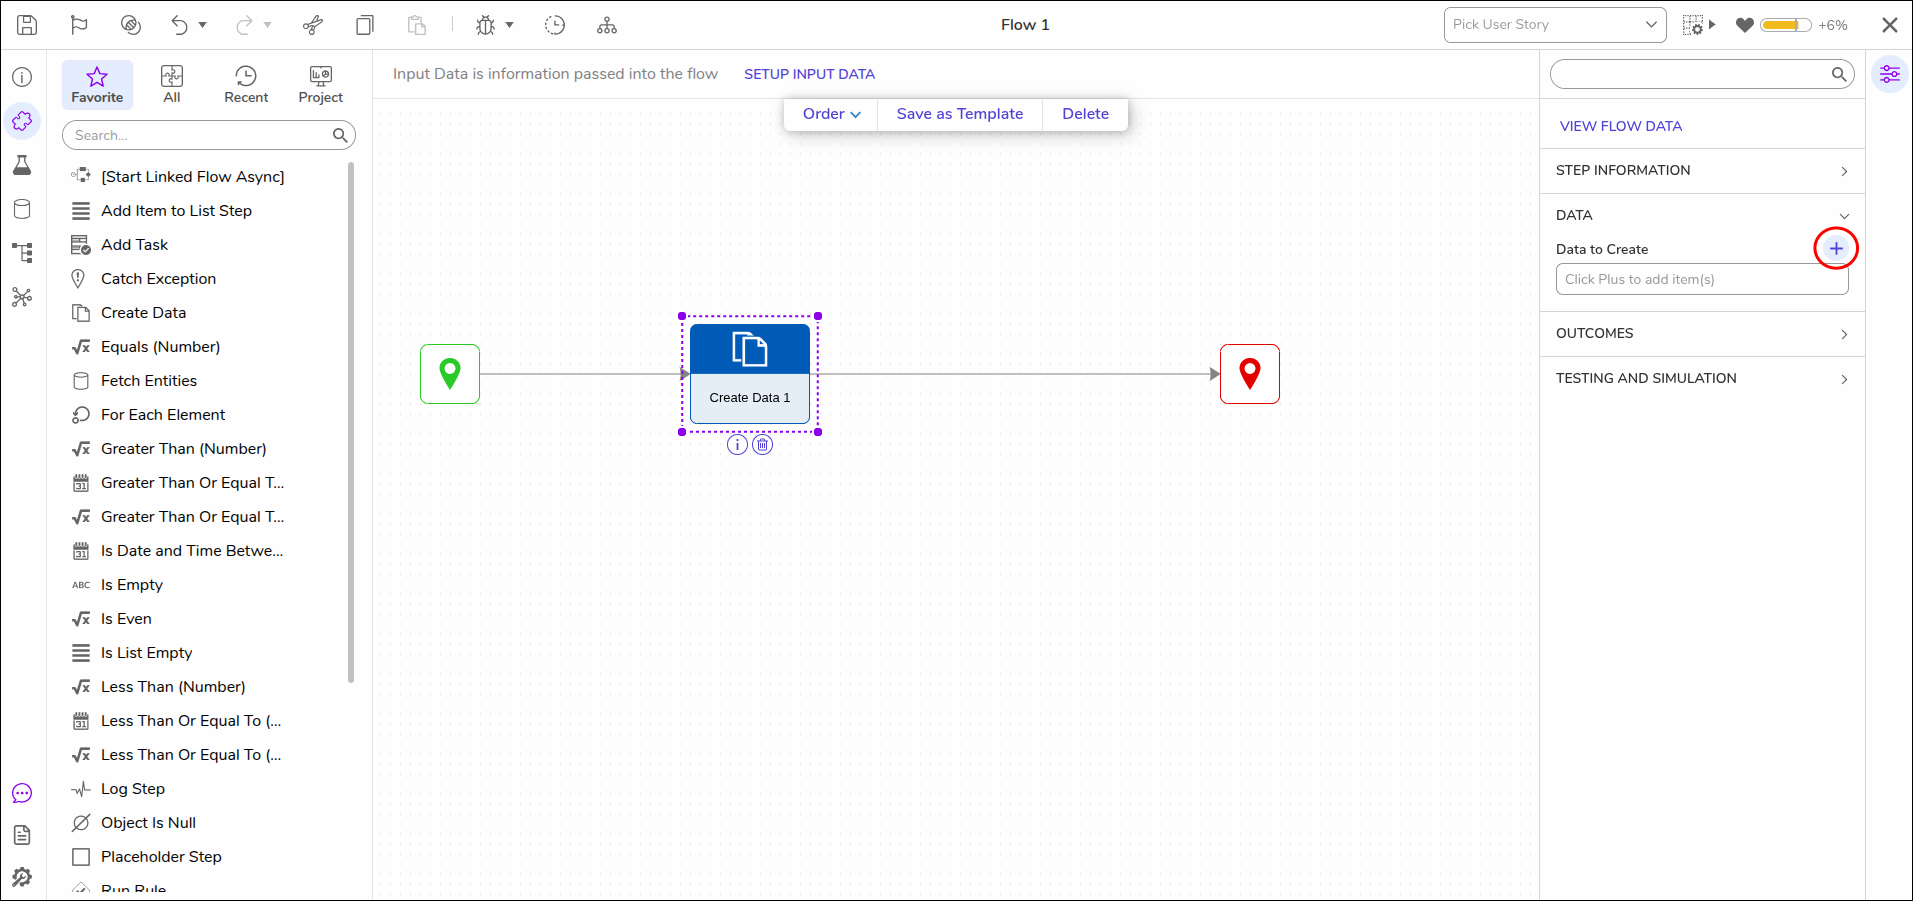
- From the Toolbox panel, attach a Create Data step from the Favorite category to the Start step.
- From the Data tab, click +.
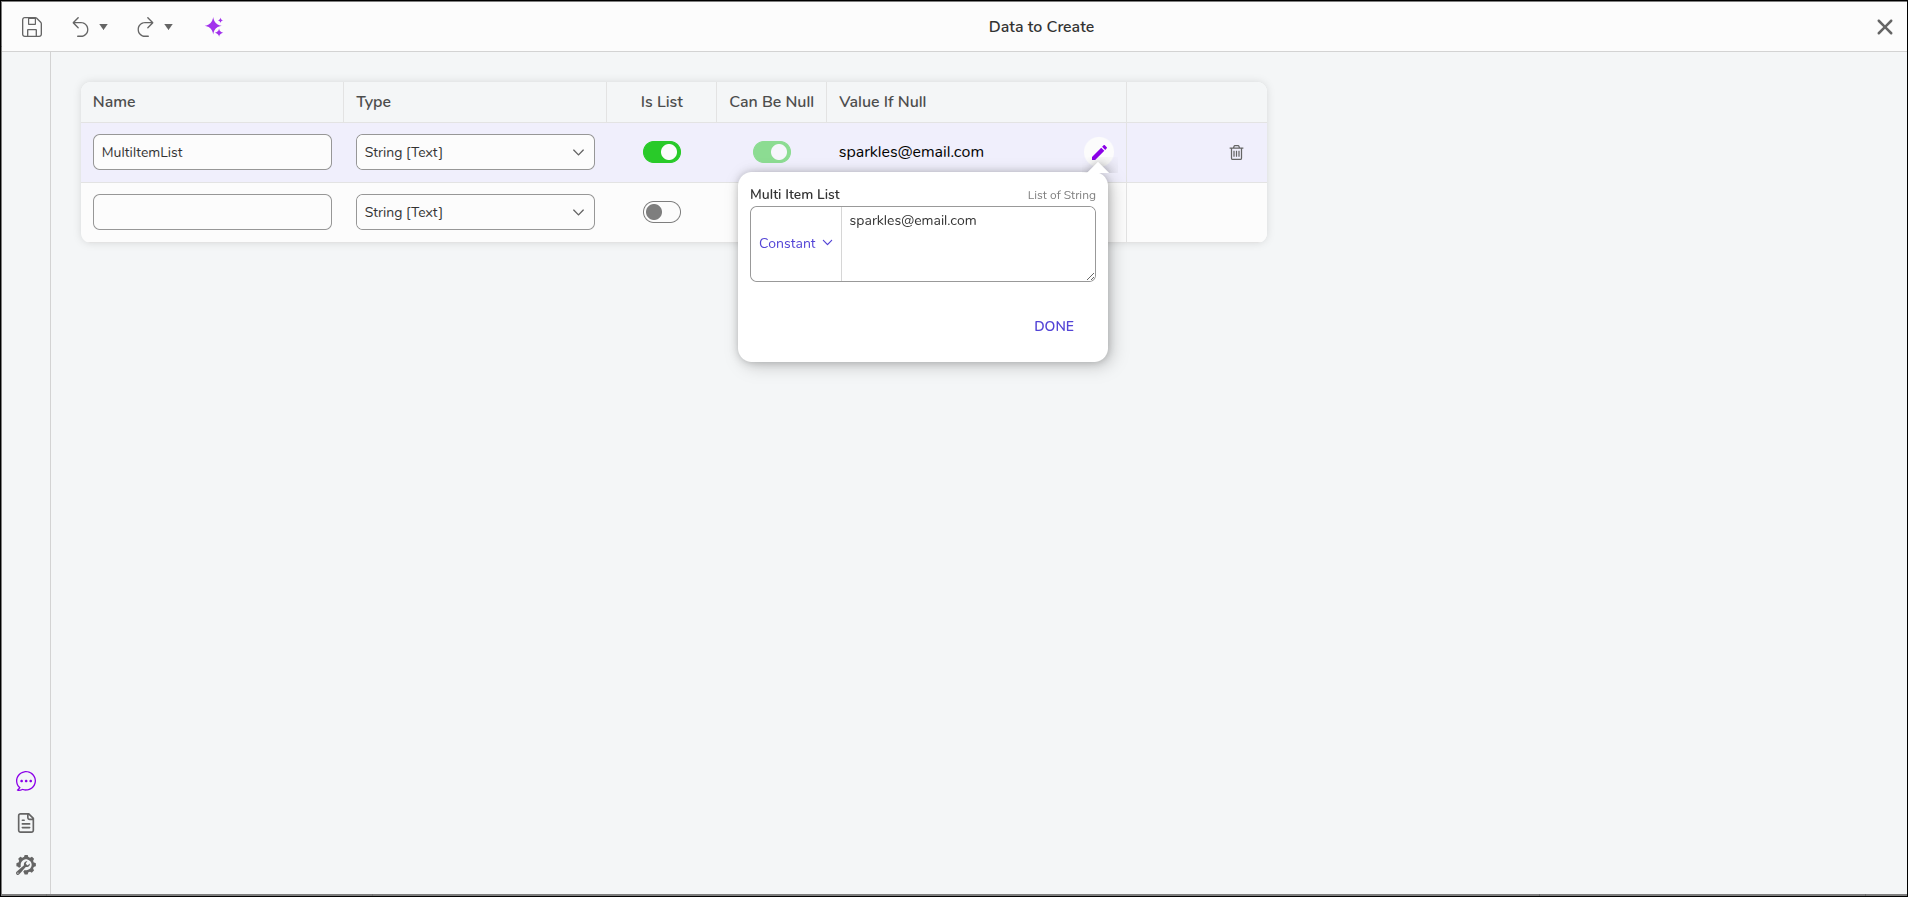
- From the Data to Create window:
- Enter a name.
- Select the String [Text] type from the dropdown menu.
- Select the IS LIST.
- In the Value If Null, set INPUT to Constant, then map the desired Emails.
- Click DONE, then save and close the window.
- From Favorite, attach a Run Sub Flow step to the Create Data step. On the Properties panel, select PICK OR CREATE FLOW and create a new Flow.
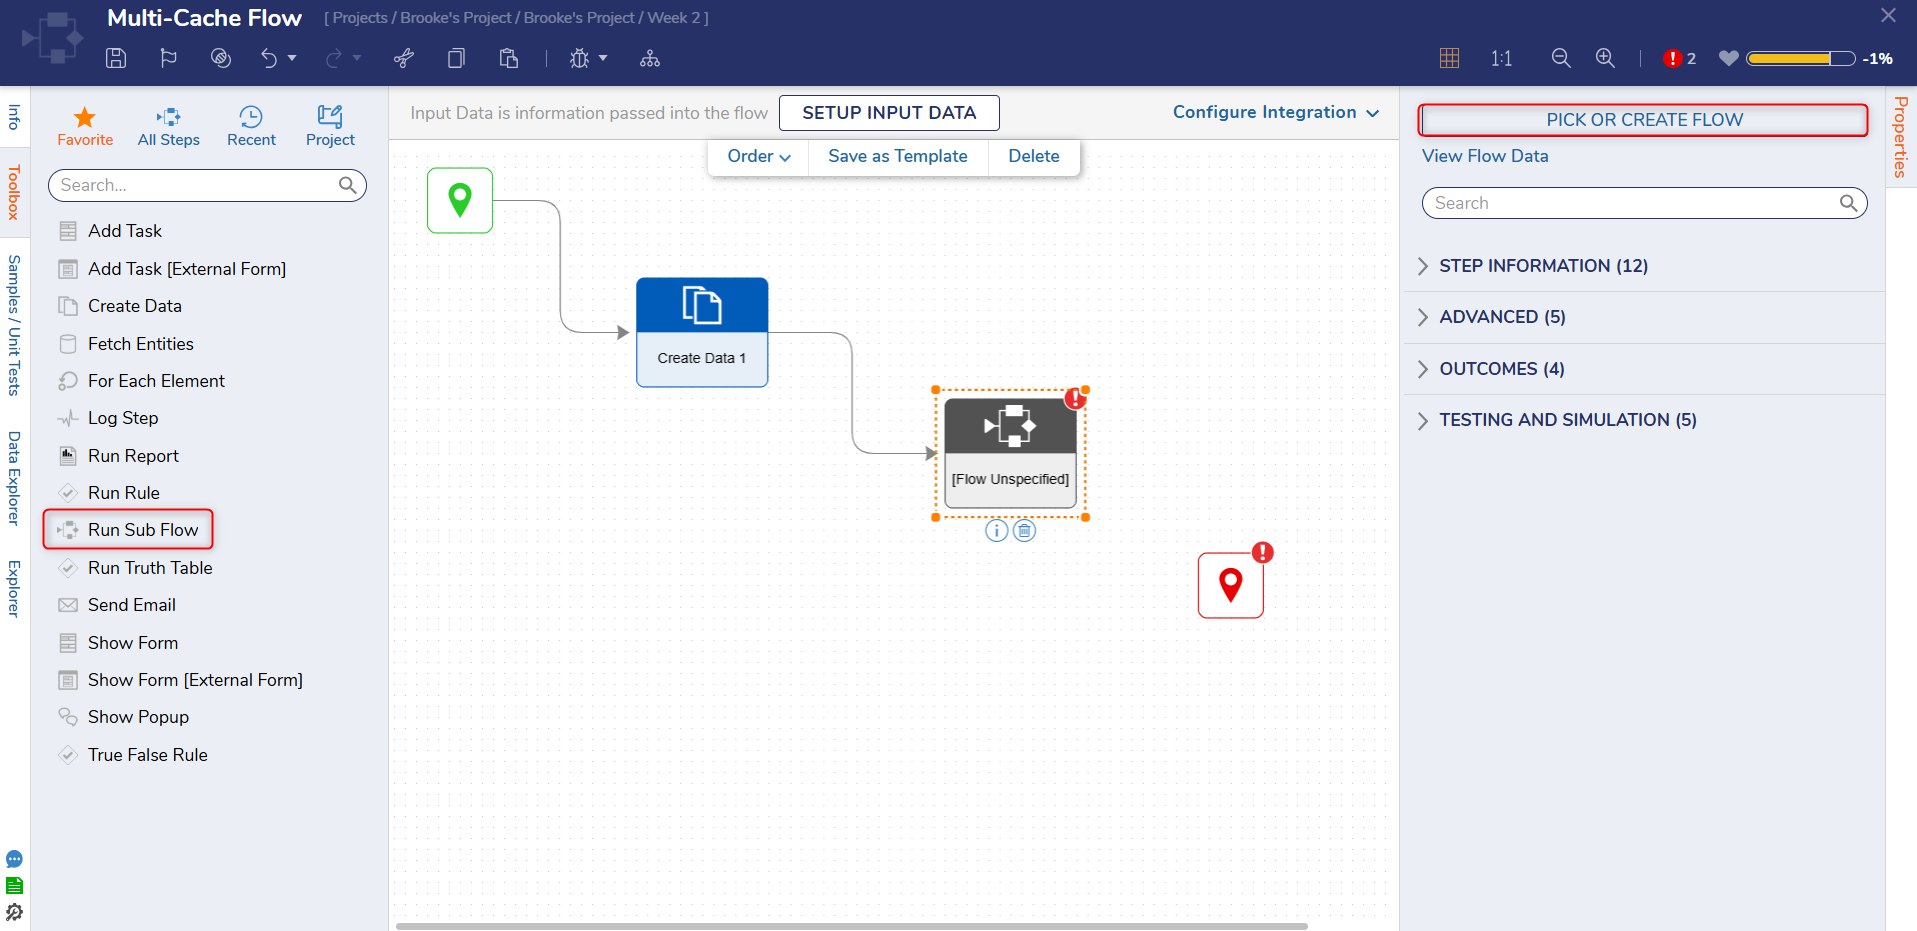
- From the Flow Designer of the new Sub Flow, click SETUP INPUT DATA and then define under Input Data.
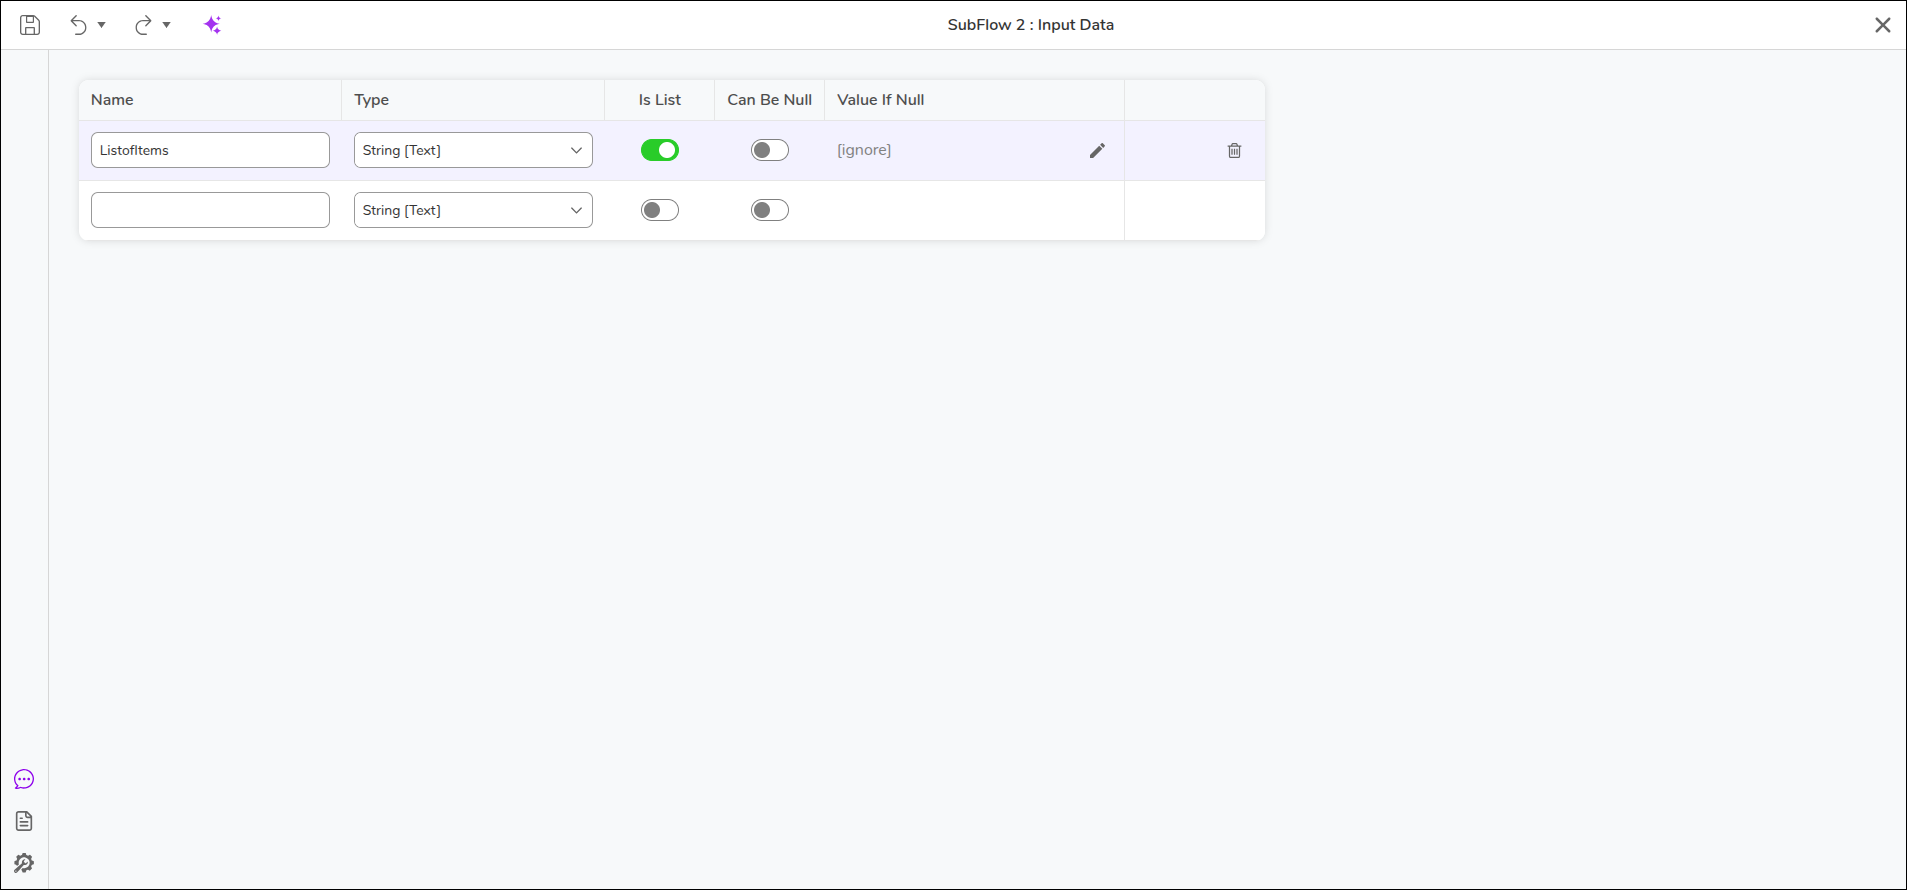
- In Name, enter "ListofItems"
- In the Type dropdown, select "String [Text]".
- Enable Is List.
- Click Save, and close the window.
- In the Toolbox panel, navigate to All > FLOW MANAGEMENT > ITERATION, attach a ForEach Step step to the Done path of the Start step.
.png)
- On the Properties panel next to the Collection field, select Flow Data.
- Click the Pencil icon to map it to ListofItems.
- In the Toolbox panel, navigate All > SYSTEM > CACHING category, attach a [List] Add Item step to the Next path of the ForEach Step.
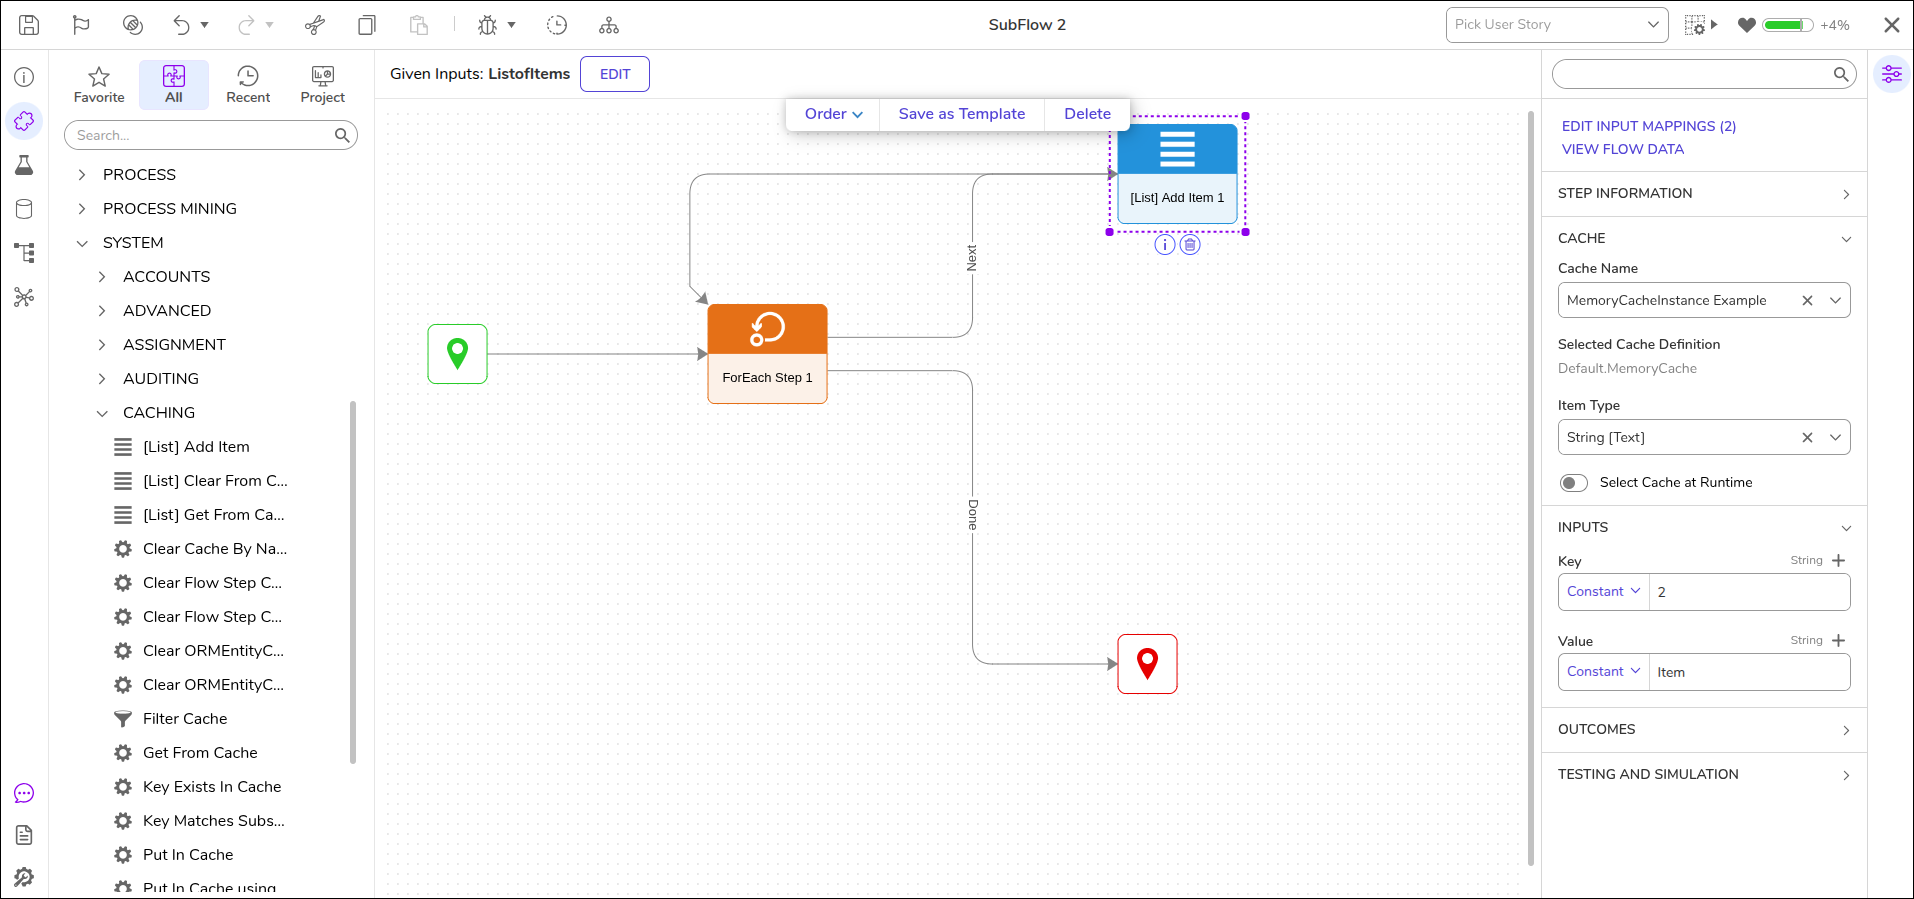
- On the Properties panel in the CACHE setup, select a Cache Name.
- In the INPUTS settings, set a constant in the Key setting.
- In Value, enter Item . Utilizing the same Key should allow the ability to recover all the added Values at once.
- Connect the Done path of the [List] Add Item step to the ForEach Step, then connect the ForEach Step's Done path to the End step. The ForEach Step is used to split the input List of Emails into individual items, then send each item to the [List] Add Item step to be added to the cache.
- Save the changes to the Sub Flow and close the Sub Flow.
- From the Parent Flow, select the Sub Flow step to navigate to its Properties tab and map the Output of the Create Data step, to the Email List Input of the Sub Flow.
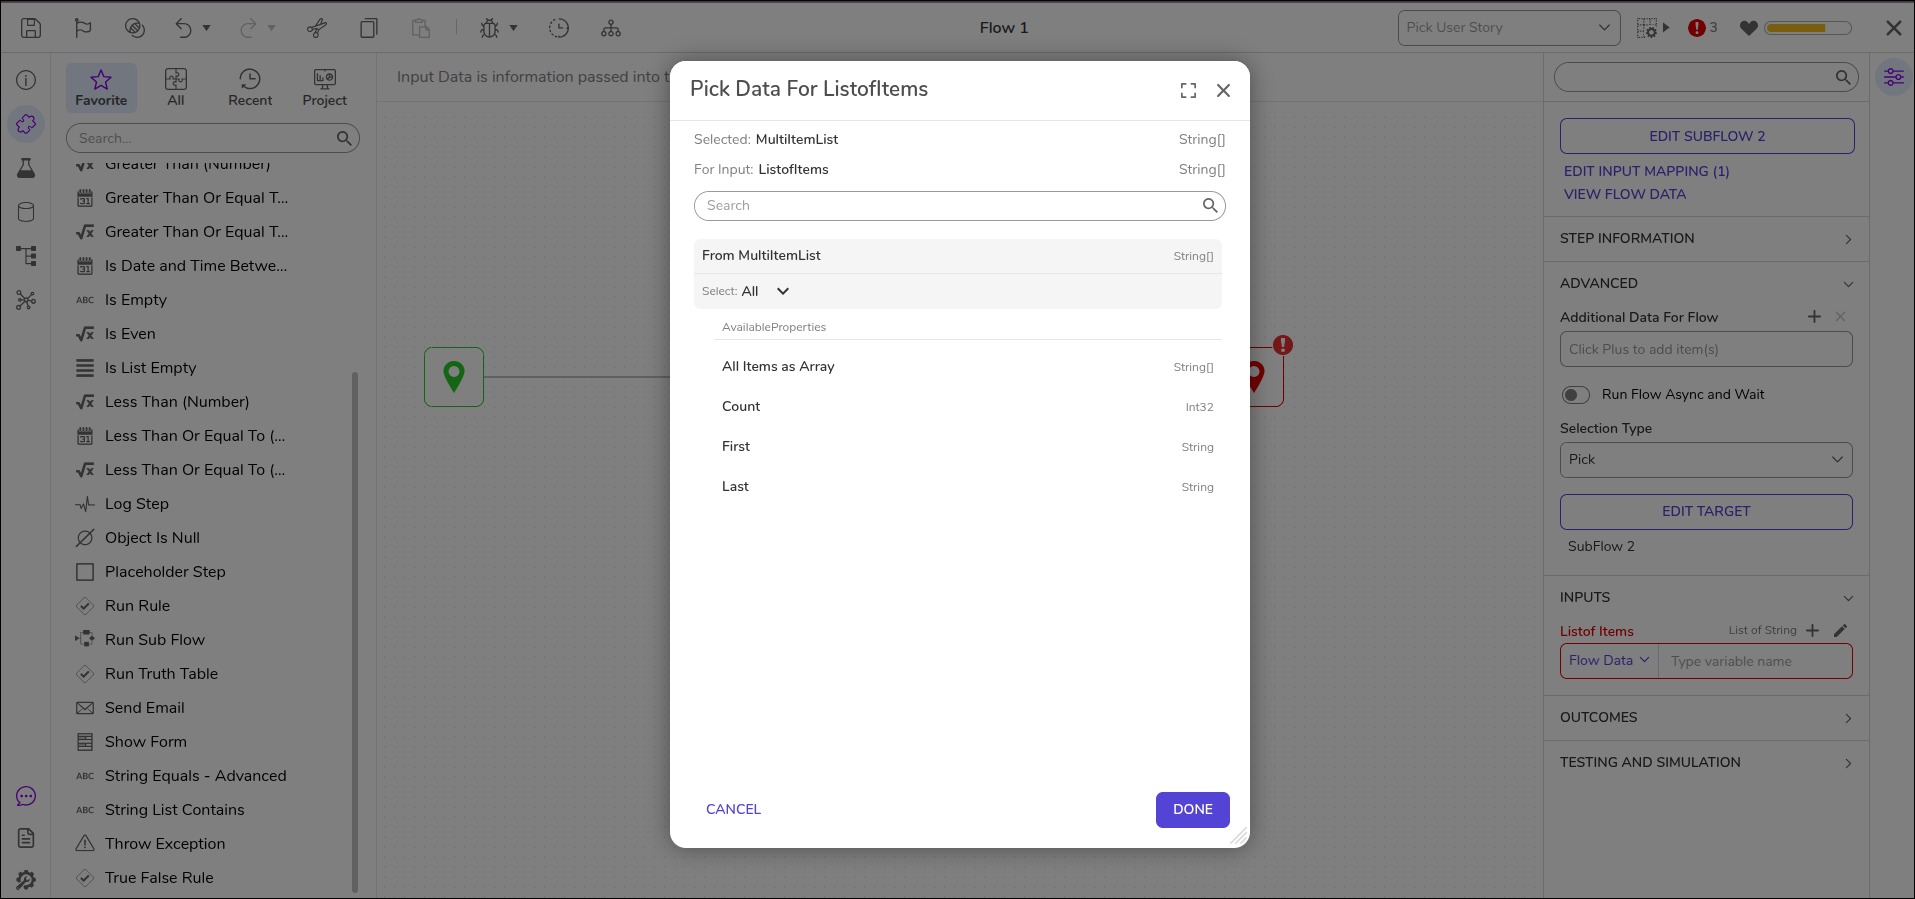
- Connect the Done path of the Sub Flow to the End step. Then, save the Flow.
- Click Debug from the top action bar. Then, click Start Debugging.
- Select the Sub Flow.
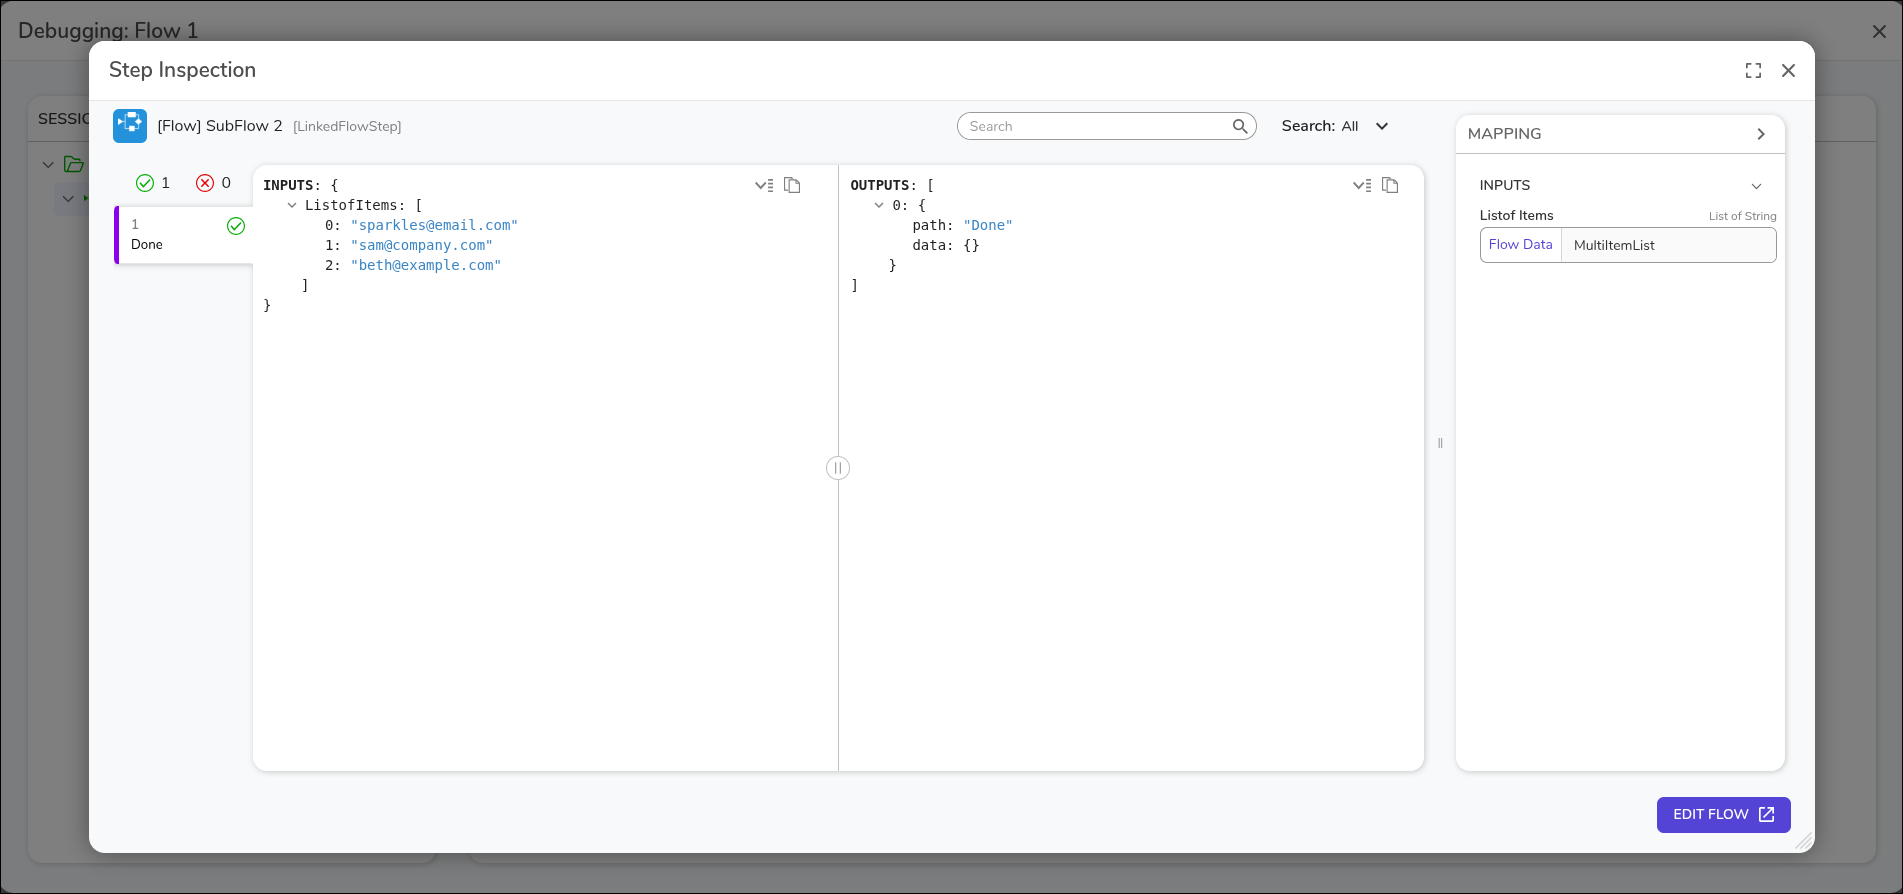
Additional Cache Steps
| Cache Step | Description |
|---|---|
| [List] Add Item | Adds a specified list of items to the cache. |
| [List] Clear From Cache | The Clear From Cache (List) step clears a list of objects from a specified cache. |
| [List] Get From Cache | Use the [List] Get From Cache step to get a list of values from cache. |
| Clear Cache By Name | Clears a desired Instance in the cache. Can be selected by Name or Type. |
| Clear Flow Step Cache | This clears the step cache for individual steps in a Flow. This does not clear any Cache instances. |
| Clear Flow Step Cache [All Flows] | Clears the cache of all the steps within all Flows. This action does not clear any Cache instances. |
| Clear ORMEntityCache By Id | Clears the cache for a specific entity by its ID. |
| Clear ORMEntityCache By Type | The Clear Cache By Type step is used to clear out Data entries from Caches in a Project based on the selected Type of Data -String, Int, etc. |
| Delete From Cache By Filter | Delete certain items from a cache by using a filter to set the properties of what is to be deleted. |
| Filter Cache | Applies a filter to the cache. |
| Get From Cache | Pulls a cache value based on a specific Key. |
| Key Exists In Cache | Check if the Instance of the cache contains the Key. |
| Key Matches Substring In Cache | This Step will search the cache for keys that have any characters in their key input. Then it will return True or False depending on the result. |
| Put In Cache | Use the Put In Cache step to place some value in memory for a defined time. Cache Instance Name can be any name you want to associate with this cache. |
| Put In Cache using Generated Key | Allows Users to put a value in the cache to generate a key to access the value. |
| Put Items In Cache | Adds a String list of items to the selected cache. This looks for an existing list, whereas [List] Add Item actually creates a list of items. |
| Remove Key From Cache | Removes the key value from a cache instance. |
| Reset Constants and Lookups | The Reset Constants and Lookups step is used in conjunction with a Data Cache step to reset any existing constants or lookup list values in a cache. |