Overview
This tutorial demonstrates how to use Cache Fetch Flow Behavior. This Flow Behavior can be used to fill the Cache in with data that needs to be kept for a certain period of time. Additionally, this tutorial demonstrates how to get a collection of data from the cache.
In the following example, Cache a collection of Account Emails. Next, this Flow will fill a custom created Cache Type. Finally, a second Flow will get all items from the custom Cache Type.
Example
- From a Designer Project, select CREATE FLOW from the top Action bar.
- Select Flow, provide a Name, and click CREATE.
- Navigate to the Properties tab on the right.
- Under the SETTINGS section, select System Cache Flow Behavior from the Behavior Type dropdown menu.
- Attach a GetAll step from the INTEGRATION > INTERNAL SERVICES > ACCOUNTSERVICE category of the Toolbox tab; connect the Done path to the Cache Value step.
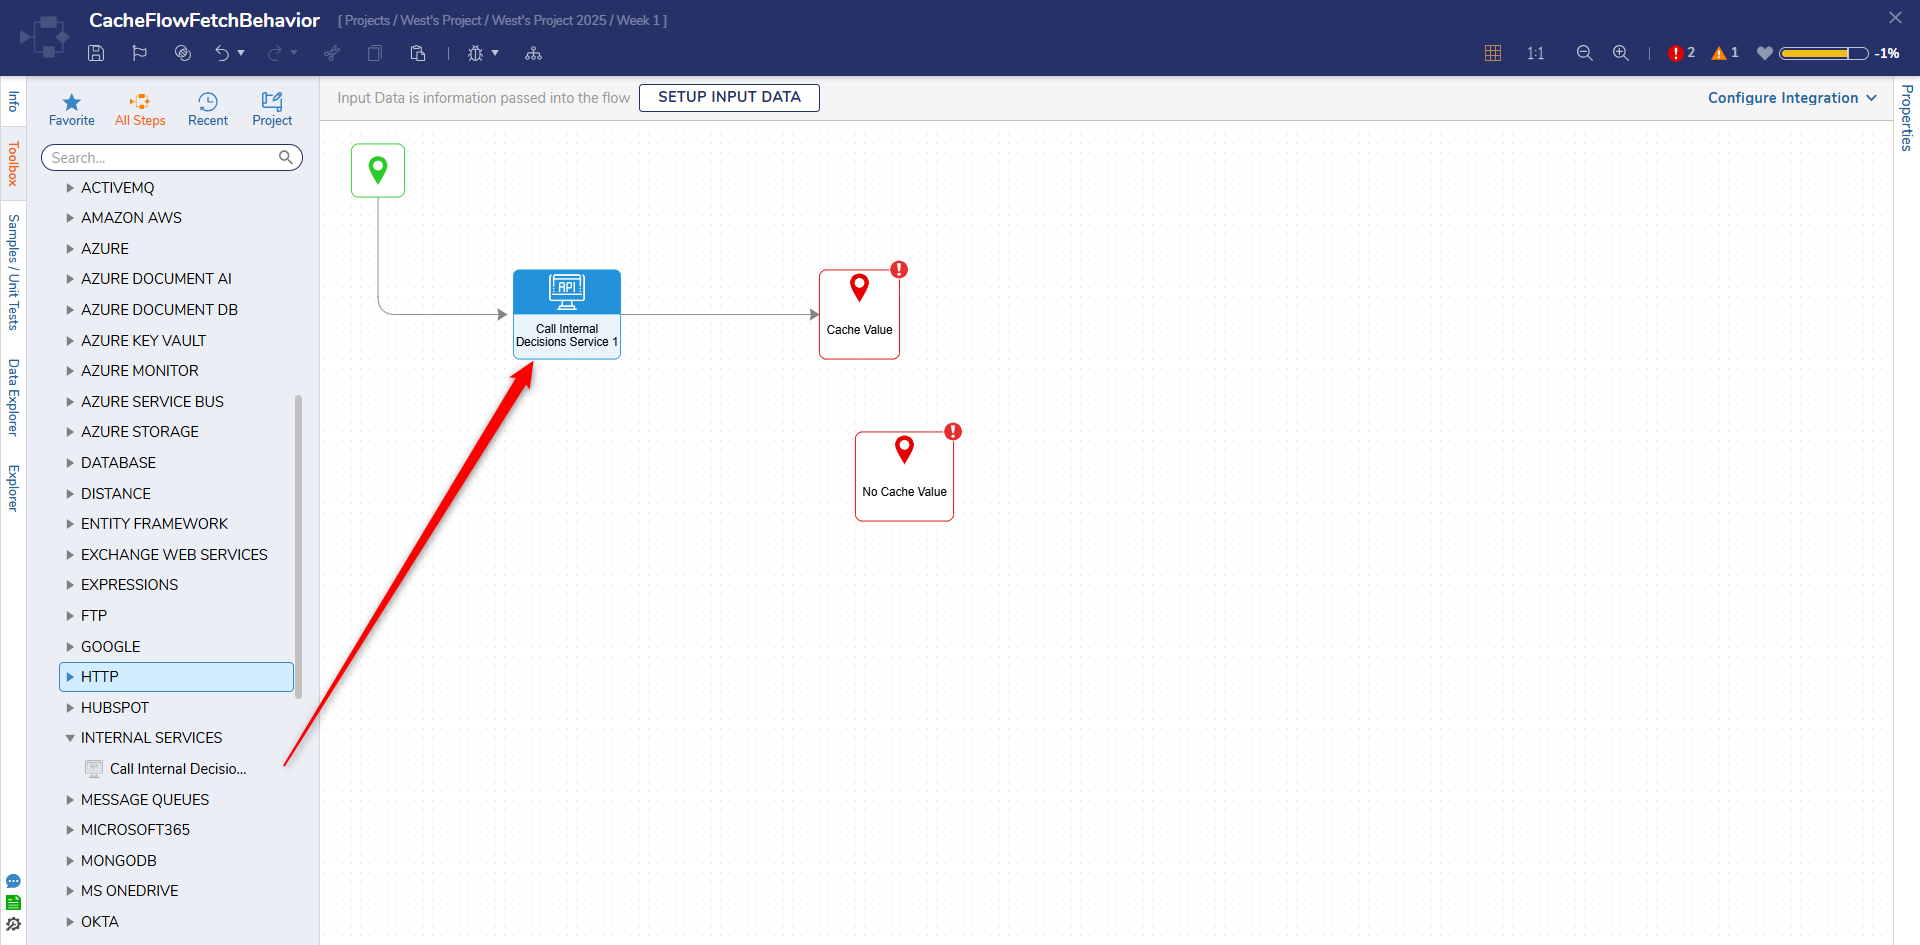
- Select the Cache Value step to navigate to its Properties tab.
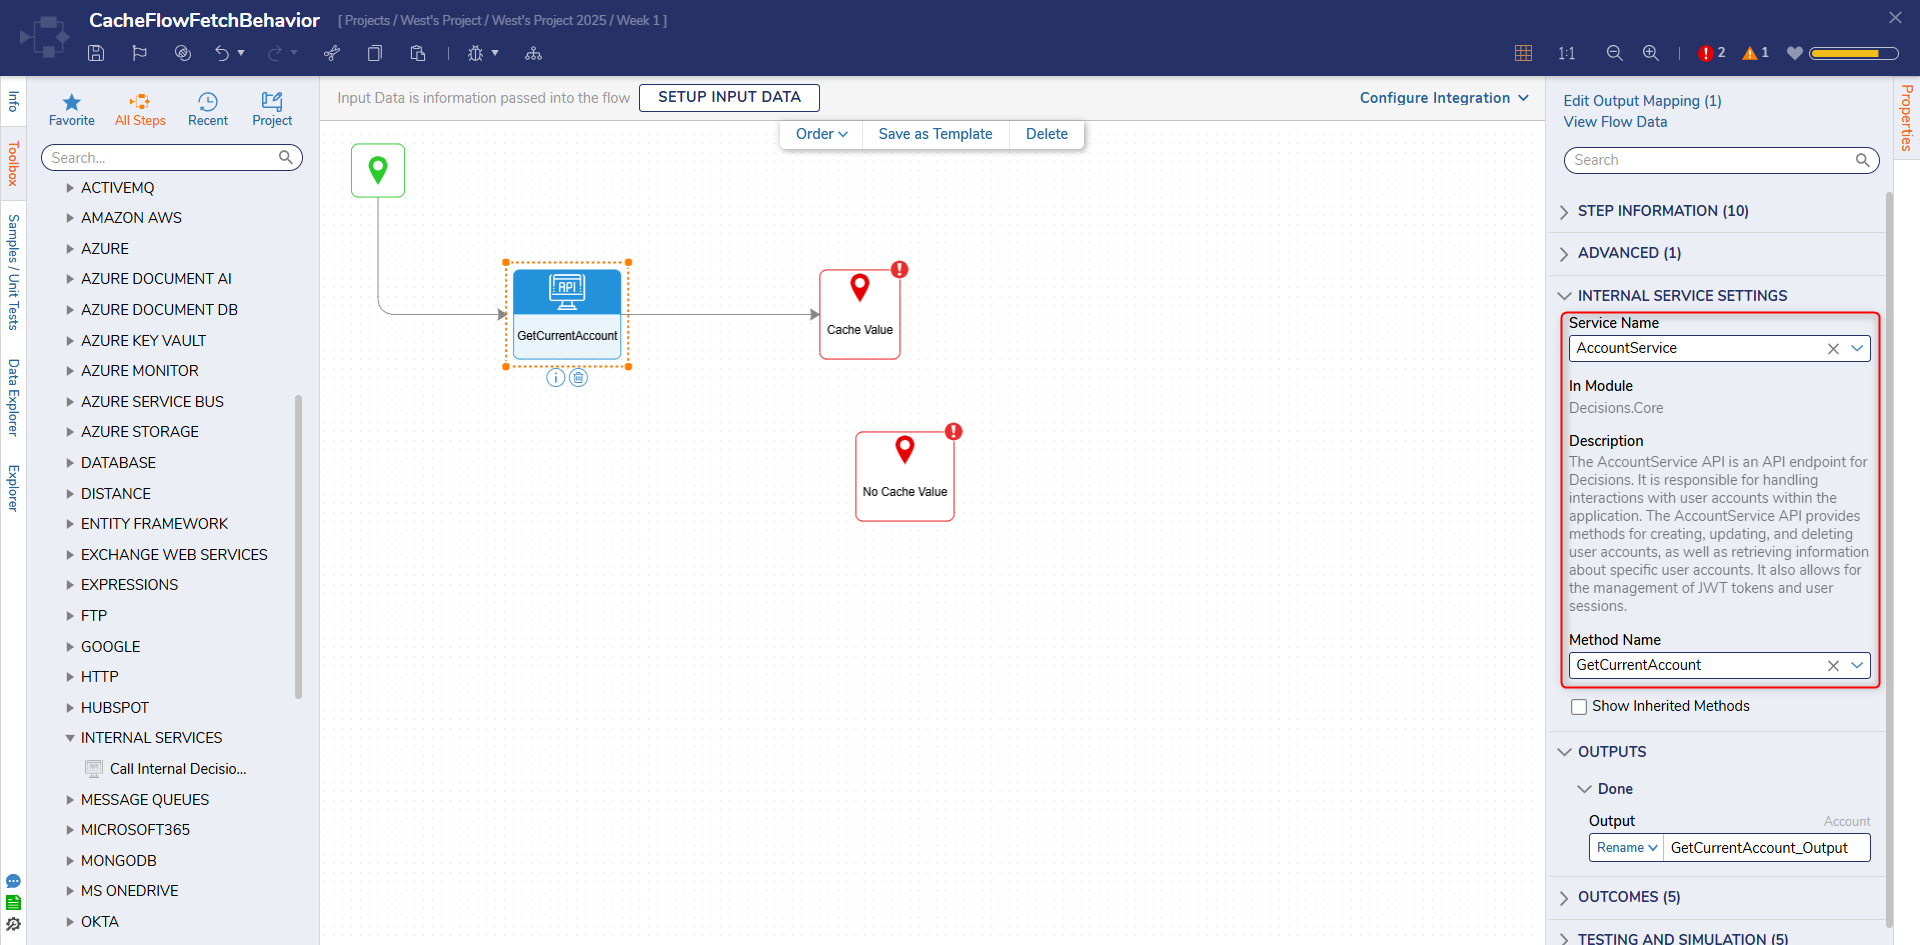
- Select From Flow map GetAll1_Output.All EmailAddress to INPUTS > Value.

- Save the Flow, then close with X.
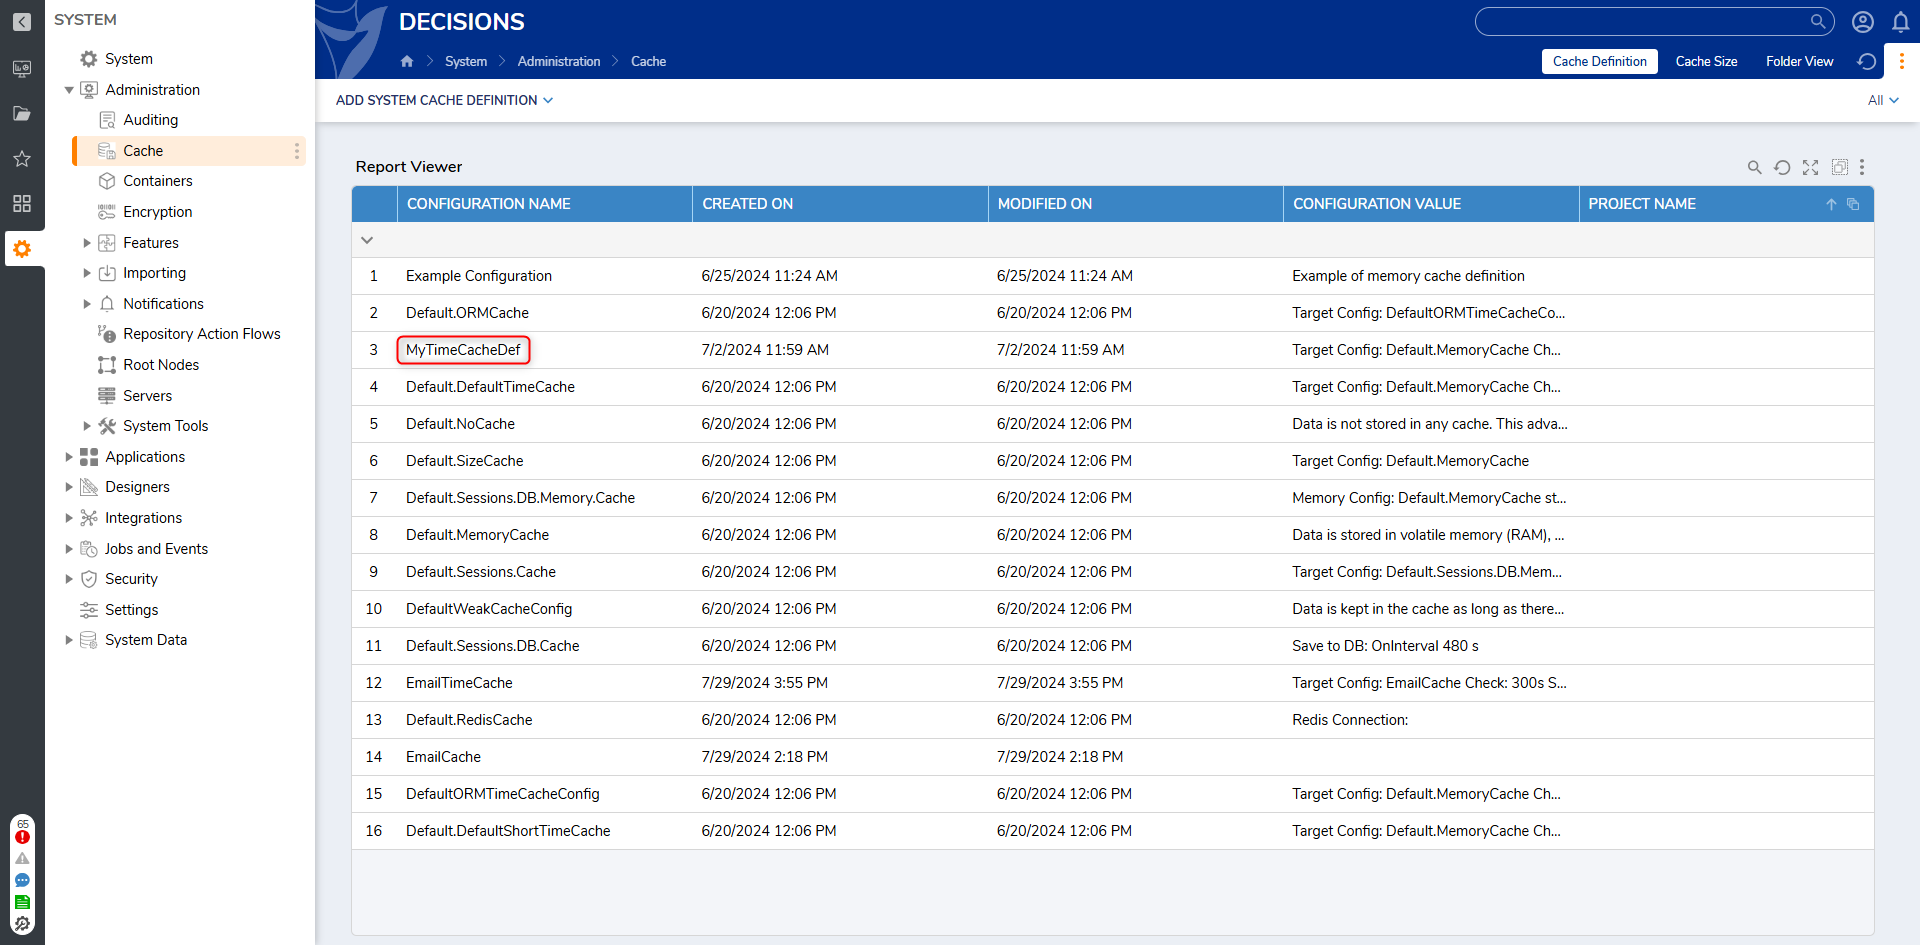
Define Cache Type
- From System > Administration > Cache, select ADD > TimeCacheDefinition from the top Action bar.
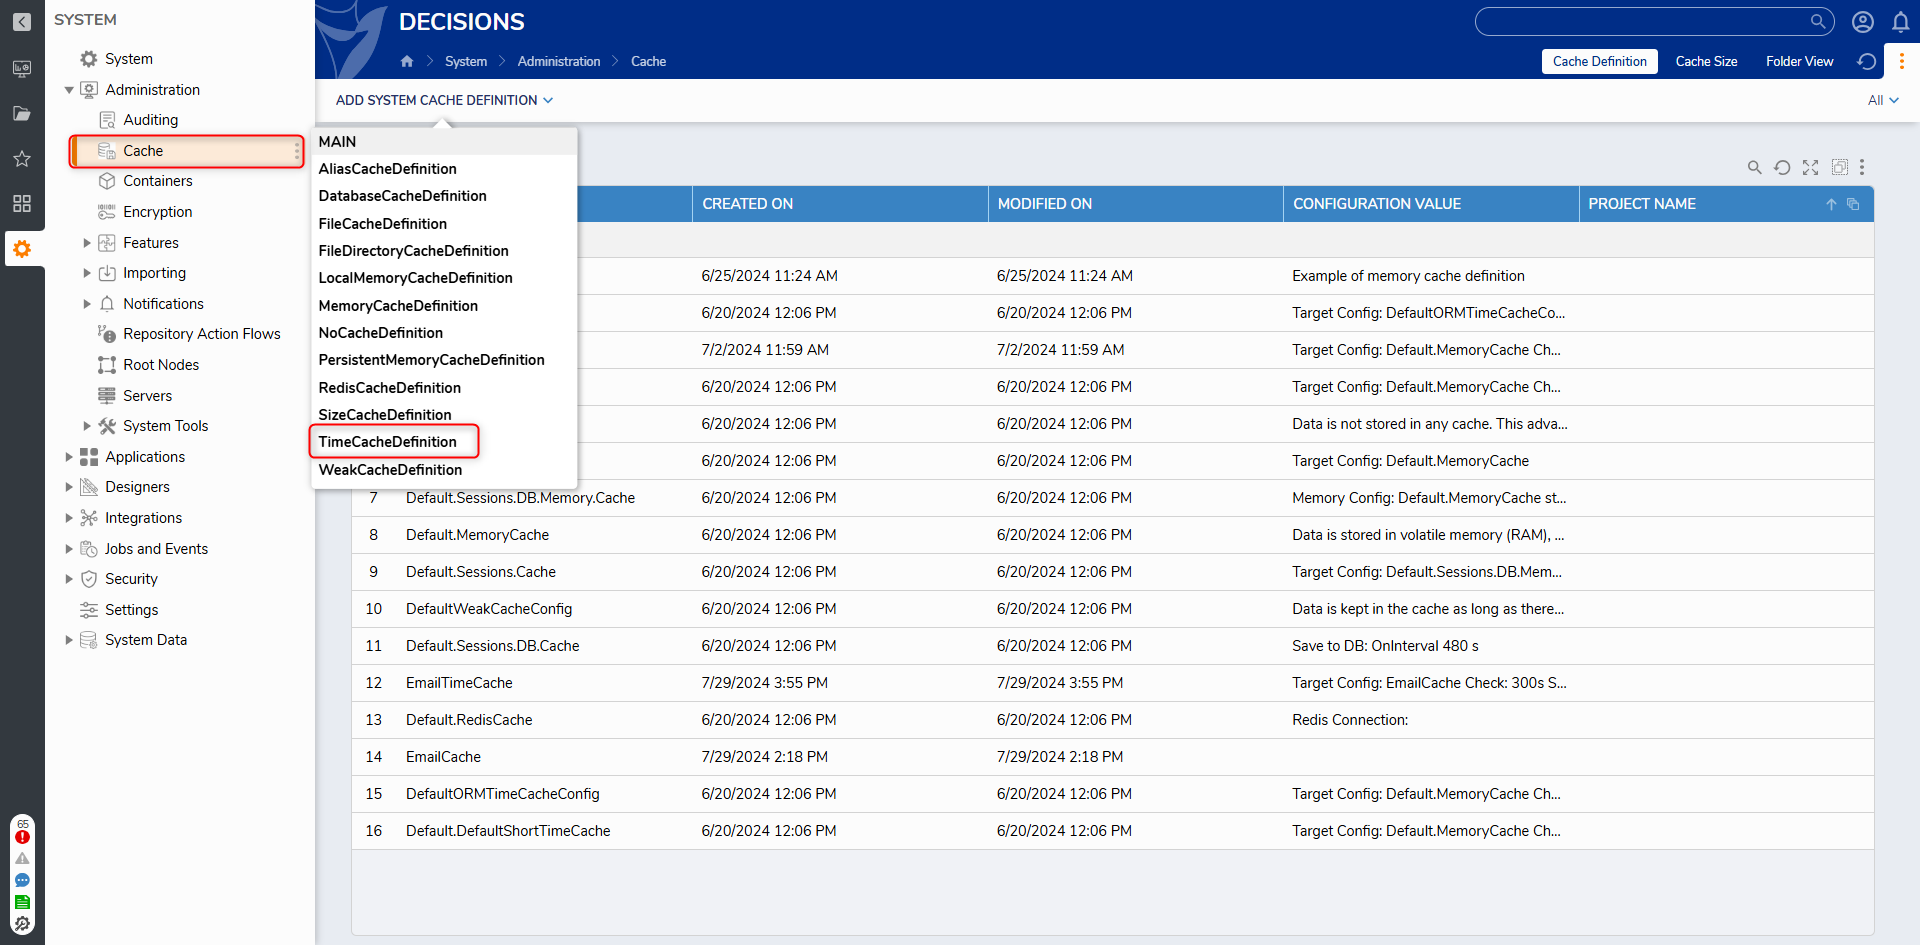
- In the TimeCacheDefinition dialog, under CACHE, check Fill Cache Using Flow; then, from Cache Fill Flow, PICK the Flow that was previously created in the beginning example.
- Under CACHE INFORMATION, provide a Configuration Name.
- Under TIME CACHE DEFINITION INFO, from the Target Cache Config Name dropdown, Select Default.MemoryCache.

- Click SAVE.
- Verify that the Cache was created in the Cache Folder.
- From a Designer Project, select CREATE FLOW from the top Action bar; select Flow, provide a Name, and click CREATE.
- Attach a [List] Get From Cache step from the SYSTEM > CACHING category of the Toolbox tab, to the Start and End steps.
- Navigate to and define the Properties tab for the [List] Get From Cache step.
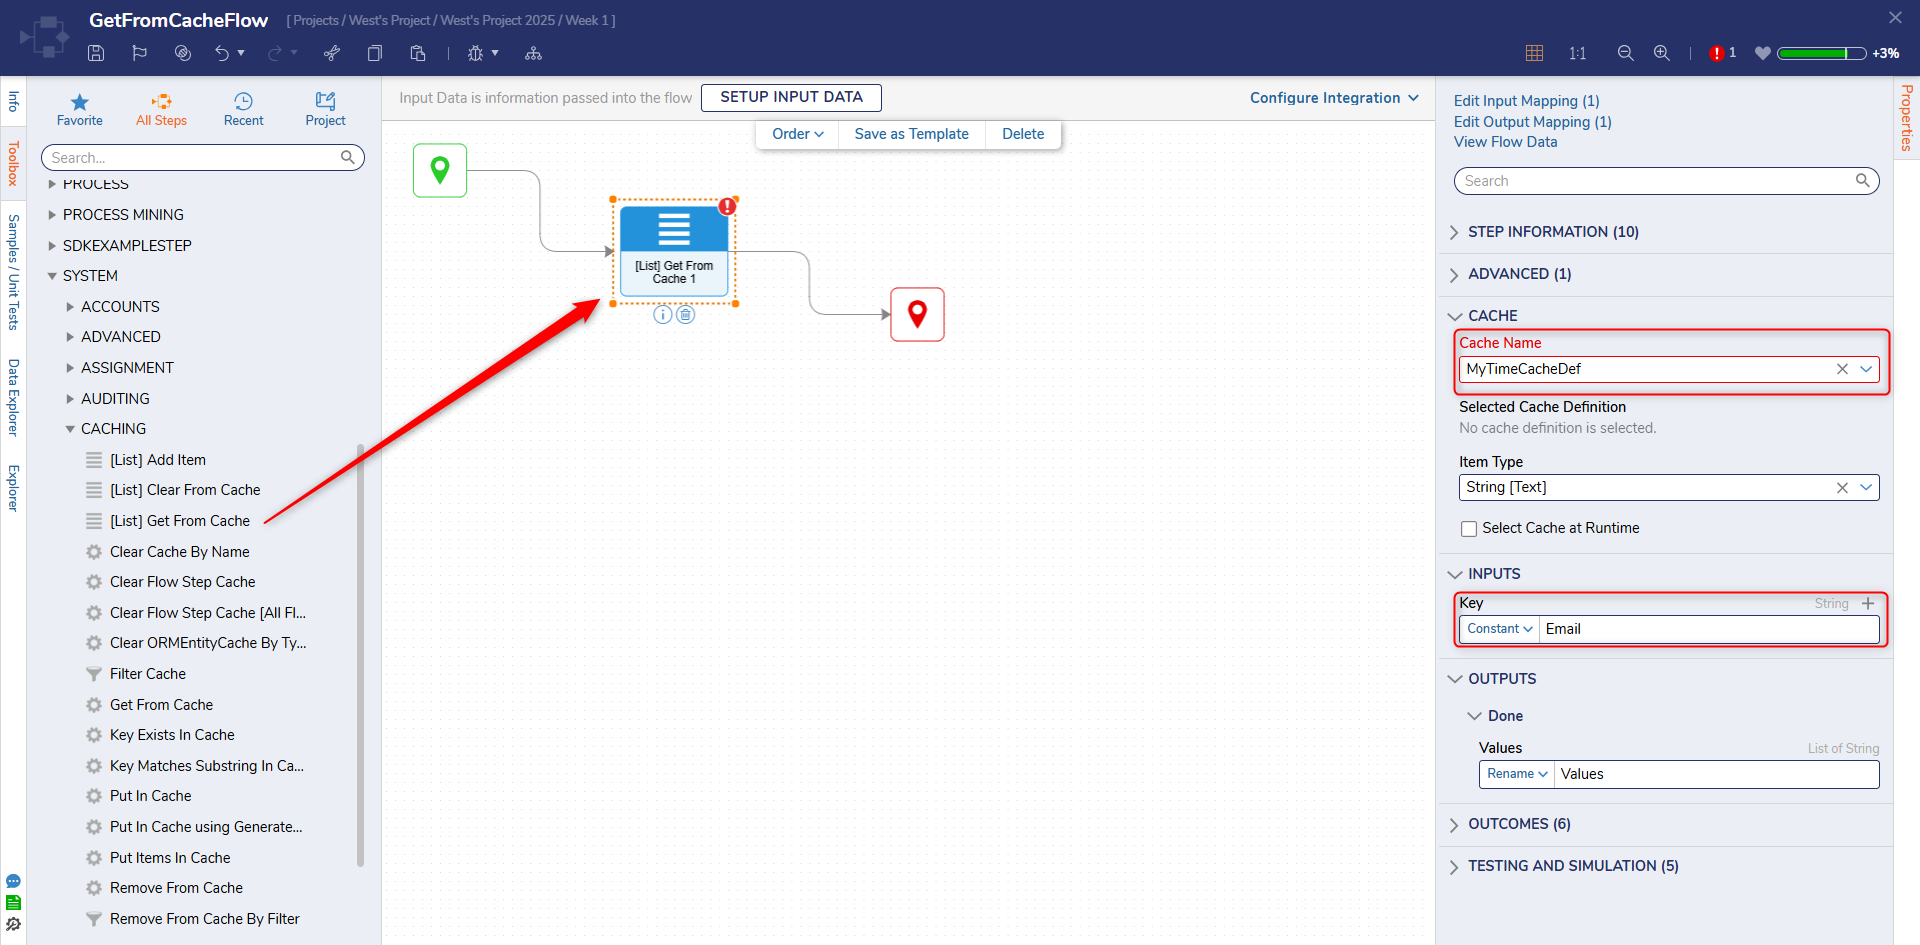
- Provide a Cache Instance Name and from the CachTypeName drop-down; select the Cache that was previously created.
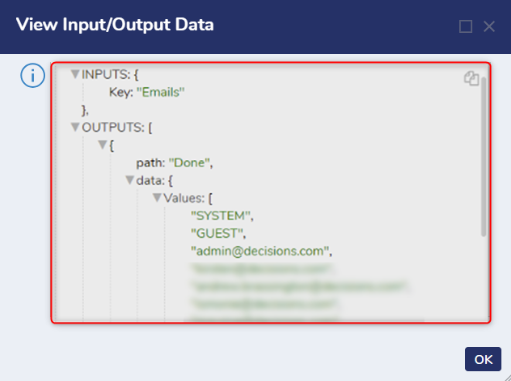
- Constant map, "Emails" to INPUTS > Key.
- Save the Flow, then if desired, close via X.
Debug
- From the Flow Designer, click the Debug link on the top Action bar.
- Click START DEBUGGING.
- Click the [List] Get From Cache step, and select View Input/Output Data.The Output Data will display a list of the cached data.