Overview
Projects serve as organized spaces where developers and teams can build and manage applications. They offer a structured framework that promotes efficiency, collaboration, and scalability in creating and managing applications.
Within a Project, various components such as Designer Folders, Folders, Flows, Forms, Rules, Reports, and Dashboards are utilized to define the application's logic and present data effectively. Moreover, developers can fine-tune the application's behavior and extend functionalities by configuring project-specific settings, including project Dependencies, enabling Modules, establishing project constants, and integrating SDK Extensions.
Create a Project
Navigate to the Projects from the Sidebar. Click on the Create Project or '+' icon.
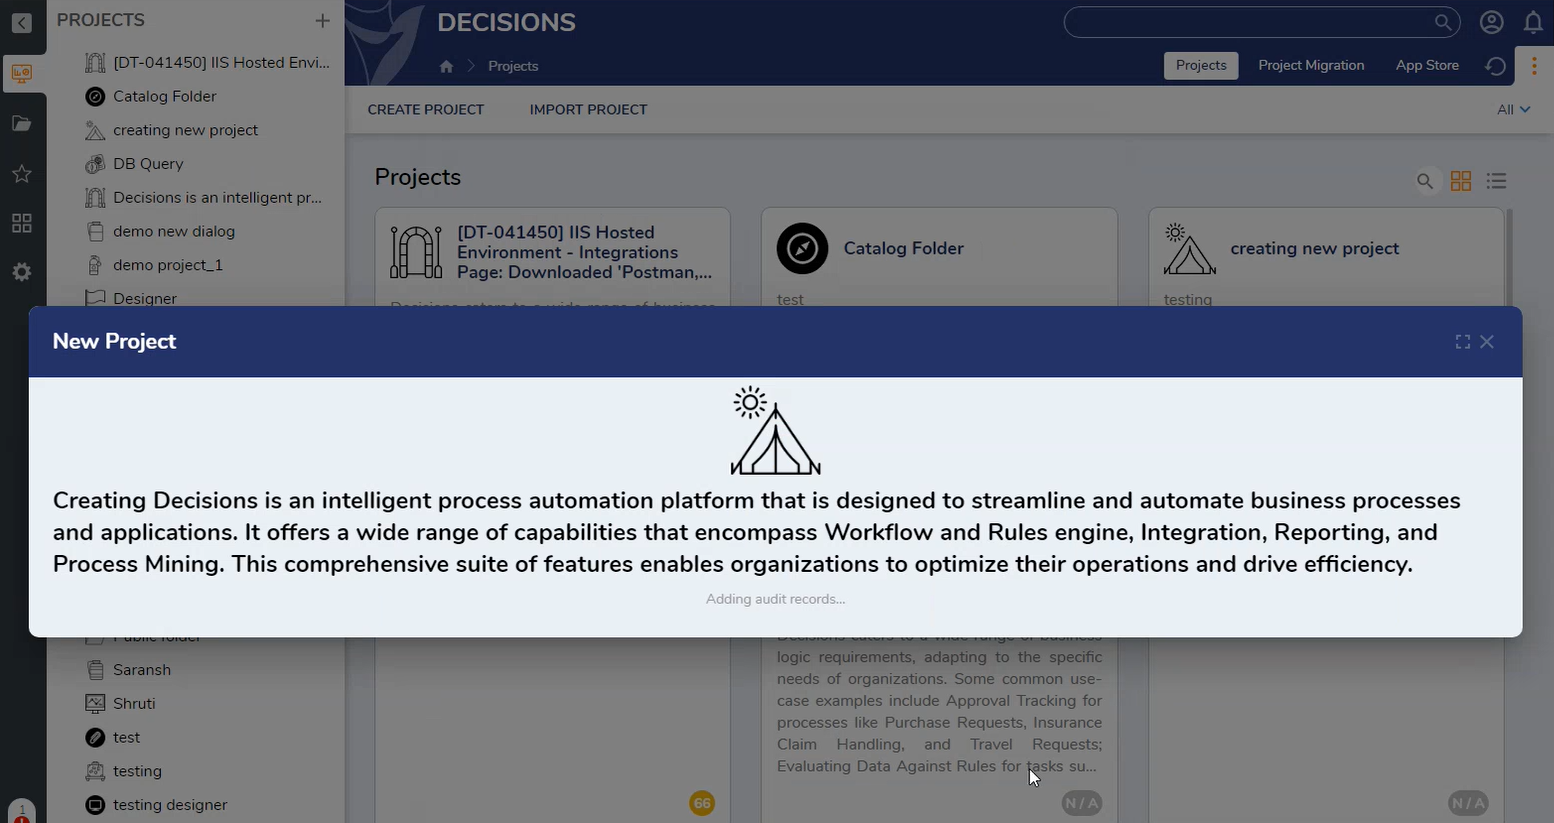
A dialog box named "New Project" will appear, and input essential details for the Project:
Project Name: Enter a name representing the Project's purpose or functionality.
Detailed Description: Provide a comprehensive description outlining the Project's objectives, functionalities, or other relevant details.
Project Icon: Choose or upload an icon that symbolizes or represents the Project visually.
Initial Folder Name: This field auto-populates with the Project's name, serving as the default name for the initial Designer Folder within the Project. Modify this name to reflect the Designer Folder's content or purpose.
Select CREATE. An indicator screen will appear.

As soon as the Project is created, the Project Info Dashboard opens.
.png)
Project Info Dashboard and Folder Structure
The Project Info Dashboard serves as a central hub for developers, facilitating swift access to critical project information and management of the development lifecycle. This dashboard enhances project visibility, allowing easy navigation to essential elements while monitoring various aspects of project progression.
After creating a project, the Info Dashboard will display an overview of project details and functionalities. Along with Info, users see the following list of folders within the project folder tree.
Folder Name | Description | |
|---|---|---|
| The Info dashboard shows a complete overview of the Project on a higher level. It includes several other dashboards, such as project Health, project Dependencies, Project History, and project Integrations. | |
| Previously known as the Portal, the Public folder will hold all items for End Users to view and interact with. Developers with administration permissions on the project will control access to projects and the 'public' folder. | |
Previously known as Workflow catalog. A location for end users to run project-specific processes. | ||
This will include all the folders accessible to the end users. | ||
| Project settings allow developers to manage project activities, including monitoring project health, integrations, jobs, and events. | |
Activity | Allows monitoring and tracking of entity and user activity within the Project, ensuring a comprehensive understanding of interactions to enhance project management. | |
Allows monitoring user interactions, optimizing data structures, and maintaining a detailed project history. | ||
Manage settings and monitor database integrations, external services, OAuth, and scripting within the platform. | ||
Configuration | Features different configuration methods within the platform, including Variables, Data, Templates, and User Favorites. | |
Jobs & Events | Manage Scheduled Jobs and Message Queues. | |
Security | Manage user data in the Project, including Assignment Roles, Groups, Named Sessions, and Permissions. | |
Default Designer Folder | This is the default designer folder where users start building the Project. | |
.png)
Folder Actions on Projects
Once a Project is created, users have various actions to perform on the Project.
| Icon | Action Name | Description | |
|---|---|---|---|
Back | Takes the user back to the ProjectHub folder to view all Projects in the system. | ||
Add Folder | This action allows the creation of Designer Folders within the Project. | ||
Add to Favorites | Pins the selected Project to the Sidebar. | ||
More Actions | This icon will open the Action Menu with the following actions for the Project. | ||
| MAIN | |||
| Create Folder | Creates a Designer Folder. | ||
| Create Project Folder Documentation | Creates an HTML document showing the Health score and the number and types of Designer Elements that make up the Project. | ||
| MANAGE | |||
| Navigate to Project | Moves the User to the very top of the Project. | ||
| Open in New Tab | Opens the folder view of the Project in another tab. | ||
| Permissions | |||
| Manage Permissions | This allows users to control and manage the access permissions of users who can use, view, edit, administrate, etc., the Project. | ||
| More | |||
| Delete | Opens the menu for deleting the Project. | ||
| Personalize | Opens the Personalize menu for customization of the Project's look and feel. | ||
| Manage Tags | Allows you to add a Tag to the Project. | ||
| Add as Favorite | Pins the Project to the Sidebar. | ||
| DEPLOYMENT | |||
| Import/Export | |||
| Import | This allows users to import entities within the Project. It will only accept .decobj (decisions object) and .zip files. | ||
| Export | Exports the entire Project as a .zip file. | ||
| OTHER | |||
| Get Project ID | Retrieves the ID of the Project. | ||
Default Folder
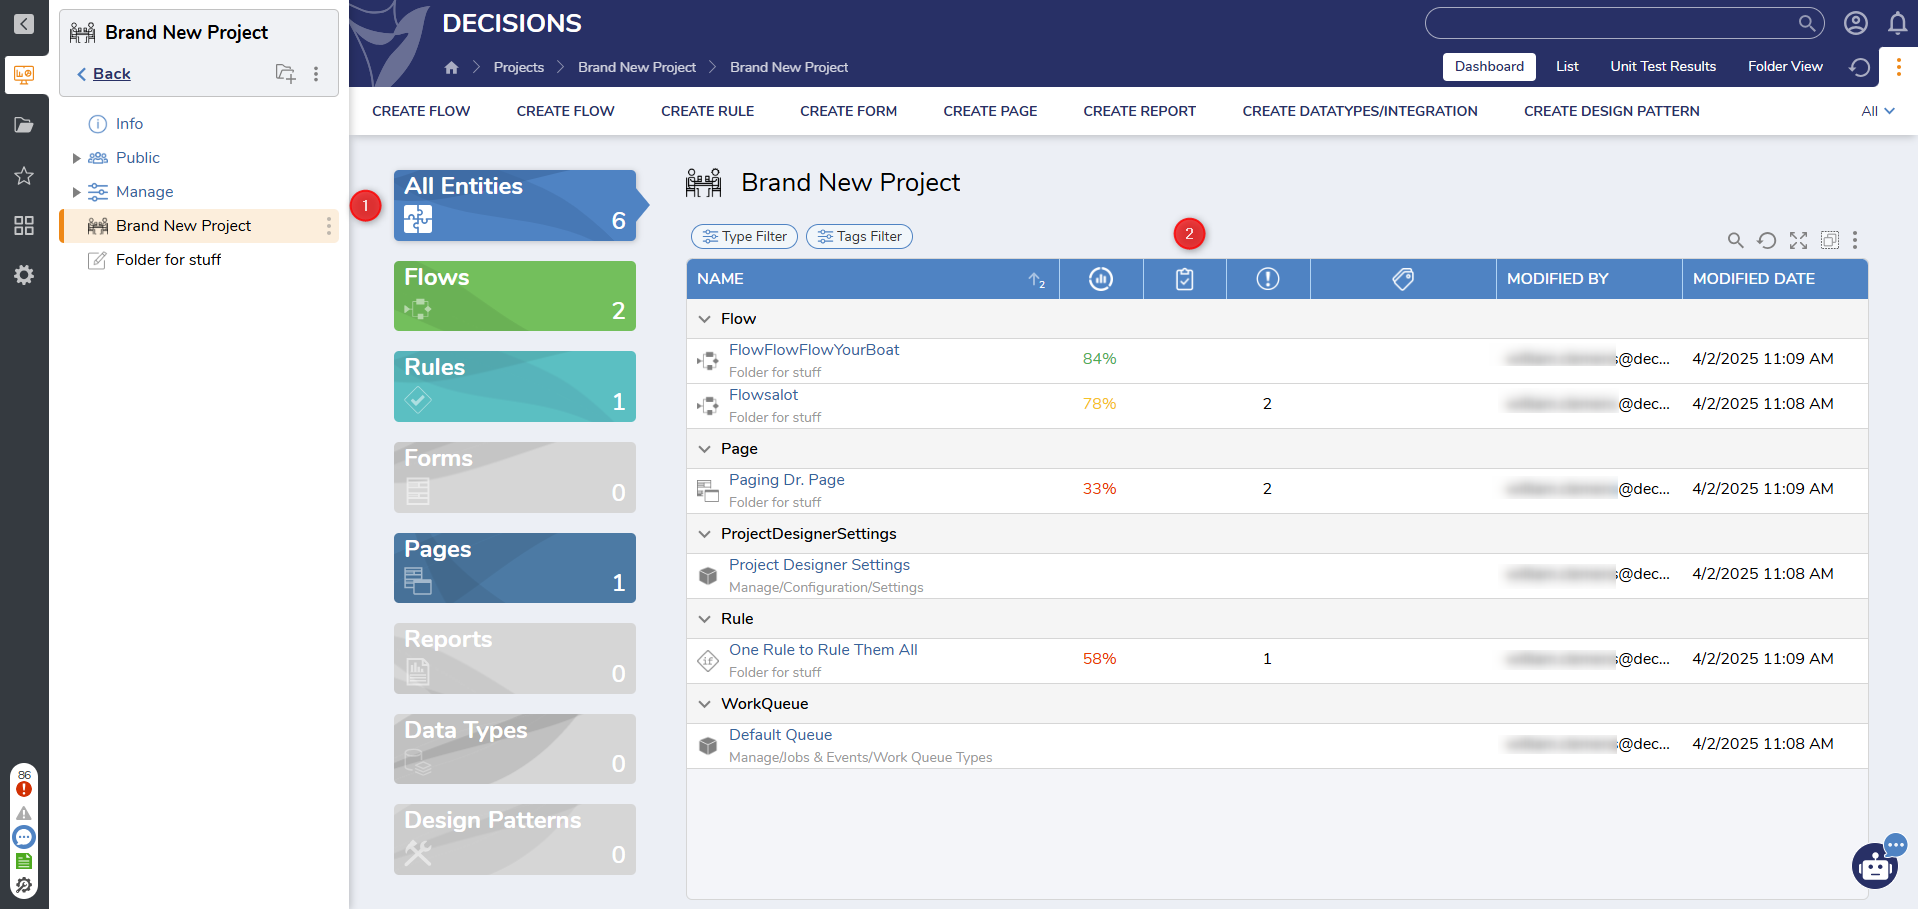
When a Project is created, an initial default Folder is created as well. The default Folder contains a report that shows all of the Designer Entities, by type, in the Project. Users can see the entity's health score, any validations, tags, and To Dos. The location of the entity is just below its name. Clicking any of the tiles on the left side will filter the Report so show only a specific type of Designer Entity.
This Report only appears on the Folder that's created with the Project. Any other Folders that are created later will not show this Report. This feature also only applies to v9.9 and above.
See Next:
Info Dashboard: Learn shows the high-level view of the Project.
Feature Changes
| Description | Version | Release Date | Developer Task |
|---|---|---|---|
An indicator screen appears after the Create Project button has been pressed to let users know the Project is being created. | 9.1 | July 2024 | [DT-041481] |
| Removed the folders that appear when first creating a Project. | 9.6 | January 2025 | [DT-042295] |
| Added a new default folder with a Designer Entity Report. | 9.9 | April 2025 | [DT-042828] |