Overview
The following article demonstrates the best practices to deploy the project stably into production.
Best Practices to Build Decisions
Before deploying any application, it is essential to build a project considering its functionality, reliability, and maintainability. The article aims as a guide for users. Adhering to these practices is optional for development. However, these principles and techniques are recommended by Decisions' developers to contribute to efficient development.
Types of Environments
During development, the application goes through a series of stages. It is highly recommended to have multiple environments for different stages of Project Development.
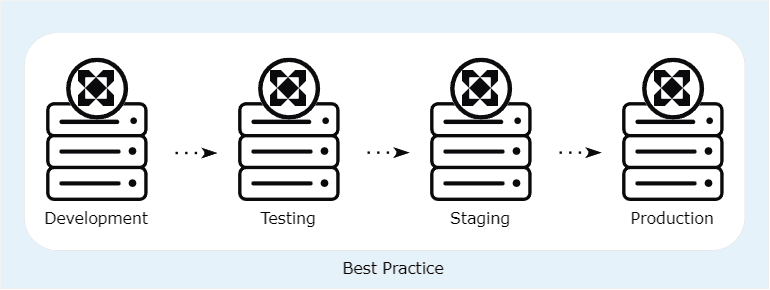
- Development: This is where the development of the project takes place. It is the first environment where users develop the project for the first time and update it frequently to match the end user's requirements.
- Testing: The testing environment allows QA engineers to test the project via automated or non-automated techniques.
- Staging: The purpose of this environment is to test on a near-production level but in a non-production environment to verify that the application will behave correctly after deployment.
- Production: This is where real users will officially use the application.
Moving Projects within Environments
Manual Import and Export
Projects can be manually imported and exported within the environments. For more information, refer to Importing and Exporting Projects.
Deploying in Production
Items To Include
- Dependent data structures, Flows, Forms, Rules, Reports, Pages, Dashboards, etc.
- All Groups related to the project
- Group permissions
- Other hidden items
Items To Exclude
- Accounts and account permissions
- Components with unresolved validation errors
- System constants (these should be in their project)
- Sandbox and testing flows
Exporting Data
Depending on the data types associated with a project, you may or may not want to migrate this data along with a project. It is essential to understand the way that different data can be exported.
- Data created by the Entity data structure can be linked to the project and can be exported together with all other available resources. Data created by any of the remaining data structures cannot be tied to a project.
- It is advisable not to migrate data that is generated by running processes. Certain items, such as process folders, assignments, and comments, are typically associated with projects but should not be included in the migration process.
- Review all Designer Elements and if any test data was mapped constantly that it is fixed and tested properly before deployment.
Test Export and Import
Before the project is ready to go, testing the export of projects to a new machine and verifying that there are no issues is a crucial step that must be performed.
Make sure that:
- The test should happen on a server that is in the same state/configuration as the production server.
- Also, test on a clean server. Importing to a fresh server gives an excellent picture if any items are missing from the import.
- Everything is in the correct folder.
- Components are tied to the correct project.
- Things like group permissions and other hidden items are included in the project.
- Dependencies are included in the project(s).
- Ensure the modules needed for the project are already installed on the environment.
- The export window will display a list of dependent elements but always double-check as there may be hidden dependencies.
- Do a smoke test of running flows after the import is complete.
- While importing multiple projects, make a note of the importing sequence.
Pre-Deployment Checks
Before deploying a project to the Production environment, it is crucial to conduct a final check and ensure all features work as intended. Additionally, it is important to document each feature and how it is intended to function. This documentation can serve as a reference point for future maintenance and updates to the project.
For a detailed checklist, refer to Production Ready Project Check List.
Post-Deployment Checks
Once a project is deployed to a production environment, developers should thoroughly check the project to ensure everything works properly.
- Ensure all the data from the development environment has been successfully migrated to the production environment.
- Check that all external connections to databases are successful.
- Ensure all API Integrations have been migrated properly.
- Test all the features and functionalities of the application to ensure they are working properly.
- Verify that all security measures have been implemented to protect customer data.
- Test performance and make sure that it can handle the expected workload.
- Allow a group of users to test the application and provide feedback on any issues or areas for improvement.
By thoroughly checking these items, developers can ensure the application is ready for use in the production environment and will perform reliably for its intended users.
Deploying Project Changes
After a project has been deployed, it is essential to regularly update it to incorporate design changes, bug fixes, feature enhancements, and performance improvements. This topic illustrates how to deploy changes to an already deployed project.
Service Down-Time
For the stability and reliability of the application, it is recommended not to deploy any of the changes in the production environment when the application is running and active. Instead, it is recommended to schedule a period of downtime for the server and then push the changes to production.
Resolving Common Import Issues
When the project changes are pushed to the production environment, a few issues might be found that need attention. For more information, refer to Import Resolutions.
Perform the Pre Deployment Checks. For more information, refer to Production Ready Project Check List.
Clustered Environment
Importing or merging Decisions project changes to clustered environments requires slightly different steps than a standard, single-server installation. This is necessary to maintain high availability in higher environments and avoid potential code sync-related issues. The two procedures below outline different approaches for merging project changes when high availability must be maintained and production downtime is allowed.
Steps For Merging During Scheduled Downtime
First Node (Node01):
- Import or pull the project changes.
- Restart the Service.
Second Node (Node02):
- Once Node01 is started, restart Node02.
It is not necessary to import the changes on both nodes. Restarting the Decisions service will pull any updated items into the cache from the database.
Steps When Maintaining High Availability
First Node (Node01):
- Pull Node01 out of the load balancing rotation and let existing connections drain to the other node.
The exact procedure for this may vary slightly based on the load-balancing technology in use. After this is complete, there should not be any user sessions present in Decisions on the server, and the load balancer should be directing all new sessions over to the other node(s) in the cluster. - Turn off clustering in 'System > Settings > Clustering’.
- Restart the Service.
- After the service is started, merge or import project changes.
- Turn to cluster back on ('System > Settings > Clustering') and restart the service.
- Return the node to the load-balancing rotation.
The server should begin to receive traffic.
Second Node (Node02):
- After the above steps for the first cluster node are complete, pull Node02 out of the load balancing rotation and let connections drain off.
- Once Node02 is clear of new and existing user sessions, restart the service.
This ensures that the latest assemblies are pulled from the database, and the cluster nodes are in sync.