Overview
The primary purpose of this feature is to delete or move the old, inactive, process-completed data to a separate database or warehouse. This allows the primary database to focus on managing the essential data for current operations. At the same time, the archived data can be used for compliance, auditing, historical analysis, etc.
Users with Administrator Permissions and Can Administrate Permissions to the folders can mark entities archived using the Archive Entity action. Once an entity is marked as archived, it is not moved or deleted immediately; instead, the "Archive Entities Settings" allows administrators to configure the duration for which entities remain in the system before being deleted or moved to an external database.
This document discusses the following topics:
- Configuring the Archive Entities Settings
- User actions to Archive the Entities
- Automating Archiving of Case Folder
- Generate a Report of the entities that have been archived
- Archiving of Entities is an irreversible process. Retrieval of data is not supported after the archival of any entities.
- Decisions using PostgreSQL Database does not support the moving of entities to an external database.
Type of Entities that can be archived
Only transactional data can be archived.
Configuring Archive Entities Settings
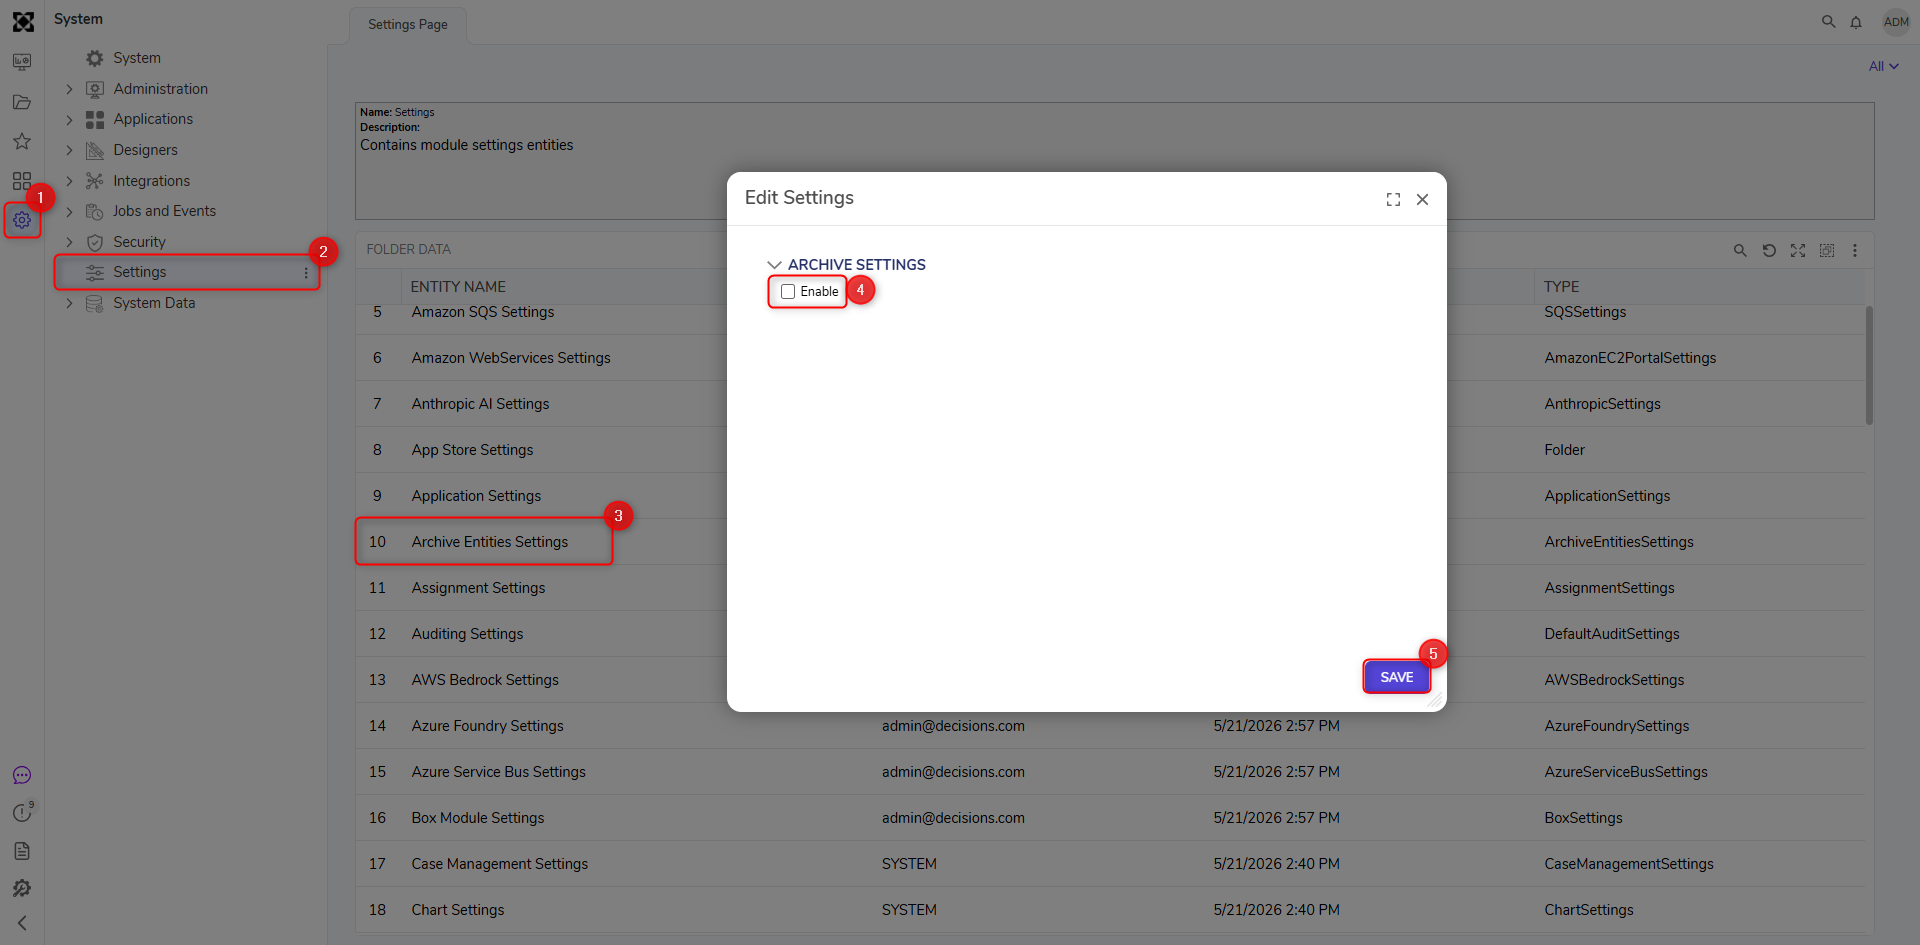
Navigate to System (Gear Icon) > Settings > Archive Entities settings. A dialog box appears to edit the archive entities settings.
For all the configurations and a detailed description, please refer to the following table:
Archive Settings
| Configuration | Description |
|---|---|
| Enable | Enabling this setting will allow the manual archiving of all the entities. |
| Process After Days | This allows administrators to configure a time limit (in days) for how long an entity can be marked as archived. |
| Archiving Strategy | Currently, there are two Archiving Strategies, |
Archive Strategy Settings
When using an archiving strategy that involves moving data, the administrators must set up the connection to the external database.
- When connecting to an external database, it is recommended to create a new database.
- Moving Entities to PostgreSQL is not supported.
| Configuration | Description |
|---|---|
| Server Name | The DNS name or IP of the server running the Database. |
| Database Name | Name of database. |
| Windows Authentication | Checking this box will use the windows login to access the Database. |
| User Name | Username of the SQL account used to access the Database. |
| Password | The password of the SQL account access the Database. |
| Use an Encrypted Connection | Enabling will encrypt the connection between the client and the server. Ensure to configure the database server to use trusted certificates. |
| Trust Server Certificate | Enabling will bypass the 3rd party trusted certificate and will use the server's own trusted certificate. |
| Timeout | The timeout setting sets the maximum time limit, in seconds, for the transfer of entities between databases, after which the process gets terminated. |
Archive Settings Calendar
Admins must configure the calendar information to schedule a job. This scheduled job will automatically archive all the entities which are already marked as archived and also surpassed the number of days configured in Process After Days. Refer to Understanding Scheduled Job articles for a detailed description of all the calendar settings.
When the folder is marked as archived, all the child entities (comments, folder assignments, and documents) within the folder get marked as archived simultaneously. The child entities will follow the same archiving strategy configured in the Archive Entities settings.
However, if a parent folder is marked as archived and a child entity is added later, the parent folder will get archived, leaving the child in the primary database.
User actions to archive the Entities
Archiving can be done manually on demand via folder actions (right-click on the entities) or through Flow Steps.
- Archiving through Folder actions:
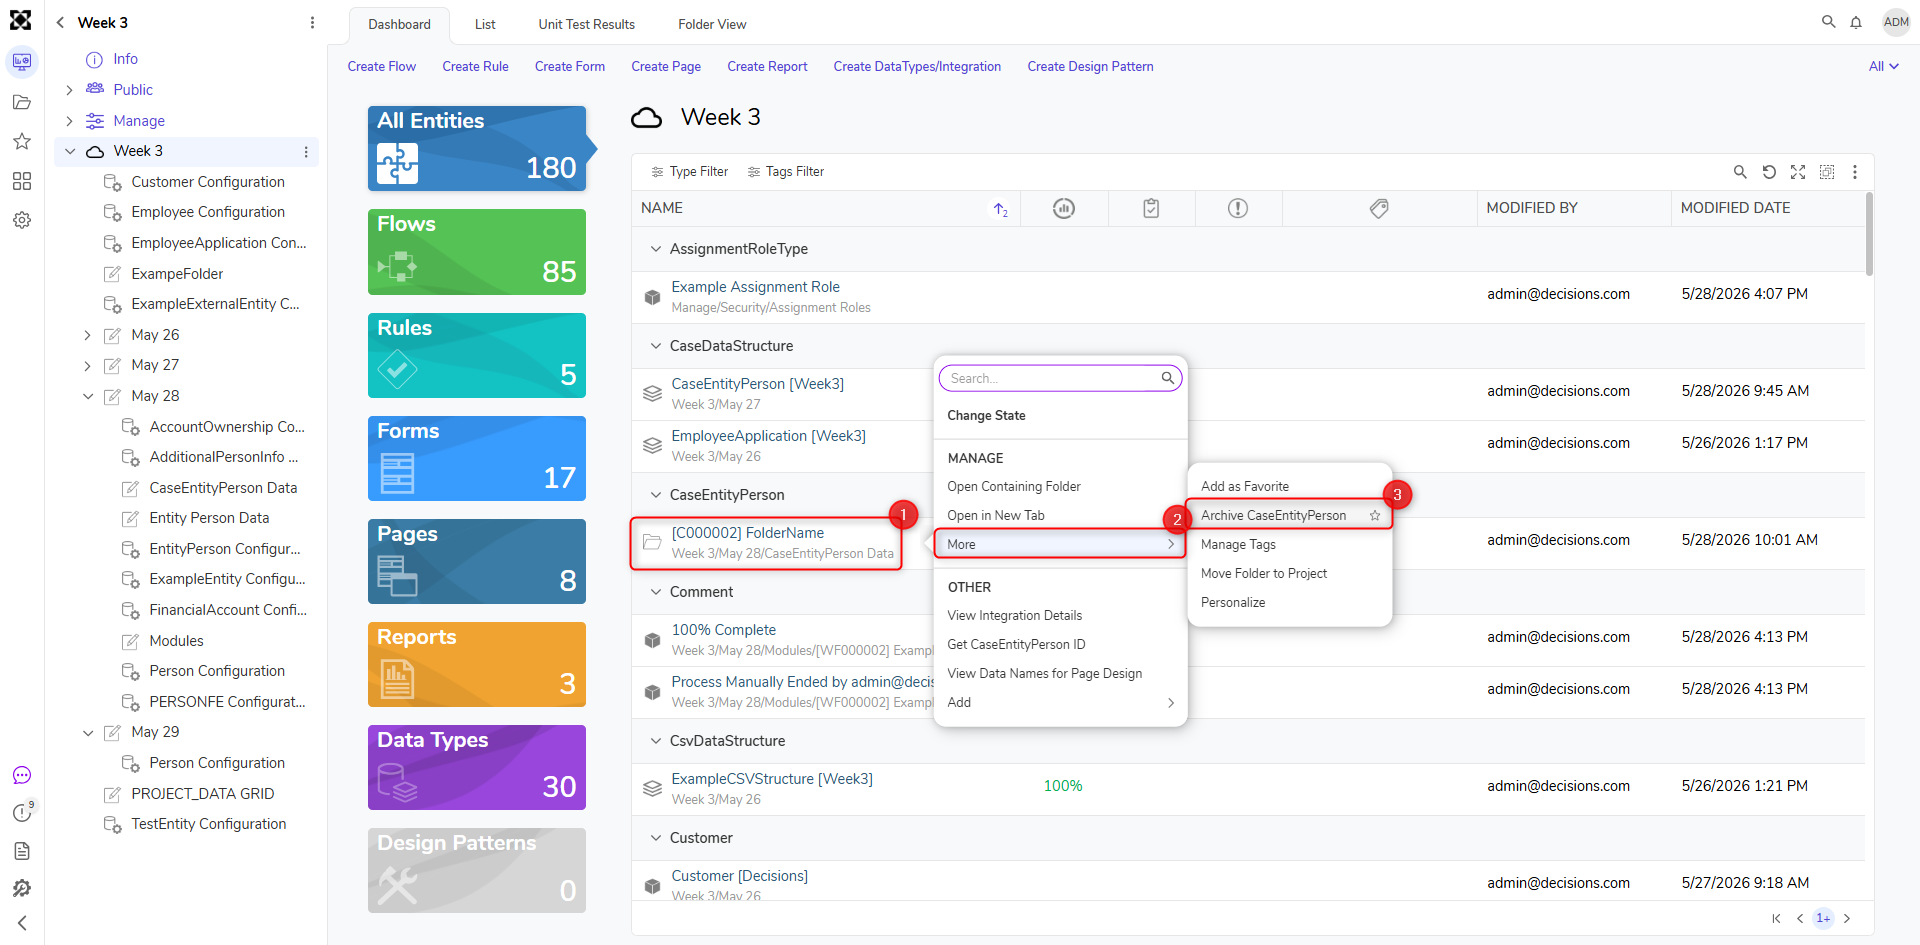
- After configuring the settings for archiving. Navigate to the process folder that you wish to archive.
- Right-click on the Folder > More > Archive Folder. A confirmatory dialog box will open. Click OK.
- Hence, the folder will be marked as archived.
- It is possible to select multiple entities at the same time and mark them as archived simultaneously by using a multi-select feature. Press "Ctrl" and click on the entity to enable the multi-select.
- Un-Archiving through Folder Actions:
Navigate to the folder that is already marked as Archived. Right-click on the folder > More > Un-Archive Folder. A confirmatory dialog box will open. Click OK.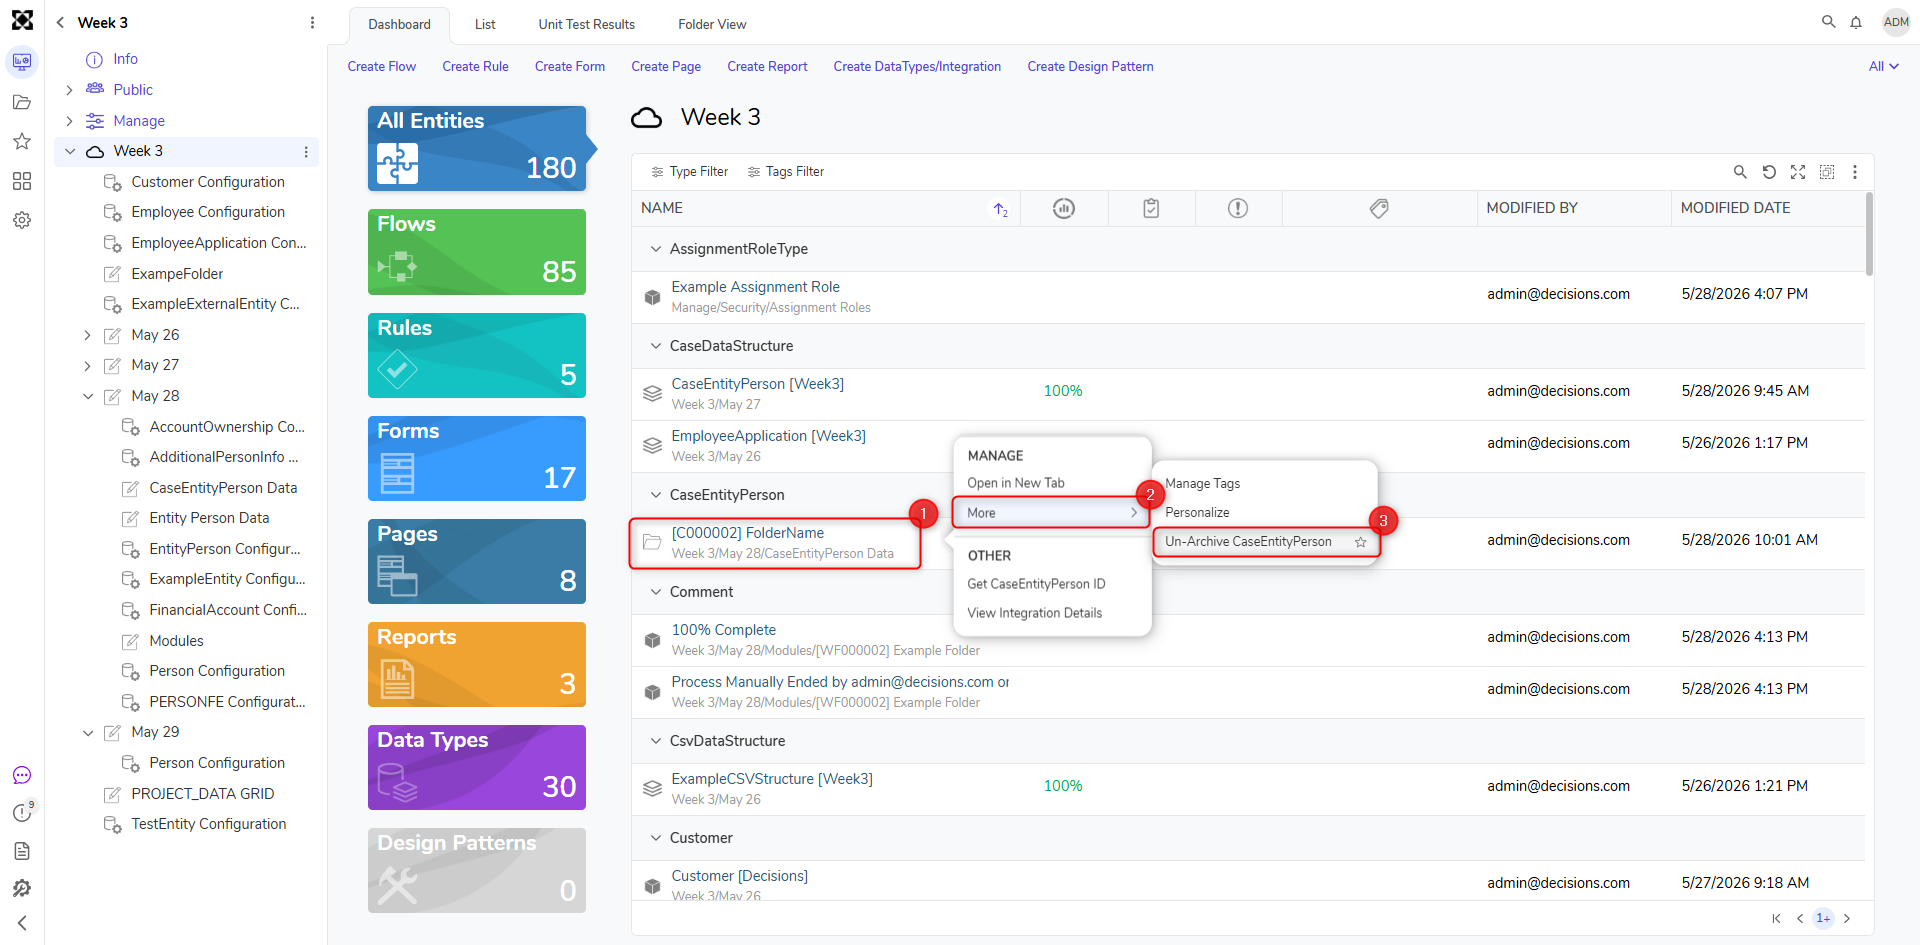
- Archiving through Flow Steps:
Users can mark "archive" to the Case folders or the Process folders by using the "Archive Folder" step within a Flow. The Archive Folder step takes the Folder ID as input and marks the Folder as Archived, similar to the one we mark manually. Refer to the Archive FolderStep article for detailed information about the step.Note:From the System settings, if Archive Entities Settings is disabled, the Step will throw a "Business Rule Exception" stating thatNot allowed to Archive {Folder Name}.
Automating Archiving of Case Folder
When a case folder reaches the closed state, it will be automatically marked as archived after a specified number of days, as configured by the administrator in the case management settings.
Configuring Case Management Settings
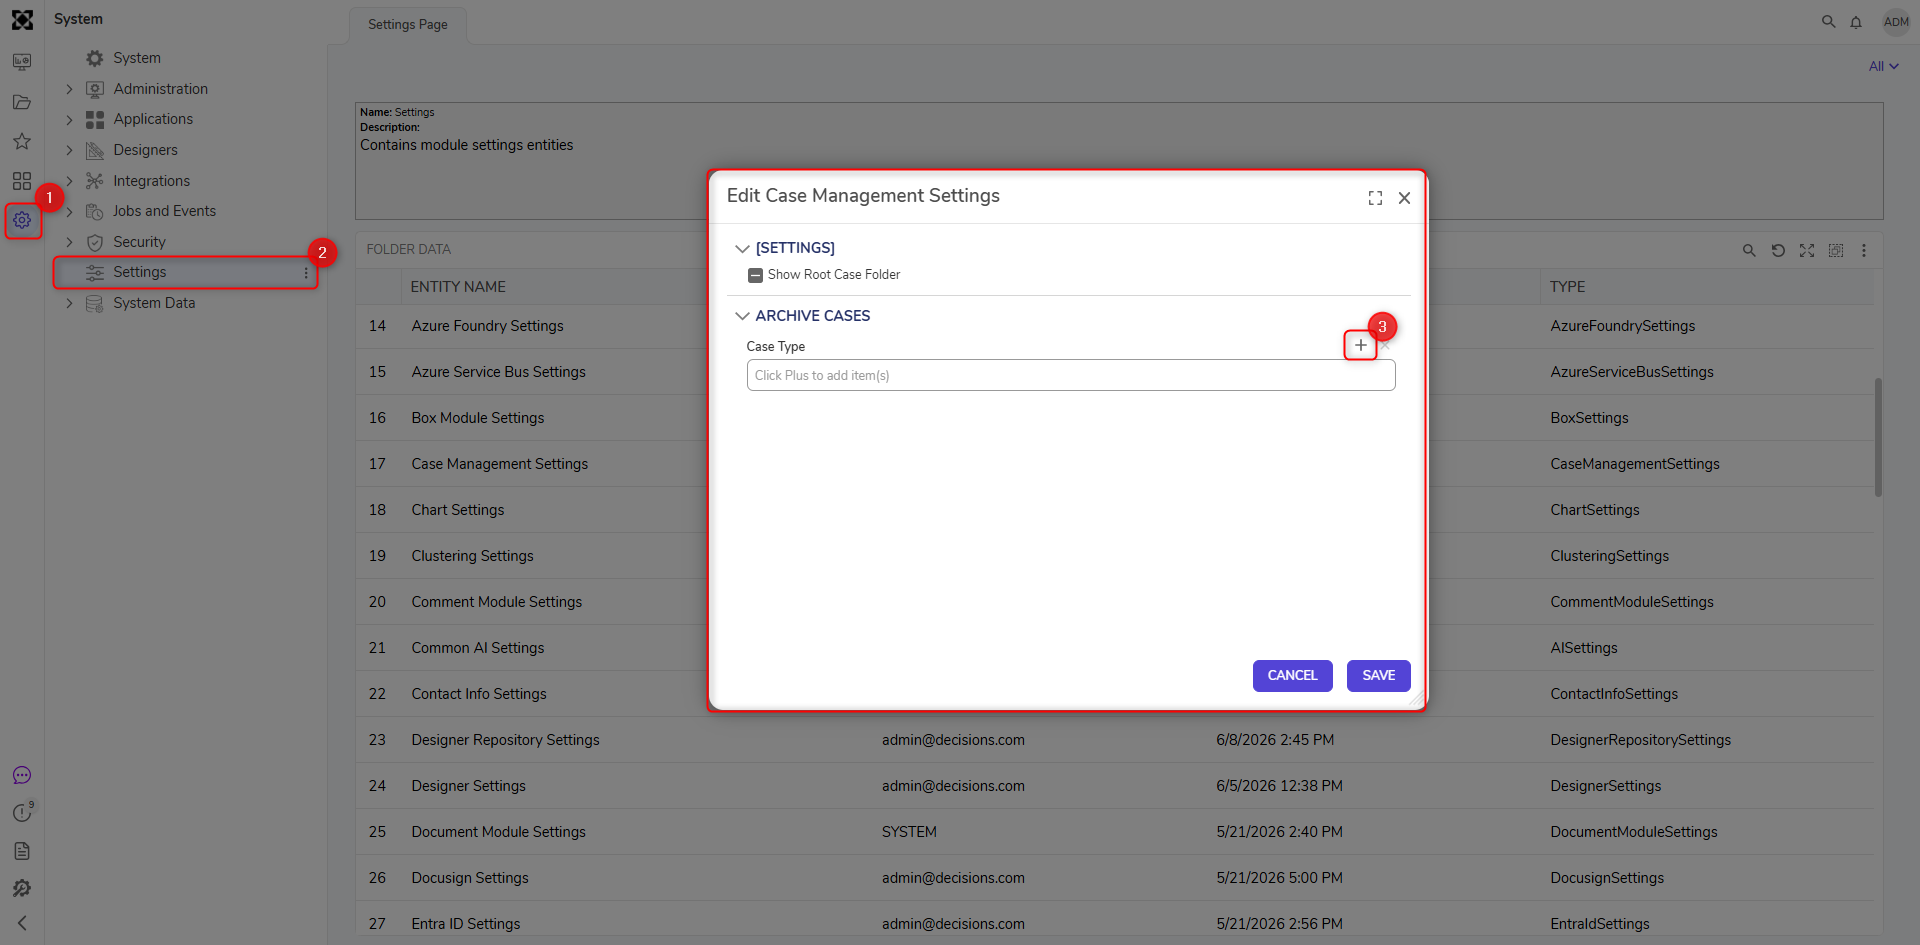
Navigate to System (Gear Icon) > Settings > Case Management Settings. A dialog box appears. Click on ADD to add the type of case.
| Configuration | Description |
|---|---|
| Type Name | From the drop-down, choose the type of Case Entity you wish to enable for archiving. |
| Archive After Days (on reaching closed state) | This allows administrators to configure a time limit (in days) after how long an entity can be marked as archived. Once the entities have reached the closed state and also surpassed the time limit, the scheduled job will follow the archiving strategy configured in the Archive Entities settings to move or delete it. To mark an entity as a closed state, refer to the "Case Entities" article. |
After adding the case type it will expose the calendar information to configure the scheduled job. Refer Archive Settings Calendar for more information.
Decisions Data on External Database (Warehouse)
When connecting to an external database, it is recommended to either create a new database or use a database that was not used by any decision instance.
When the data is moved to the external database (warehouse), a database schema is automatically created only for the entities being moved, and all archived data is moved to the respective tables.
For example,
- Folders will be moved to dbo.entity_folder
- Comments will be moved to dbo.comments_folder
Generating Report of Archived Entities
Users can generate a Report of all the archived entities by integrating with the external database (warehouse) that has been used to archive the entities.
Example
- Integrating with external database(warehouse)
- Follow steps 1 and 2 from the following article to integrate with an external database. Ensure to use the same credentials that were used to connect to the warehouse.
- In this example, we have named the external database Archivied_Entities_DB.
- Integrate with the Database Table.
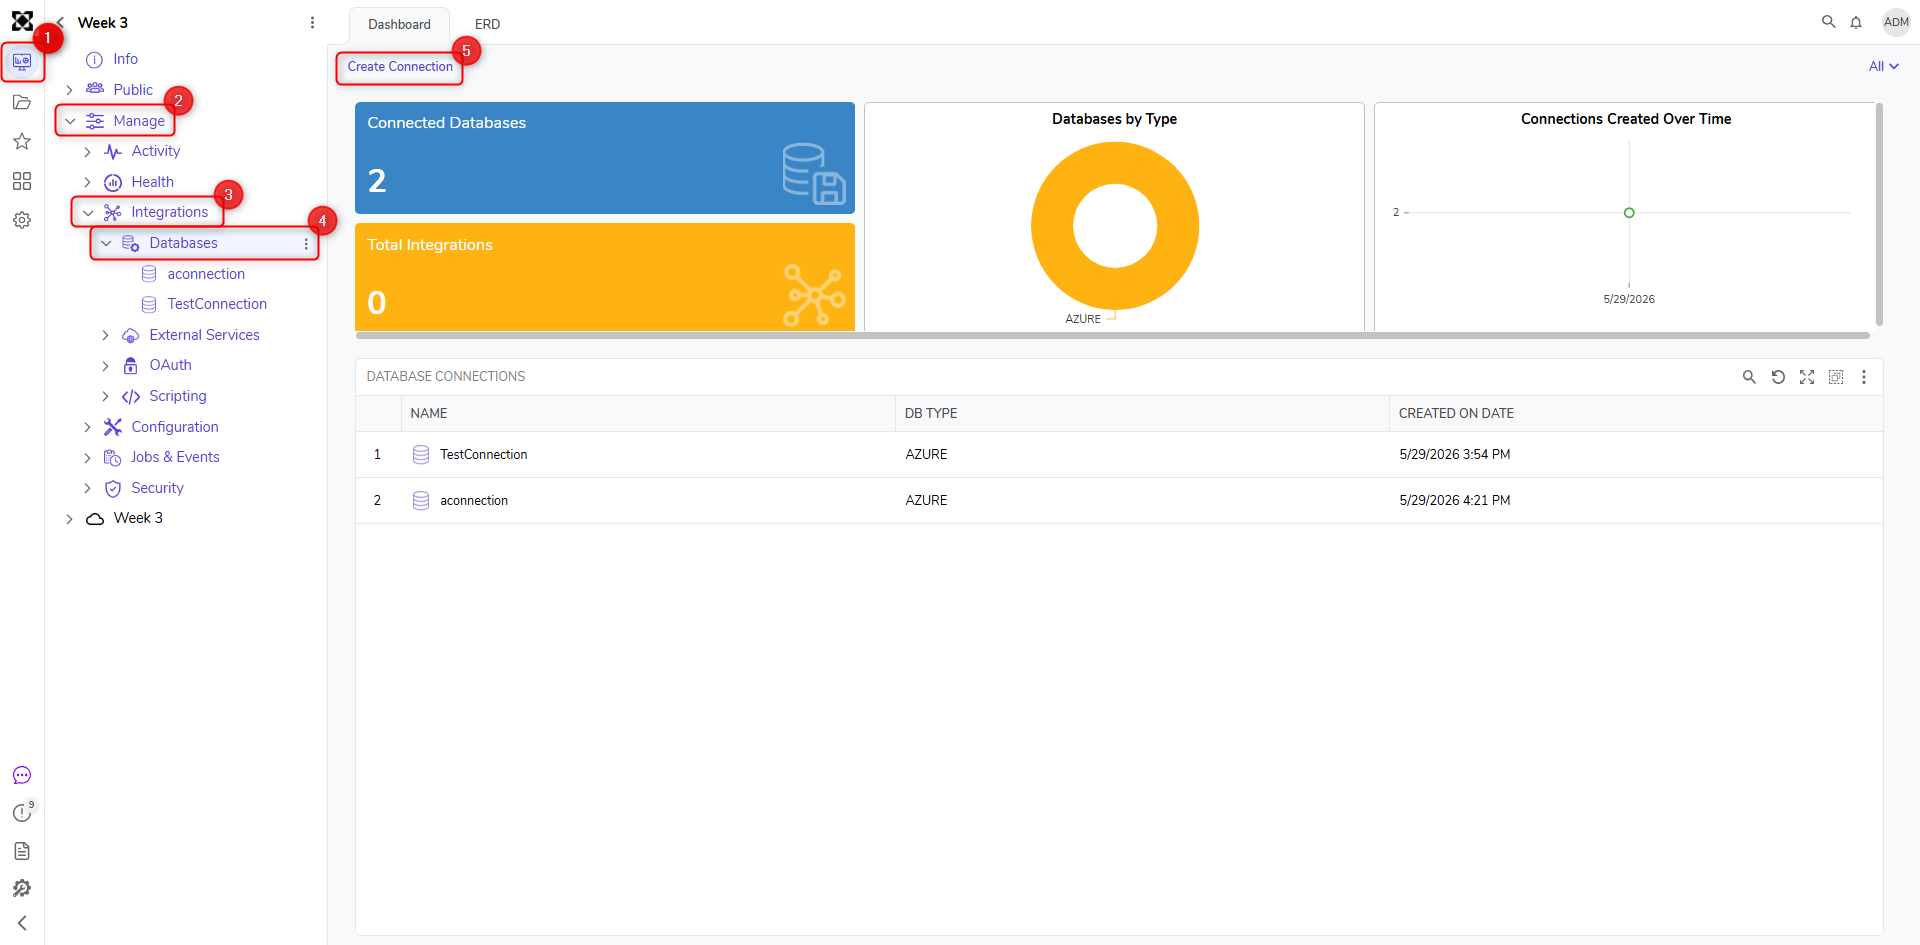
- Click on the newly created database connection. From the top action bar, click on Add Table, and a database integration dialog appears.
- From the drop-down, select dbo.entity_folder and click on Next-Next-Save.
- Click on the newly created database connection. From the top action bar, click on Add Table, and a database integration dialog appears.
- Creating the Report.
- Navigate to the Designer Folder and create a new Report Archived Entities.
- Under Data Sources > Add > Common > Archivied_Entities_DB [name of the database] > dbo.entity_folder [name of the table].
- Under Data Fields > Add > entity_name, archivied_by etc. Save and close the Report.
- Navigate to the Designer Folder and create a new Report Archived Entities.
- Refer to the following article to Add a Report to Page.
Similarly, users can create multiple reports after adding multiple tables from the database. Refer to the following articles to build more complex reports. Configuring the Archive Entities Settings