- Introduction
- Installation
- Decisions License Updated
- Prerequisites
- Self Service Licensing Guide Updated
- Basic
- Advanced
- Enterprise
- Background Processing with Decisions Enterprise New
- Containers
- Containers Overview
- Decisions Container
- Decisions Environment Variables Updated
- Configuring Settings.xml to Environment Variable Updated
- Deploying Containers on Docker
- Deploying Containers on Azure
- Deploying Containers on Amazon ECS Updated
- Converting and Upgrading a Container
- Deploying Containers on GCP Updated
- Deploying Azure Kubernetes Services (AKS) Updated
- Deploying an AWS Kubernetes Cluster
- Securing Decisions Container Environment
- AWS Container Setup
- Clustering
- Multi Tenancy
- Upgrading
- Getting Started
- Projects
- Data Structures
- Starting with Data Structures
- Creating Data Structures
- Creating Case Entities Updated
- Creating Entities
- Creating Leased Entities
- Creating External Entities
- Creating Entity Extensions
- Creating Folder Extension Data Structures
- Creating Flow Execution Extension Data Structures
- Creating Flow Structures
- Creating Defined Data Structures
- Creating Database Structures
- Creating Value Lists
- Creating a CSV Data Structure
- Creating Types From JSON Schema
- Creating Types From XSD
- Creating Types From JSON
- Data Fields
- Building Data Structures CRUD Actions
- Managing Data Structures
- Flows Updated
- Create Flows Updated
- Flow Behaviors
- About Flow Behaviors
- Building and Using Converter Flows
- Flow Step Trigger (After, Before, Error) Flow Behavior
- Folder Count Flow Behavior
- Login User Flow Behavior
- Post to Flow Handler Behavior
- Login User UI Flow Behavior
- Process Folder Data Aware Behavior
- Tile Source Flow Behavior
- Turn Flow Statistics On
- Get Page Variable
- Report Field Action Handler Flow
- Password Reset Flow
- Creating a BPMN Flow
- Exporting BPMN Flow
- Report Group Action Flow
- Steps
- Simple Flows
- Sub Flows
- Flow Behaviors
- Configure Flows
- Debug Flows Updated
- Implement Flows
- Best Practices
- Create Flows Updated
- Forms Updated
- Create Forms Updated
- Form Controls
- Data Grids
- Data Repeaters
- Dropdown Lists
- Javascript Controls
- Form Control Glossary Updated
- Form Control Behavior Overview
- Form Control Key Triggers Updated
- Adding a Timeline to a Series of Forms
- Color Picker
- Copy-able Label
- Creating Help Text Messages for Form Fields
- Masked Textbox Control
- Currency Box and Number Box/Spinner
- Document Viewer
- Multiple File Upload and Download Controls Updated
- Tree View Control
- User Controls
- Video Control
- Latitude and Longitude Control
- HTML Display Control
- Create Form with Property Grid
- Editing Data Objects in a Wizard Property Grid
- Progress Bar Overview
- Editing CSV Records in a Form
- Simple Forms
- Form Controls
- Configure Forms
- Layout & Design
- Data & Logic
- CSS
- Form Settings in the Flow Designer
- Implement Forms
- Create Forms Updated
- Formulas
- Rules
- Create Rules
- Creating Statement Rules
- Creating an Expression Rule
- Creating a Truth Table
- Creating an External Truth Table
- Creating a Rule Table Updated
- Creating a Matrix Rule
- Creating a Tree Rule
- Creating a Rule Set Updated
- Creating an Interceptor Rule
- Creating a Rule Chain
- Creating a Sequential Rule
- Leveraging Default Rules
- Rule Verbs
- Configure Rules
- Debug Rules
- Implement Rules
- Create Rules
- Reports Updated
- Create Reports
- Configure Reports
- Properties
- Report Properties
- Setting Column Properties
- Setting Report Row Colors Updated
- Allowing Inline Editing on a Report
- Using Conditional Formatting
- Overriding Action Contexts on Reports
- Row Click Action Types
- Using Icons On Reports
- Using a Flow to Source a Report
- Setting Report Row Colors with a Rule New
- Filter
- Charts
- Calculated Columns
- Report Views
- Properties
- Implement Reports New
- Output Reports Updated
- Pages / Dashboards Updated
- Create Page / Dashboard Updated
- Page Controls Updated
- Charts
- Tiles
- JavaScript Page Controls
- Selecting a Data Drill View for the Report Viewer
- Report Viewer Control Updated
- Flow Run Part
- Folder Activity Panel
- Folder Viewer
- Tag Browser
- Adding Folder Navigation Buttons to a Page
- Horizontal Folder Timeline
- Adding an Image to a Page/Dashboard
- Adding Run Flow Links or Buttons to a Page
- Adding User Actions with a Page/Dashboard with the Action Bars Component
- Date Range Filter on Pages
- Filtering Reports via Page Control
- Page Controls Updated
- Configure Page New
- Implement Page
- Create Page / Dashboard Updated
- Networking
- Integrations
- Starting with Integrations
- Agents
- Database Integrations
- Database Integrations Overview
- Integrating an External Database with a Flow
- Creating a Database in MSSQL for Decisions
- External Database Integration Updated
- Advanced Postgres Connection
- Connecting with an ODBC
- Integrate with Database Table
- Fetching External Data to a CSV
- Return Dynamic Data Rows When Fetching Data From Database
- Creating Access Pattern For Table Integrations Updated
- Using Stored Procedure in Flows
- Raw SQL Step
- Integrating Decisions with External Oracle Database
- Connect to MySQL
- Connecting to Amazon Redshift
- External Service for OData
- Adding a Query to a Database
- Add Query (Parameterized Queries) Updated
- Using Transaction Steps
- Integrating with Snowflake
- Managing Database Connection Timeouts
- Troubleshooting Database Connection Response Times
- External Services
- JWT
- OAuth
- Using Decisions in External Applications
- Services
- Query Editor
- Decisions Backend
- Modules
- About Modules
- Available Modules
- Installing Modules New
- Generating Certificates with OpenSSL
- Active Directory
- Adobe Sign
- AI.Common
- AWS
- AWS Bedrock
- Azure
- Box Module
- Datamatics
- Docker
- Docusign
- Dropbox
- Equifax
- Exchange Web Services
- Experian
- FHIR
- Financial
- Foreign Exchange
- Google Drive
- Google Cloud
- Google Vertex
- Google Gemini
- HL7
- HubSpot
- IBM ODBC
- iCal
- Jira
- Logging.WindowsEvent
- Messaging
- MongoDB
- MS OneDrive
- Okta
- OpenAI
- OpenID
- PGP
- Plaid
- PowerShell
- Python
- QR Codes
- R Module
- Remedy
- Salesforce
- SAML
- Sharepoint
- Slack
- SSH
- Symantec
- Telephony
- USPS
- UnitTestCore
- Word To PDF
- X12
- SDK
- Advanced
- Guide of Decisions Entities Locations in SQL Tables
- API and Authentication
- Modifying an Application Servers SMTP Settings
- Using Selenium and NUnit for Front-end Testing
- Changing the Portal Base URL
- Securing Decisions and Web Application Firewalls (Azure)
- Decisions Disaster Recovery Architecture
- Troubleshooting
- Logging & Auditing
- Logging Overview
- Logging Settings
- Reading Logs
- Using the Log Step
- Writing To Log Files
- Creating Custom Log Files
- Setting up AWS Cloudwatch Logging
- Setting Up Azure Log Analytics Integration Updated
- Enabling W3C Logging
- Enabling Auditing
- Configuring Decisions with Grafana Loki
- Troubleshooting Using the Profiler Updated
- Usage Logs
- Understanding Thread Jobs and Processes
- Administrators
- User Management
- Accounts & Groups
- AD (Active Directory)
- SSO (Single Sign-On)
- Deployment
- Customization
- Permissions
- System Folders
- System Settings
- System Folders Tree Updated
- Controlling Assignment Notification Types for Server
- Creating Custom Modes of Notification with Notification Flows New
- Event Viewer
- Flow Management Dashboard
- System Validation Folder
- Turn Portal Statistics On
- Configuring Locations
- Stored Workflows
- Setting Up Notifications for Events
- Edit Flow Data While A Flow Is Running
- Toolbox Visibility Rules
- Email and SMTP in Decisions
- File Archiving and Deletion
- Integration Activities
- User Management
Overview
The SolaceMQ Module provides Flow steps that can be used to integrate with Solace PubSub+ event brokers. Solace PubSub+ is an event streaming platform used to send and receive requests between two applications. The Module includes steps that can be used to start, stop, pull, or post messages from a configured Solace Queue. Decisions can also act as consumers, processing messages through a Message Handler Flow.
Setting up SolaceMQ PubSub+ Broker
The Solace PubSub+ Broker can be installed locally onto a container. To install the broker onto a container, Docker Desktop will need to be installed. Once Docker has been installed:
- In an elevated Command Prompt, run the following command to create a container with the PubSub+ Broker. Ensure that port 8080 is available; otherwise, the container may not start.
docker run -d -p 8080:8080 -p 55555:55555 -p 8008:8008 -p 1883:1883 -p 8000:8000 -p 5672:5672 -p 9000:9000 -p 2222:2222 --shm-size=2g --env username_admin_globalaccesslevel=admin --env username_admin_password=admin --name=solace solace/solace-pubsub-standard
Shell - Once the container has been created, navigate to http://localhost8080 to be brought to the web console for the message broker. Enter admin as both the username and password to access the web console.
Creating a Queue
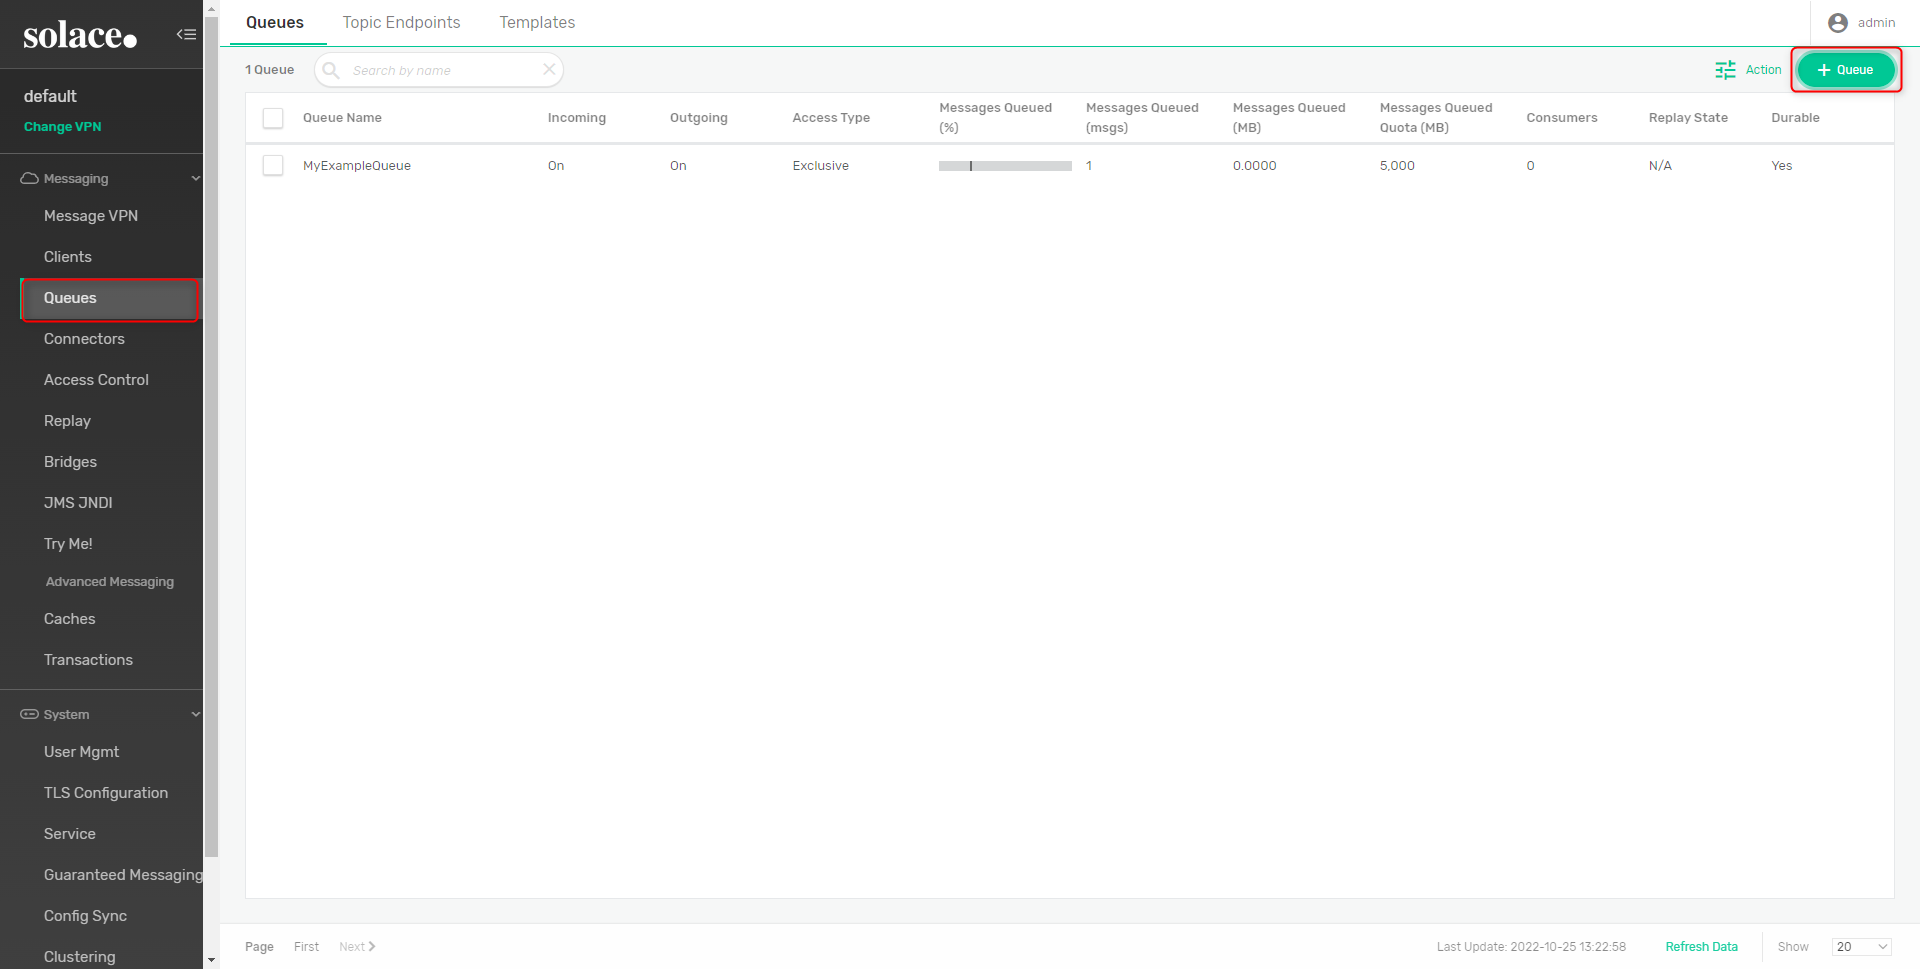
- To create a queue, select Queues in the left hand menu, then select the Add Queue button in the top right hand corner.
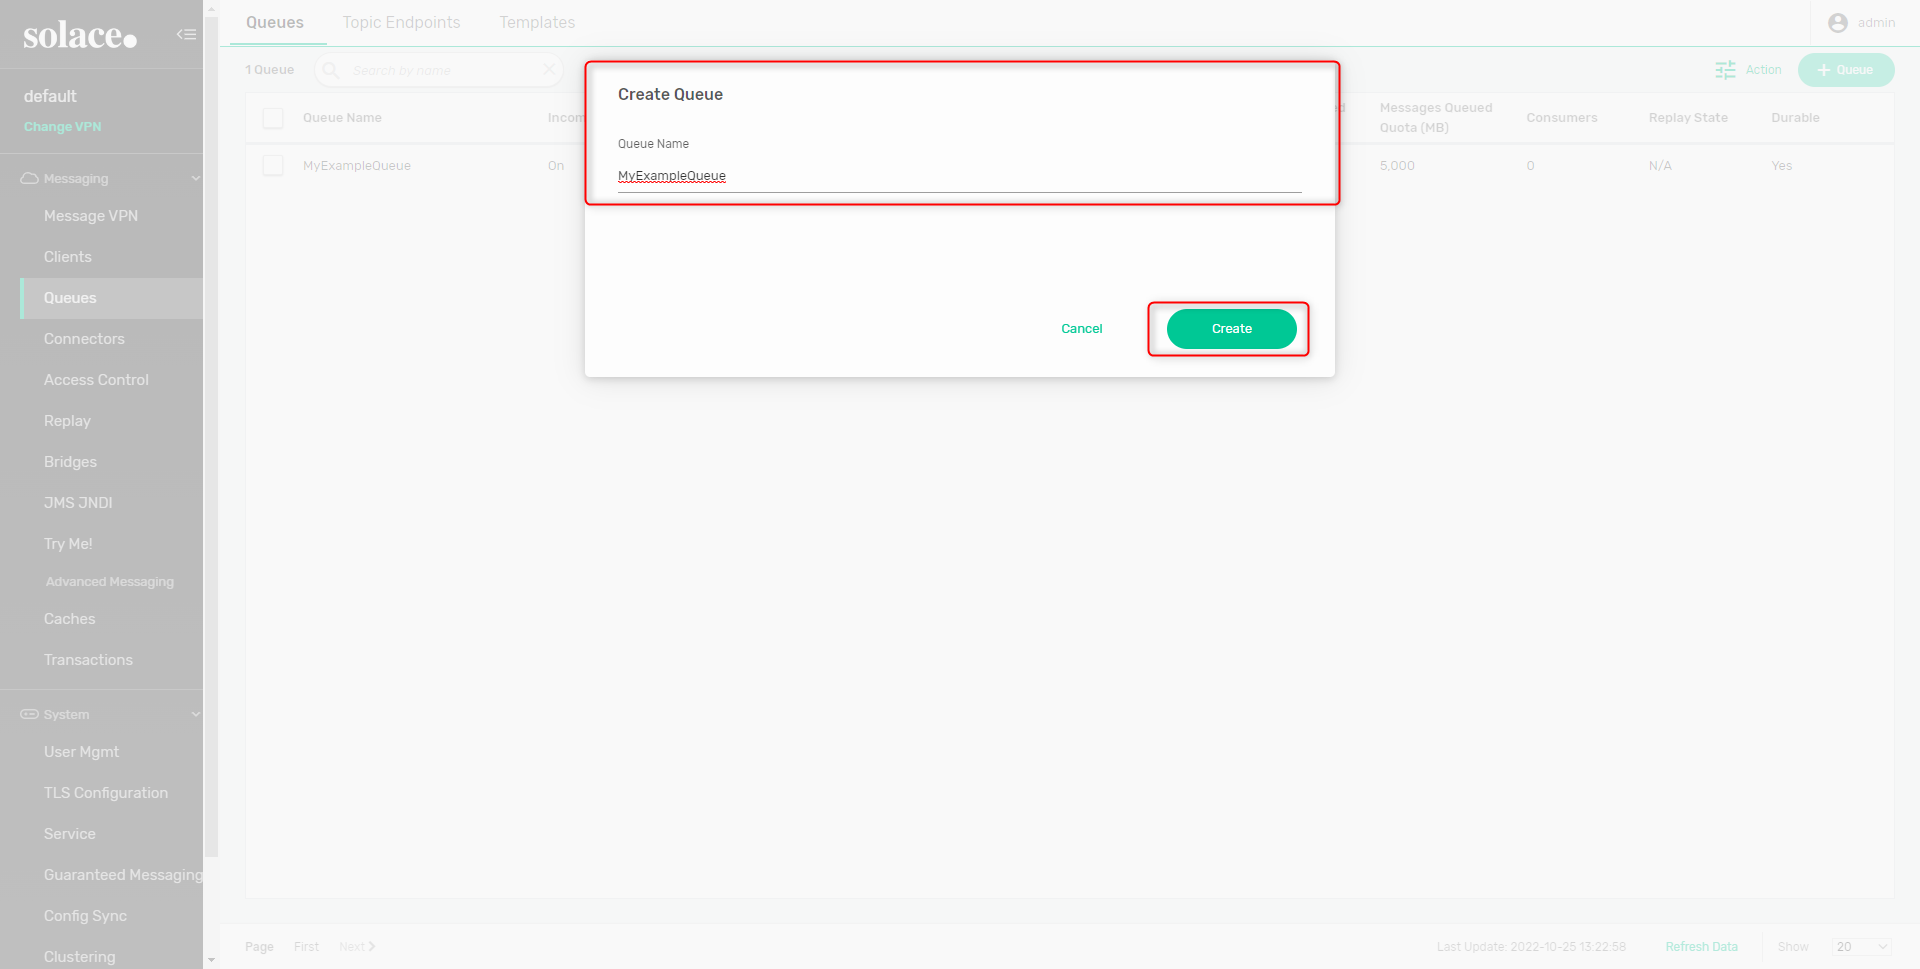
- A popup should open. Provide a name for the Queue. This name will also be used in the Queue Name field in Decisions. Once the name is entered, click Create.
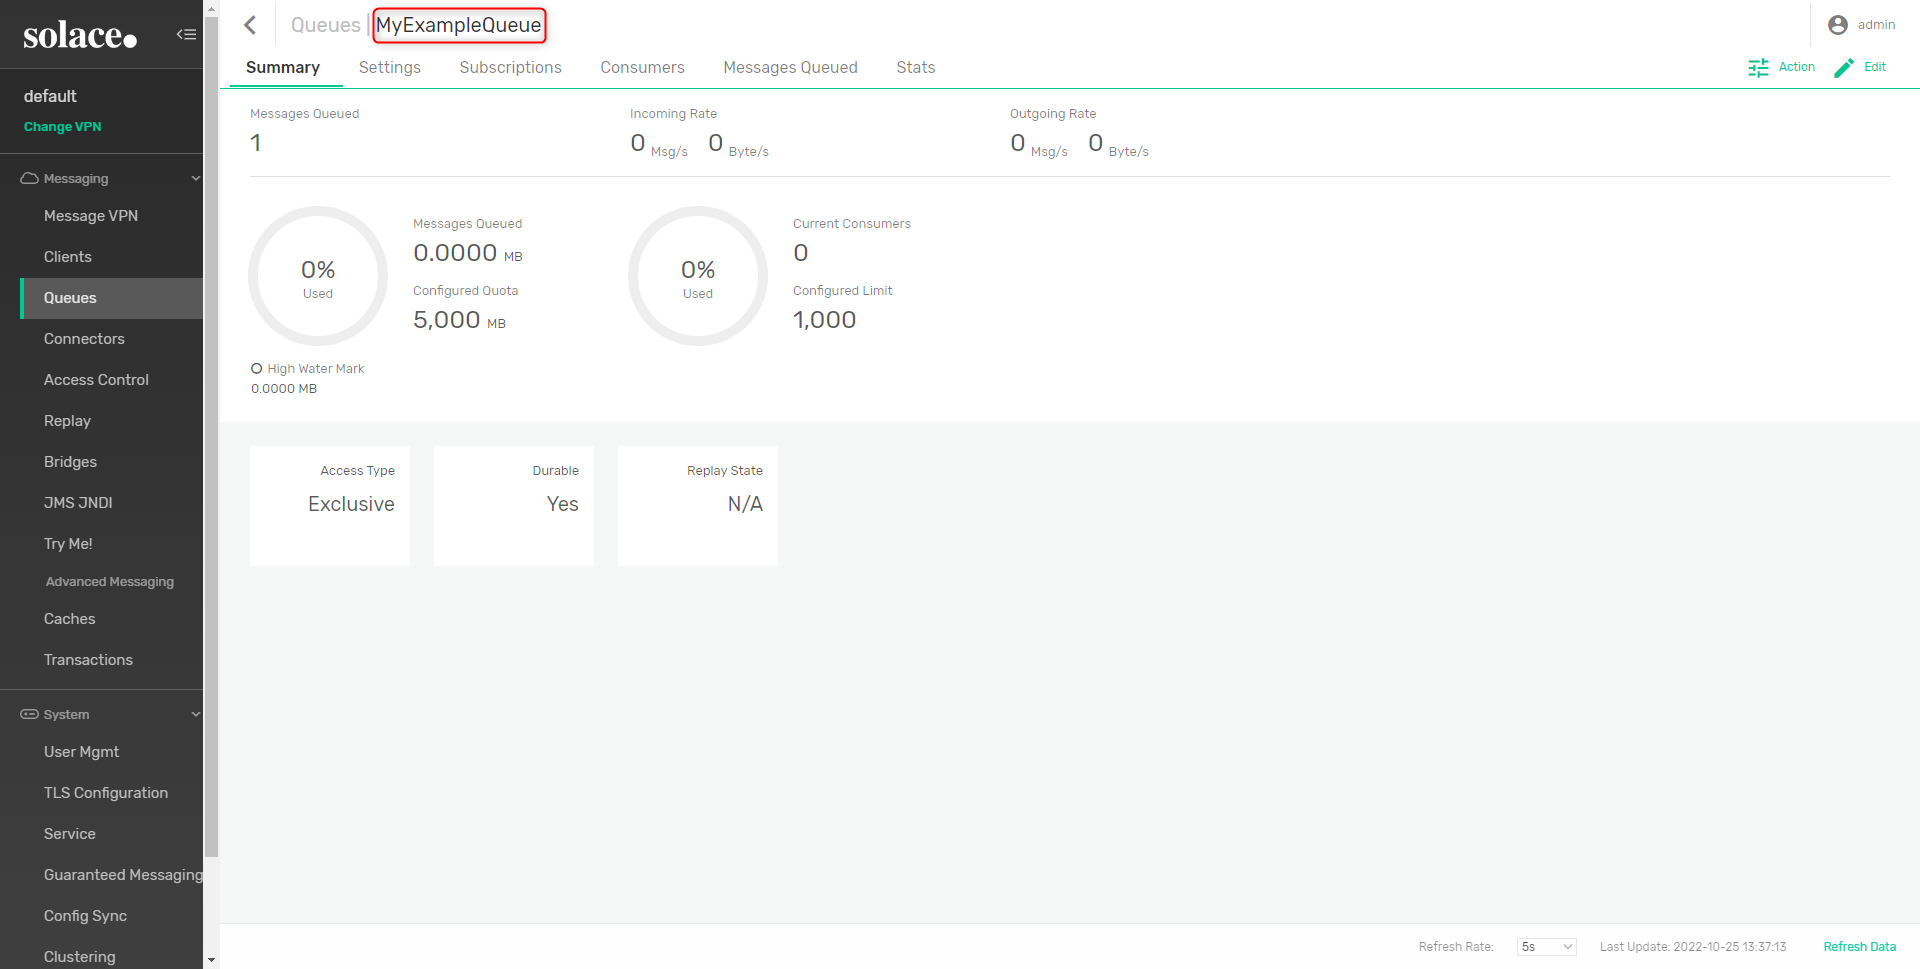
- A new queue should appear with the defined queue name.
- Selecting the Queue from this menu will display a summary of the Queue. Only the Queue Name will be needed when configuring a connection to the queue in Decisions
SolaceMQ Settings
SolaceMQ Settings can be found under System > Settings Solace MQSettings. These settings configure the default connection to the message queue host.
Configuration Options | Description | |
---|---|---|
Default Host IP or Name | The configured Host IP or Server name for the SolaceMQ broker. | |
Default Virtual Router Name | Optional setting used to test how messages can be sent and received from a SolaceMQ message broker. | |
Default User Name | The default user name is used to establish a connection to the SolaceMQ broker. | |
Default Password | The password is used to establish a connection to the SolaceMQ broker. | |
Use Client Certificate for Authentication | Enables SSL connections to SolaceMQ. If enabled, the following fields will require inputs: Filename of Client Certificate, Filename of PFX/P12/PKCS12 File To Sign with, Password for PFX/P12/PKCS12 File, SSL Trust Store Directory. | |
Filename of Client Certificate | The name of the file containing the SSL certificate. | |
Filename of PFX/P12/PKCS12 File To Sign with | The name of the file holding the signatures for the SSL certificate. | |
Password for PFX/P12/PKCS12 File | The password to access the SSL certificate. | |
SSL Trust Store Directory | The full file path to the SSL Trust Store Directory. If no trust store directory is specified and TCPS is enabled, the certificate will be retrieved from system certificates. If TCPS is not enabled, no Trust Store is used at all. |
Adding a Solace Message Queue
Once the settings have been configured to connect to a Solace MQ host machine:
- Navigate to System > Integration > Jobs and Events > Message Queues.
- Select Add Solace Queue from the action bar and define the values for the message queue. Save.
Properties | Description |
---|---|
Display Name | The name of the message queue as it will appear in Decisions. |
Queue Name | The name of the message queue. |
Override Host Info | If enabled, provides a textbox used to override the Host IP or Name field defined in SolaceMQ Settings. |
Override Virtual Router Name | Optional input is used to override the Virtual Router Name field defined in SolaceMQ Settings. |
Override Client Certificate in Settings | If enabled, provides textbox controls used to override Filename of Client Certificate, Filename of PFX/P12/PKCS12 File To Sign with, Password for PFX/P12/PKCS12 File, and SSL Trust Store Directory fields defined in SolaceMQ Settings. |
Override Client Credentials | If enabled, provides textbox controls used to override the User Name and Password fields defined in SolaceMQ Settings. |
Always Try to Reconnect | If enabled, attempt to reconnect to the queue after a set period of time. |
Time Between Reconnect Attempts (ms) | Defines the time between reconnects to the message queue. By default, this setting is set to 3000. |
Available Steps
The following table lists all the steps available in the Module.
Step Name | Description |
---|---|
Disable Solace Queue | The Disable Solace Queue step allows users to disable a Solace message queue through a Flow. |
Enable Solace Queue | The Enable Solace Queue step allows users to enable a Solace message queue through a Flow. |
Get String Message from Solace Queue | The Get String Message from Solace Queue step allows a set number of messages to be pulled from a Solace message queue to be used in Decisions. |
Publish Message to Solace Topic | The Publish Message to Solace Topic step posts messages to a Solace Topic. The Topic must be added as a queue in Decisions in order for the step to be used. |
Put Binary Message in Solace Queue | The Put Binary Message in Solace Queue step is used to send a message to a Solace Queue. The message sent will be in binary format. |
Put String Messages in Solace Queue | The Put String Message in Solace Queue step is used to send a message to a Solace Queue. The message sent will be as text. |
Feature Changes
Description | Version | Developer Task |
---|---|---|
The "SSL Trust Store Directory" text box has been unlinked from the "Use Client Certificate for Authentication" and will always be visible. | 8.15 | [DT-038905] |
A hidden Module called Decisions.MessageQueues Module will be downloaded automatically when any message queue Module is installed. | 9.0 | [DT-039289] |