Overview
The Azure Service module provides Decisions with the ability to integrate with Azure Service Bus. Azure Service Bus is an enterprise-level message broker that supports point-to-point and Publish/Subscribe message queues.
The module provides Flow steps to send messages to an Azure Queue and functionality to connect and process messages.
Prerequisites
- Existing Microsoft Azure Service Bus Account.
- Installation of the Azure Services Module.
- A Project dependency must be created.
Creating an Azure Service Bus Queue
The following section covers the setup and configuration of a broker/message queue and is intended to serve as an example resource to integrate with Decisions. The example highlights the values needed to connect a message queue to Decisions and is meant for informational and troubleshooting purposes.
Please refer to the product's official documentation for a more in-depth and detailed guide on configuring a message queue for use in production environments.
The Azure portal can be used to create new queues. To access the Azure portal, an Azure account will be needed. Once the account is created, to create a new queue:
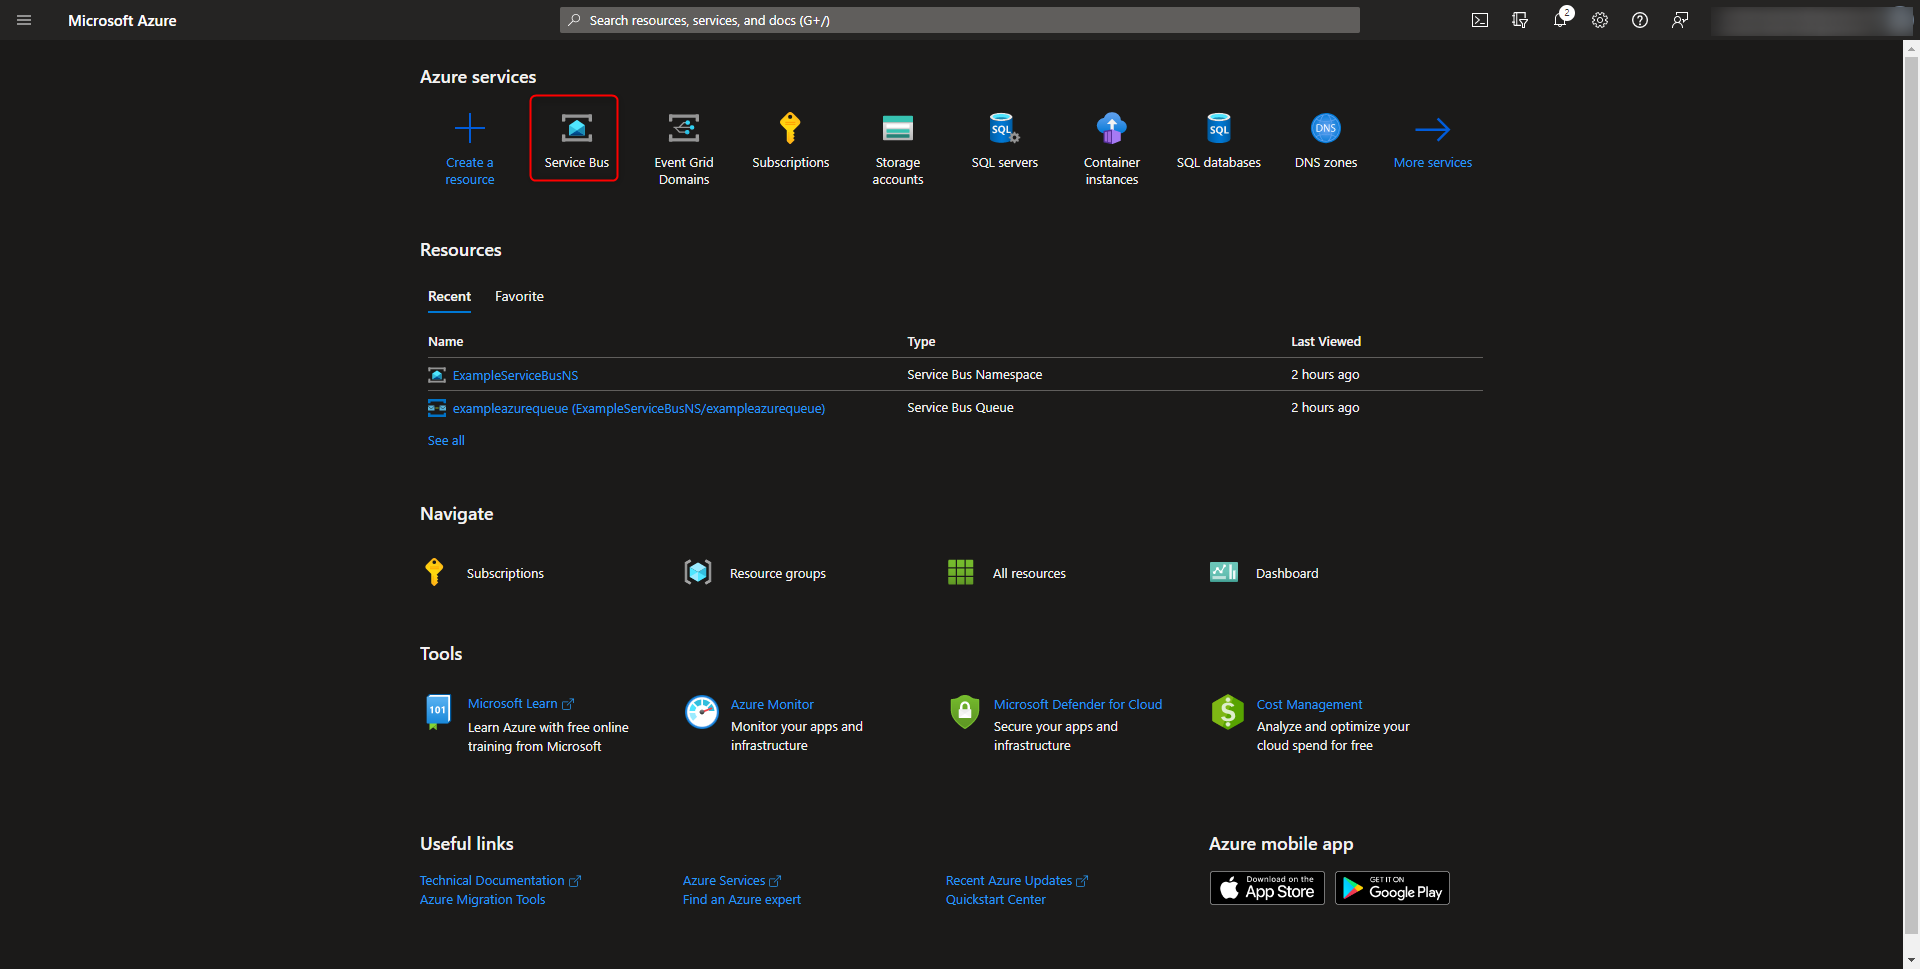
- From the Home page in the Azure portal, select Service Bus service.
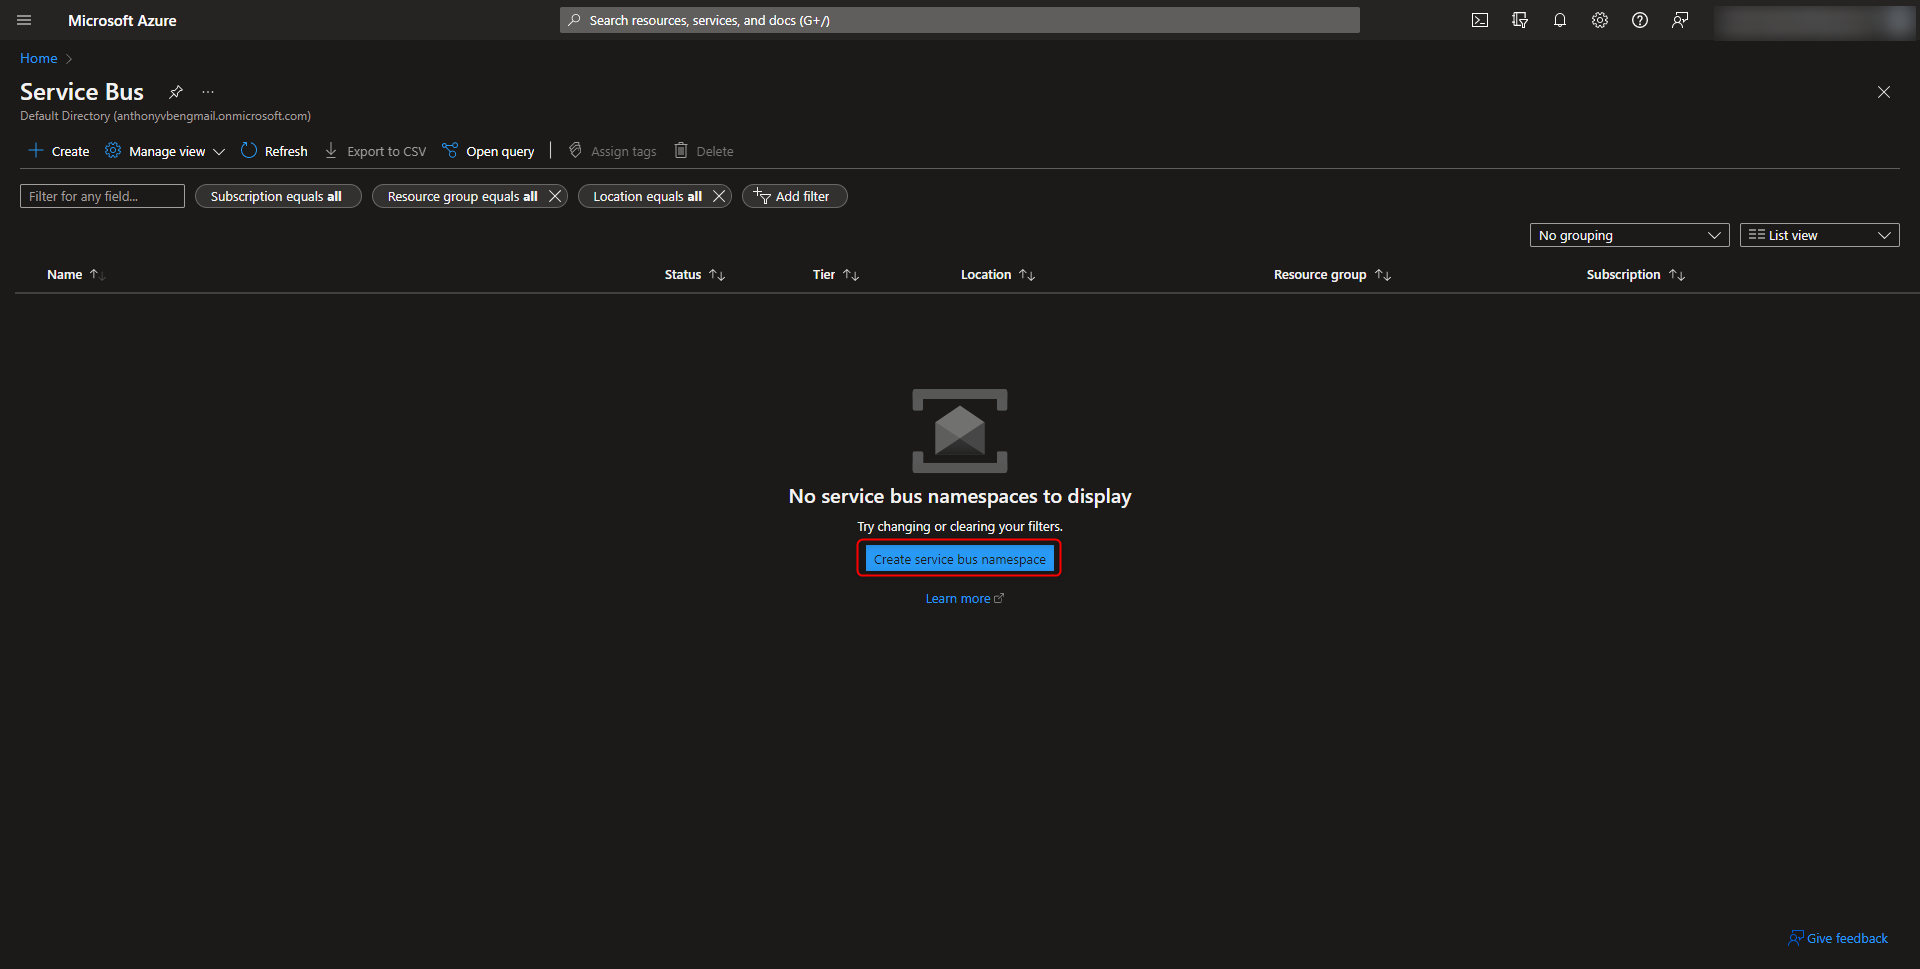
- If no Namespace is created, define a namespace.
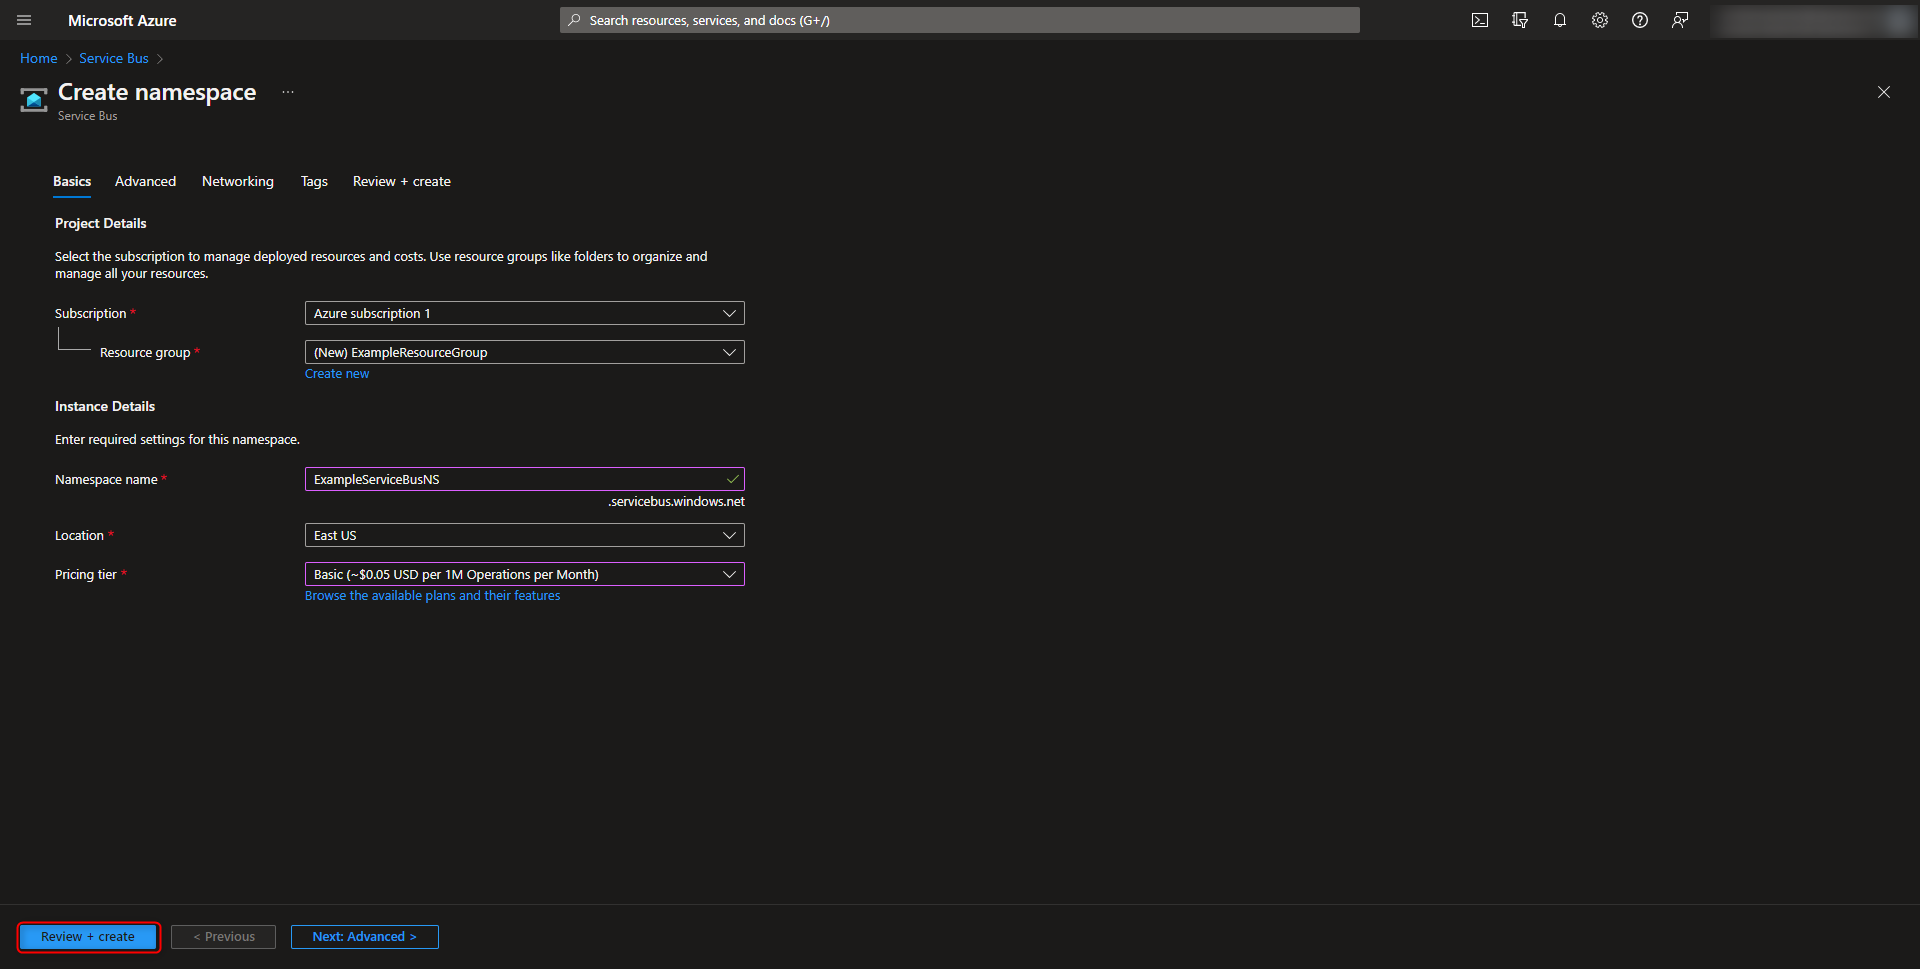
- Select or create a Resource group, enter a Namespace name, Location, and Pricing tier. Select Review + Create to leave the remaining settings as default.
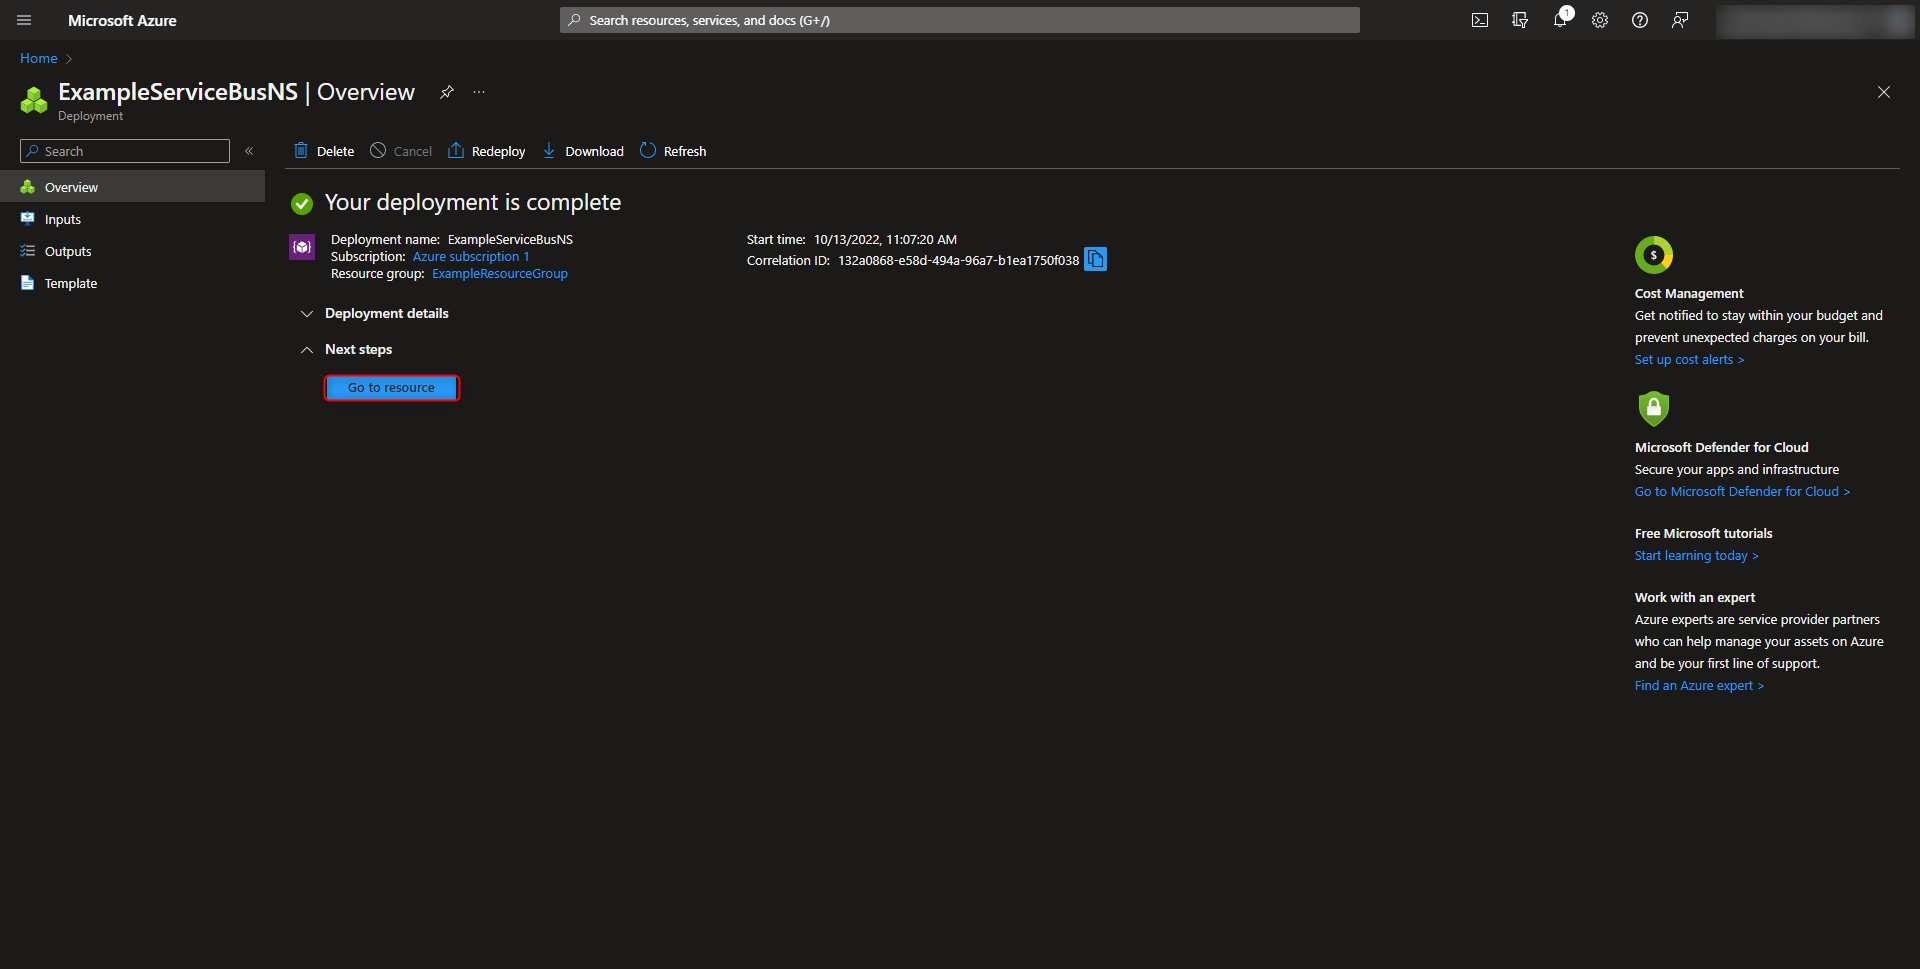
- Once the namespace is created, the page will refresh while the namespace is being deployed. Select Go to Resource.
- In the left navigation panel, under Entities, select Queues.
- Select the add Queue action.
- Provide a name for the queue, and set the Max delivery count. For this example, other options were set to default values.
- Select the Create button to create the queue.
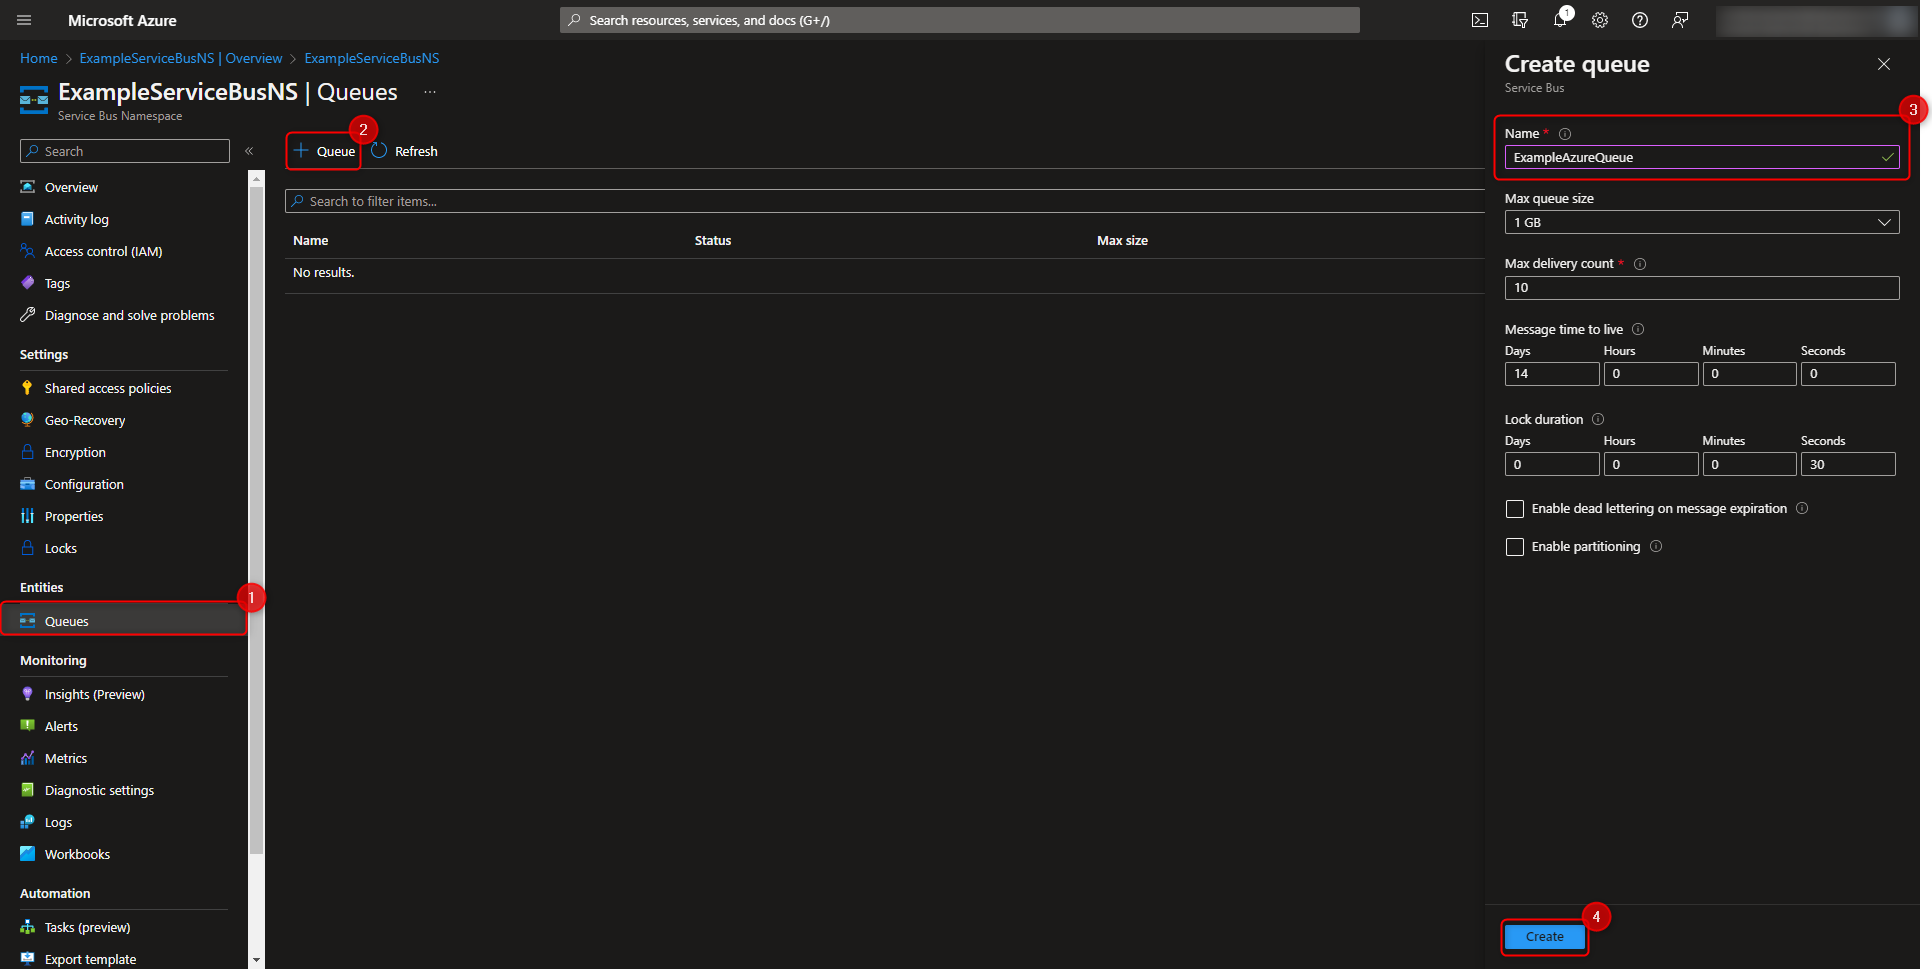
Adding an Azure Queue
- Navigate to Manage > Jobs and Events > Messaging > Queues. Click ADD AZURE QUEUE. This action will only appear after a dependency has been made to the module.
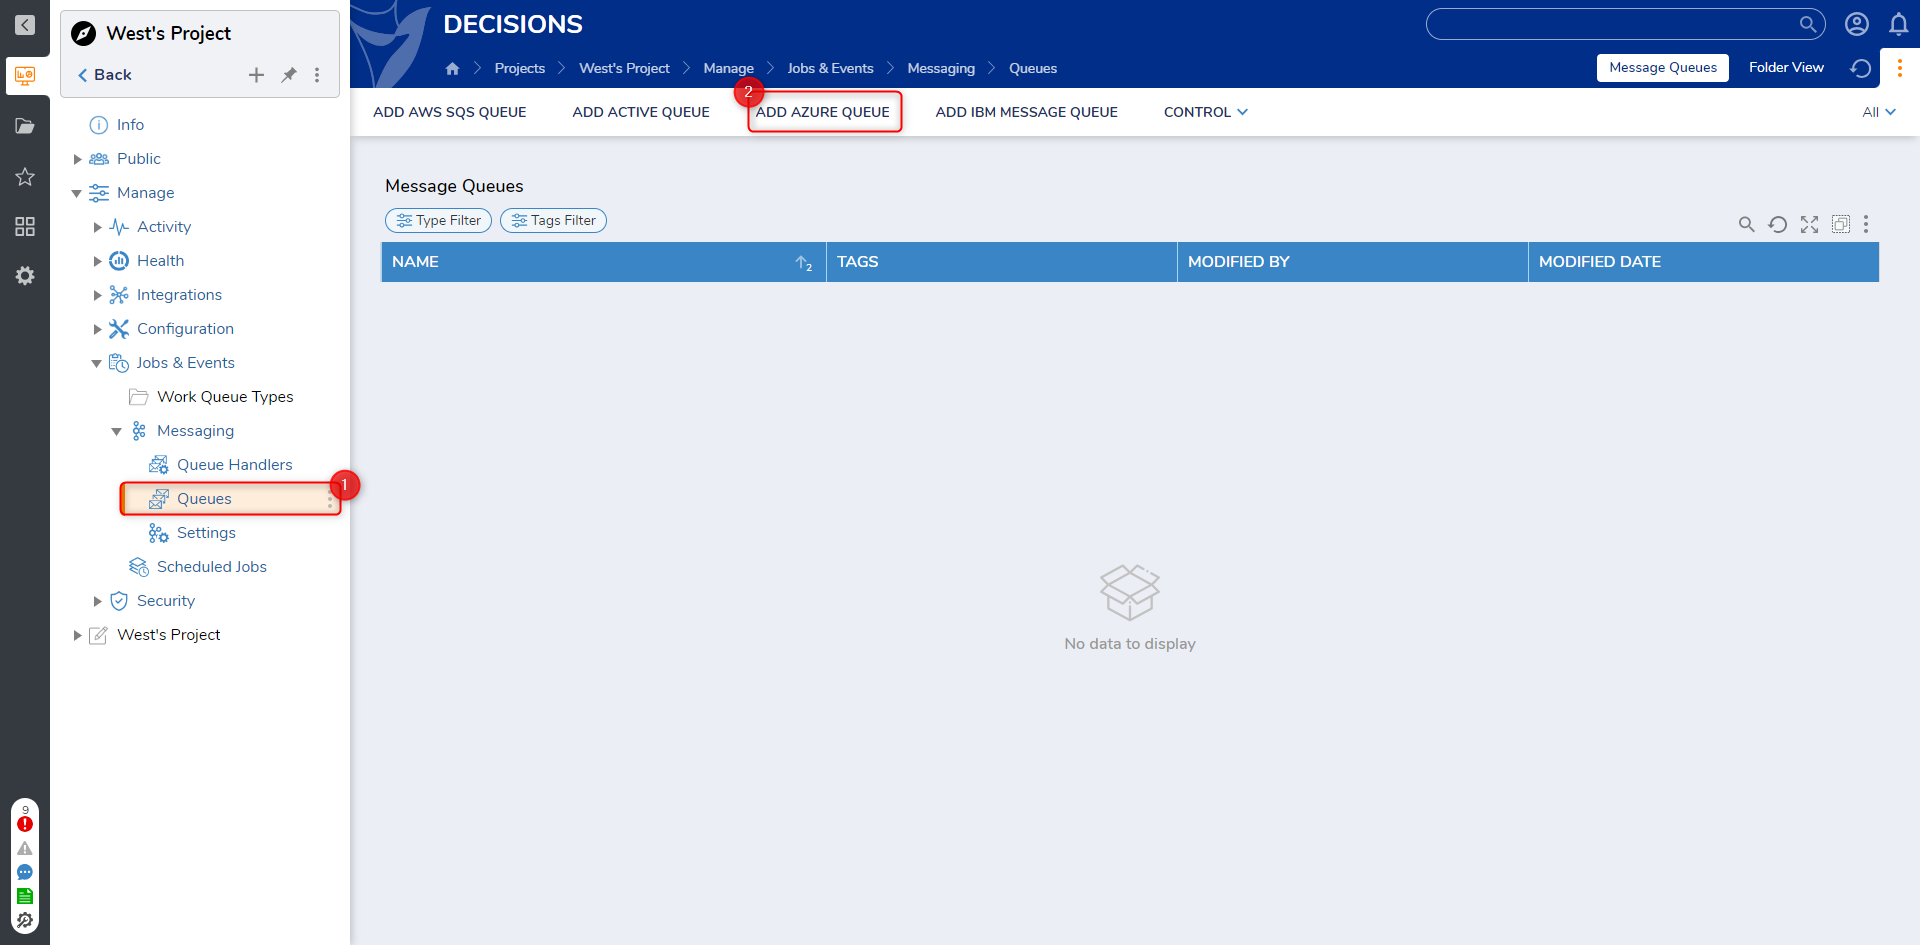
- On the Add Azure Queue window, configure the options with the correct information. When complete, click SAVE.

Configuration Options Function Display Name The name of the Queue as it will be displayed in Decisions. Messaging Type Determines the messaging type, either point-to-point (Queue) or subscription-based Queue Name The name of the queue as it appears in Azure, or the name for the topic that Decisions will be subscribed to. Subscription Name* Prompts for the name of the subscription for topics. This setting is hidden unless the messaging type is subscription-based. Session ID An optional field that must be filled if the setting is enabled on the Azure Service Bus Queue. A session ID will need to be used to identify which messages will be sent to Decisions. Decisions will receive any messages containing a matching ID. Custom Connection String Used to override the Connection String configured in System > Azure Service Bus Settings. The connection string is the endpoint to establish a private connection to the Service Bus Queue
Viewing Azure Queue configuration
Within the Azure portal, the configuration information, such as the queue name, can be found here. To access the overview page:
- From the Home page in the Azure portal, select Service Bus service.

- In the left navigation panel, select Queues, then select a queue.
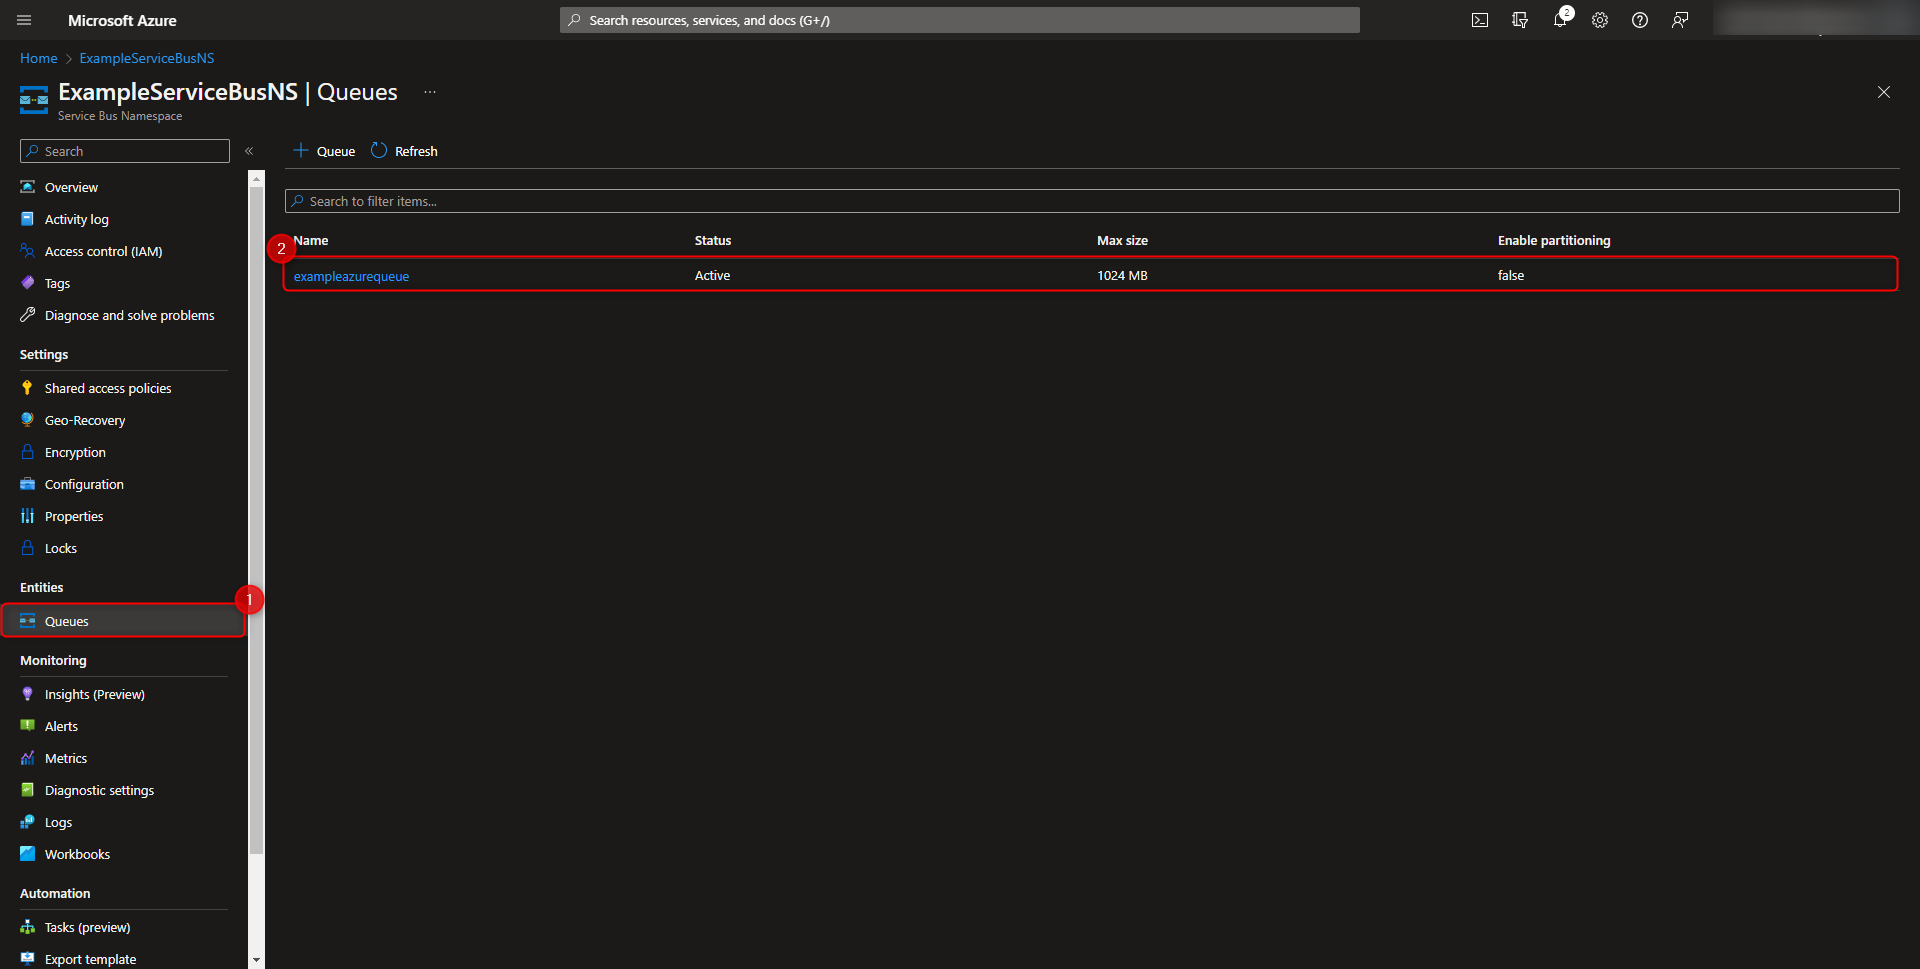
- The overview page will be displayed. The queue name can be found in the top left corner, along with additional configuration settings.
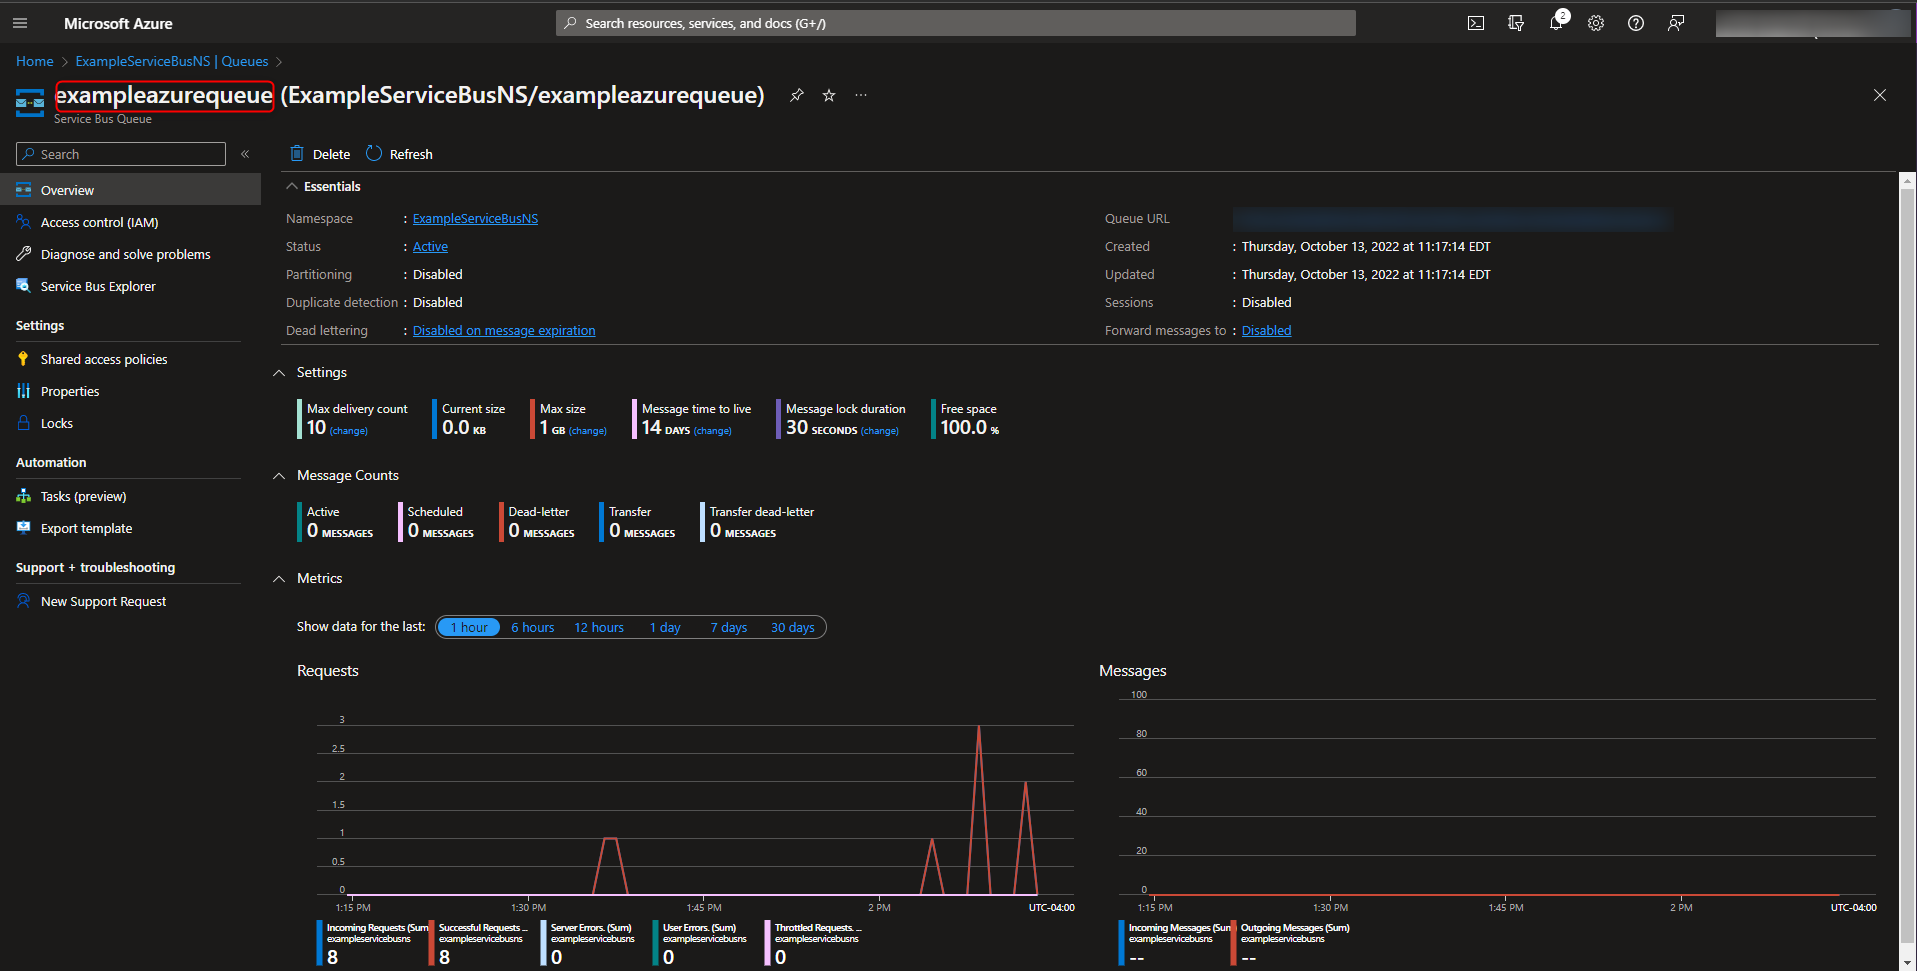
Azure Service Bus Settings
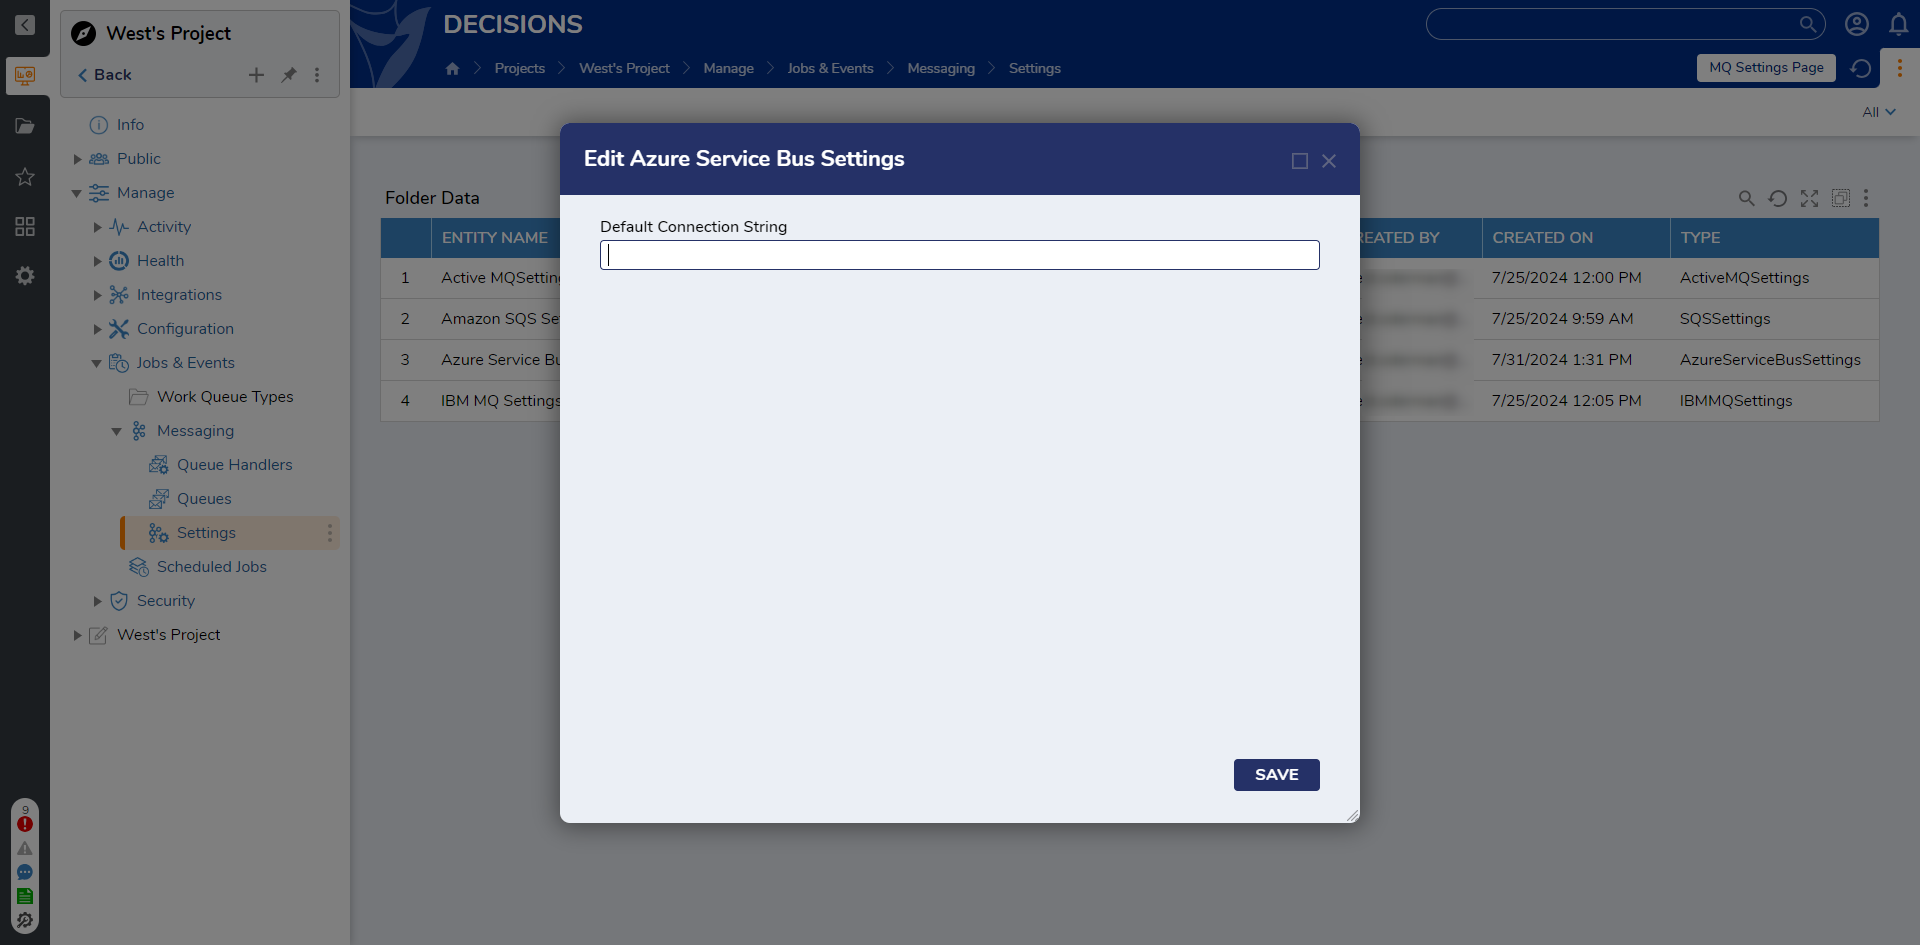
The Azure Service Bus settings allow for either a Default Connection String or OAuth tokens. This is used to define authentication and authorization to the Azure Service Bus.
Default Connection String
Older versions of Decisions only support the Default Connection String with Azure.
Retrieving the connection string
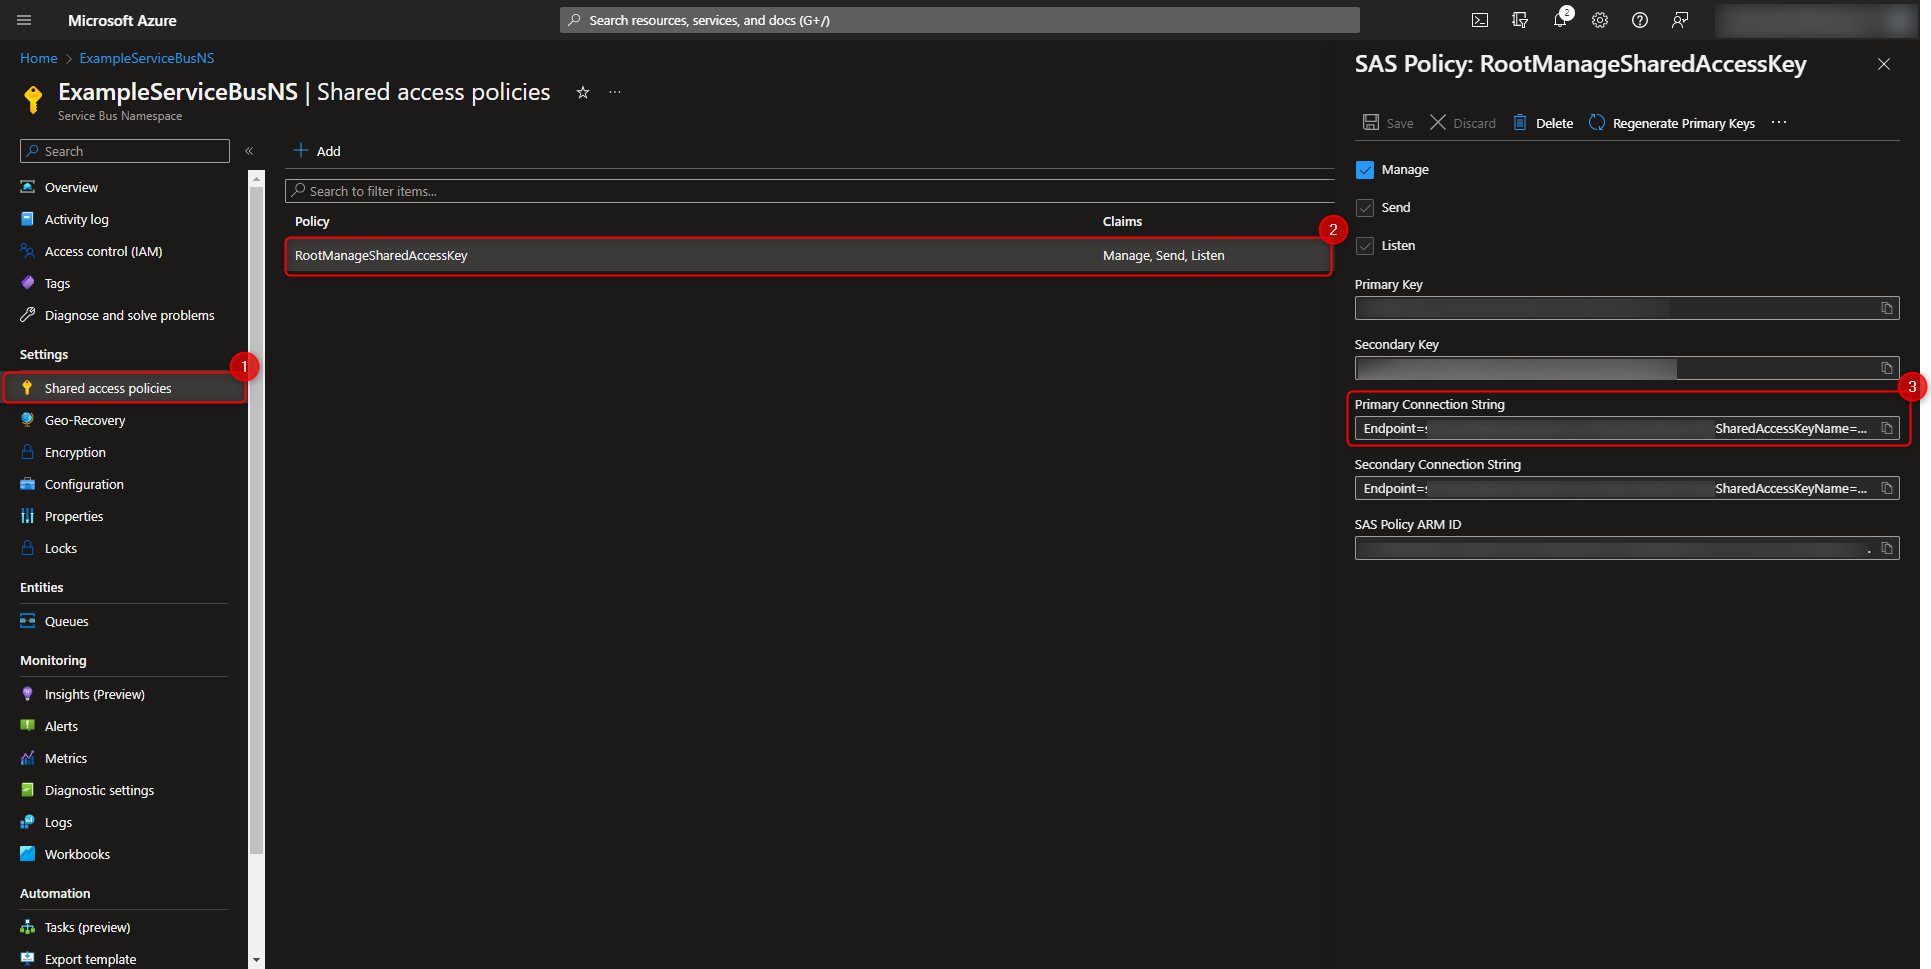
The connection string is located under the shared access policy for the resource. The Primary Connection String will be the field that needs to be copied to Decisions. To locate the connection string:
- From the portal, select the Service Bus namespace.
- Navigate to Settings > Shared Access Policy in the left navigation menu.
- Select the RootManageSharedAccessKey Policy. Copy the Primary Connection String.
OAuth Tokens
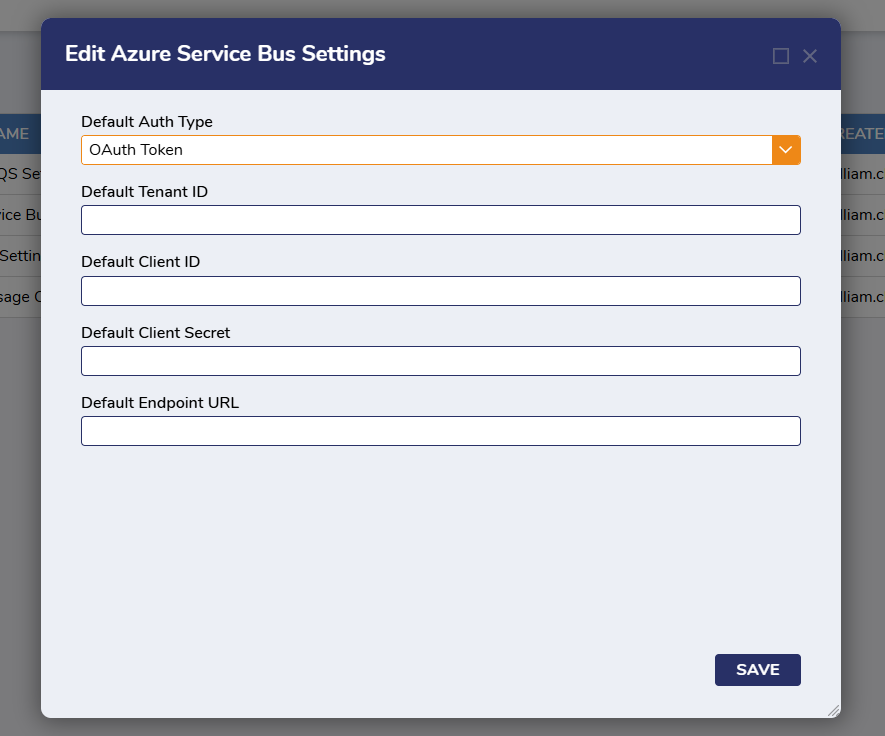
Decisions must be v9.6 or higher to have access to OAuth Token settings. Users will need to enter the Default Tenant ID, Default Client ID, Default Client Secret, and Default Endpoint URL.
Uncaught Exceptions
If Lease is being used by a message queue handler flow, and the handler flow throws an uncaught exception, the platform will call the Abandon method. This causes Service Bus to unlock the message within the queue and make it available to be received again. Depending upon the configuration of the Azure queue, enough failed deliveries will cause the message to be sent to the dead message queue.
Feature Changes
| Description | Version | Release Date | Developer Task |
|---|---|---|---|
| A hidden Module called Decisions.MessageQueues Module will be downloaded automatically when any message queue Module is installed. | 9.0 | May 2024 | [DT-039289] |
| Added two new steps - Run Document Analysis and Run Document Analysis in JSON. | 9.5 | November 2024 | [DT-042896] |
| Added OAuth and RBAC support. | 9.6 | January 2025 | [DT-042721] |
| The Label property is now usable in the Messager Queue Flow logic. | 9.7 | February 2025 | [DT-043457] |