Overview
Designer Elements can be exported from one environment and imported into another.
These elements are exported as Decisions object (.decObj) files within a .zip file. When a project or application moves from one environment to another, management shifts from one Administrator to the other. Due to this shift, account privileges should be monitored so that the appropriate accounts are given Administrator access.
Exporting a Project
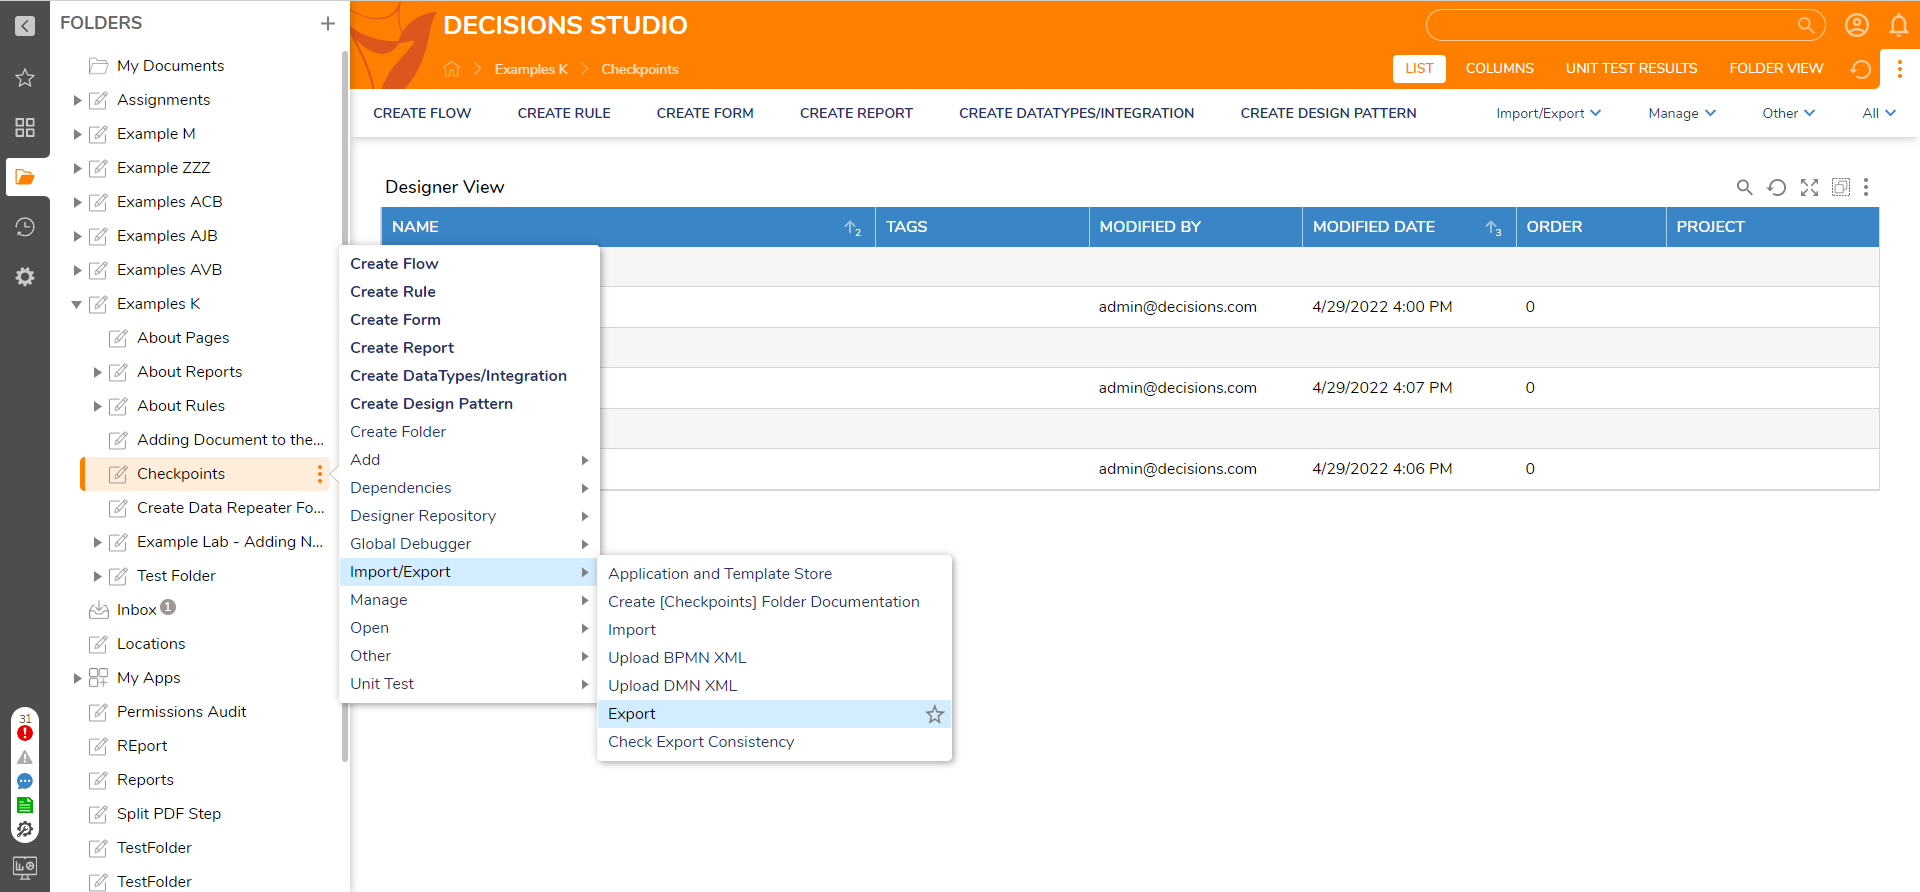
- Locate a Designer Project. Right-click the Designer Project and navigate to Import/Export > Export.
- From the Select Project window, enter a New Project Name and click CONTINUE.
The Select Project window assigns the Designer Entity to a Project before Export. In addition to creating a new Project, the window also offers the ability to select a pre-existing Project from a drop-down menu.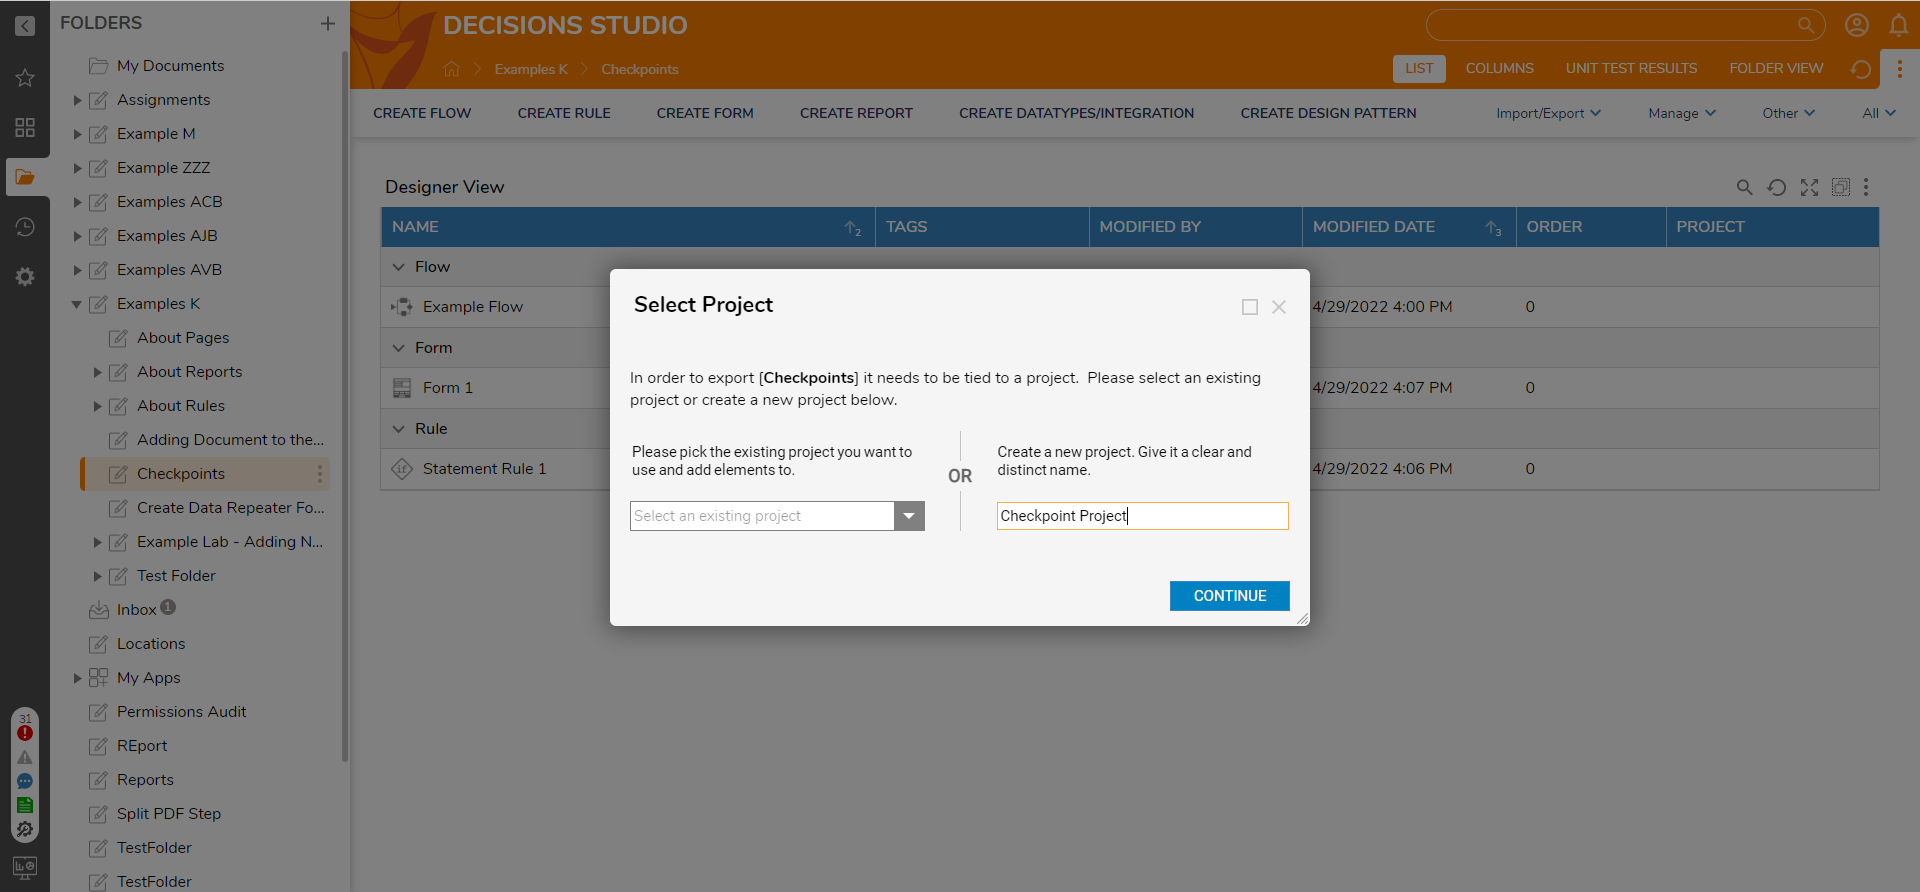
- From the Export window, select Project with Dependencies and click CONTINUE.
Export Option Description Project with Dependencies Downloads the entire Project with all its Dependencies Project Downloads the Project This Folder Downloads just the Folder without the rest of its attached Project Advanced Options Option to further configure Export (Hidden Folders, Sub Folders, History Folders) 
- In the next window, toggle which object will be exported via the Select Items checkboxes, then click EXPORT.
Single entities can be exported as opposed to the entire project. To do this, navigate to the Designer Project where the single entity lives and bring up the Action Menu for this entity, select the Import/Export option from the menu and then select EXPORT.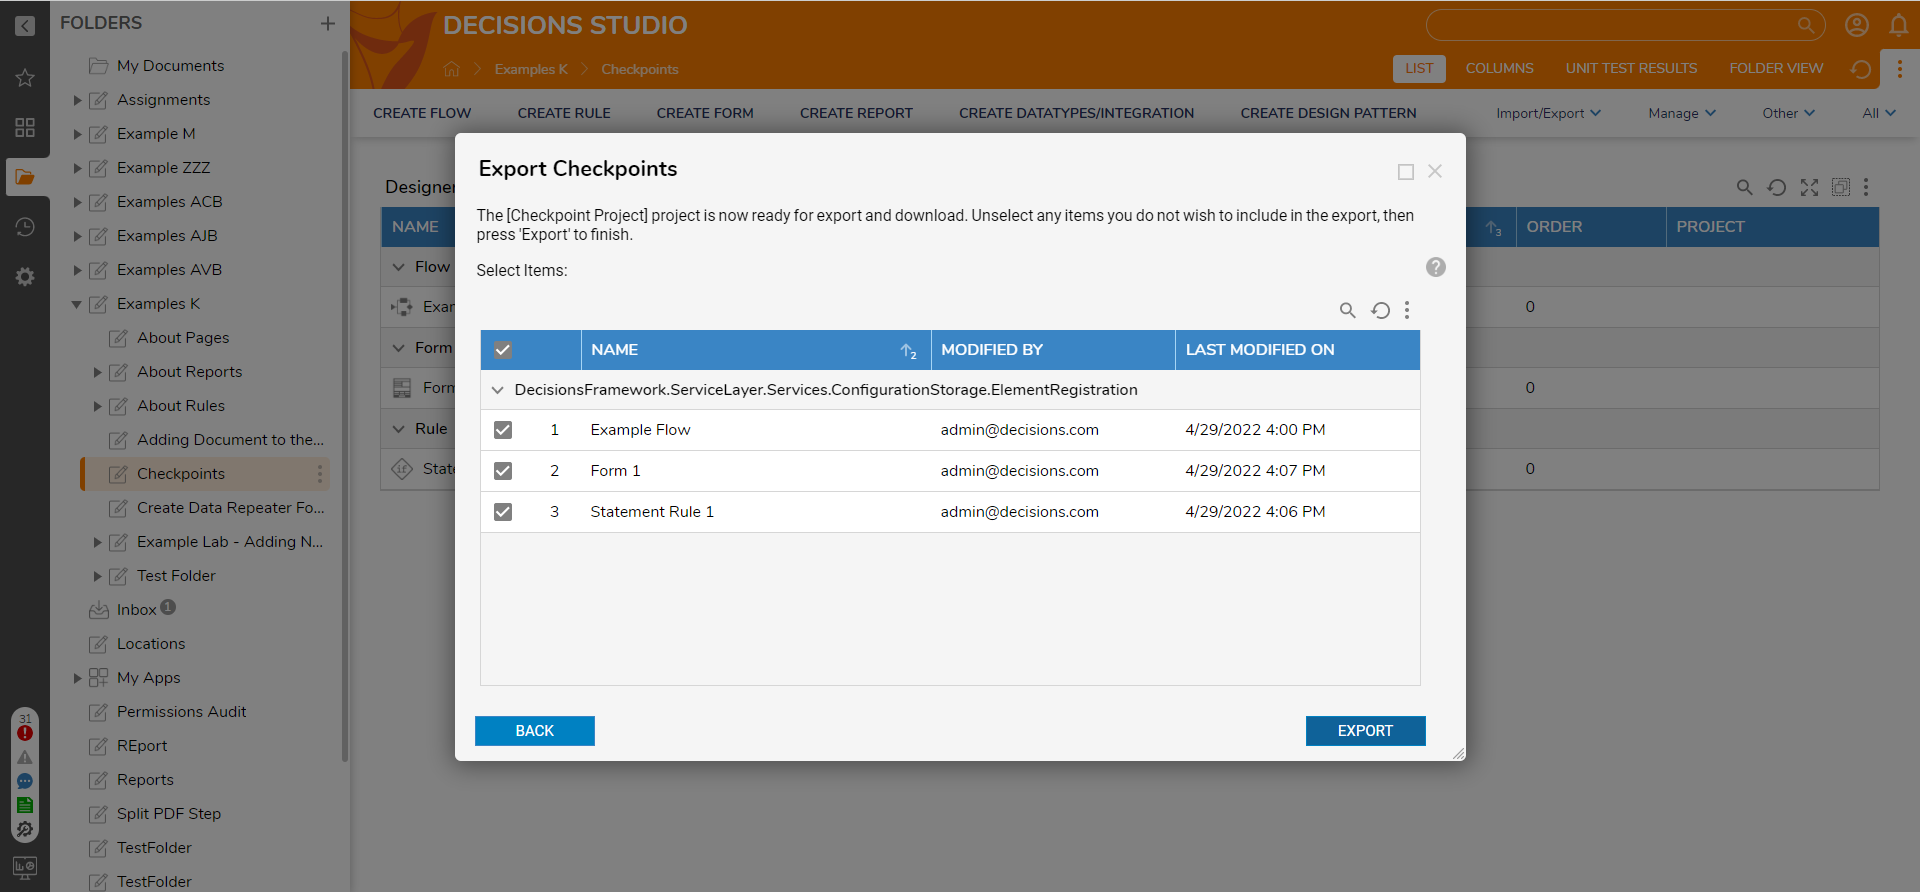
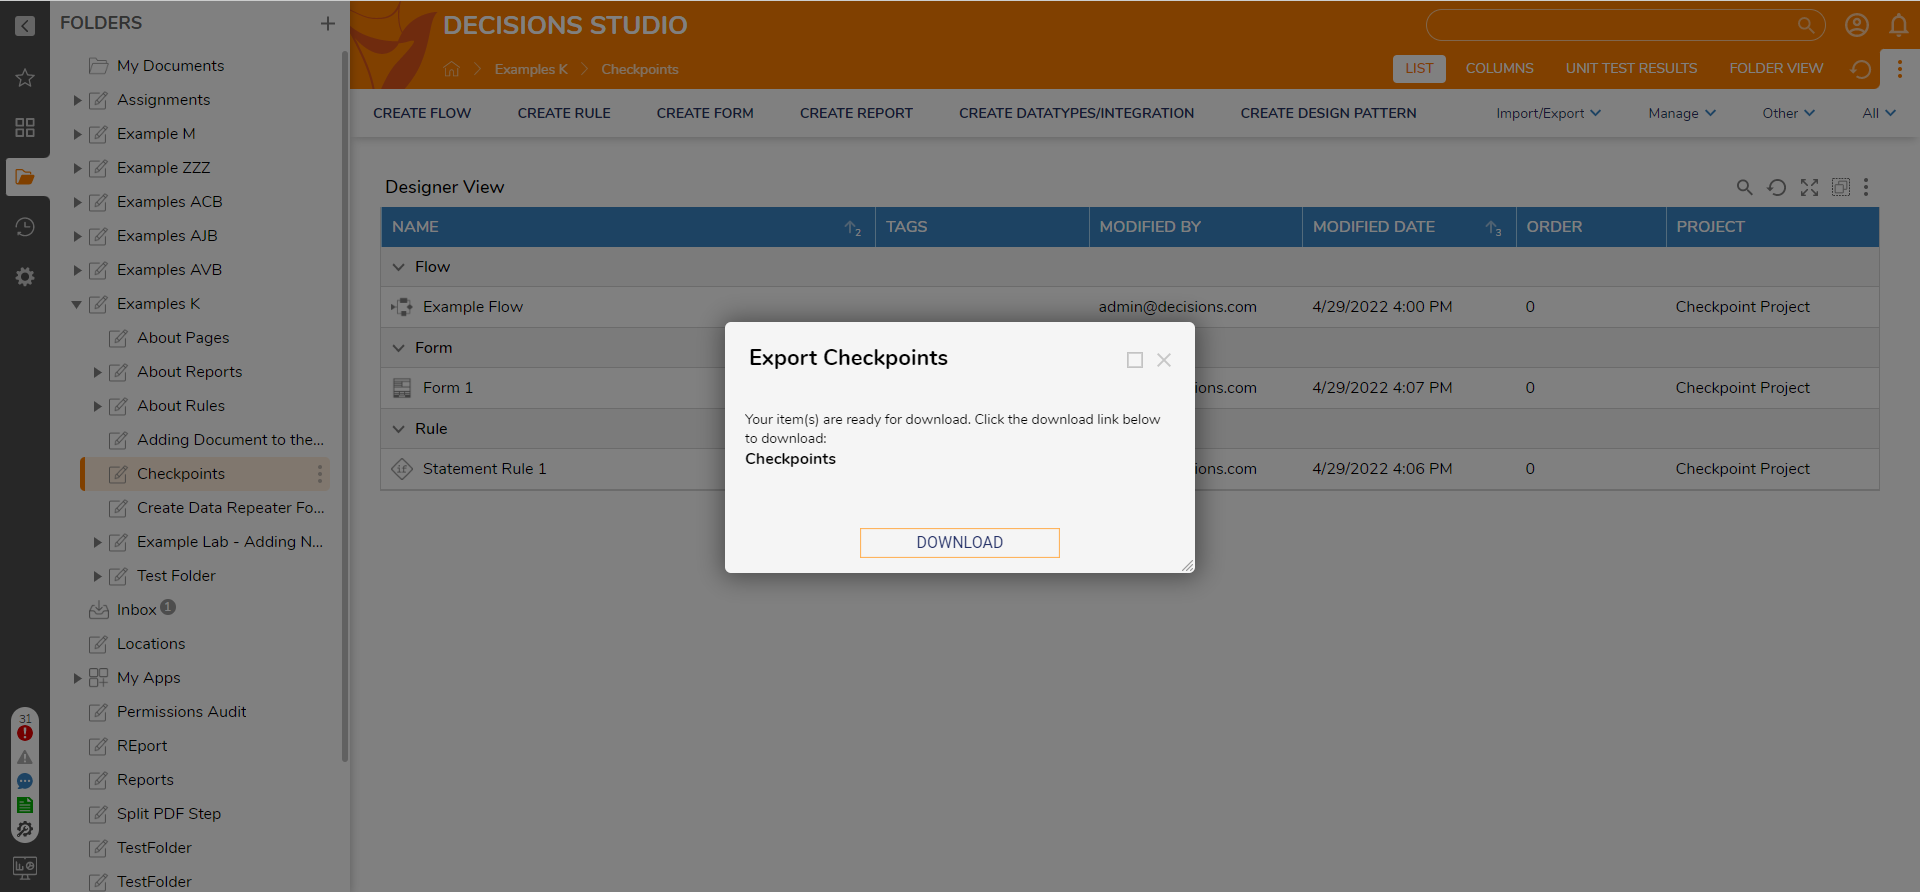
- Select the DOWNLOAD button. Selecting Download will export the Project in the form of a .zip file. Unzipping the file reveals each separate Designer Element in the form of individual .decObj files.
Importing a Project
For the following example, download the .zip file below, which contains an exported Designer Folder with several .decObj, including a Flow, Form, Report, and Rule. This .zip file will be downloaded to the designated Windows File Explorer location (Windows 'Downloads' by default) and used later in the example.
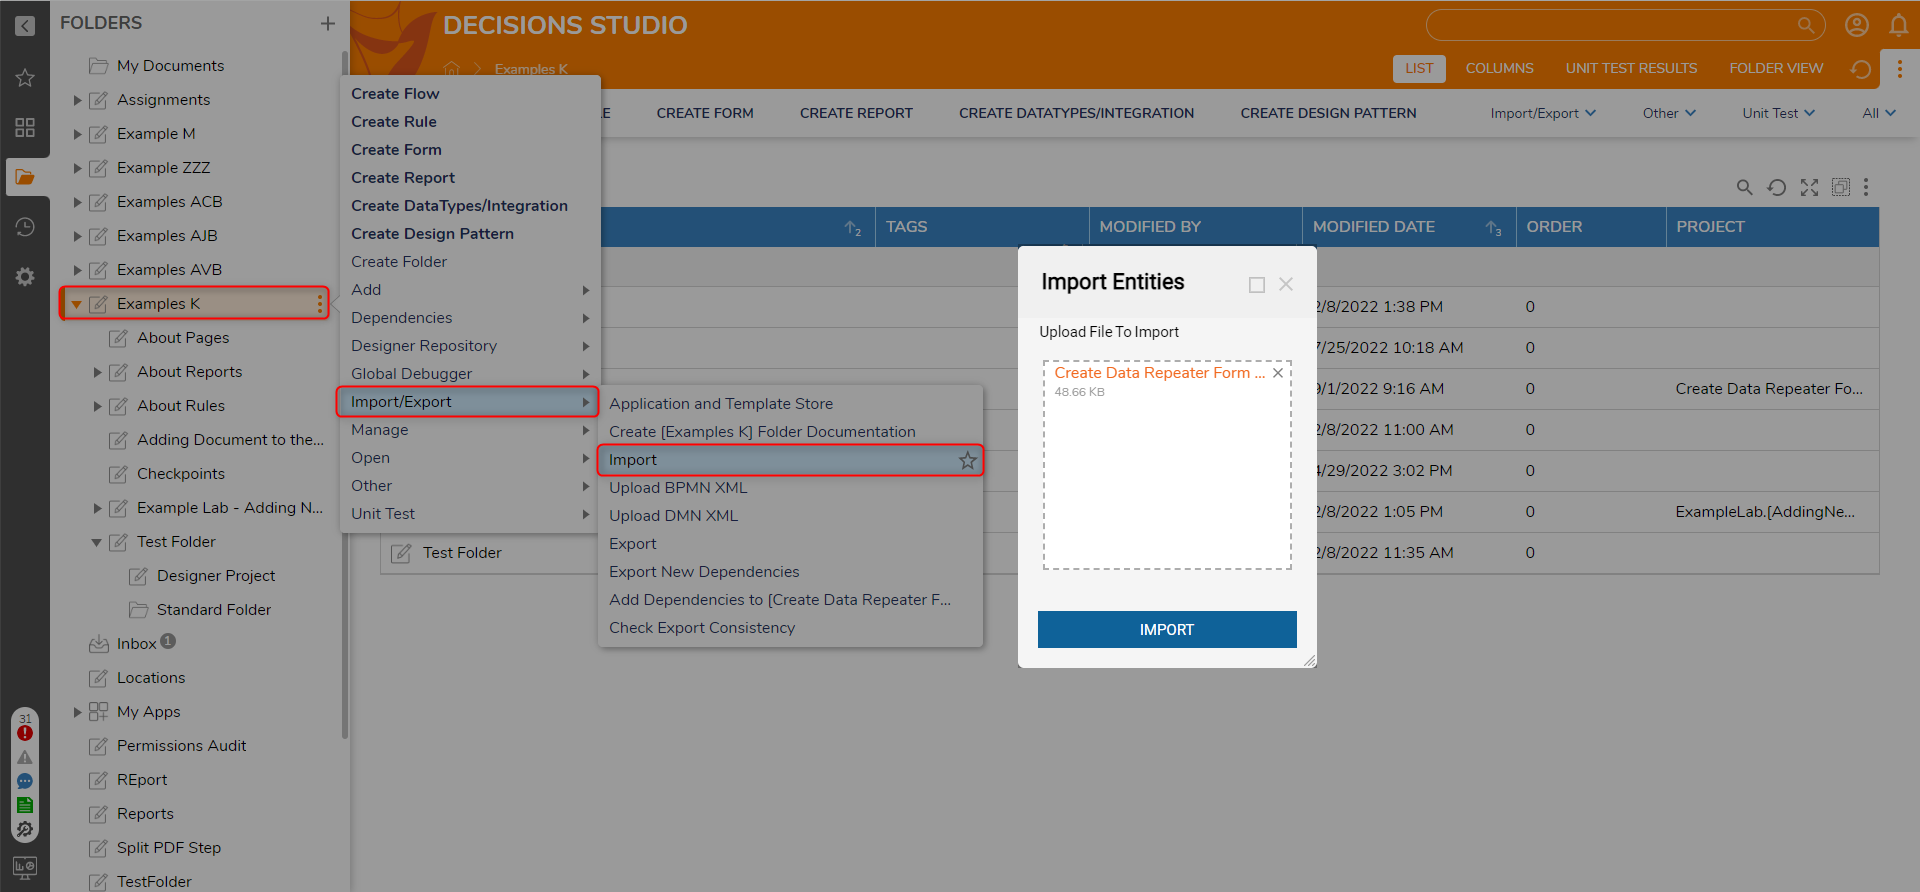
- From the Designer Studio, right-click any Designer Project. Select Import/Export and click Import.
- Select CHOOSE FILE and select the desired file. Click IMPORT.
- Designate each desired Entity for import by toggling the checkbox beside each NAME in the Import Summary Report window. Select COMPLETE IMPORT.
If there is an issue with one of the entities during import, this Report will help to resolve these issues before importing.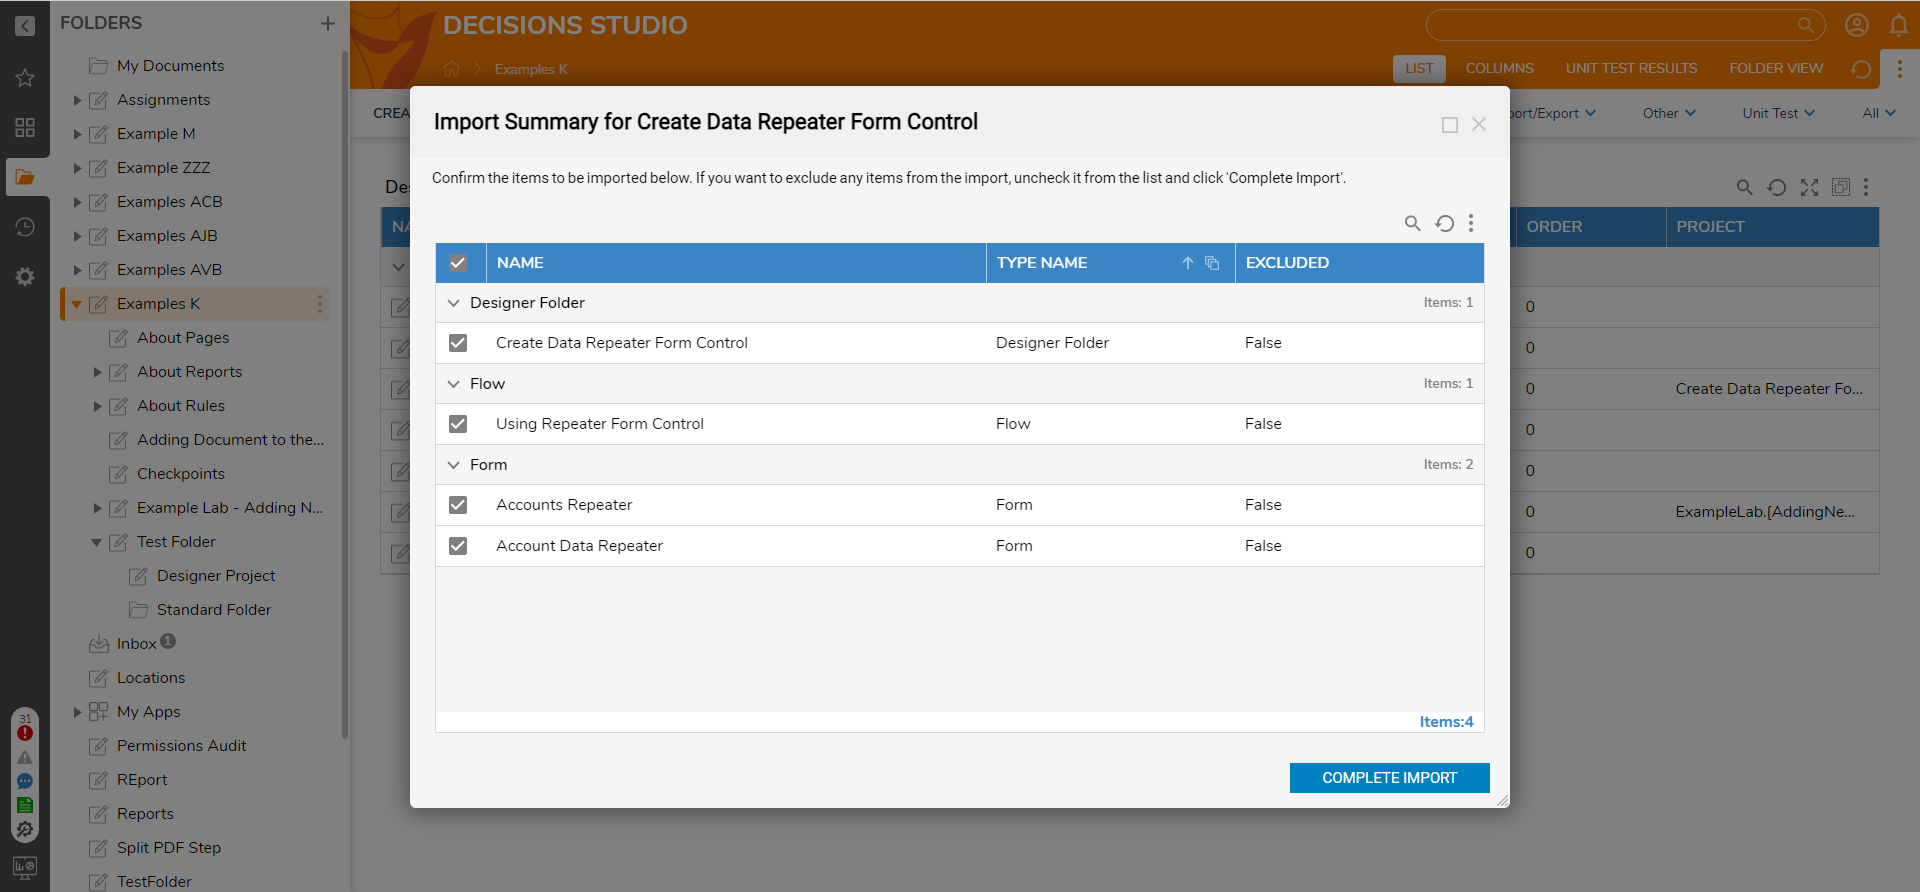
- During Import an Import Status dialog will appear displaying a timestamp and action occurring during the timestamp.
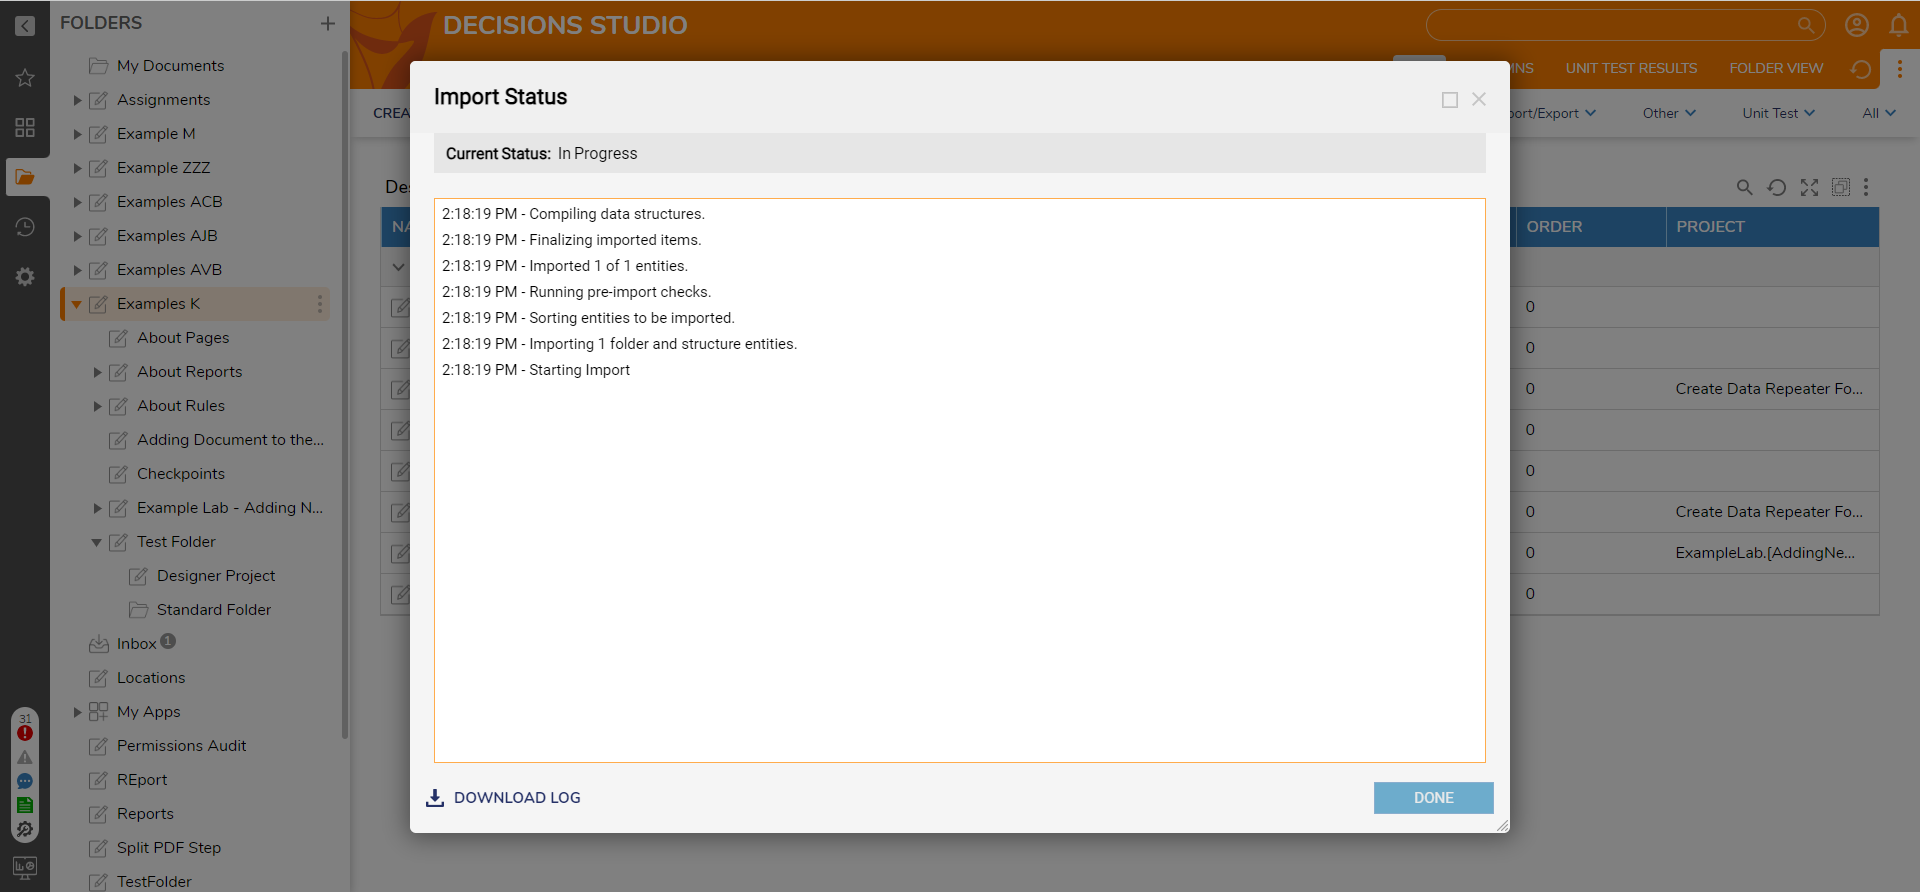
- When the import completes, the status will read Success. Select DONE.
.png)
Import/Export Settings
If the Import or Export wizard appears to be running slower than usual upon exporting larger projects or the wizard is exporting too many Elements or unwanted Elements, users may utilize the Import/Export Studio Settings to adjust which types are ignored in the Export process.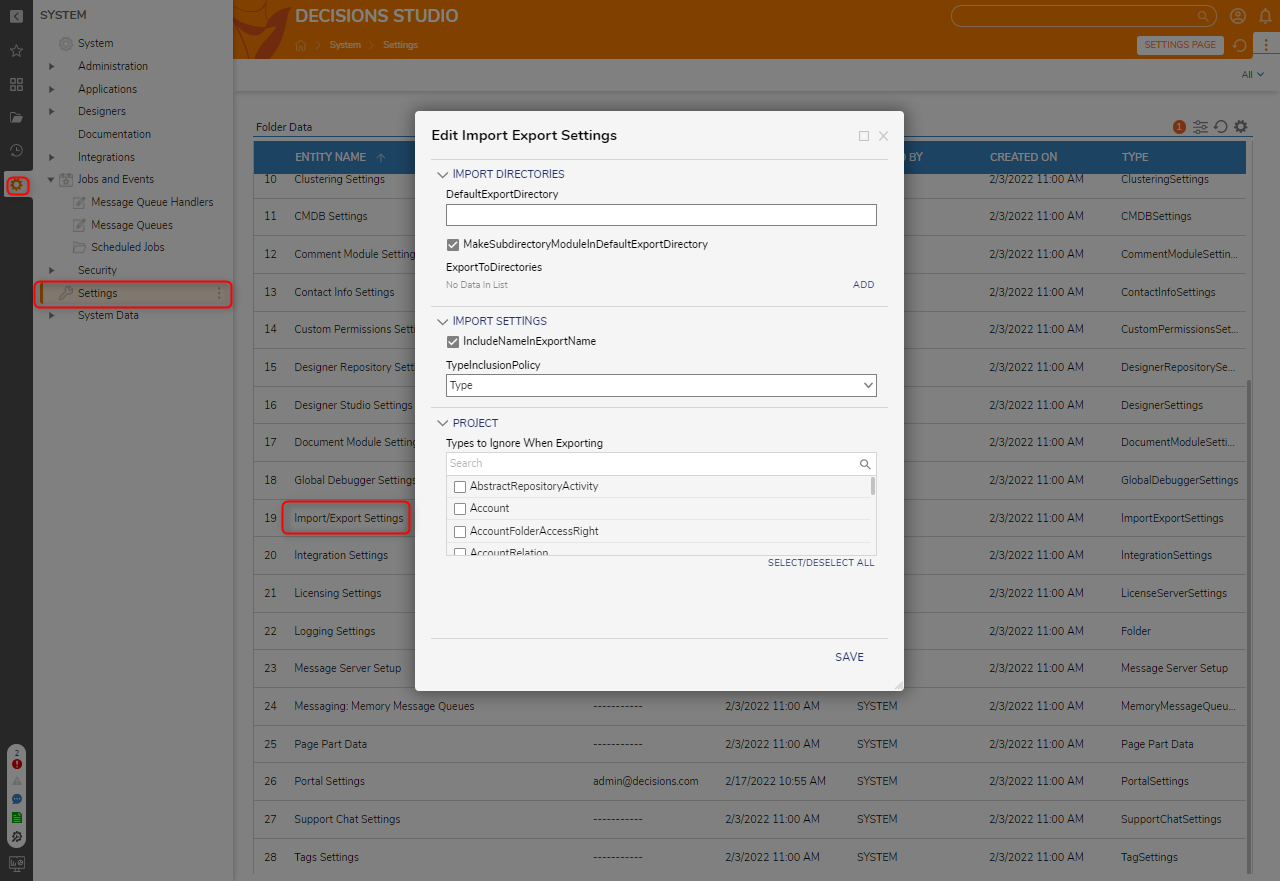
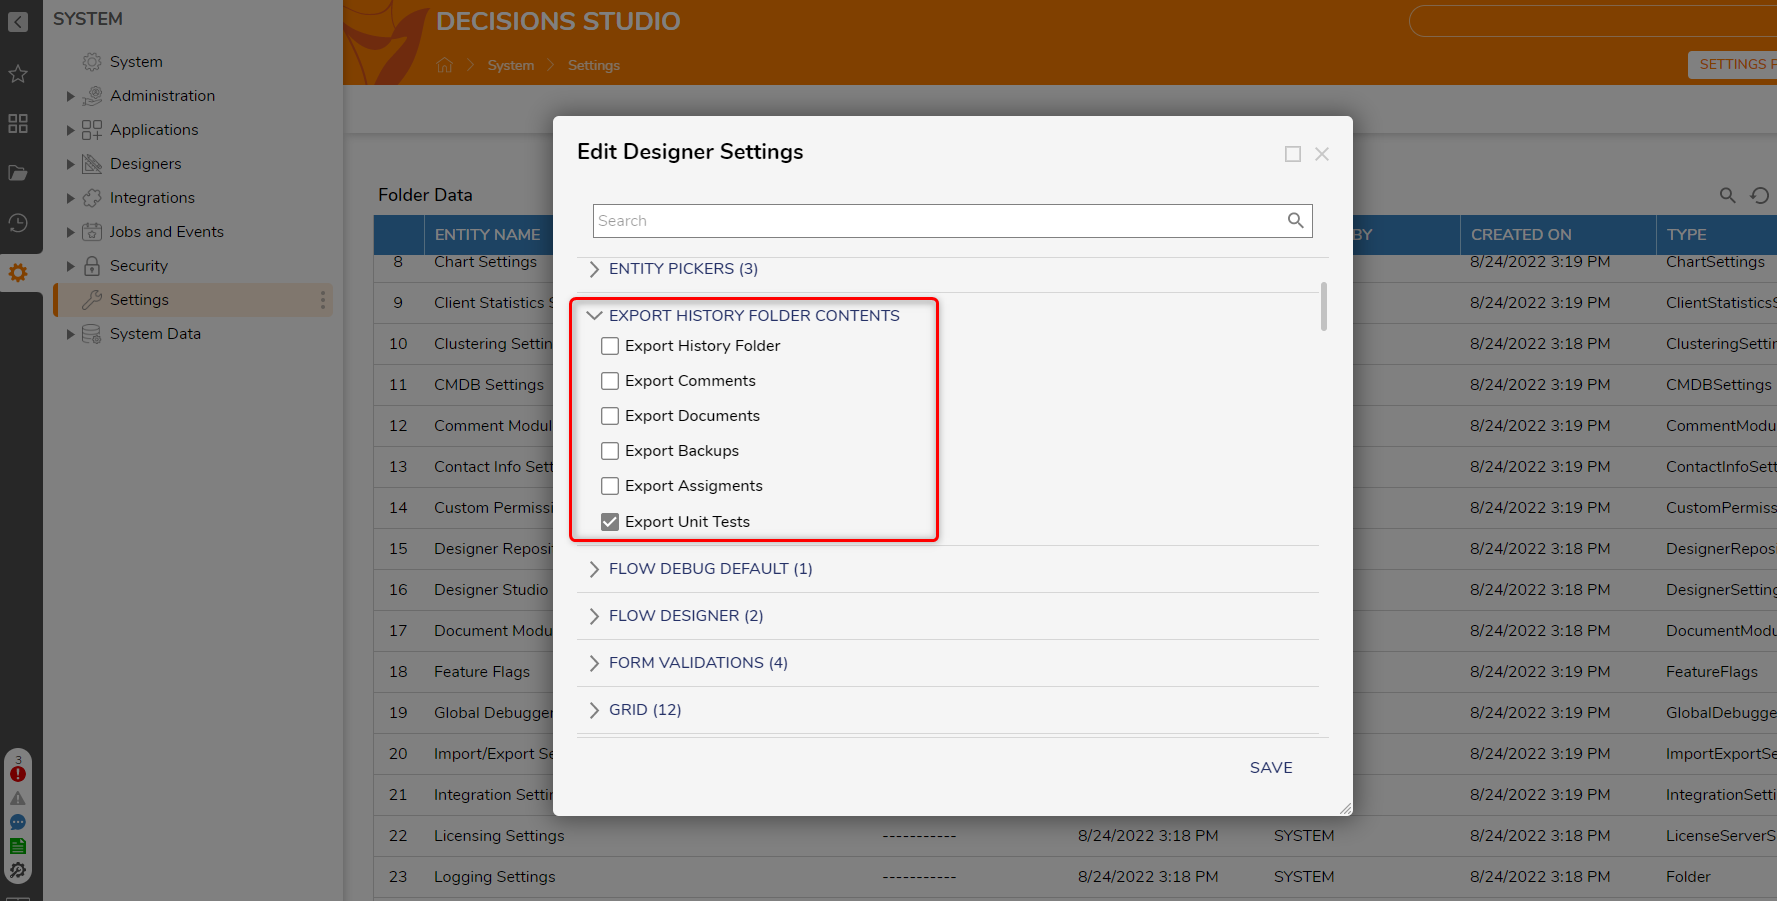
Exporting History Content
When exporting the History folder, users can select what content will be exported by navigating to System > Settings > Designer Studio Settings and selecting the desired options under the EXPORT HISTORY FOLDER CONTENTS category.