Overview
Users may submit custom images into the Decisions Image Library, where they may be added to Forms, Pages, etc., to suit aesthetics and/or branding needs best.
Uploading an image in the Decisions memory allows multiple users in the same instance to quickly access similar images, such as logos and icons, when creating an Element. This removes the repetitive rework of selecting the same image URL and/or image file from a device.
Custom images support the following image file extensions.
- SVG
- ICO
- JPG / JPEG
- PNG
There are two ways to add Custom Images to Decisions: the System folder or the File Directory.
System Folder
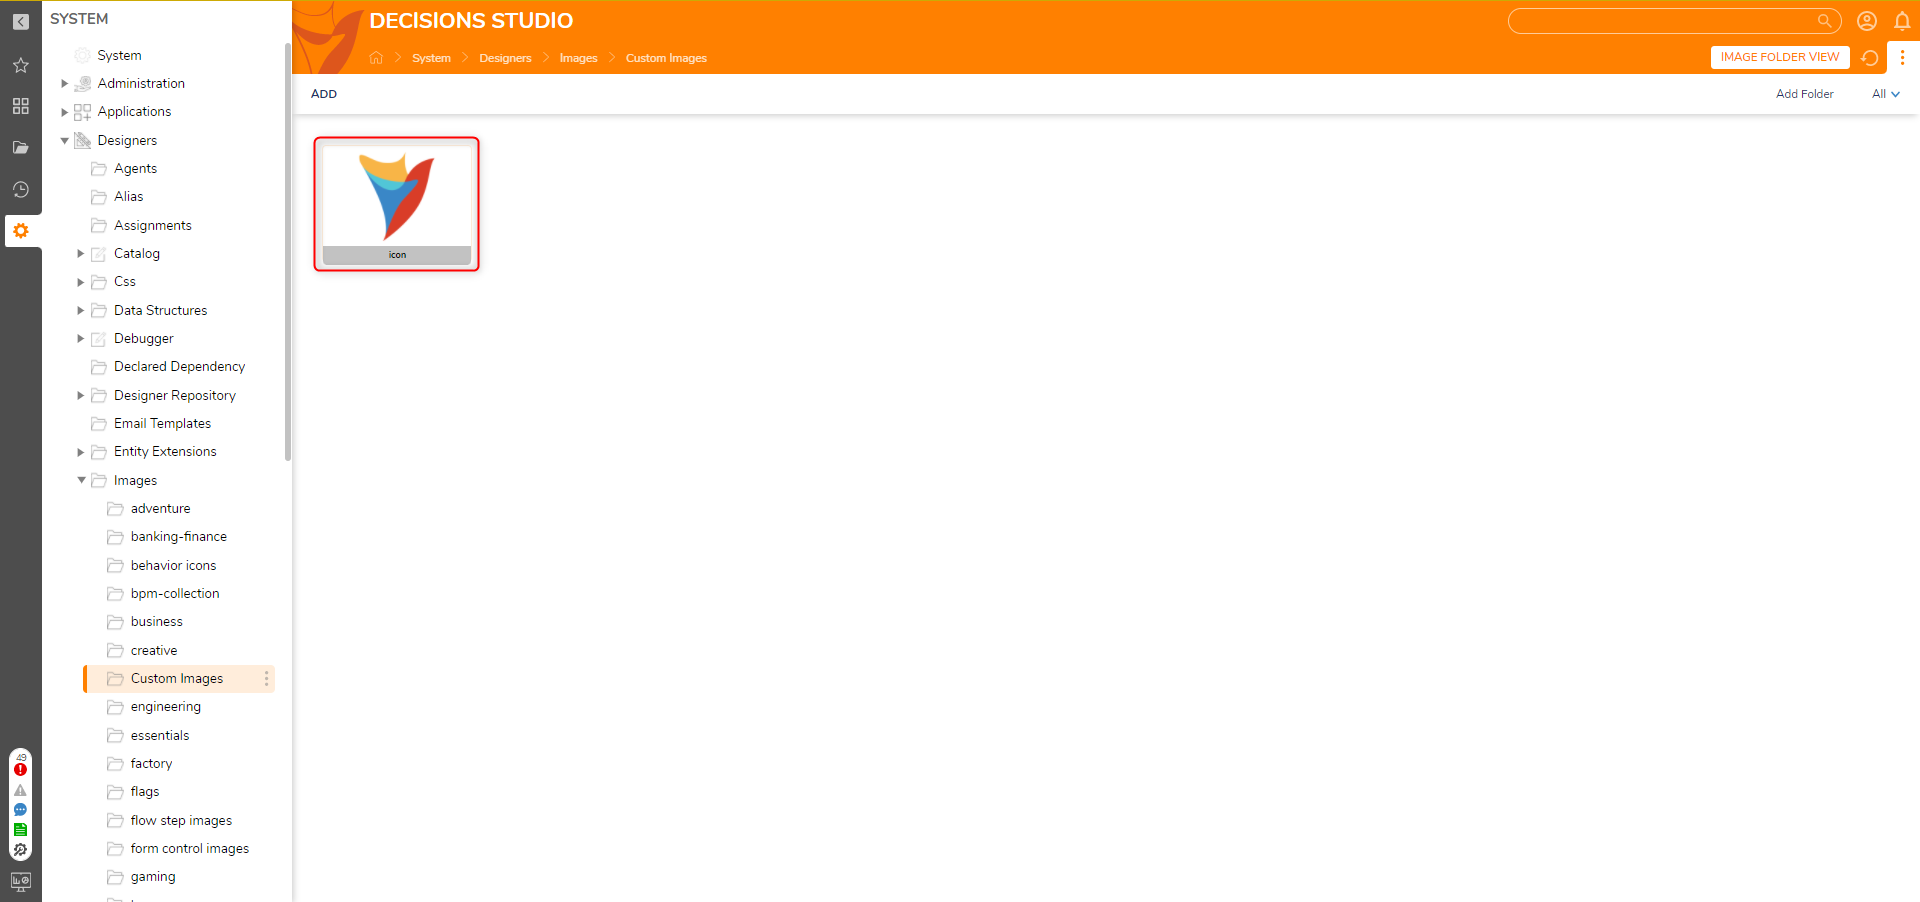
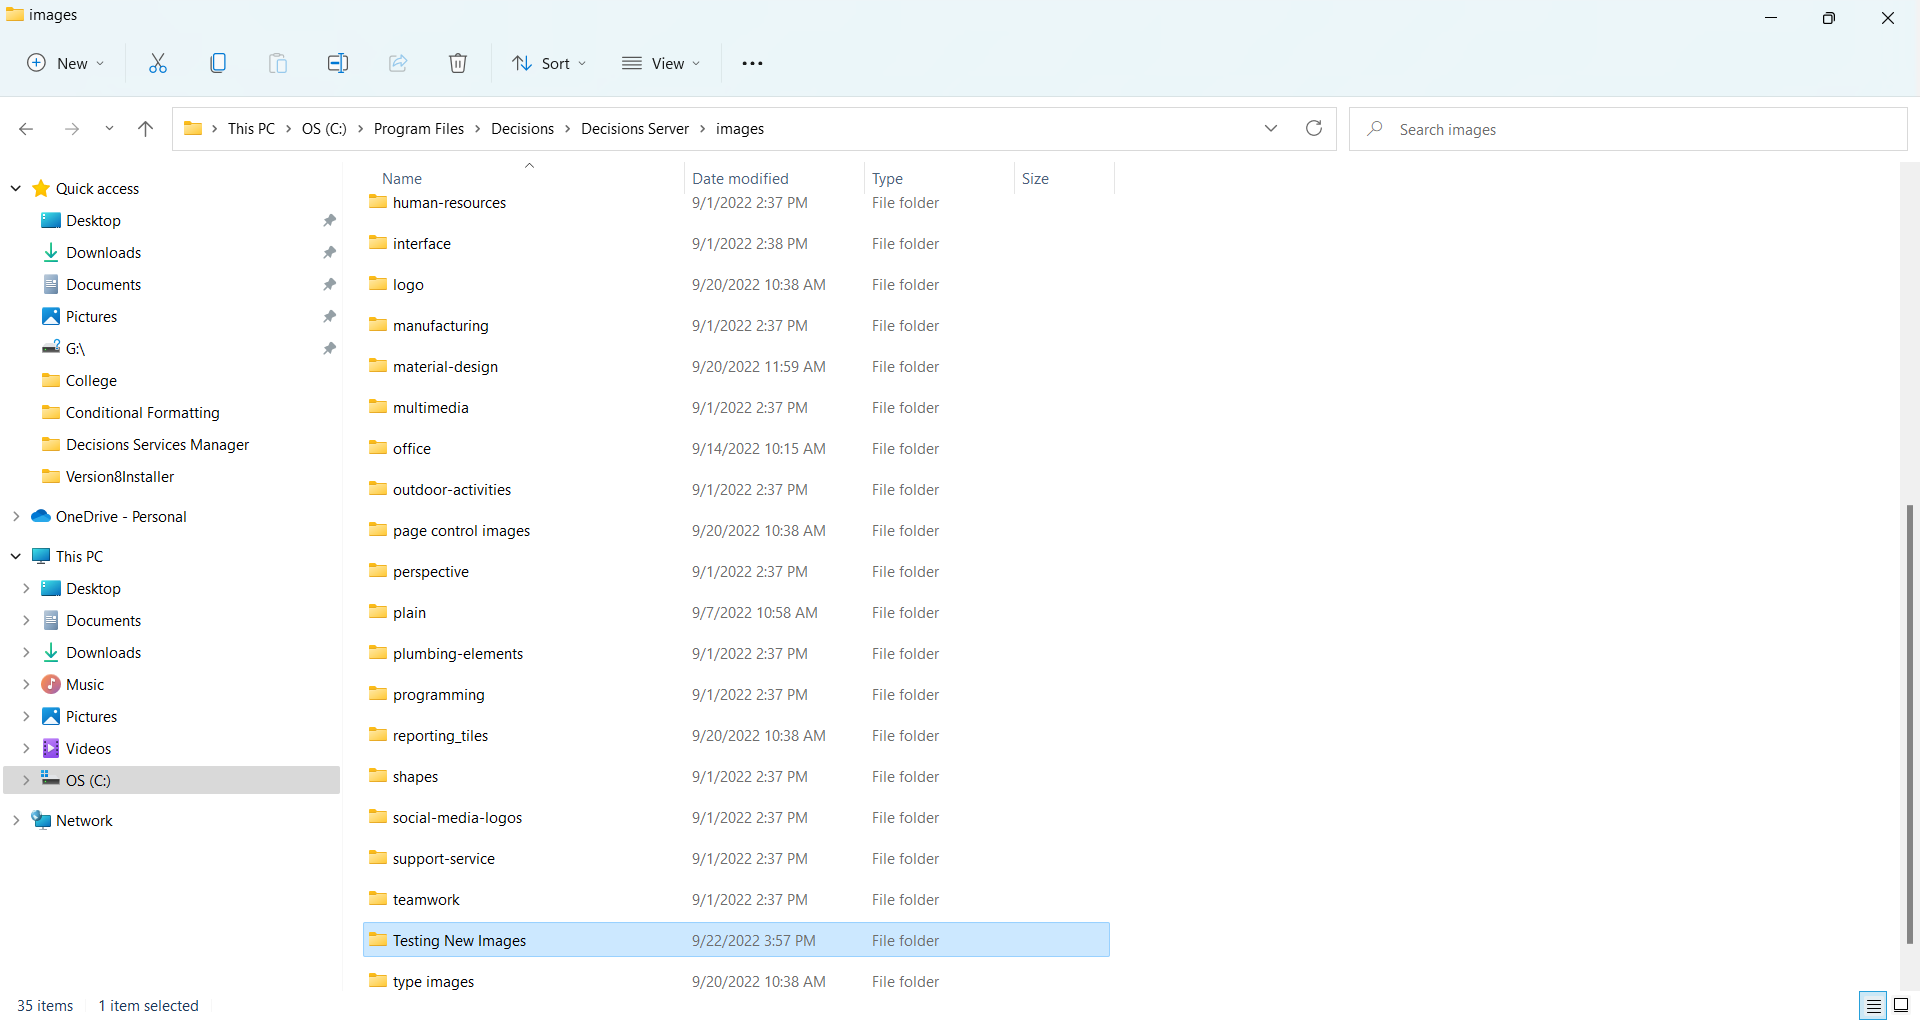
- Navigate to System > Designers > Images > Custom Images.
- Select ADD at the top left of the Custom Images folder.
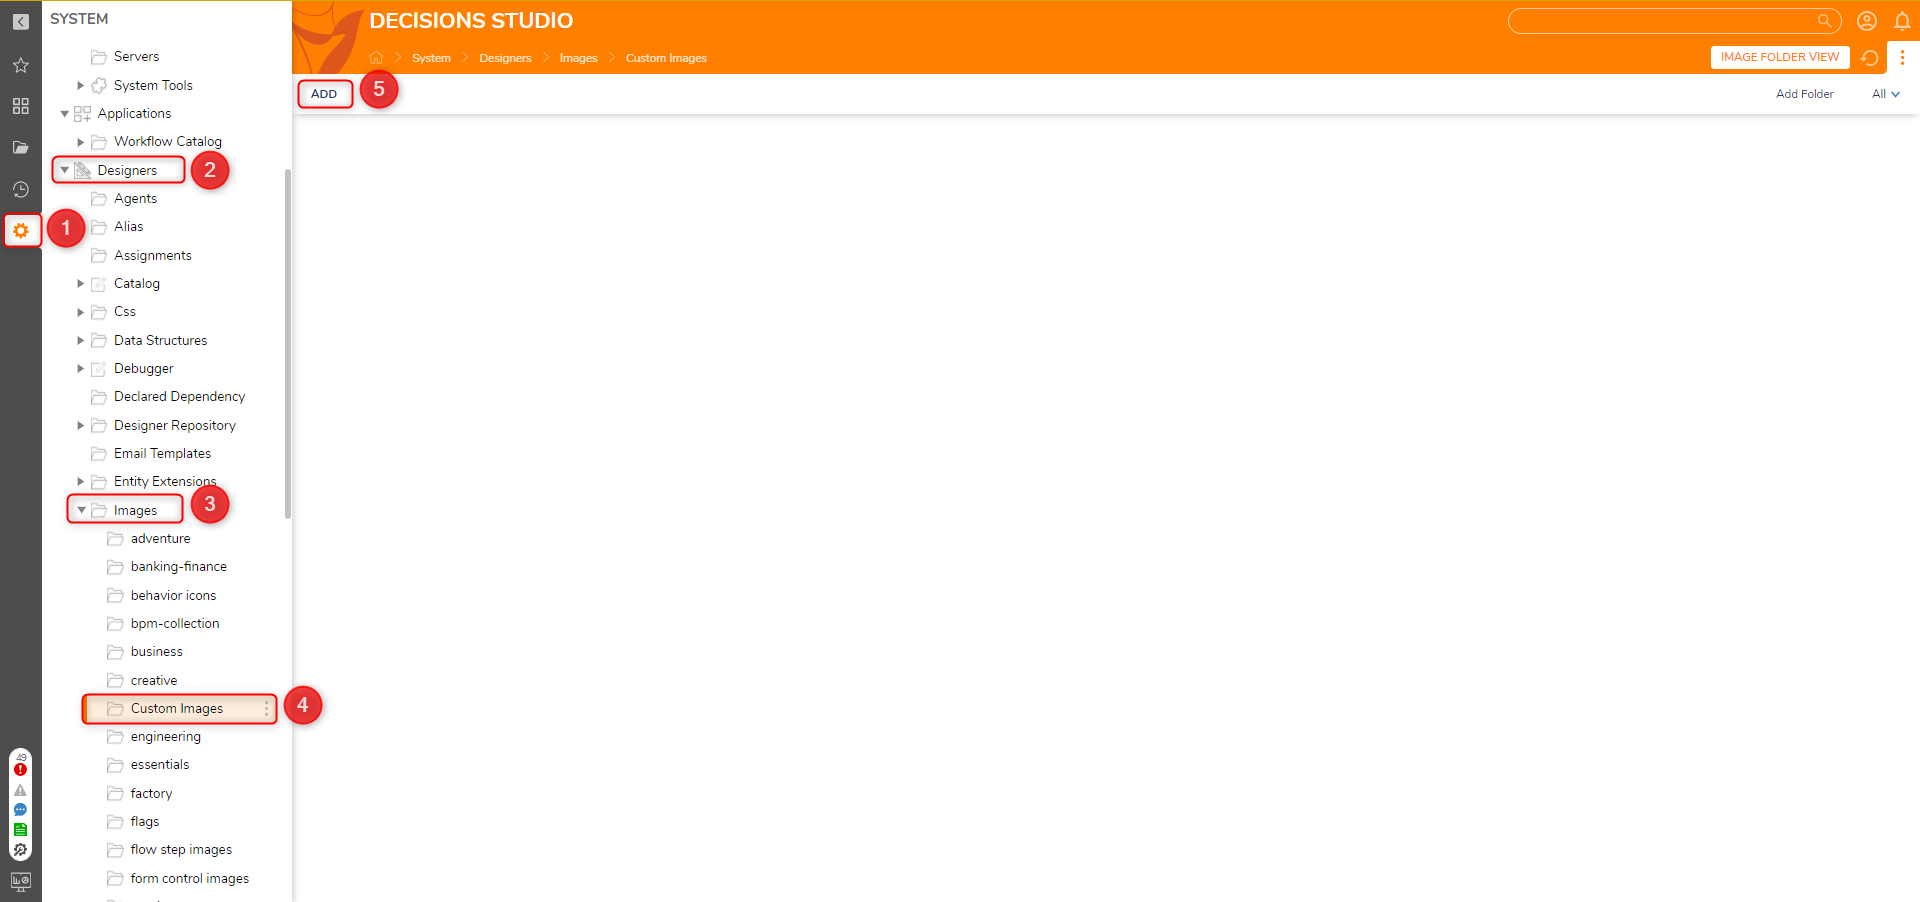
- In the Add window, drag or choose a supported image file to upload, then confirm the selection by choosing UPLOAD IMAGE. Refresh the browser to view the newly uploaded image in the folder.
File Directory
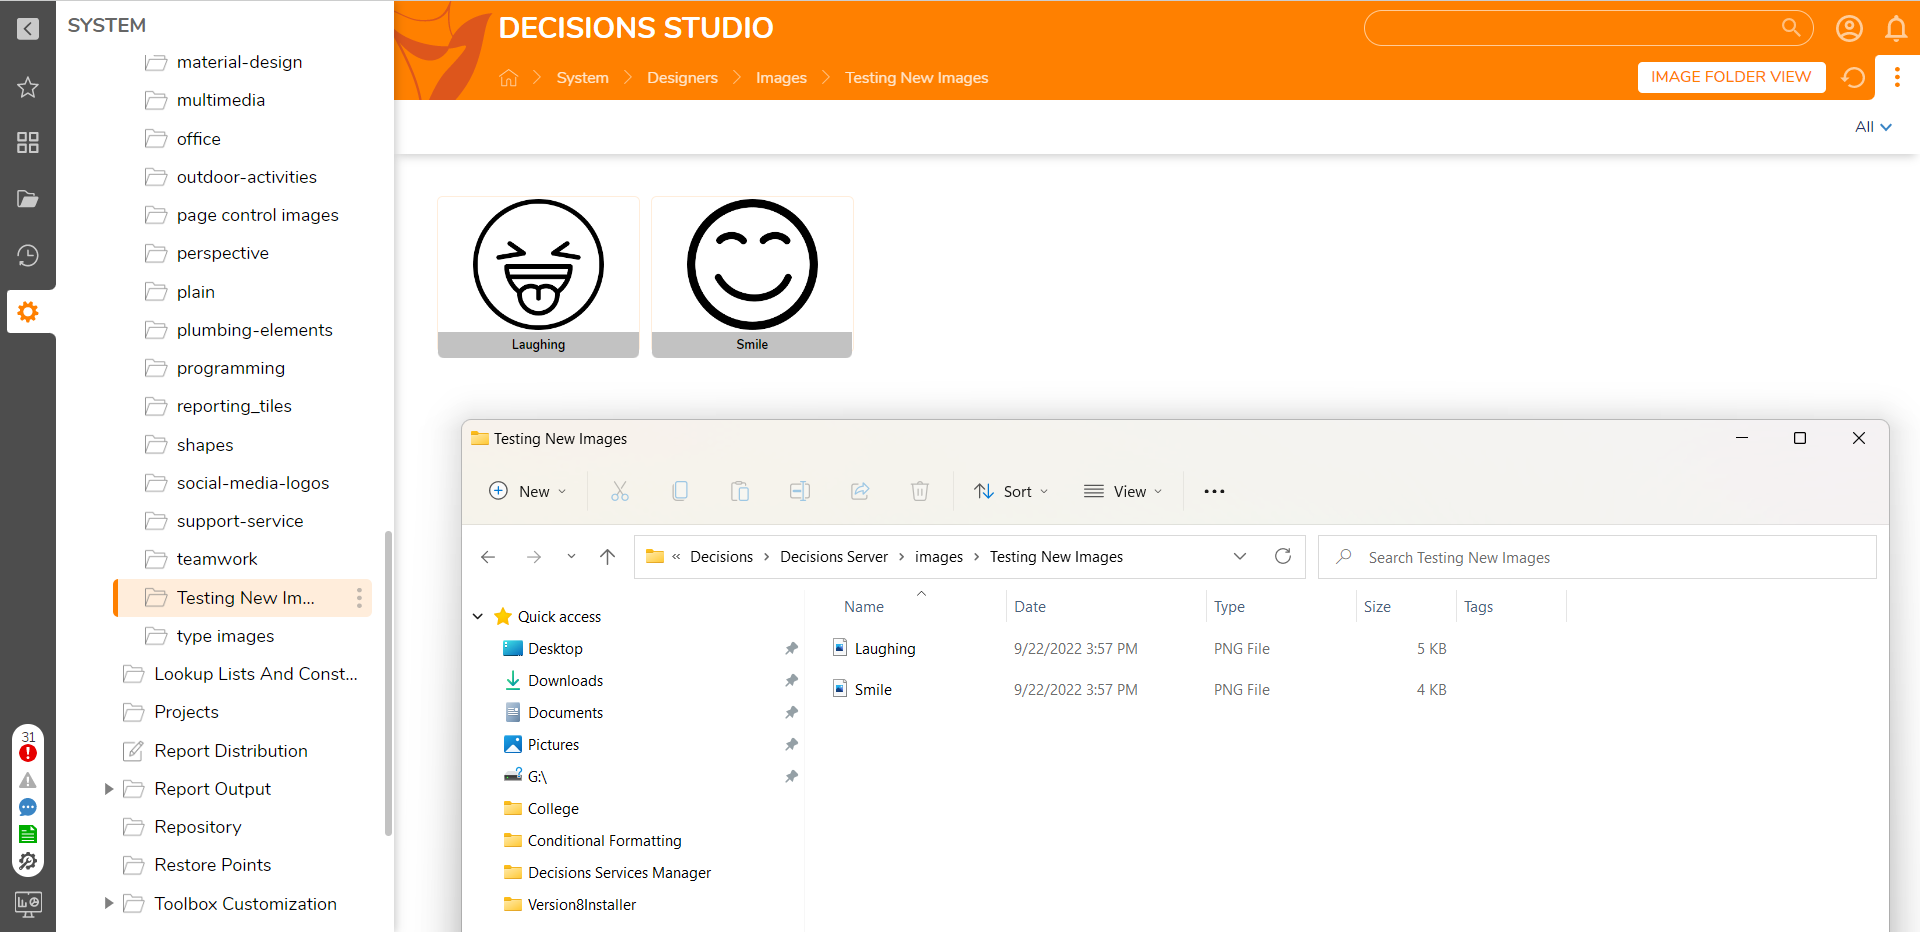
- Create a Folder with the desired image files in C:\Program Files\Decisions\Decisions Server\images.
- Restart the Decisions server. Restart is only necessary on initial folder creation and does not need to occur every time an image is uploaded.
- Navigate to System > Designer > Images to see the newly added image folder.
Removing a Custom Image from the Studio
Once uploaded into the Custom Images folder, users cannot delete custom images directly from the Studio/Portal. Instead, users must remove custom images via Flow logic.
Download and import this example file or build this project alongside the below example to learn how this works.
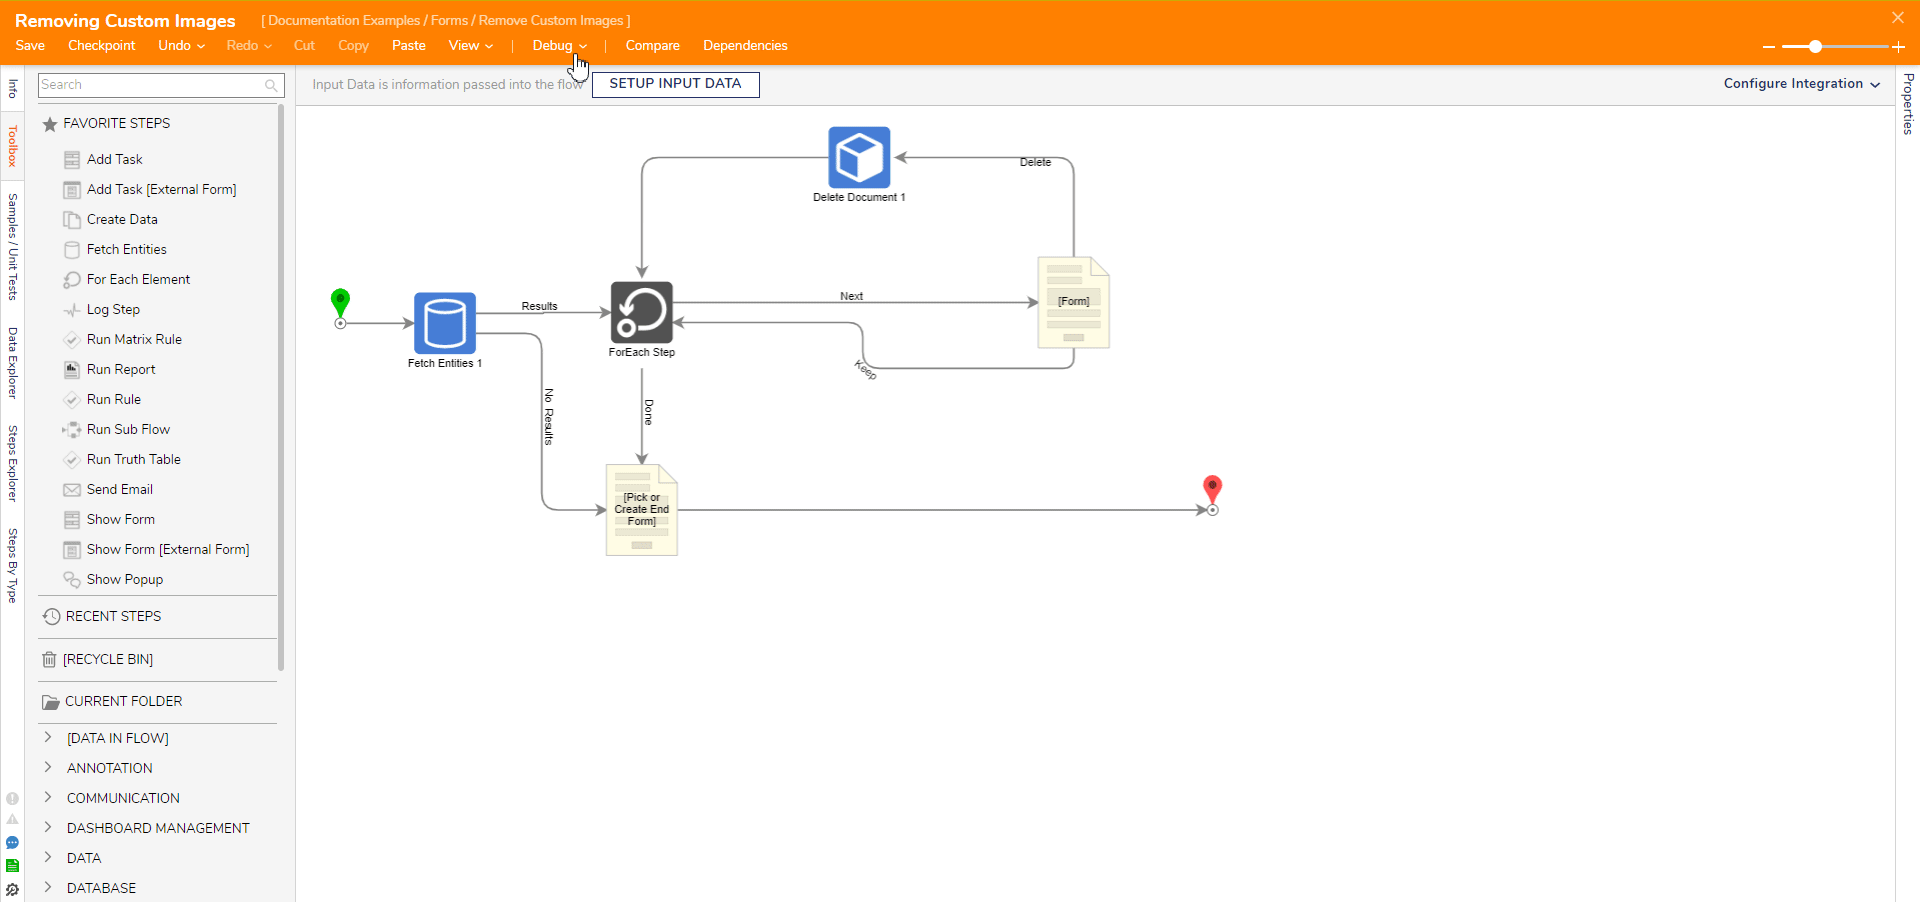
- In a Designer Project, create a new Flow. It will automatically open in the Flow Designer.
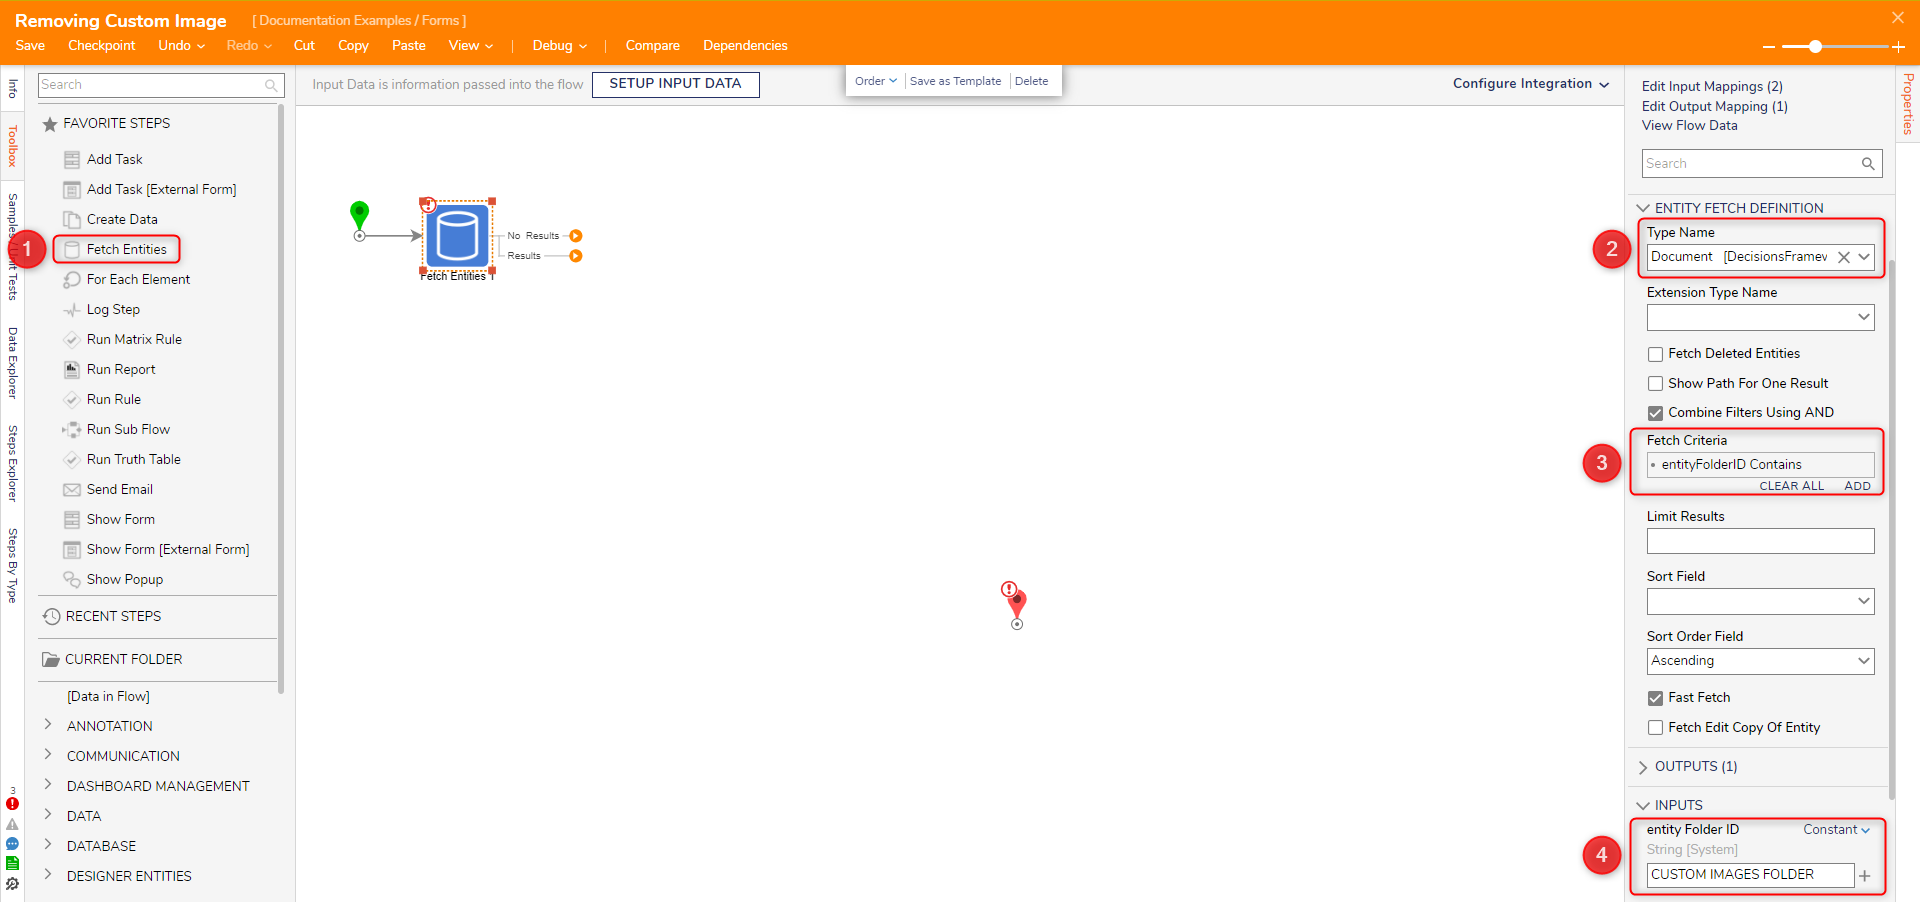
- From the Toolbox's Favorite Steps section, add a Fetch Entities step after the Start step.
- Select the Fetch Entities step to view its Properties. For Type Name, search and select for the Document data type.
- Create a new Fetch Criteria and select entityFolderID for the Field Name. For Query Match Type, select Contains. Select OK to confirm criteria creation.
- Under INPUTS > entity Folder ID, change the mapping type to Constant and enter "CUSTOM IMAGES FOLDER". This step will now fetch Documents from the Custom Images Folder.
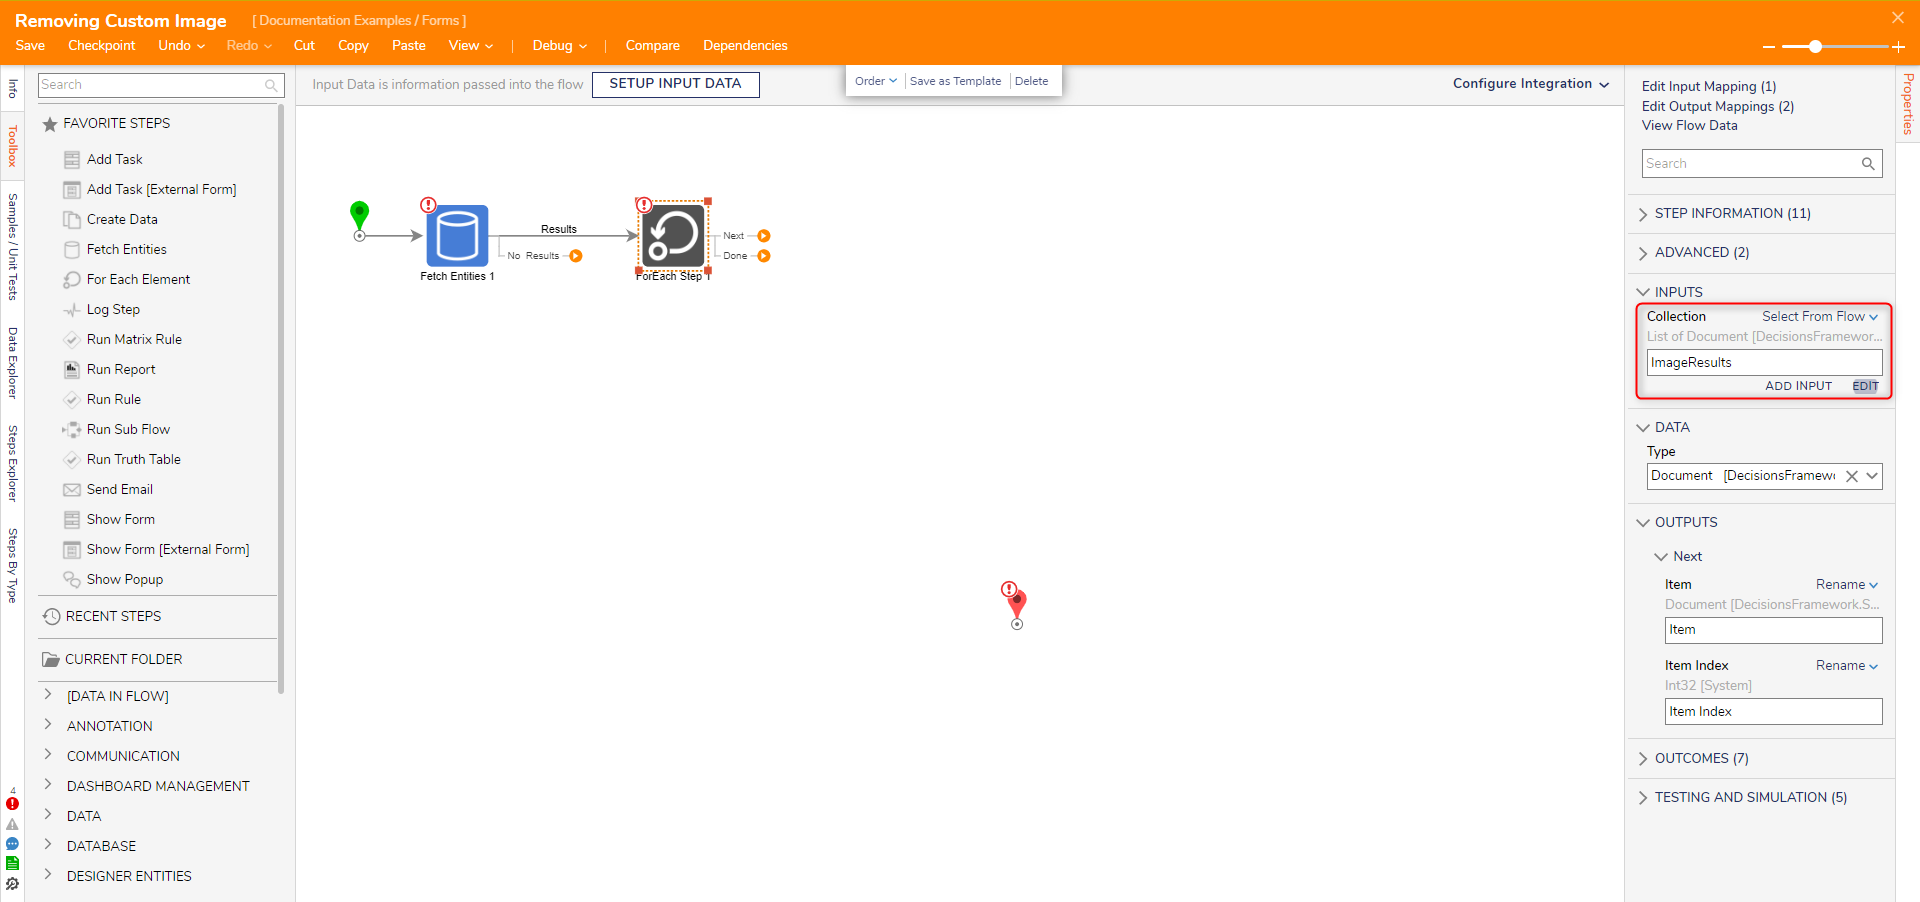
- After the Results outcome path of the Fetch Entities step, add a ForEach step. For its Collection input, select the Fetch Entities' output (e.g. 'ImageResults) by using Select From Flow.
- After the Next outcome of the ForEach Step, add a Show Form step and create a new Form. It will automatically open in the Form Designer.
- In the Form Designer, add a Document Viewer control, four Labels with two containing Data Names "ContainingFolder" and "ImageFileName", and two Buttons named "Delete" and "Keep".
For the Document Viewer's Data Name, enter "InputImage". Save and exit the Form Designer.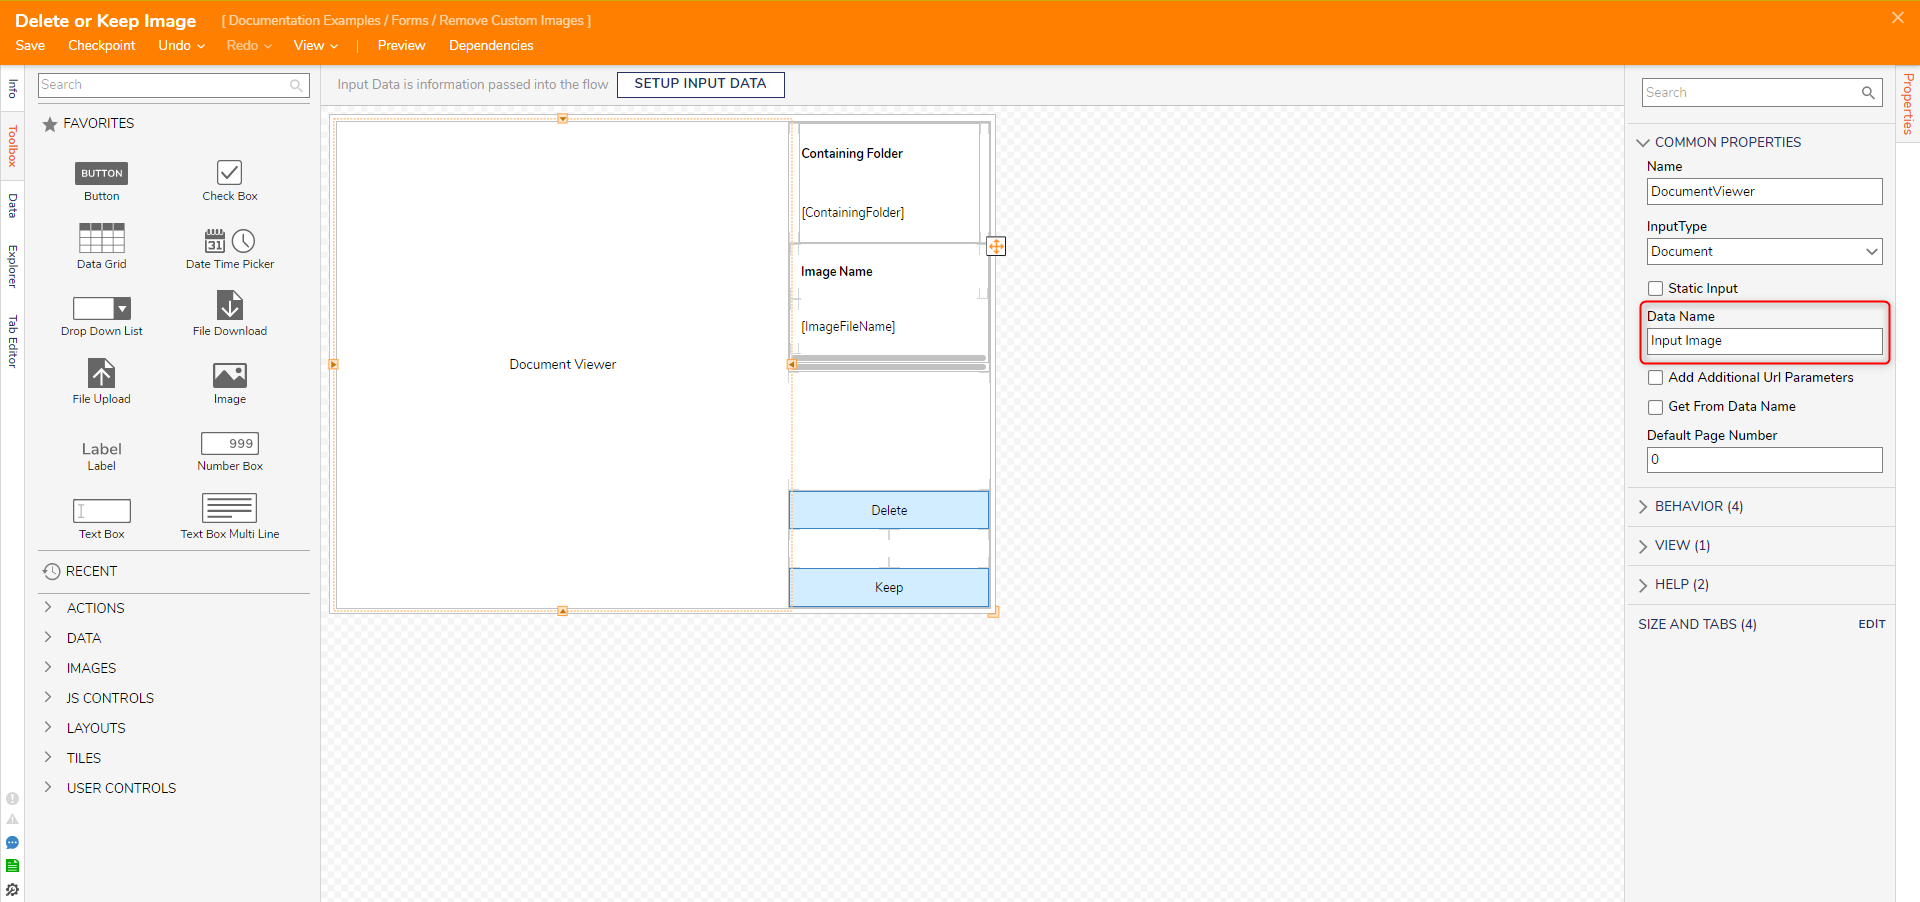
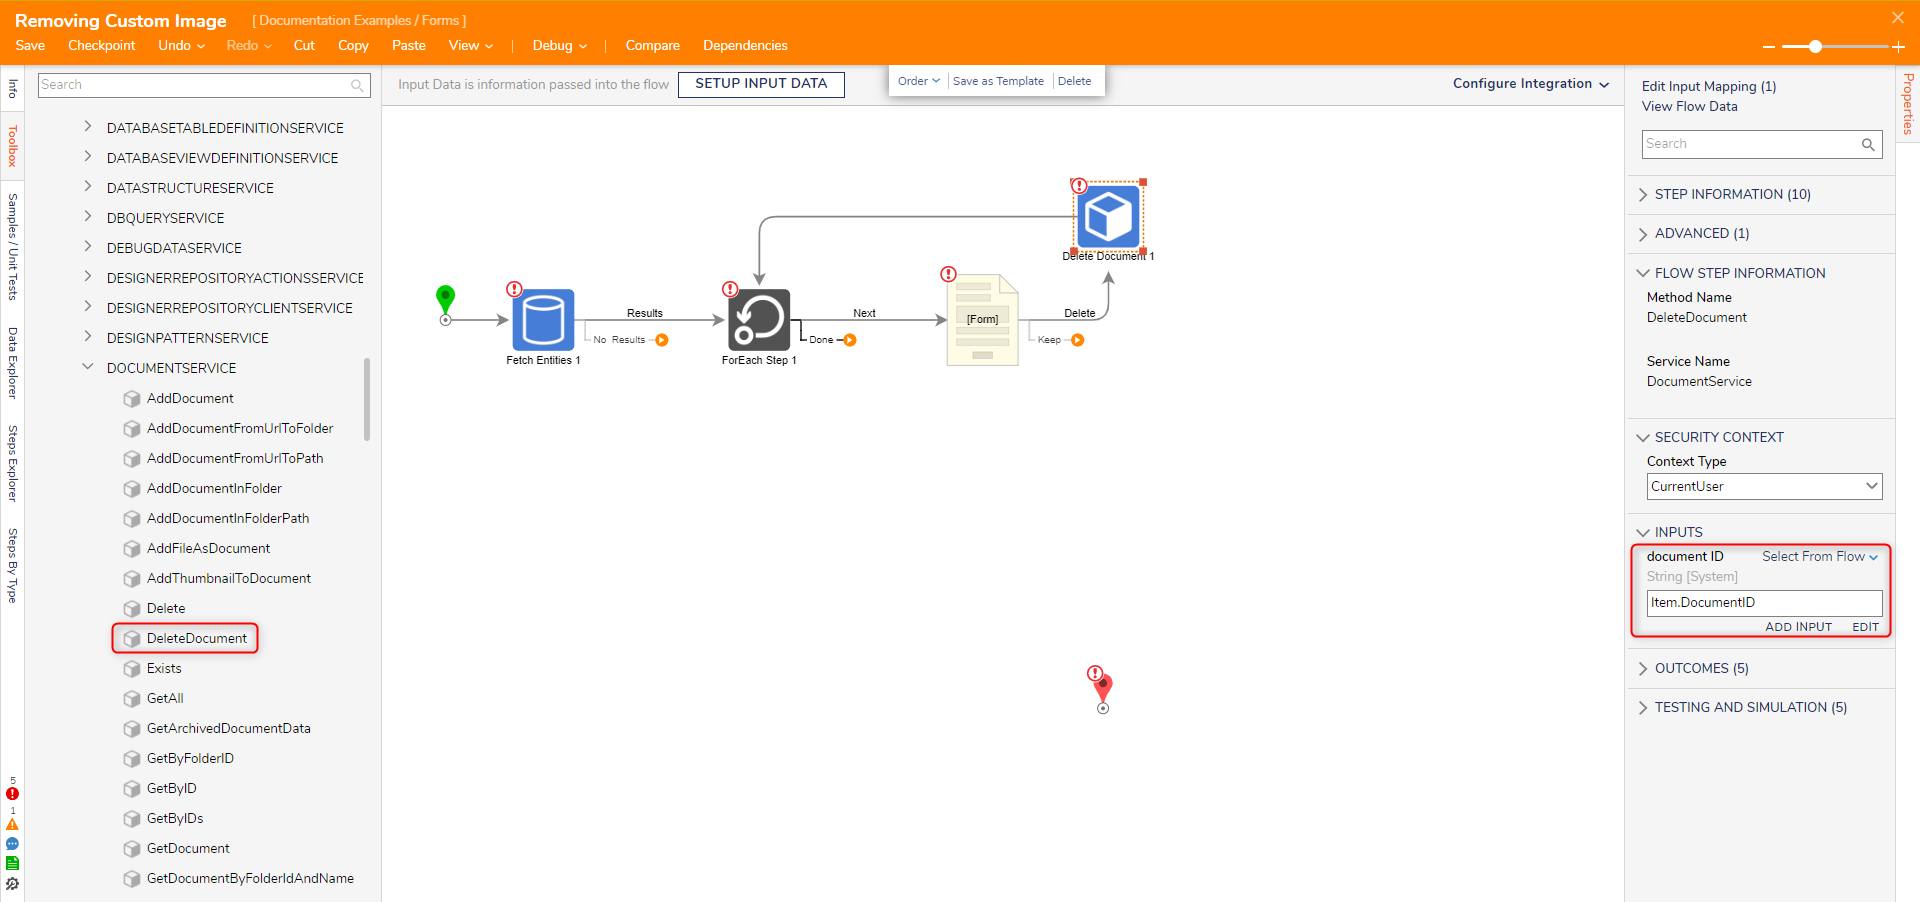
- Back in the Flow Designer, add a Delete Document step found under Integration > Internal Services > Document Service after the Delete outcome path. For the document ID input, select the Item output of the ForEach step, then select DocumentID, e.g., "Item.DocumentID".
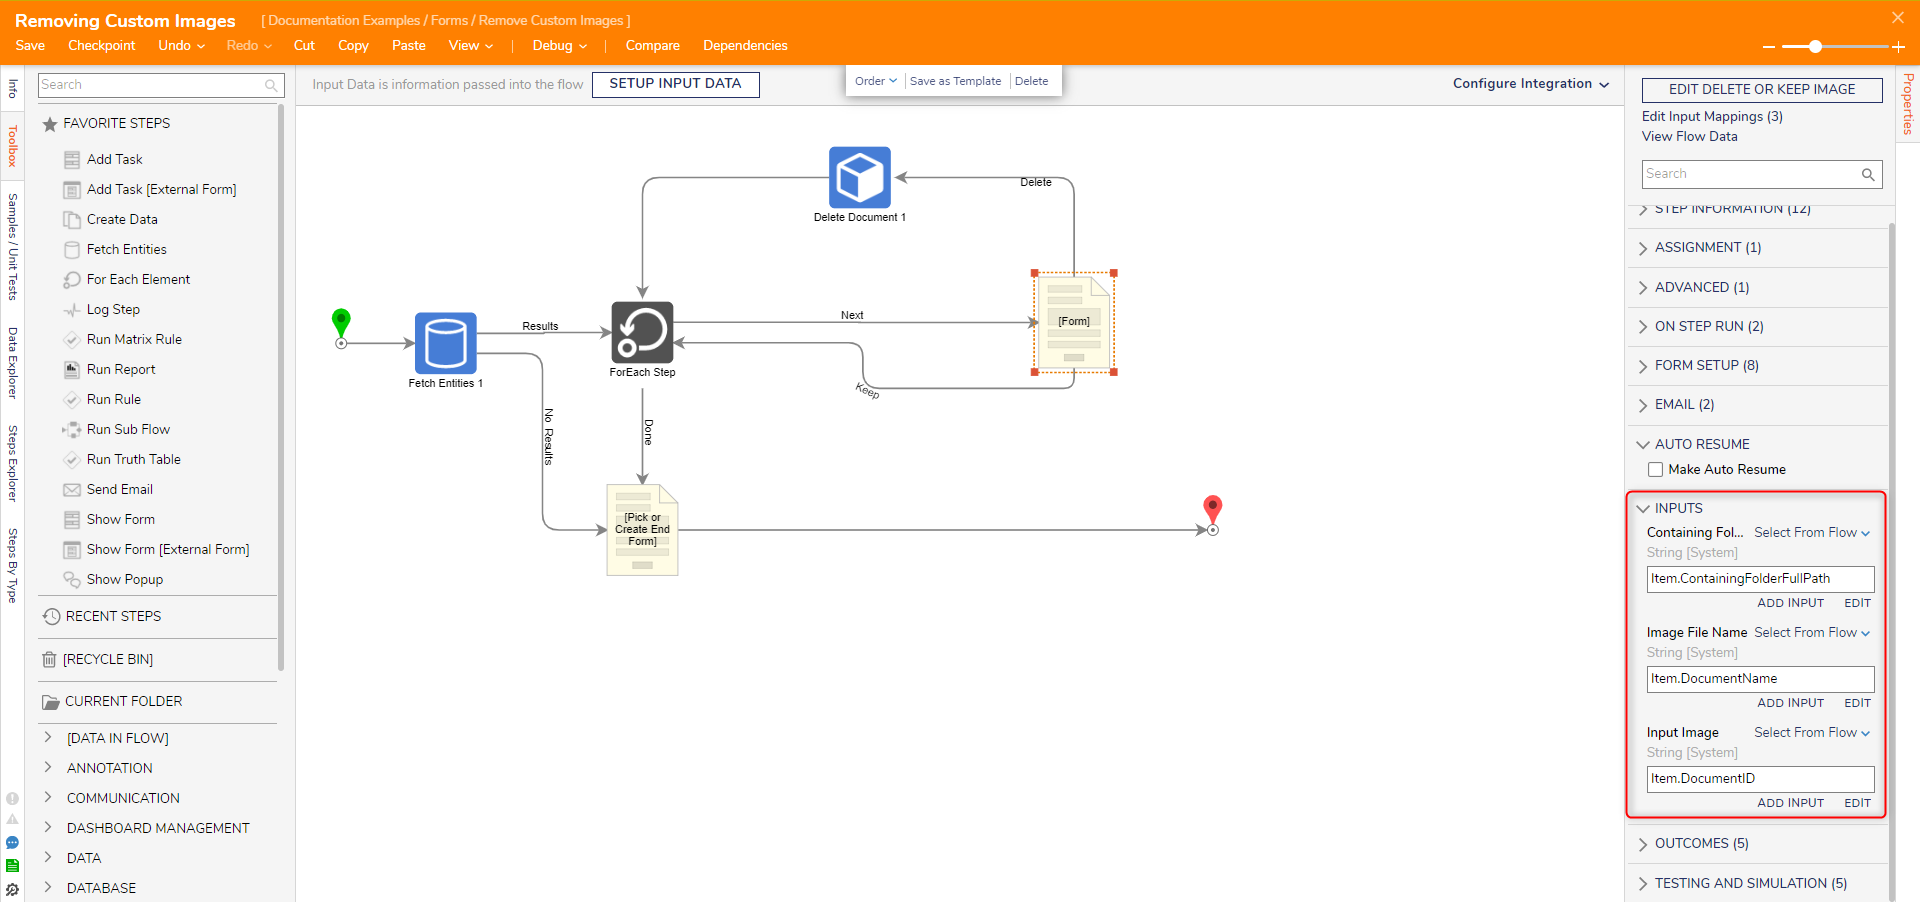
- Select the Form and view its Inputs. Changing each to Select From Flow, map the following inputs: Containing Folder to Item.ContainingFolderFullPath, Image File Name to Item.DocumentName, and Input Image to Item.DocumentID.
- For the Keep outcome path, direct it back to the ForEach step to preserve the custom image.
- After the ForEach step's Done outcome path, add a Pick or Create End Form step. Connect the Fetch Entities No Results outcome path to this step as well. Connect the Pick or Create End Form step to the End step.
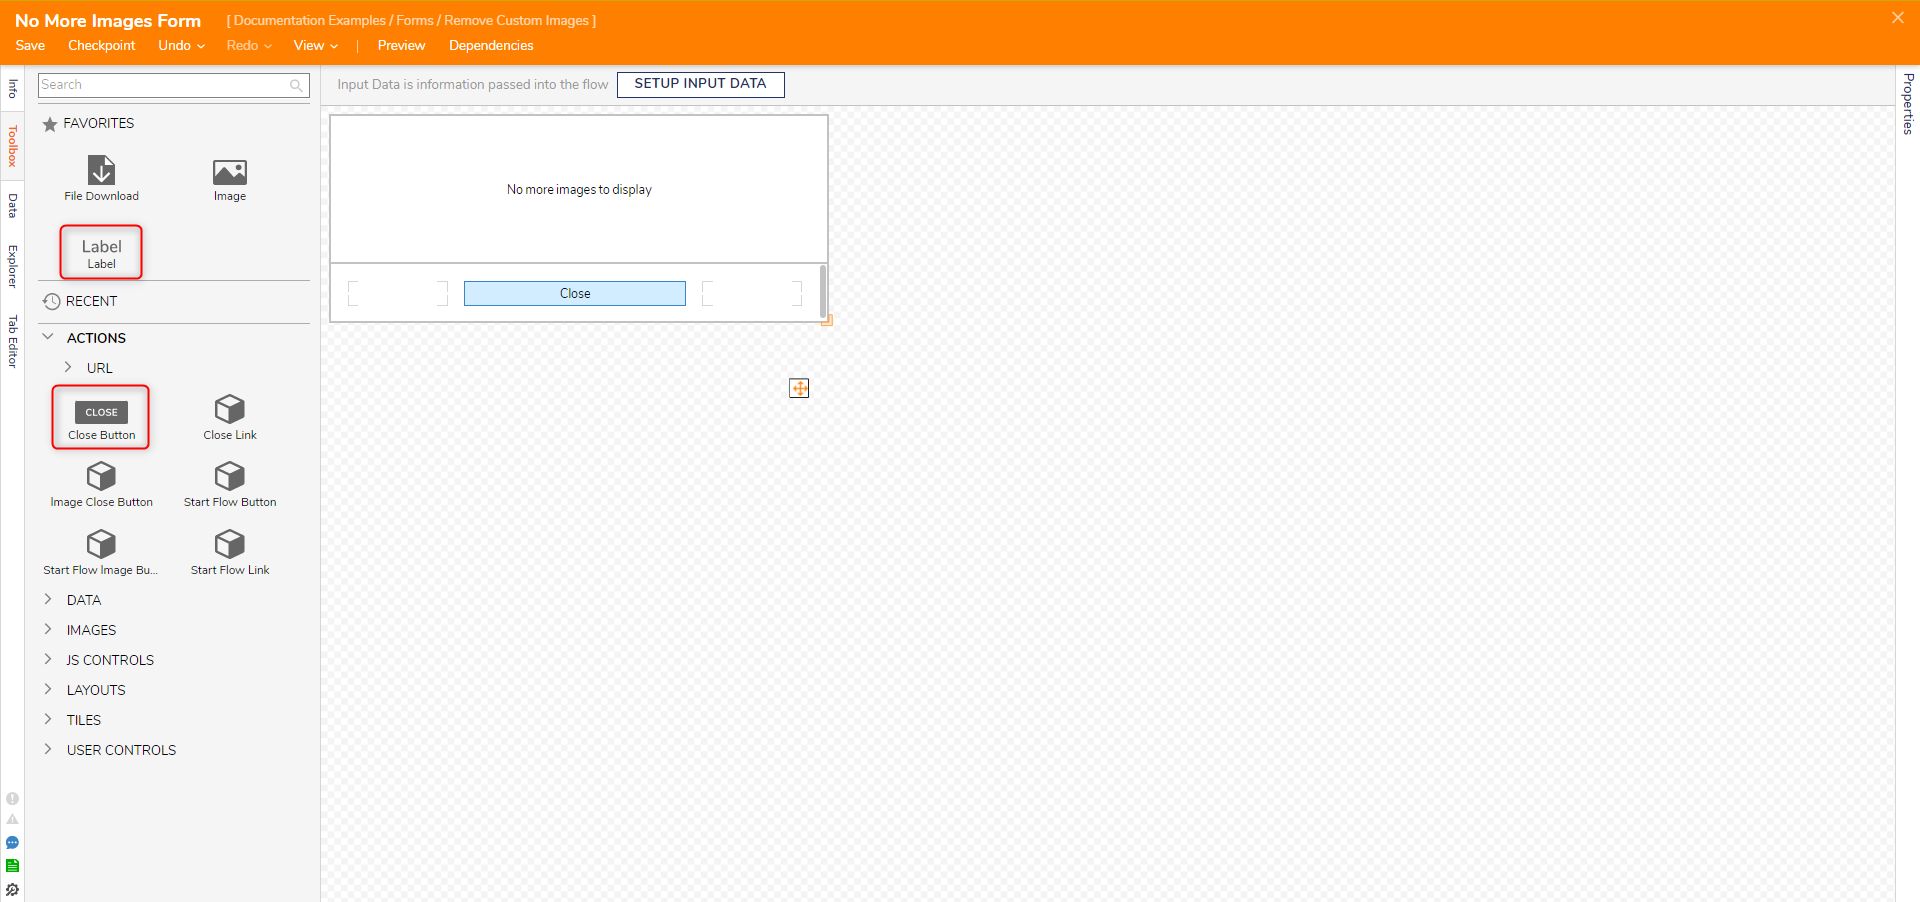
- Create a new End Form and open it in the Form Designer.
- Add a Label with text confirming deletion and a Close Button under the Actions section of the Toolbox. Save and exit the Form Designer.
Debug
- Select the Debug action from the top orange action bar. Selecting this automatically saves the Flow.
- Select Start Debugging.
- When the first Form pops up, users may choose to delete or keep each image found in the Custom Images Folder. Those marked for deletion are deleted by the Delete Document step before looping back to the ForEach step. After all images are looked through, the second Form either confirms all deletions or confirms no images were found in the folder.