Creating Attached and Detached Pages
Pages/Dashboards may be attached to a parent Folder for easier end-user navigation by appearing as a tab within the Studio and Portal
Unattached Pages may be attached to a Folder after creation, not just during.
Building an Attached Page
- From the Decisions Studio, right-click on the desired Parent Folder and select Manage > Page/Dashboard > Add Page/Dashboard.

- From the Add Page/Dashboard window, provide the desired Page Name, designate an Order value, and if desired, EDIT the ADVANCED SETTINGS. Setting ConfigurationThe following chart represents the function of each setting on the Add Page/Dashboard window:
Setting Function Page Name Provides the name for the Page that appears on the tab at the top of the Folder. Order Designates the order in which a Page appears in the sequence of Pages. A value of "0" represents the first Page in a sequence. Display If Resolution Greater Than/Less Than Determines the boundaries for graphical resolution by which the Page can be displayed in, Display Platforms Dictates which devices the Page can be viewed from. 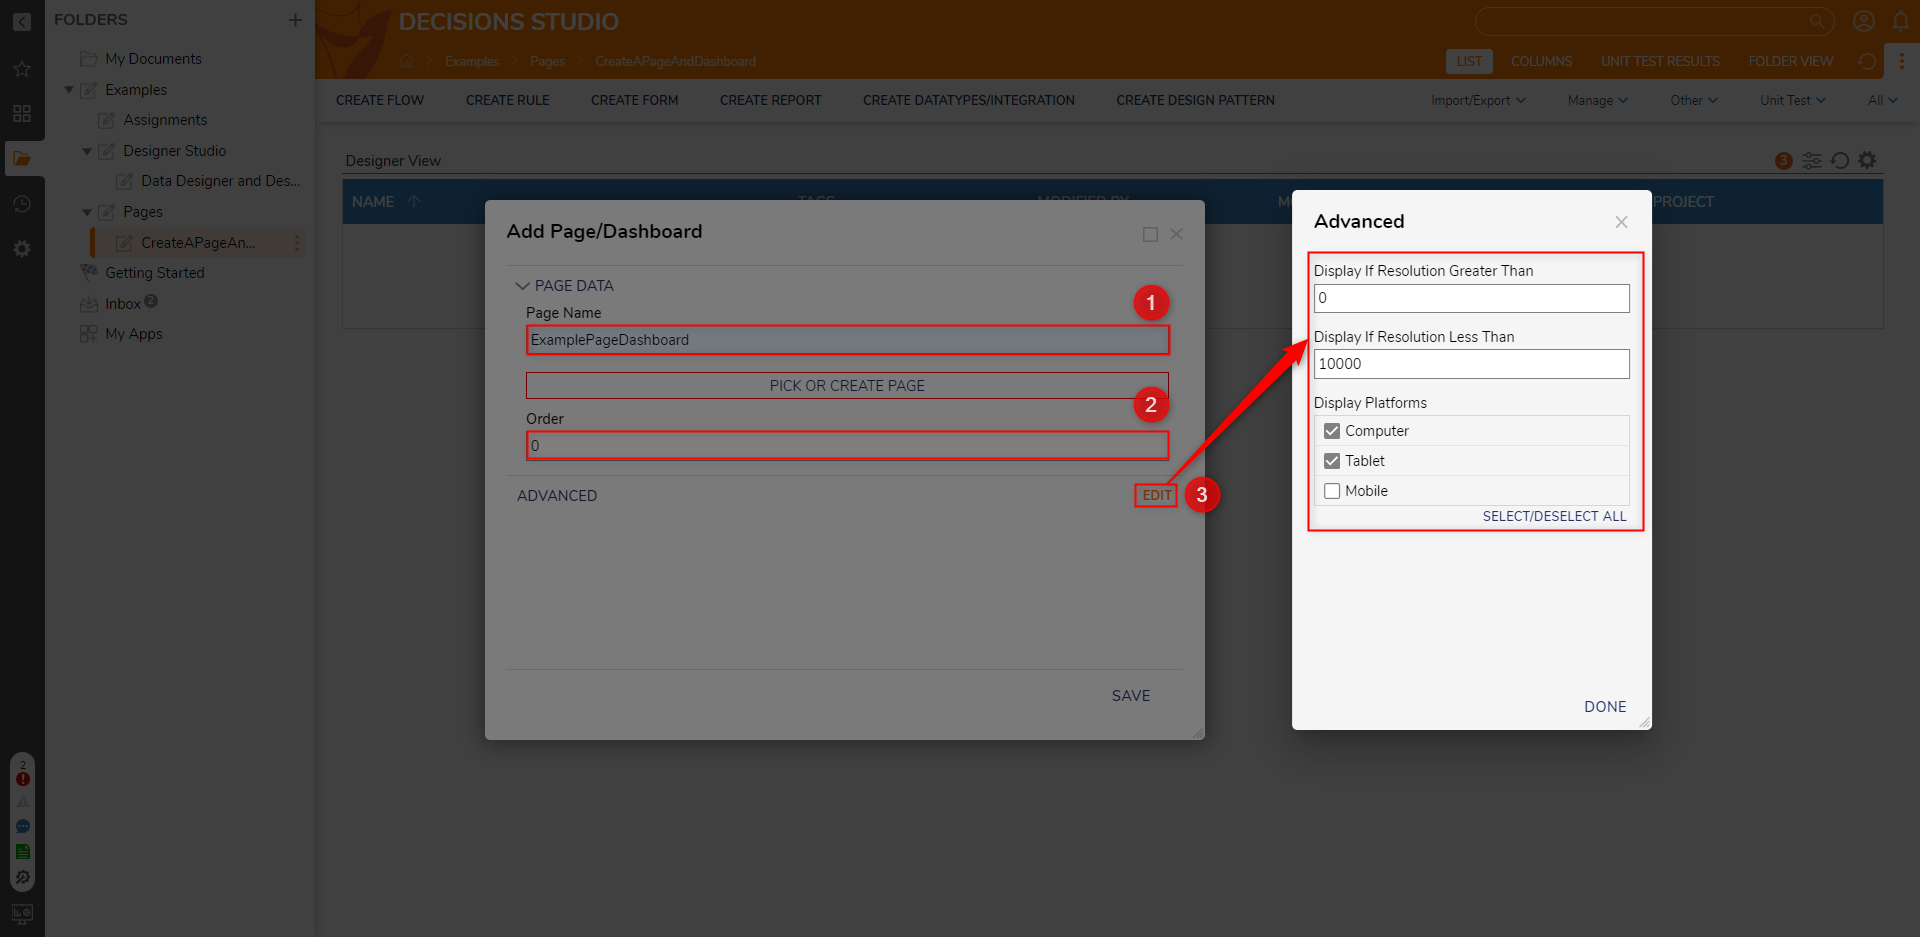
- Click PICK OR CREATE PAGE, then CREATE a new Page. Alternatively, PICK a preexisting one.
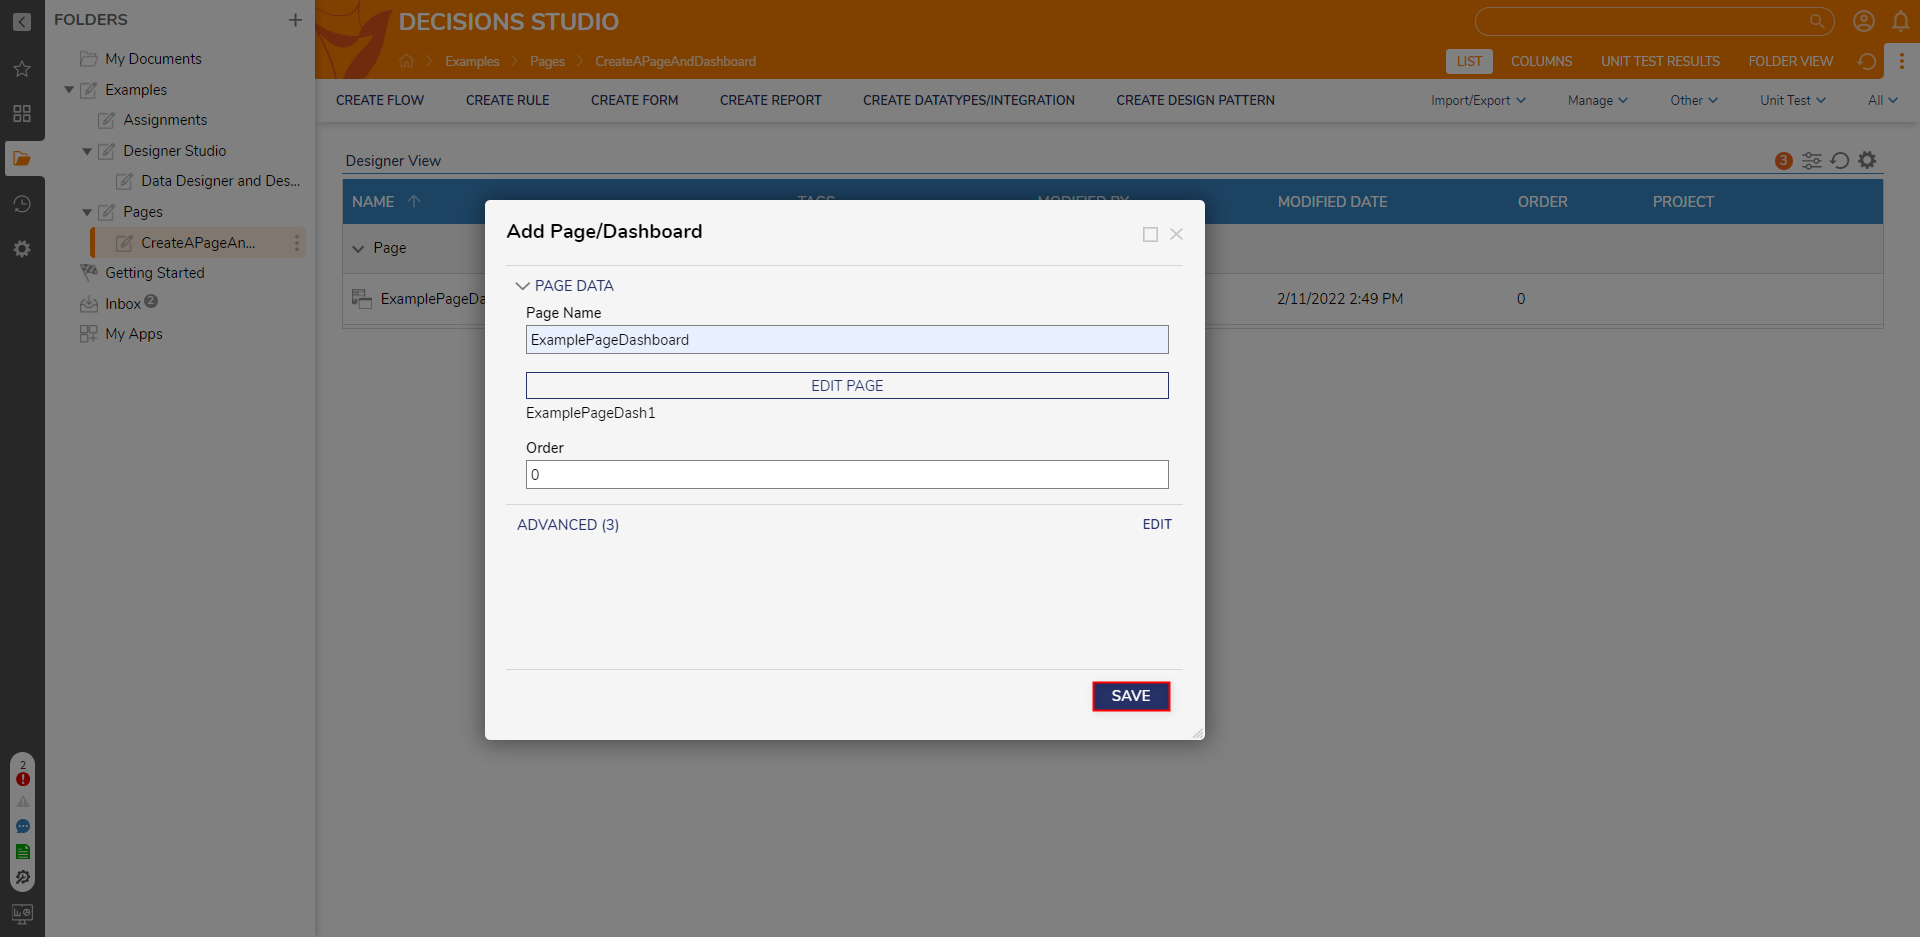
- Design the Page/Dashboard as desired, then Save and close the Page Designer.
- Back in the Add Page/Dashboard window, click SAVE.
Adding a Detached Page
- From a Designer Project, click either CREATE FORM or CREATE REPORT button on the Global Action Bar.
- If selecting CREATE FORM, open the Page/Dashboard section and select Page.
If selecting CREATE REPORT, select Page from either the Favorites or Page/Dashboard sections. Name and create a Page.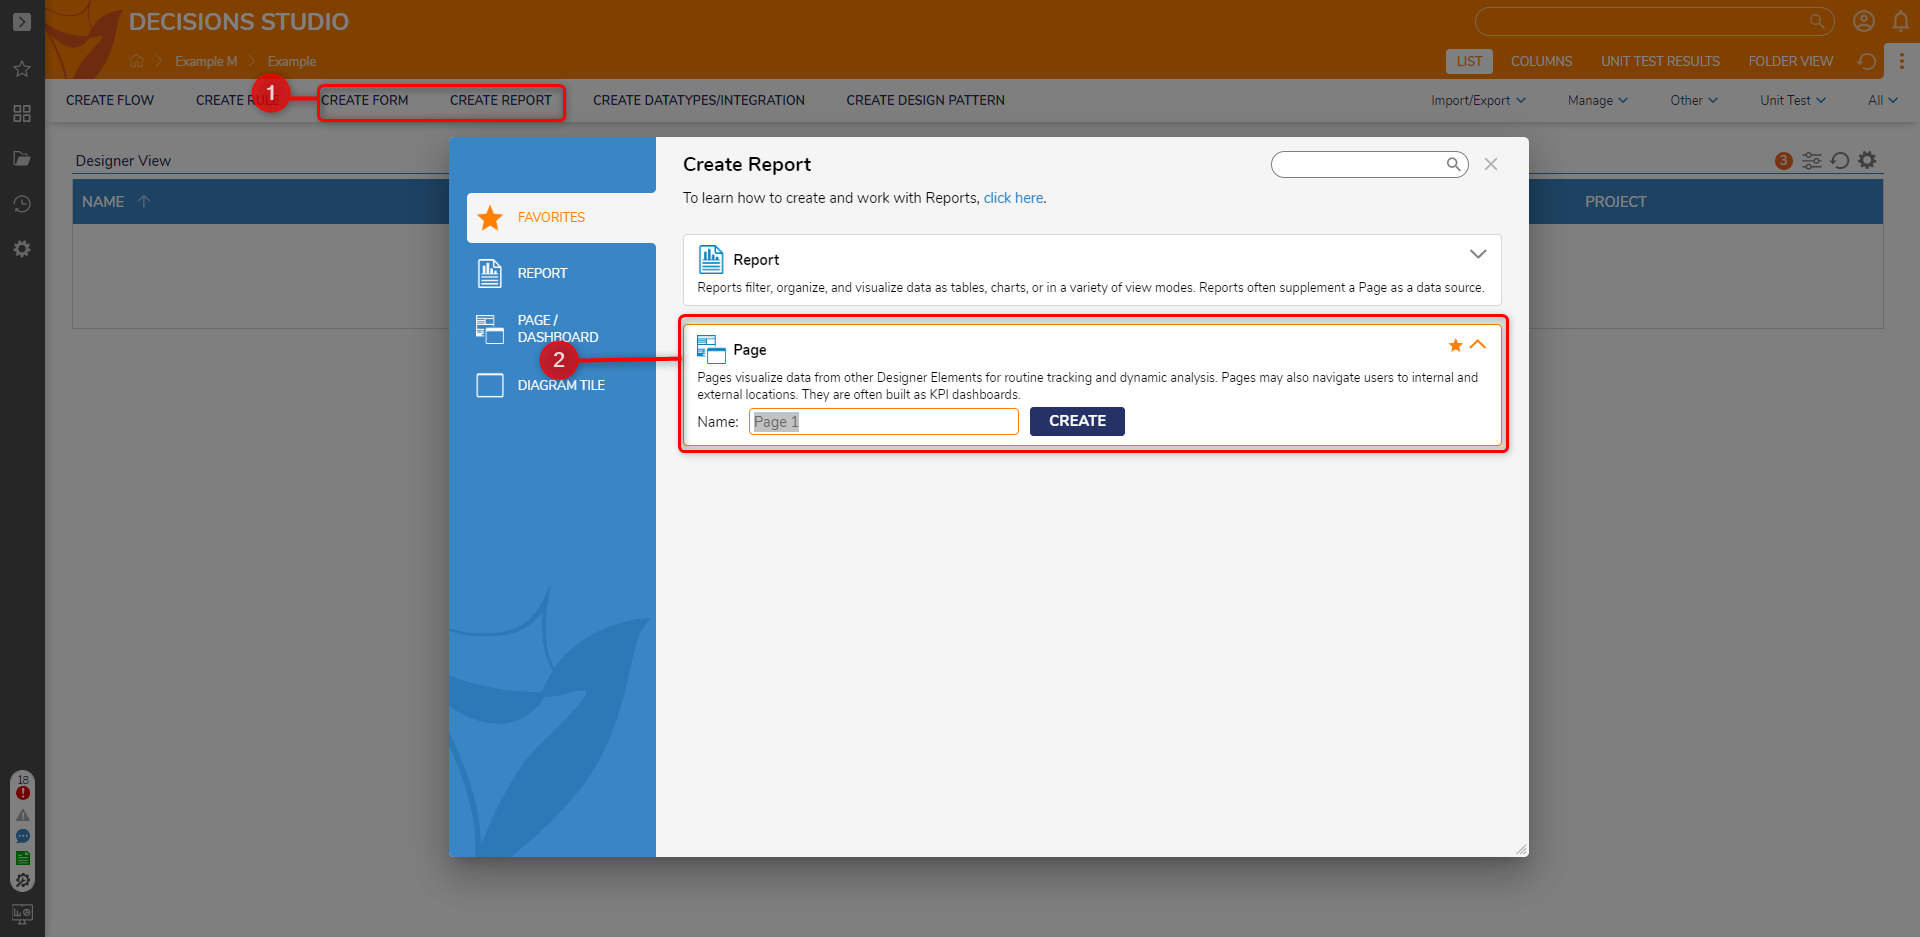
Building a Page/Dashboard
- From the Page Designer, design the Page as desired by dragging and dropping controls such as from the Report Viewer, a Simple Tile, a Simple Bars Chart from the Toolbox tab into the workspace.
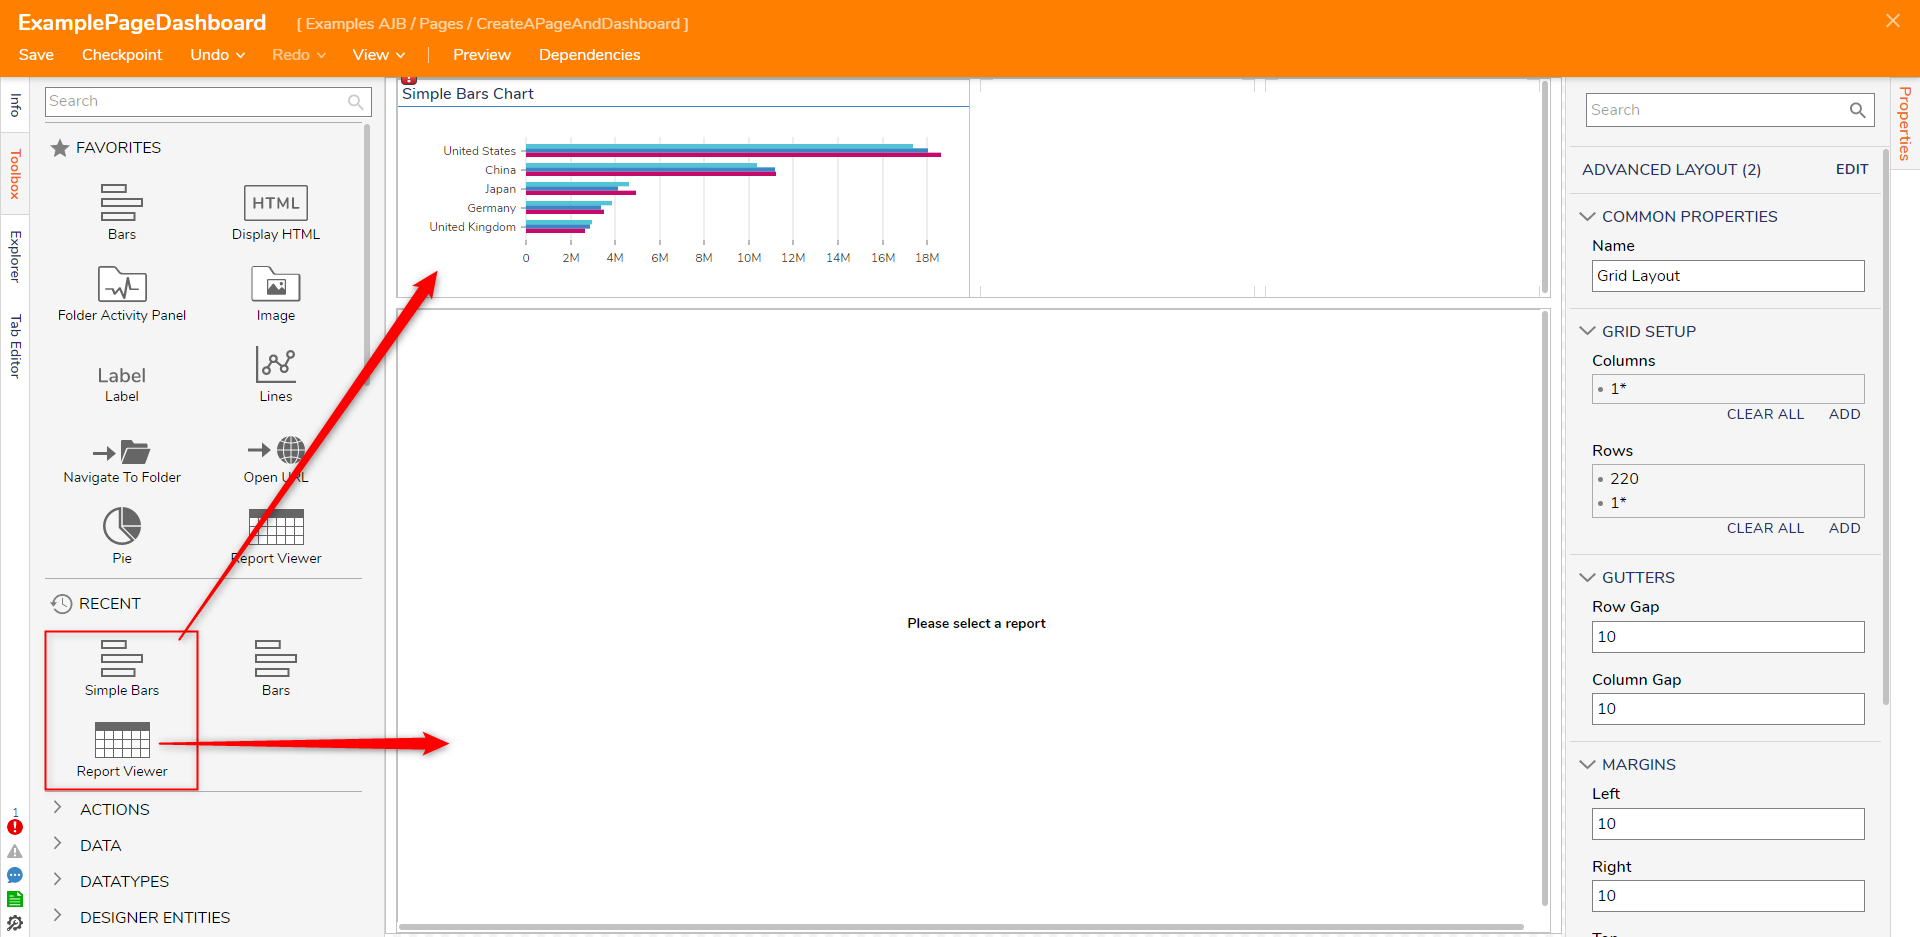
- Select each added control and configure its settings in the Properties Panel.
Since Report Viewers, Tiles, and Charts source their data from outside the Page from sources like Reports, Flows, Matrices, built in data, etc., this example sources built-in Account data available in every instance.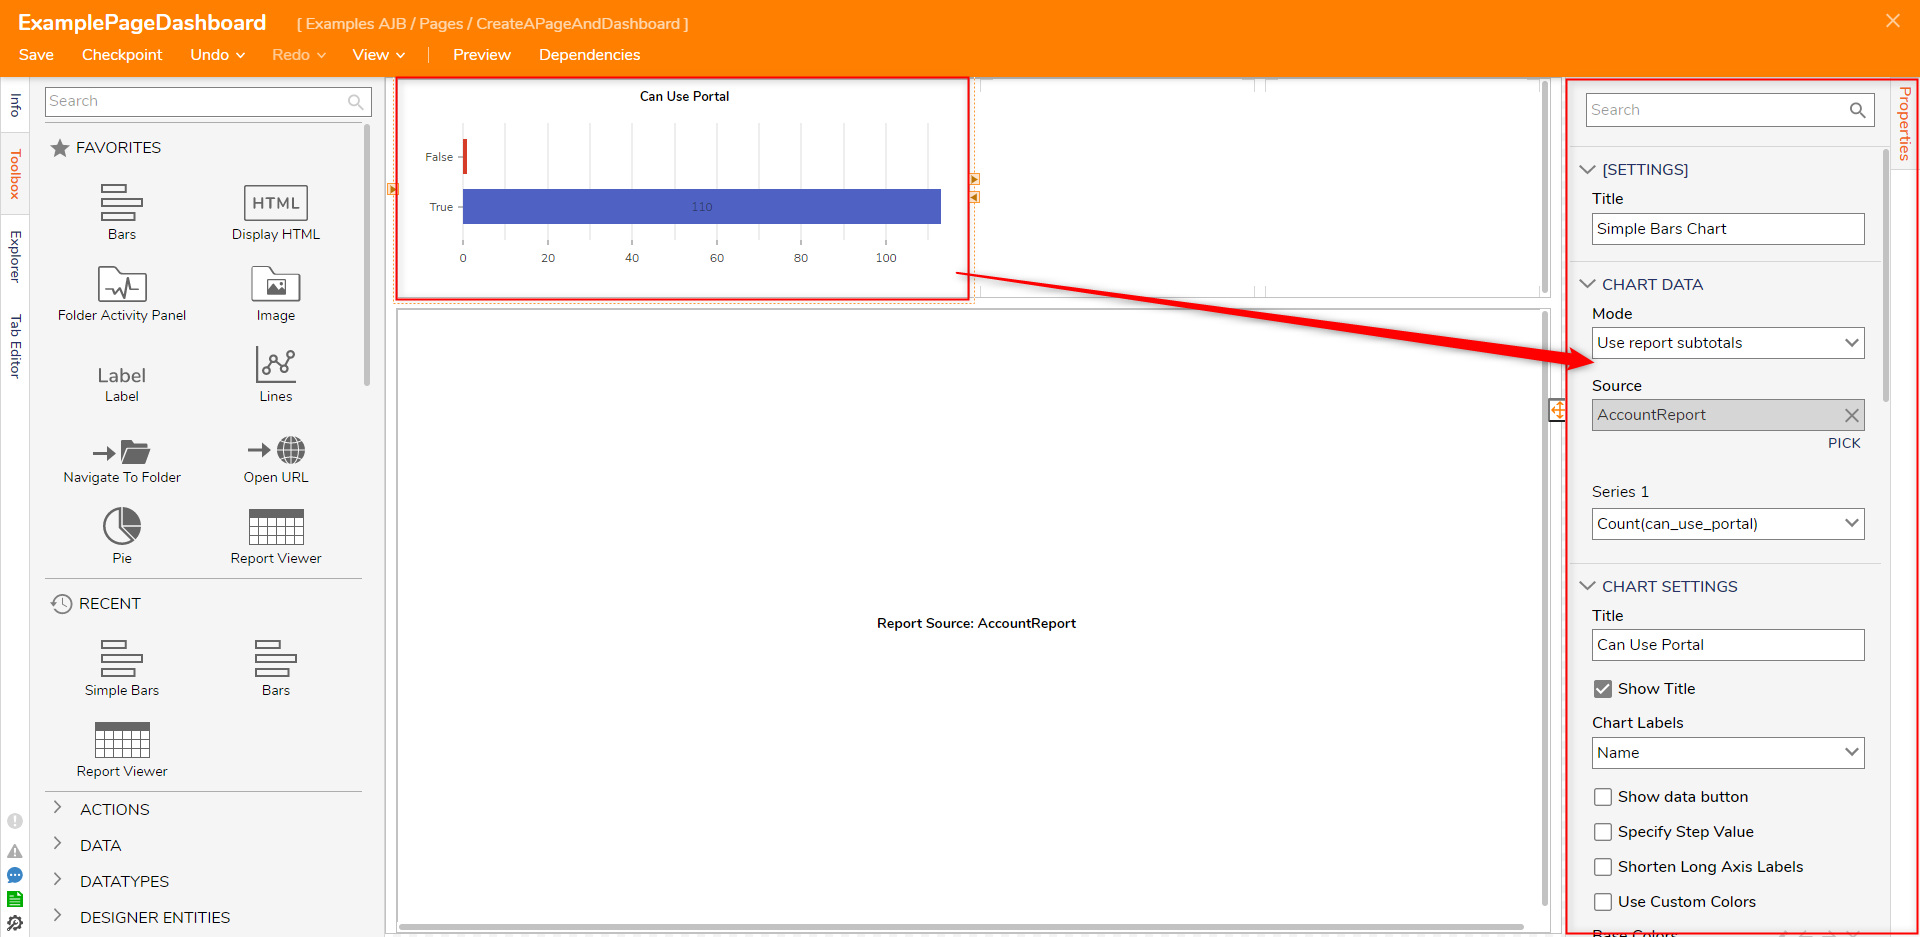
- Save and close the Page Designer.
Edit an Existing Page
- Find the desired Page by navigating to the desired Designer Project > Dashboard and right clicking on the Page to be edited. Select the Edit Page option.
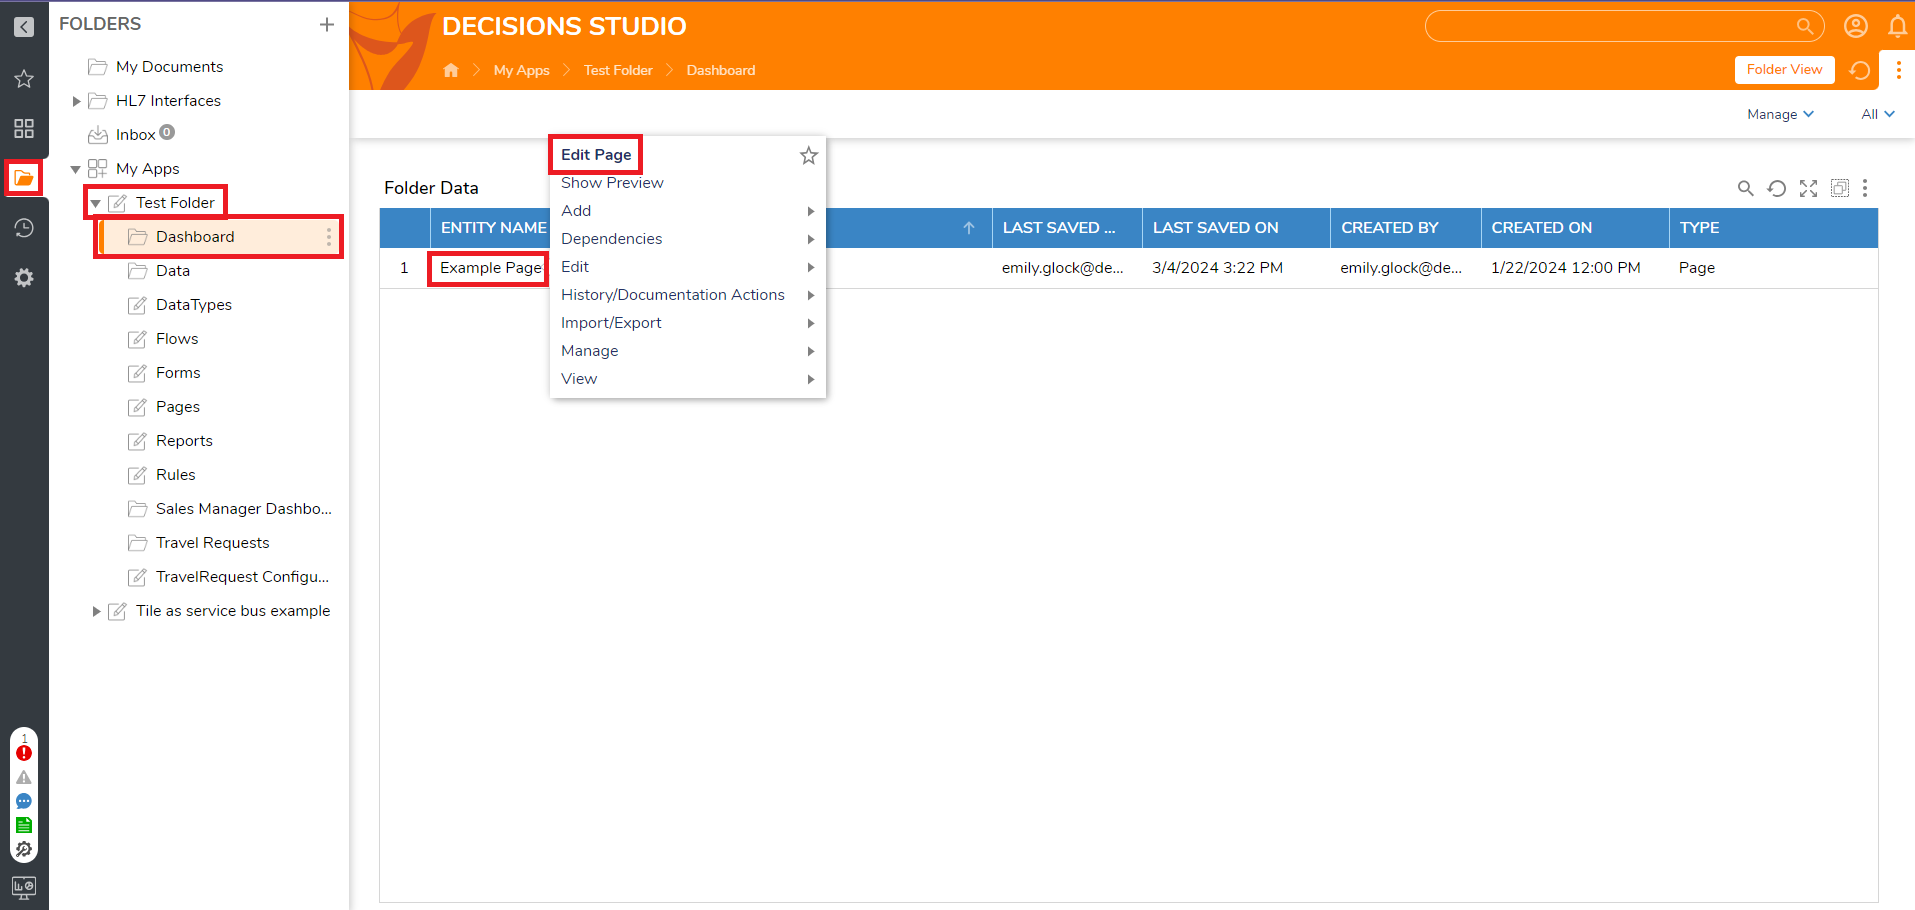
- The user will then make the desired edits to the existing Page and then save and close once it is complete.
Remove Page from Dashboard
- Find the desired Page by navigating to the desired Designer Project > Dashboard and right clicking on the Page and navigate to Manage > Delete Page.
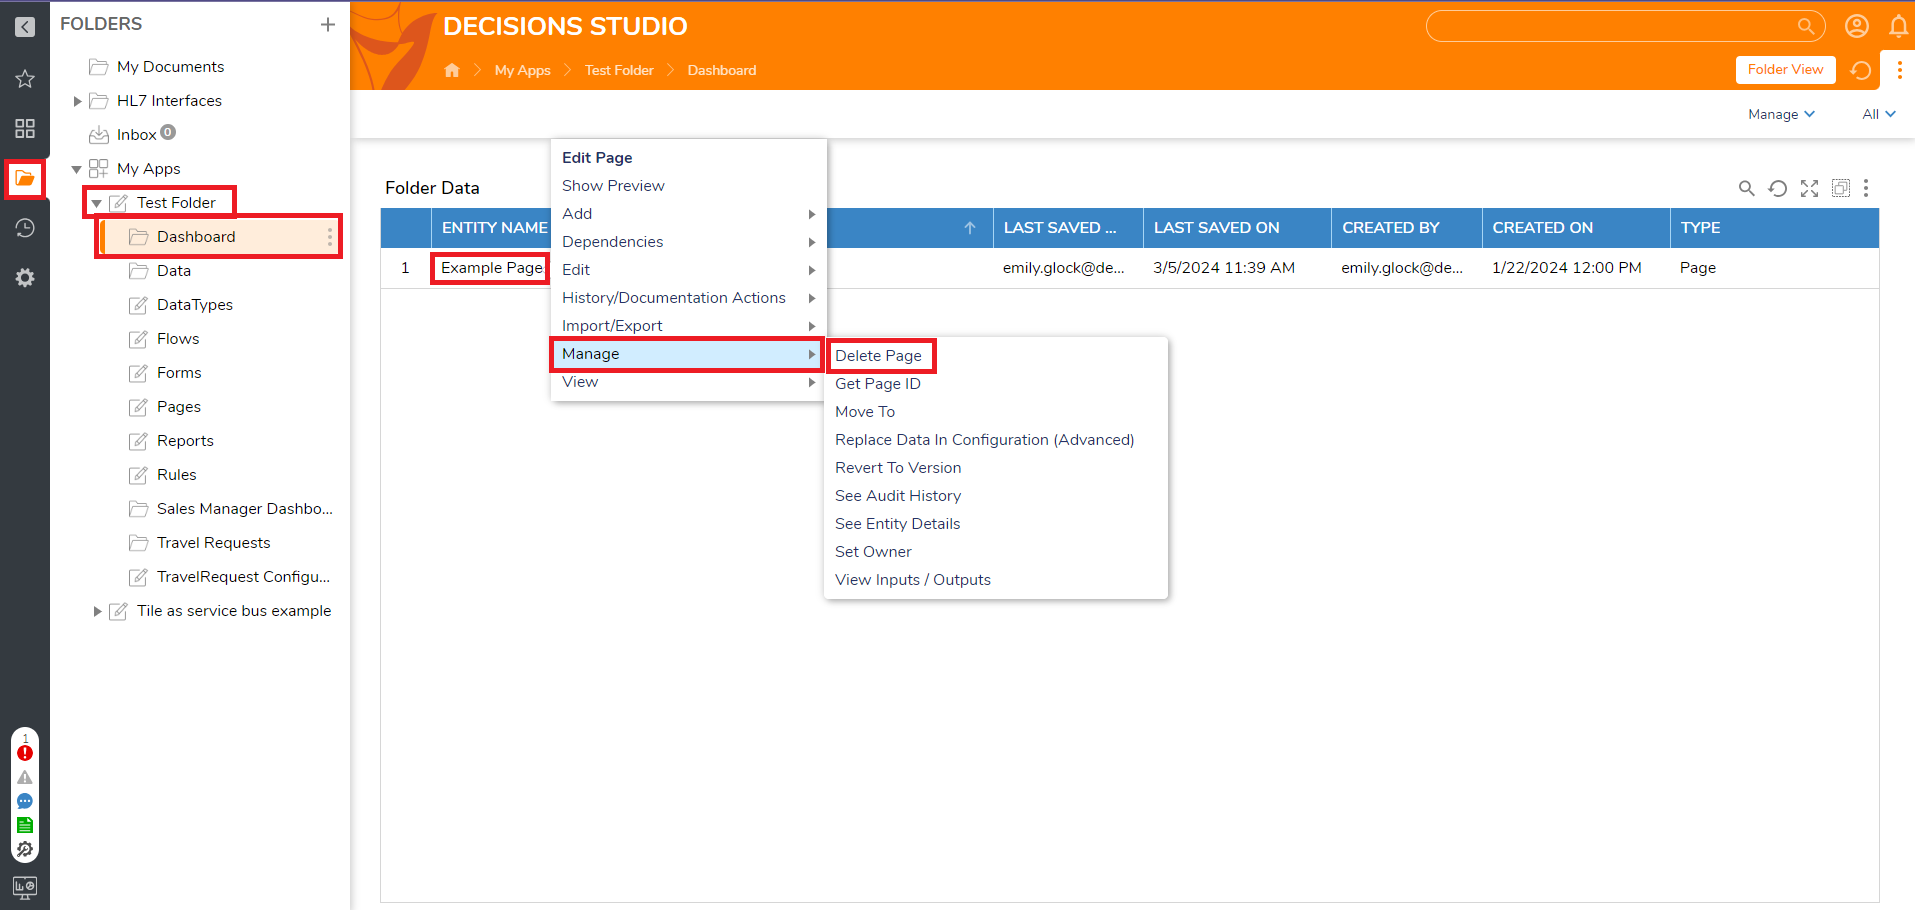
- When the Confirm Delete dialog appears, select YES. The Page is now removed from the Dashboard.
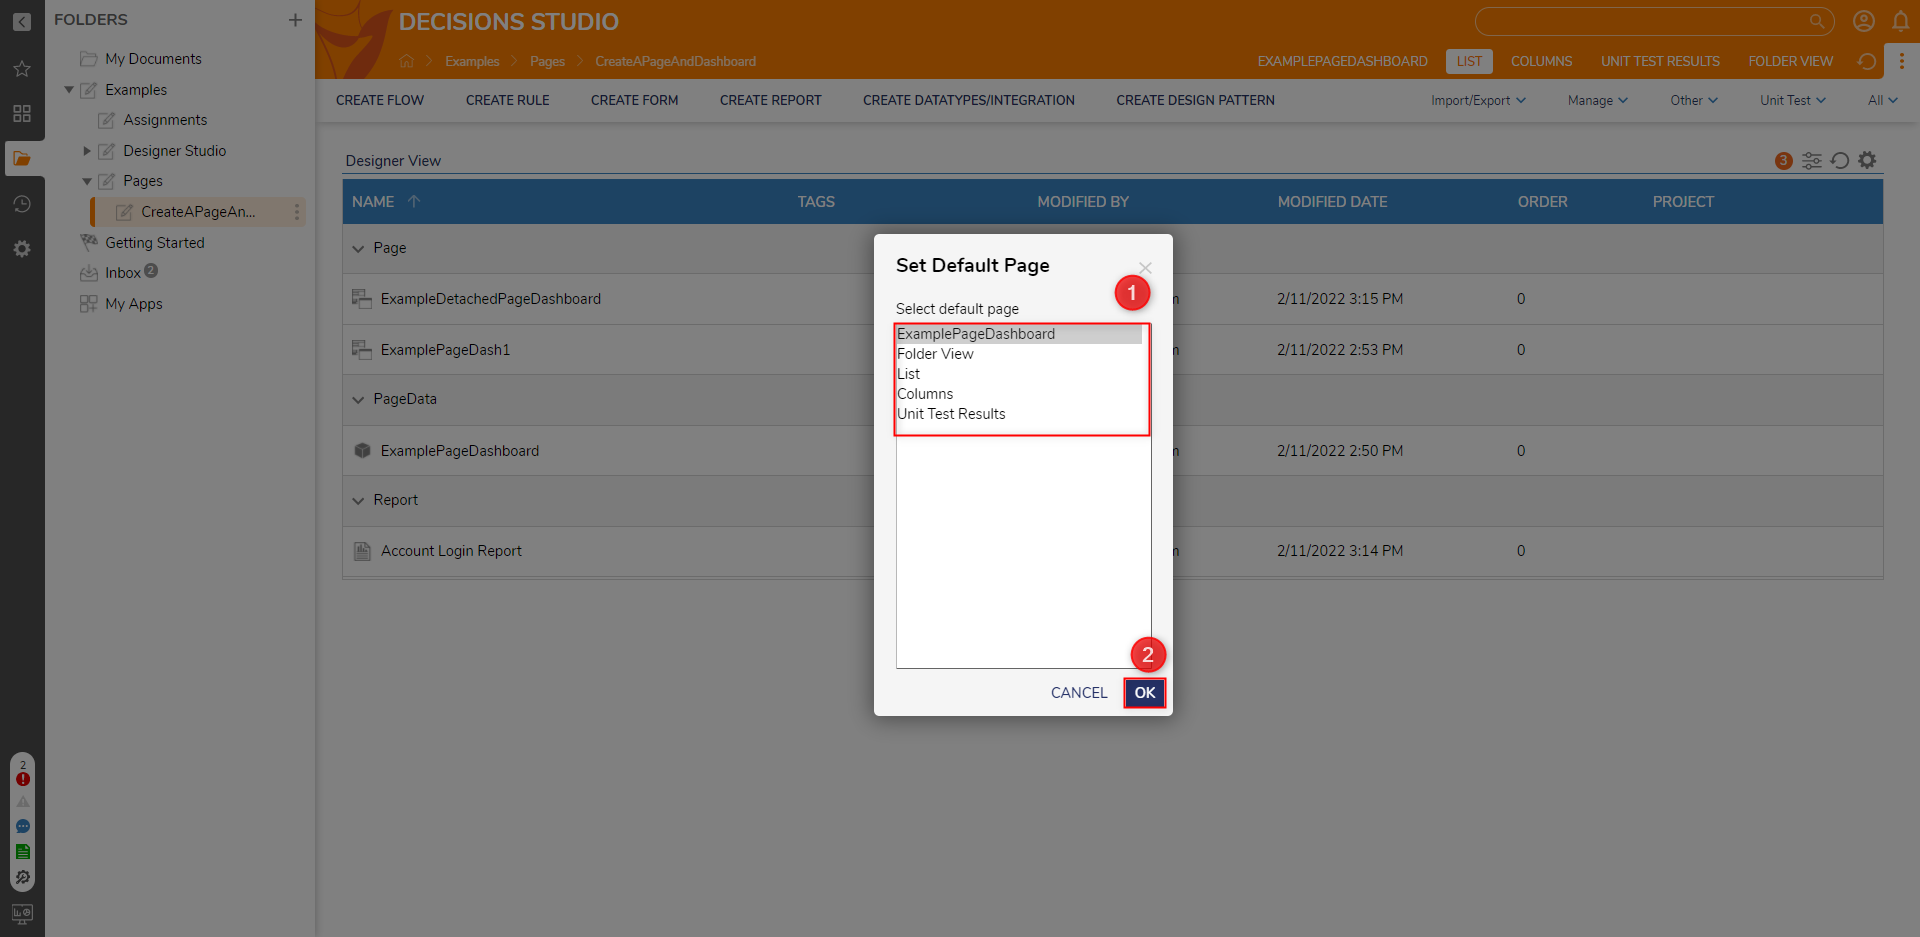
Set Default Page
Once a Page/Dashboard has been created and configured as desired, it may be set as the Default Page for its respective Folder.
- From the desired Designer Project, right-click the Designer Project and select Manage > Page/Dashboard > Set Default Page.
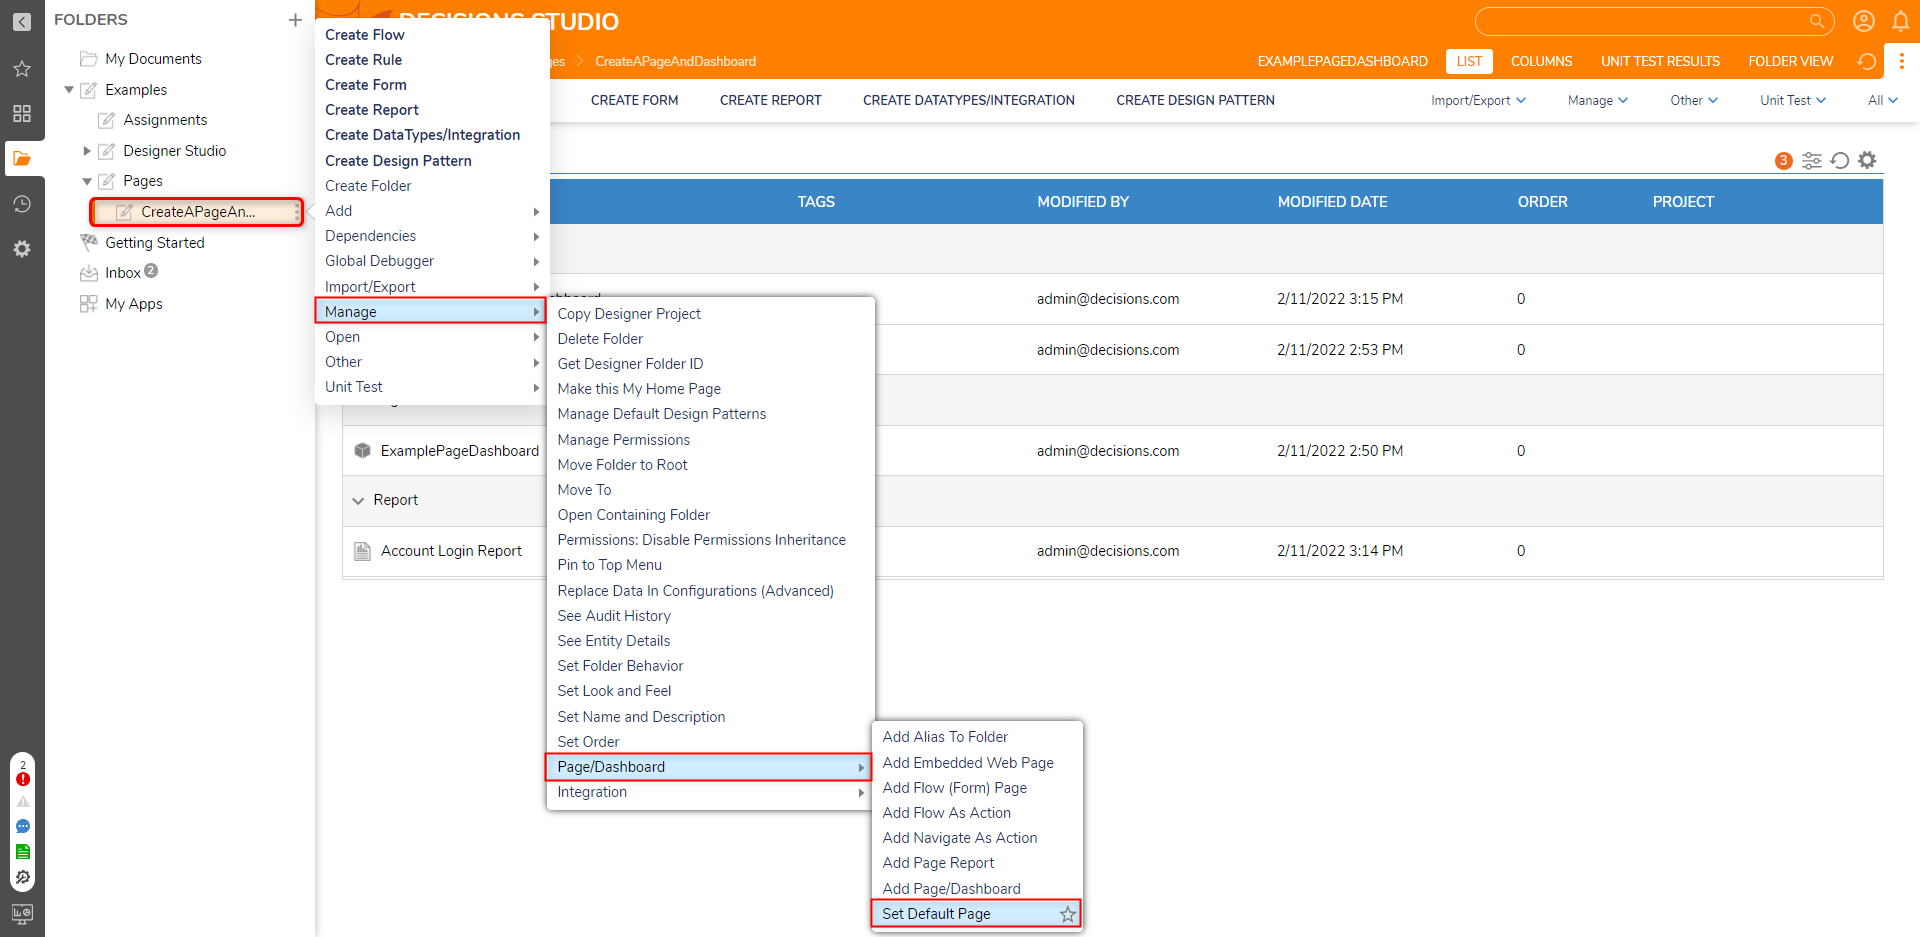
- From the Set Default Page window, select the desired option from the Select default page list. Then, click OK.
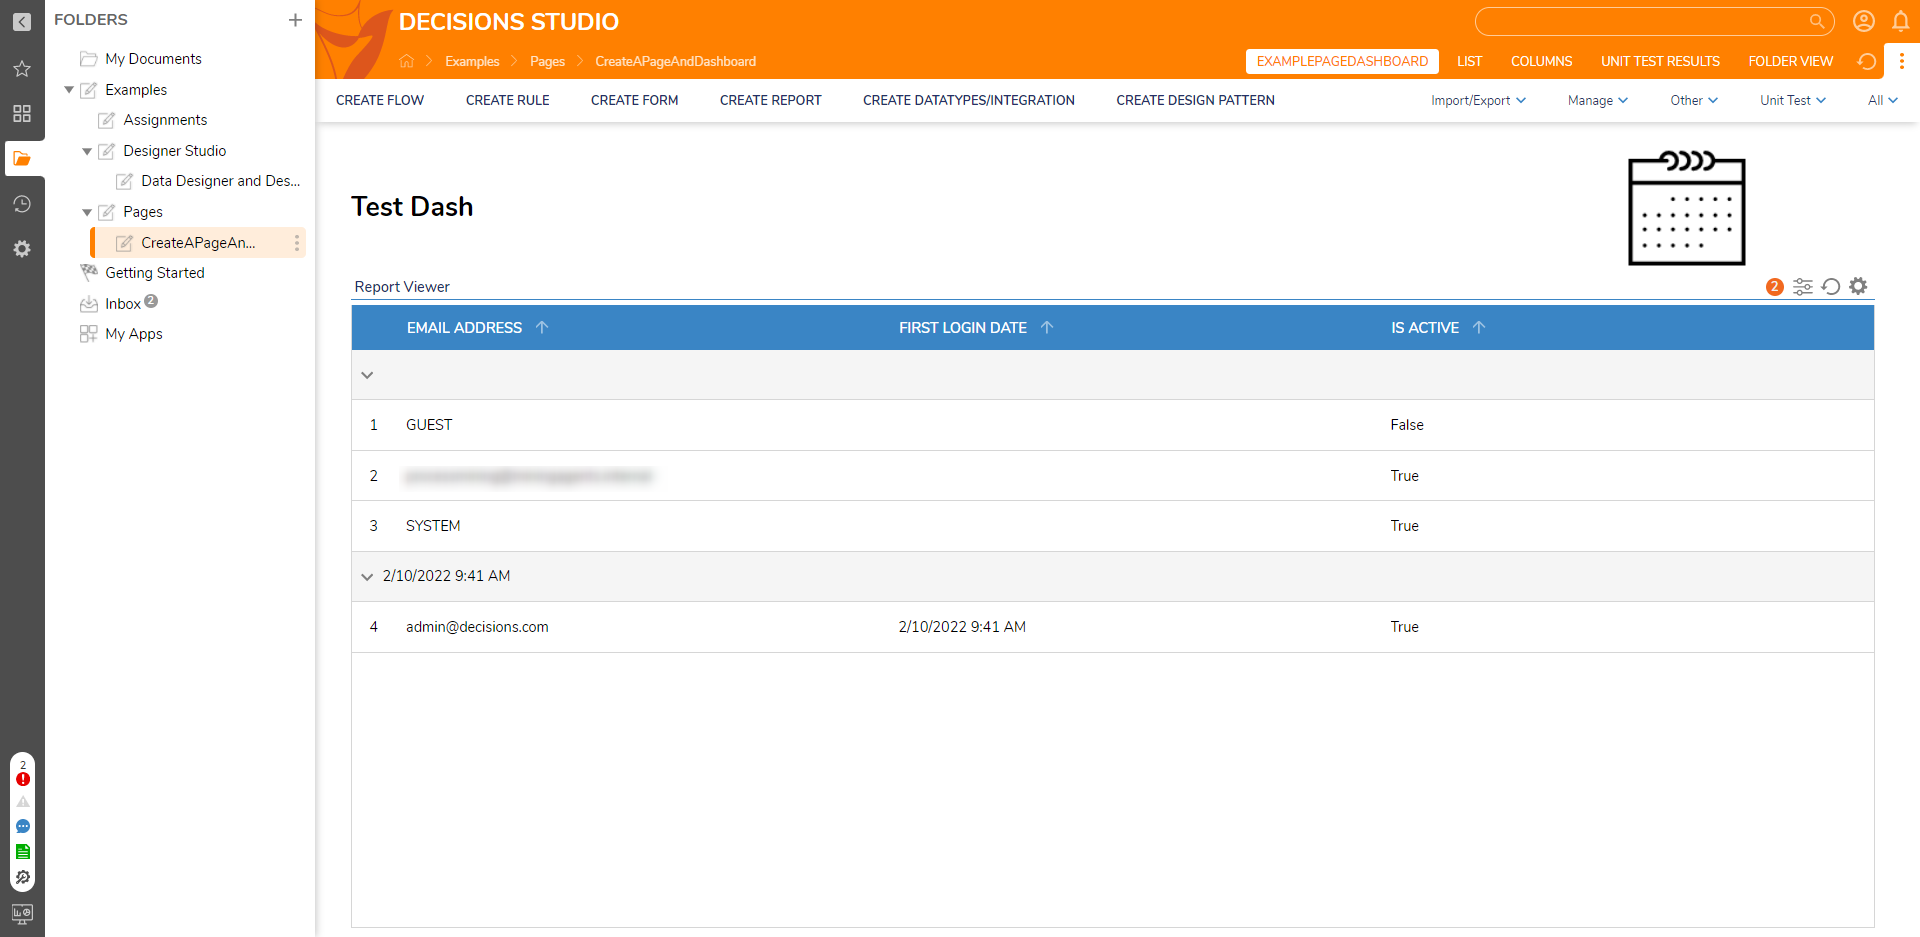
- Re-navigate to the Designer Project to verify that the Default Page has been updated.
For more information regarding Pages and Dashboards, see Decisions Forum: Pages.