Overview
Decisions includes a pre-built Approval Flow. This Flow allows users to quickly create a Flow that requires Approval using a Sub Flow and Approval Chain for the Approval process.
To use the Approval Flow, the Approval Module needs to be installed. To learn how to install modules, see Installing Modules in Decisions.
Example
This example demonstrates how to use the pre-built Sub Flow, which has Approval behaviors, to quickly create a simple request Flow that requires Approval.
- In a Designer Project, click CREATE FLOW, select Default under Flow, and click CREATE. Name the Flow and click CREATE.
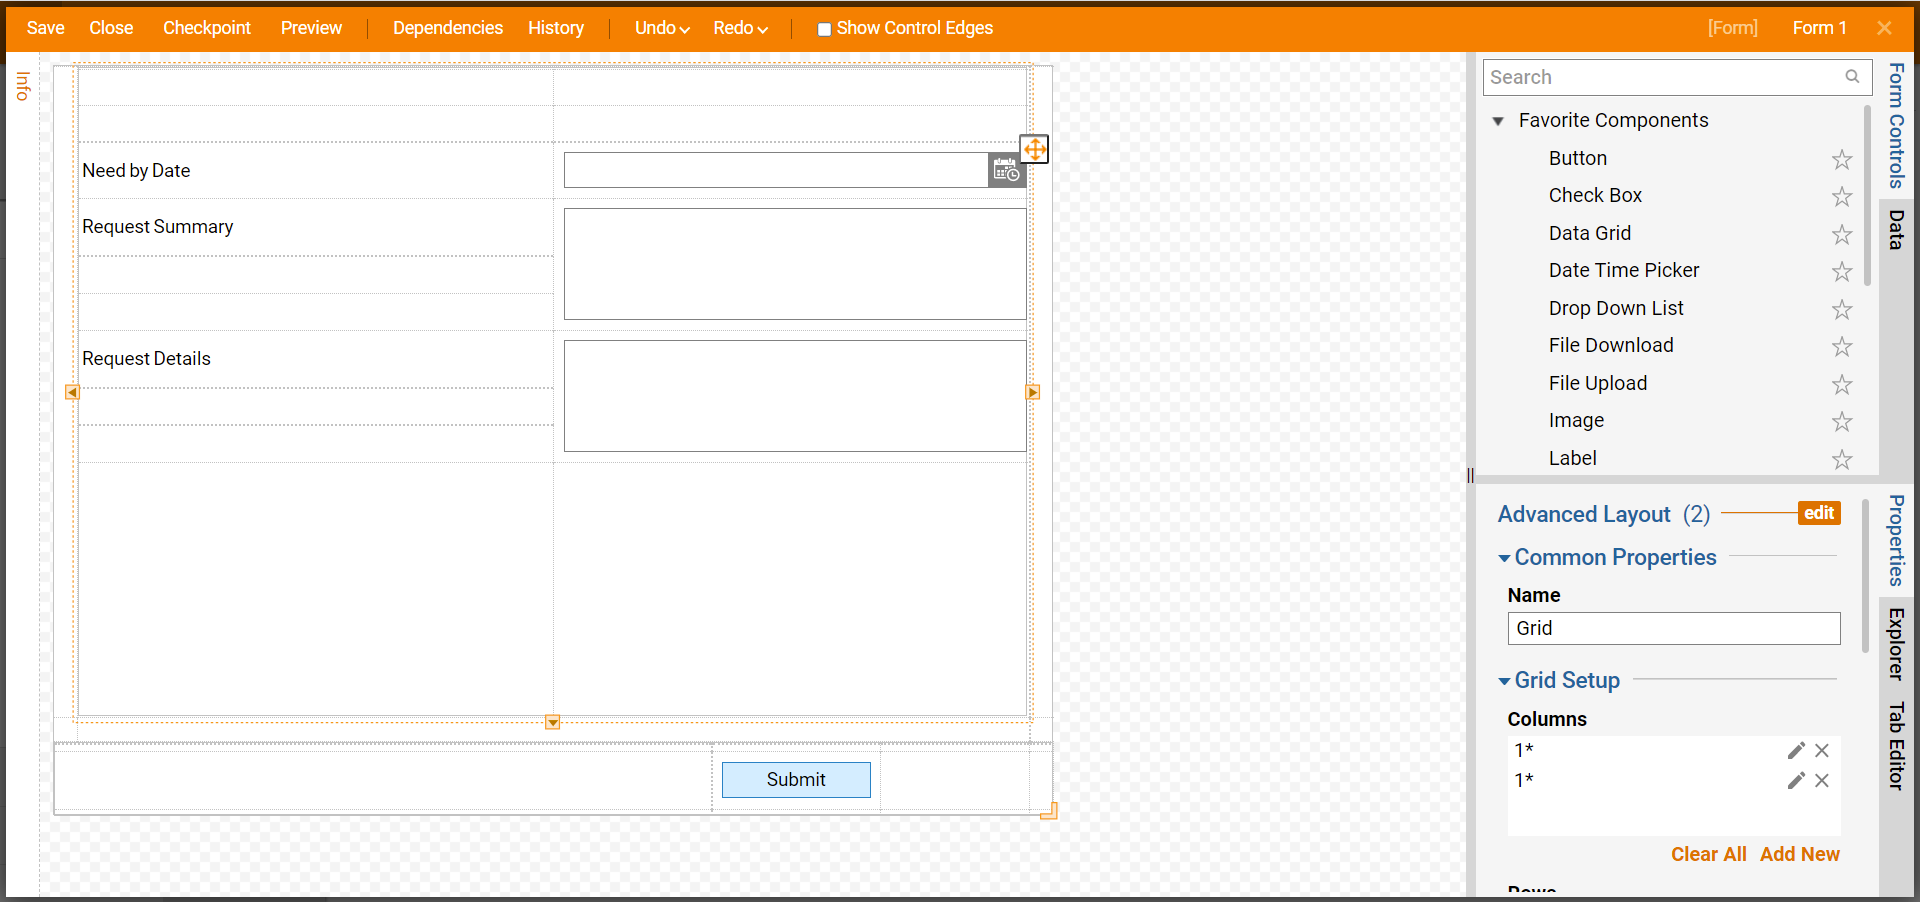
- In the Flow Designer, add a Show Form step to the Done path of the Start step. Configure the Form to have two Text Box elements, Date Time Picker, and Button. Click Save to save Form and click Close to return to Flow Designer.
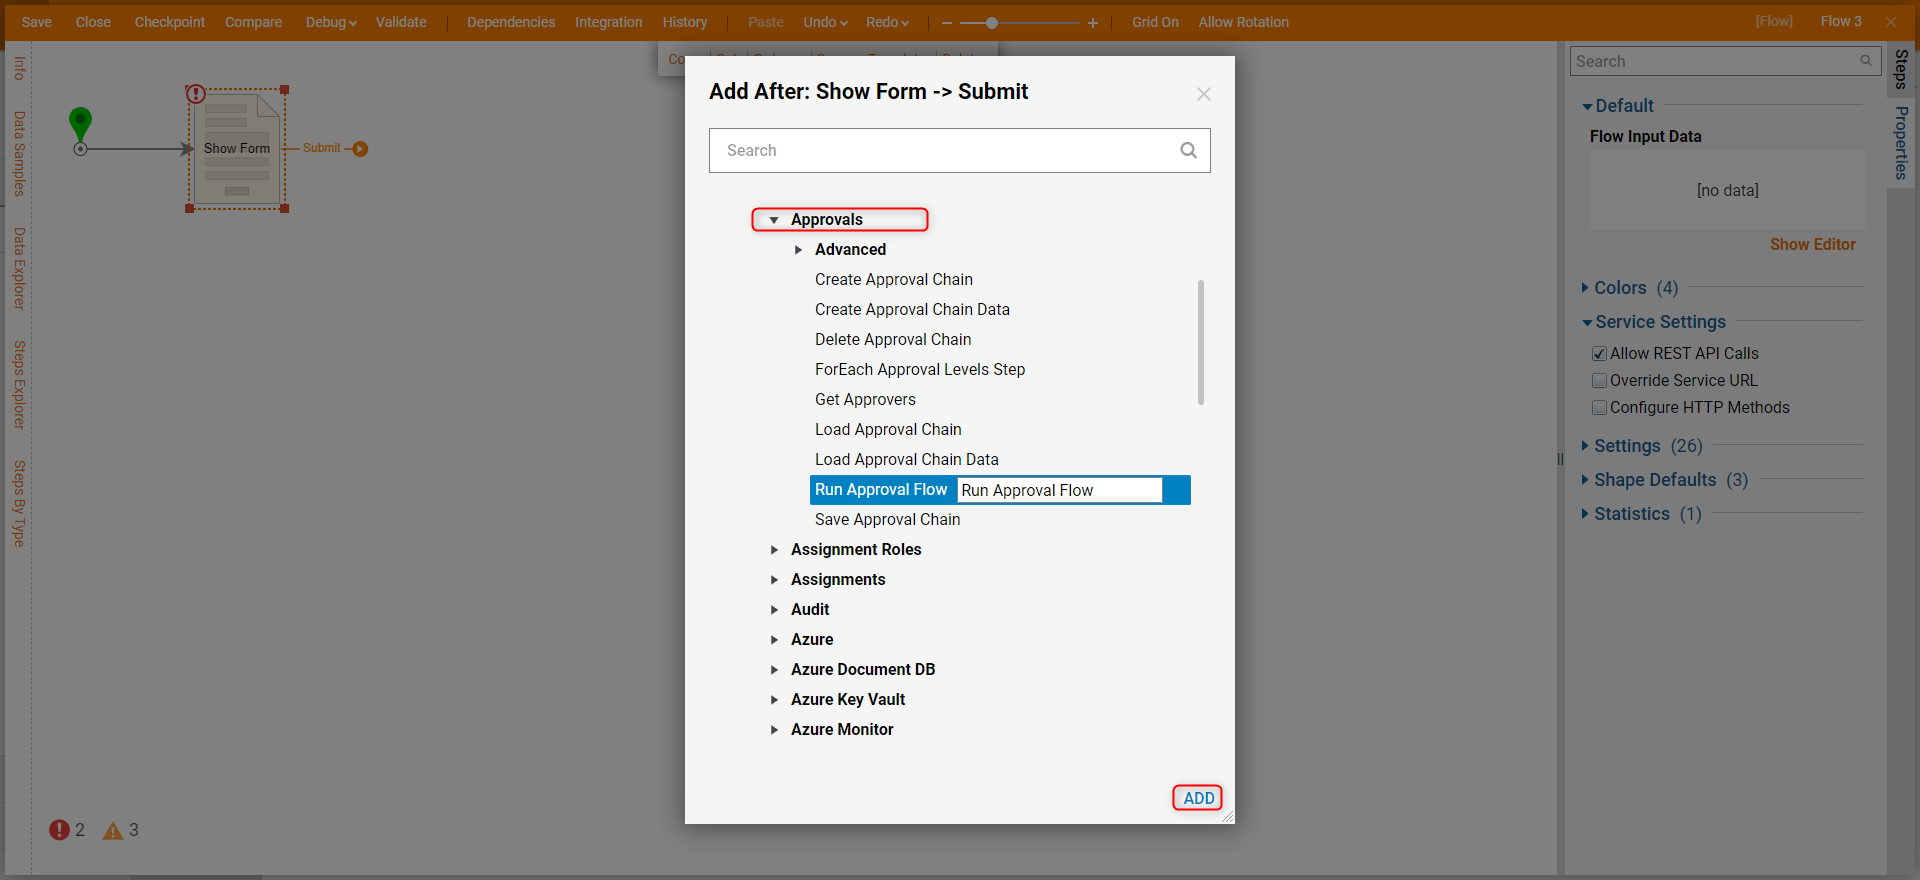
- Click the Submit path and navigate to Integrations > All Integrations > Approvals. Select the Run Approval Flow step and click ADD.
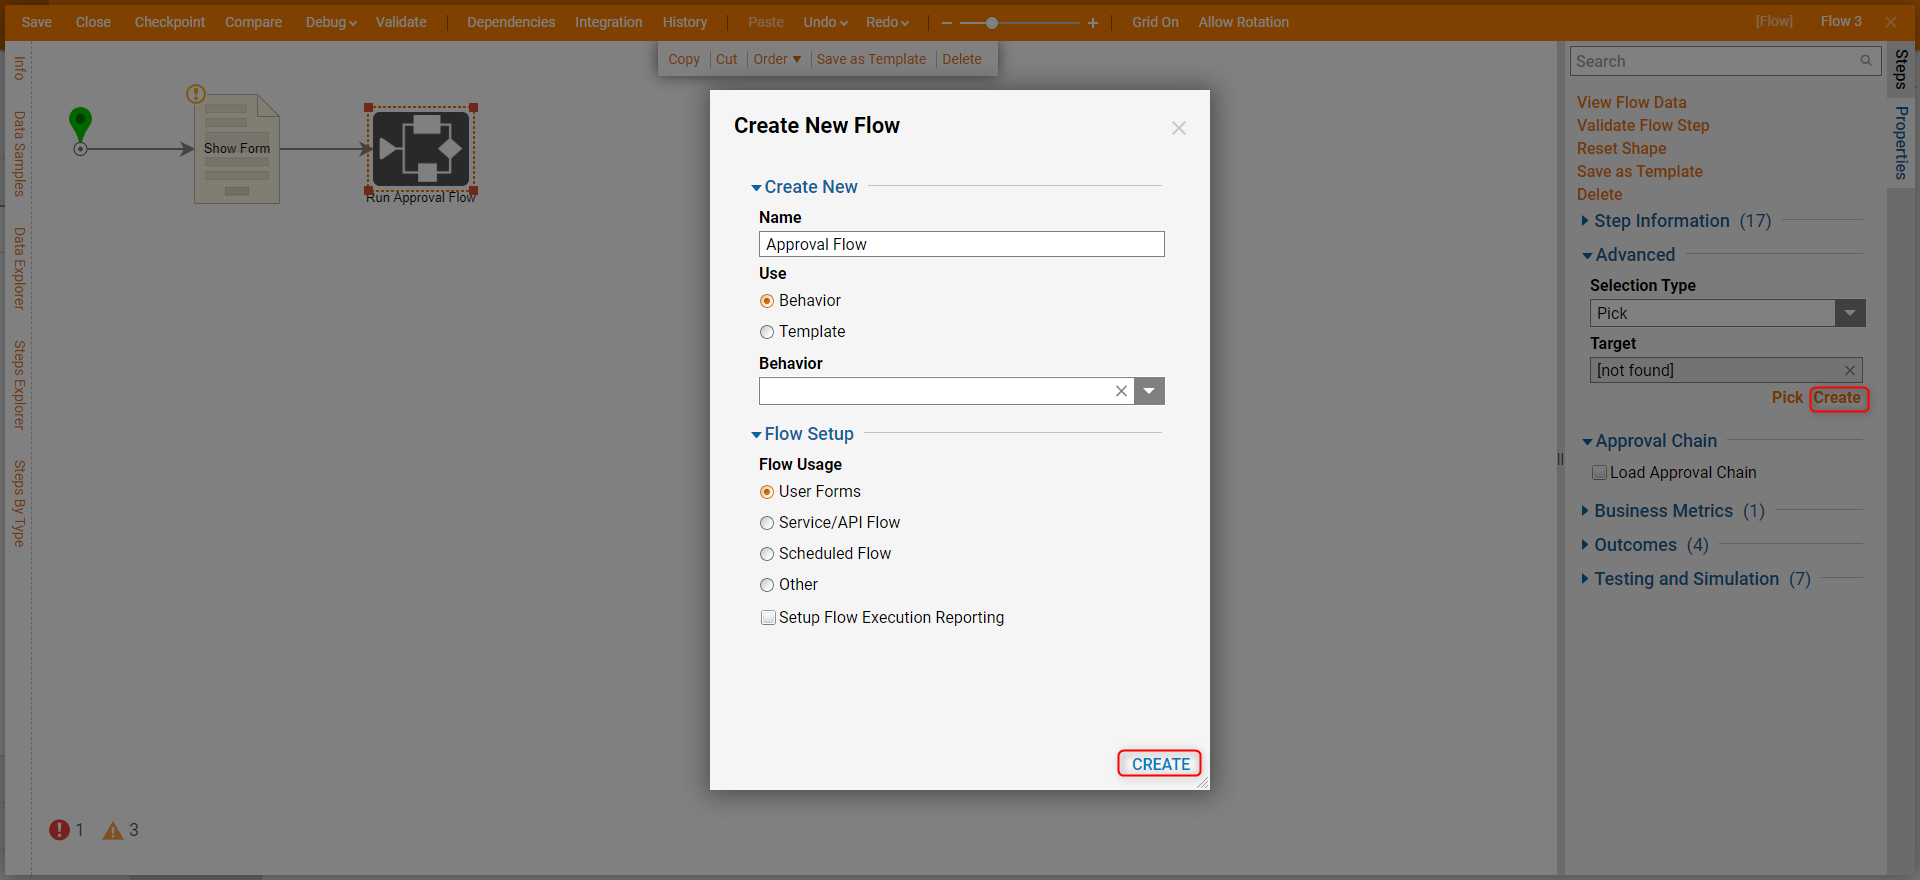
- Under the Advanced category on the Properties panel, click Create. Name the Flow and click CREATE.
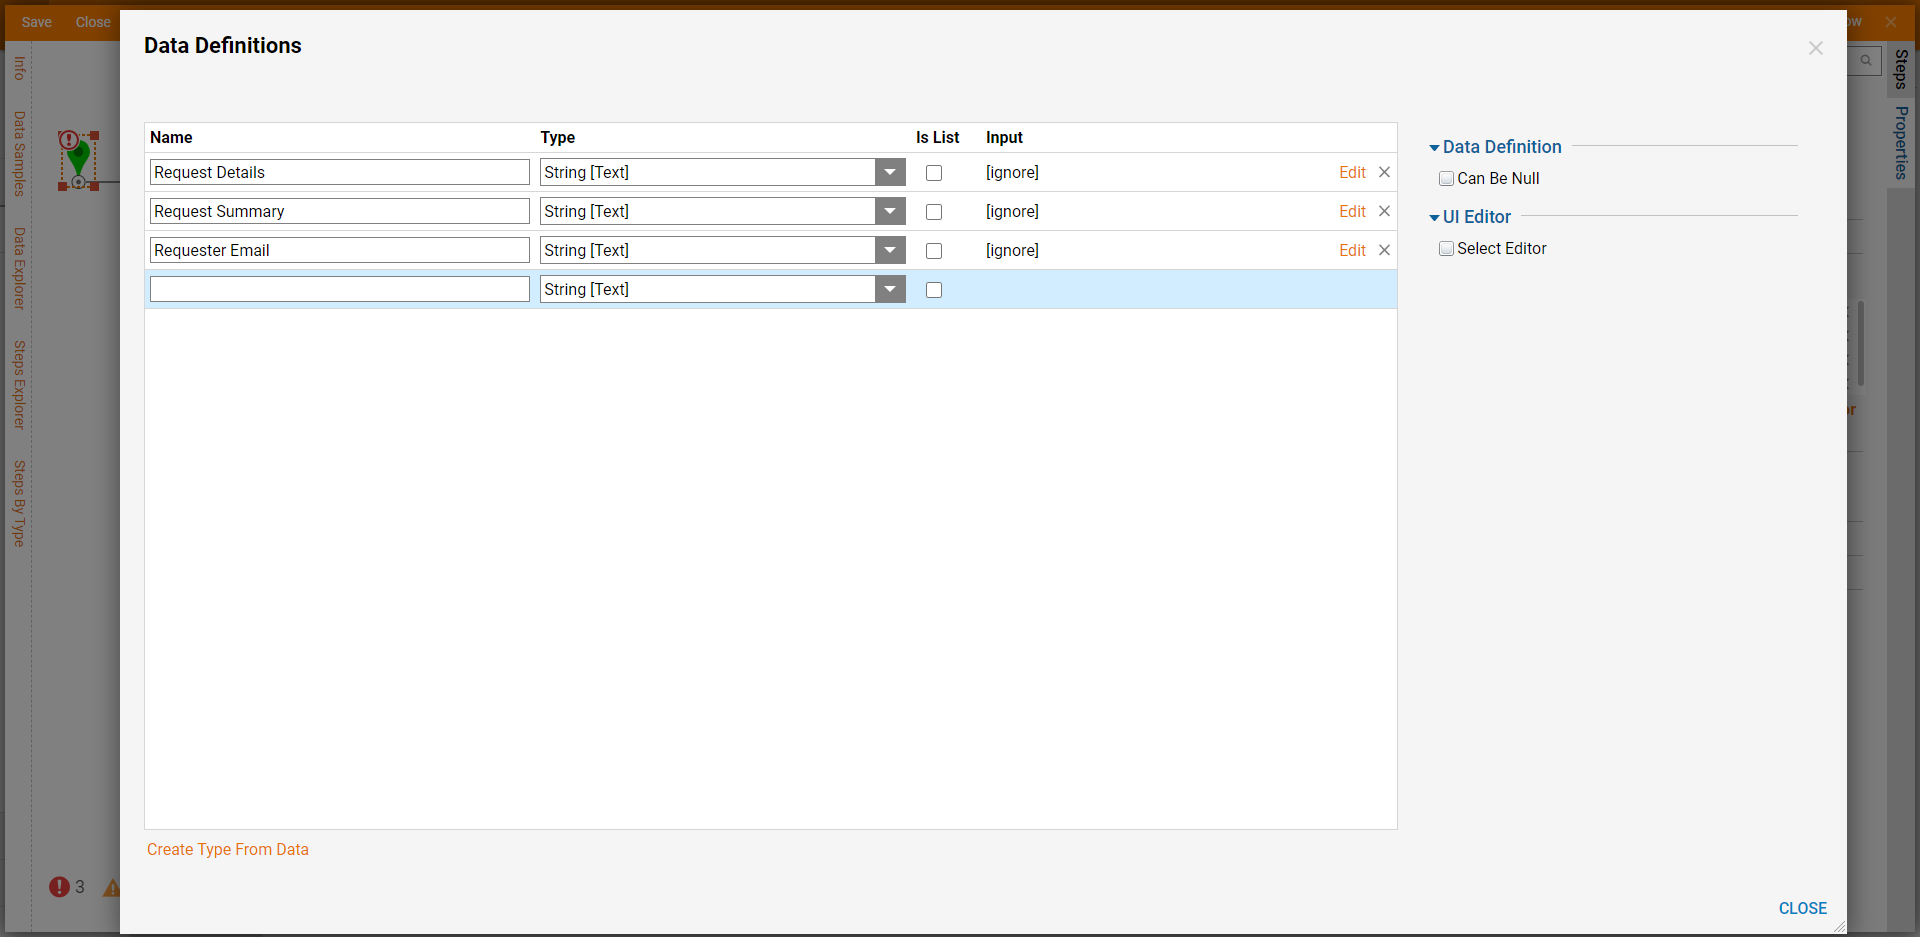
- Select the Start step and click Show Editor on the Properties panel. Add fields for Request Details, Request Summary, and Requester Email. Click CLOSE to save.
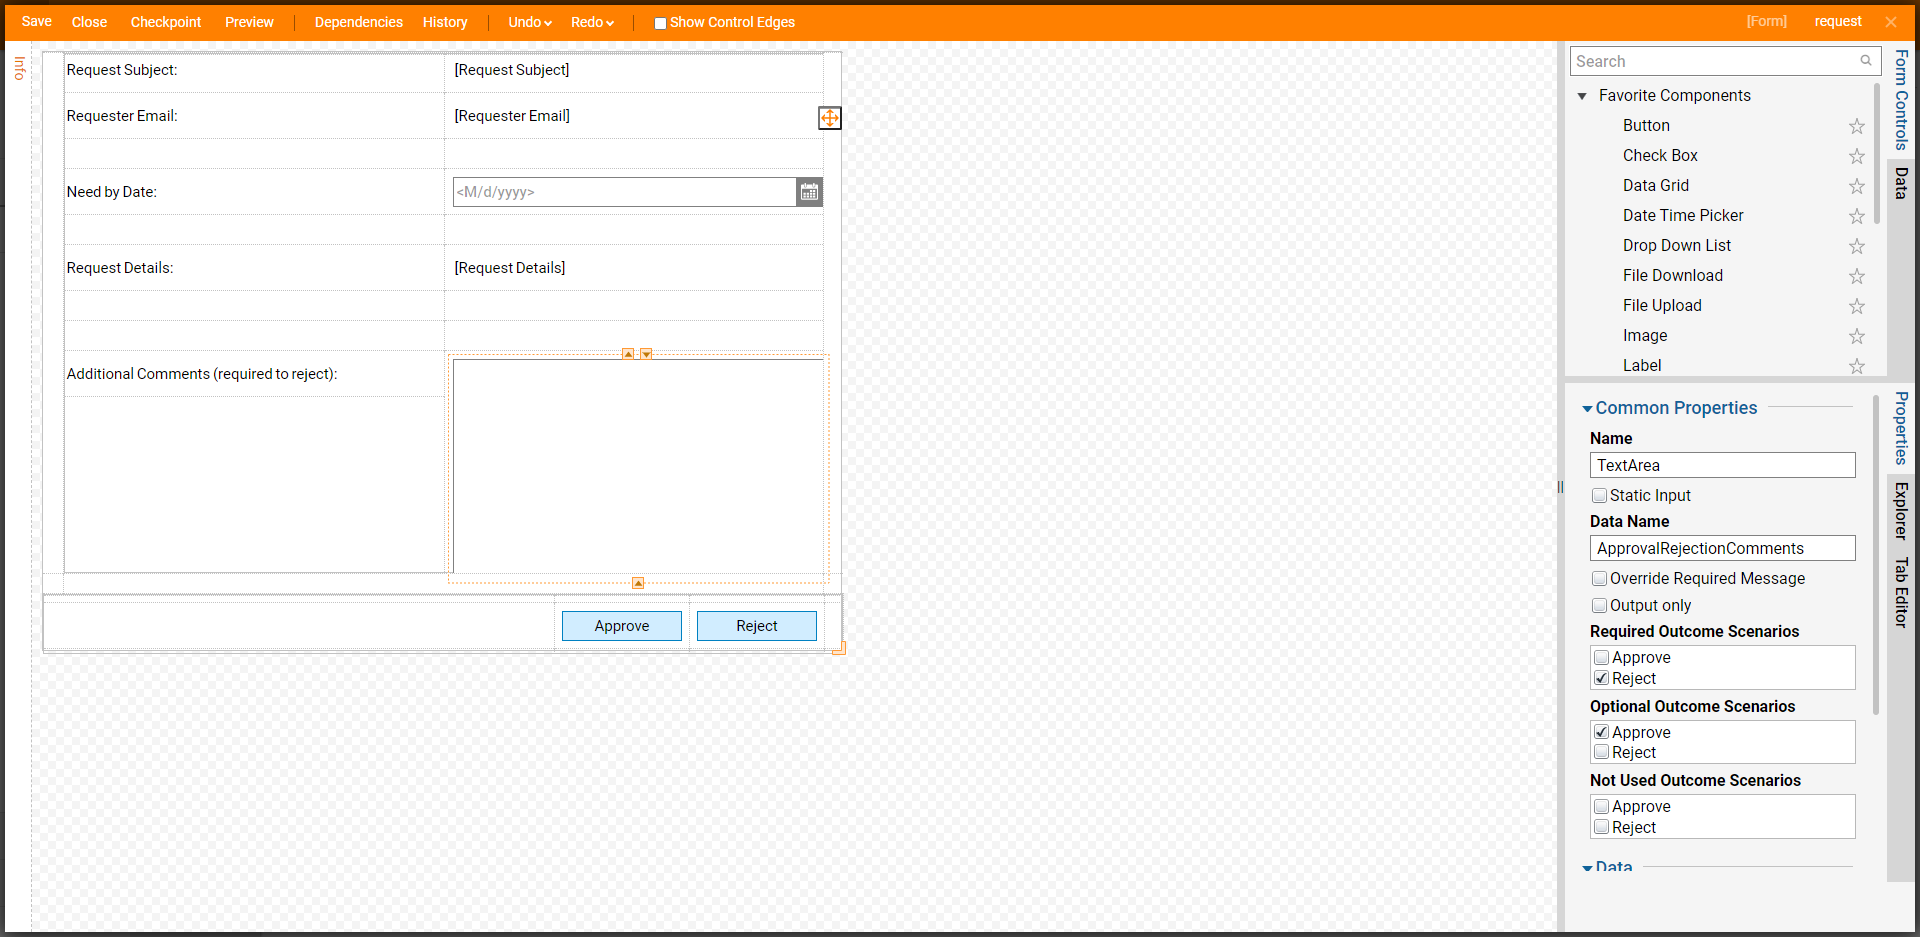
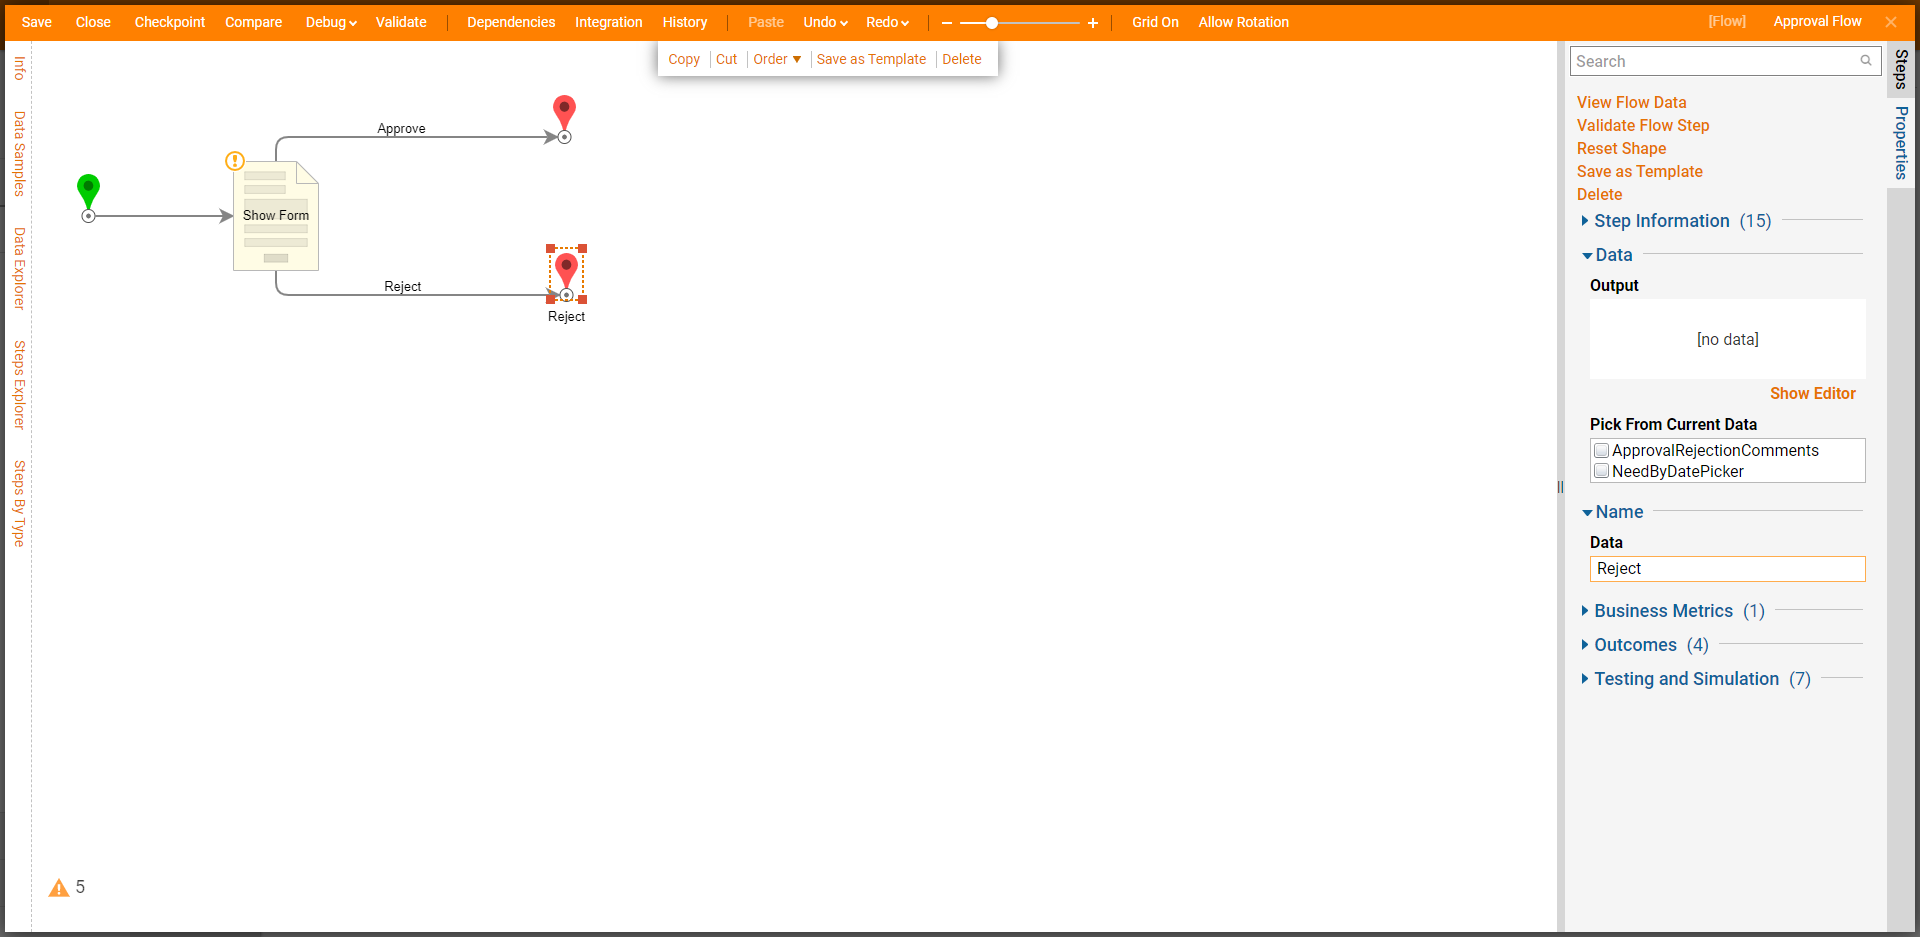
- Click the Done path and add a Form that displays the data from the Request Form and a Text Box for providing details on Rejection. Select the Text Box and under Required Outcome Scenarios, check the checkbox Reject. Click Save and close the Form.
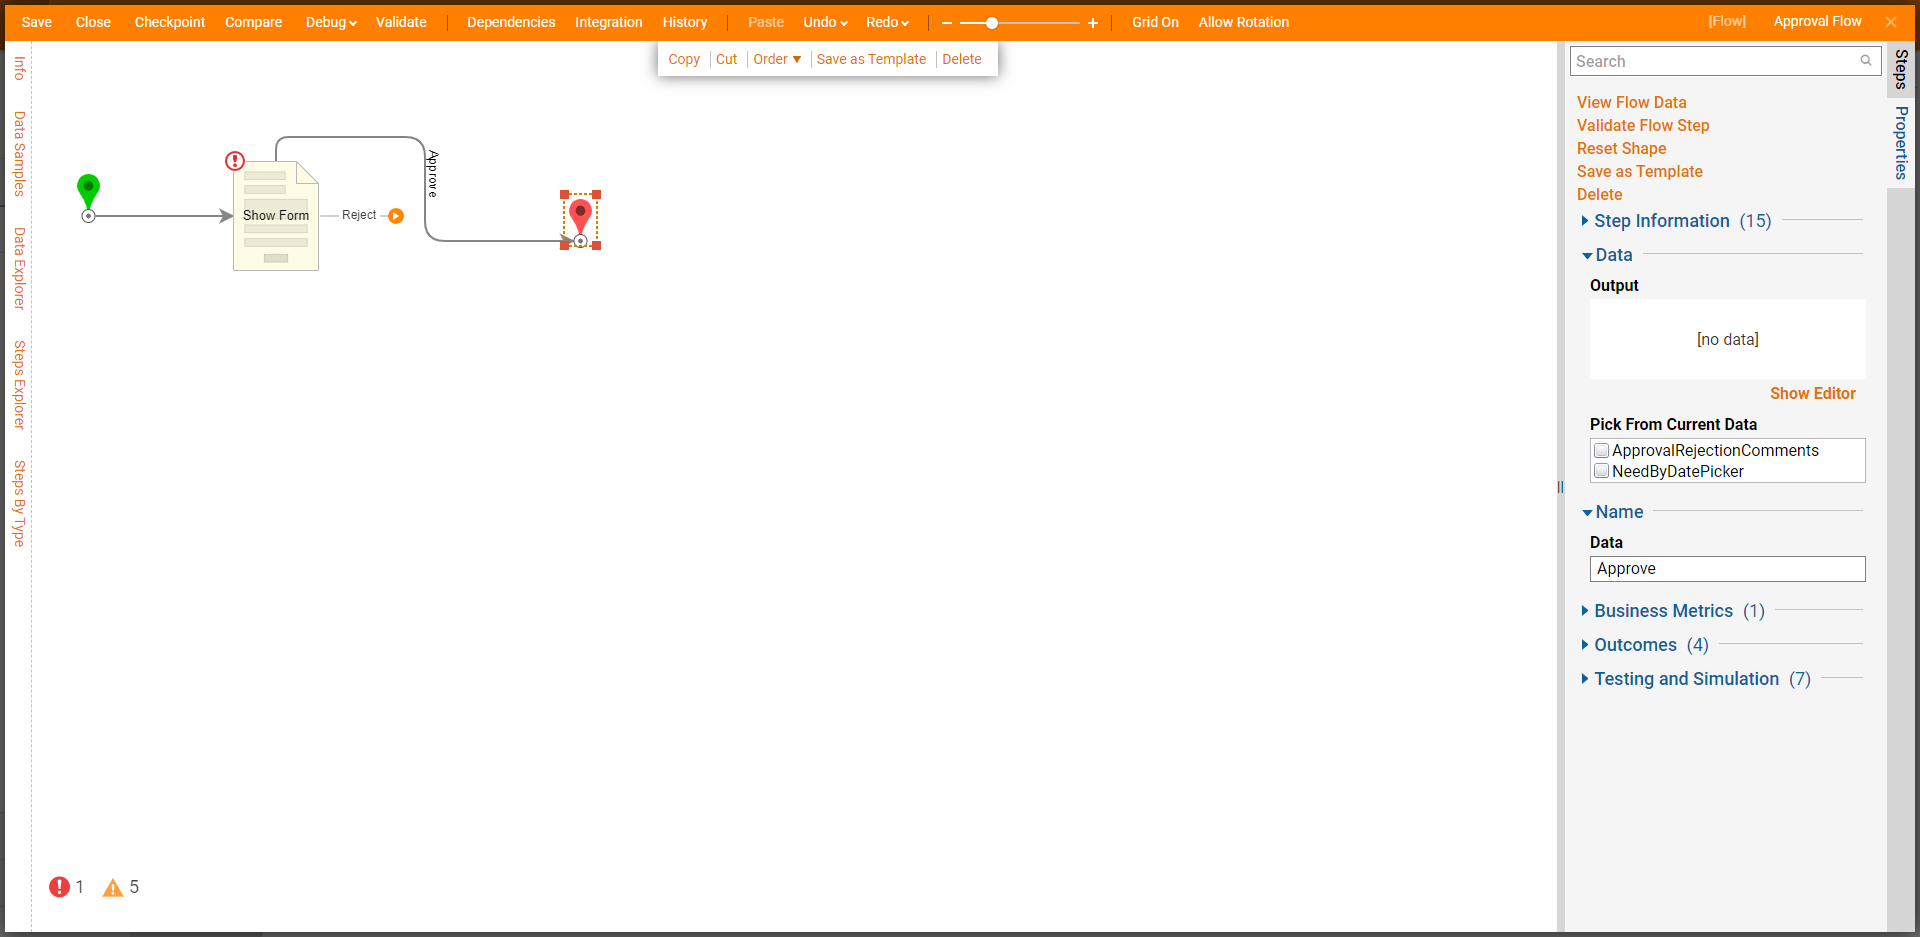
- Connect the Approve path to the End step and rename the Data field to "Approve".
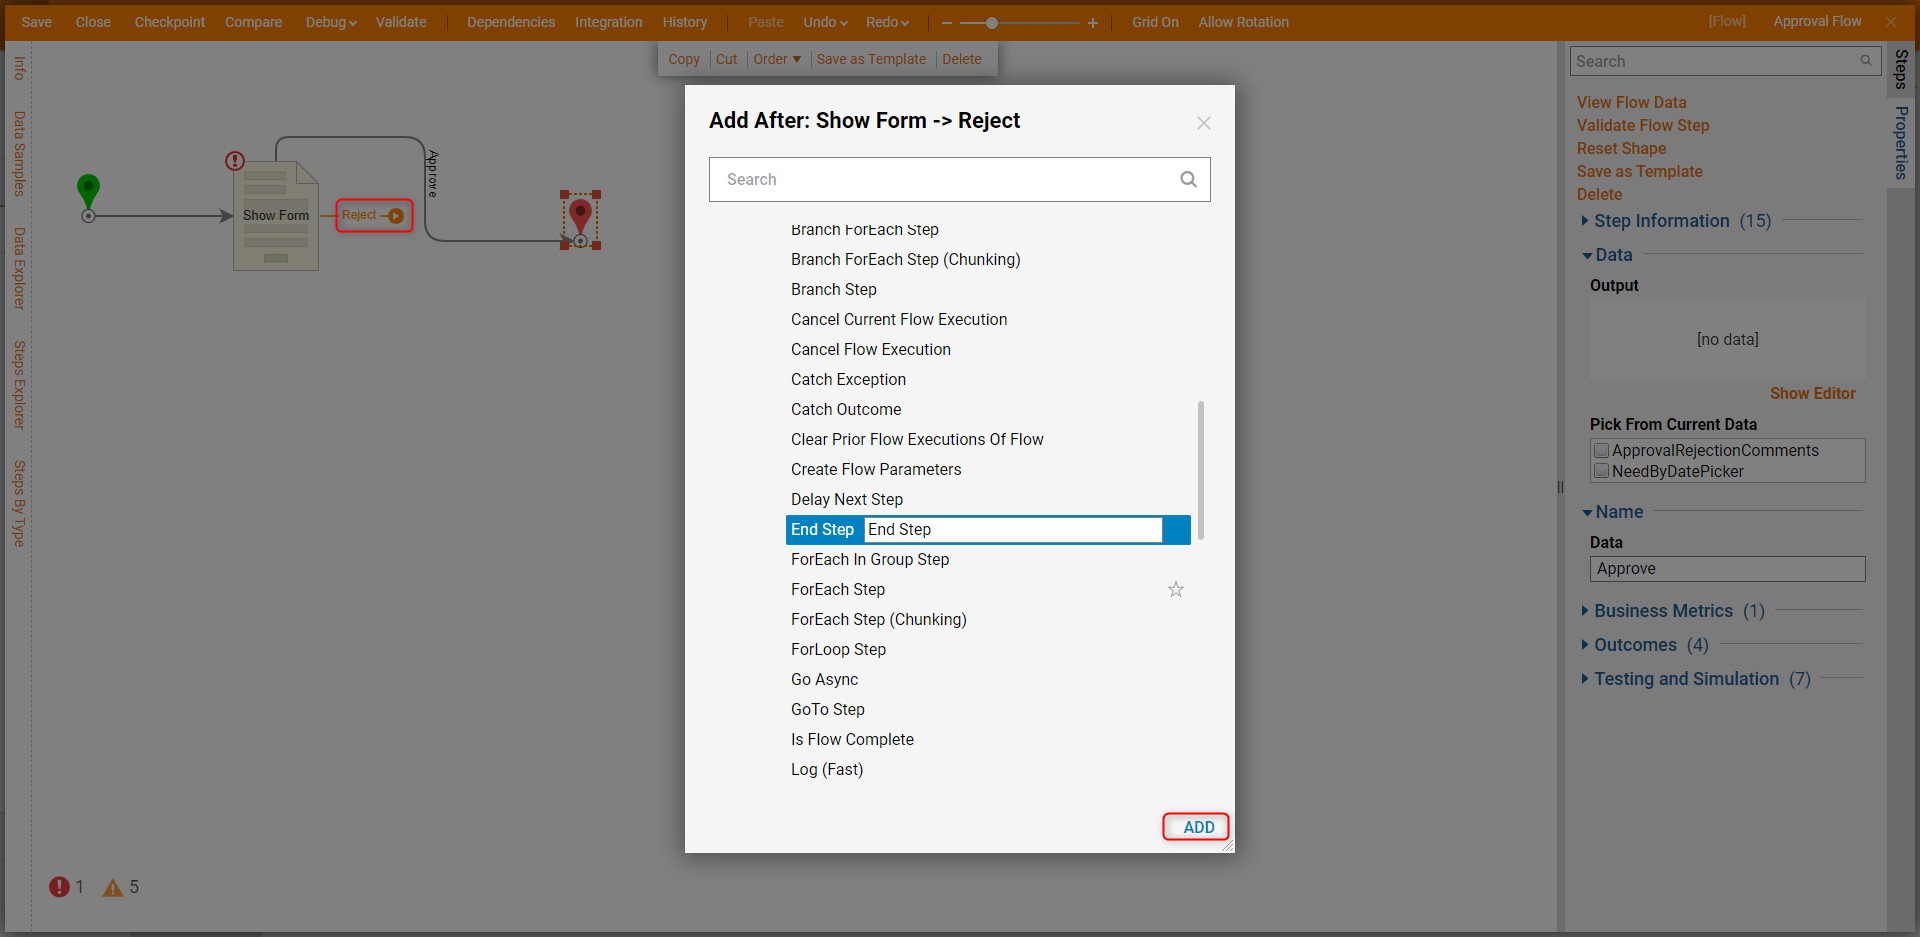
- Select the Reject path and navigate to All Steps [Catalog] > Flow Management. Select End step and click ADD.
- Enter "Reject" in the Data field.
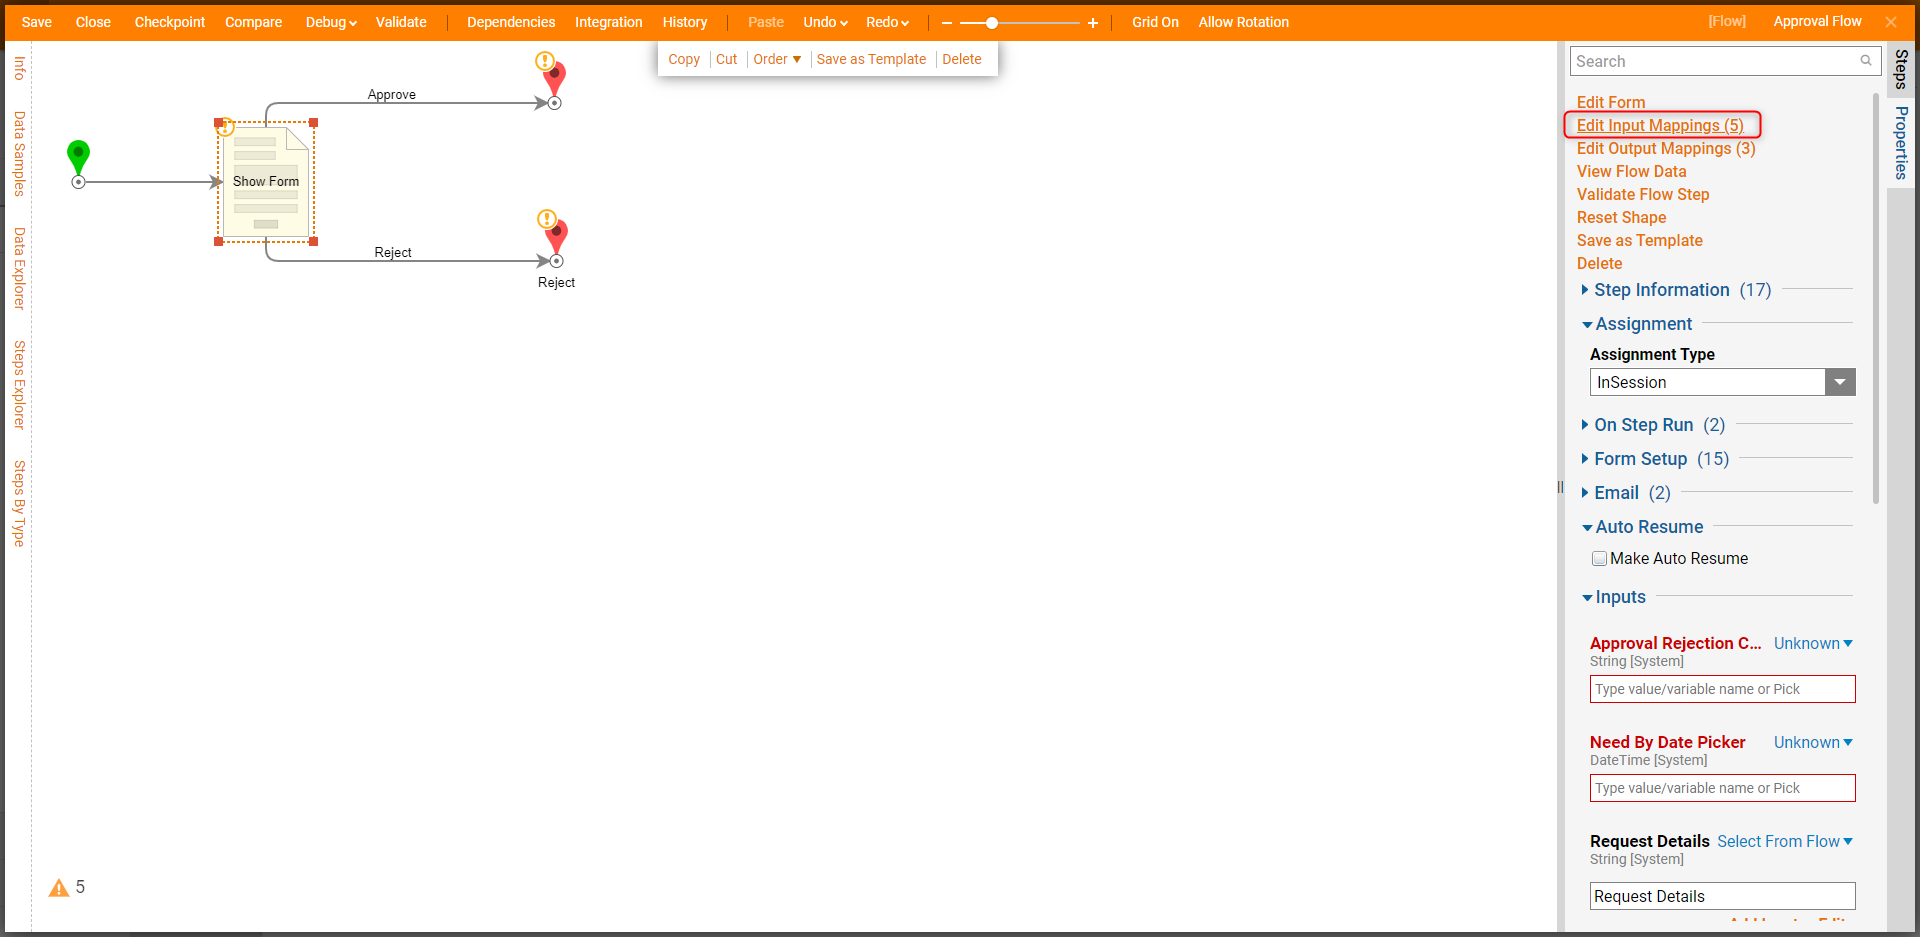
- Select the Form and click Edit Input Mappings.
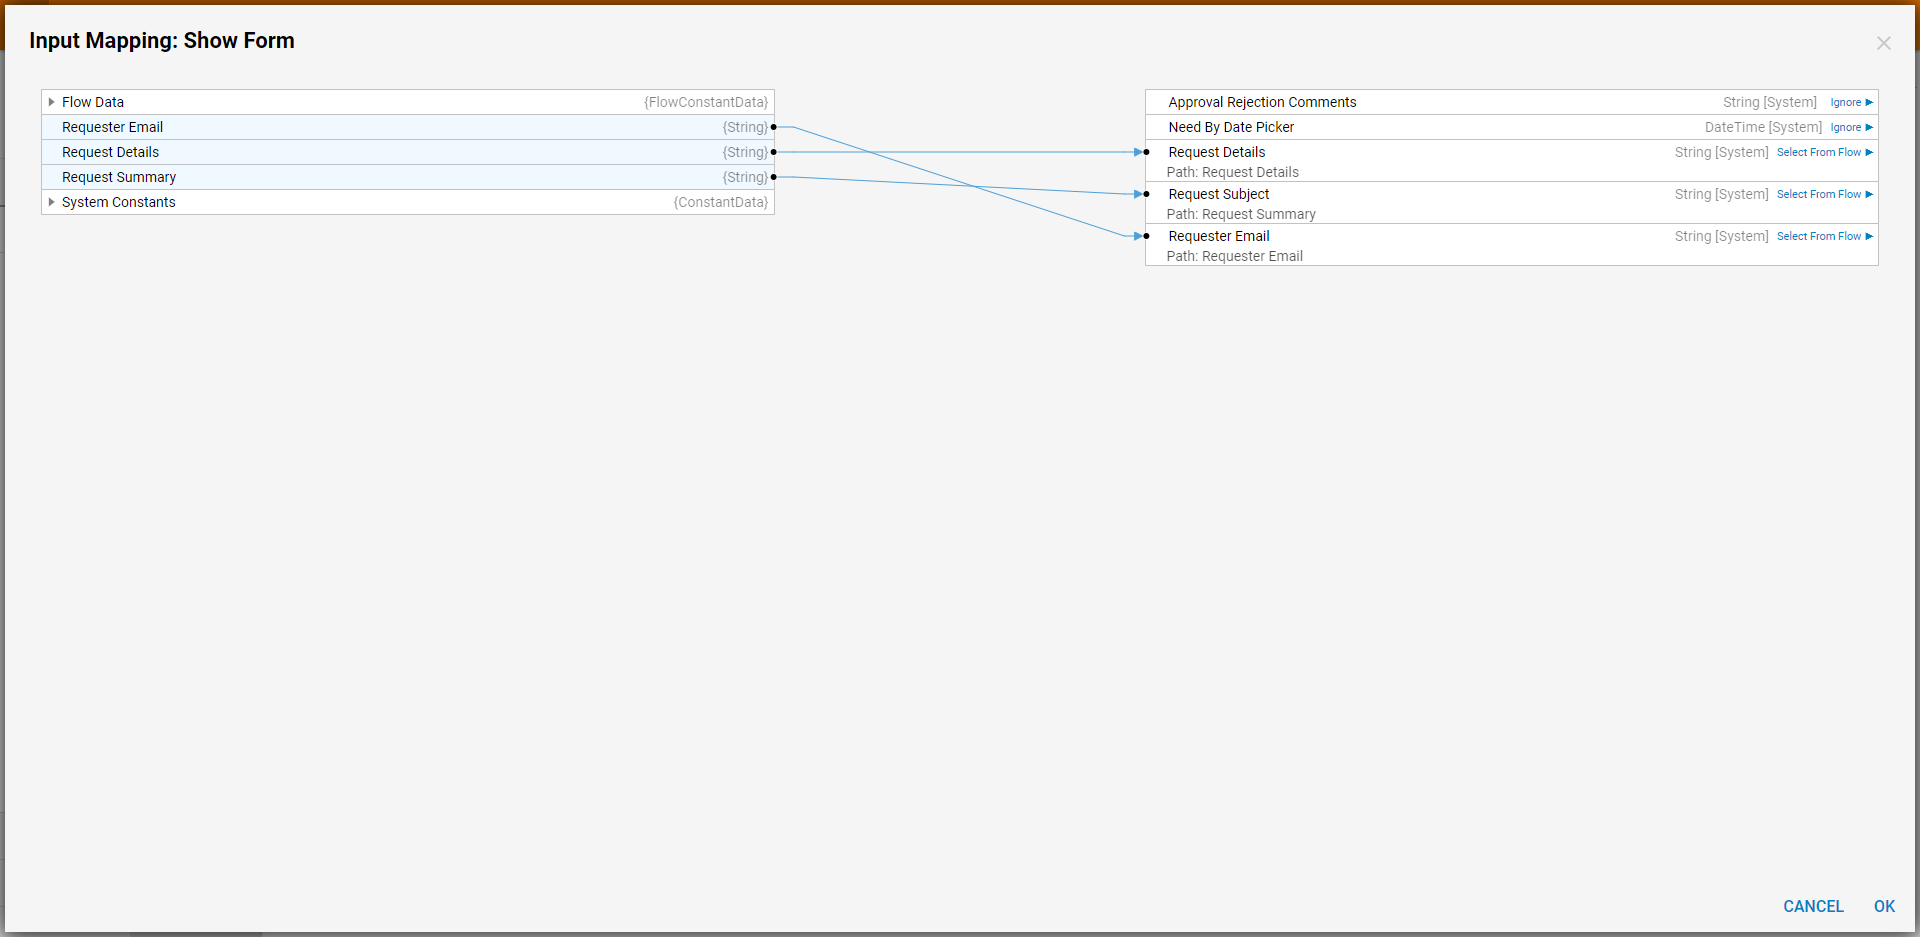
- Map the fields from the Start step that correlate to the appropriate Form fields. Choose the Ignore mapping for the Approval Rejection Comments and Need By Date Picker fields. Click OK to save.
- Click Save and close the Flow.
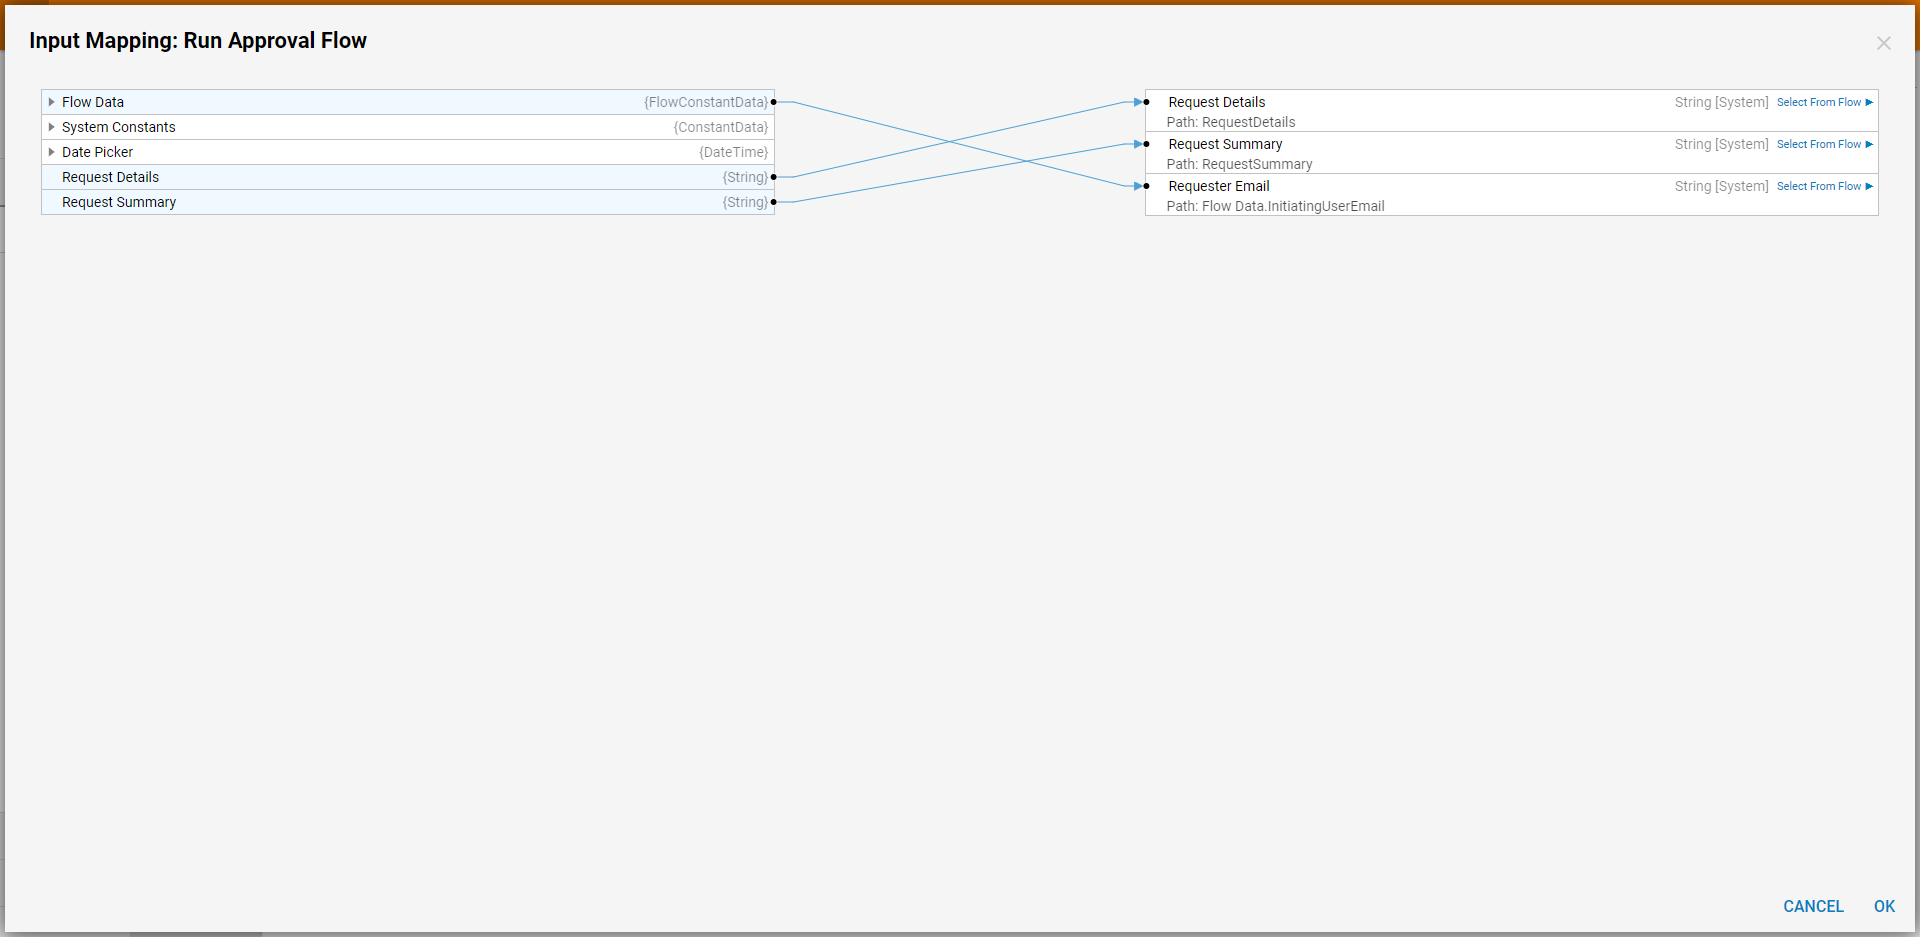
- With the Run Flow Approval step selected, click Edit Input Mappings and map the Request Form output to the Flow Input. Click OK.
- On the Properties Panel, toggle the Load Approval Chain setting and click Pick and choose the desired Approval Chain.
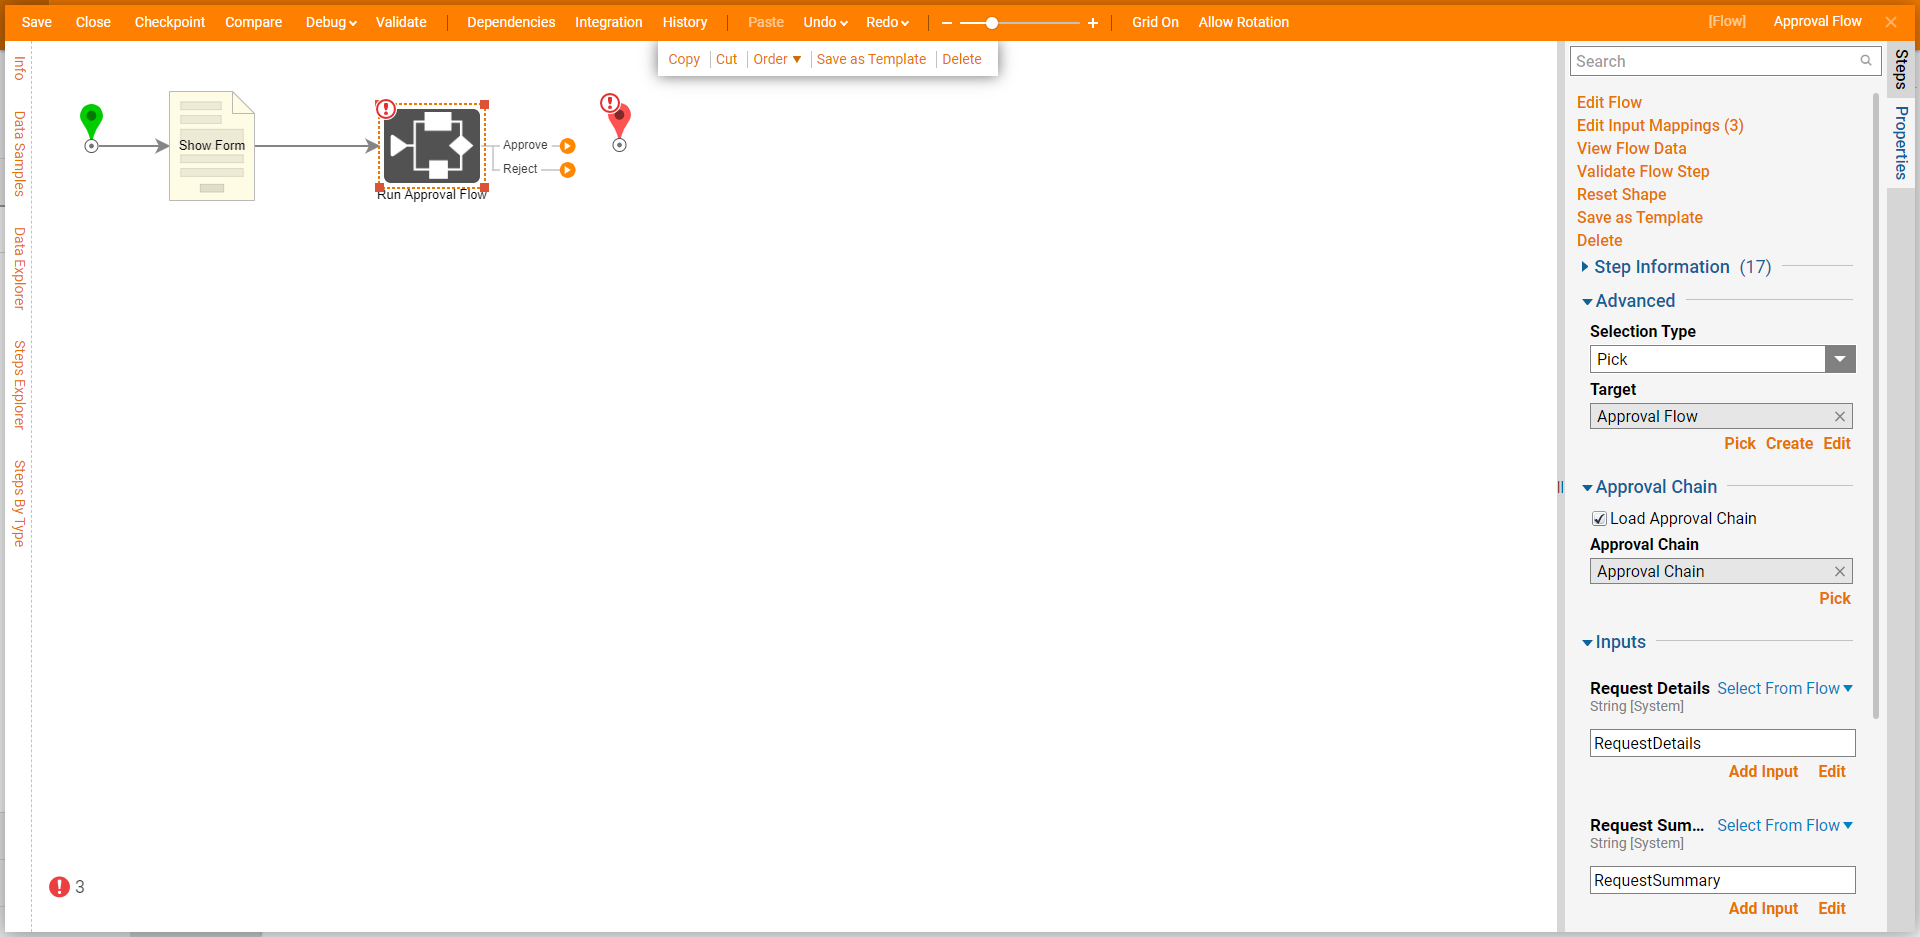
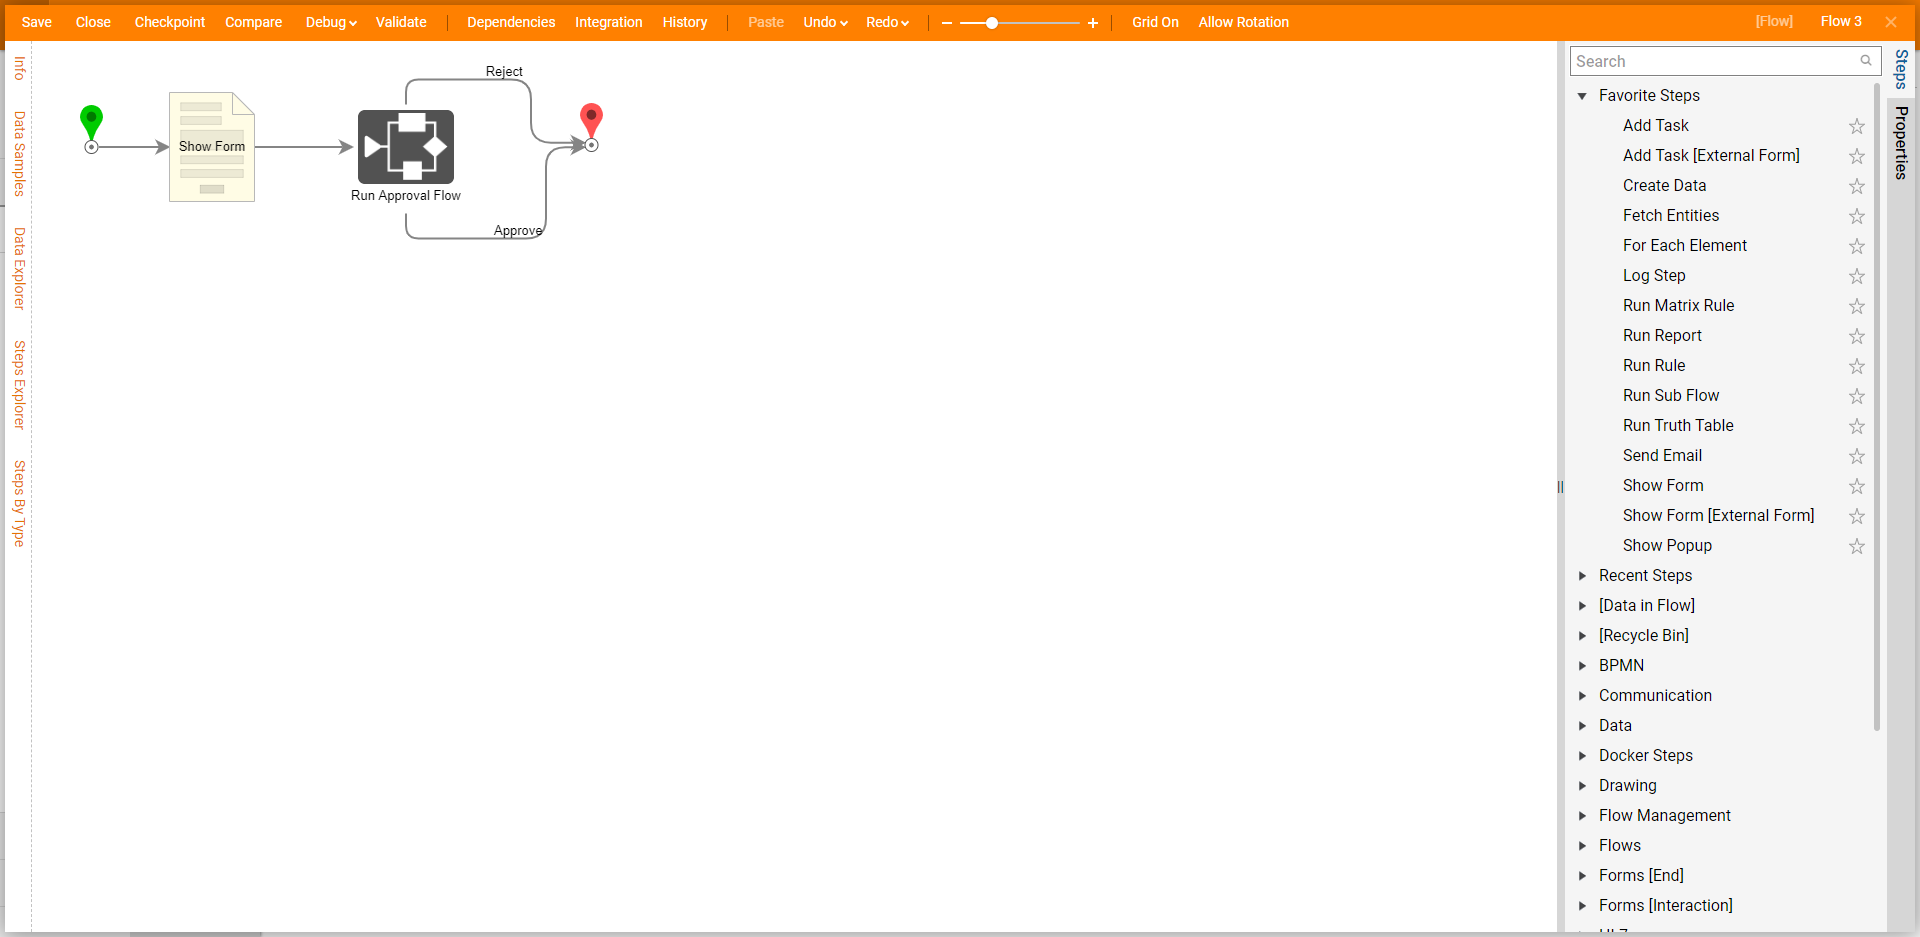
- Connect the Approve and Reject paths to the End step. Click Save to save changes.
Debug
- Click Debug on the top action bar. Then, click FULL.
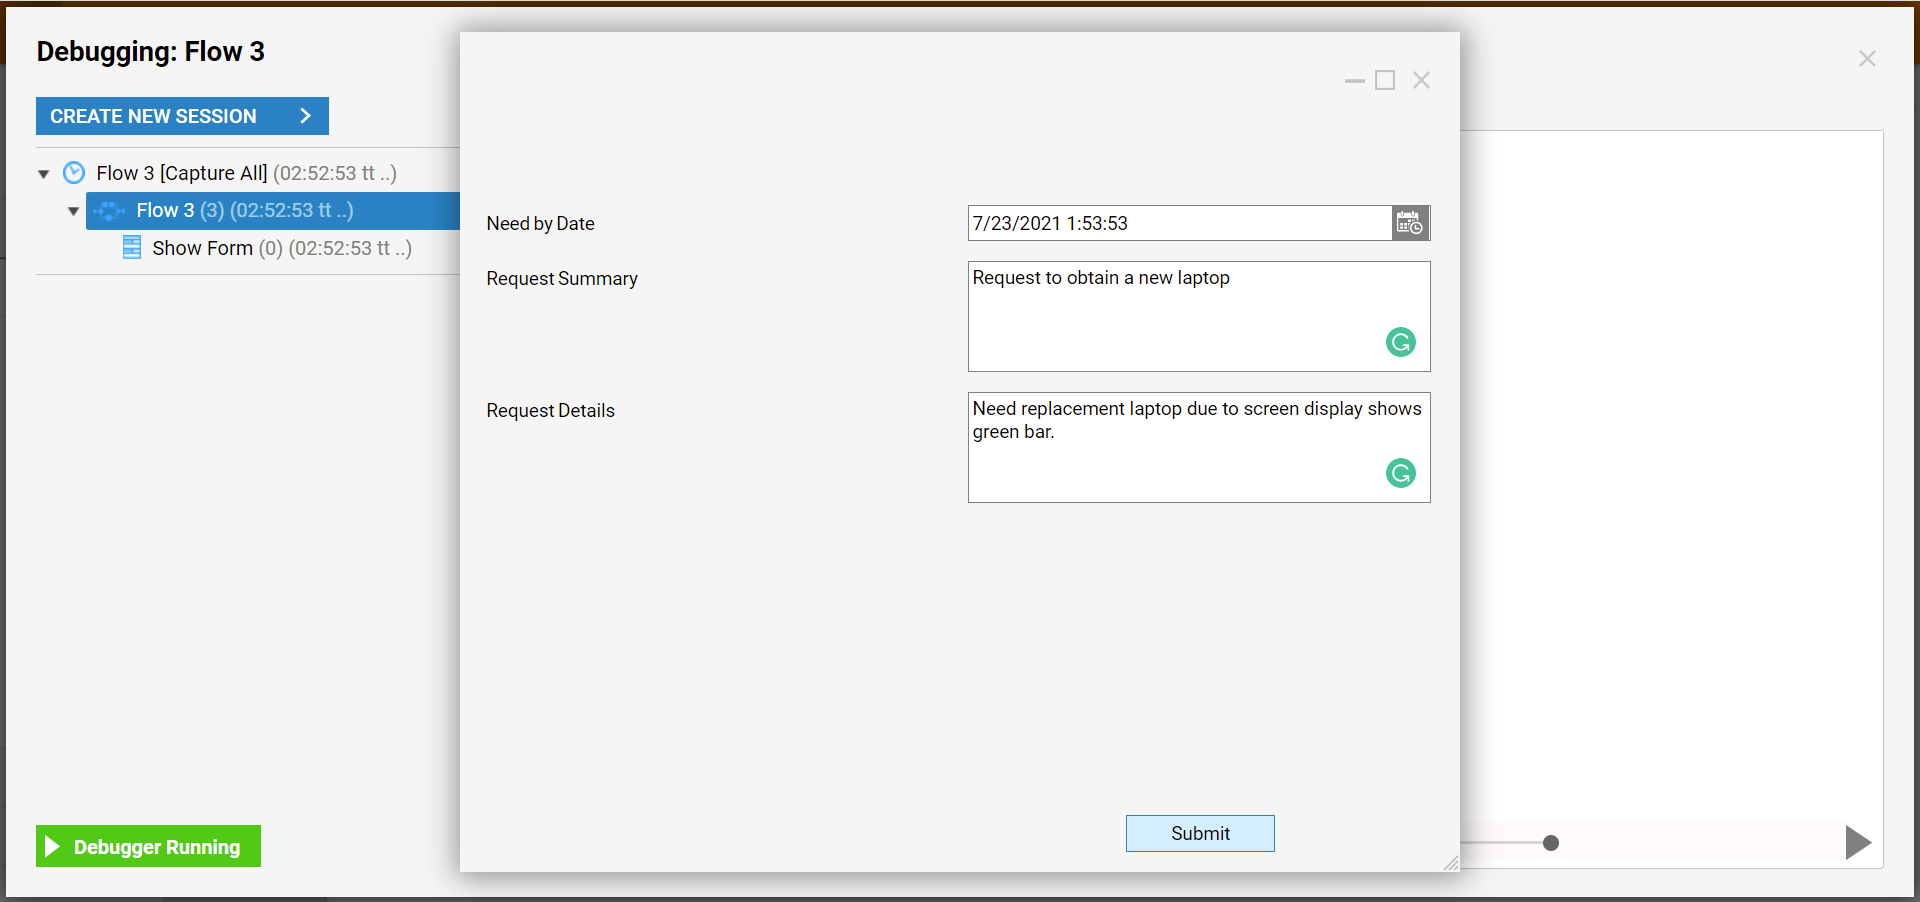
- The Request Form will display, fill it out and click Submit.
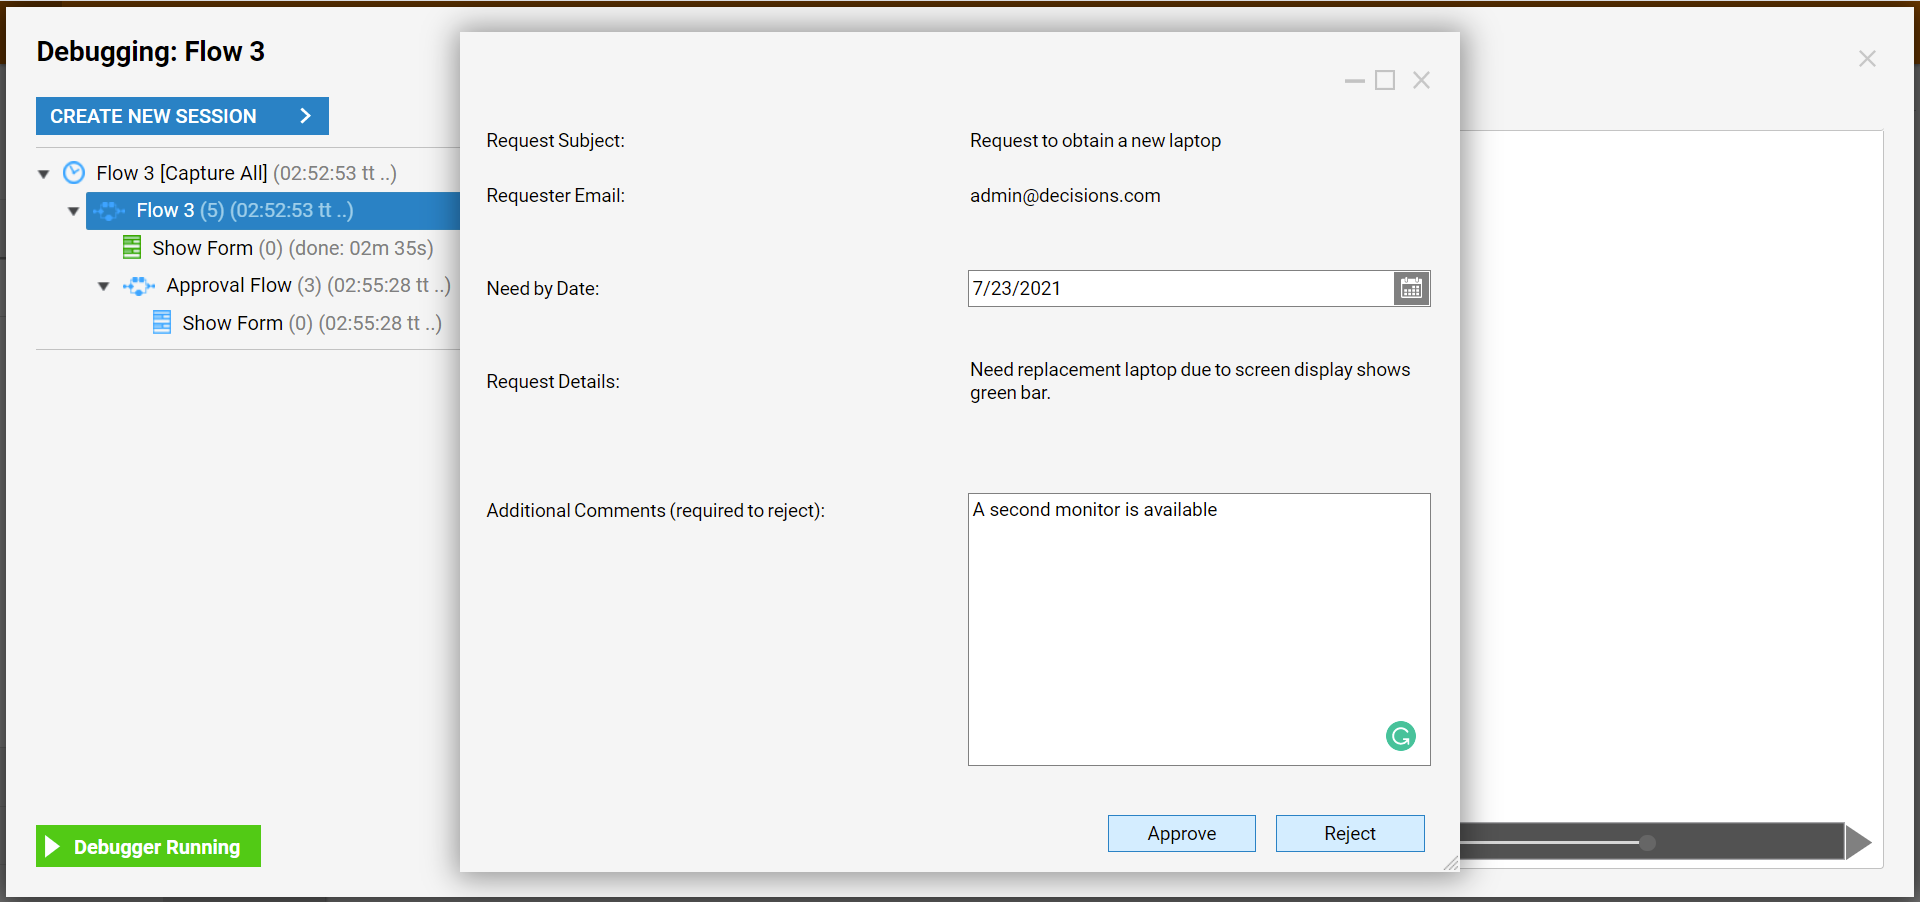
- The Approval form will display. Fill out the form and click either Reject or Approve to test each path.
