Overview
Approval Chains are a series of Approvals that are created by an Administrator to allow System Administrators the ability to decide when and which requests need Approval, and by whom. An Administrator can use an Approval Form to create and set up an Approval Chain.
Example
For information regarding installation see Using the Approvals Module.
The following example demonstrates how to create an Approval Chain using an approval Form within a Flow. To do so:
- Navigate to a Designer Folder, and CREATE a new Flow.
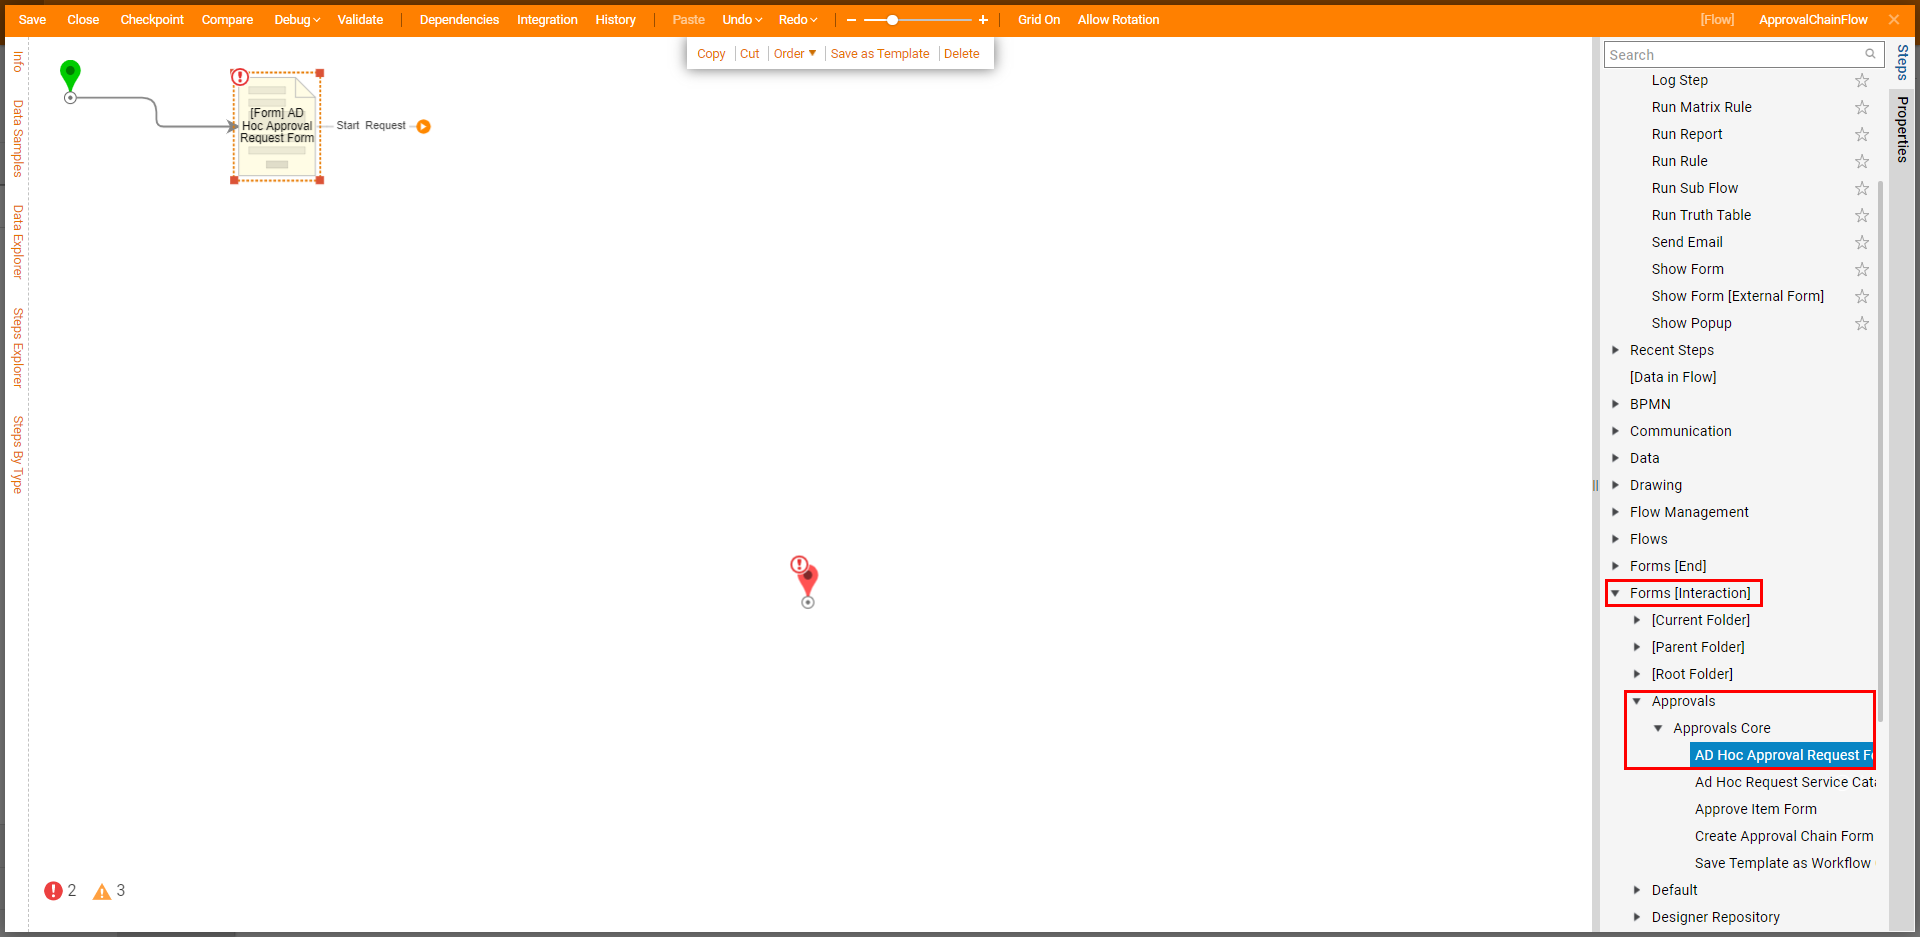
- From the Flow Designer, in the Steps tab, navigate to Forms [Interaction] > Approvals and attach an AD Hoc Approval Request Form step to the Start step.
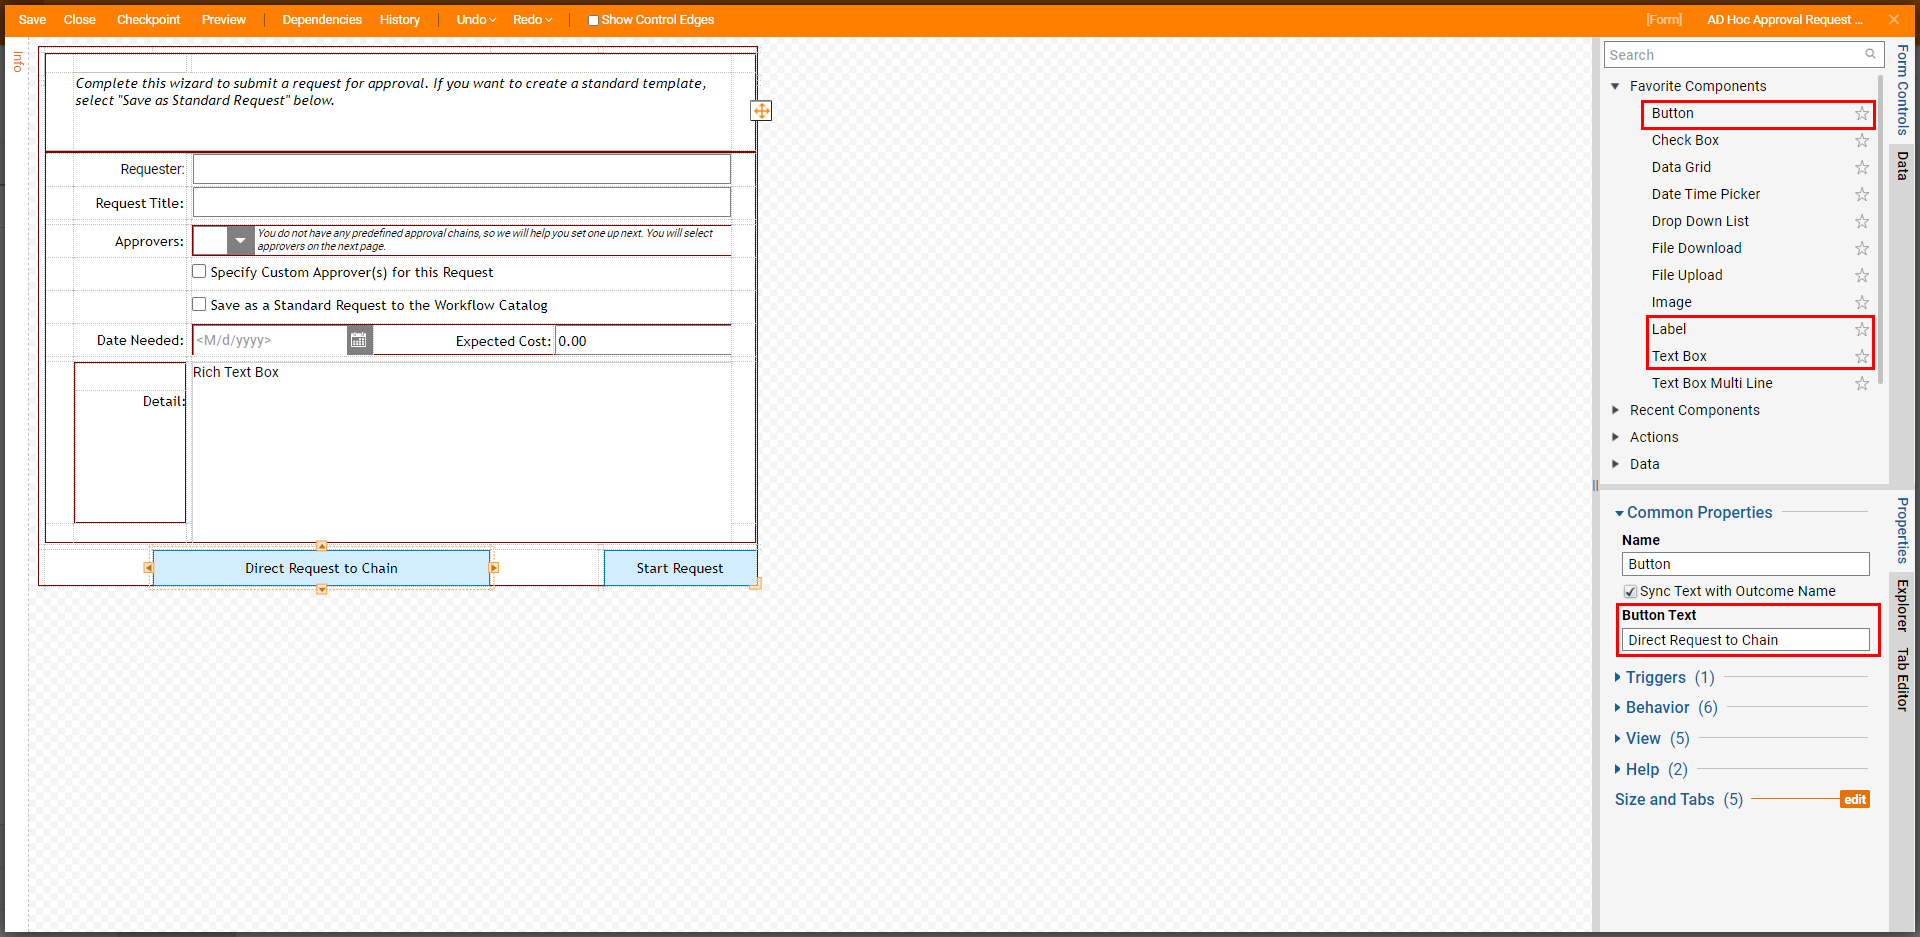
- From the Properties tab of the Form, click Edit Form. From the Form Designer, and an additional Button component with the Button Text, "Direct Request to Chain", and a Text Box with its corresponding "Requester:" Label. Save the Form, then Close the Designer.
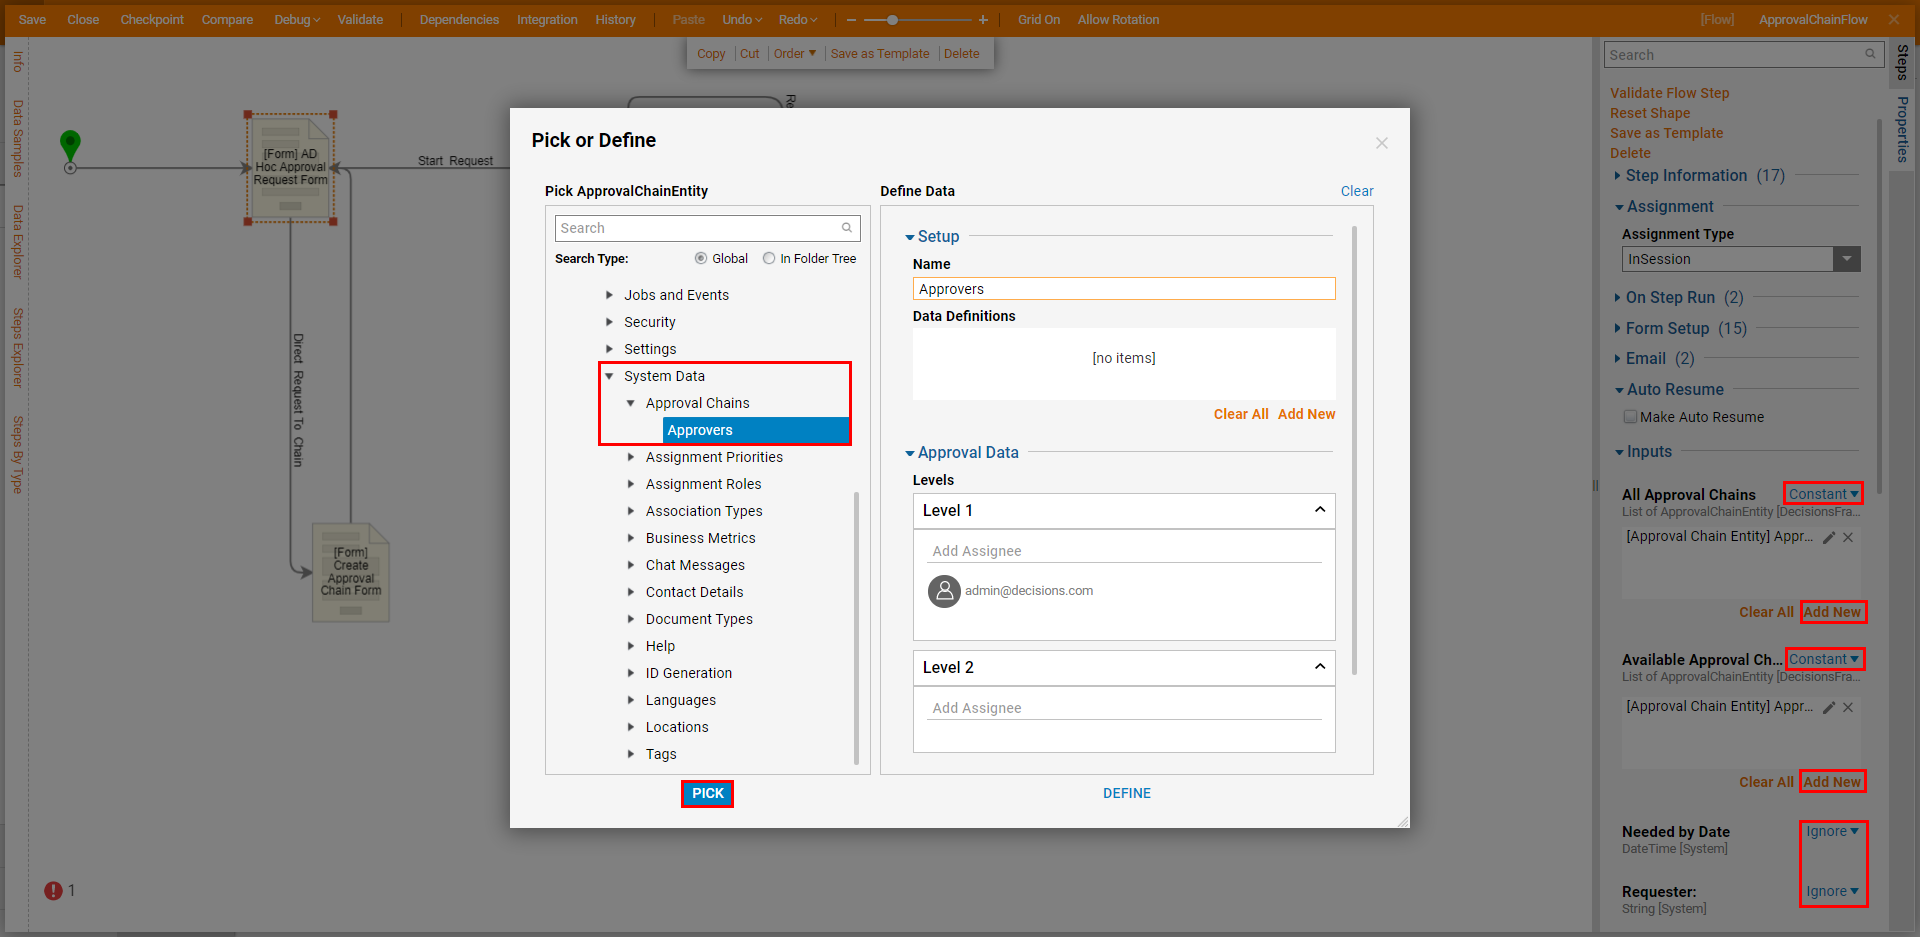
- From the Flow Designer in the Properties for the Form, set Needed by Date and Requester: to Ignore, and All Approval Chains and Available Approval Chains to Constant. Then under each Approval Chains Input, click Add New and PICK the desired Approval Chain.
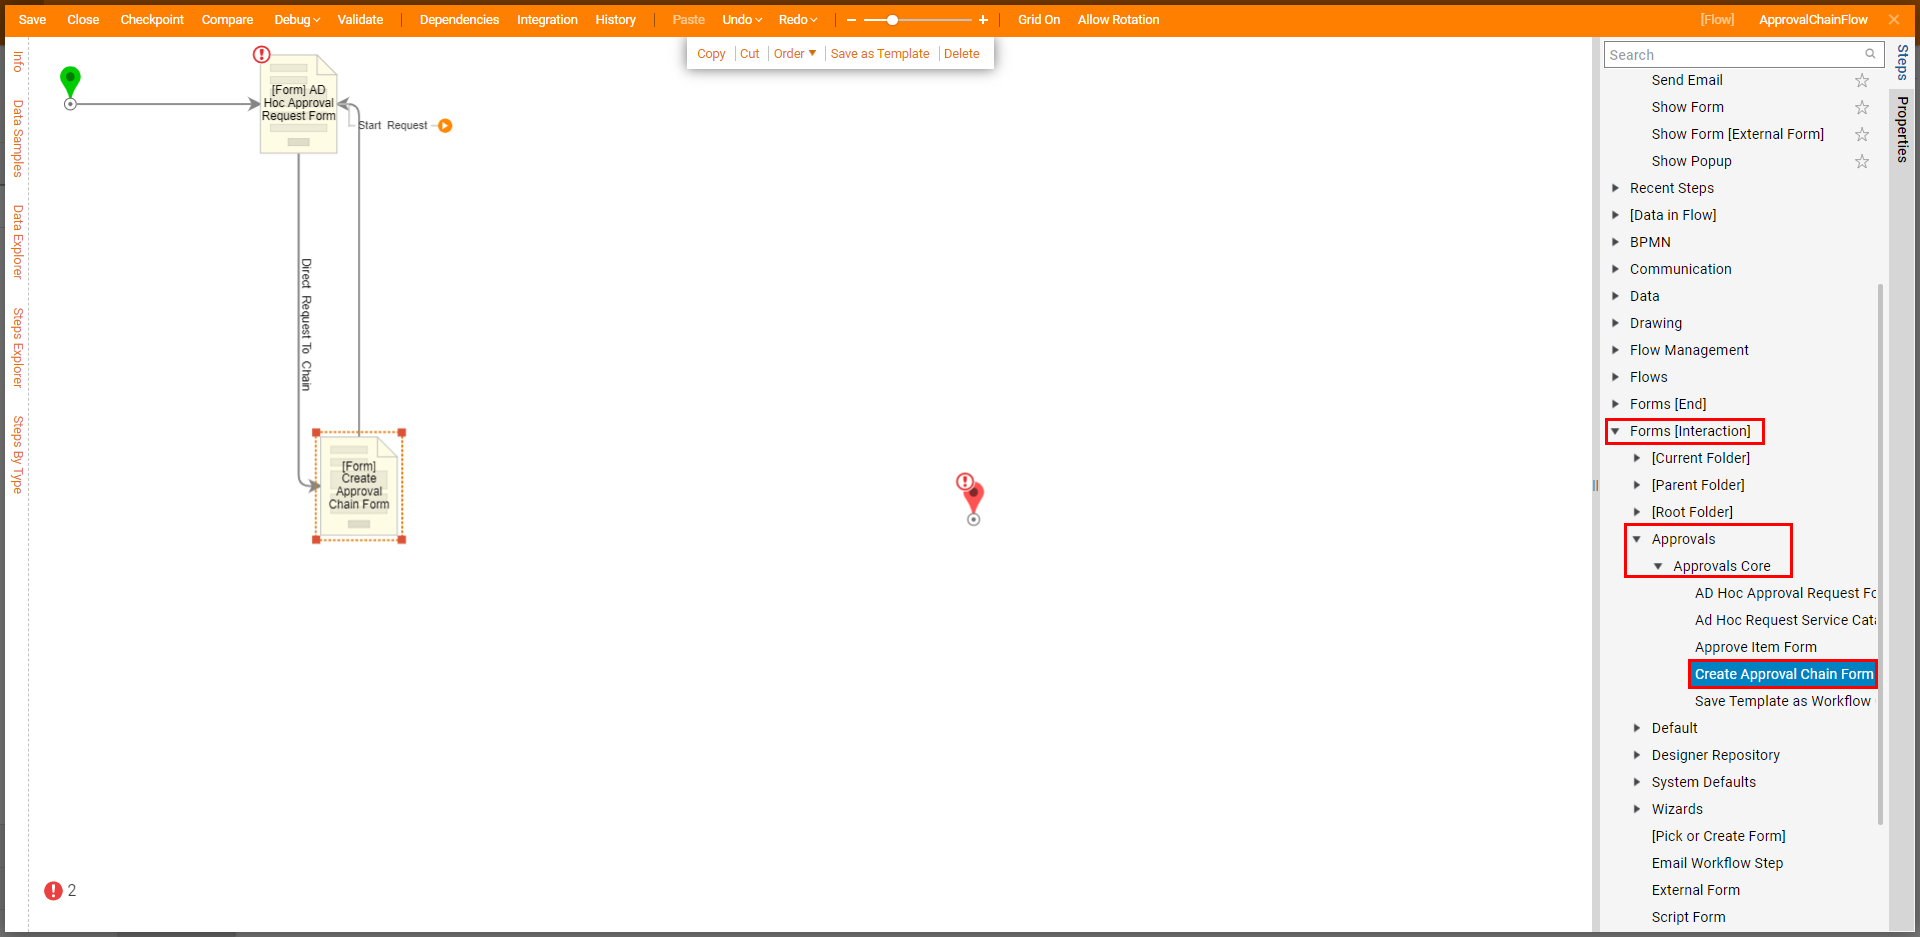
- From Steps > Forms [Interaction] > Approvals > Approvals Core,attach a Create Approval Chain Form step to the Direct Request To Chain path. Then, connect the Start Request path of the Create Approval Chain Form back to the AD Hoc Approval Request Form.Connecting these steps to each other allows the Form to create and request to an Approval Chain based on the designated Available Approval Chains.
Attach an Approve Item Form from the same Forms [Interaction] > Approvals > Approvals Core Folder and connect both the Approve and Reject paths to the End step. From the newly added step's Properties, map Request Title to Approval Form Title, Request Detail to Approval Item Description, Requester: to Request Detail, Needed by Date to its respective Input, and Approval Chain.Levels.All CreatedOnDate.First to Requested On.
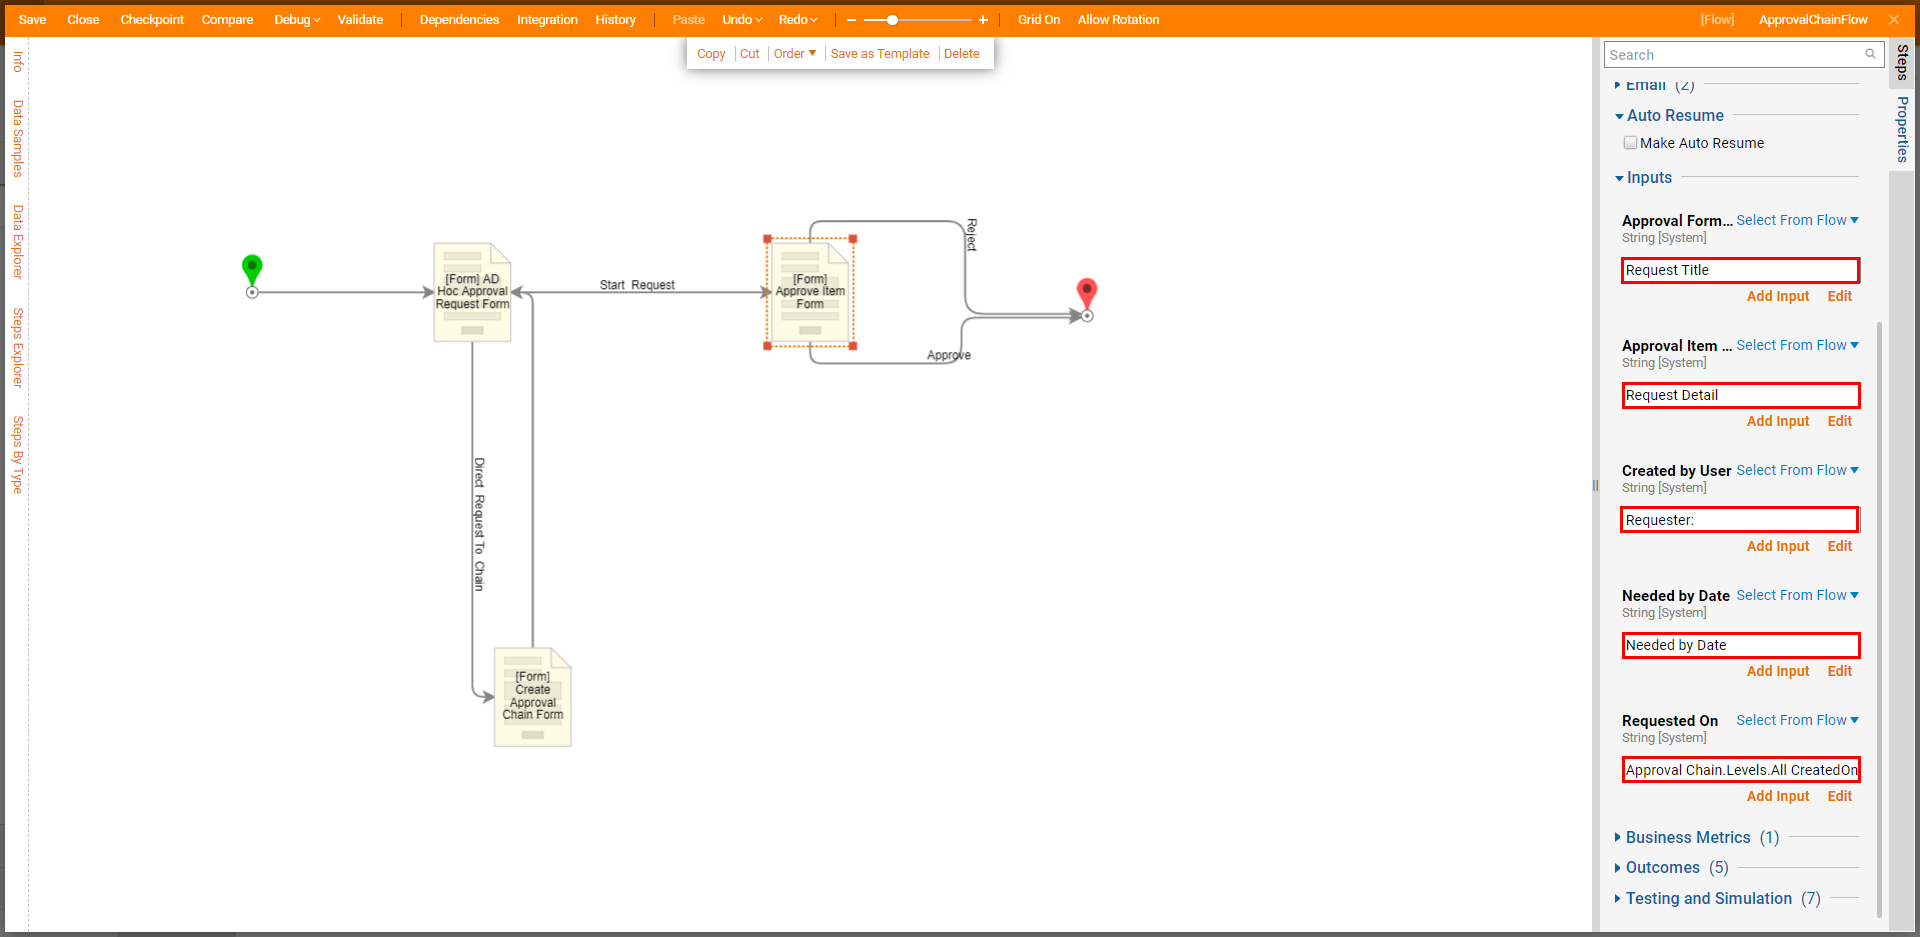
Save the Flow, then if desired Close the Flow Designer.
Debug
- From the Flow Designer, click the Debug link from the top toolbar. Then, click FULL.
- On the Form in the Debugger, enter the Title, Requester, Detail, and Date and select Direct Request To Chain to add the request to the Approval Chain.
.png)
- In the Configure Approver Chain window, select the Name of the new Approval Chain list, and add the Approvers for each level. The Approver can be an Account, Group, or Role. Click the Edit button to specify whether it is an Escalation Level or Time to Approve.
- Click OK.