Overview
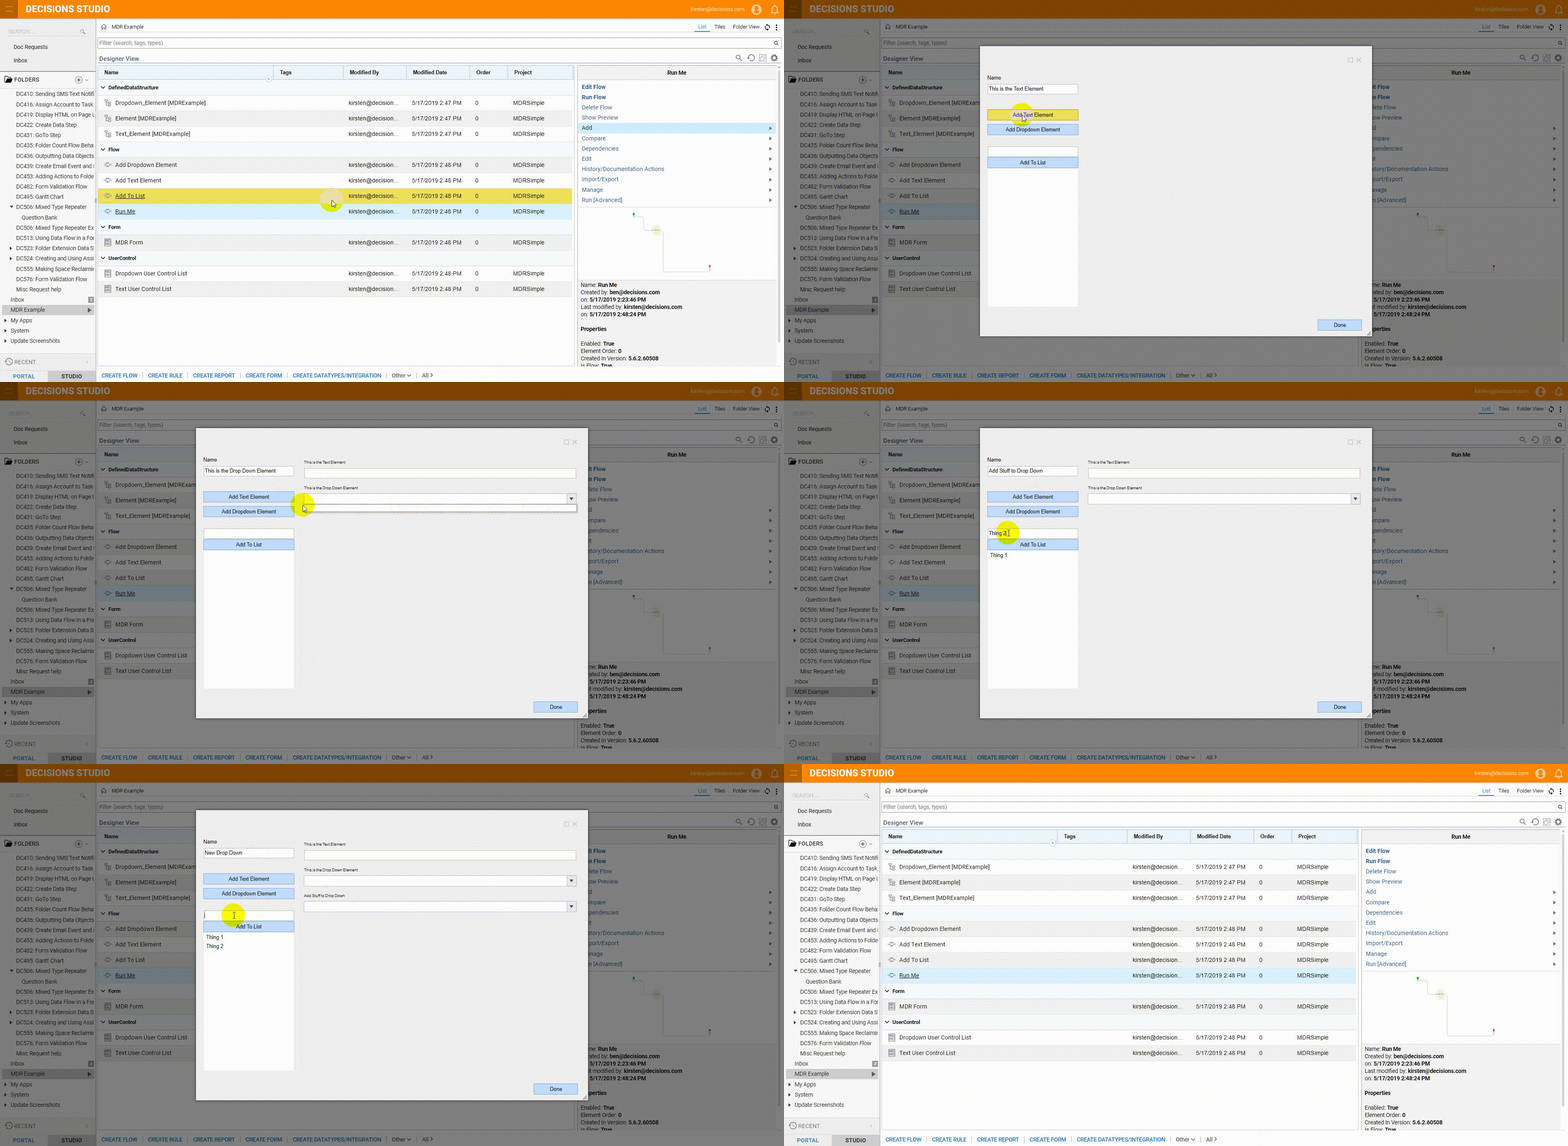
The Mixed Type Repeater control allows a Decisions form to dynamically display which type of repeater to display based on a users input. Users can also display different custom data types or display primitive data types. A common use case for the Mixed Type repeater is for creating dynamic surveys. When creating a survey, users can use the mixed type repeater to populate different types of survey questions like a radio button list, true or false question, or a multiple choice question. The example mixed type repeater in this document is configured to give the user the ability to create a custom dropdown list repeater with a title, or create a text data repeater with a title. At the end of this example build, both these types of repeaters can be instantiated by the click of a button.
Example
In this example, a form is built using the Mixed Type Repeater control. This control displays a Text Element and a Drop Down Element.
An add to list event is used to add elements to the drop-down lists.
Requirements
Under our Project section, a relevant example lab is available to supplement this article. An example lab offers its readers a downloadable Decisions file of a functional project to import to their own Decision instance alongside a thorough explanation of its configurations. After importing this file, the reader may navigate the project at their own pace from within the platform.
Please refer to our Creating a Mixed Type Repeater example lab to review and download the project file.
For help importing the file, refer to our Importing and Exporting Projects article.
Defined Data Structures
Begin in a Designer Folder, in the bottom action panel select Create DataTypes/Integration. Then choose Defined Data Structure and select Create.
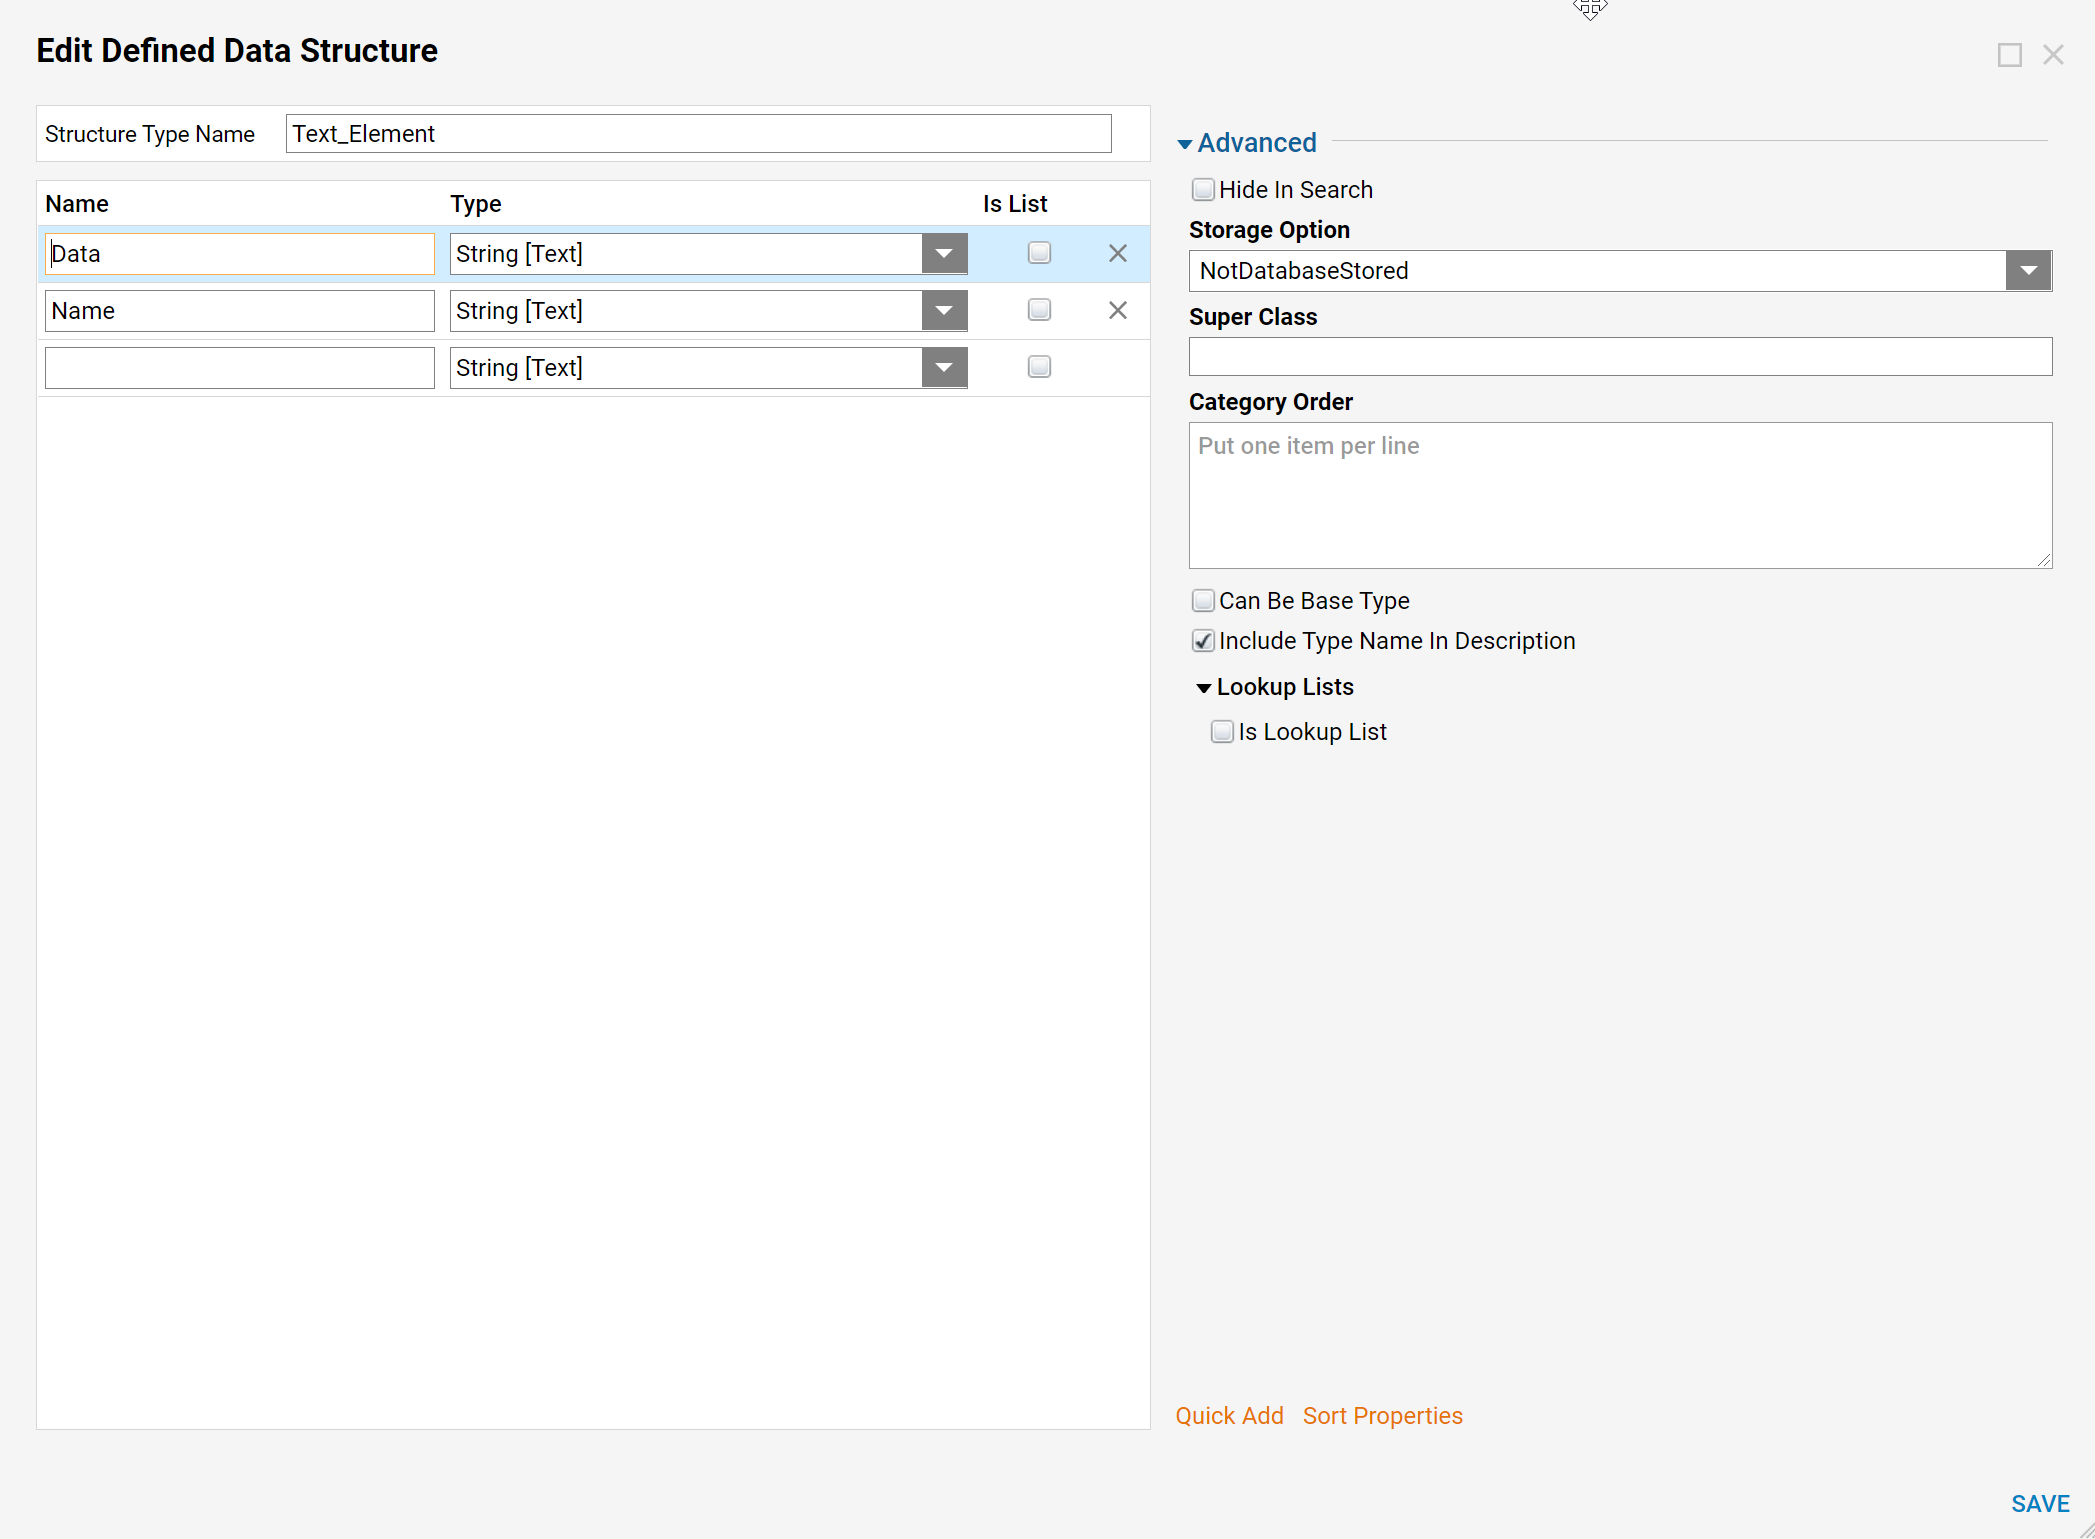
Name the first Define Data Structure "Text_Element", configure the structure like the screenshot below. Select Save, to save and close the structure.
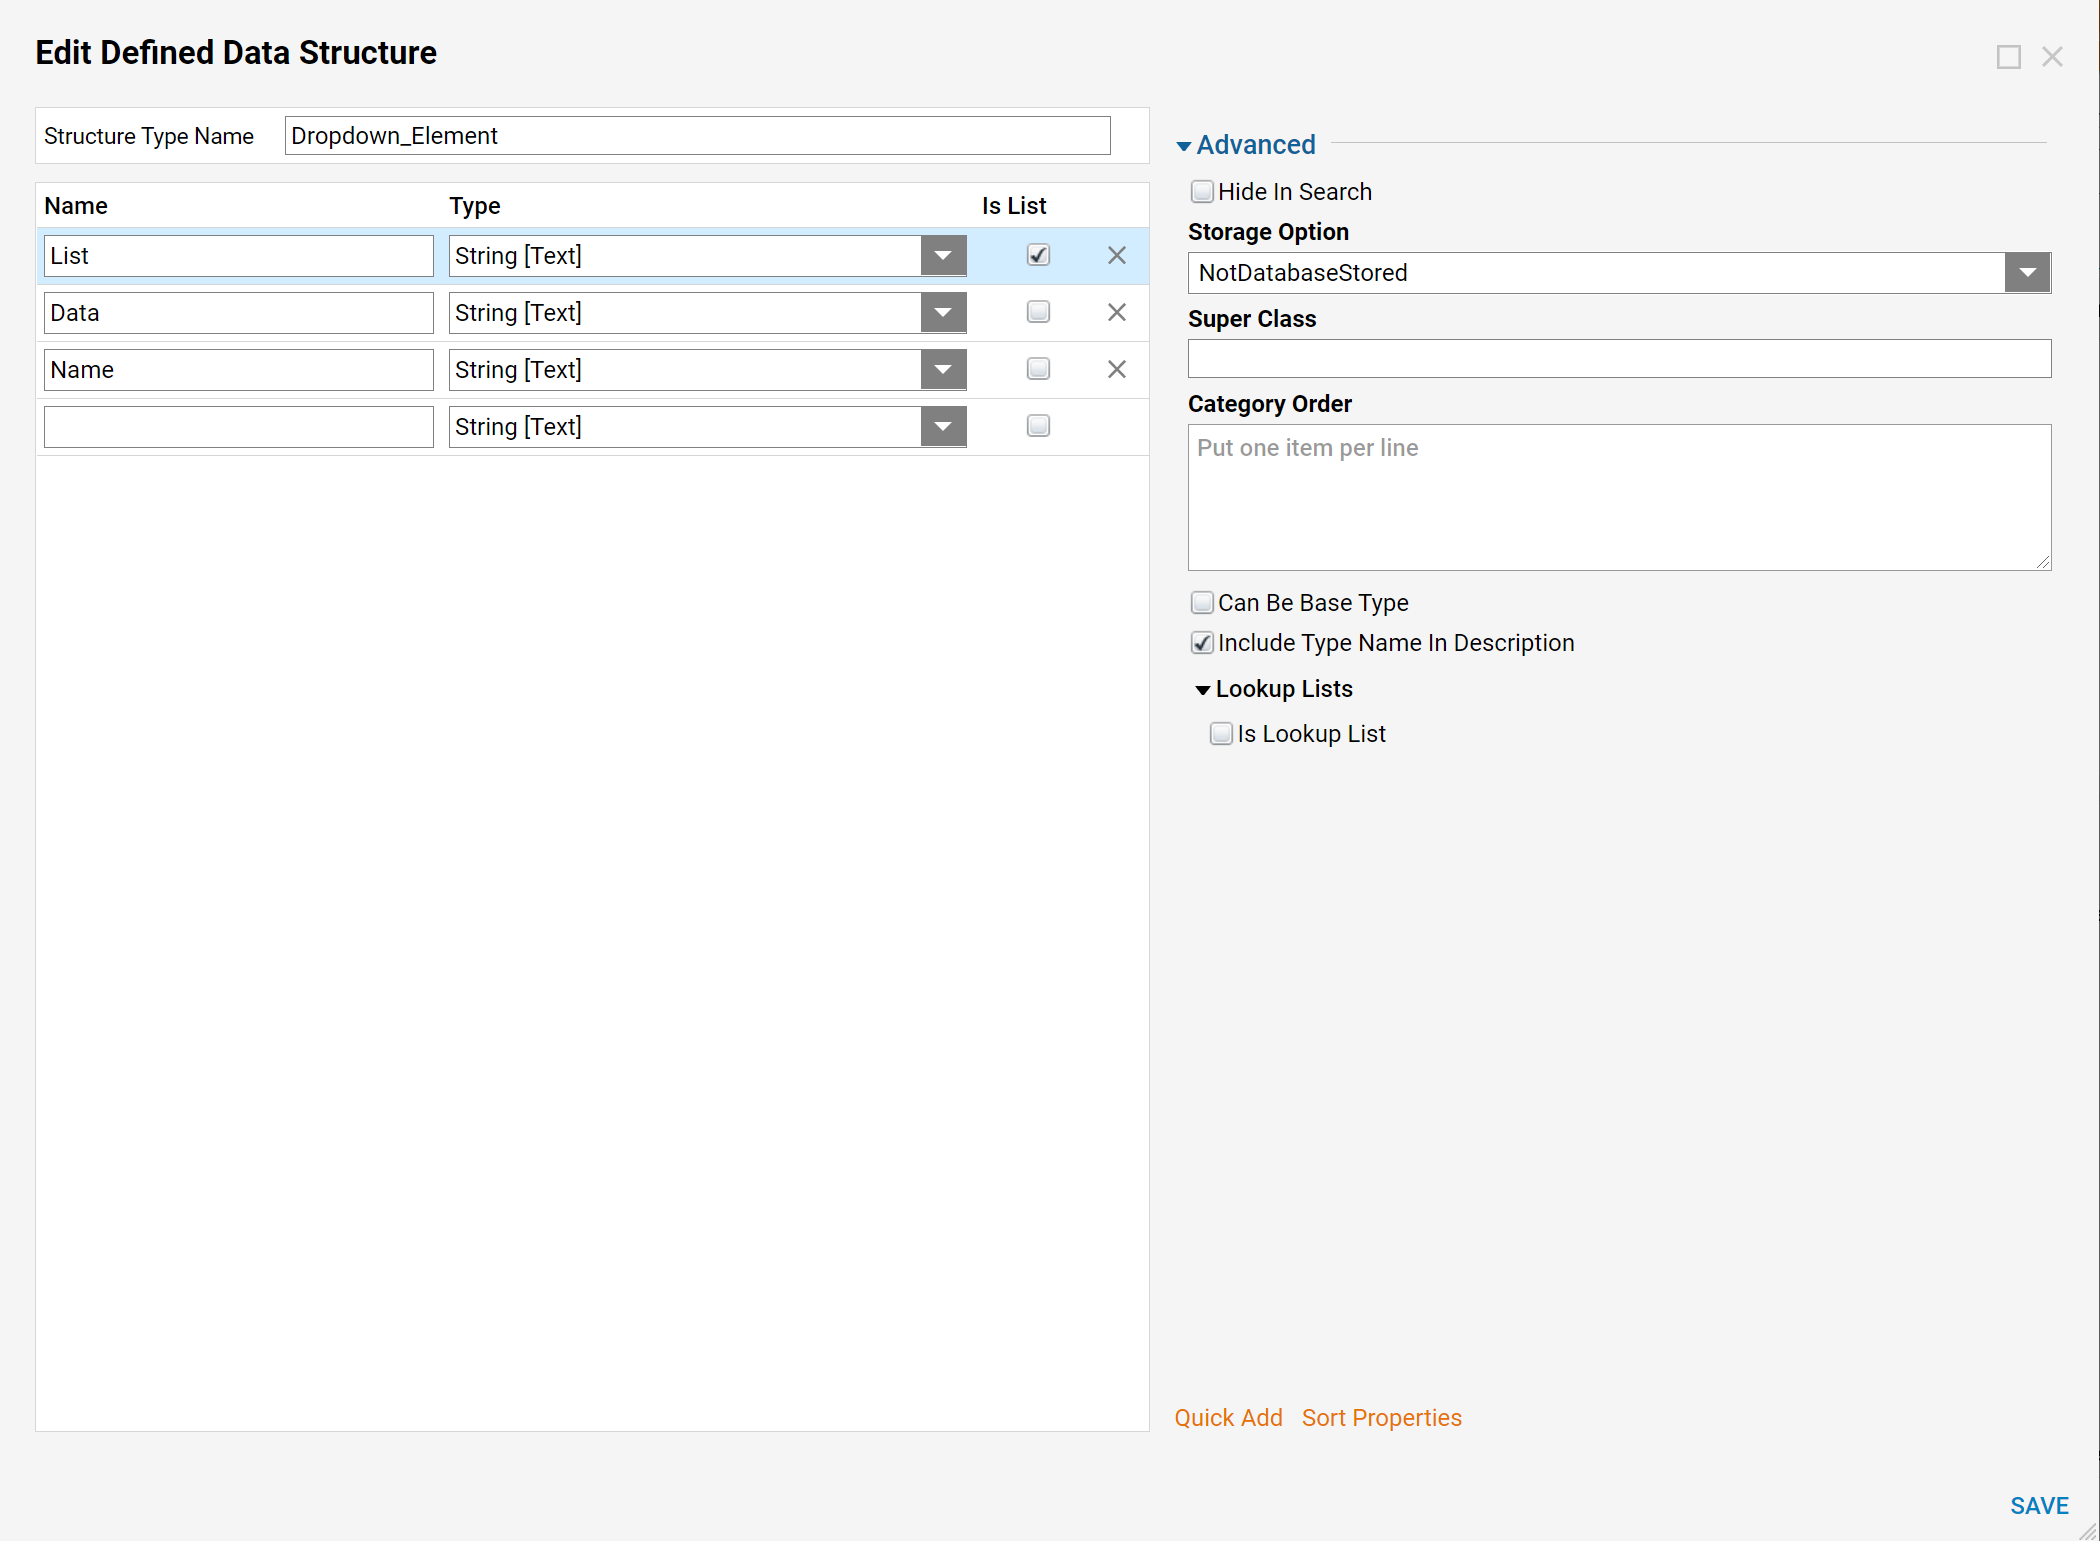
Name the second Define Data Structure "Dropdown_Element", configure the structure like the screenshot below. Select Save, to save and close the structure.
Main Flow
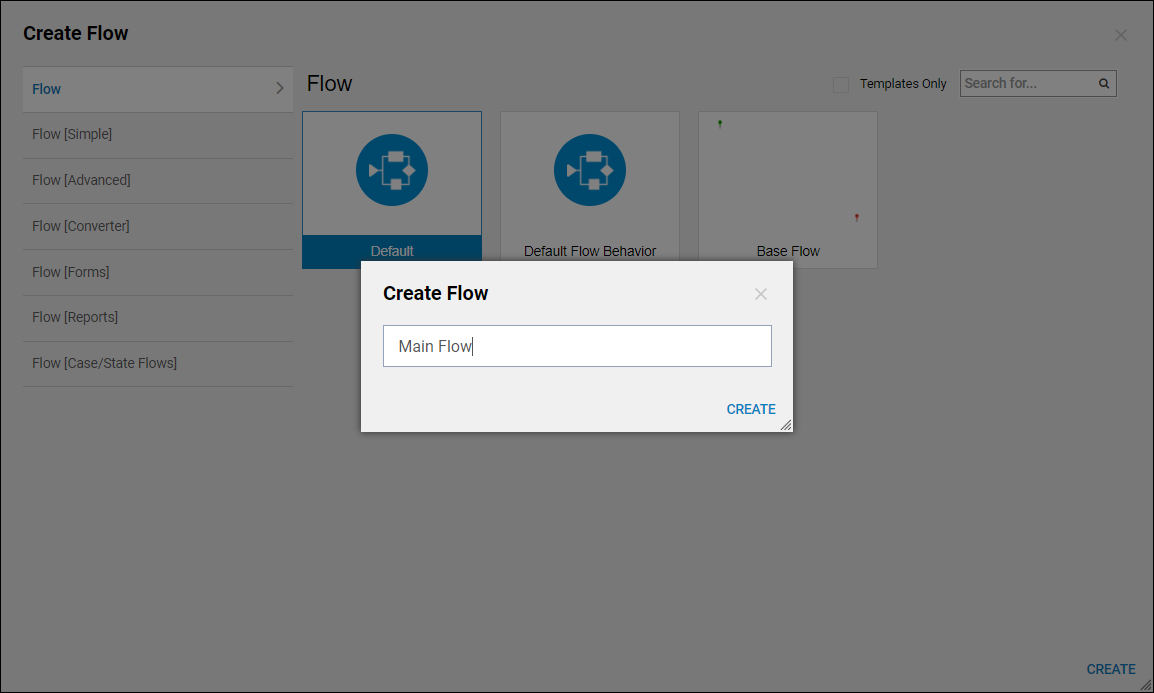
In the Designer Folder, select Create Flow in the bottom action panel. Name the flow and select Create.
In the workspace add a Show Form step after the Start step.
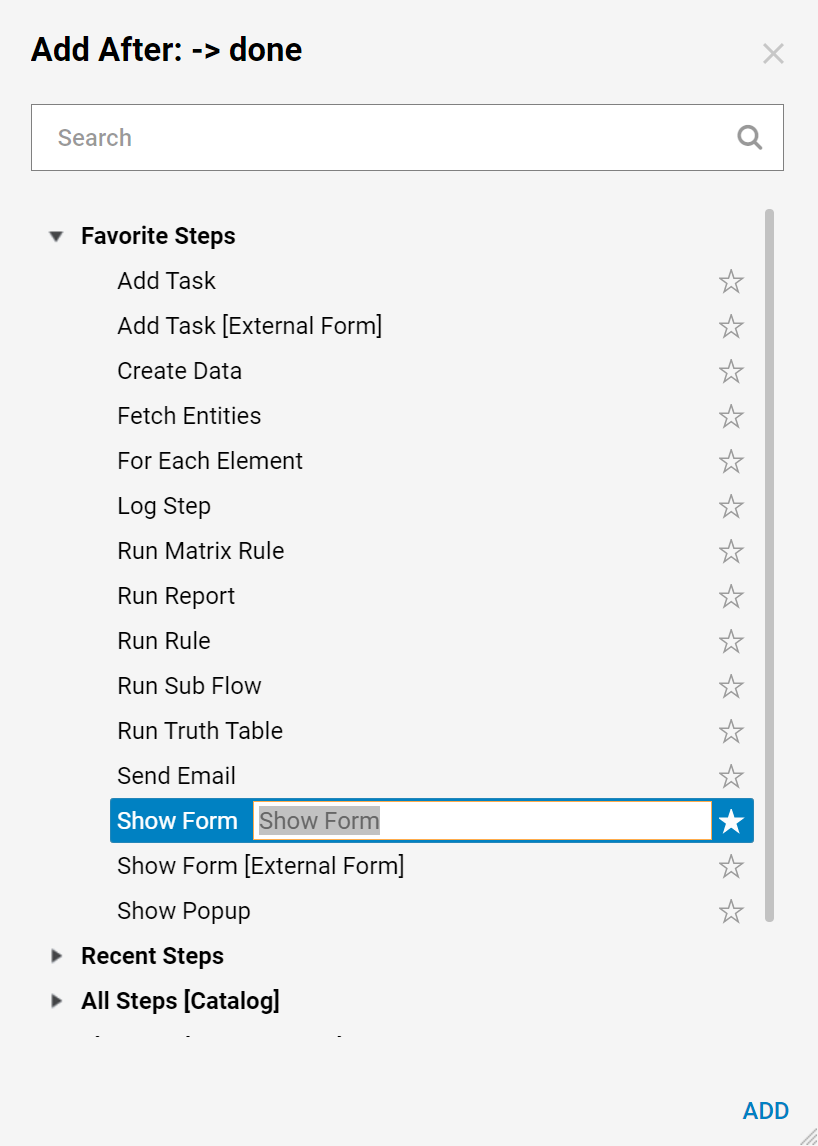
In the Default Editor for Step: Show Form dialog, under Create New, name the form and select Create.
Build the form as following:
Label
Textbox
Data Name: NameTextbox
Data Name: AddtoListEvent Button
Name: EventButton_Text
(will be configured with a data flow later in the example)Event Button
Name: EventButton_Dropdown
(will be configured with a data flow later in the example)Event Button
Name: EventButton_Add_List
(will be configured with a data flow later in the example)List Box
Data Name: ListMixed Type Repeater
See Below to ConfigureButton
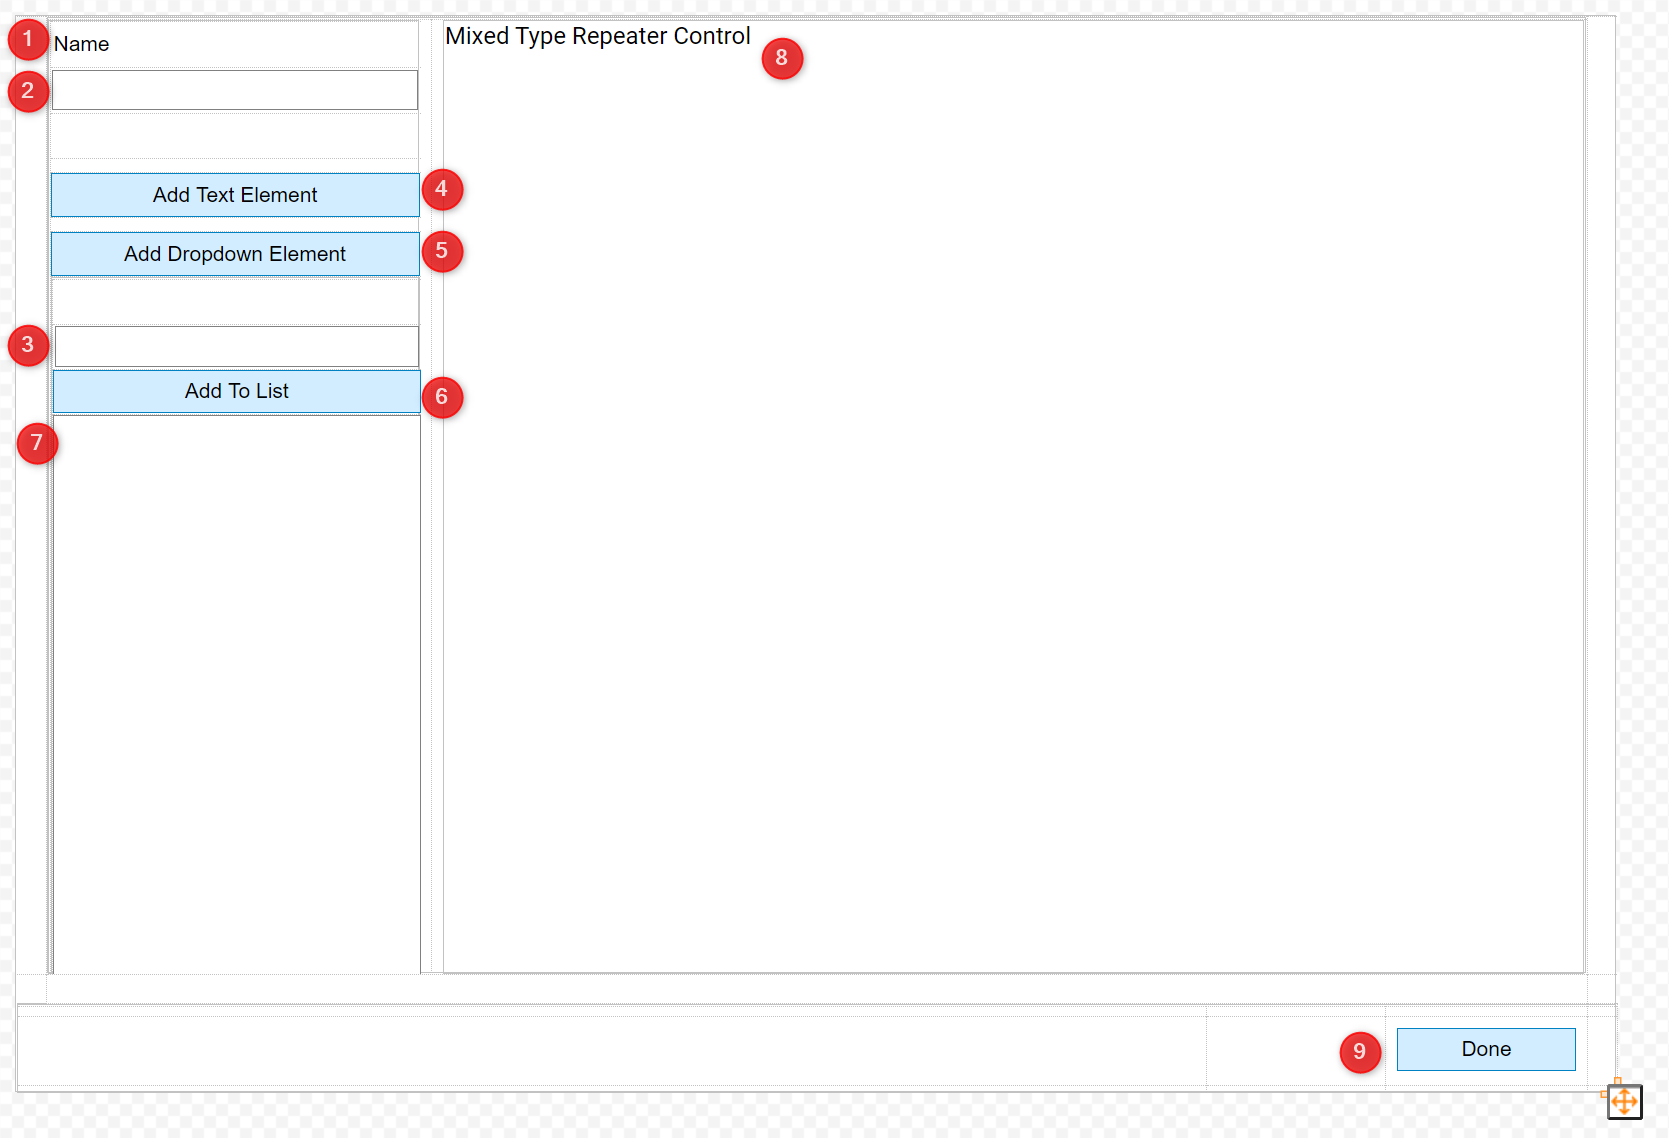
Mixed Type Repeater Control
Select the Mixed Type Repeater and navigate to the properties panel.
Under Common Properties name theData Name, Elements.
Also under Common Properties, there are Sources. Sources are miniature forms called user control lists. Multiple sources can be set up for Mixed Type Repeaters and these different sources can be different data types.
Under Sources select Add New, Create and name a new Source "Dropdown User Control". Select Create.
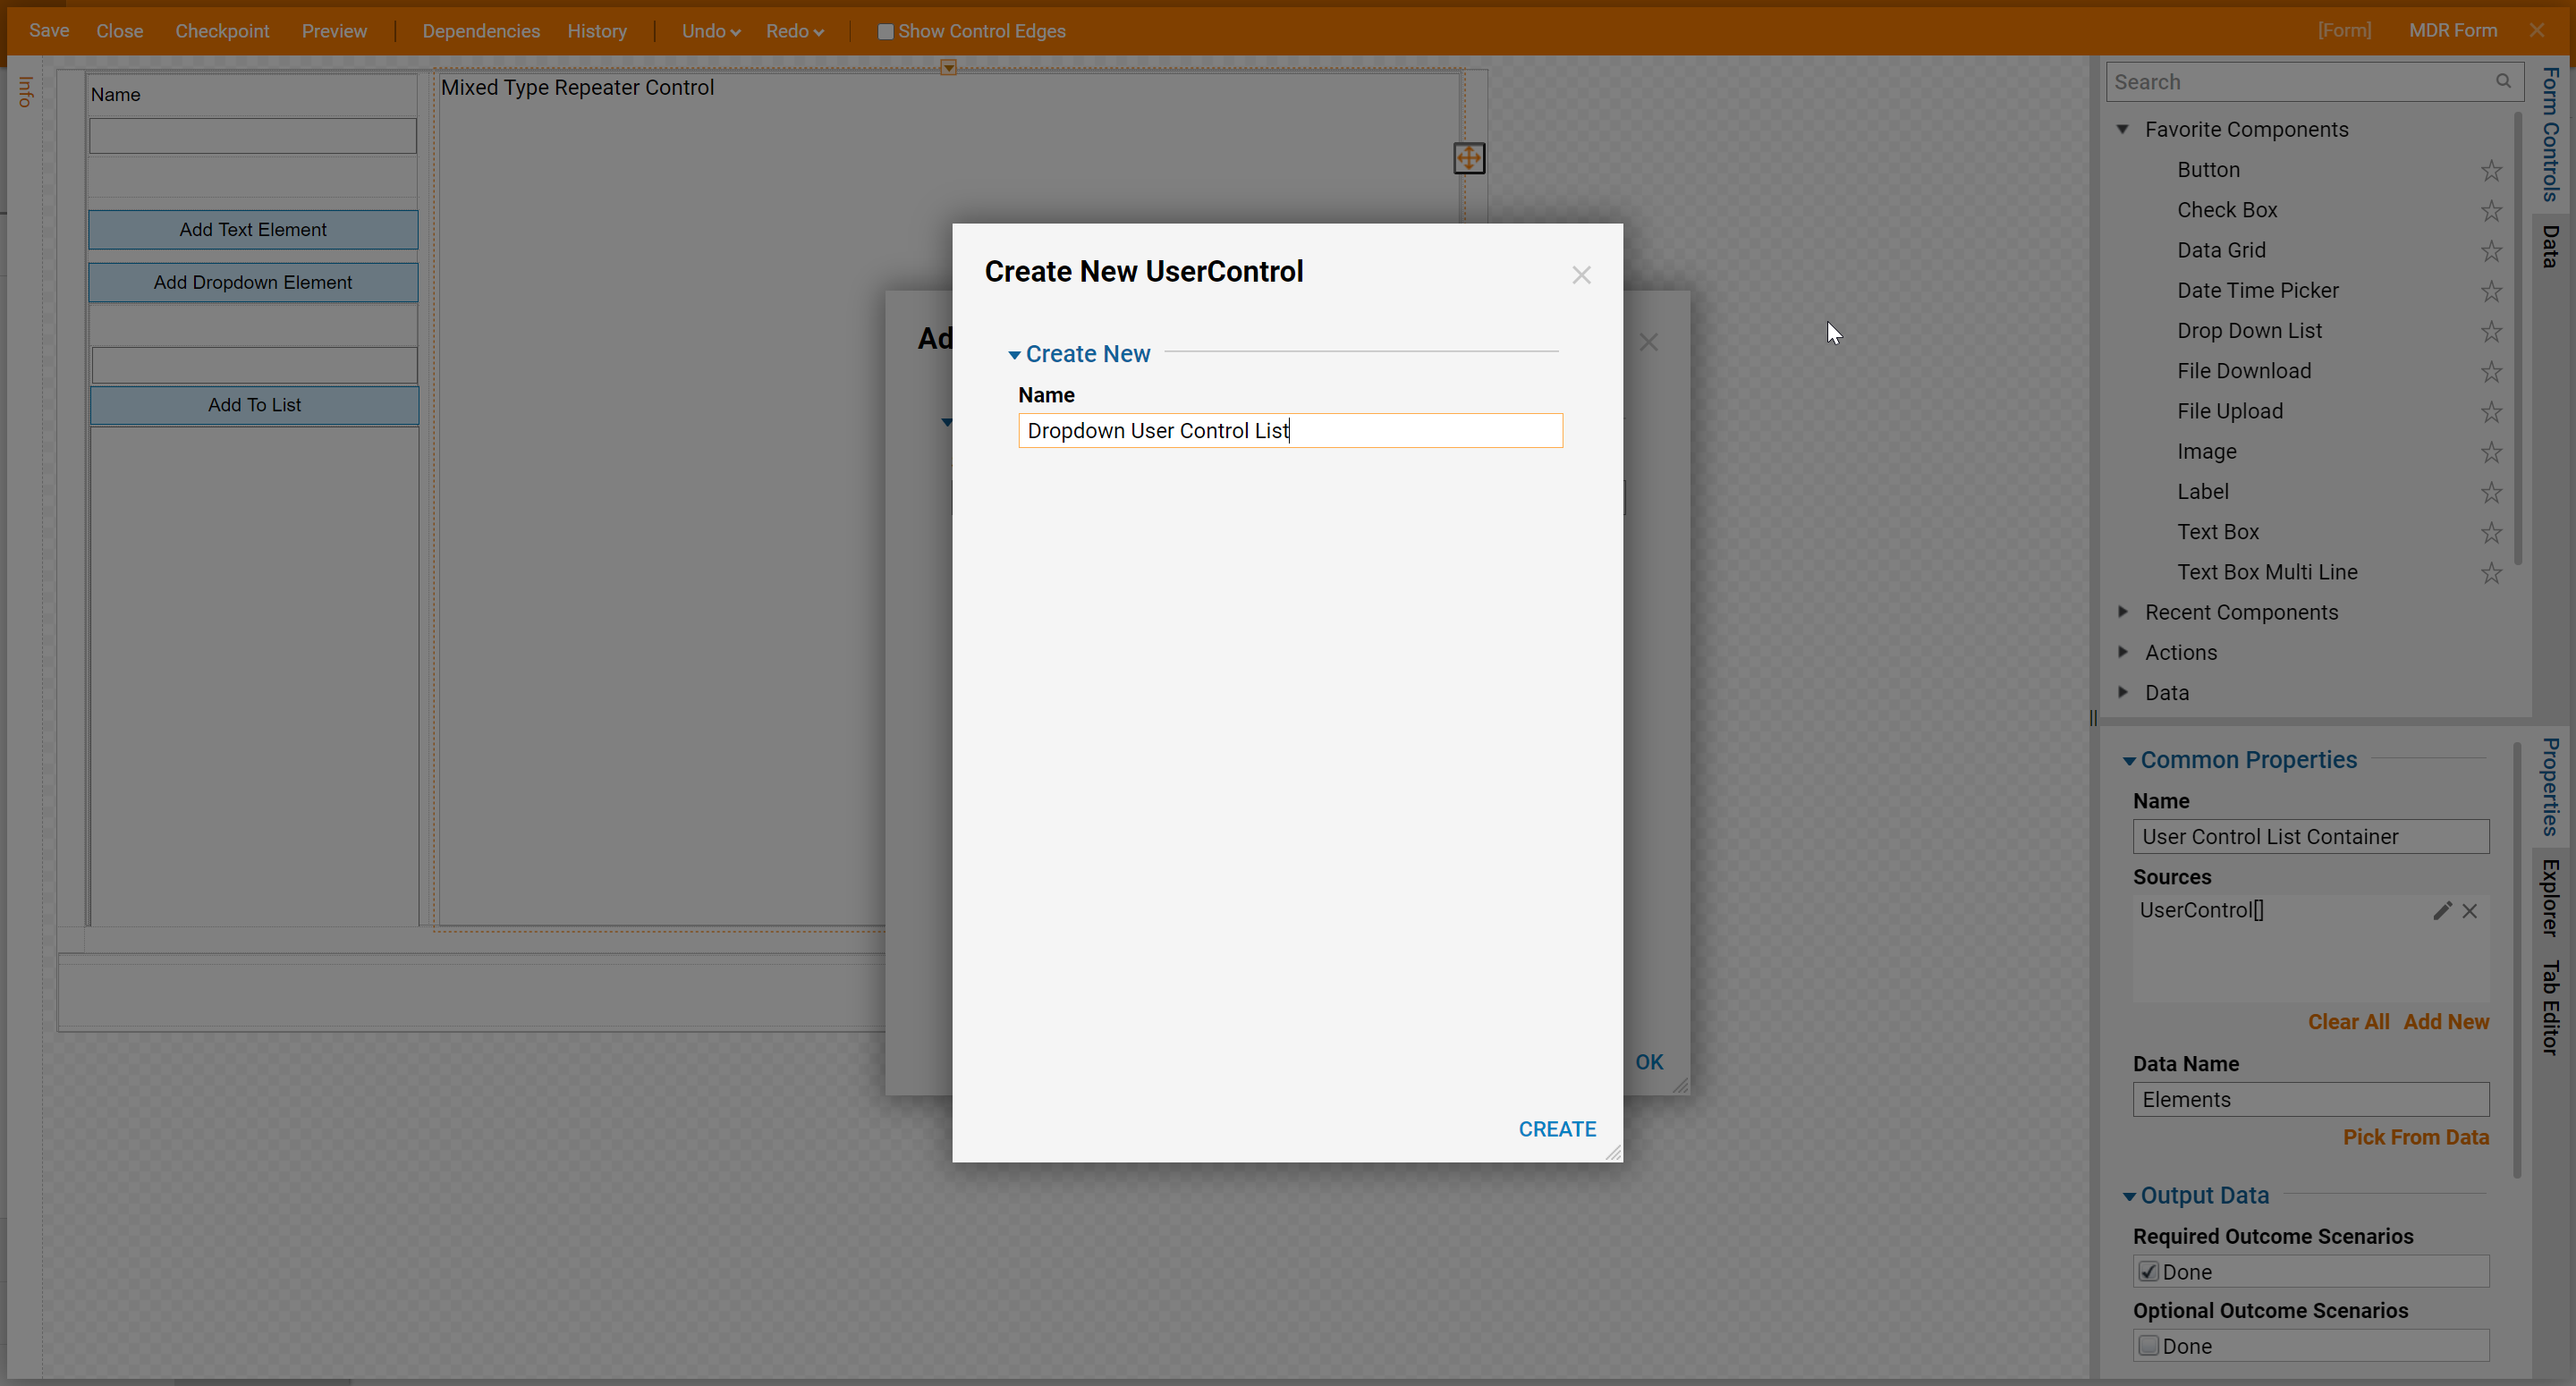
This opens a new form designer, the default layout is canvas, navigate to Layout > Container Type and in the drop-down menu change this to Grid.
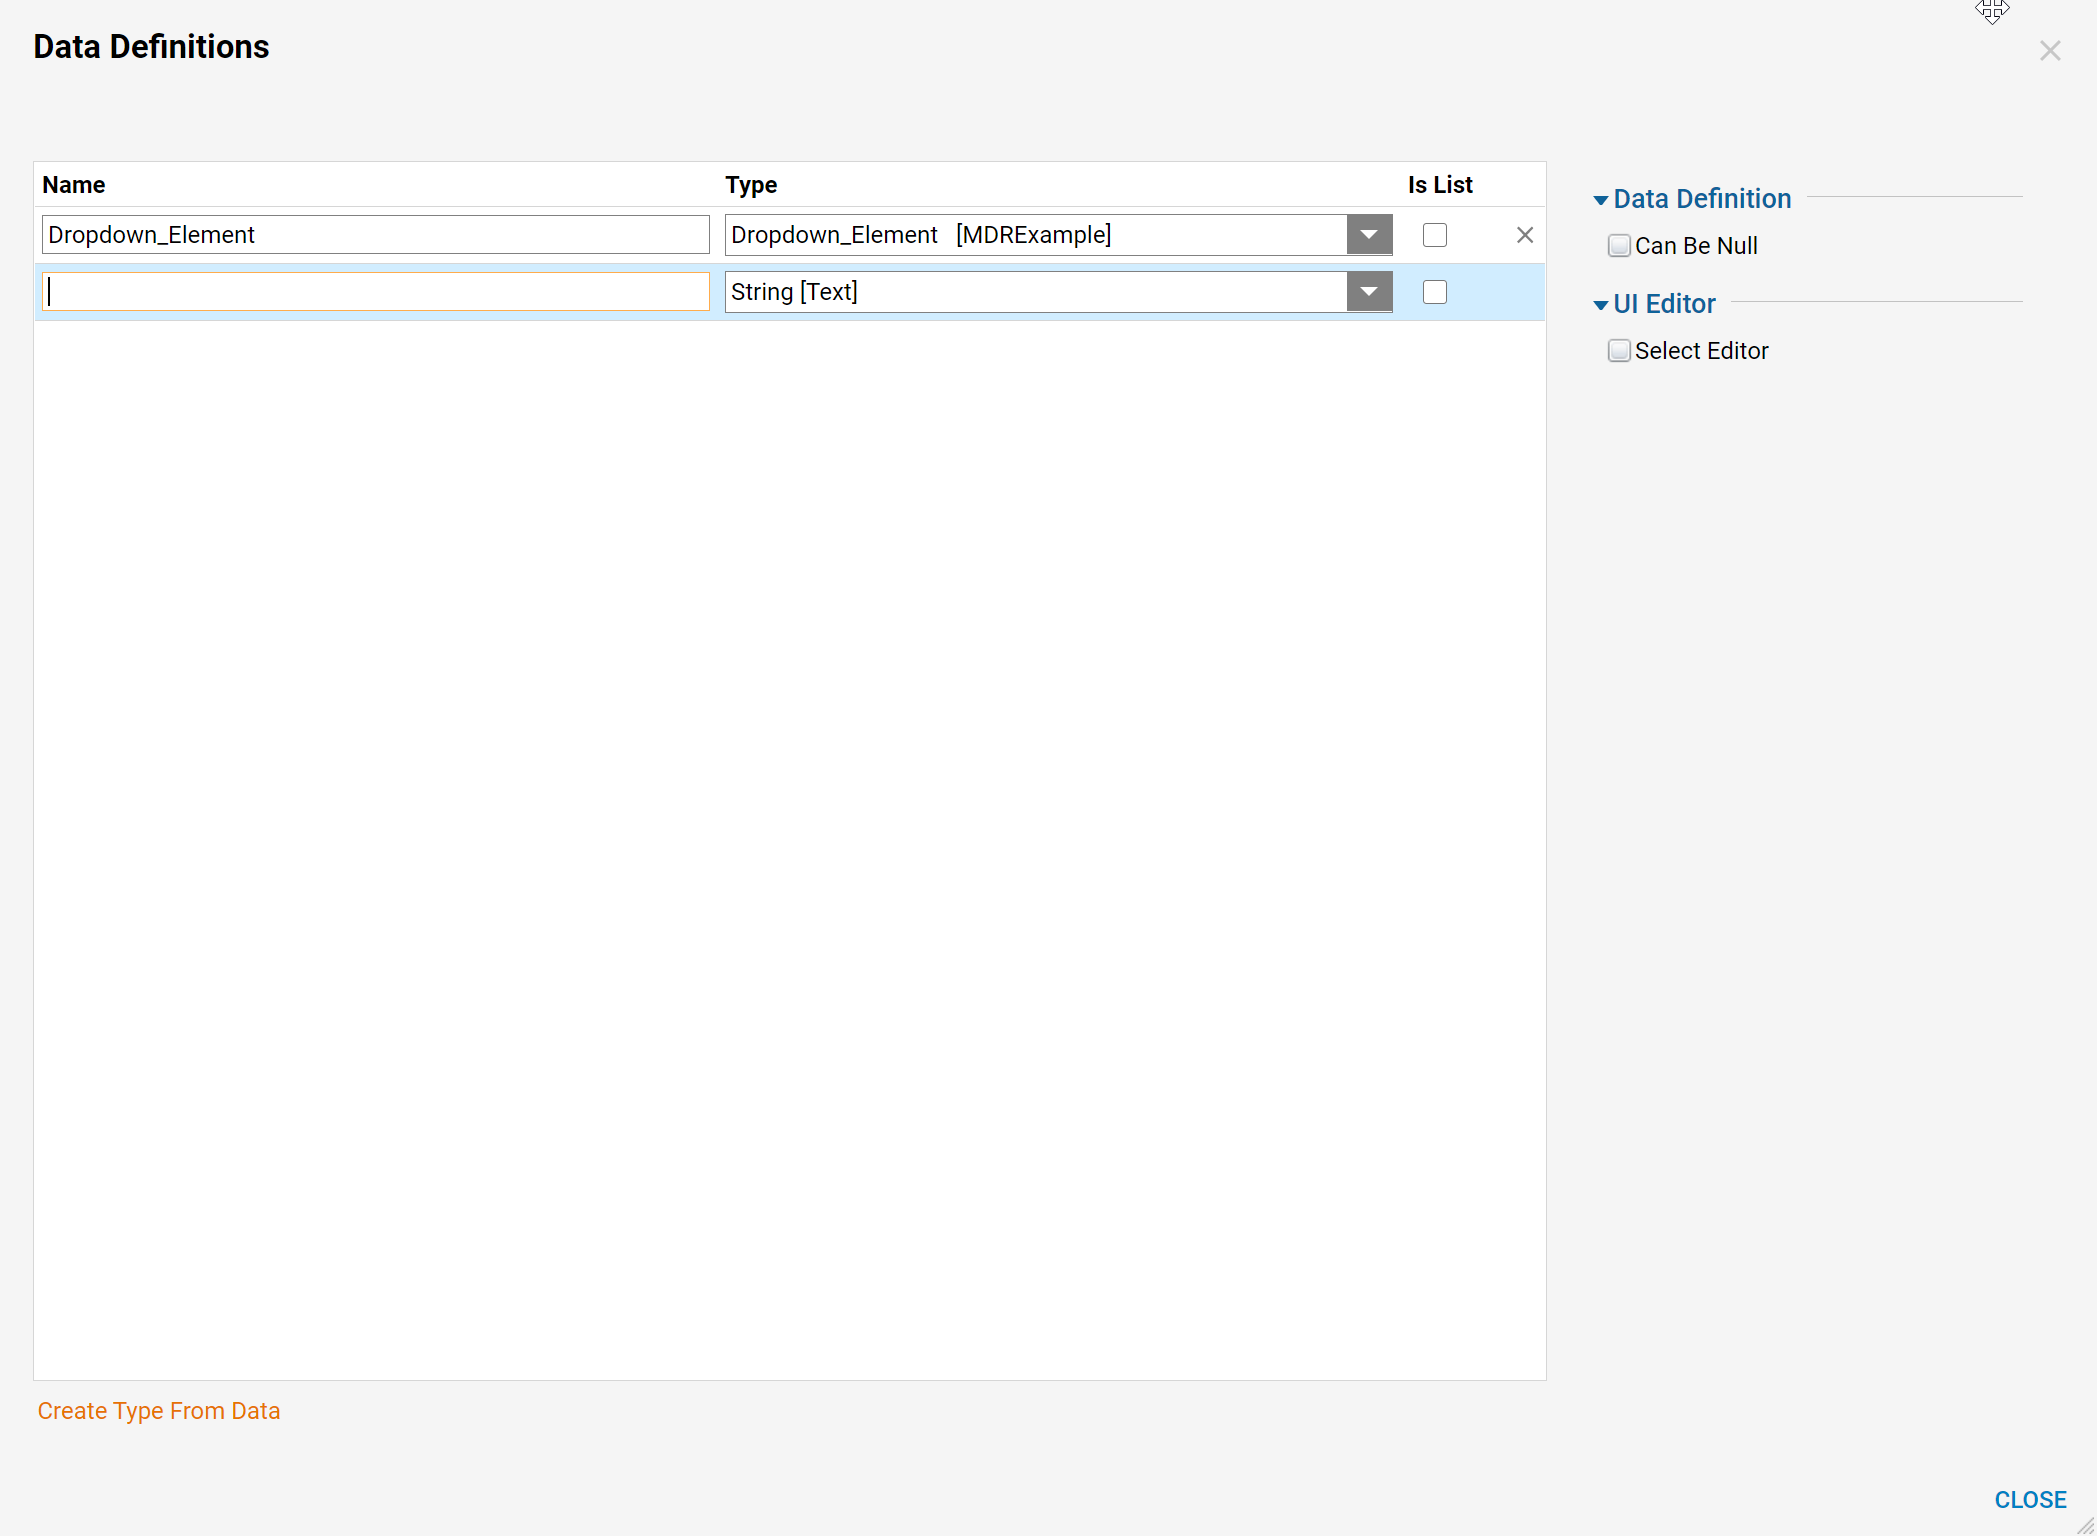
Select the whitespace to navigate to the Properties panel scroll to Input data and select Show Editor, name the data type "Dropdown_Element" and under type select the Dropdown_Element type that was created earlier in this example.
Select Close to Save.
Back in the form designer, navigate to the Data Panel. Expand Dropdown_Element. Drag and drop Name to the top of the form, in the pop-up select Label of Data Value.
In Form Controls expand Favorite Components, drag and drop Drop Down List to the form under the label. In the Drop-down properties, under Input Data > List Items DataName select Pick From Data. In the Pick Data dialog expand Dropdown Element and choose List then select Pick.
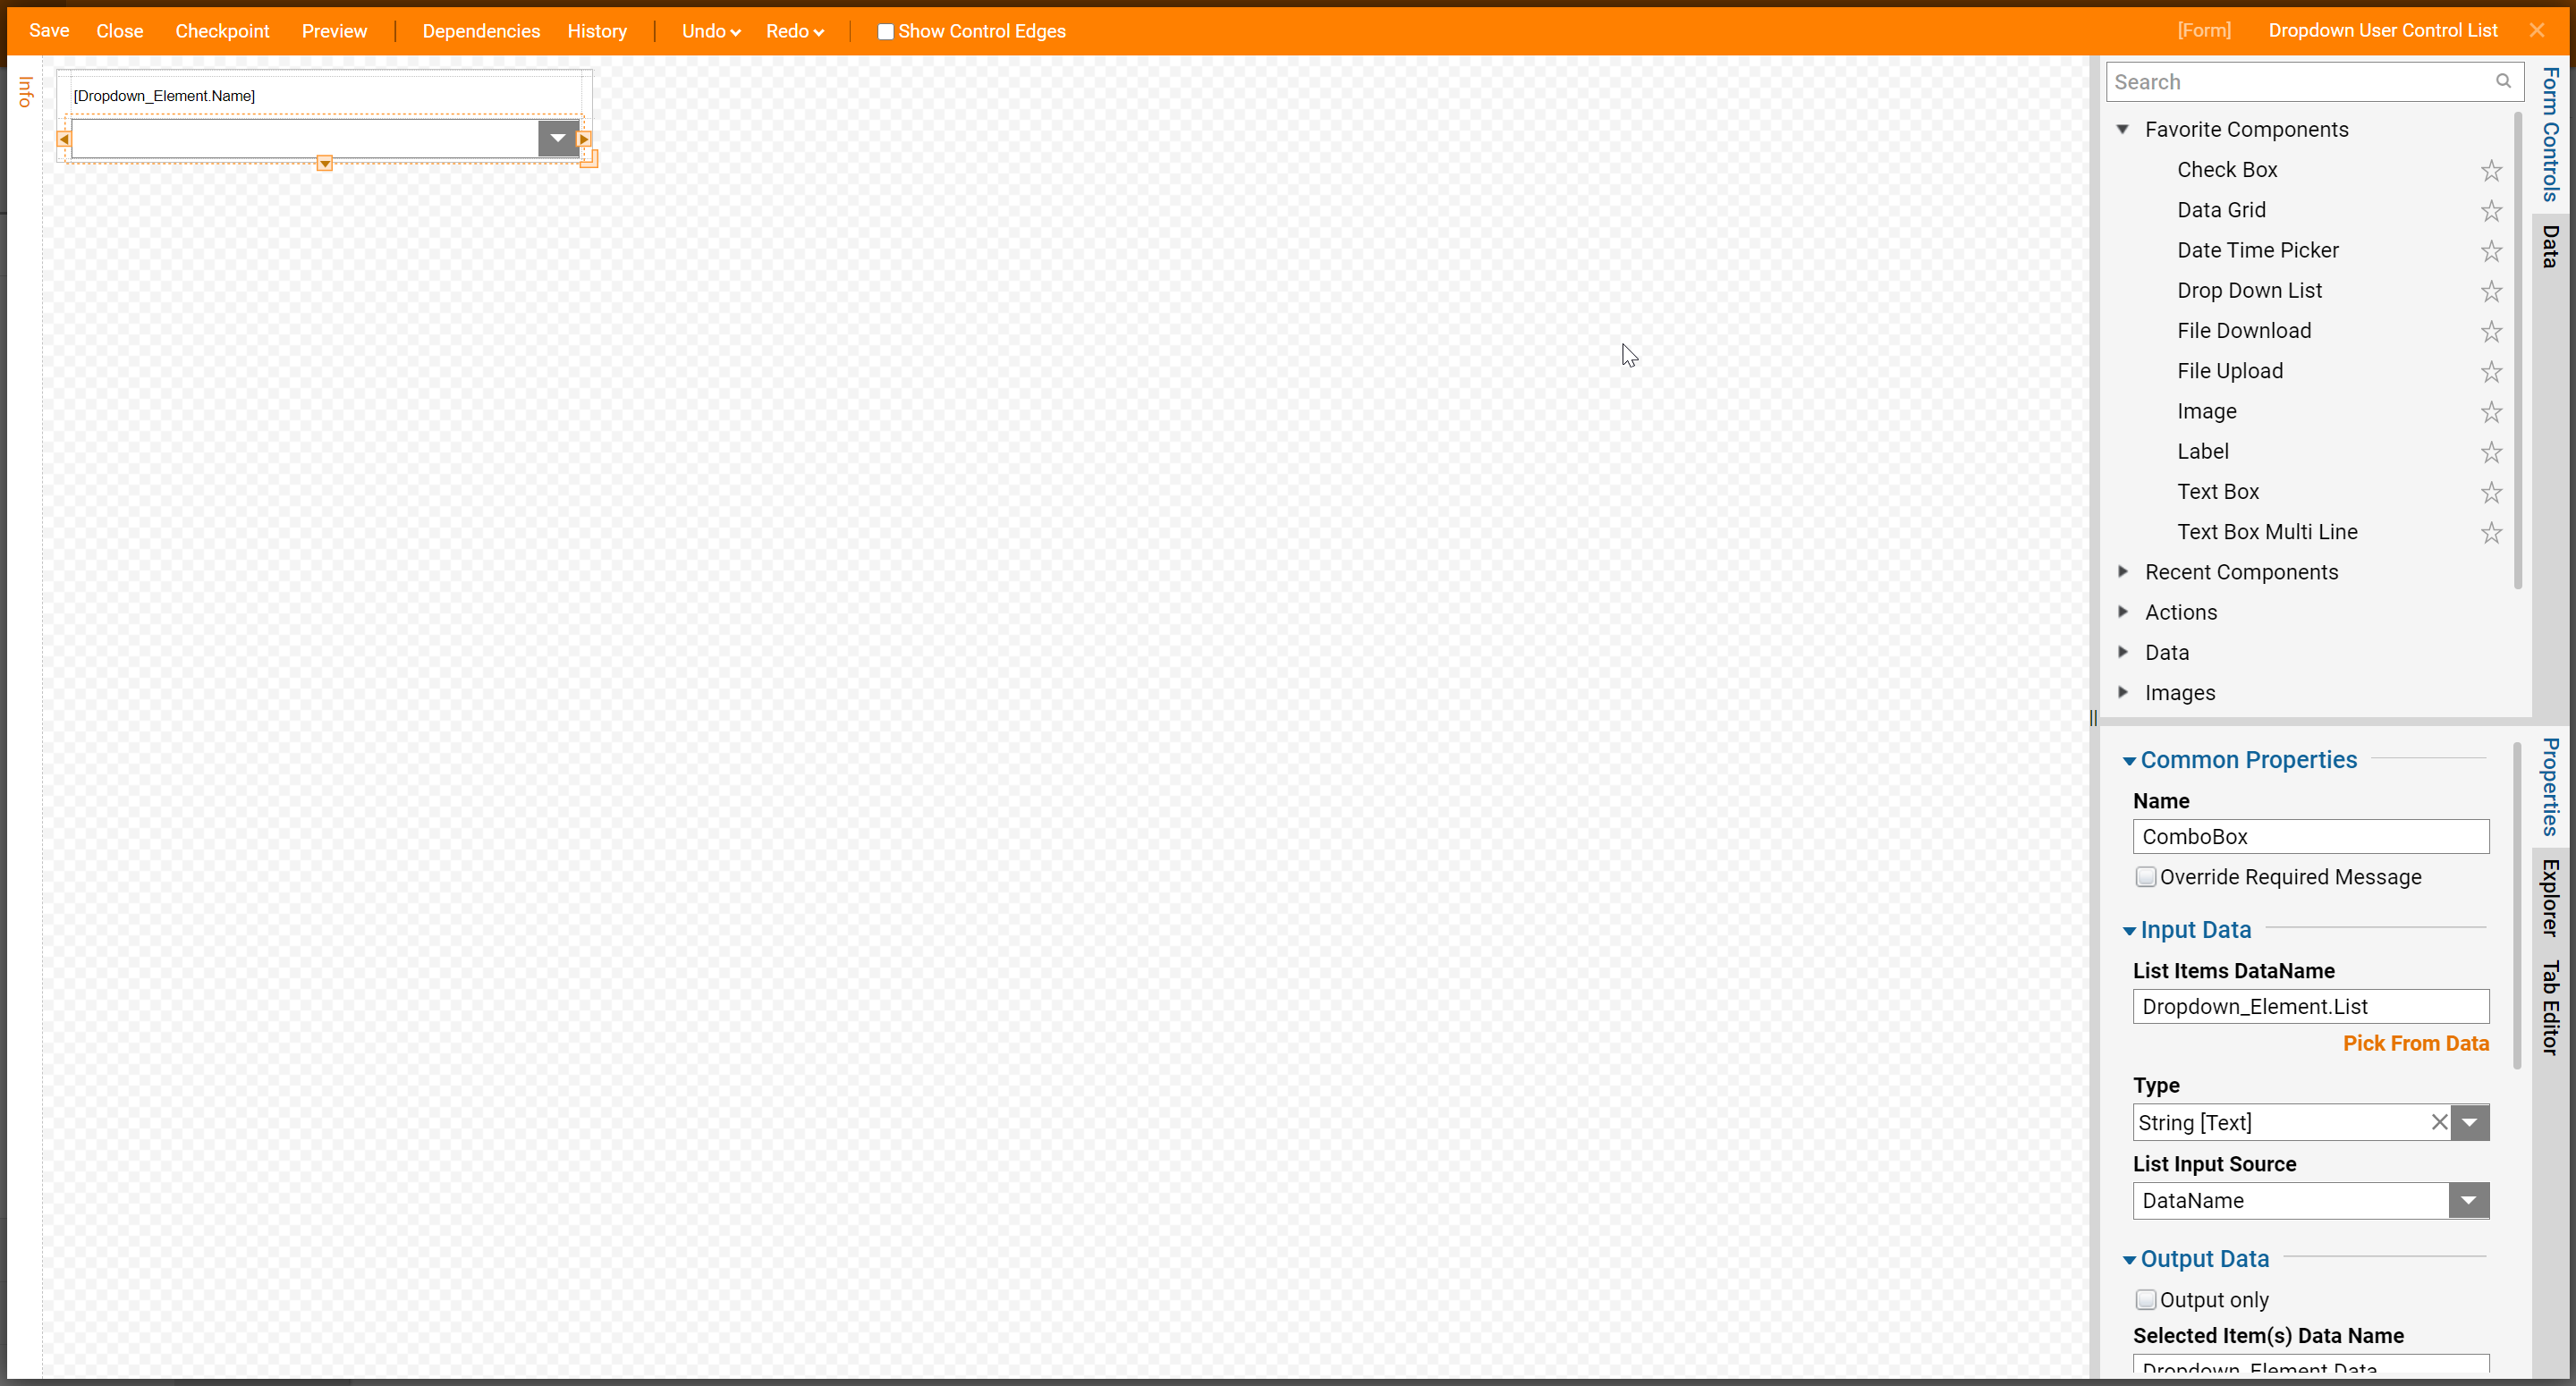
Save and Close, this will bring you back to the main form with the Edit Sources dialog still open, select OK.
Under Sources, add one more User Control by selecting Add New, Create and name a new Source "Text User Control". Select CREATE.
In the new form designer, the default layout is canvas, navigate to Layout > Container Type and in the drop-down menu change this to Grid.
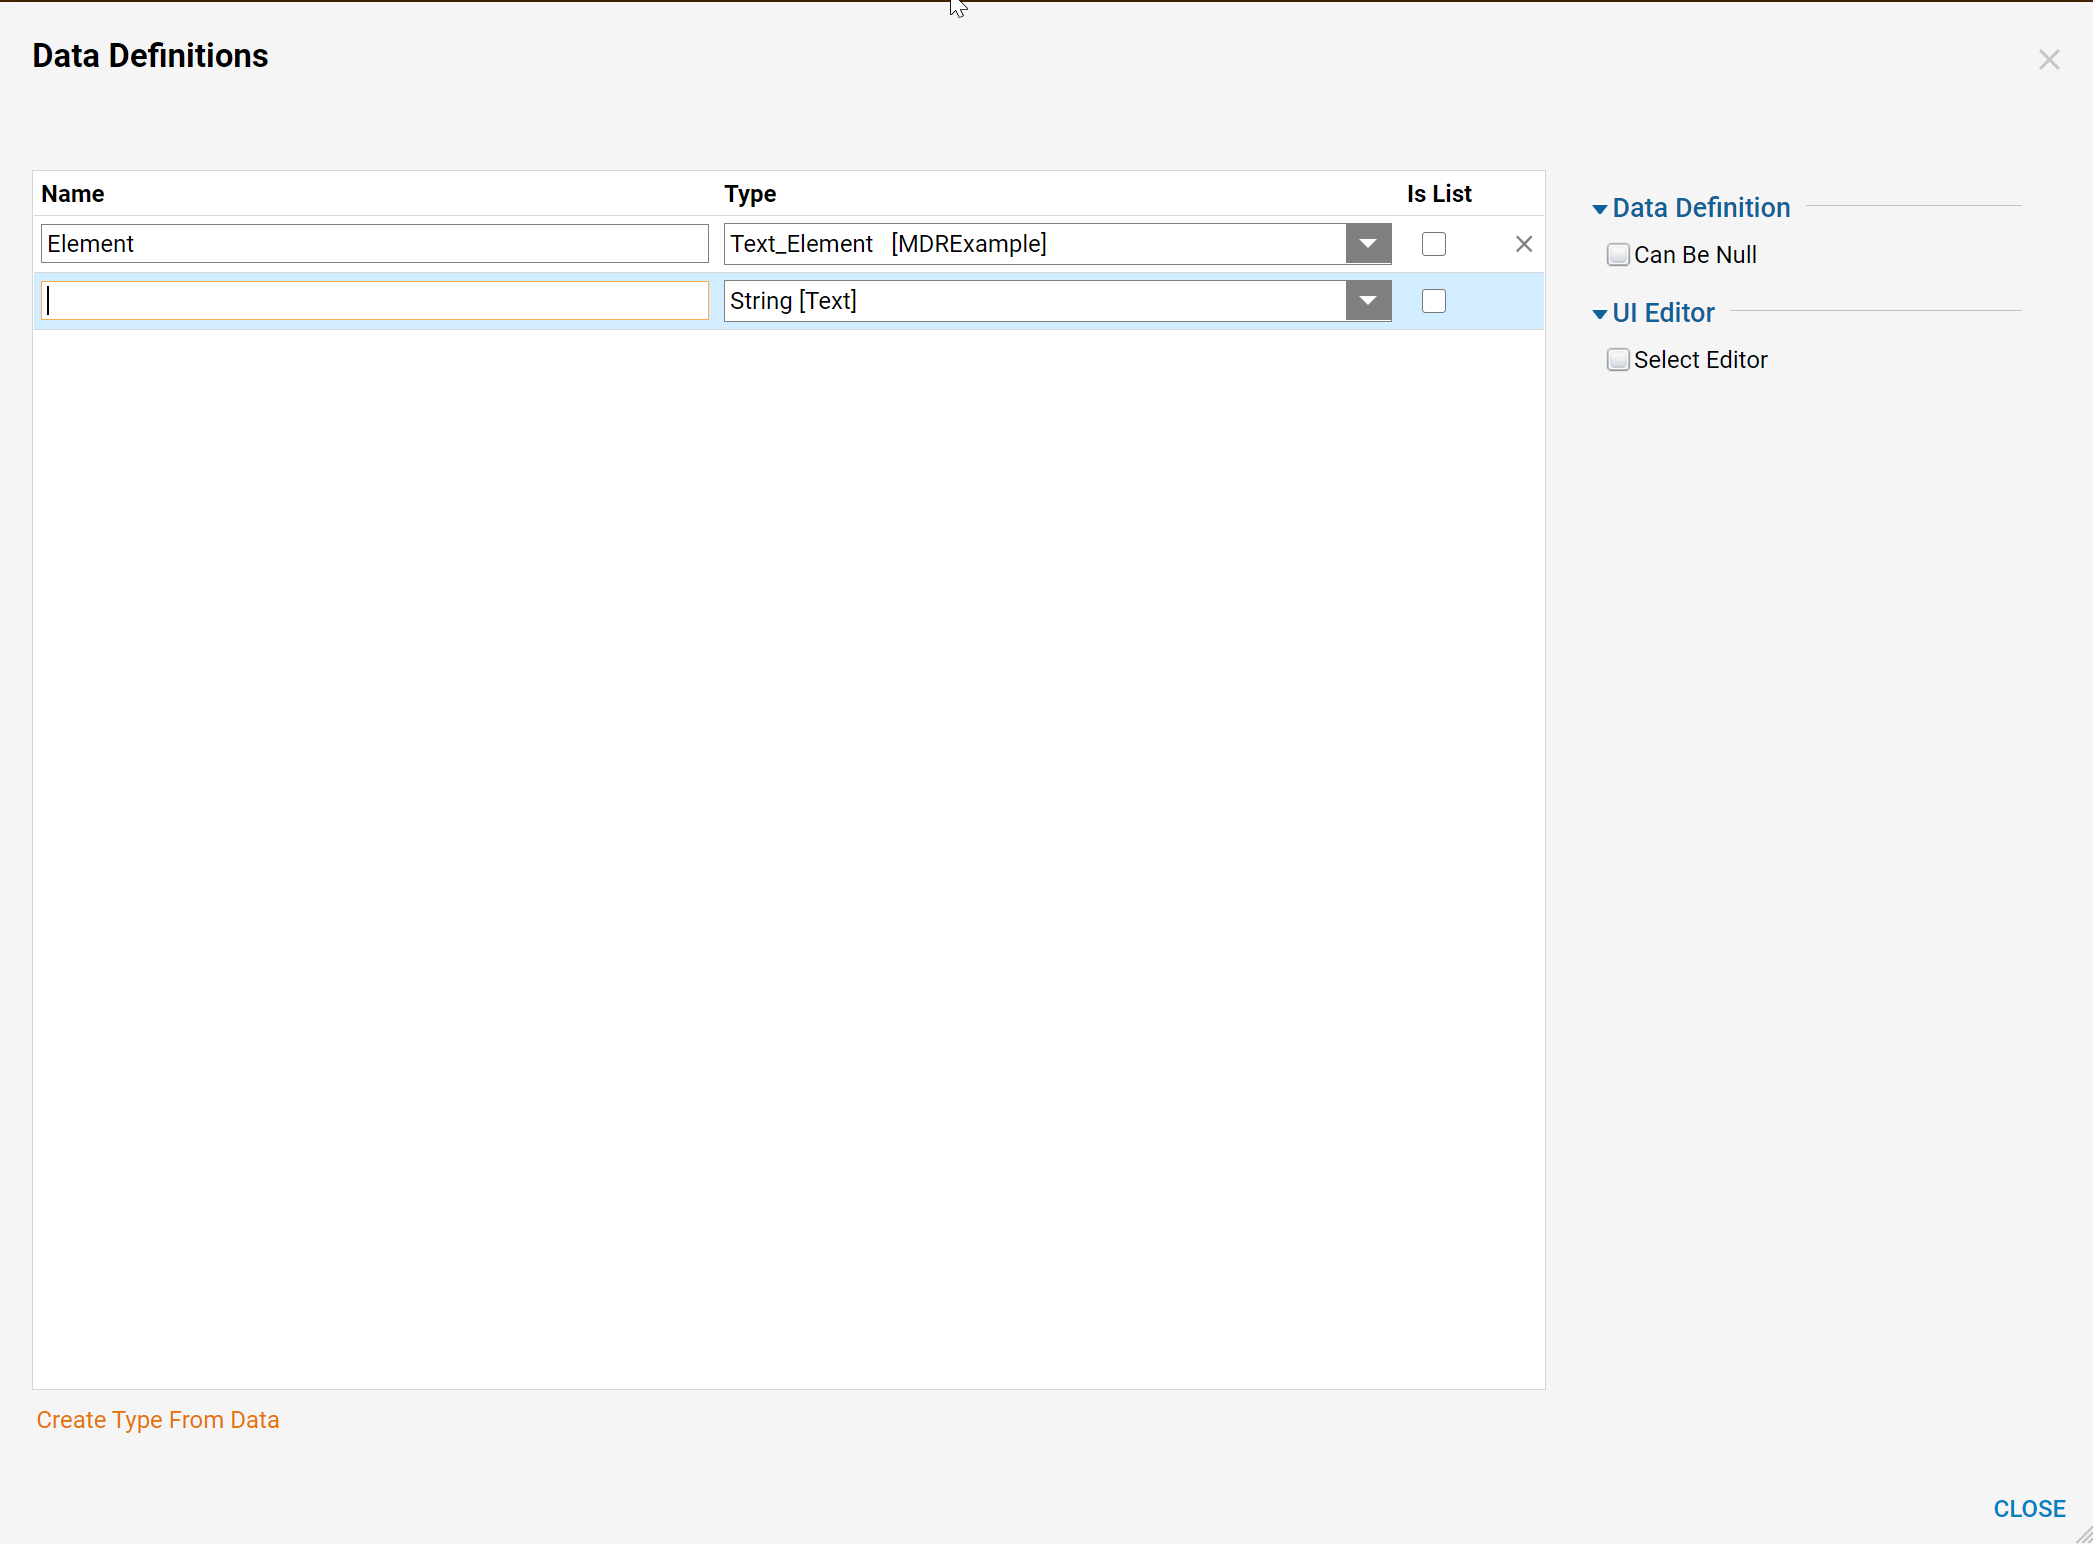
Select the whitespace to navigate to the Properties panel scroll to Input data and select Show Editor, name the data type "Element" and under type select the Text_Element type that was created earlier in this example. Select Close to Save.
Back in the form designer, navigate to the Data Panel. Expand Text_Element. Drag and drop Name to the top of the form, in the pop-up select Label of Data Value.
Also in the Data Panel, expand Text_Element, drag and drop Data to the form under the label. In the pop-up select Text Box.
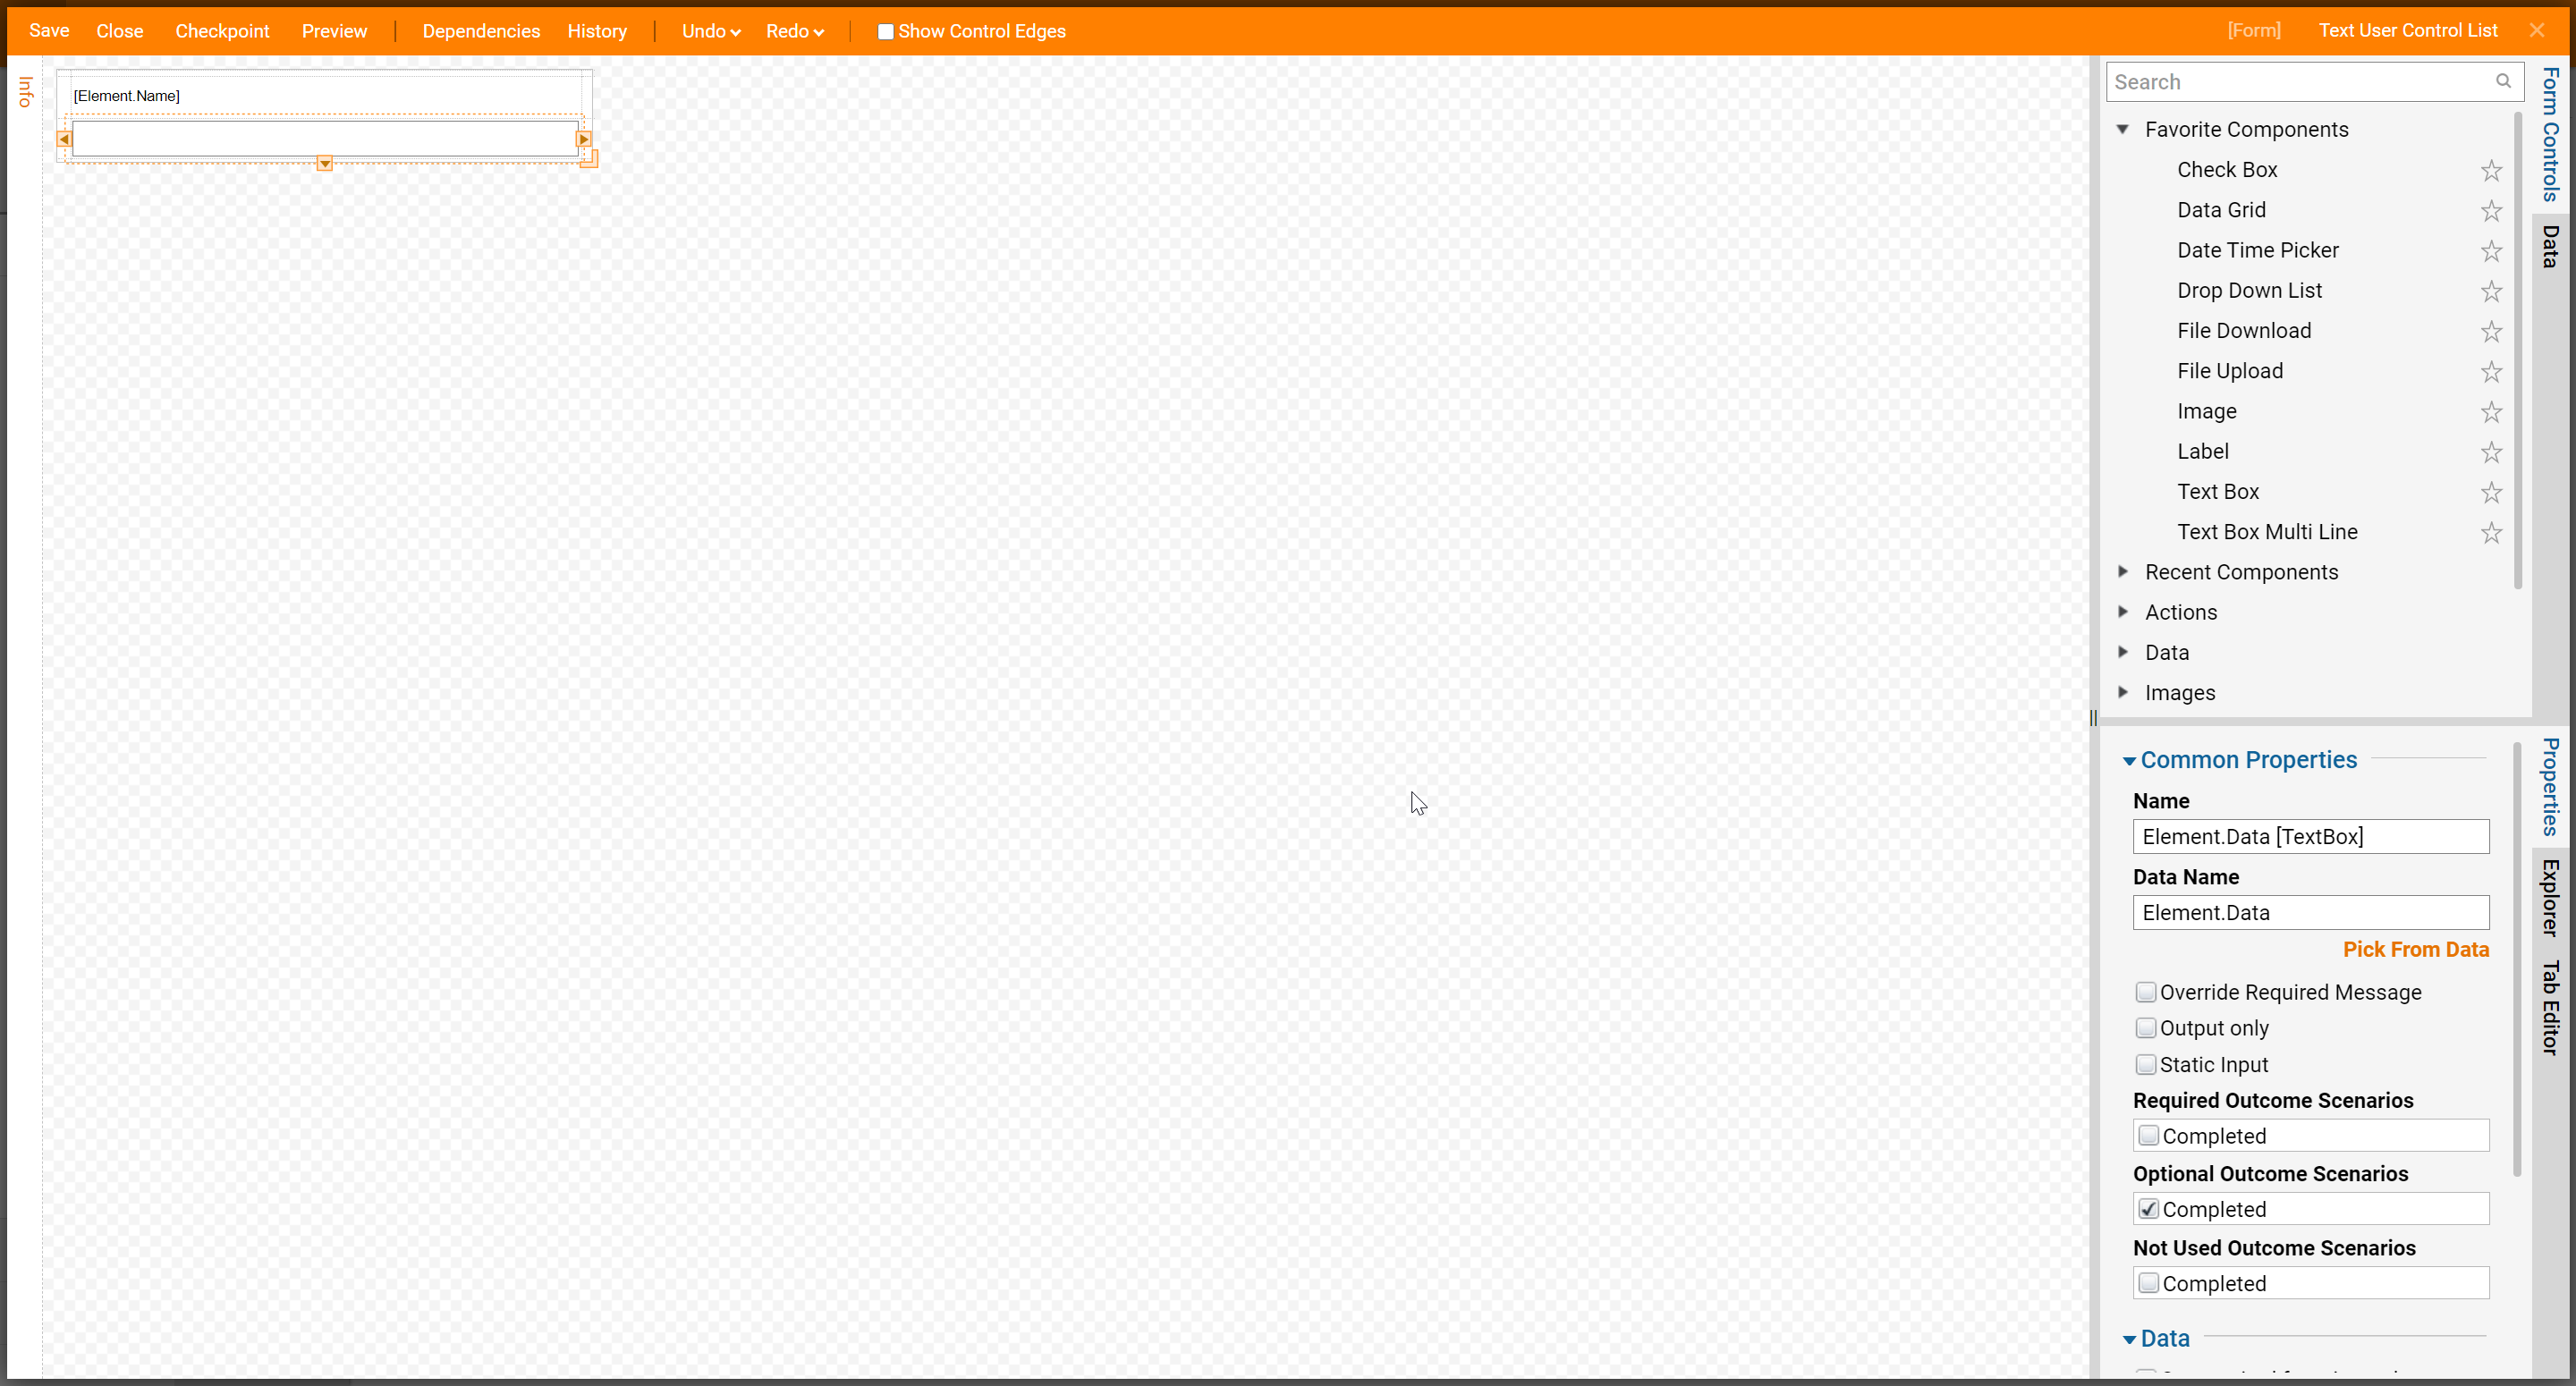
Save and Close, this will bring you back to the main form with the Edit Sources dialog still open, select Ok.
Event Button Data Flows
Select the whitespace to navigate to the Properties panel scroll to Form Rules > Data Flows and select Add New.
In the Add Data Flows dialog to name the Flow Data "Add Dropdown Element" and under flow select Create.
Name the Flow Add Dropdown Element, select create. This opens the Flow Designer.
Dropdown Element Data Flow
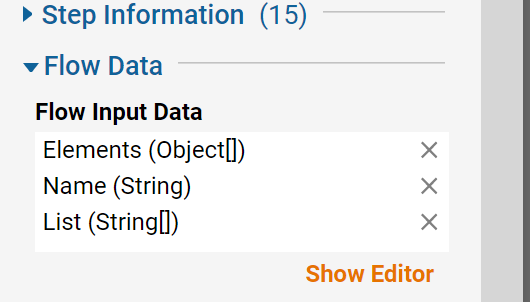
On the Start step under Flow Data > Flow Input Data, select Show Editor.
- Name one Element with the data type Object, and check is list.
- The next name Name with the data type String.
- The last one name List with the data type String and check is list.
Off of the Start step, add a Create Data step. In the properties of the Create Data step navigate to Data > Data to Create, select Show Editor.
Name this DropdownItem with the data type Dropdown_Element.
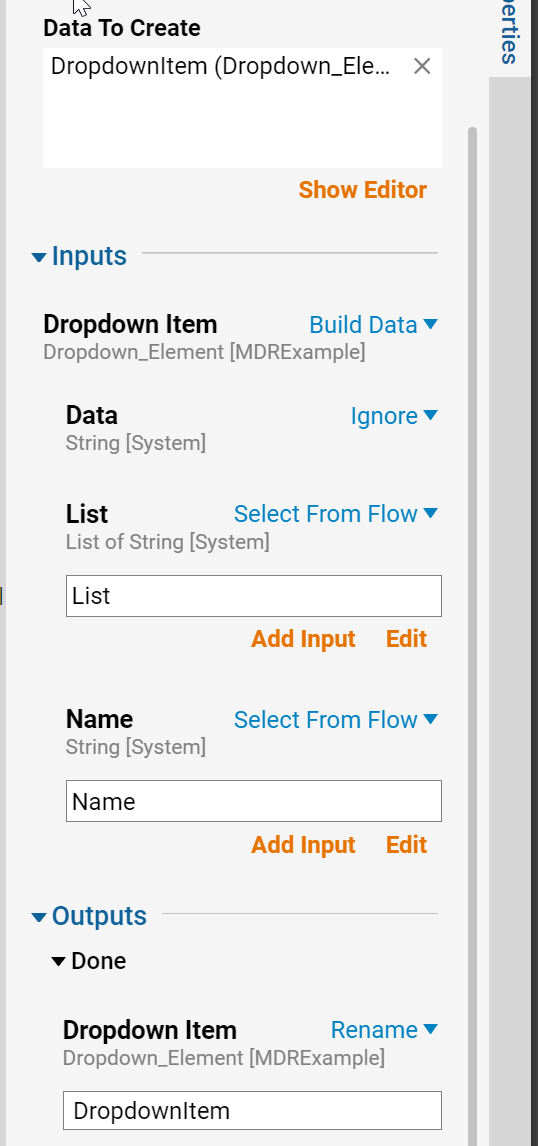
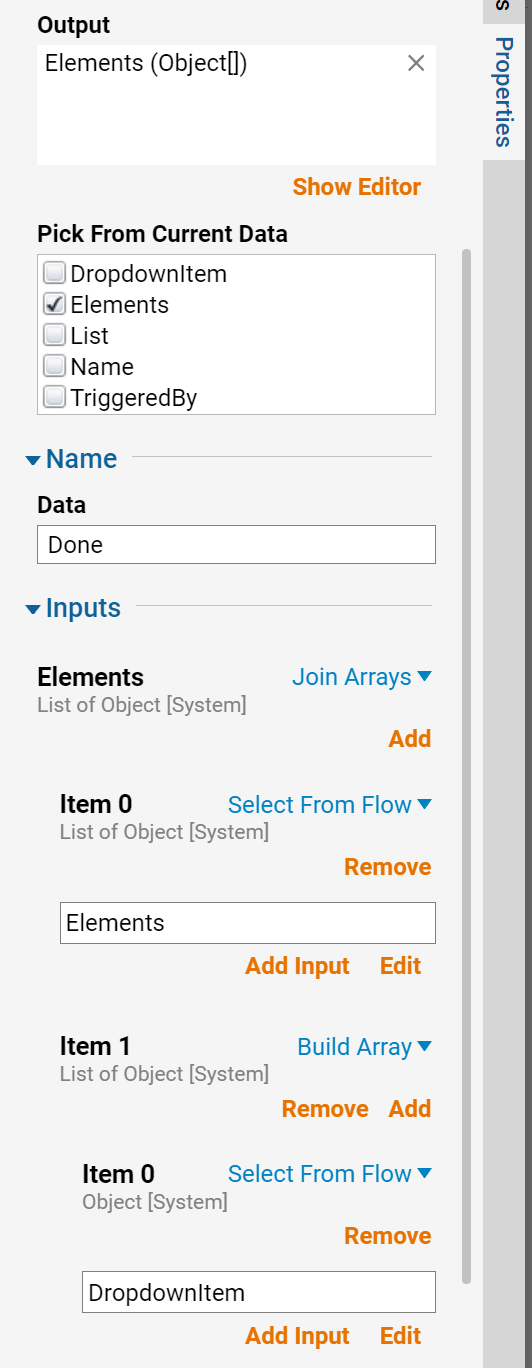
Connect the Create Data step to the End step. In the End step properties navigate to Inputs, select Join Arrays for Elements. For Item 0 select Elements, for Item 1 select Build Array as the mapping type, then for Item 0 choose DropdownItem.
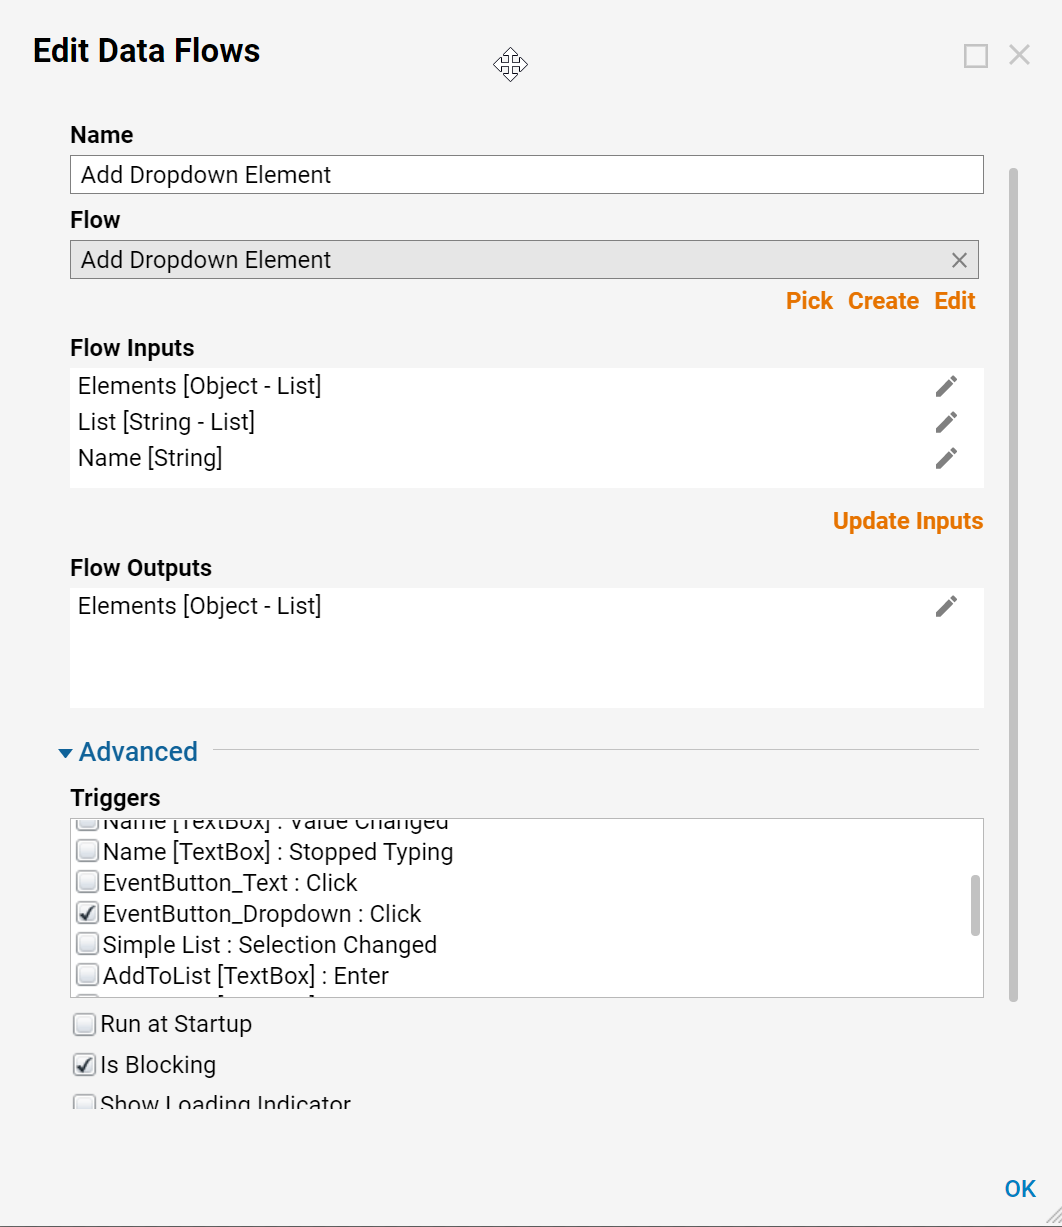
Save and close the flow. Back in the Edit Data Flows dialog select Update Inputs. Select EventButton_Dropdown: Click as the trigger.
Select Ok to save.
Select the whitespace in the form designer, navigate to the Properties panel scroll to Form Rules > Data Flows and select Add New.
In the Add Data Flows dialog to name the Flow Data "Add Text Element" and underflow select Create. Name the Flow Add Text Element, select create. This opens the Flow Designer.
Text Element Data Flow
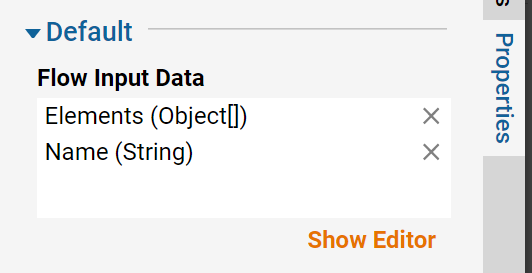
On the Start step under Flow Data > Flow Input Data, select Show Editor.
- Name one Element with the data type Object, and check is list.
- The next name Name with the data type String.
Off of the Start step, add a Create Data step. In the properties of the Create Data step navigate to Data > Data to Create, select Show Editor.
Name this TextElement with the data type Text_Element.
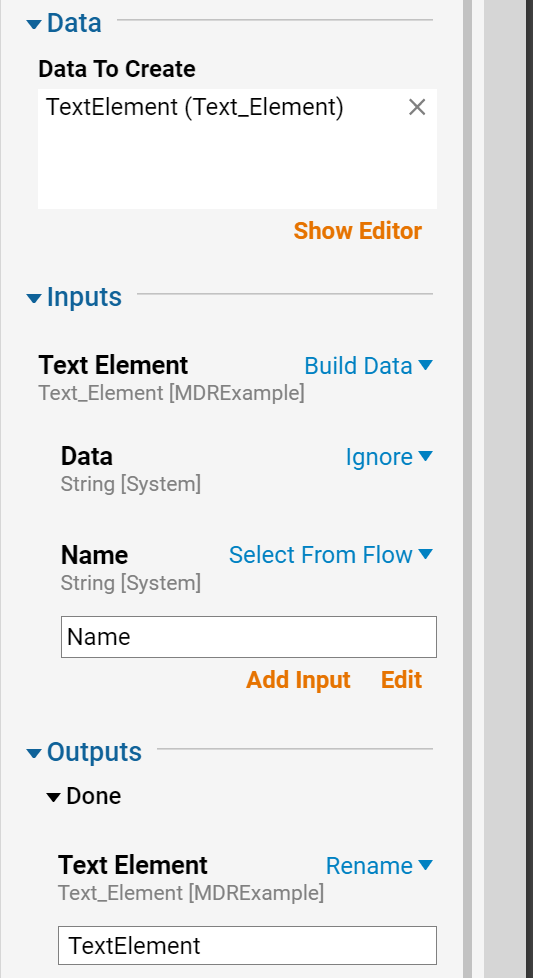
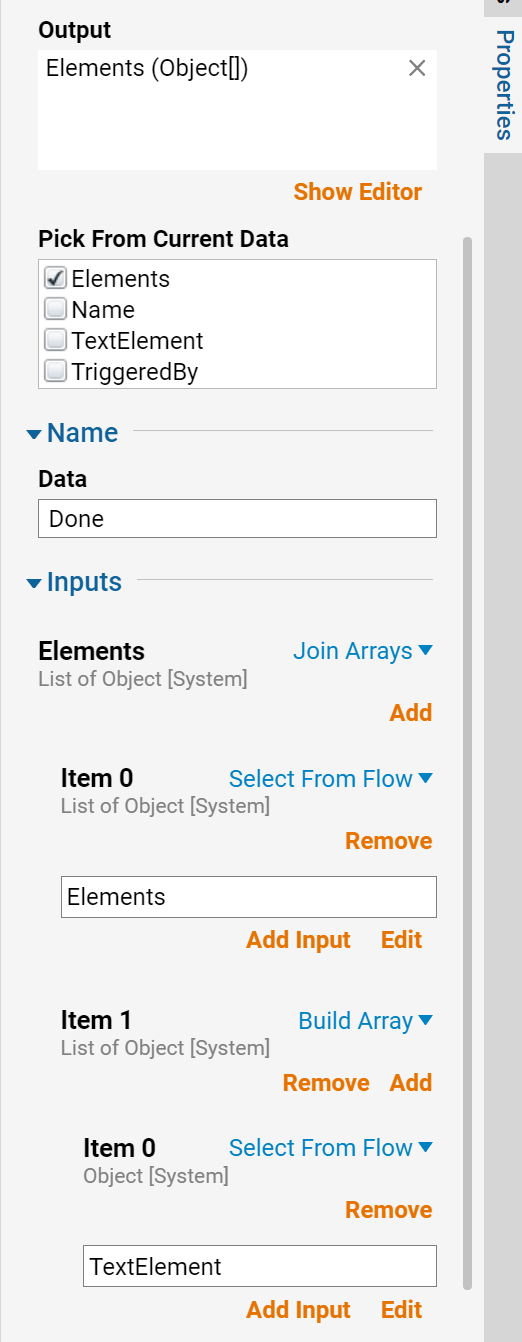
Connect the Create Data step to the End step. In the End step properties navigate to Inputs, select Join Arrays for Elements. For Item 0 select Elements, for Item 1 select Build Array as the mapping type, then for Item 0 choose TextElement.
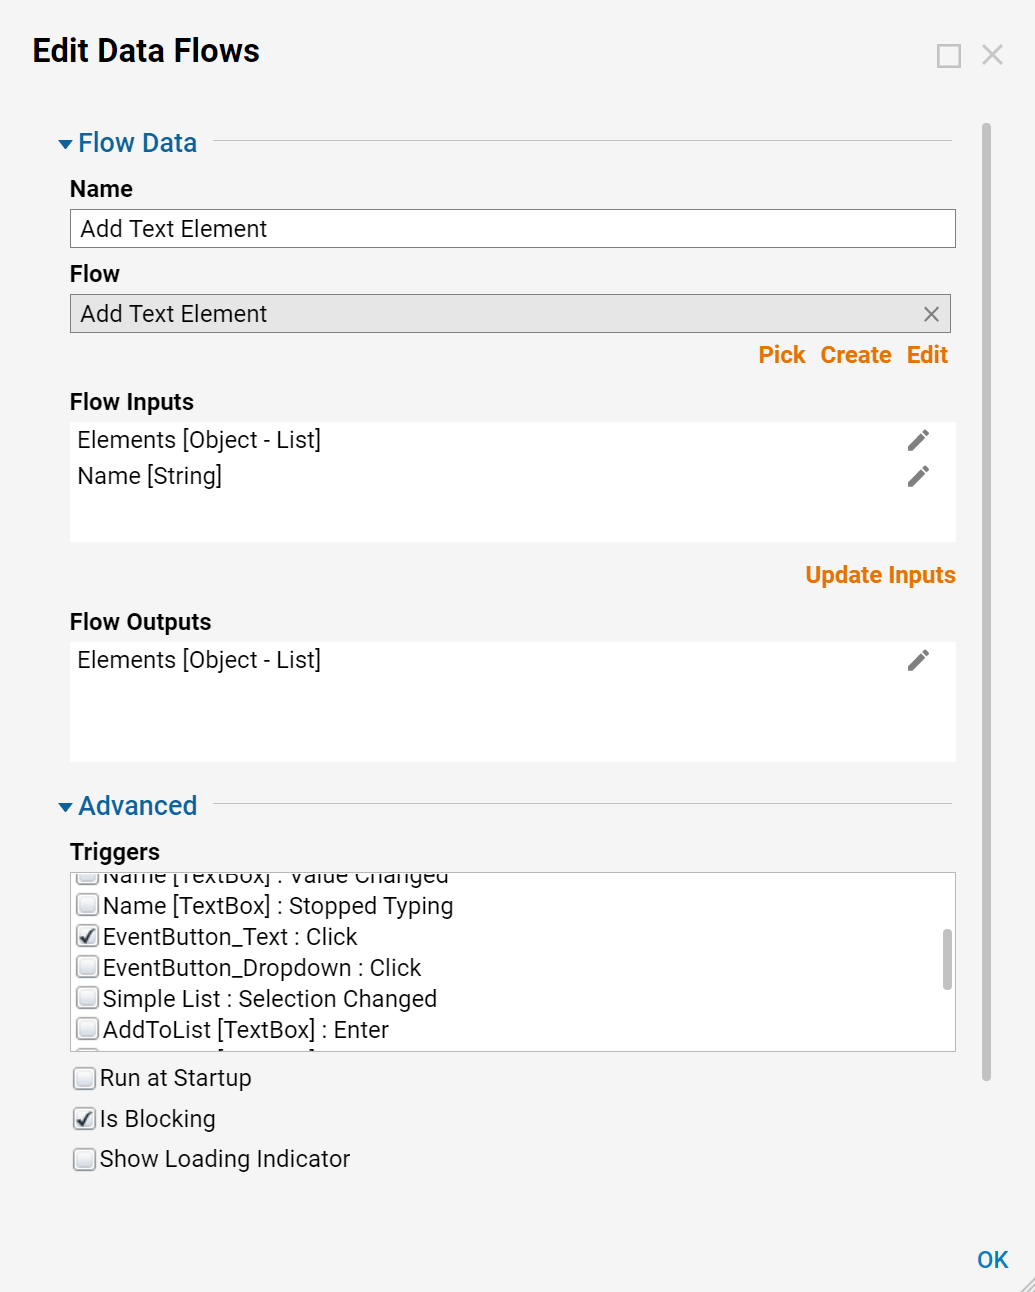
Save and close the flow. Back in the Edit Data Flows dialog select Update Inputs. Select EventButton_Text: Click as the trigger.
Select Ok to save.
Select the whitespace in the form designer, navigate to the Properties panel scroll to Form Rules > Data Flows and select Add New.
In the Add Data Flows dialog name the Flow Data "Add To List" and under flow select Create. Name the Flow Add to List, select create. This opens the Flow Designer.
Add to List Data Flow
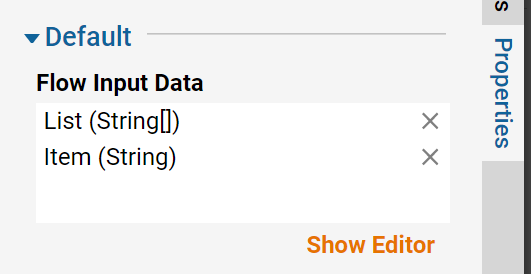
On the Start step under Flow Data > Flow Input Data, select Show Editor.
- Name one List with the data type String, and check is list.
- The next name Item with the data type String.
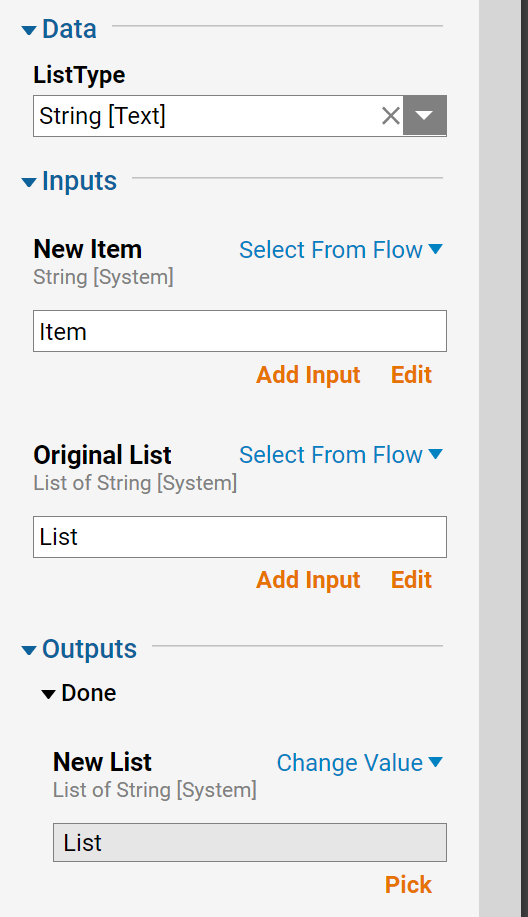
Off of the Start step, add an Add Item to List step. In the properties of the Add Item to List step, navigate to Inputs. Select Select Item from Flow for New Item and choose Item. For Original List select List from the Select Item from Flow option.
Under Outputs, Change the value of New List to List
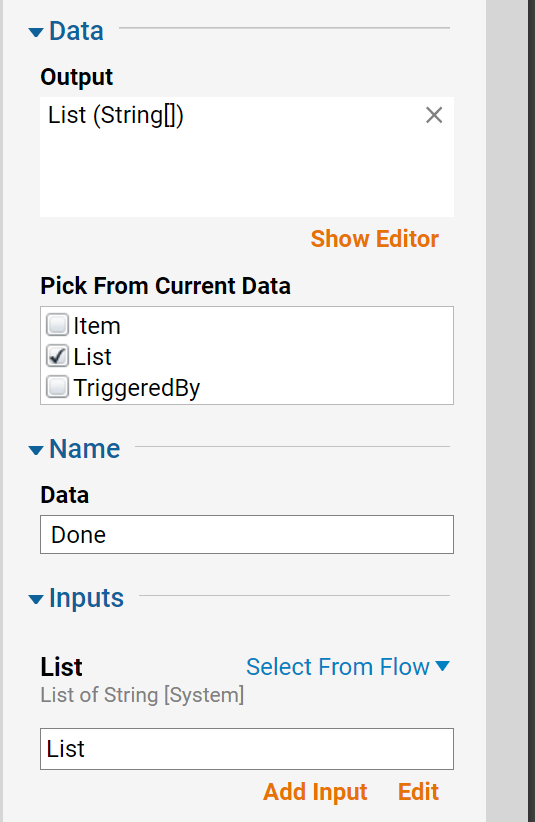
Connect the Add Item to List step to the End step. In the End step properties navigate to Data > Output, select Show Editor.
Name this List with the data type String, check is List.
Next navigate to Inputs, next to List select Select from Flow and select List from the dialog.
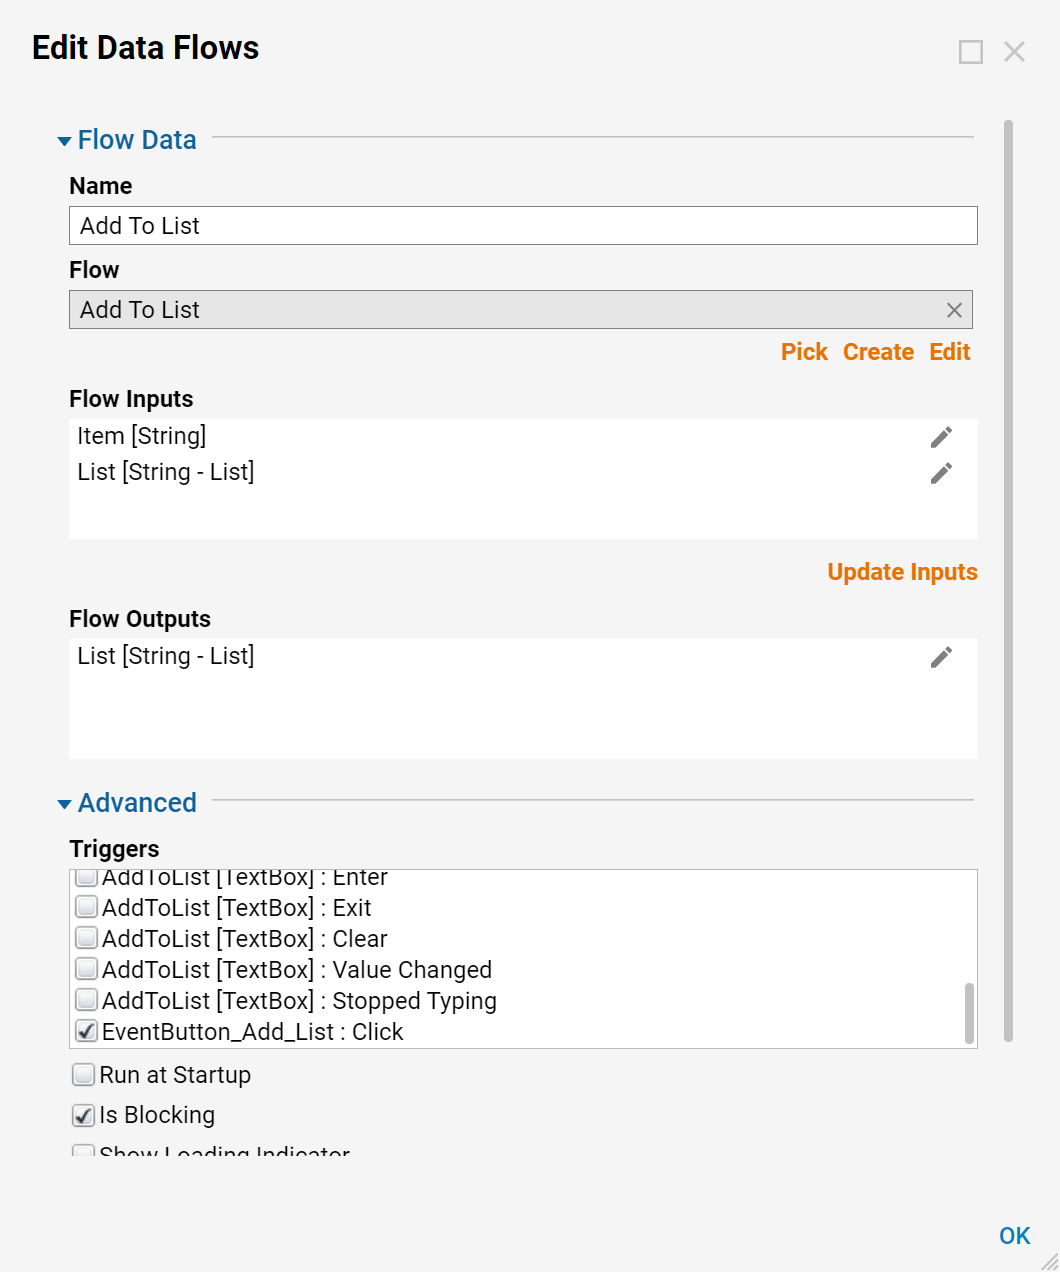
Save and close the flow. Back in the Edit Data Flows dialog select Update Inputs. Select EventButton_Add_List: Click as the trigger. Select Ok to save.
This concludes the building process.
Debug the Flow
Back in the Main Flow connect the Show Form step to the End step.
Complete the flow by selecting Debug and verify that the flow works properly.
