Overview
Form Outcome Rules allow the Designer to create a custom Rule that can be used to control the outcome behavior of Form in a Flow.
Example
In this example, a Rule is created that will be used to control a Form's outcome behavior. The Rule will have conditions to show a notification when the end-user selects the Admin email from a list of emails on the Form itself.
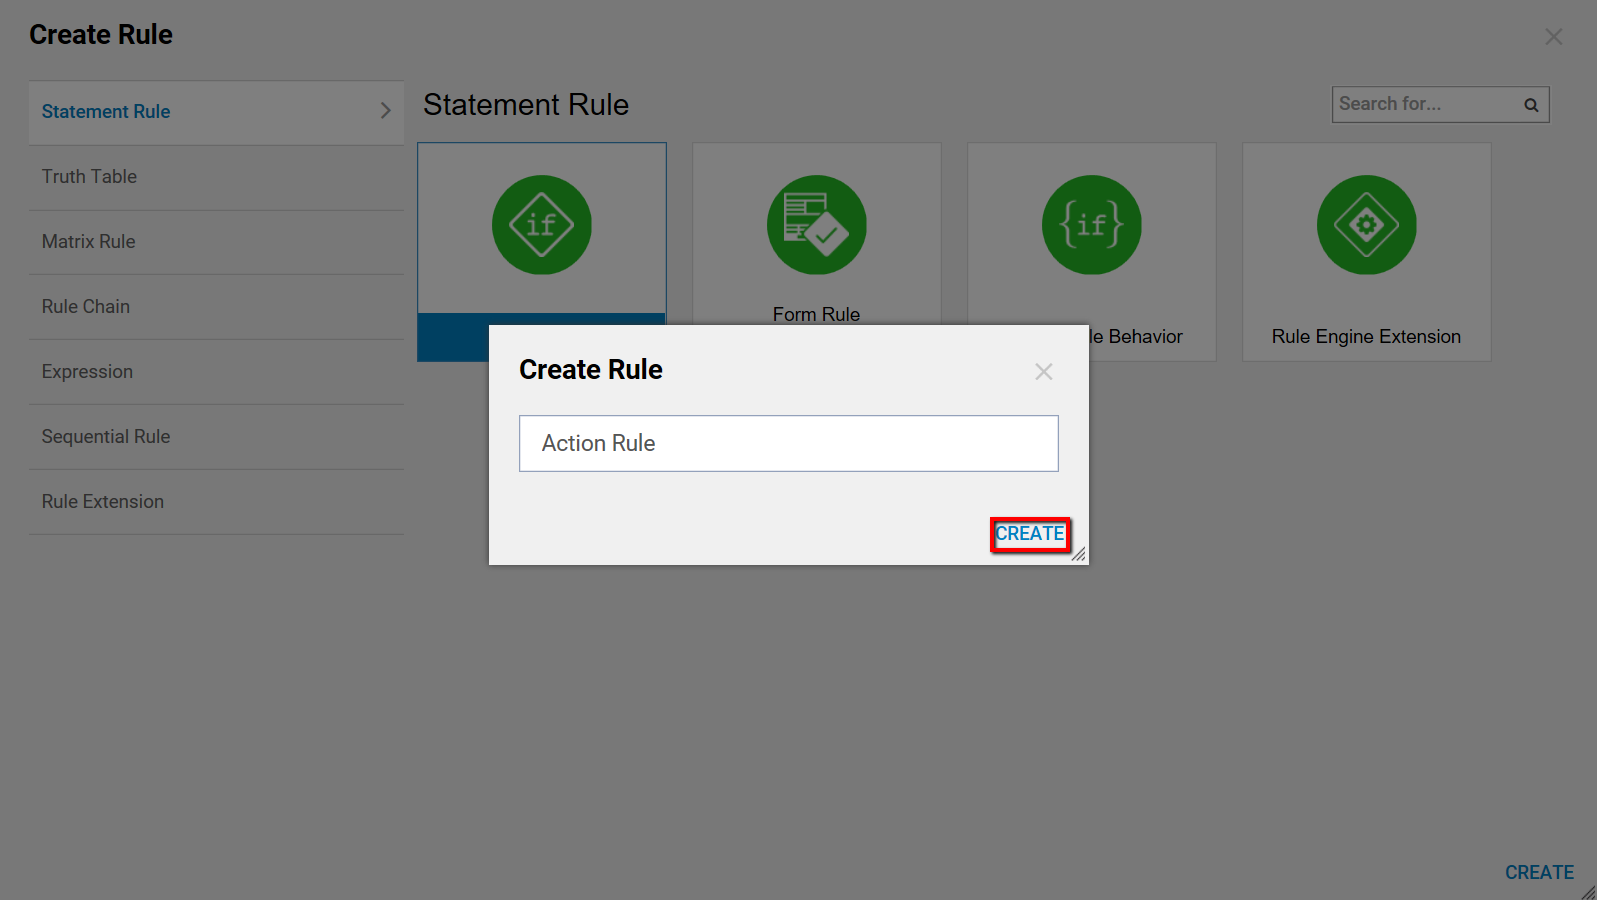
Begin in a Designer Folder and click the Create Rule button located on the Action Bar at the bottom of the screen. Select 'CREATE' for the default Rule template, name the Rule on the next screen, then select 'CREATE' again. Decisions will now redirect to the Rule Designer.
In the Rule Designer, select SETUP INPUT DATA in the Warning dialog at the top of the screen.

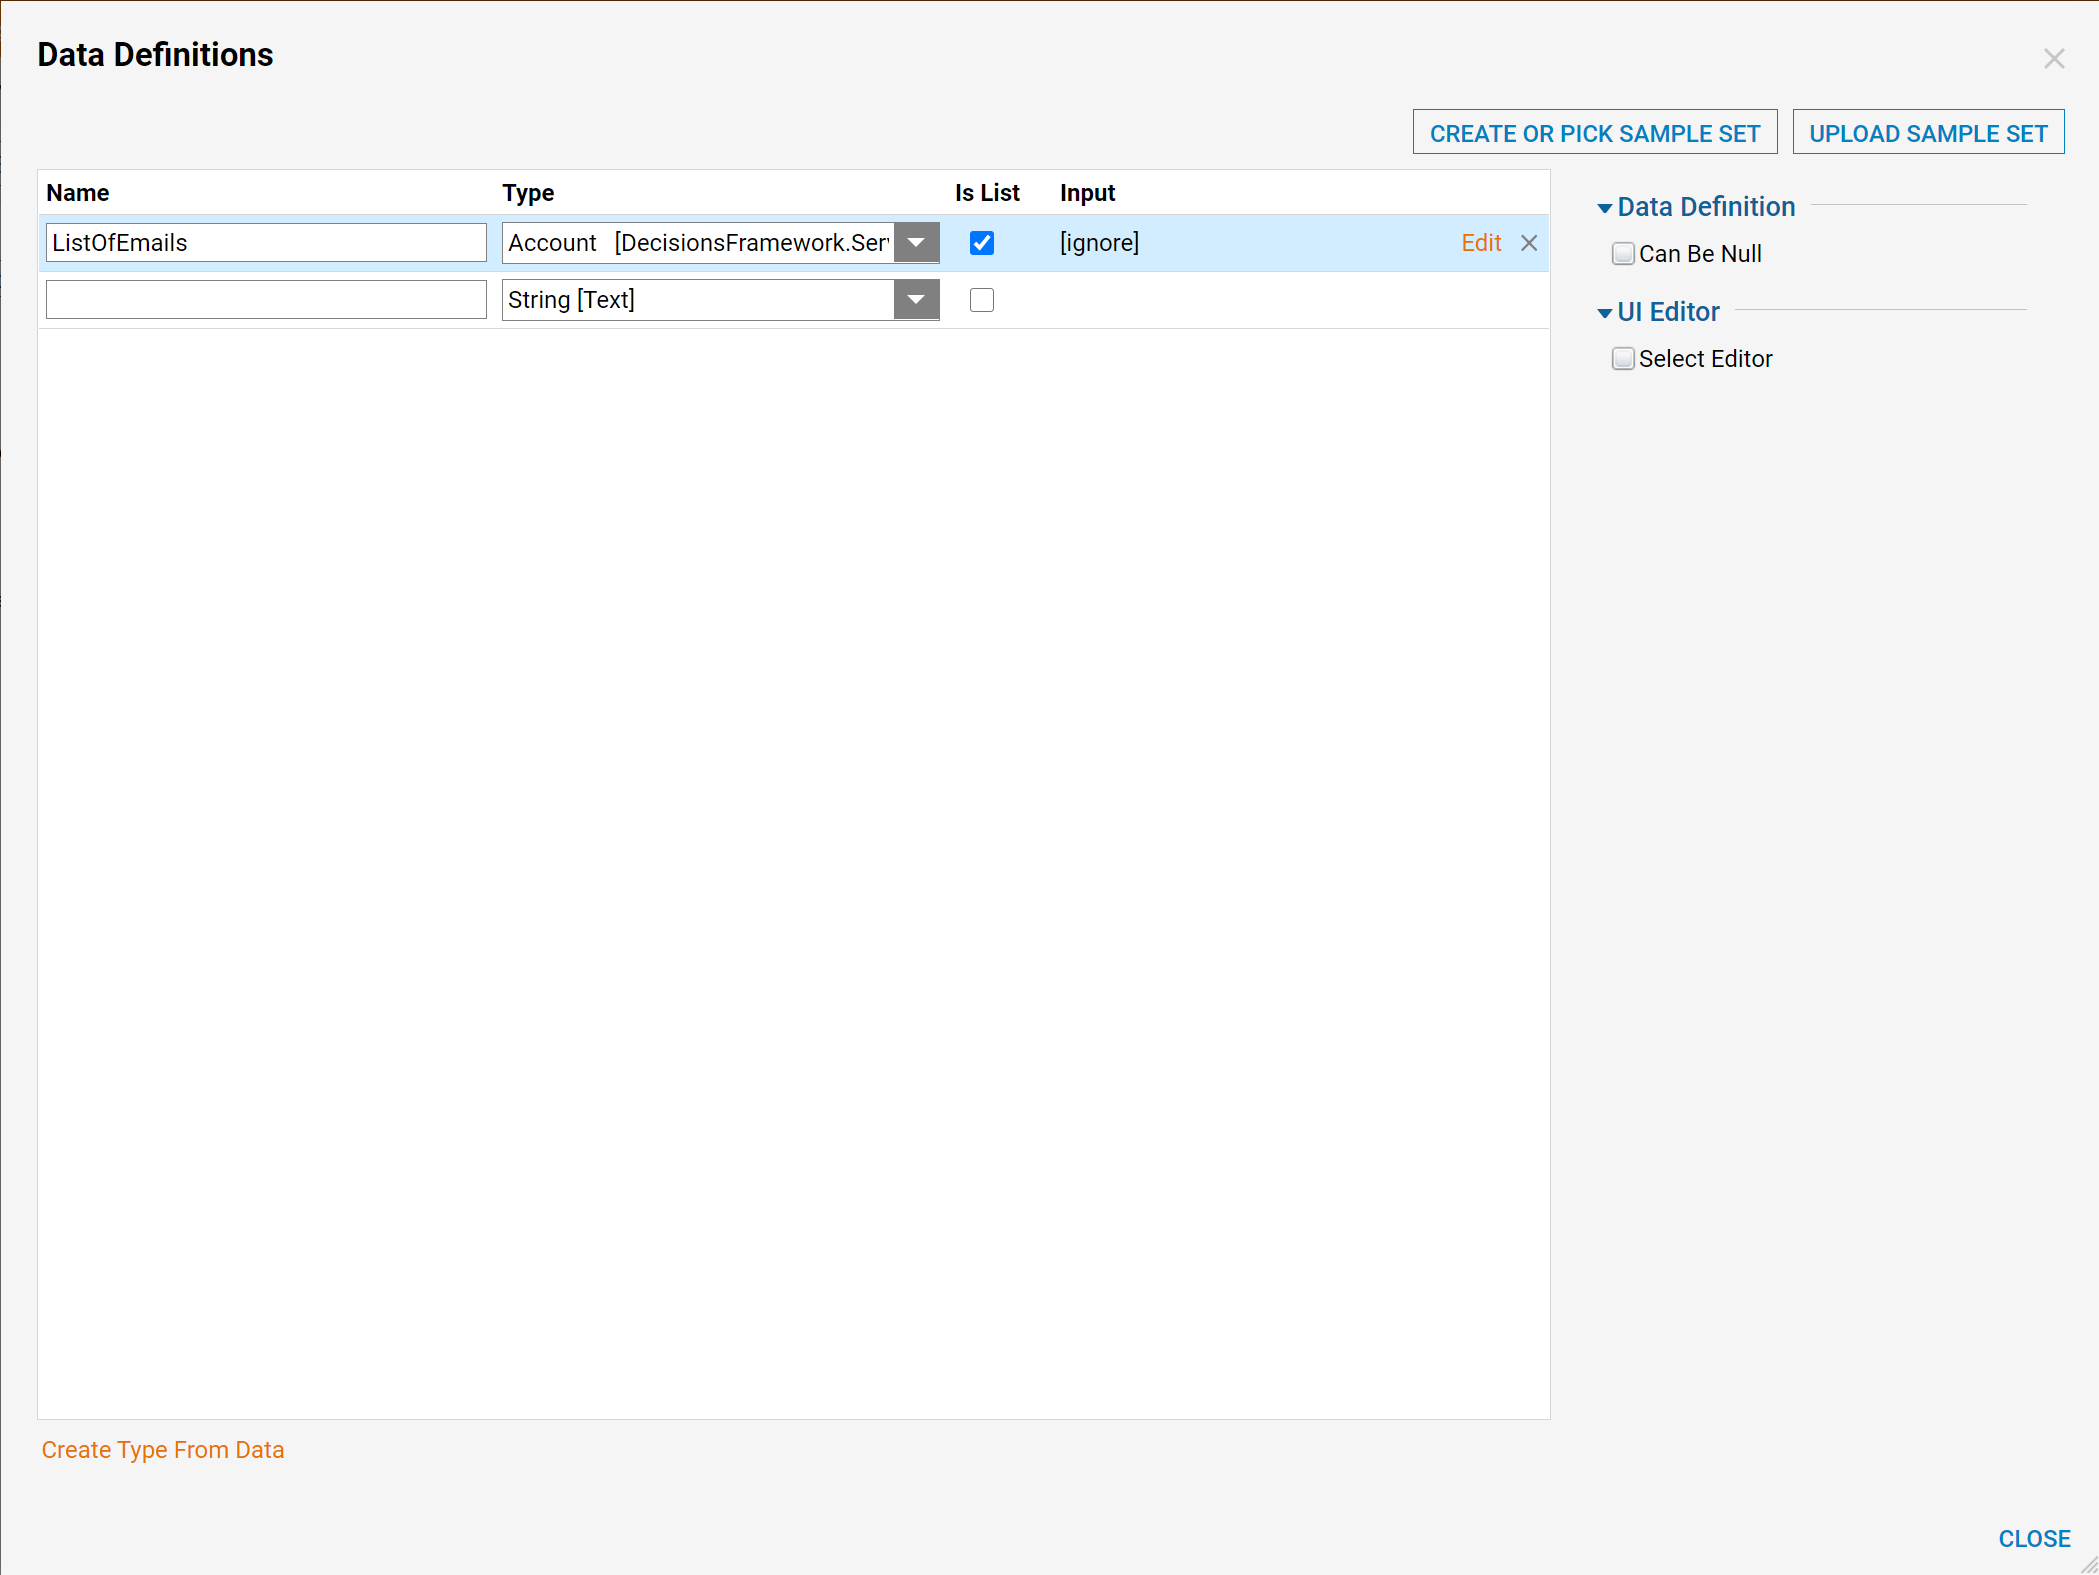
In the Data Definitions window, provide a name for each piece of Input Data, select the appropriate data type, and use the check-box to indicate whether or not the data is in list form.
For this example, name the Input Data ListOfEmails and define it as a data type of Account, then mark that it Is List. Select 'CLOSE' to save the Input Data configuration.
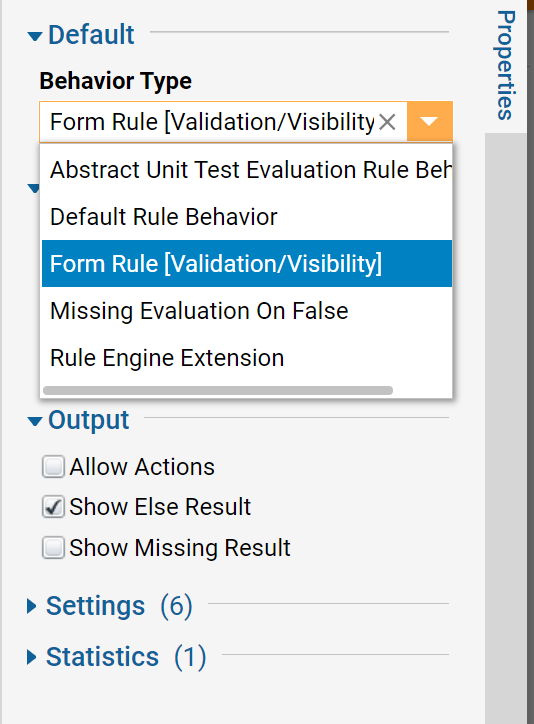
In the Rule Designer, locate the Properties tab on the right side. Under the Default section, change the Behavior Type to Form Rule [Validation/Visibility].
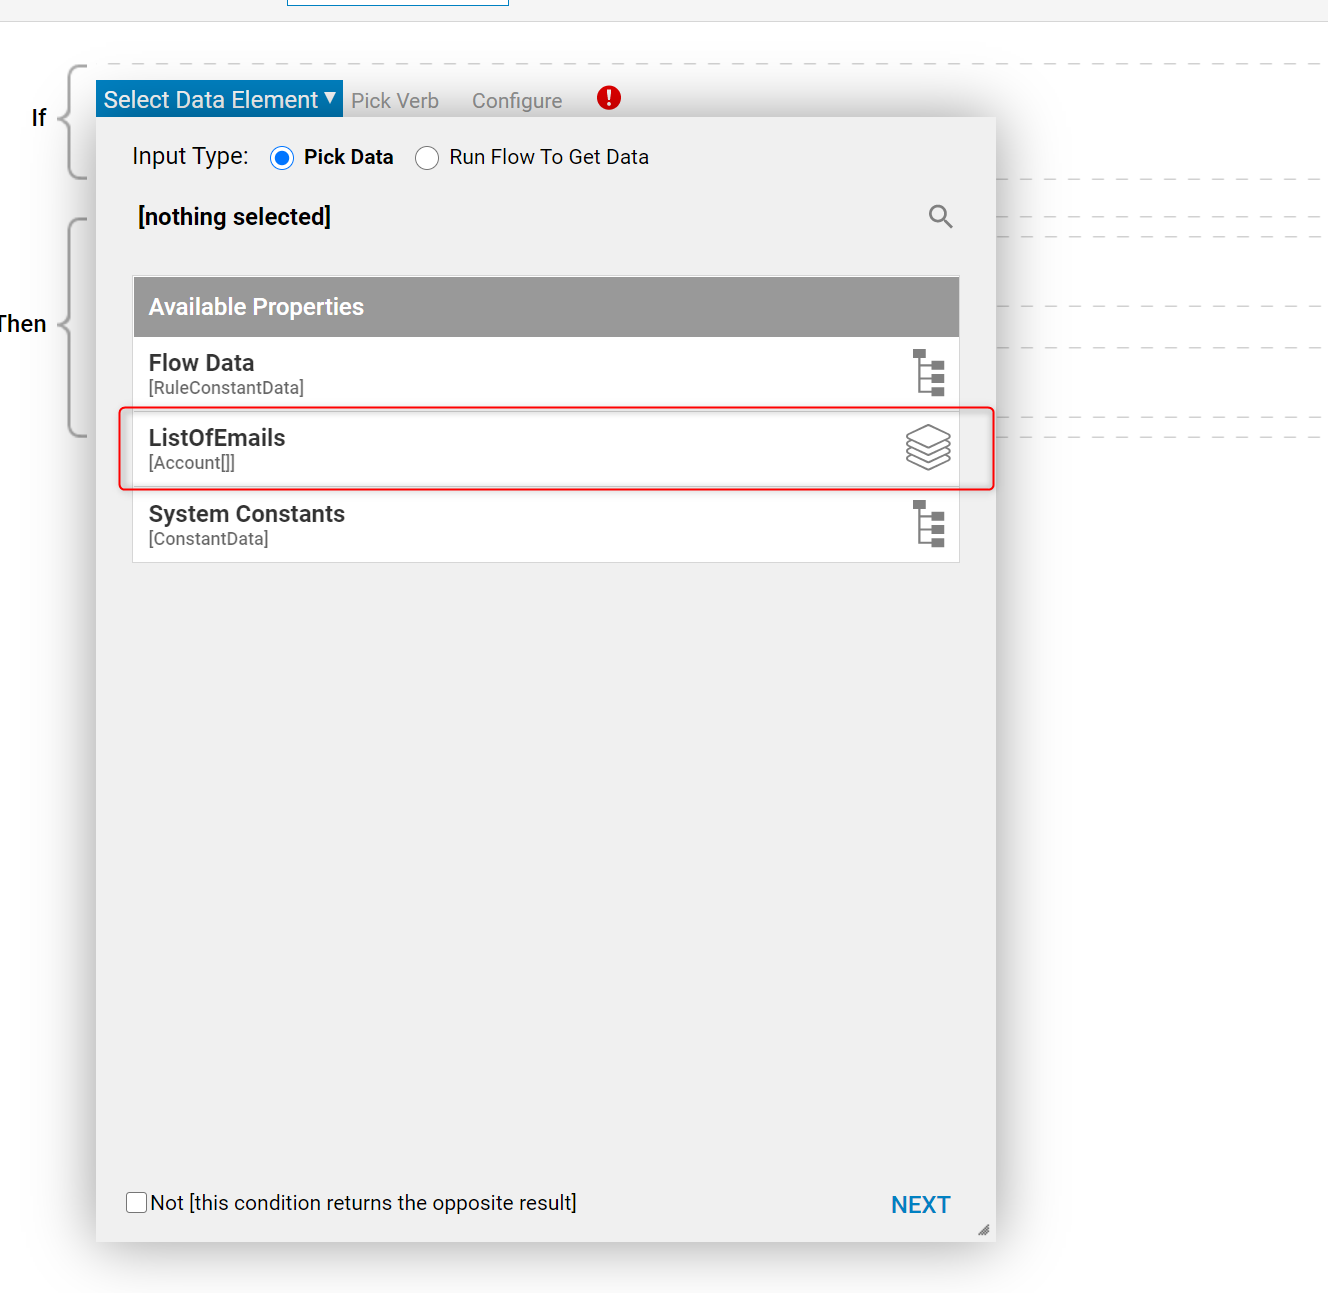
Click on Select Data Element and choose 'ListOfEmails' from the list. From ListOfEmails [Account []] should now be highlighted, bypass the Available Properties and click 'NEXT' to continue.
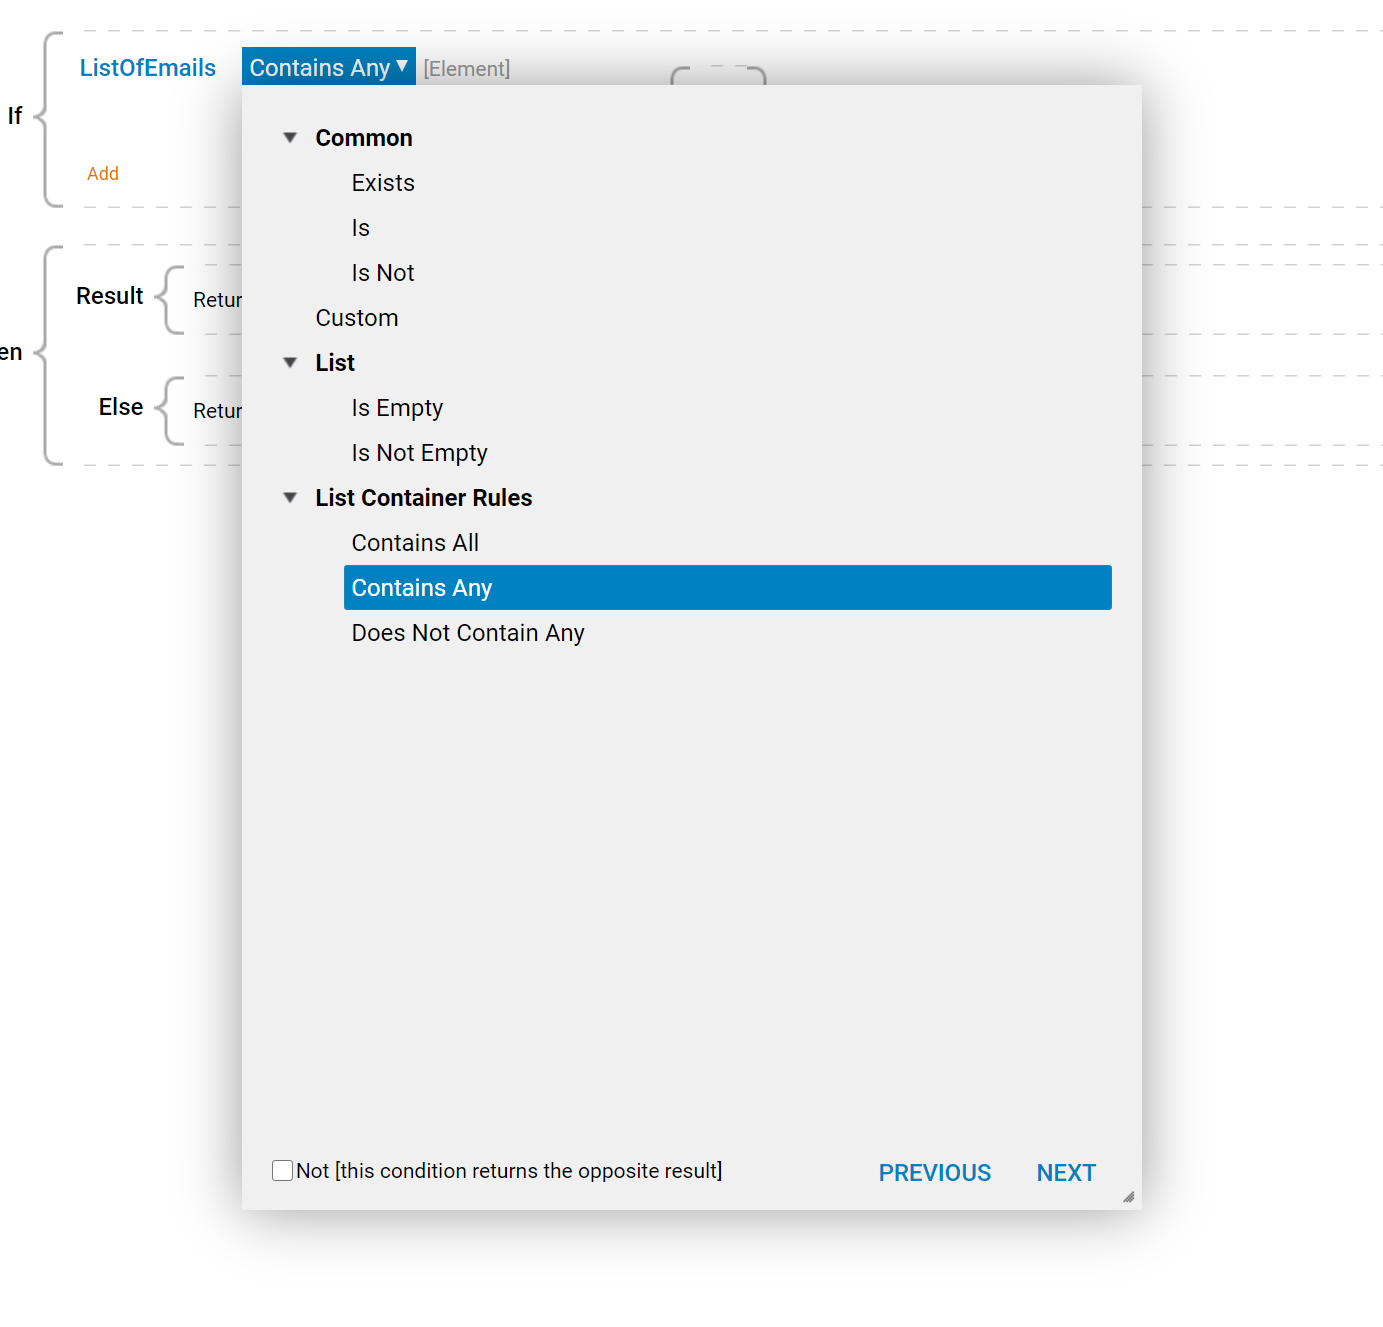
In the Pick Verb window, select Contains Any from the List Container Rules and click 'NEXT' to continue.
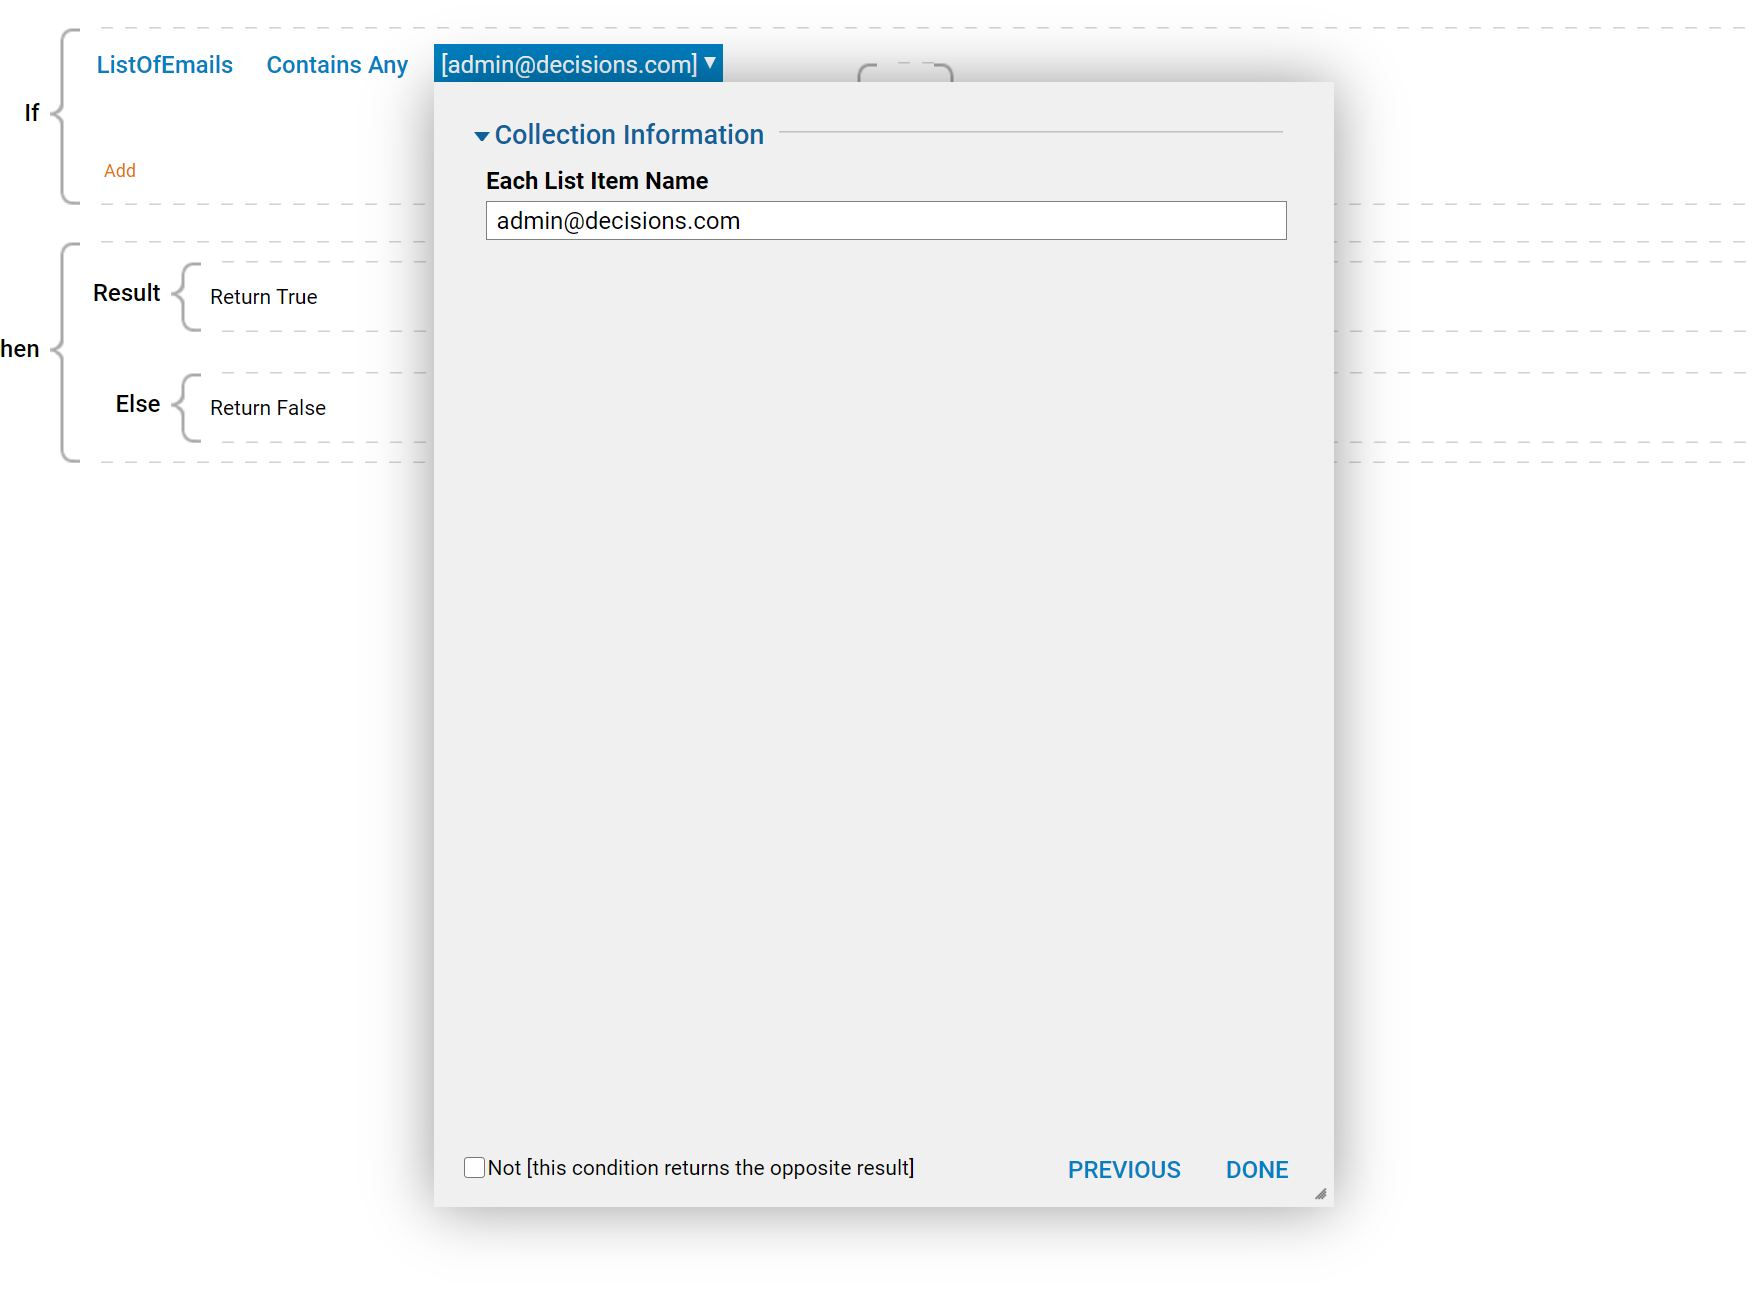
In the [Element] window, enter admin@decisions.com in the text box for Each List Item Name under the Collection Information section, then click 'DONE'. The Statement Rule is now complete, save and close the Rule Designer.
Begin in a Designer Folder and click the Create Flow button located on the Action Bar at the bottom of the screen. Select 'CREATE' for the default Flow template, name the Flow on the next screen, then select 'CREATE' again. Decisions will now redirect to the Flow Designer.

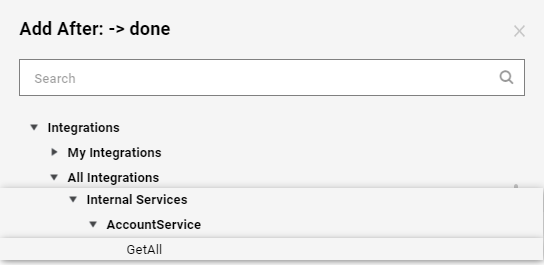
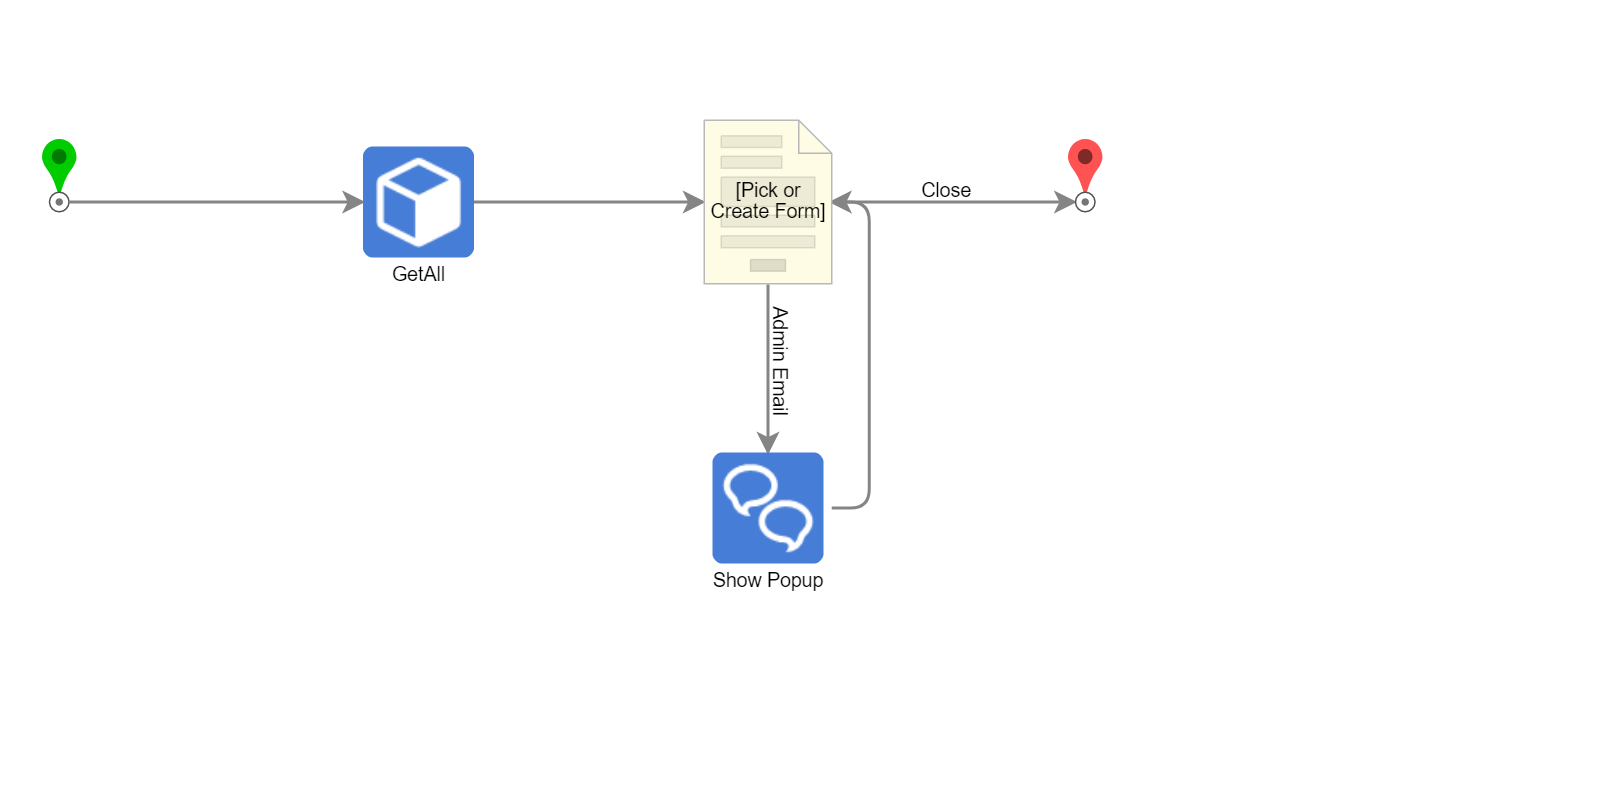
In the Flow Designer, drag the 'Done' path from the Start Step into blank space to reveal the Quick Add window. Expand the Integrations section, then navigate to All Integrations > Internal Services > AccountService and expand the 'AccountService' list. Select GetAll then click 'ADD'.
Drag the 'Done' path from the 'GetAll' Step into blank space and in the Quick Add window, navigate to Flows, Rules, Forms, and Reports > Forms [Interaction] and select [Pick or Create Form], then click 'ADD'.
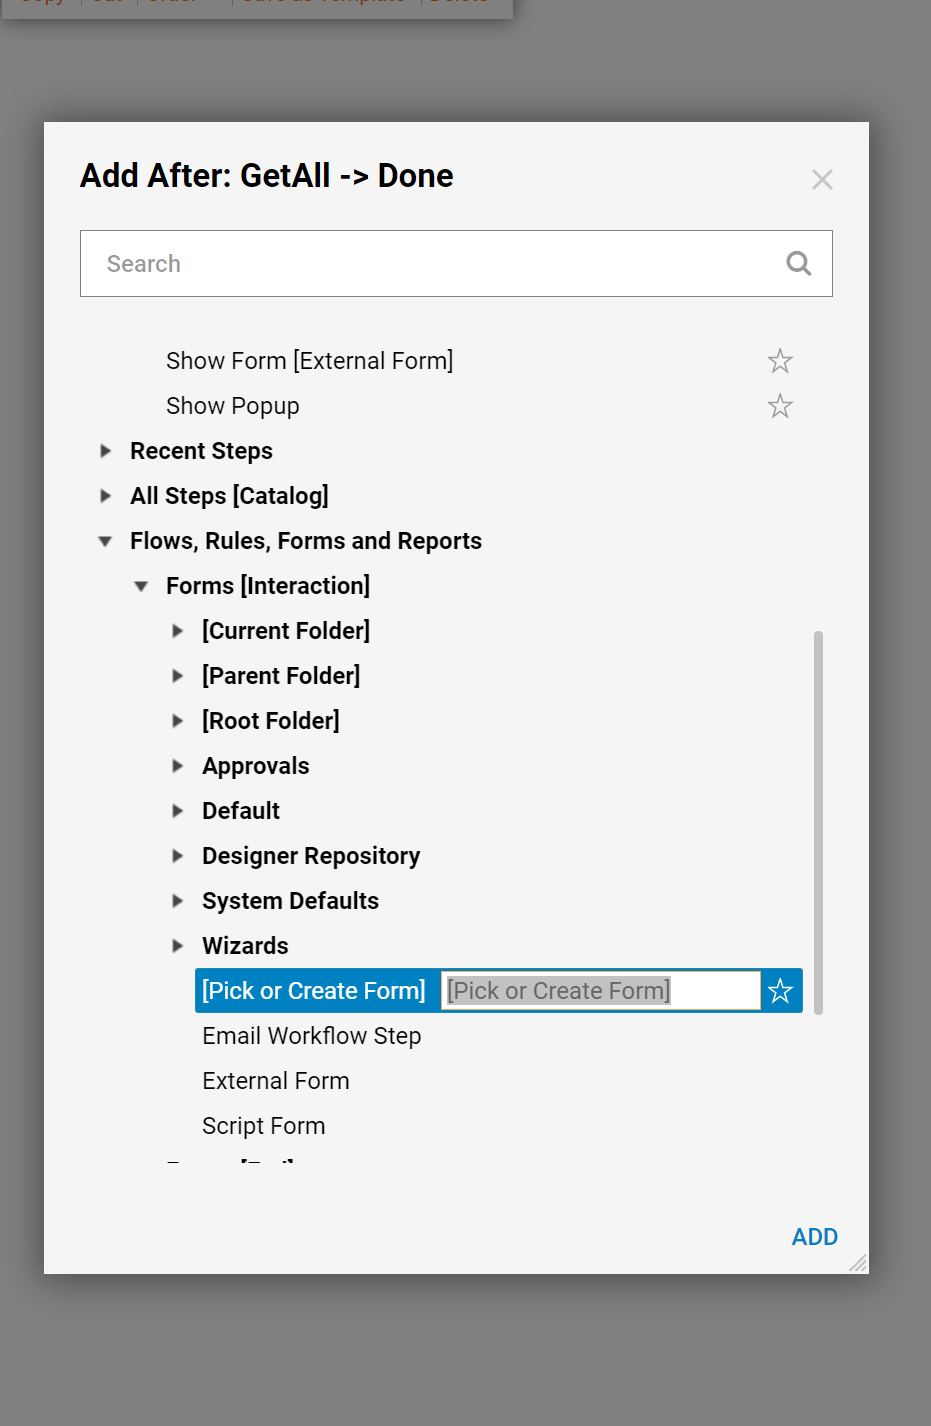
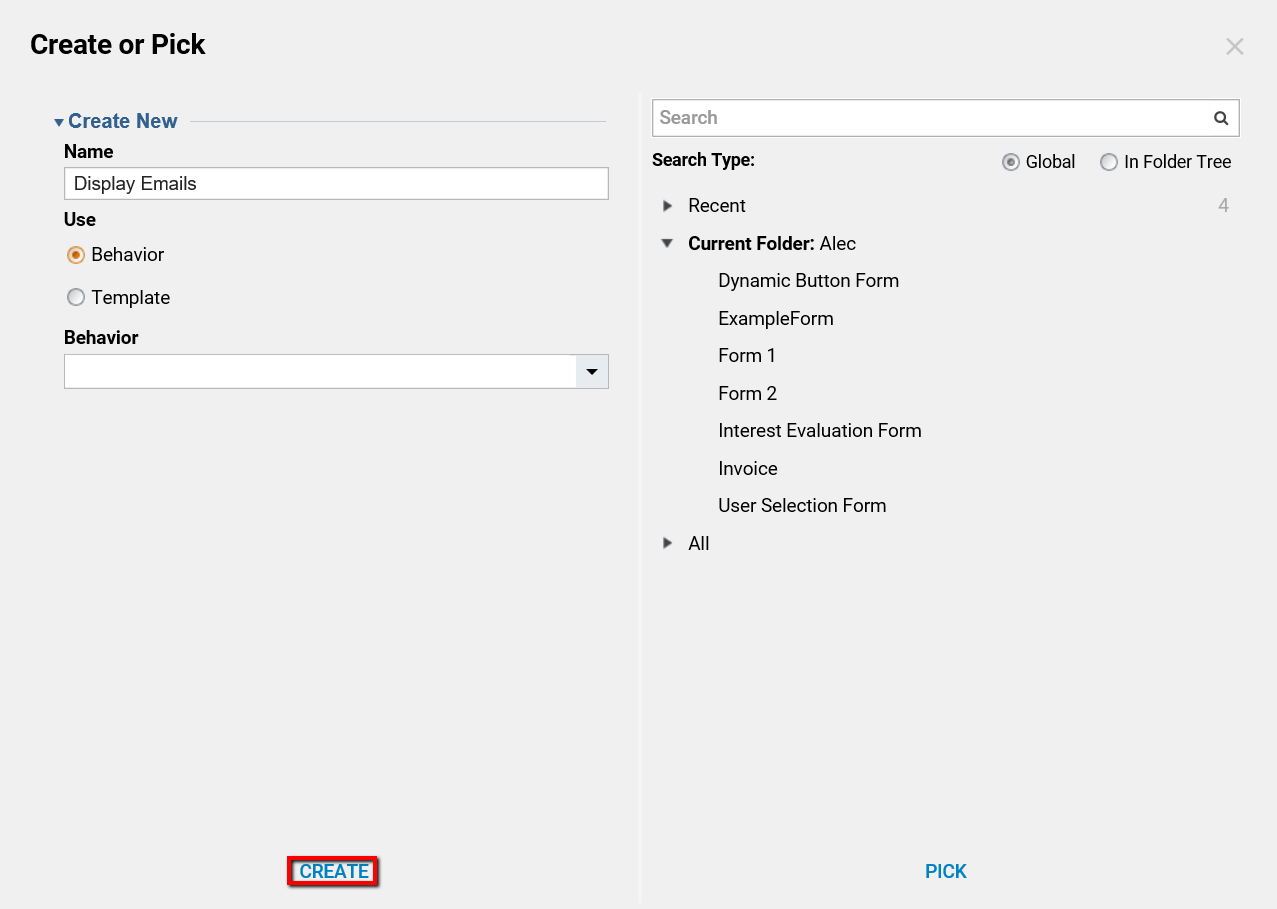
In the resulting pop-up window, we click Pick or Create Form link. Then, in the Create New field, we name the form and click Create to proceed to the Form Designer.
By default, the '[Pick or Create Form]' Step will be highlighted and the properties for this Step will populate on the right side. Click Pick or Create Form at the top of the Properties tab. In the Create or Pick window, enter Display Emails in the text box for Name under the Create New section, then click 'CREATE'.
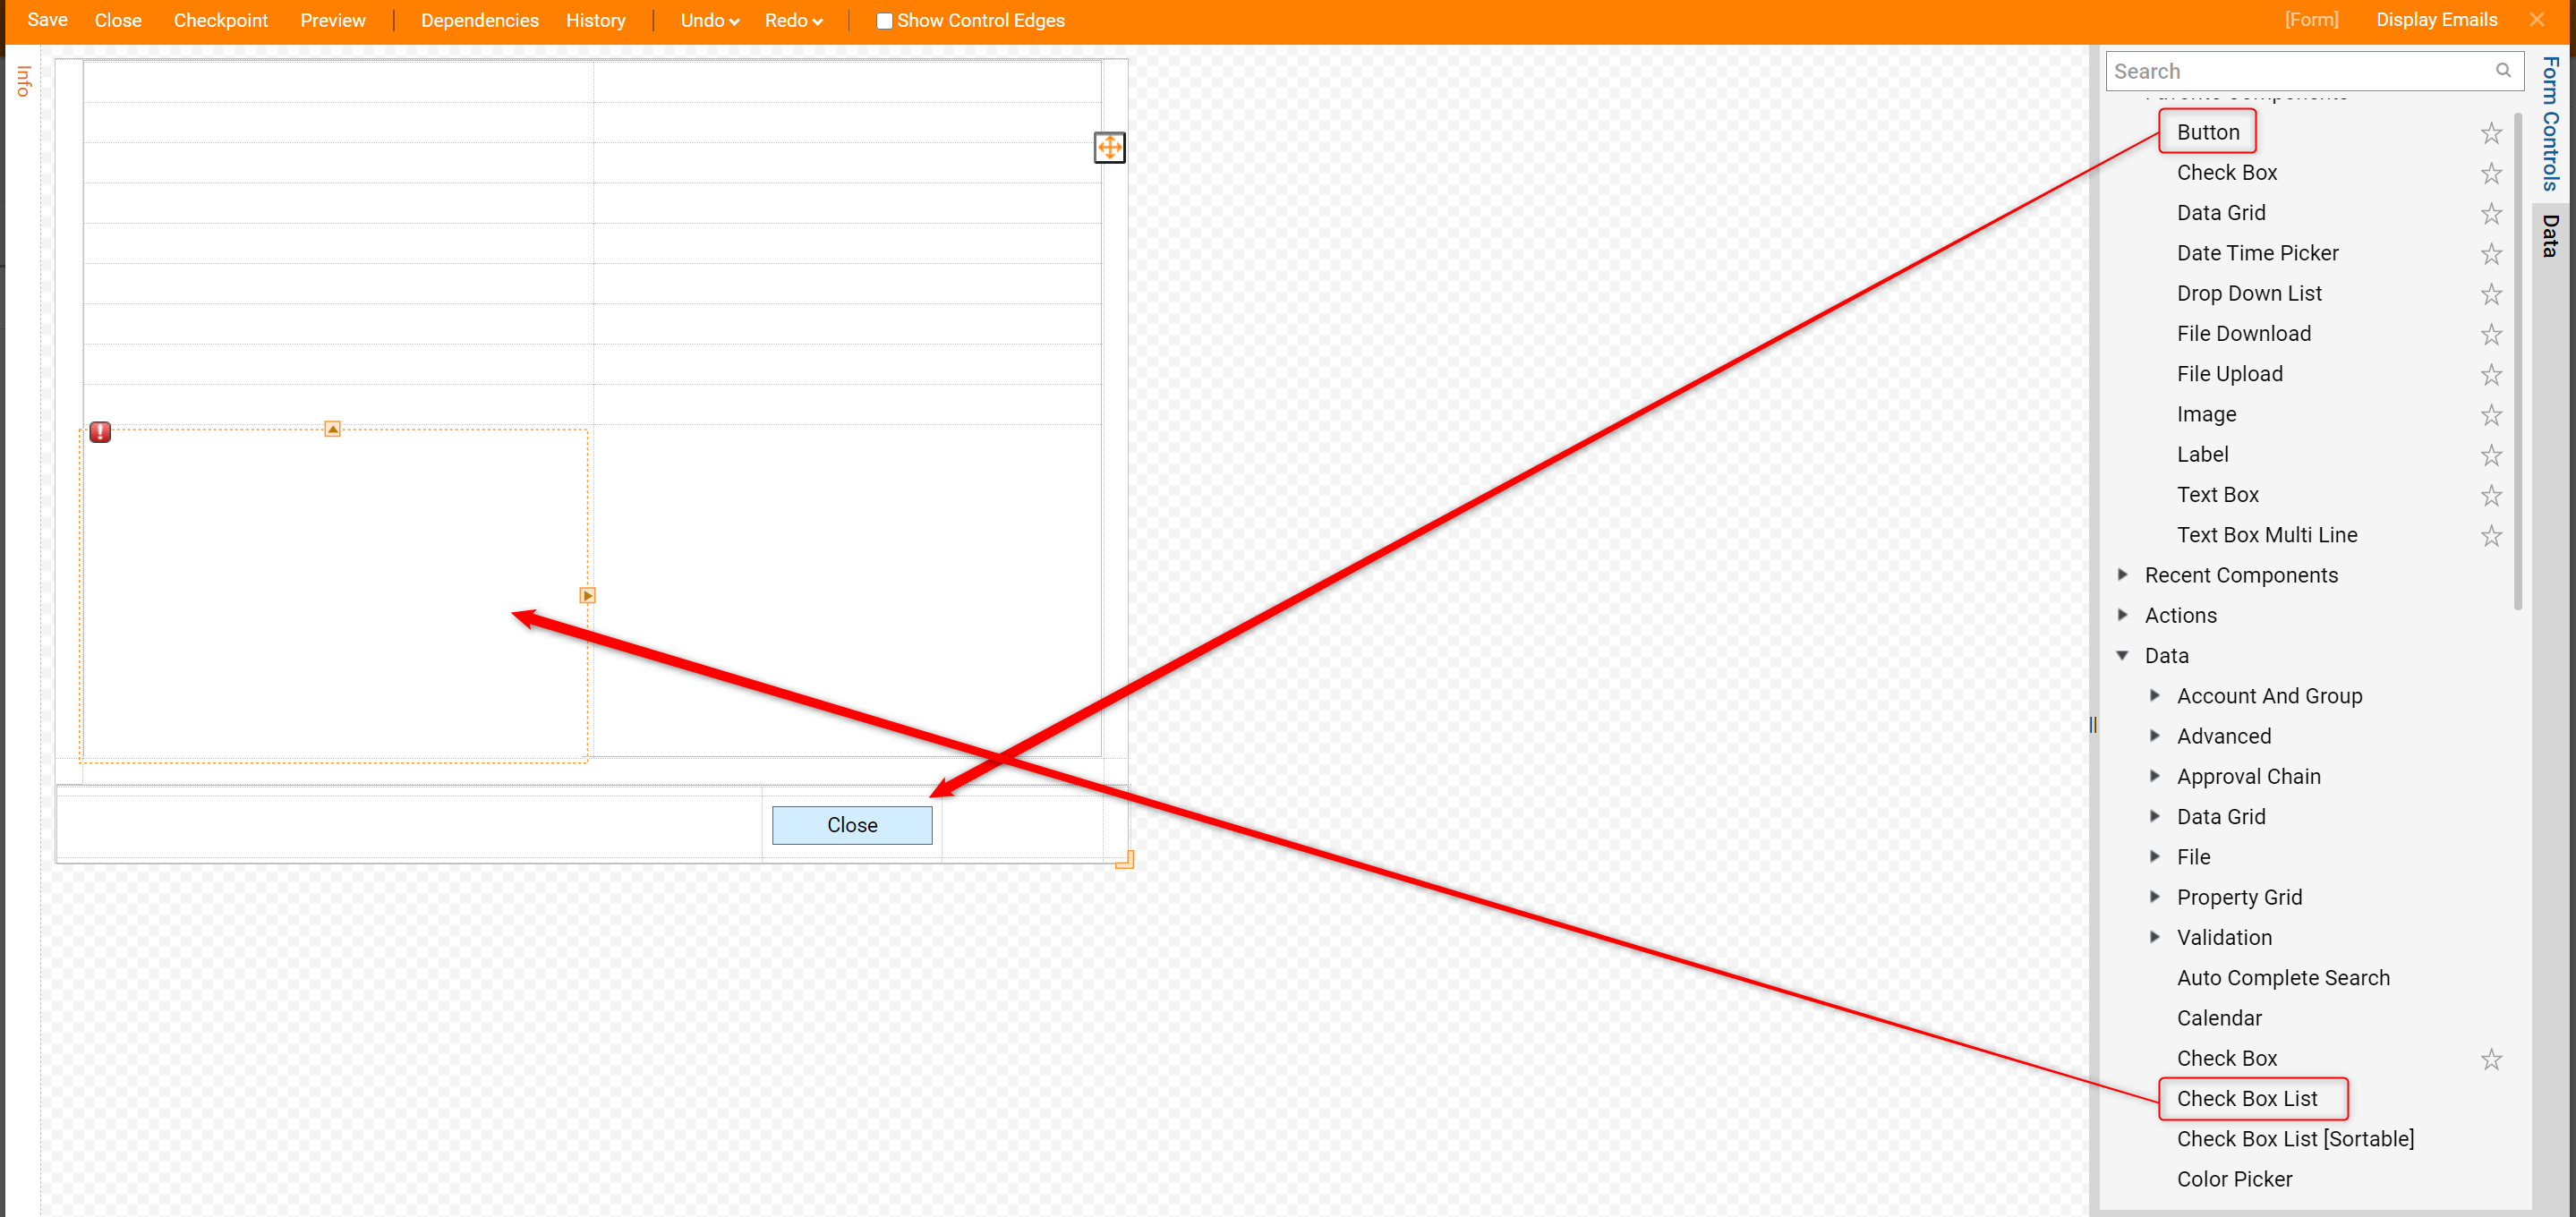
In the Form Designer, drag a Button Control to the Form layout from the Favorite Components section of the Form Controls panel. Expand the Data section of the 'Form Controls' panel and locate Check Box List, then add it to the Form.
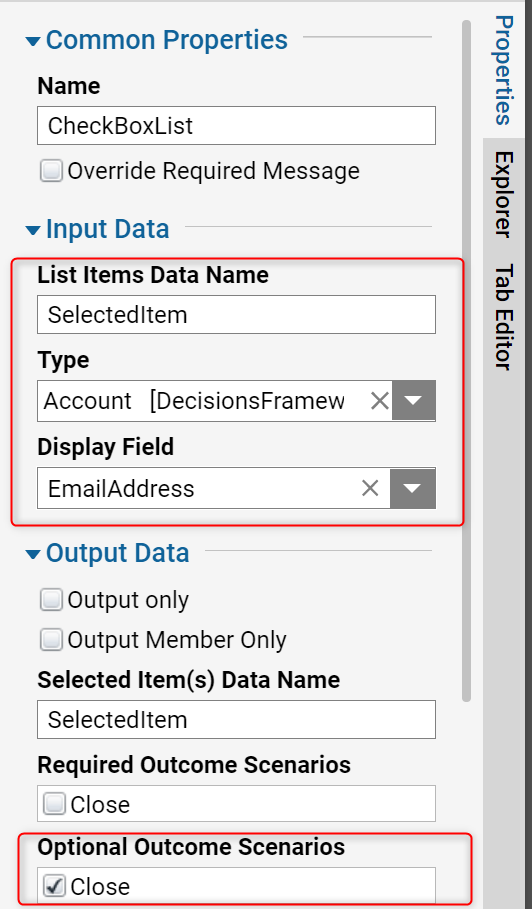
Click on the 'Check Box List' Control to highlight it and reveal the properties for this Control on the right side, as shown in the screenshot above. Configure the settings under the Input Data section as follows:
- List Items Data Name: SelectedItem
- Type (drop-down): Account [DecisionsFramework]
- Display Field (drop-down): EmailAddress
Further down in the Properties tab, make sure Button is checked as the Optional Outcome Scenario.
Now the properties of the Form itself need to be configured. Click anywhere in the checkered background space of the Form Designer so that the properties of the Form will appear on the right side.
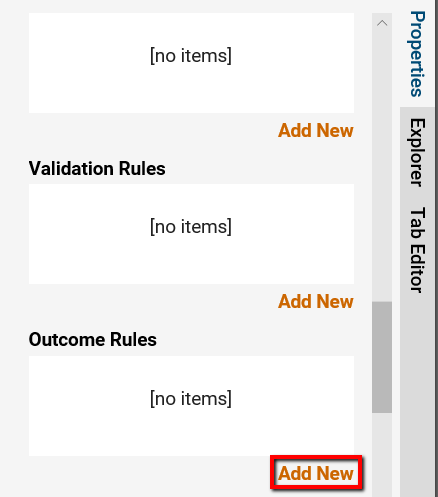
Navigate to the Form Rules section in the Form properties, locate the Outcome Rules box and click the Add New button.
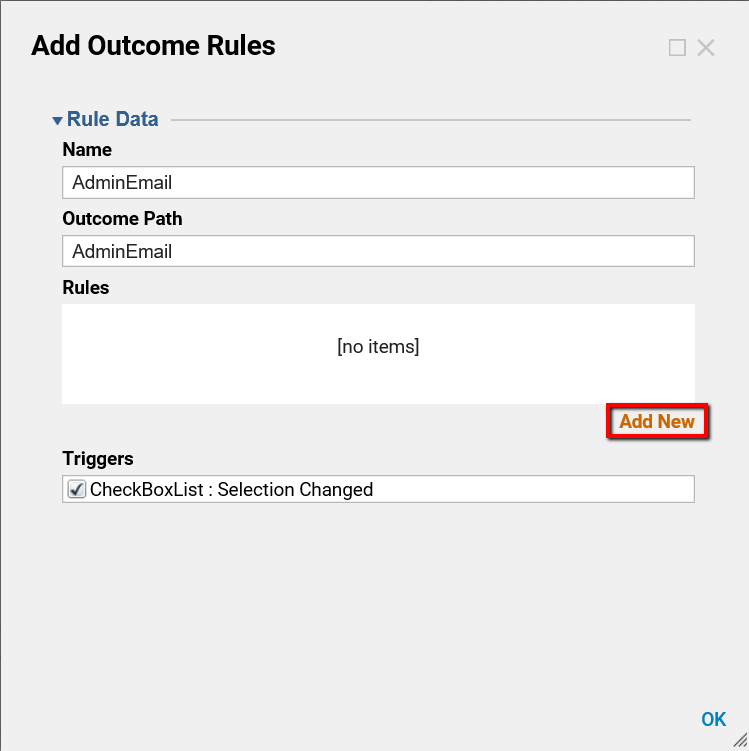
In the resulting pop-up window, we define Name, Outcome Path, and Triggers for our Rule and click Add New link to configure Rule Data.
In the Add Outcome Rules window, configure the Rule Data settings as follows:
- Name: AdminEmail
- Outcome Path: AdminEmail
- Triggers: Check the box for 'CheckBoxList: Selection Changed'
Click the Add New button under the Rules box.
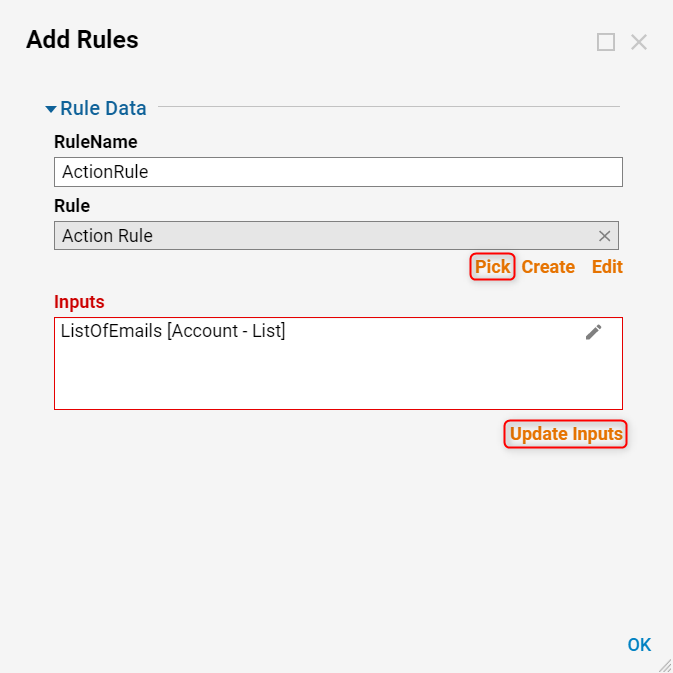
In the Add Rules window, we provide RuleName and use Rule Picker to select the Rule that we have created previously in this tutorial.
In the Add Rules window, configure the Rule Data settings as follows:
- RuleName: ActionRule
- Rule: Select 'Pick' and click the 'Action Rule' created above, then select 'PICK' again
- Inputs: Click 'Update Inputs'
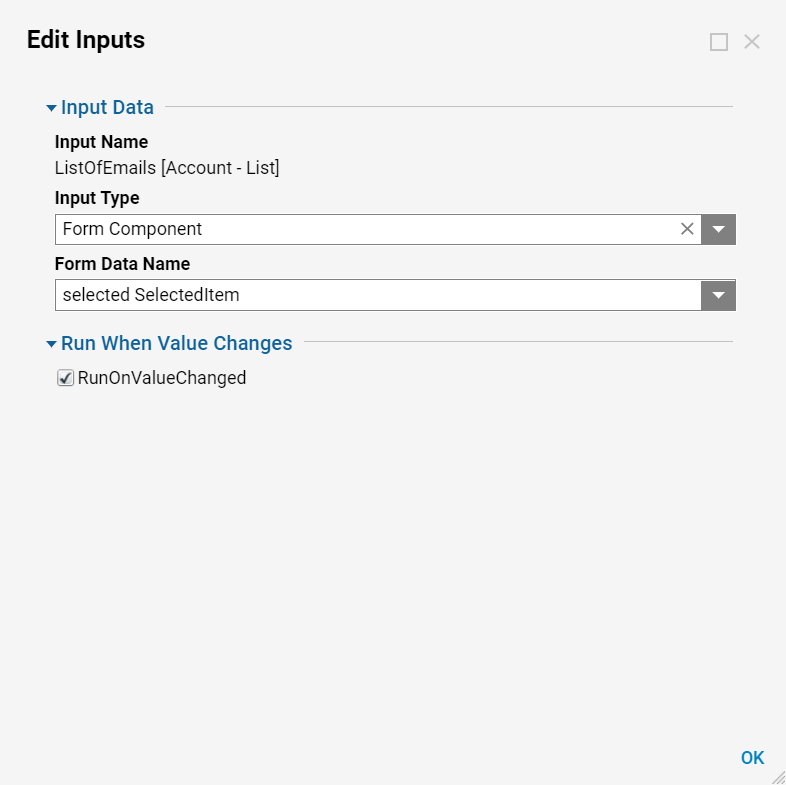
Select the pencil icon to the right of ListOfEmails [Account - List]. In the Edit Inputs window, use the drop-down list to change the Input Type to Form Component. Use the Form Data Name drop-down list to select selected SelectedItem, which acts as a data name for the email that the end-user selects from the list.
Click 'OK' on this pop-up window as well as the two others before it, then save and close the Form Designer.
In the Flow Designer, drag the Admin Email path from the [Click or Create Form] Step into blank space, then add a Show Popup Step from the Favorite Steps category in the Quick Add window.
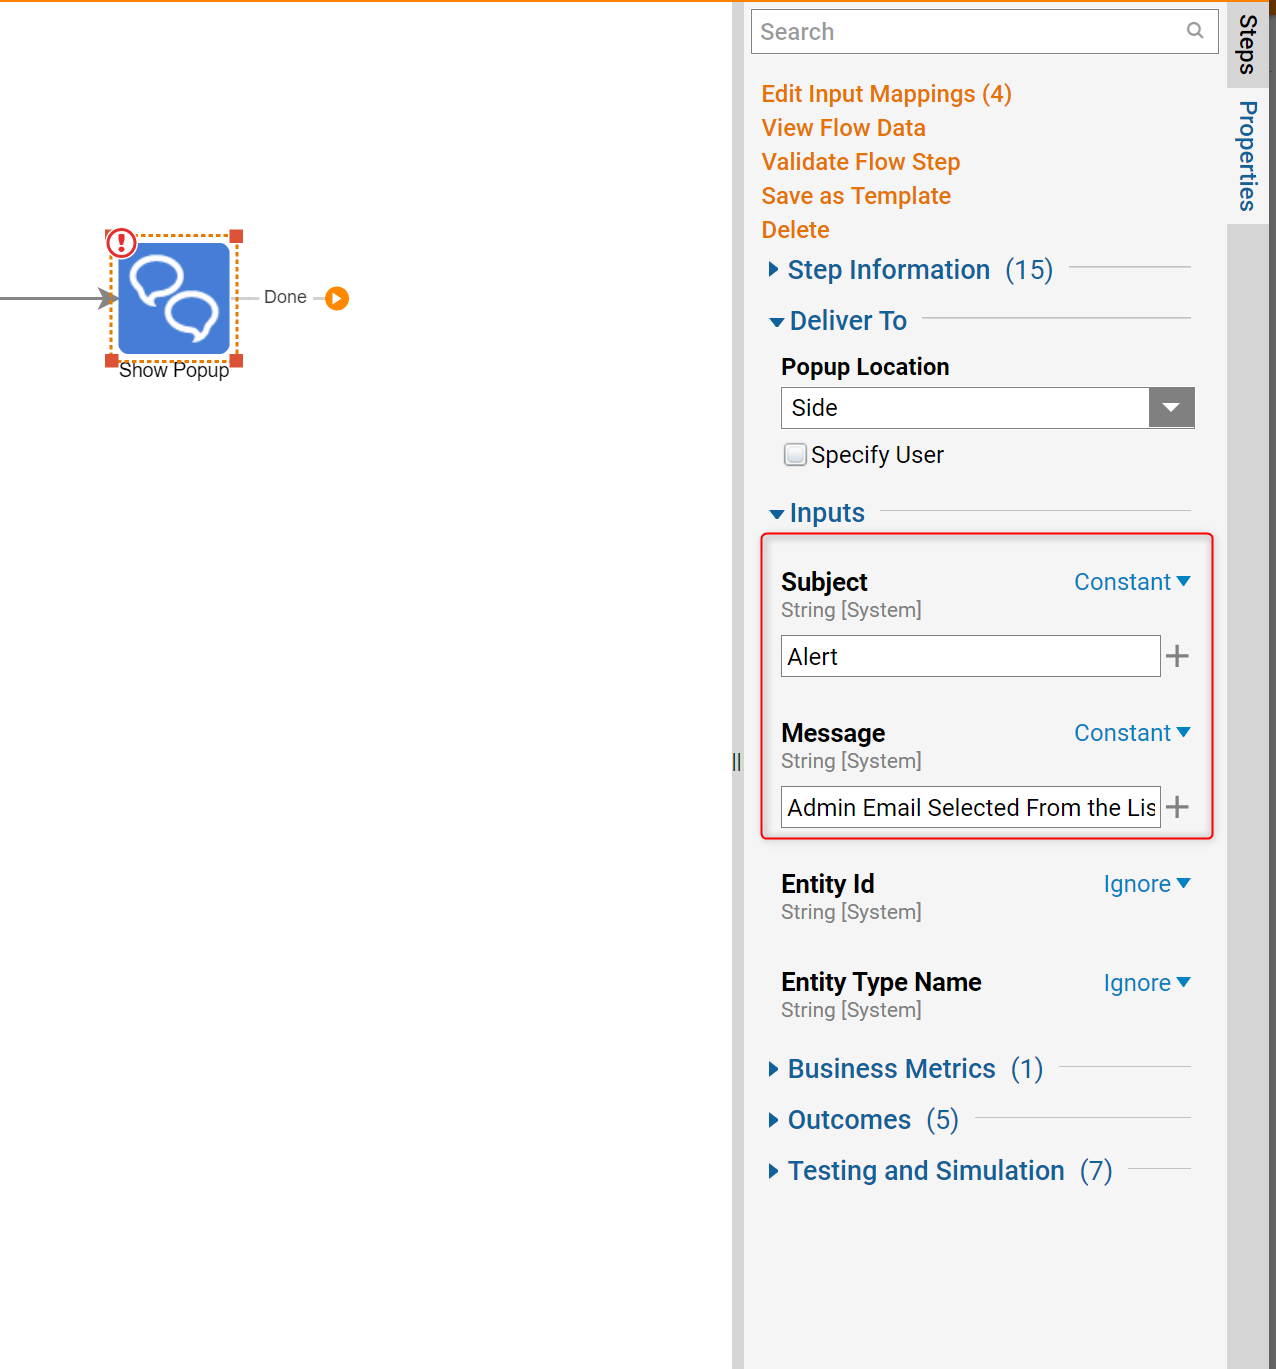
In the Edit Step: Show Popup window, configure the Inputs as follows:
- Subject - Constant: Alert
- Message - Constant: Admin Email Selected From The List
- Entity ID - Ignore
- Entity Type Name - Ignore
Connect the remaining 'Done' path and 'Button' path to the End Step to complete the Flow.
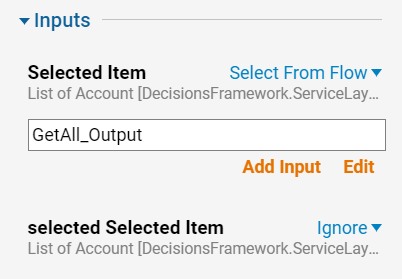
Click the [Pick or Create Form] step, then locate the Inputs section of the properties for this Step. Click the drop-down list to the right of Selected Item and choose Select From Flow, then select From GetAll_Output [Account[]] in the Pick Data For Input window and click 'DONE'. Click the drop-down list to the right of selected Selected Item and choose Ignore.
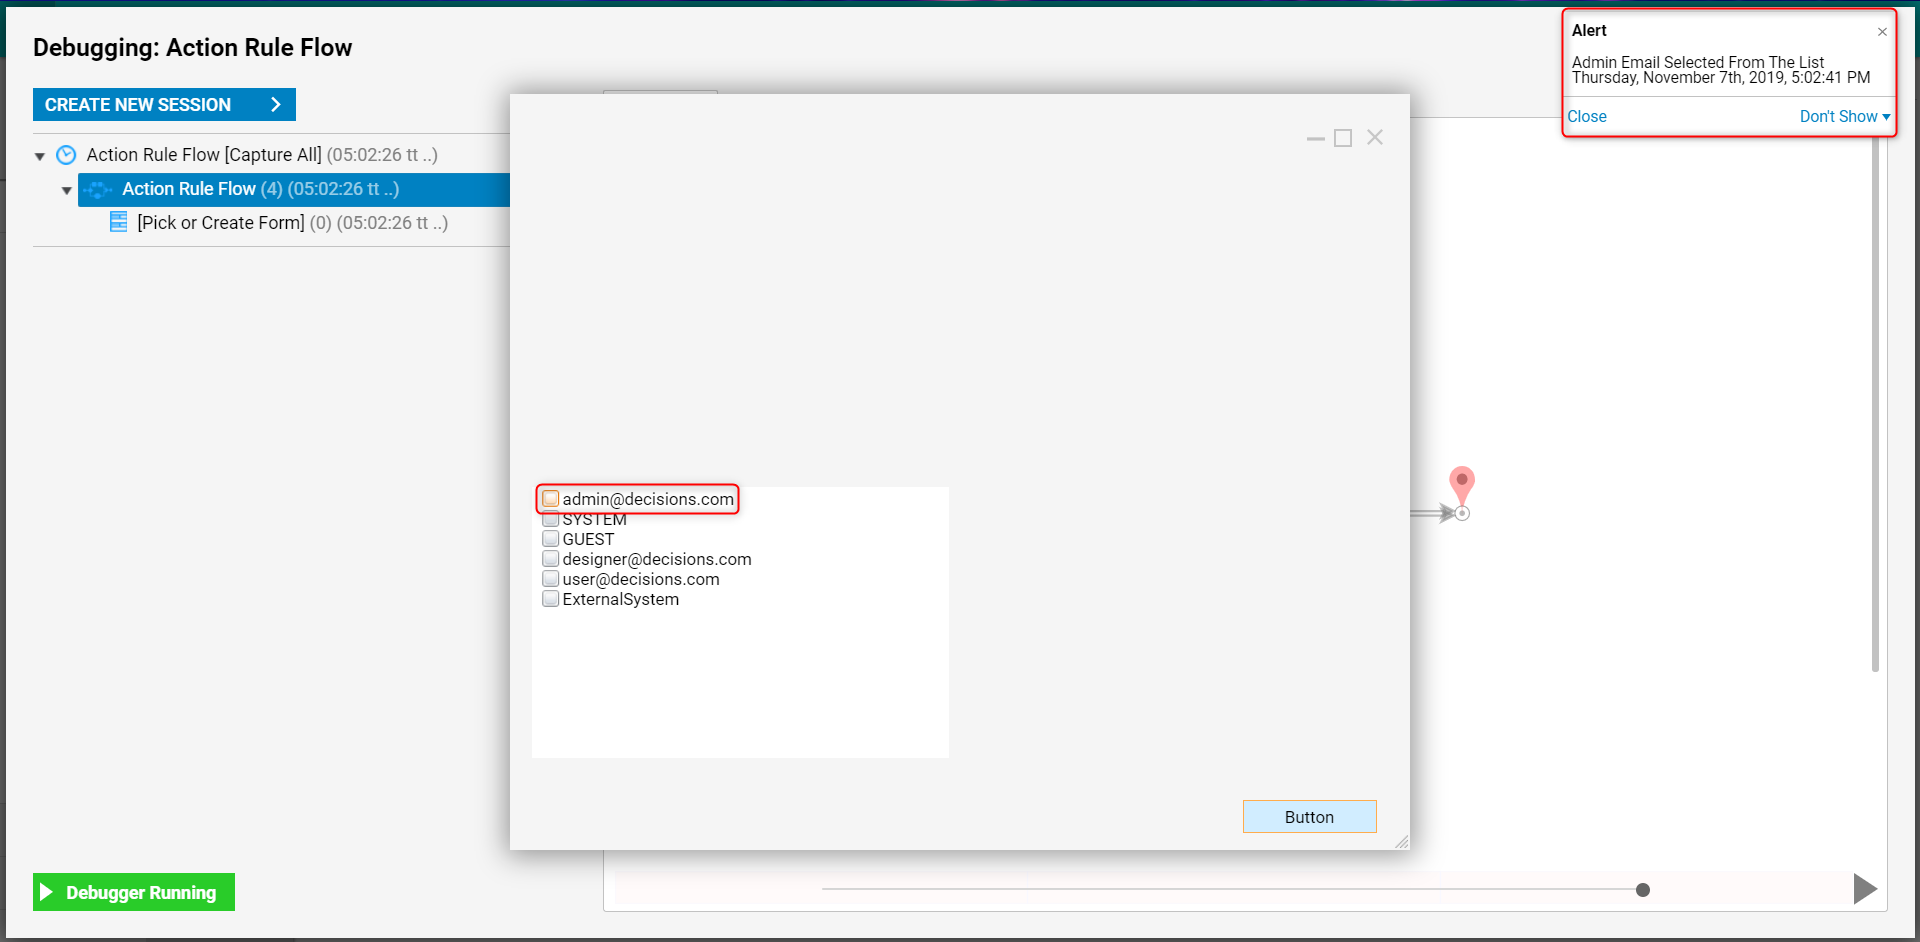
This completes the workflow. Click the Debug button on the top Action Panel in the Flow Designer to test the Flow. In the Debugger, click the FULL button to run the Flow. The Form will appear where the CheckBox List shows all of the Accounts. Check the box for admin@decisions.com to trigger the Outcome Rule, which renders the Popup when the Form resets.
