Overview
A Form shows custom configured Form Controls that allow an end-user to perform an action such as enter data, display a report or folder, or manage entities. Forms can have custom Rules created that, when applied, can manipulate the function of different Form Controls. There are several different kinds of Form Rules, including Validation and Visibility Rules, and Outcome Rules.
This article details an example use of Outcomes Rules used to auto-exit a Form upon entering 'Exit' into a Textbox.
Example
This example will walk through the configuration of an Outcome Rule in a Form. The Outcome Rule will be designed so that if the end-user types 'Exit' in a Form Text Box, the Form will automatically close.
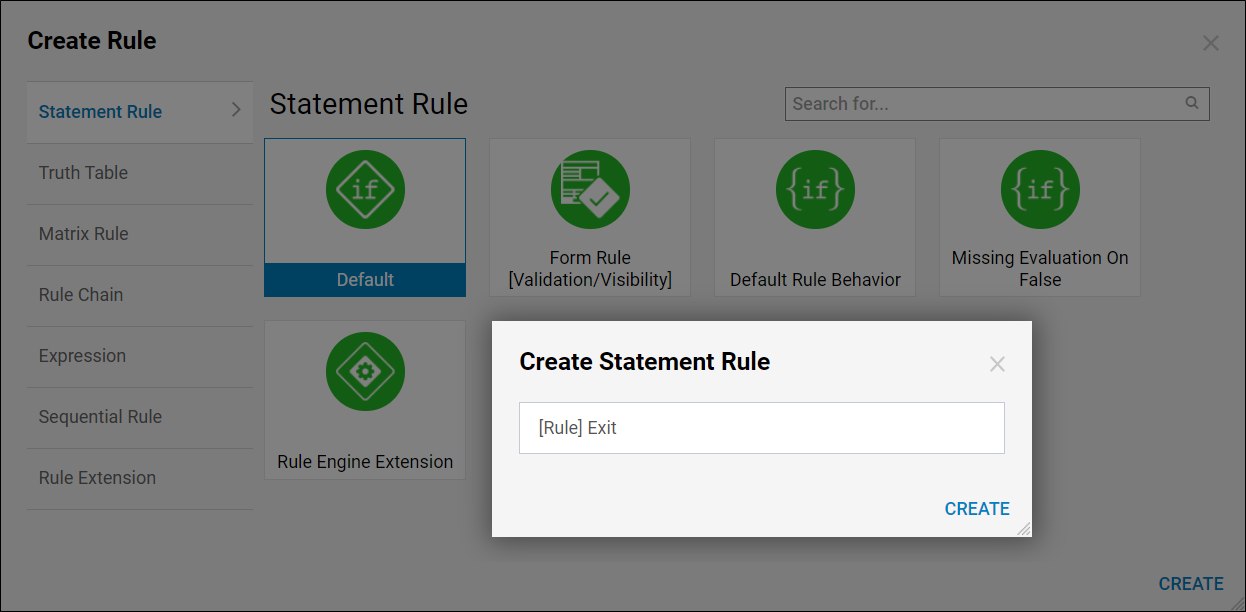
- Begin in a Designer Folder, select the Create Rule button from the bottom Action Bar. Select the Default Rule template and click Create, name the Rule then click Create again.
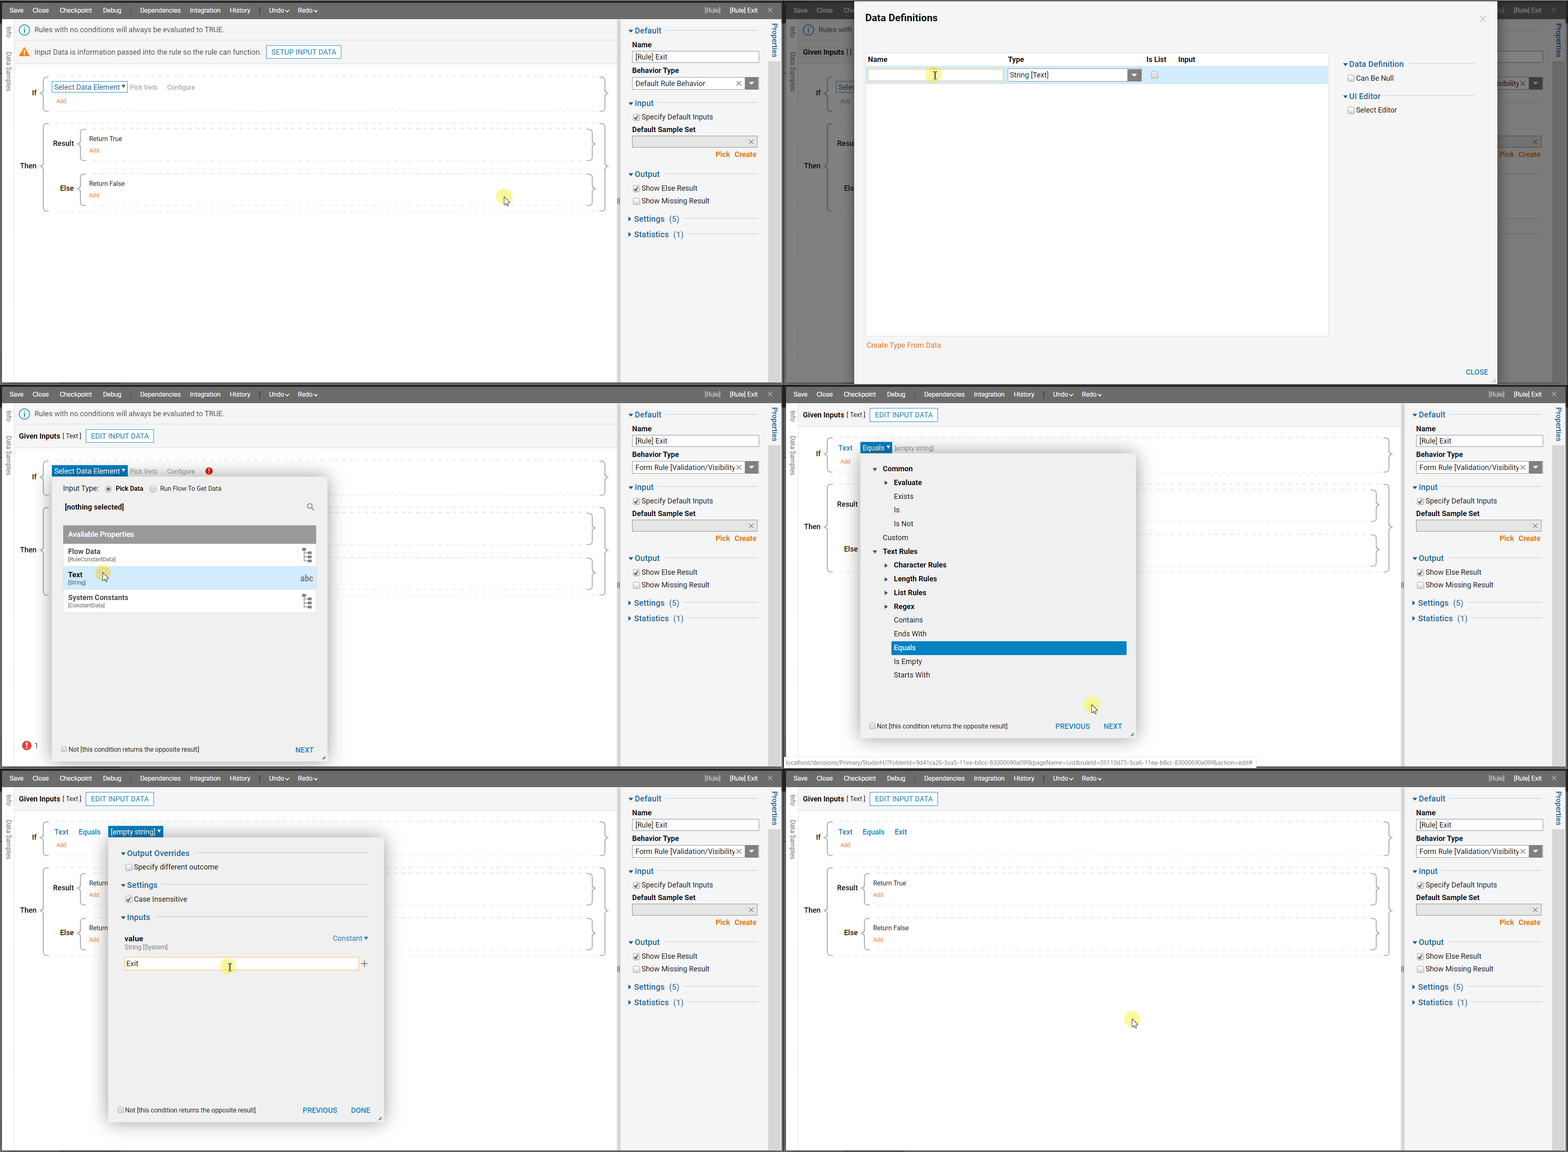
- In the Rule Designer, navigate to Properties > Default to locate the Behavior Type dropdown. Change the Behavior Type to Form Rule [Validation/Visibility].
- Click the Setup Input Data button at the top of the Rule Designer. When the Data Definitions window appears, enter 'Text' for Name and define the Type as String, then click Close.
- To begin the If Statement setup, click Select Data Element and choose 'Text', then click Next. When the Pick Verb window appears, choose Equals from the Text Rules section, then click Next.
- Under the Input section of the next window, define value with the word 'Exit', then click Done/Close. Compare builds to the GIF below, then save and close the Rule.
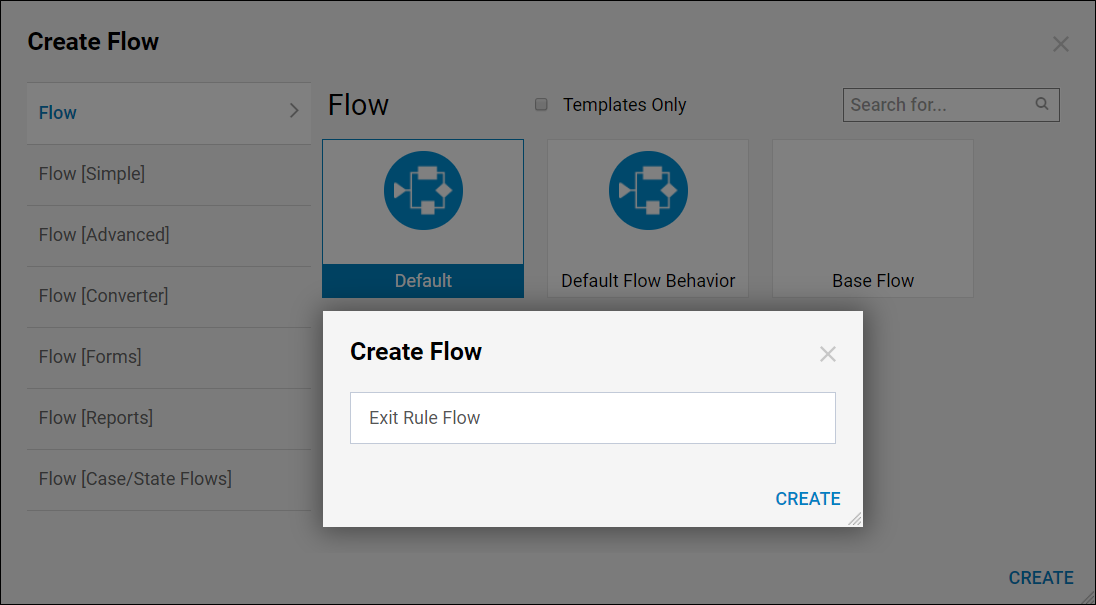
- Back in the Designer Folder, select the Create Flow button from the bottom Action Bar. Select the Default Flow template and click Create, name the Flow then click Create again.
- In the Flow Designer, click the orange arrow on the Done path coming from the Start step. When the Step Catalog window appears, locate the Favorites section and choose the Show Form step, then click Add. When the Step Editor window appears, enter Main Form as the Name of the new Form on the left side, then click Create.

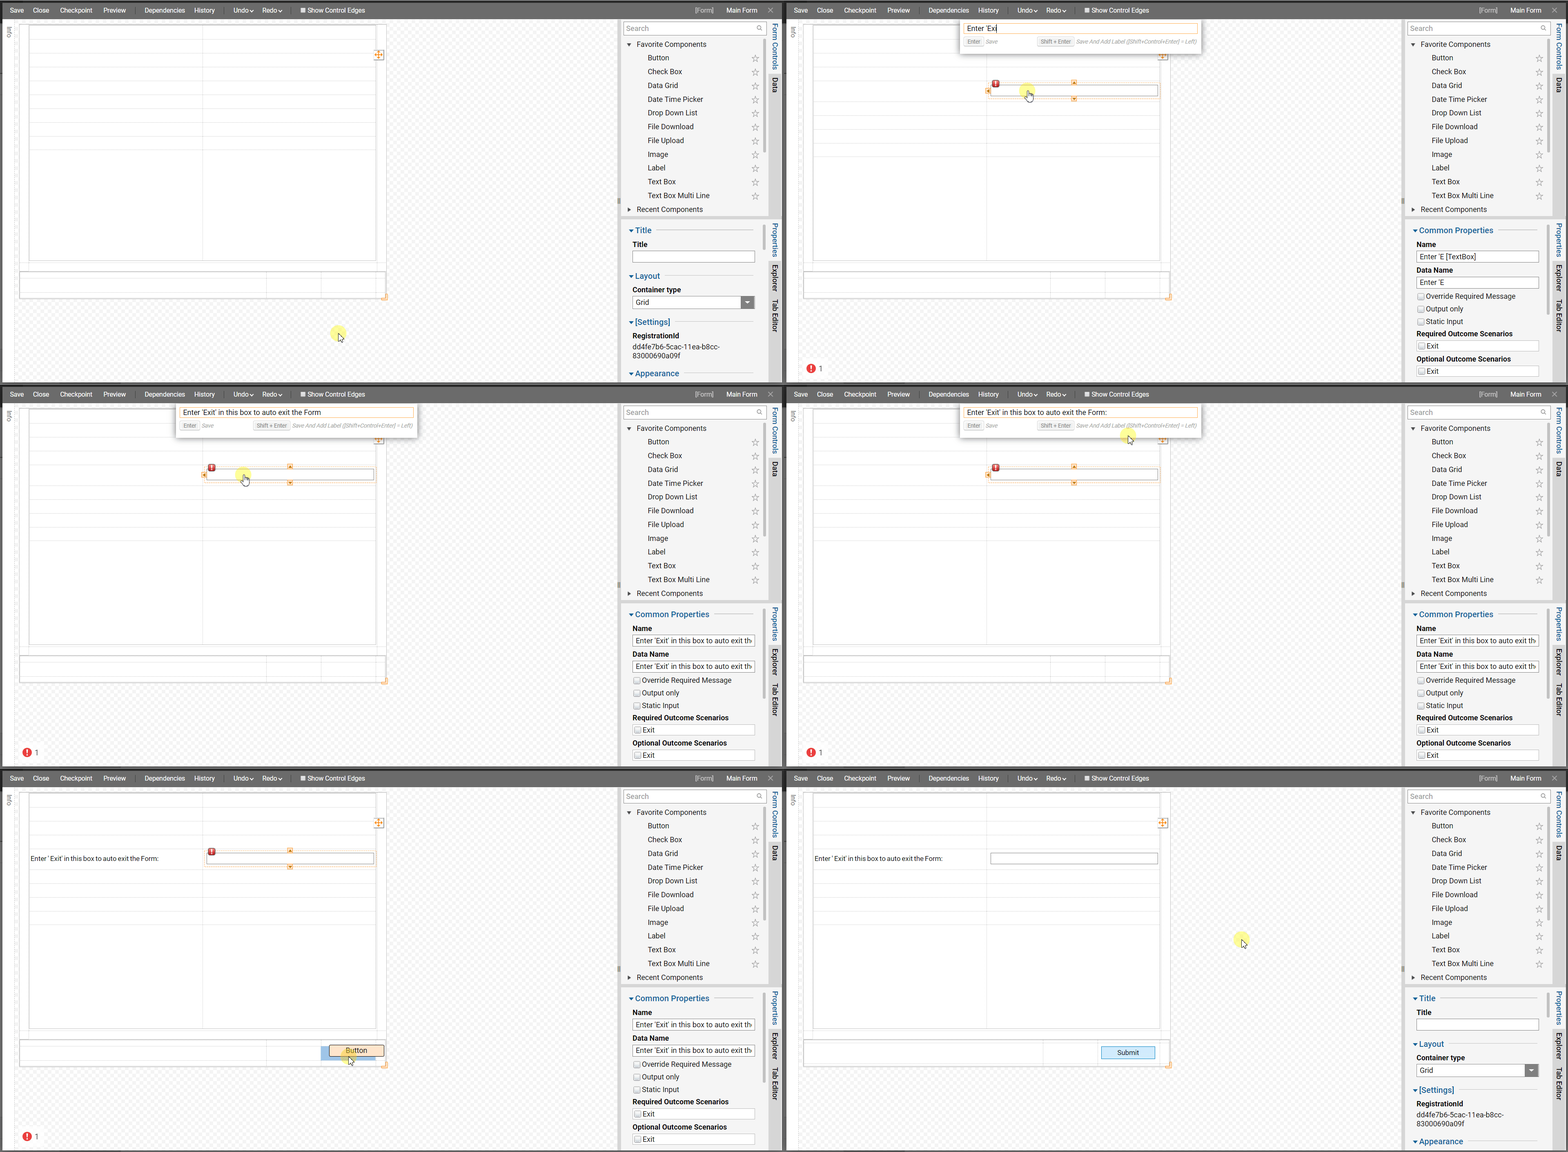
- The Flow Designer will now redirect to the Form Designer. In the Form Designer, locate the Form Controls panel on the right side, then drag a Text Box Form Control into an empty cell in the right column.
- When the Set Data Name popup appears, type 'Enter 'Exit' in this box to auto-exit the Form' then press Ctrl + Shift + Enter to automatically insert the Data Name as a Label to the left of the Text Box.
- Drag a Button into the cell on the bottom right. When the Set Action Outcome Name popup appears, type Submit and press Enter. Follow the GIF below for reference.
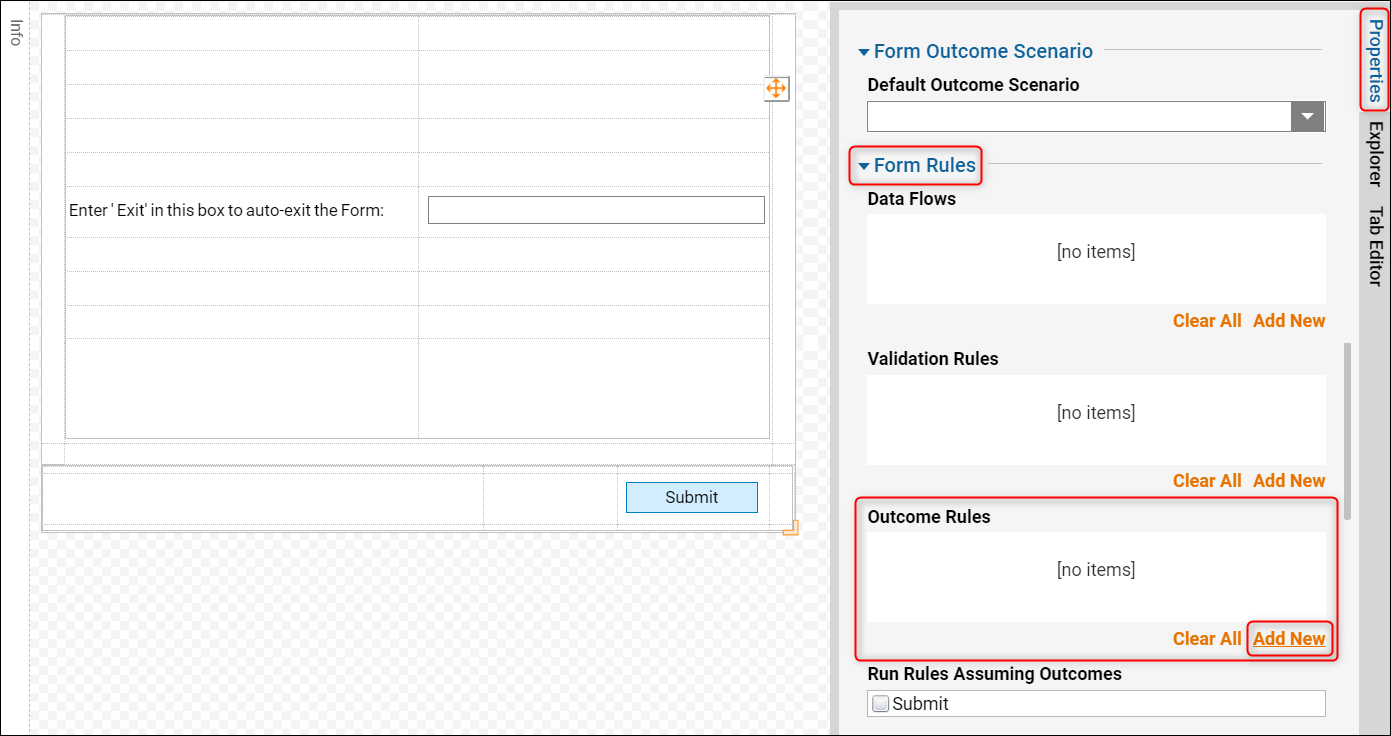
- Once the Form Controls have been placed, click into the checkered space in the Form Designer to view the Form Properties. In the Form Properties, navigate to the Form Rules section, then click Add New under the Outcome Rules box.
- In the Add Outcome Rules window, configure the Rule Data so that 'Test' is the Name and Exit is the Outcome Path. Under the Triggers section, check the box next to [Message] [TextBox] : Exit, then click Add New under the Rules box.
- In the Add Rules window, type Exit Rule as the RuleName and then choose Pick under the Rule box. Choose [Rule] Exit from the Pick Entity list, then click the Update Inputs button. Click the pencil icon that appears next to the Text input.
- In the Edit Inputs window, choose Form Component from the Input Type dropdown list then select the available option from the Form Data Name dropdown list. Click OK on all of the open windows, then save and close the Form Designer.

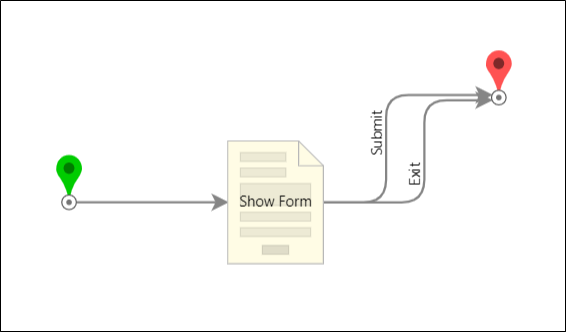
- Back in the Flow Designer, connect the Submit and Exit path to the End step. The validation warning on the Show Form step can be ignored. To optionally remove it, click the Show Form icon and set the mapping type of the input to Ignore. The configuration for the Outcome Rule to auto-exit the Form has been complete, time to Debug!
Debug
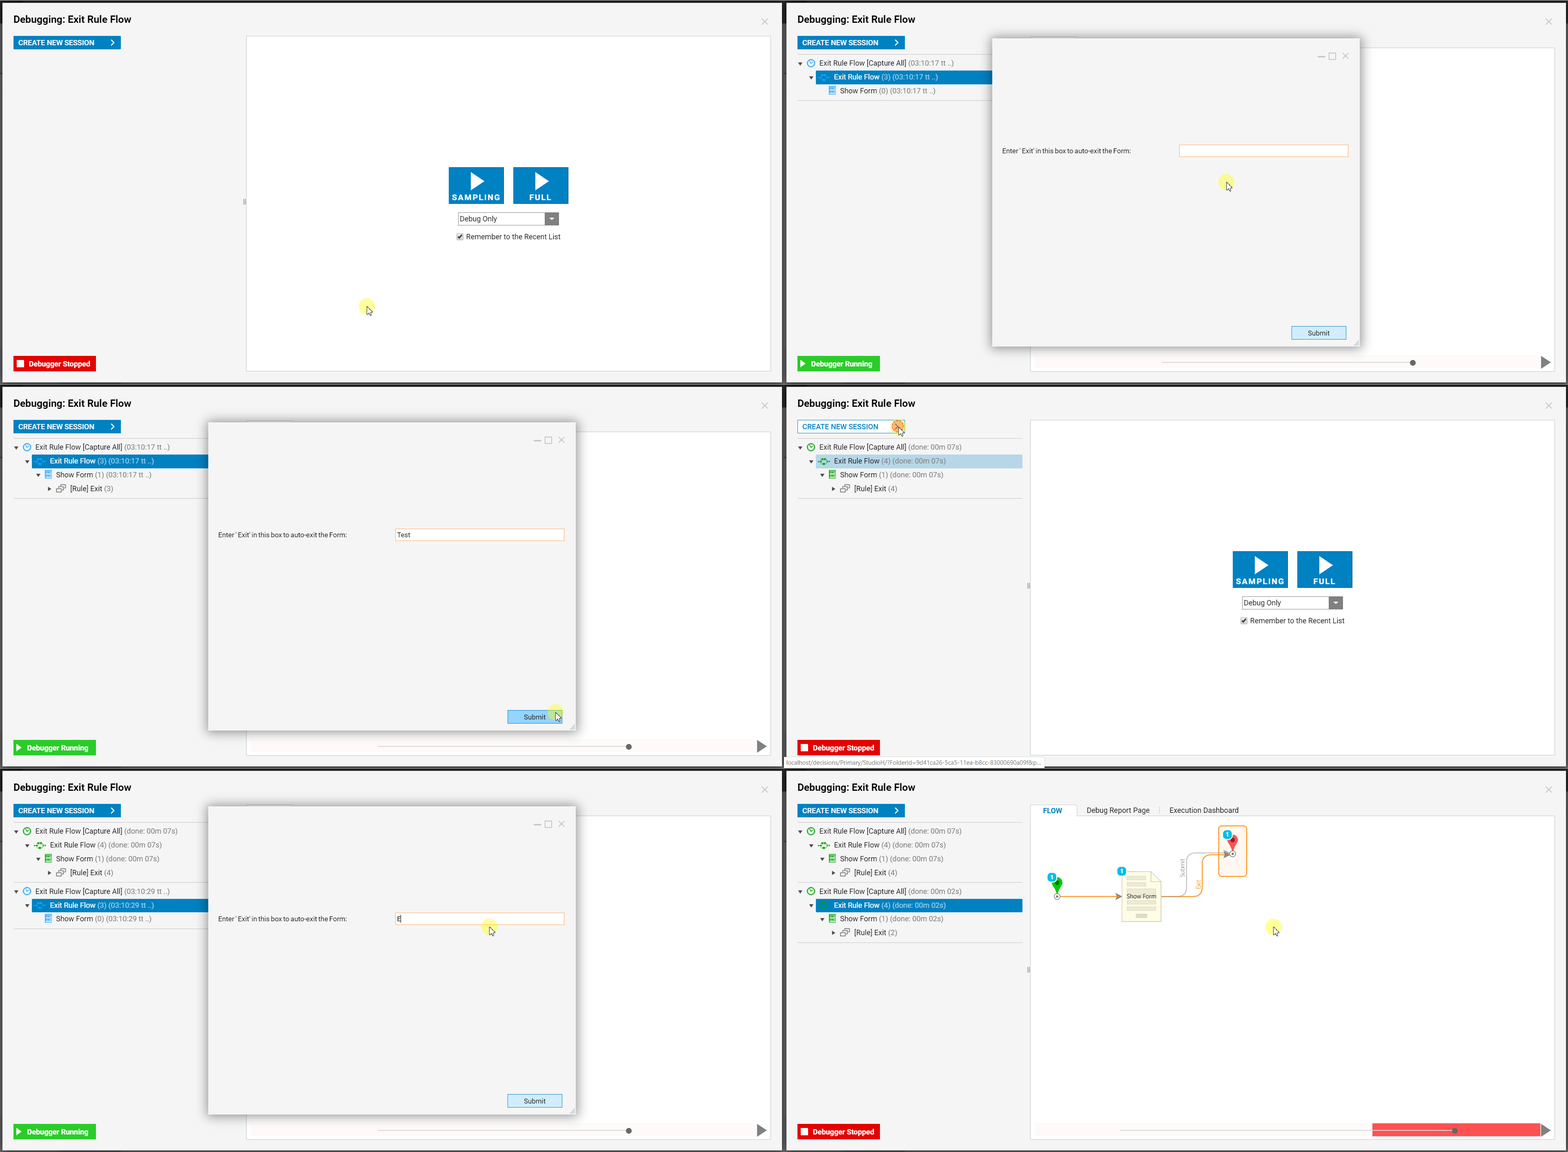
- Select Debug from the top Action Bar in the Flow Designer. When the Debugger window opens, select the FULL button to begin.
- When the Form appears, enter 'Test' into the Textbox. The end-user data follows the Submit button path.
- Click Create New Session in the top left corner and select FULL again.
- When the Form appears, enter 'Exit' into the Textbox performs an auto-exit action to the Form based on the. The end-user data instead follows the Exit path due to the Outcome Rule configuration.
