Overview
In a Multi-Tenant environment, Account Handling is used to control which Account has access to certain Instances. Linking an Account to a Customer will give the Account access to the Control Instance, while an unlinked Account will only have access to the Customer Tenant environment. Decisions offers resources for Hosted environments to manage assigned user Accounts and create new Accounts per Tenant.
Example
The following example will use the [Decisions] Customer Name and the [Instance1] Instance Name; it will also introduce the Contract/InstanceDefaultSetupPrototype.
Add Account
- From the Decisions Studio, expand System > Hosting > Select (Instance Name) > Press ADD INSTANCE ACCOUNT > (Select Account).
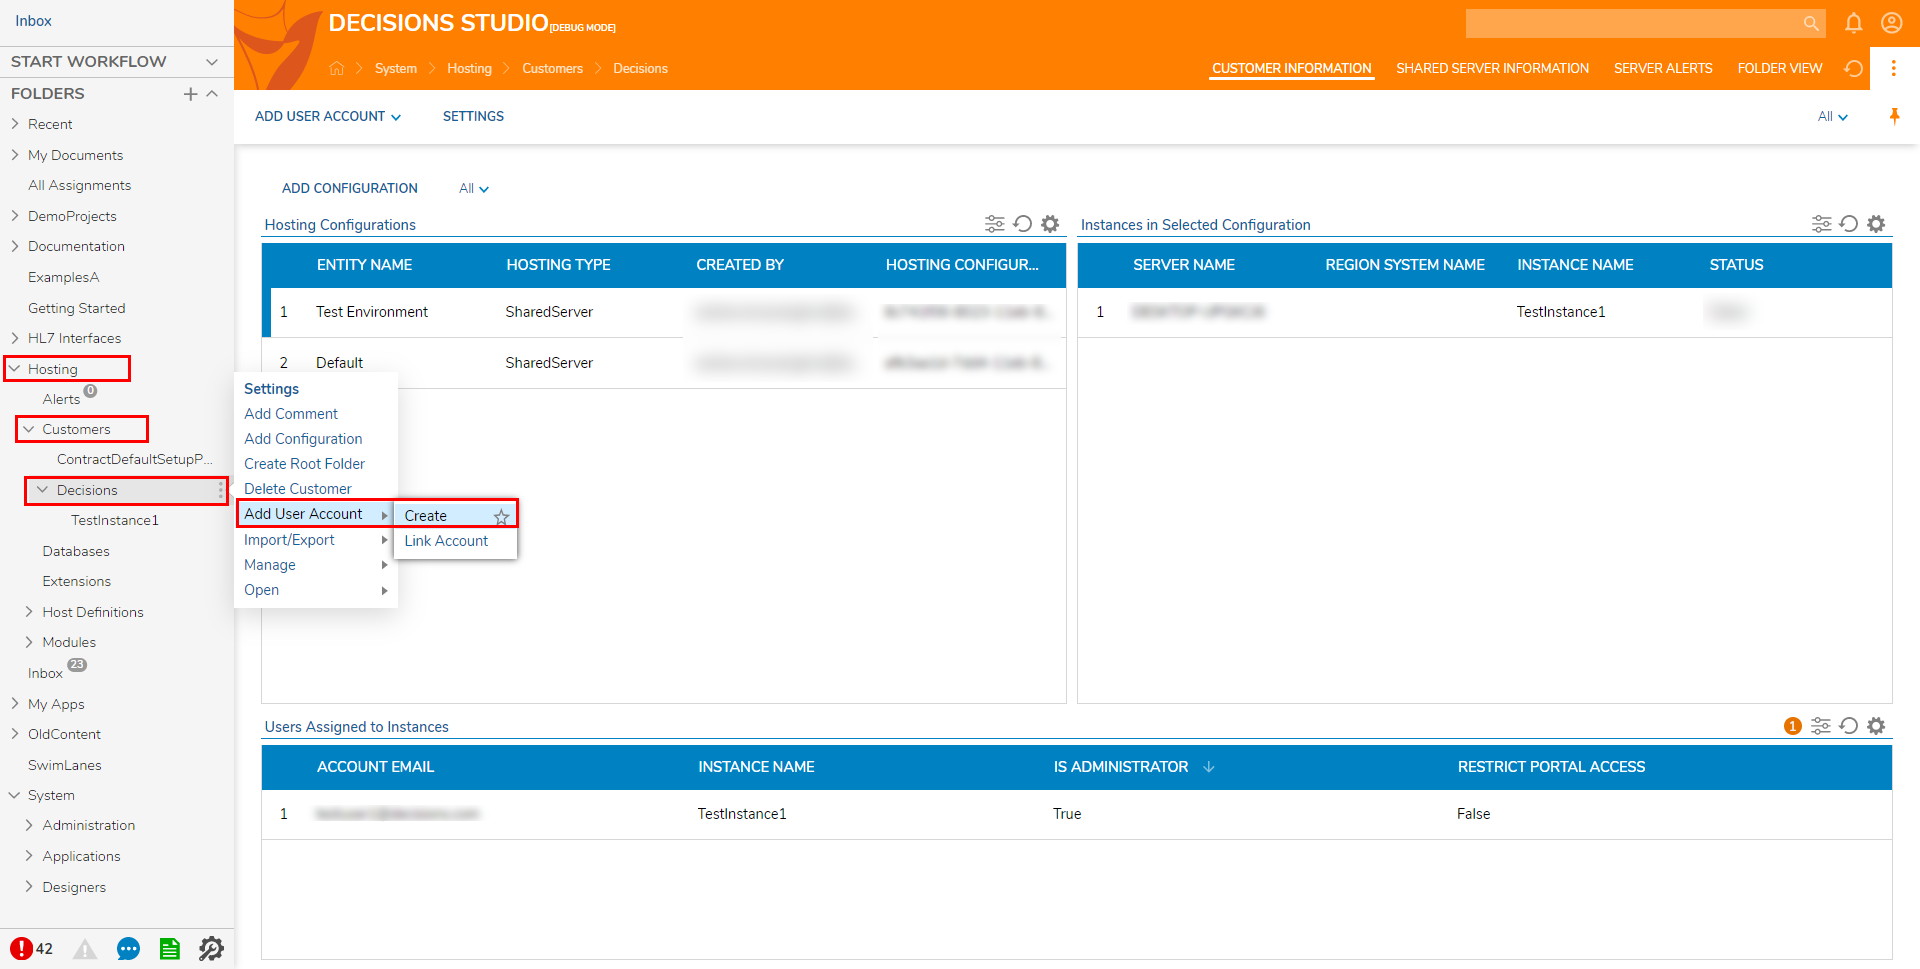
- Right-click the [Customer Name] Folder and select Add User Account > Create.
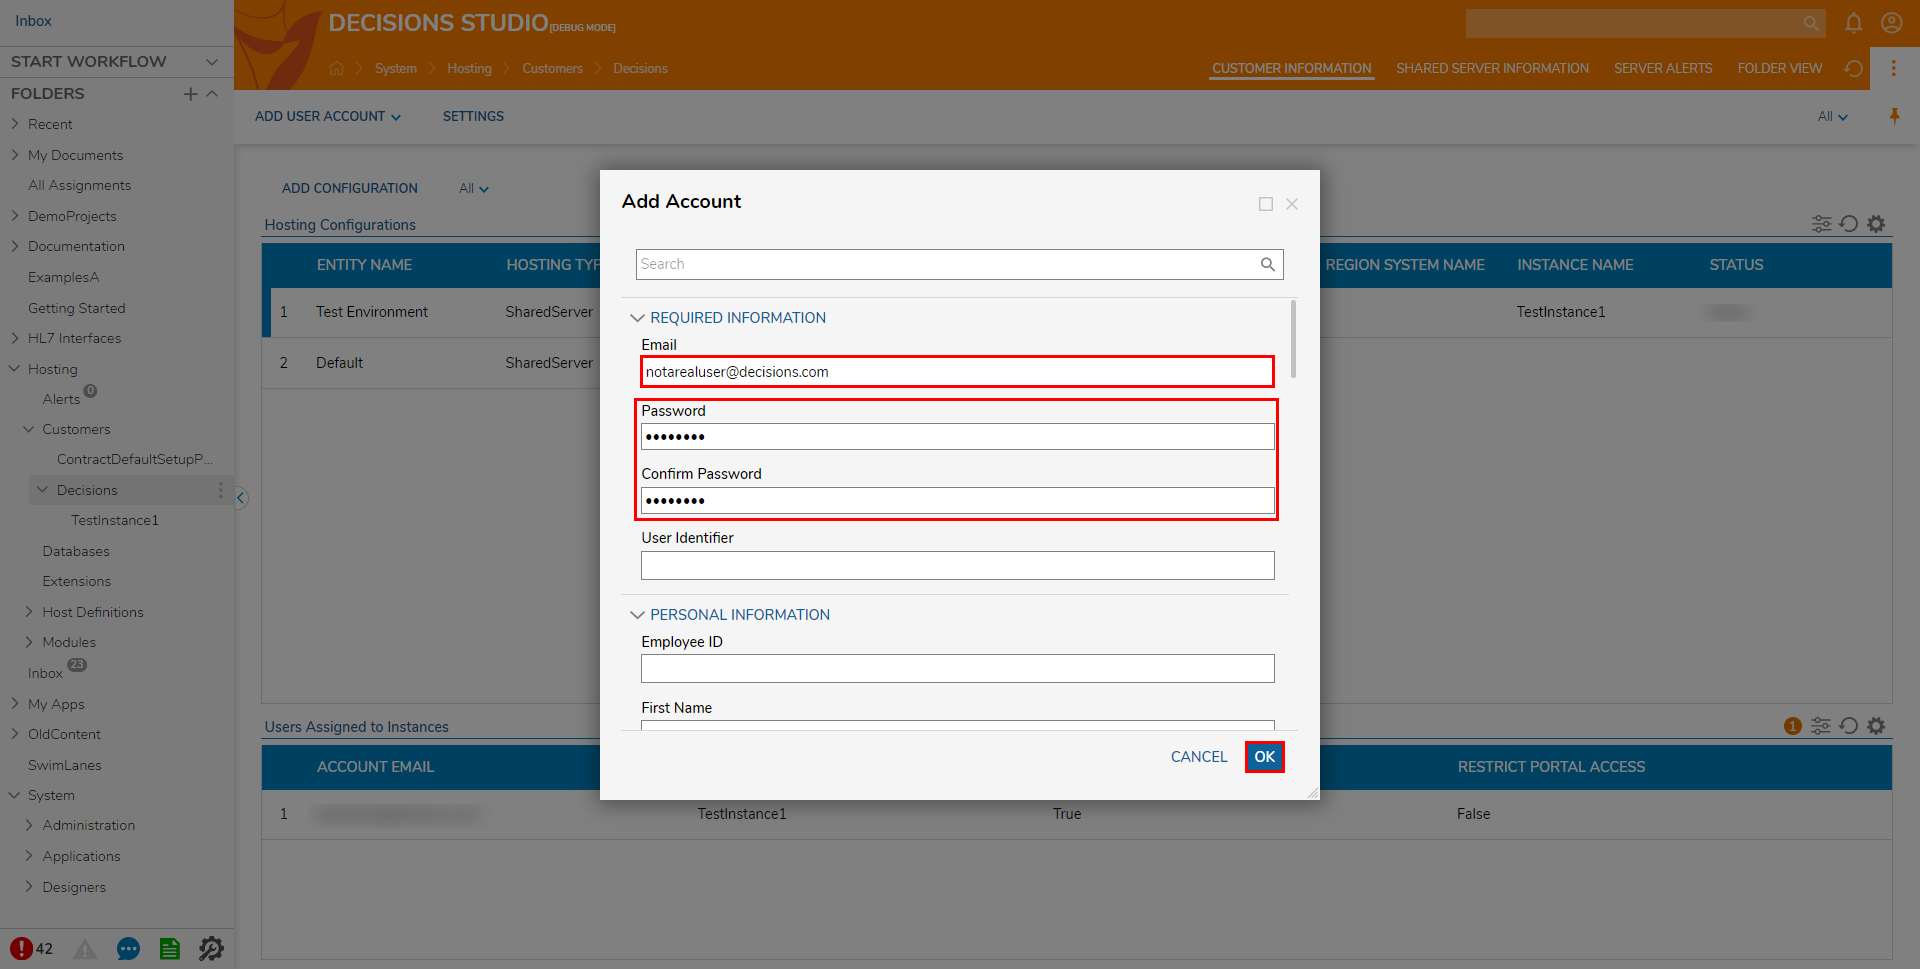
- From the Add Account window, under REQUIRED INFORMATION, provide an Email and a Password, then click OK.
View Customer Users/Modules
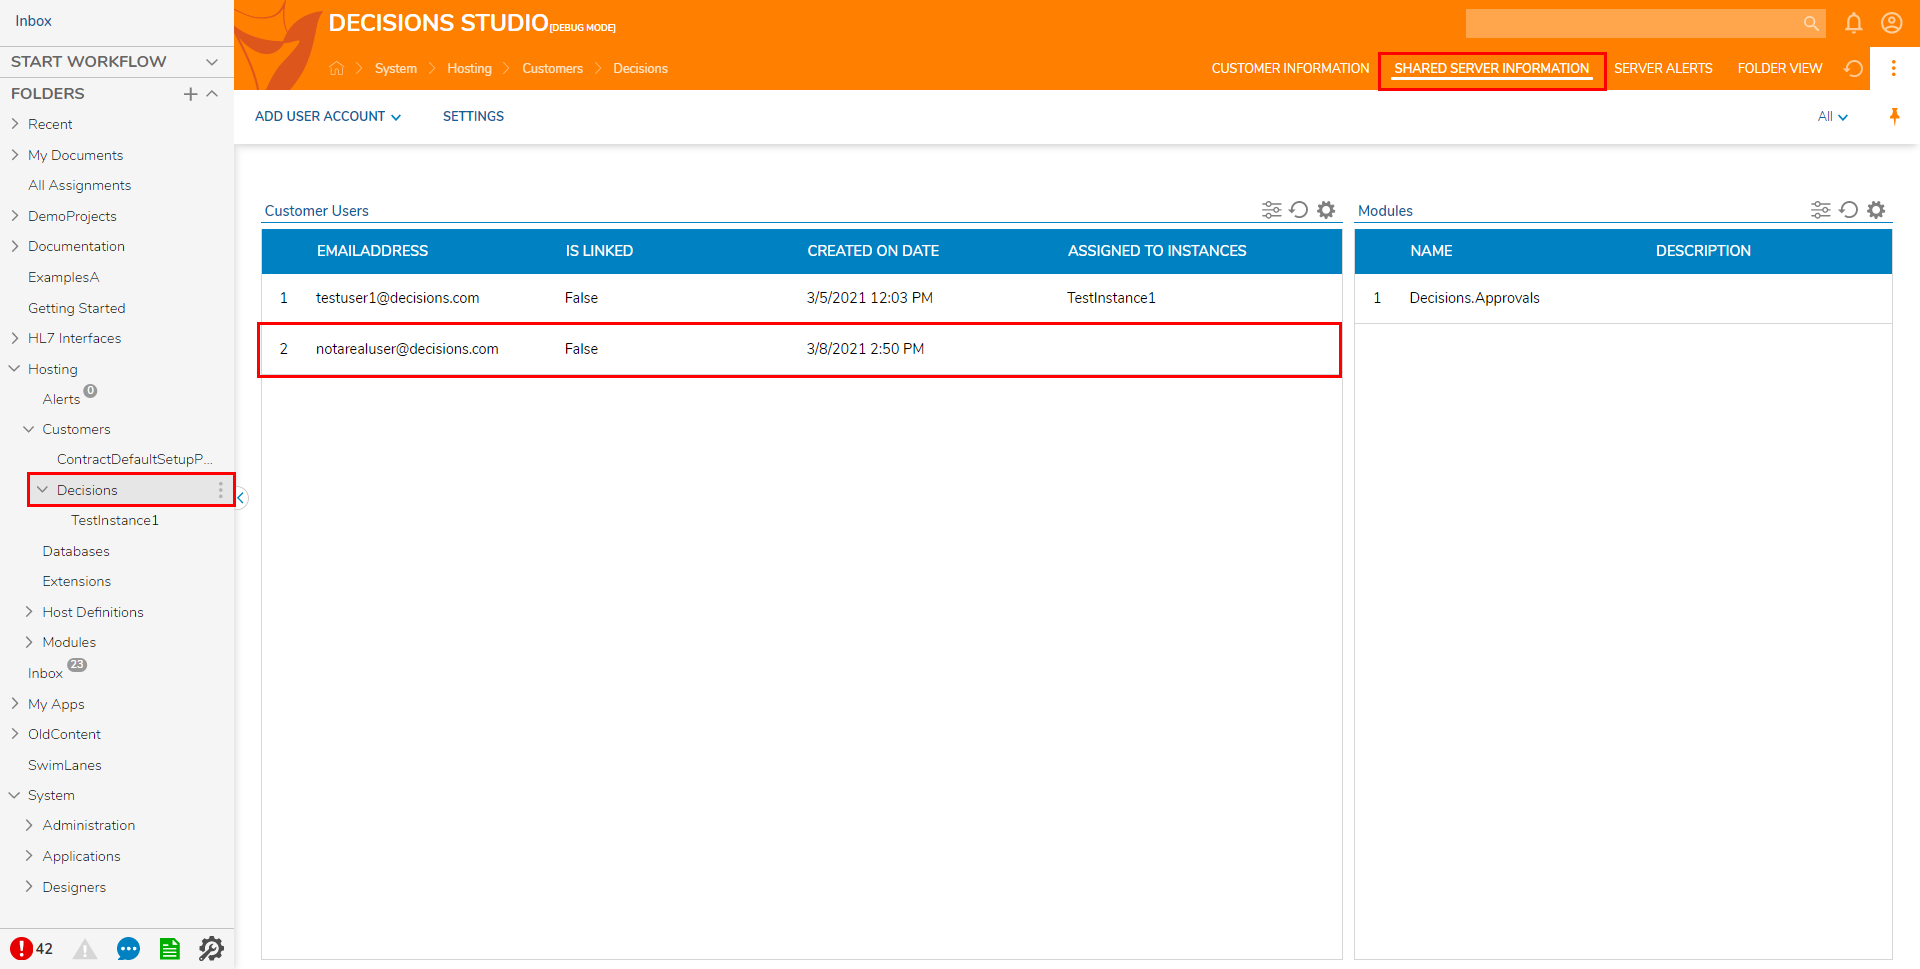
Once the account has been added, select the SHARED SERVER INFORMATION in the Customer folder to see the Customer Users, where the new account is now on the Report.
Assign Account to Instance
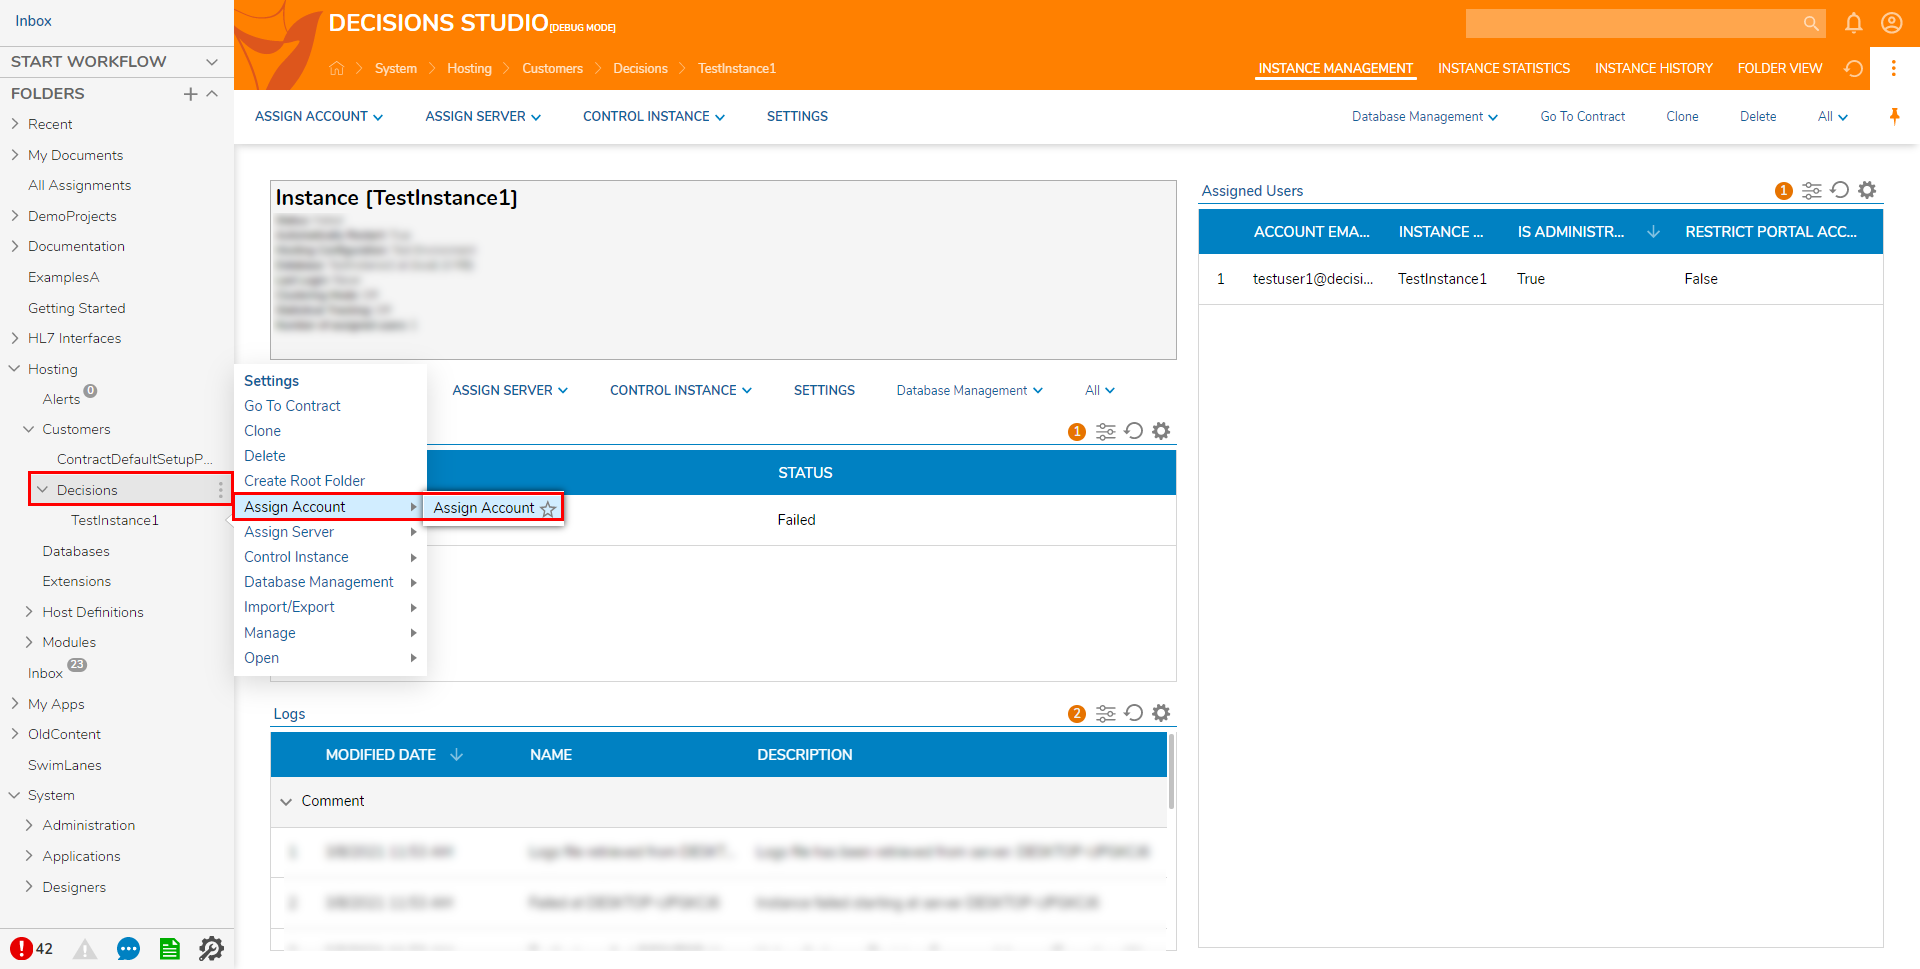
- Right-click the Folder for the Instance and select Assign Account > Assign Account.
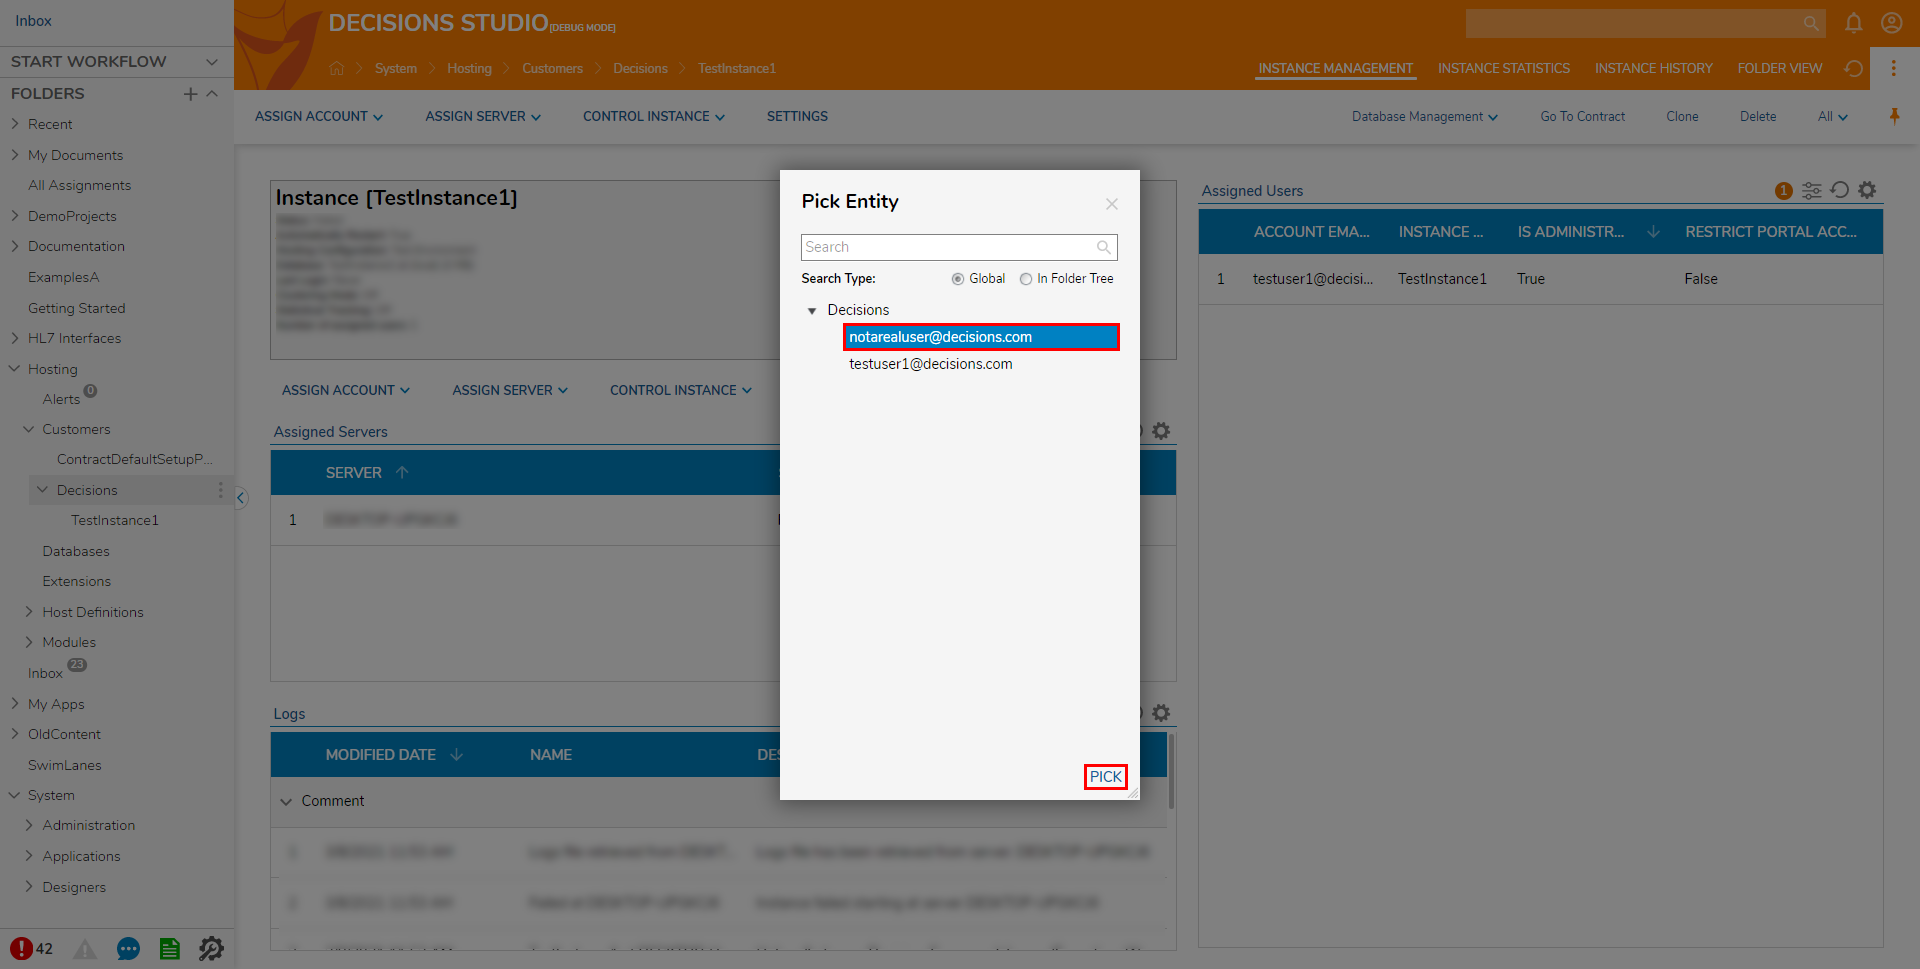
- Select the desired Account then click PICK.
 The User Account will now be assigned to the Instance and in turn, will be available on the Instance Dashboard.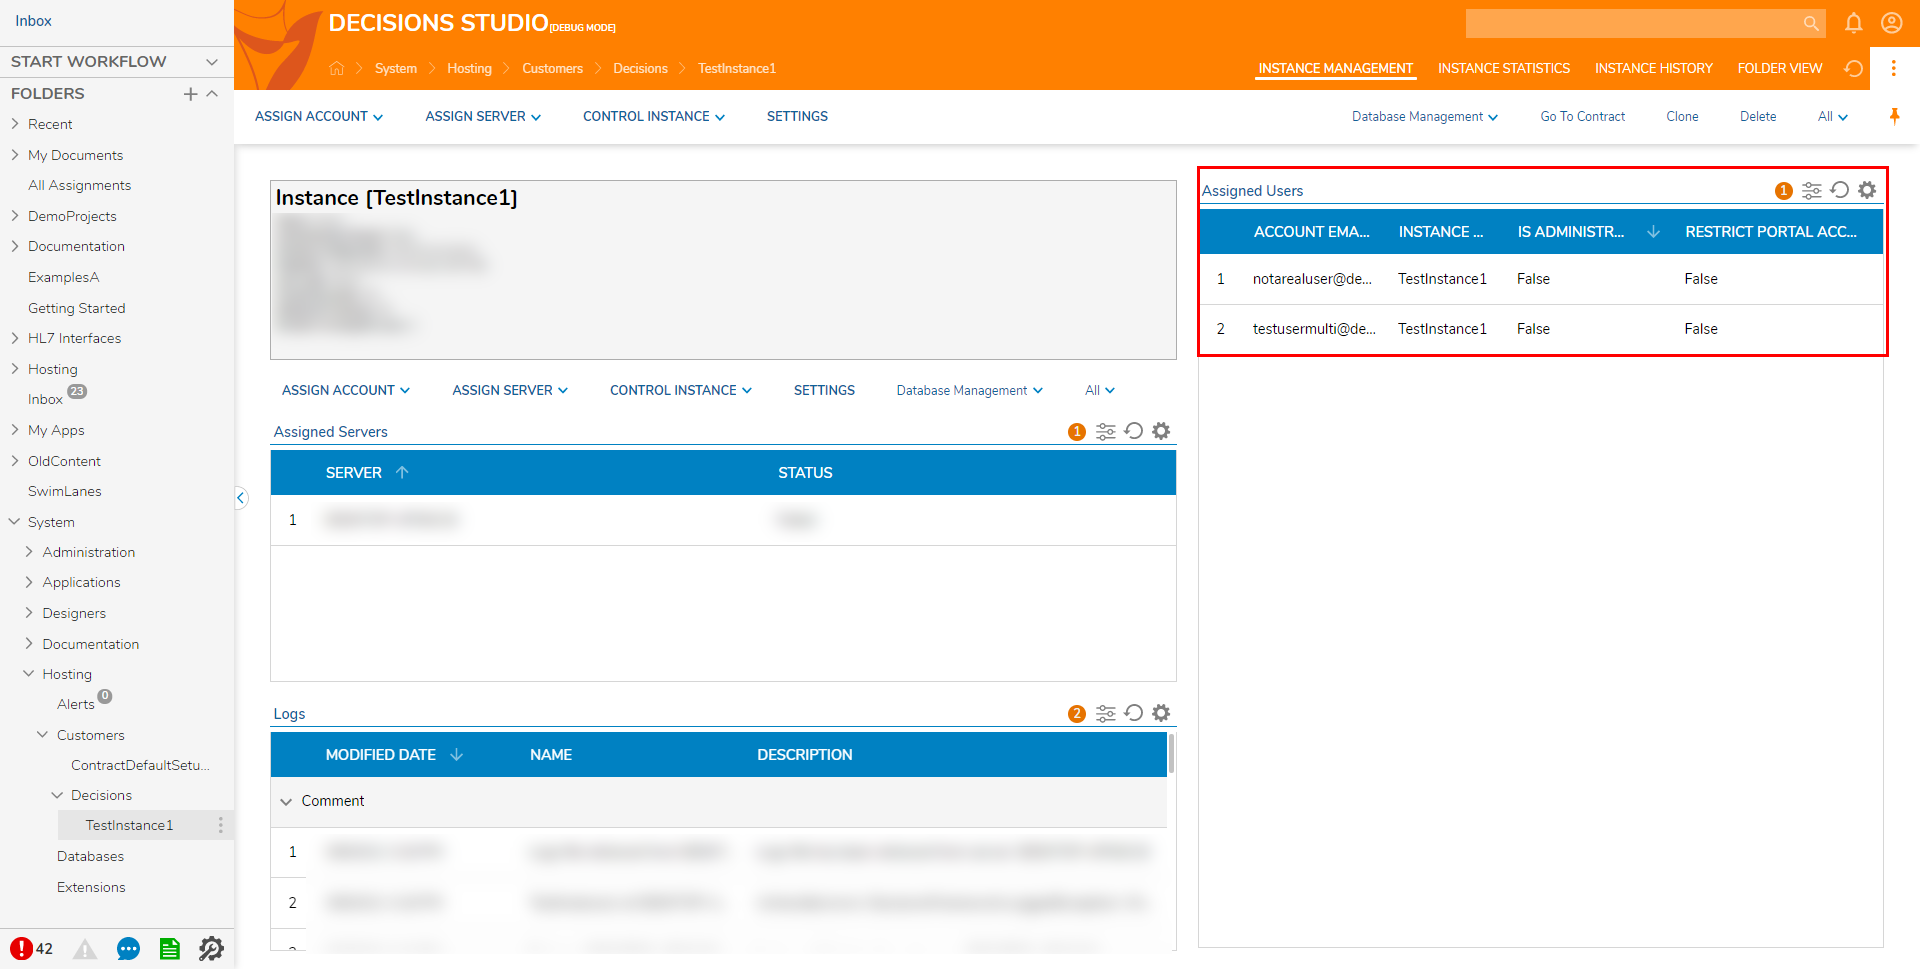
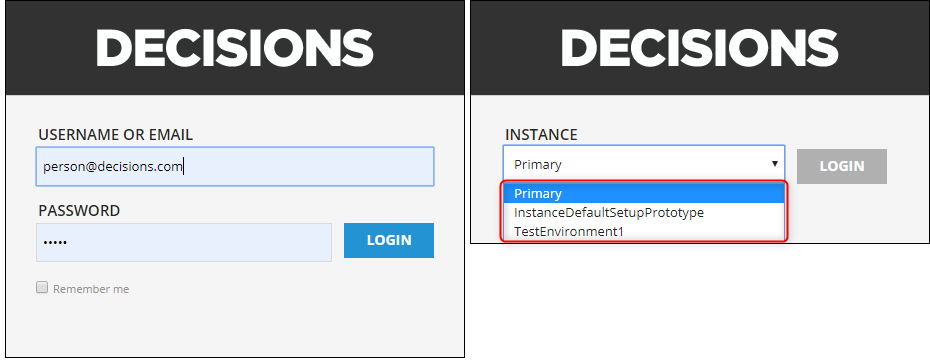
- Logout of the Admin Account or use a private browser window to login to Decisions with the new Account credentials.
Once logged in, the User Account will automatically be directed to the Customer Tenant environment. 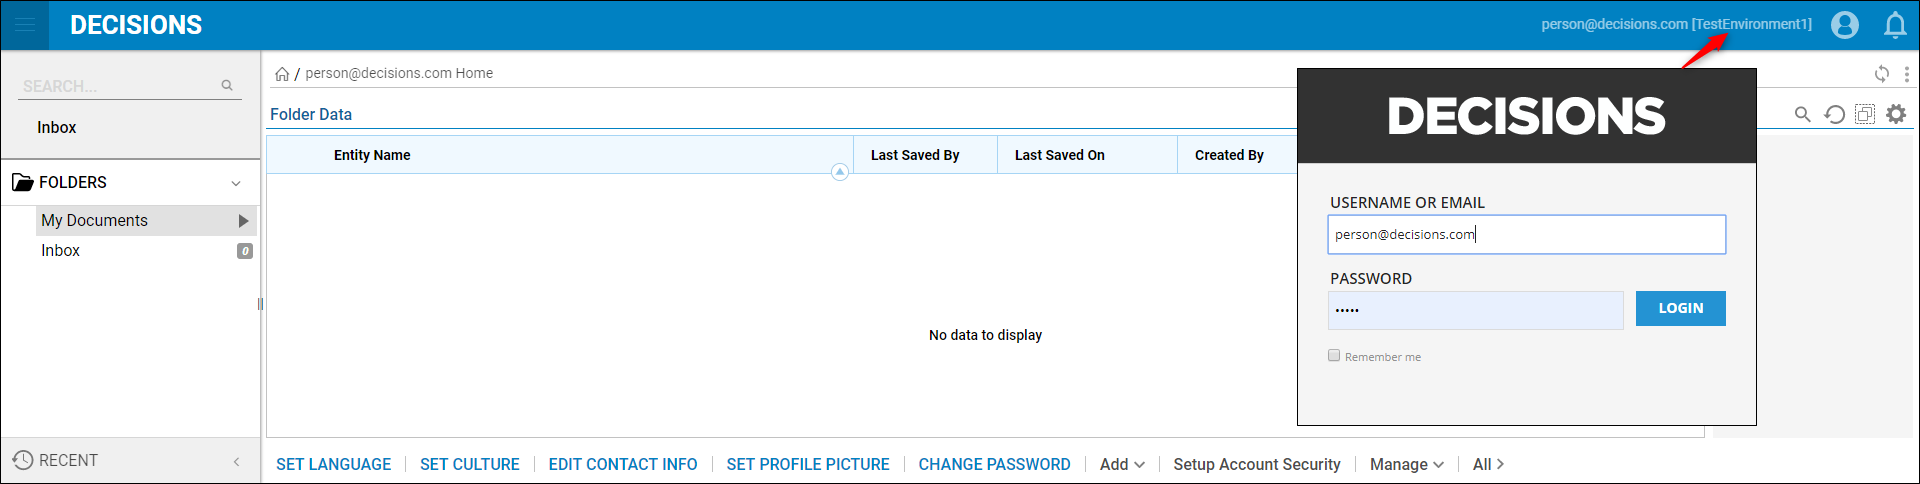
Contract/Instance Default Setup Prototype and Linking Accounts
In Decisions, when the platform is changed to a Hosted environment, the ContractDefaultSetupPrototype Folder appears under the Customers folder. The ContractDefaultSetupPrototype is essentially just a new Customer default setup template for an enabled Hosted environment.
In relation, the InstanceDefaultSetupPrototype acts as a new Instance default setup template. It is a Customer and Instance that users can be assigned to.
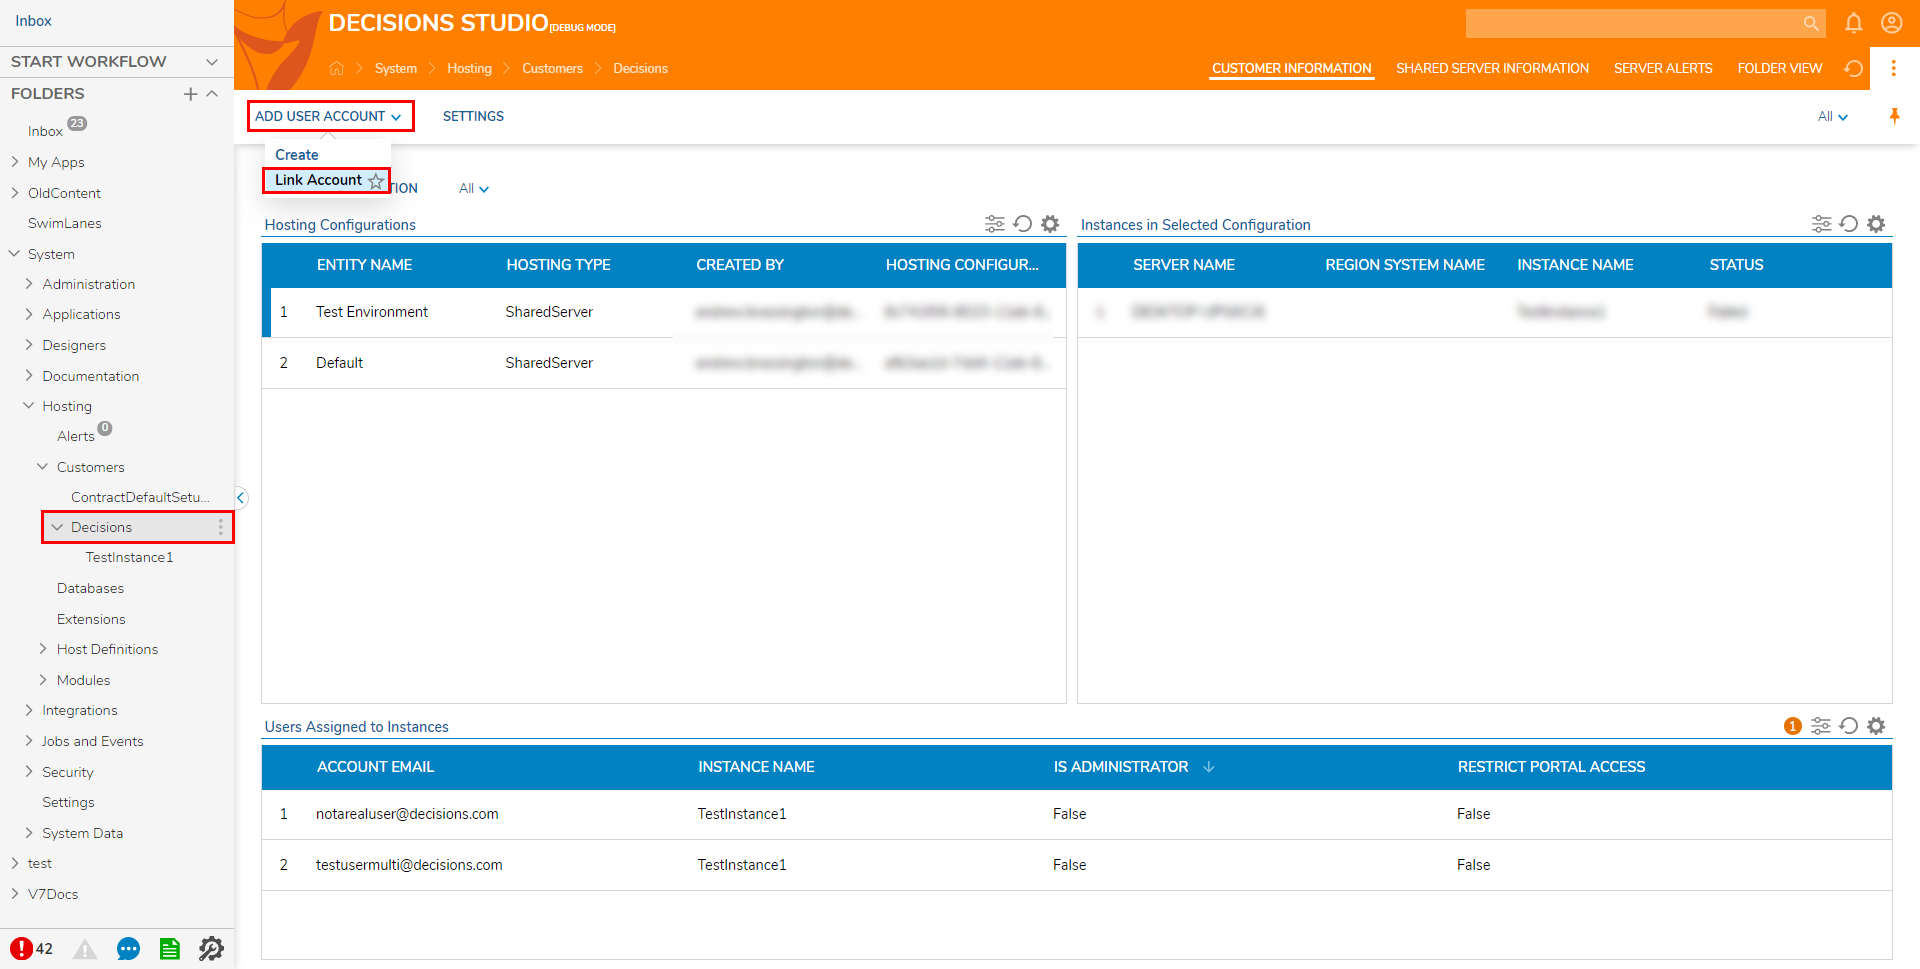
- Navigate to desired Customer Folder under the Customers.
- Select ADD USER ACCOUNT > Link Account from the Global Action Bar.
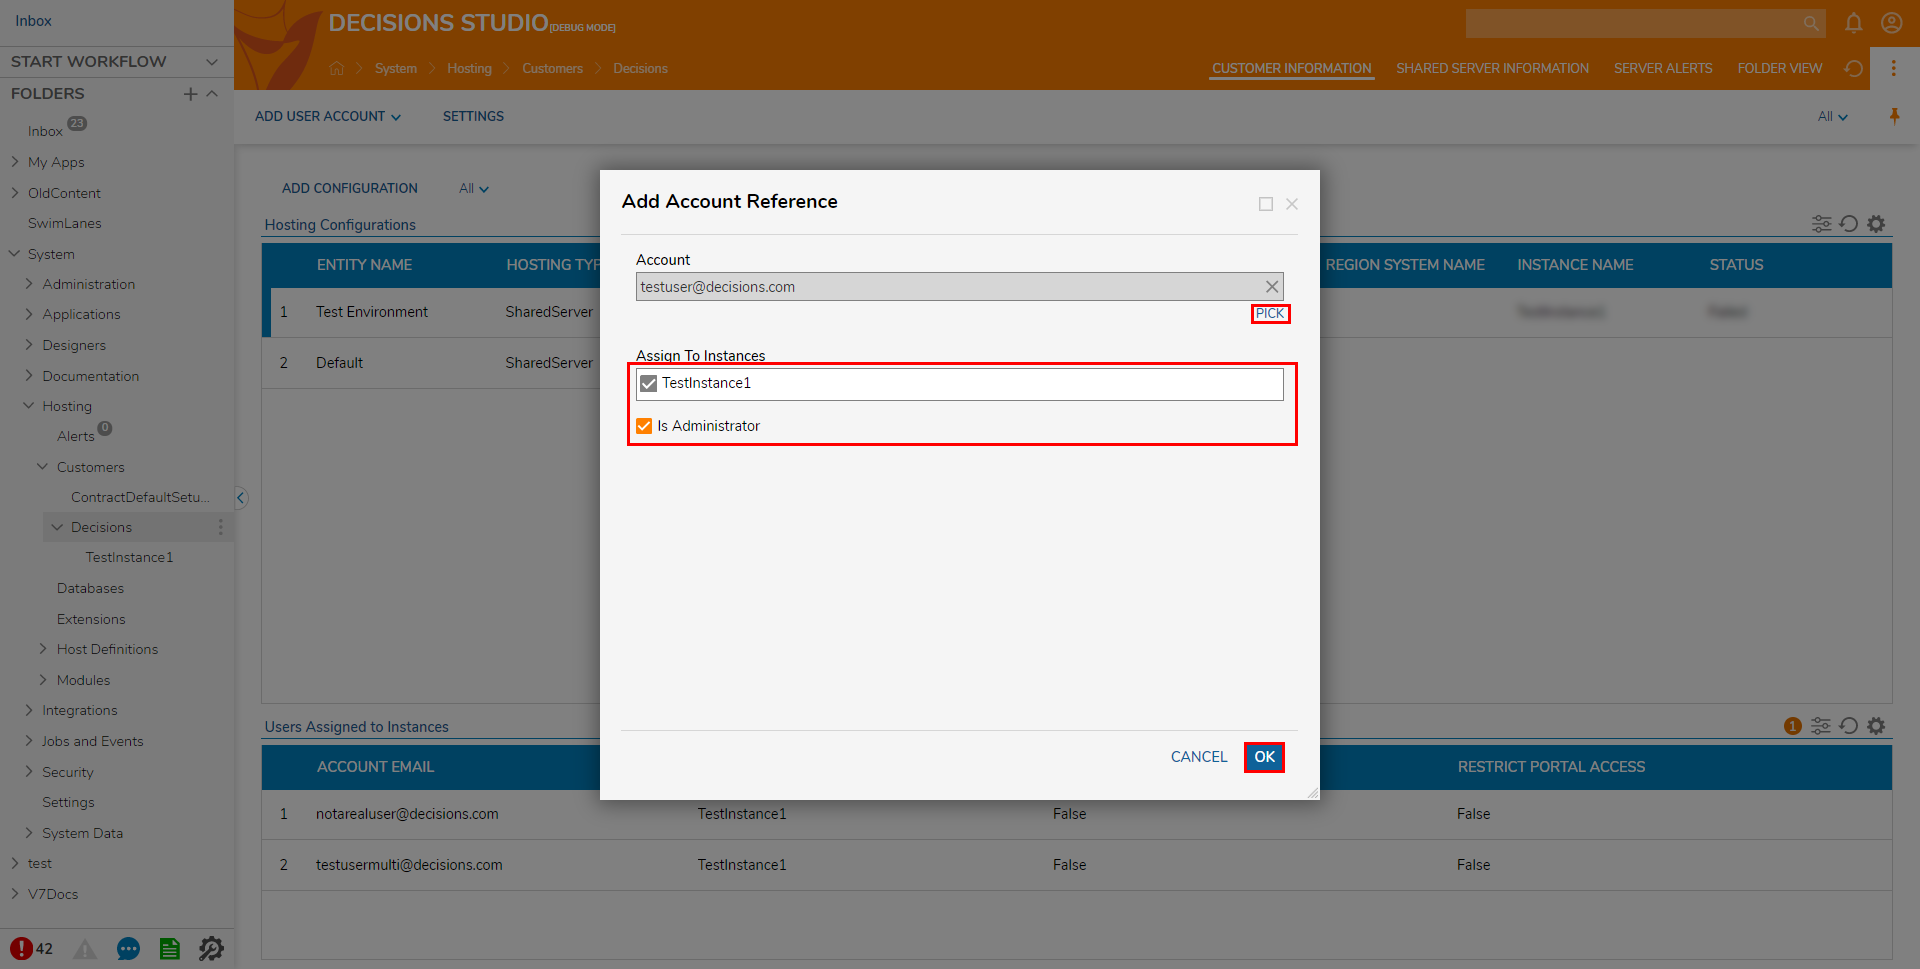
- PICK the new Account, select the desired Instance under Assign To Instances. Then, if desired, check Is Administrator, then click OK.
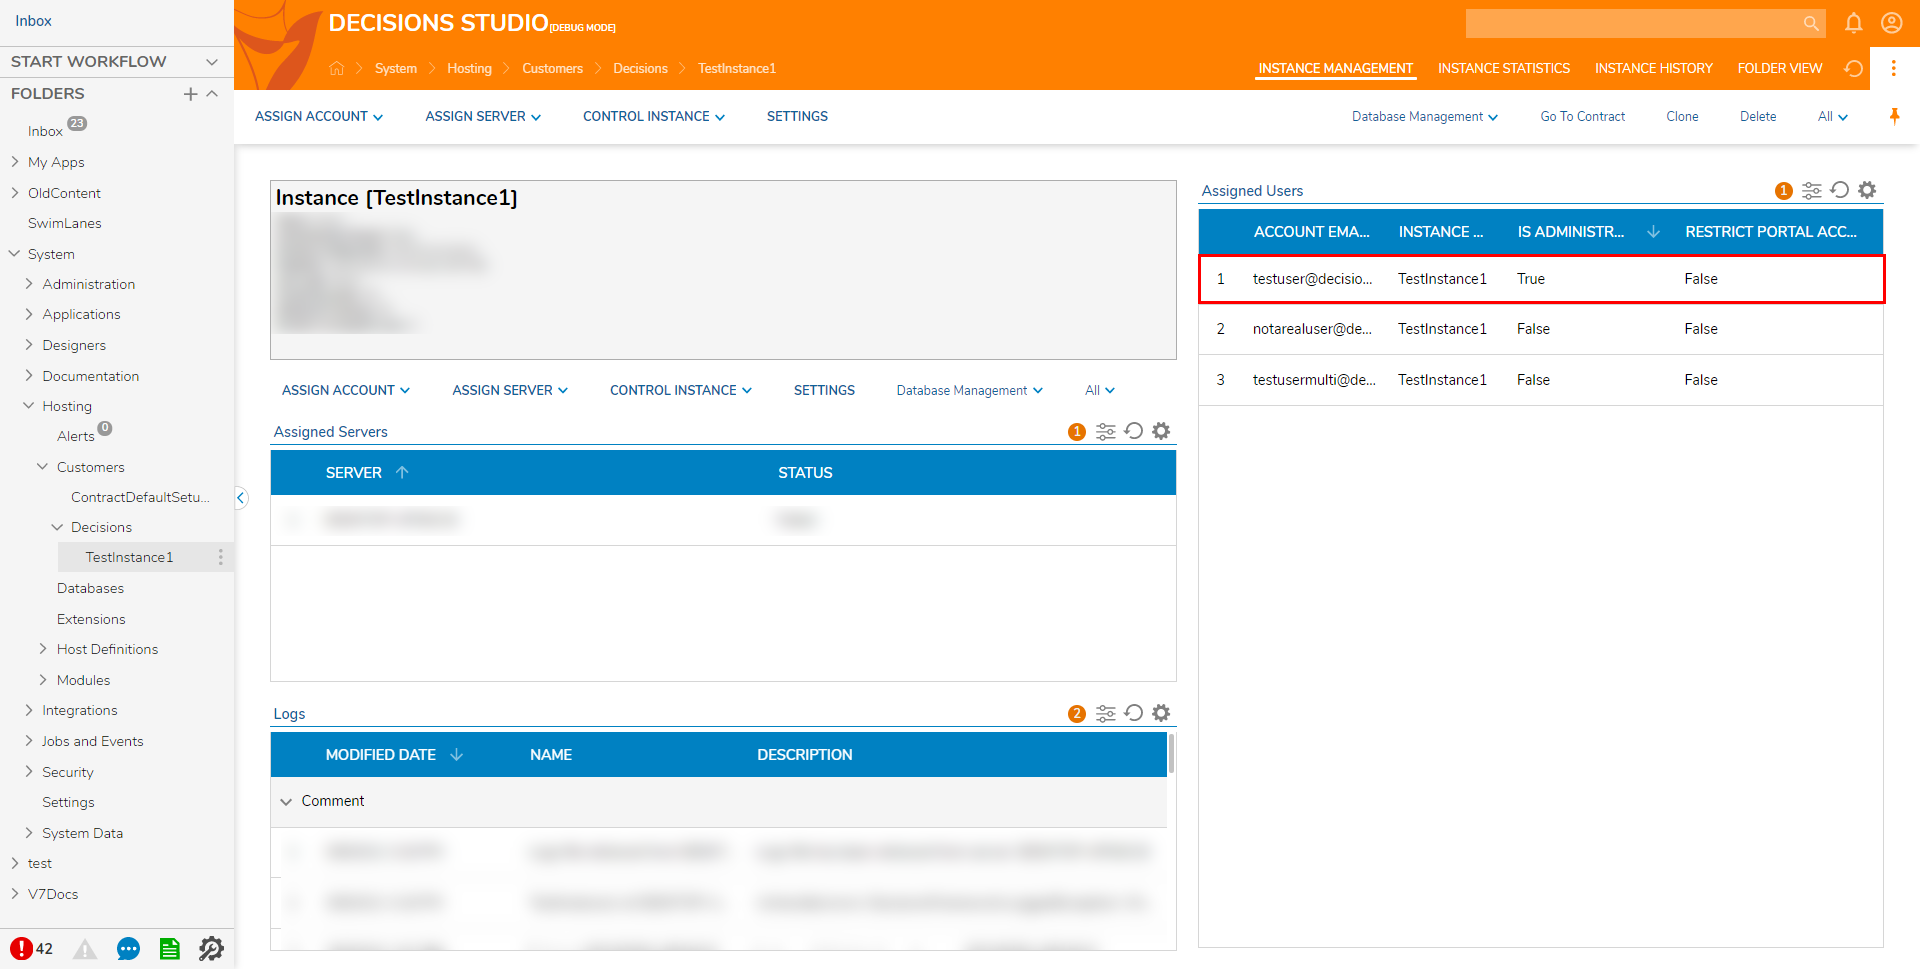
- Navigate to the Instance's Folder to see that the new Account is added to the Assigned Users list for this particular Instance. This gives the Account access to the Control Instance.
Logout of the Admin Account or use a private browser window to login to Decisions under the newly linked Account.
If the Account is affiliated with more than one Instance, choose the desired option from the INSTANCE dropdown menu and proceed by selecting LOGIN.