Overview
Element Links can be placed anywhere; however, their intended location should be in a different folder than the original Designer Element. Links cannot be edited without affecting the original Element. To turn a Link into its editable Element, right-click the link and select Covert To Copy.
Prerequisite:
- Enable Development Actions in the Portal Settings
- Can Add permission on the original Element (Can Administrate permission is recommended. The account does not need these permissions for the Folder to contain the new Link; for the Element Link respects the permissions of the original Element.)
Example
- Right-click on a Designer Element in the Studio and select Create Link.

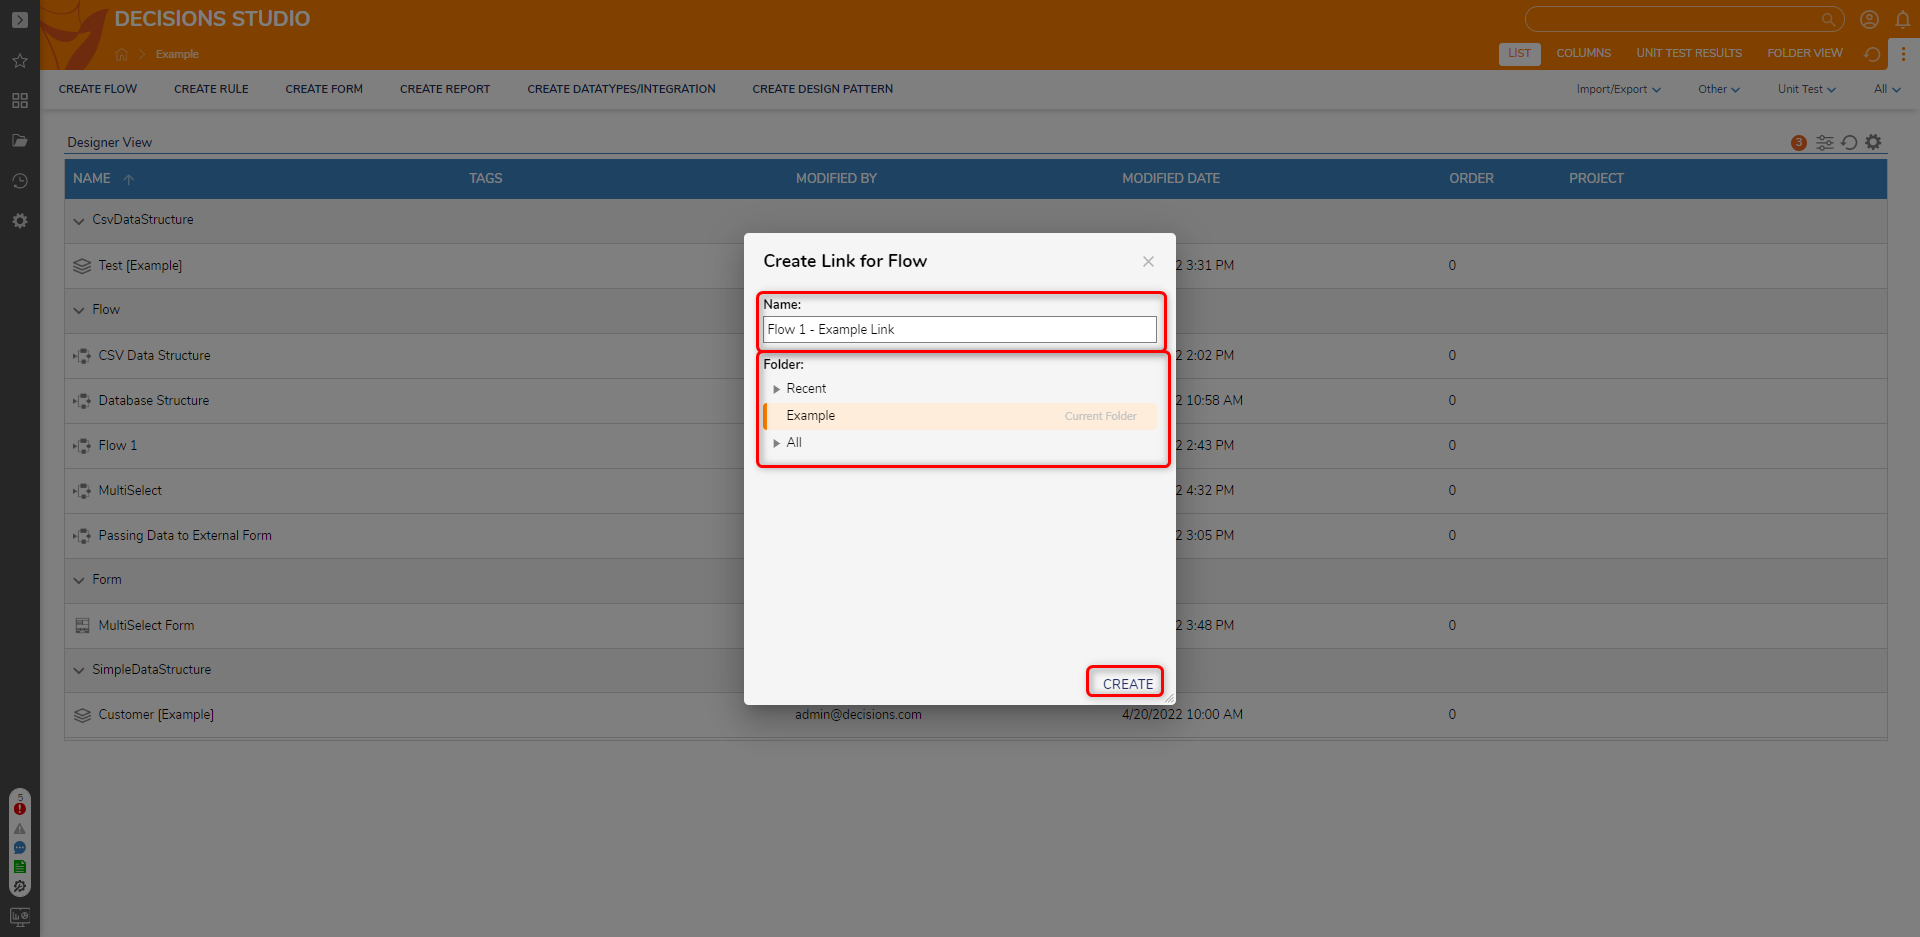
- In the Create Link for Flow window, enter a Name and select a Folder. Click CREATE.
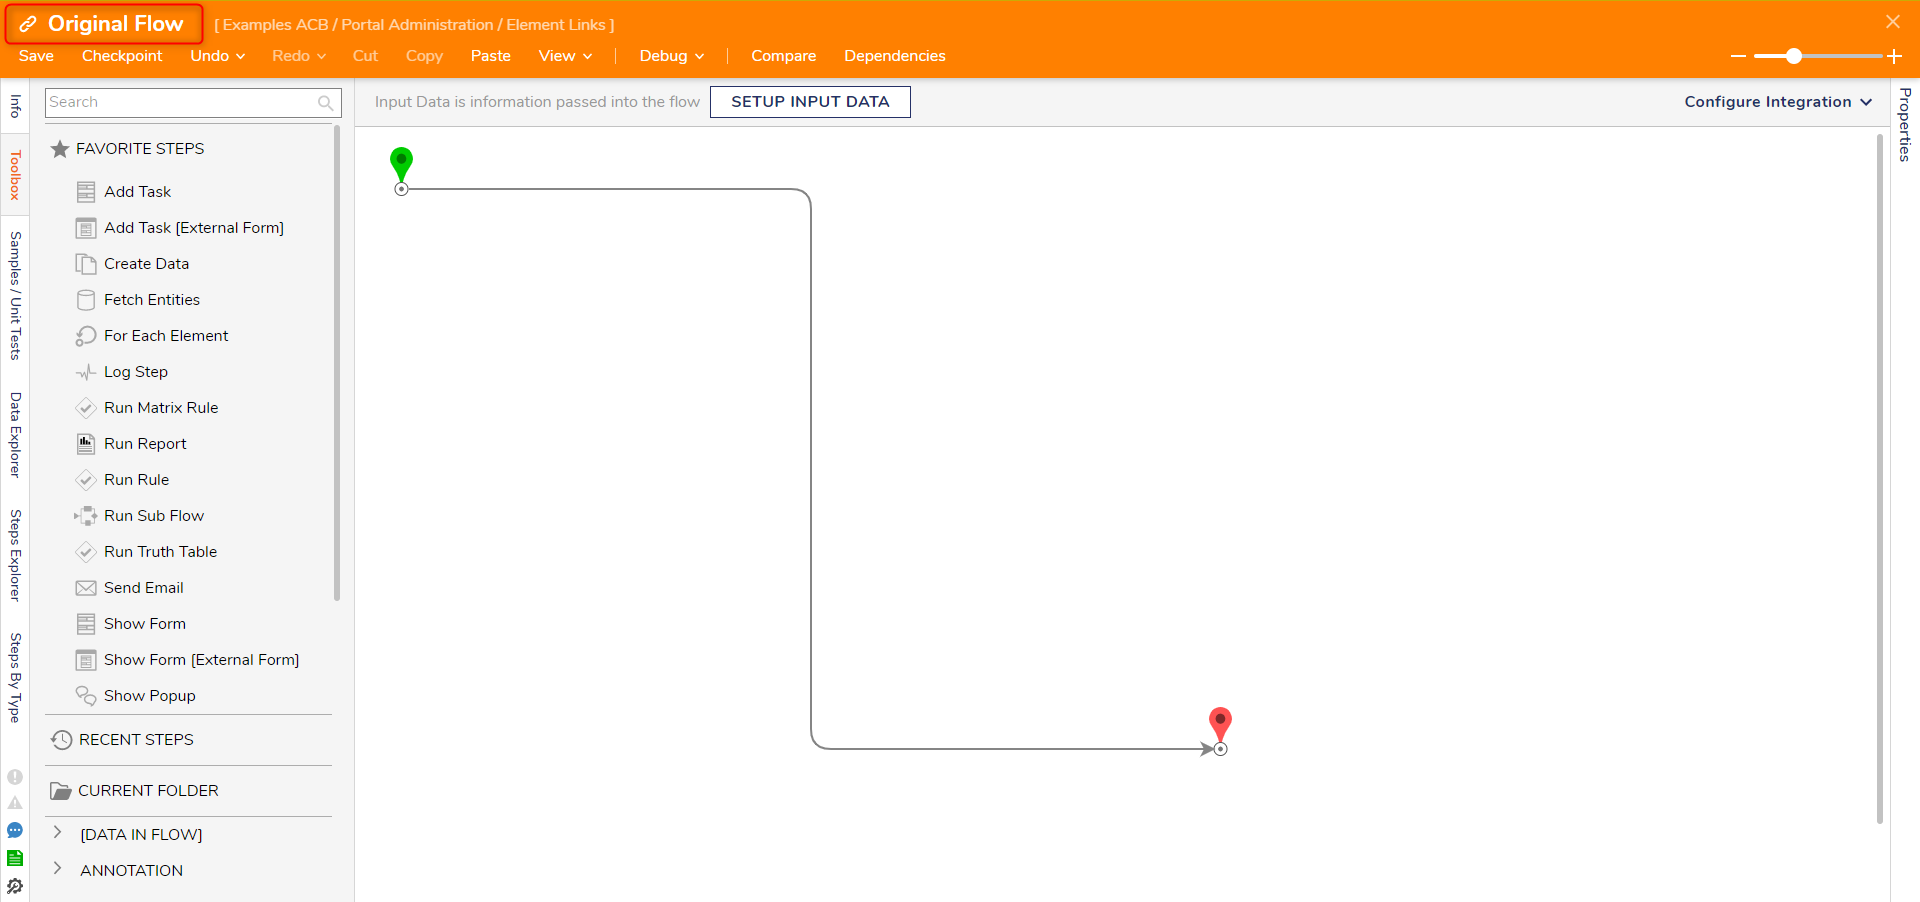
- Clicking on the link will open the original Designer Element. There will be a chain icon to the left of the name signifying this is a linked Element.
New Dialog Windows After Creating an Element Link
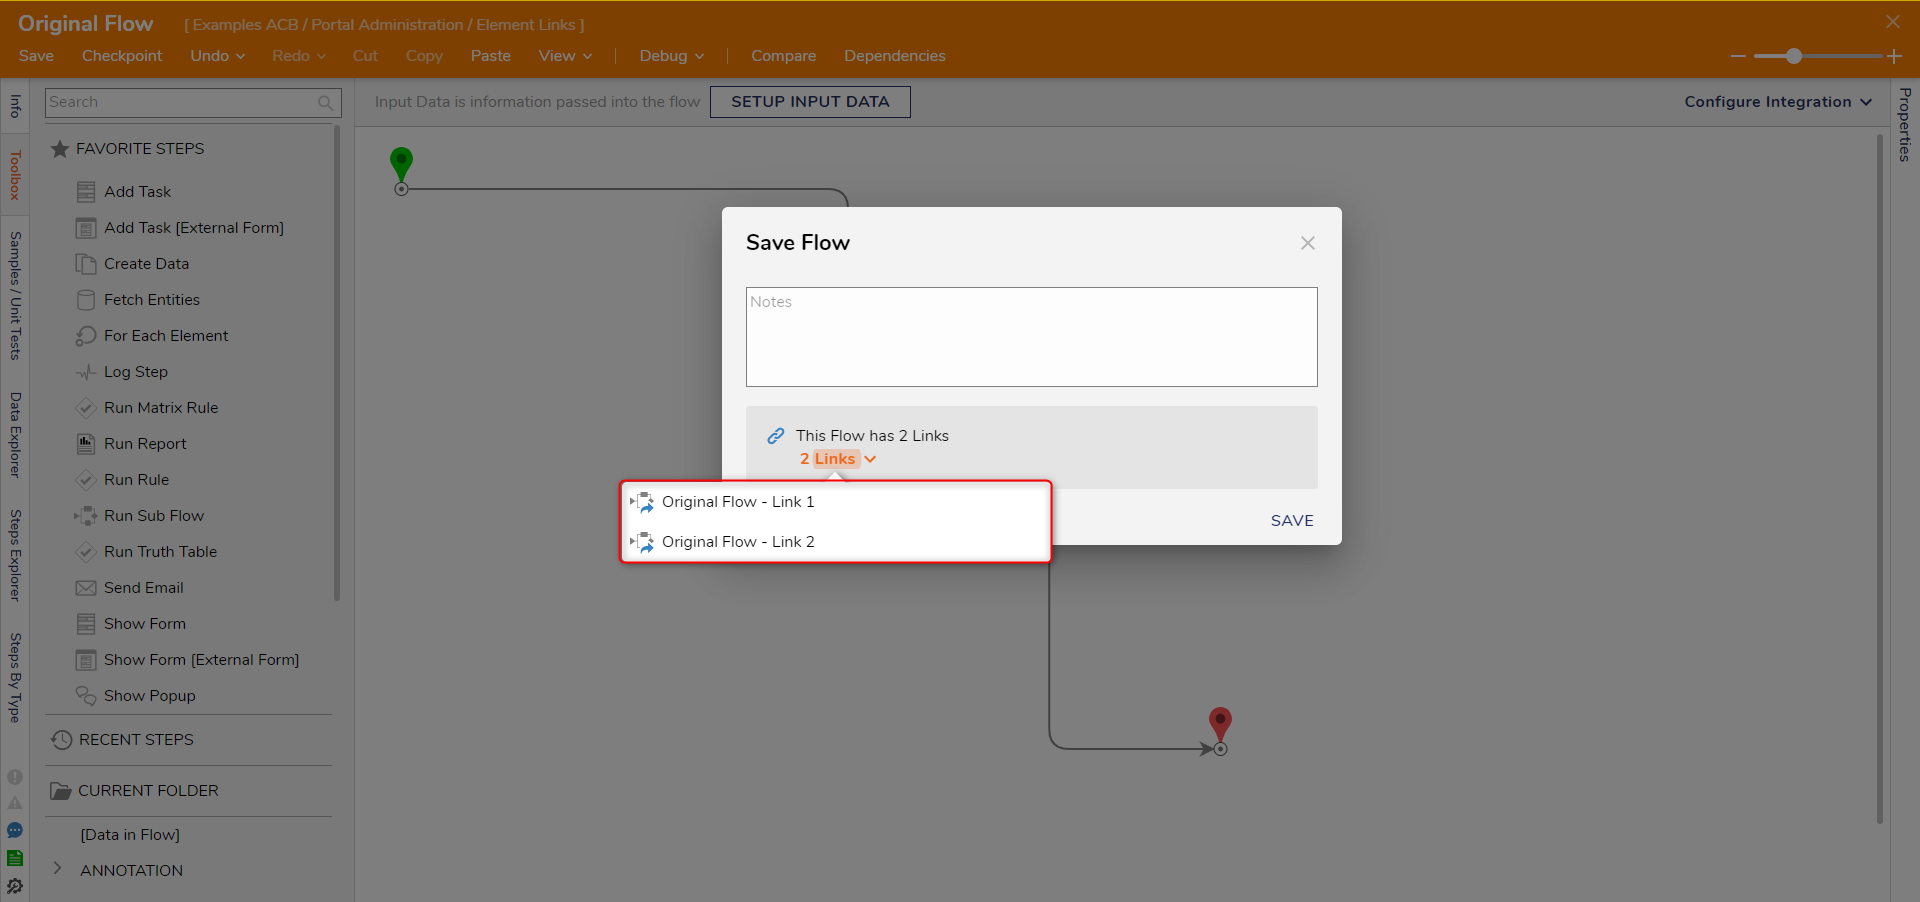
Whenever saving changes to an original Element, the Save dialog window will contain a notification of how many links are dependent on the original Element. Hovering over this total opens a menu of all the links and their names.
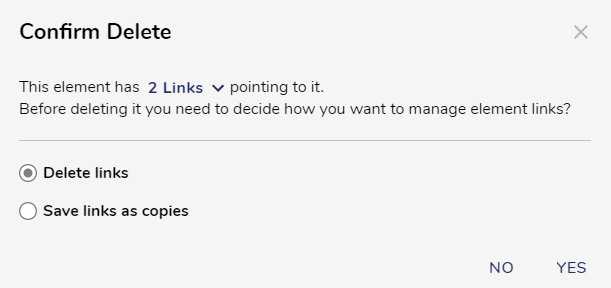
When deleting the original Element, the Confirm Delete dialog window also counts and names all links to the original. Furthermore, two options are available: Delete Links or Save Links as Copies. Delete Links deletes the original Element along with all of its Links. The Save Links as Copies preserves the Links by converting them to copies before deleting the original Element.