Overview
DocuSign Enhancer is a user-friendly Accelerator that allows users to submit a new DocuSign Request and DocuSign will process the document and send the mail to requester to sign the document. Users can download the signed document as well as cancel the request. Users will be able to see all document signing requests with their current status.
Installing App Store Applications
- Navigate to the App Store.
- Search for the DocuSign Enhancer in the Not Installed section and select Details.
- On the App Details Page, select INSTALL.
Pre-Requisites
The DocuSign module must be installed. A Project Dependency to the DocuSign module is required if using in v9. An account with DocuSign is required.
- Users should have the Error Handling Accelerator installed before utilizing this Accelerator.
What is Included
Below is a list of items included in the Application. Hidden items are marked with an asterisk.
- Submit New DocuSign Document [Primary Flow]
- DocuSign Send and Wait [Flow]
- Check All Status [Flow]
- Document Cancel [Form]
- Document Status [Form]
- Docusign Assignment [Form]
- Download Document Form [Form]
- Send Email to Current Assignee [Form]
- Update Docusign Settings [Form]
- Upload Document for Docusign [Form]
- Uploaded Document Confirmation [Form]
Configuration
The DocuSign module must configured. All DocuSign account information must be entered in the System > Settings > DocuSign Settings menu.
How To Use
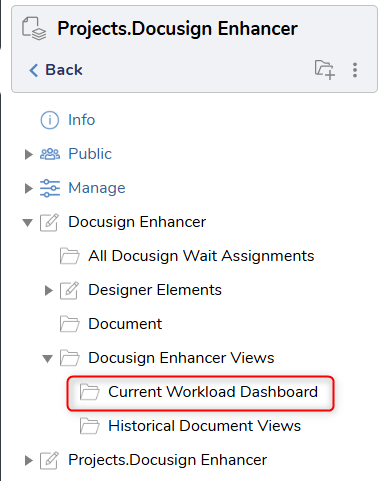
All of the actions are available under Docusign Enhancer > Docusign Enhancer Views > Current Workload Dashboard. Documents can be found under Docusign Enhancer > Document. Flows and Rules used by the Project are found in Docusign Enhancer > Designer Elements.
Submit a new DocuSign Request
To make and send a new request along with the file to be signed, use these steps:
- Navigate to Current Workload Dashboard.
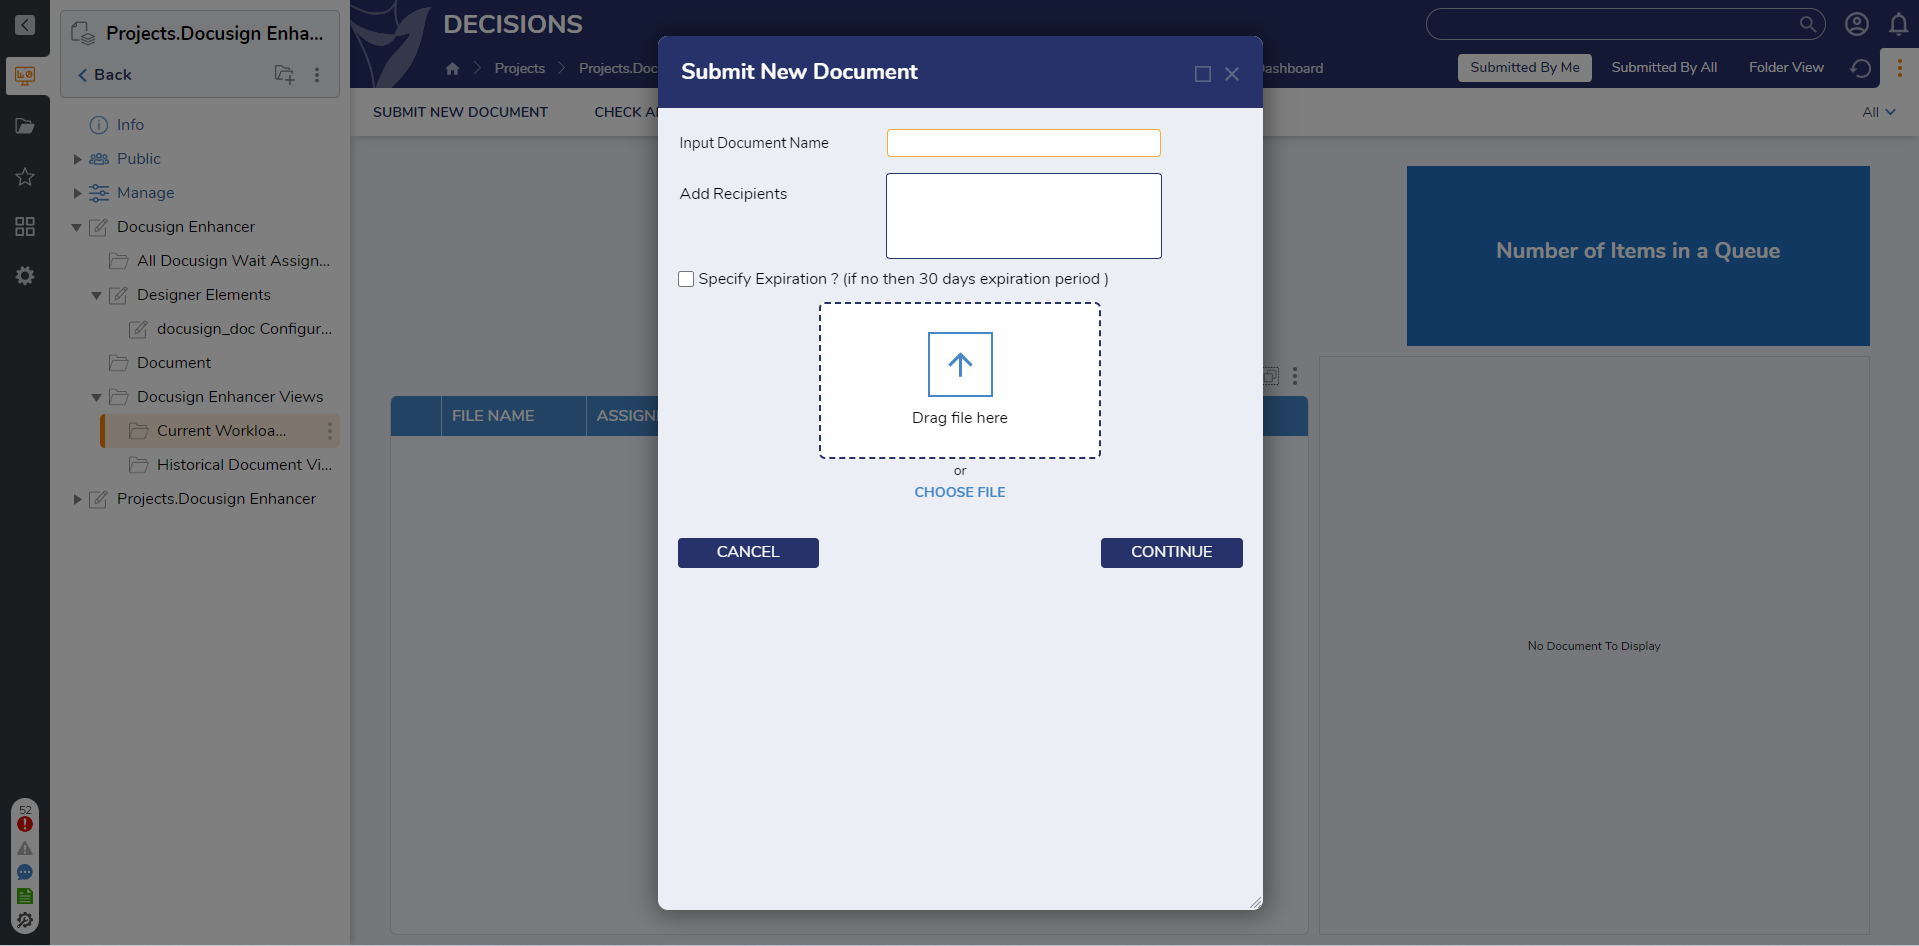
- Click the SUBMIT NEW DOCUMENT action.
- A Form will appear where the user will fill in Document Name, Expiration Date, and Document.
- A request that crosses the Expiration Date will automatically enter a canceled state.
- A confirmation screen will appear to check that the correct document has been attached to the request.
Cancel a DocuSign Request
To cancel an existing request, follow these directions:
- Navigate to Current Workload Dashboard.
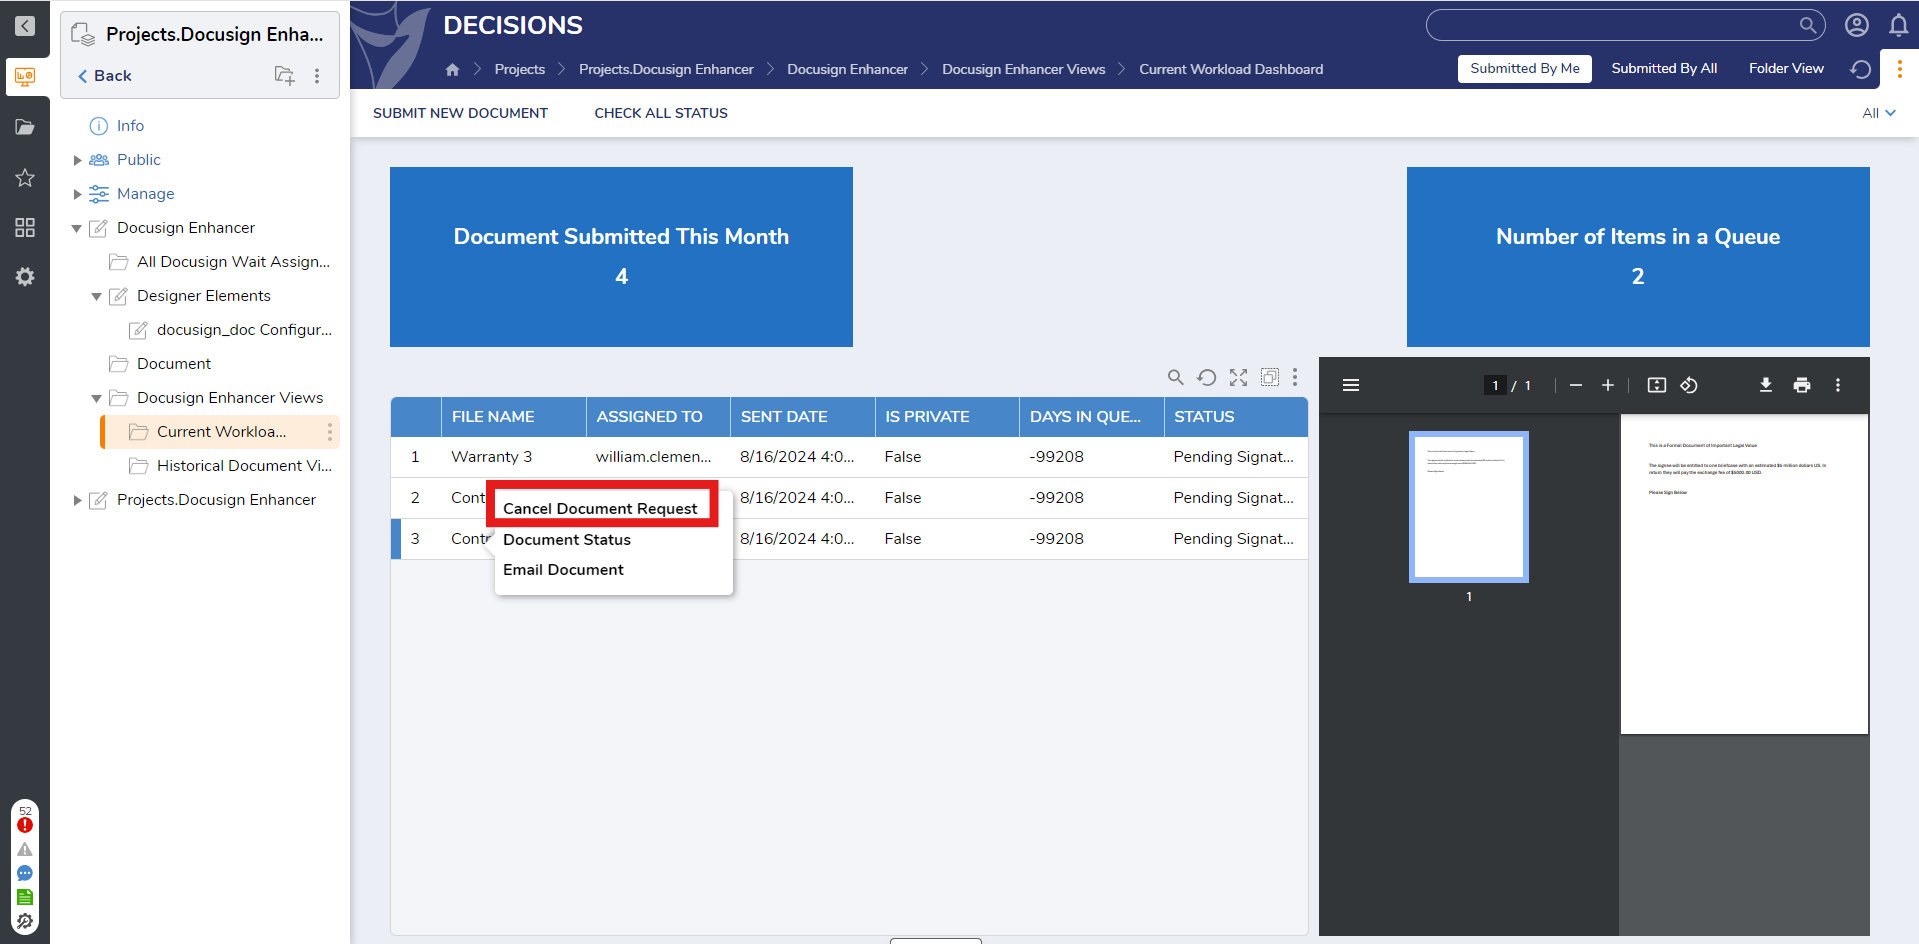
- Right click on the request to be canceled.
Download a Signed Document
Under Docusign Enhancer > Document, left click any document to download it, or right-click and select MAIN | Download.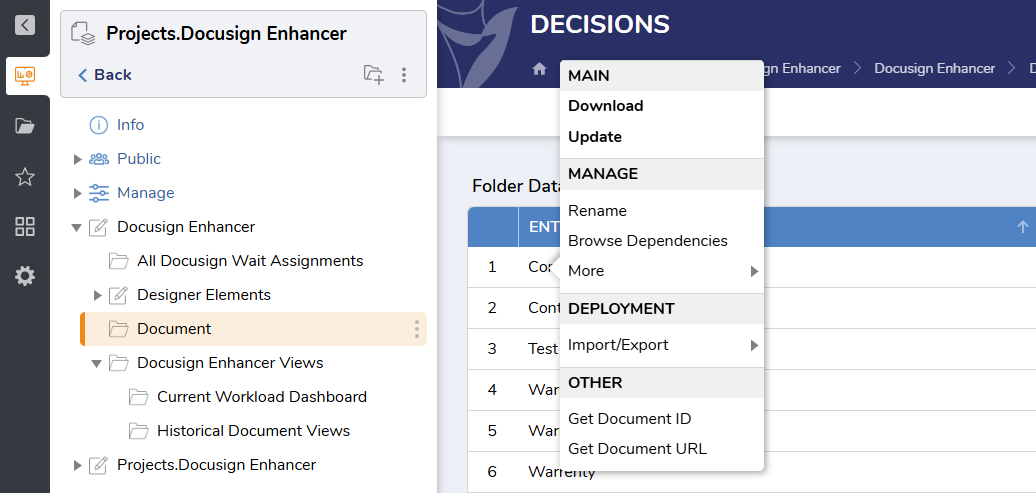
Send a Document
- Navigate to Current Workload Dashboard.
- Right click on the desired document and select Email Document.
- A Form will display with the information on who will receive the email with the document.
Check the Status of Documents
Navigate to Current Workload Dashboard and click on "Check All Status" Folder Action to see the updated status of all pending documents that appear on the dashboard. This pulls every single current envelope that is outstanding and contacts DocuSign. It is recommended that a Scheduled Job be set to check for status, rather than using this action. Using this action too often can cause performance issues or hit limits within DocuSign itself, depending on the account type.
Submit New DocuSign Document [Primary Flow]
In this process, the user will get a form that requests a document name, expiration date and document for signing. After that the document will be stored in a Folder and DocuSign data is created with Pending Signature State and will move to Send DocuSign and Wait Subflow.
- Navigate to the Workload Dashboard and click "Submit New Document".
- A Form will appear where the user will fill in Document Name, Expiration Date, and Document file.
Send DocuSign and Wait
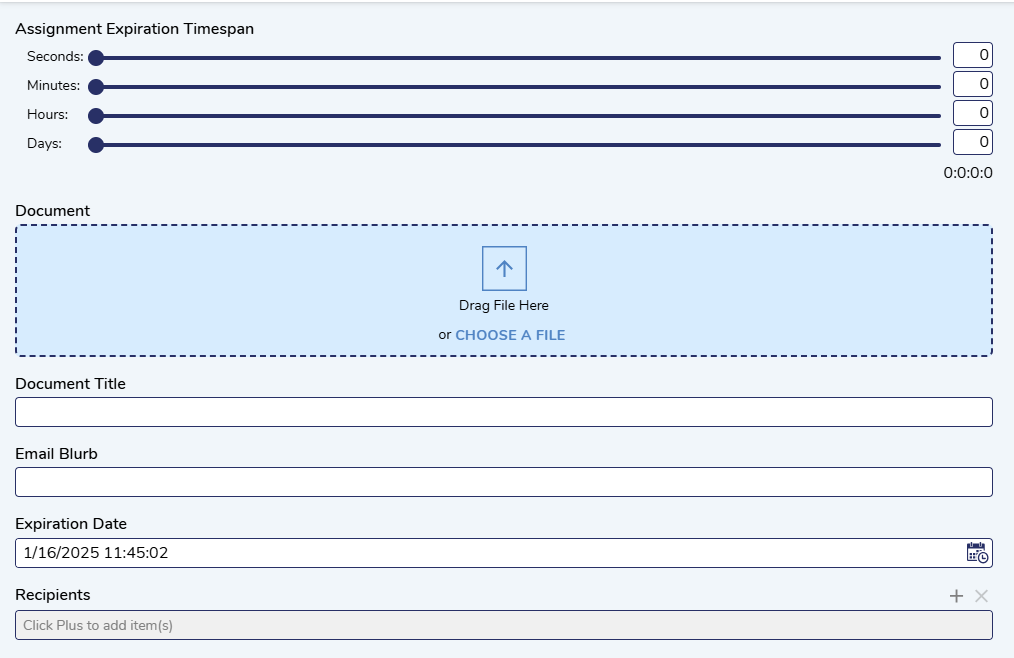
Advanced users are strongly encouraged to use this Flow as a Subflow when setting up Flows in other Projects for sending documents. This Flow provides more customization on how signatures appear and are collected.
Add Recipients
Clicking the + icon on "Recipients" opens up a new menu with several important settings.
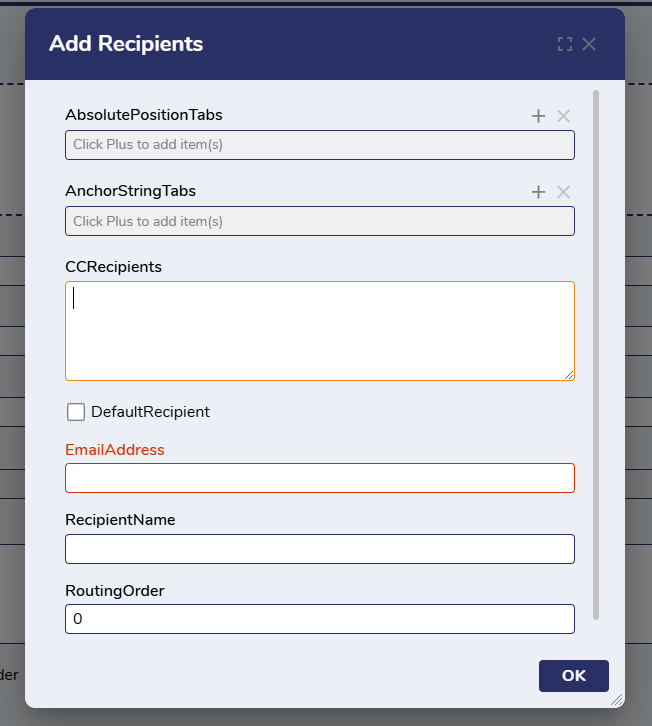
| Setting Name | Description |
|---|---|
| AbsolutePositionTabs | Allows a user to set where the signature will appear on the document. The user can set the position of the signature line by pixel. This position corresponds to the file being opened in Adobe. |
| AnchorStringTabs | Another method of placing the signature line. Wherever the Anchor Text on the document is placed will be where the signature line will appear. This can be adjusted by pixel if needed by using the X and Y offset fields. Text that works is /s[order of signatures]/ (/s1/, /s2/, etc). This text will appear on the document, and it is recommended to change the font color to white to make it invisible to readers. |
| CCRecipients | These are emails that will be sent in the CC recipient line. |
| DefaultRecipient | This will set a default email address that will always be used. |
| EmailAddress | These are the emails addresses the |
| RecipientName | This must be filled in or the document will fail to send. |
| RoutingOrder | This is the order of recipients that the document will be routed to. A recipient given '1' will be the first to receive the document and sign it. '2' would get it next, and so on. |
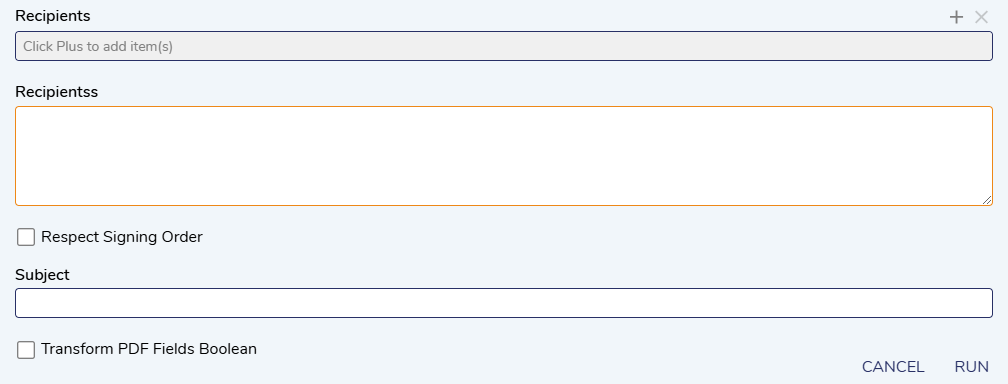
| Setting Name | Description |
|---|---|
| Recipientss | The email addresses the document will be sent to. |
| Respect Signing Order | Use "Respect Signing Order" when sending to multiple signees (for example an employee and a manager). This setting requires the first listed recipient to sign before the next. |
| Subject | The subject line of the email that will contain the document that needs a signature. |
| Transform PDF Fields Boolean | Allows PDF Fields to be automatically converted to signable objects when uploaded to DocuSign. |
Check All Status
This action will check with DocuSign if there have been any changes to the signature status of the document assignments that appear on the Report. If a document has been signed, its status will change from Pending Signature.
Check Status Scheduled Job
Rather than using the manual Check All Status action, users can set a Scheduled Job that will run checks at whatever needed frequency. Assign the Check Status Scheduled Job flow to be a Scheduled Job.
Cancel Document Request
This Flow powers the "Cancel Document Request" action that appears on the dashboard when right-clicking a document assignment.
Email Document
This Flow handles the emailing of a document.
Document Status
This provides the different statuses that a document can have.
Monitor DocuSign Assignments
This Flow checks with DocuSign to determine the status of the documents.