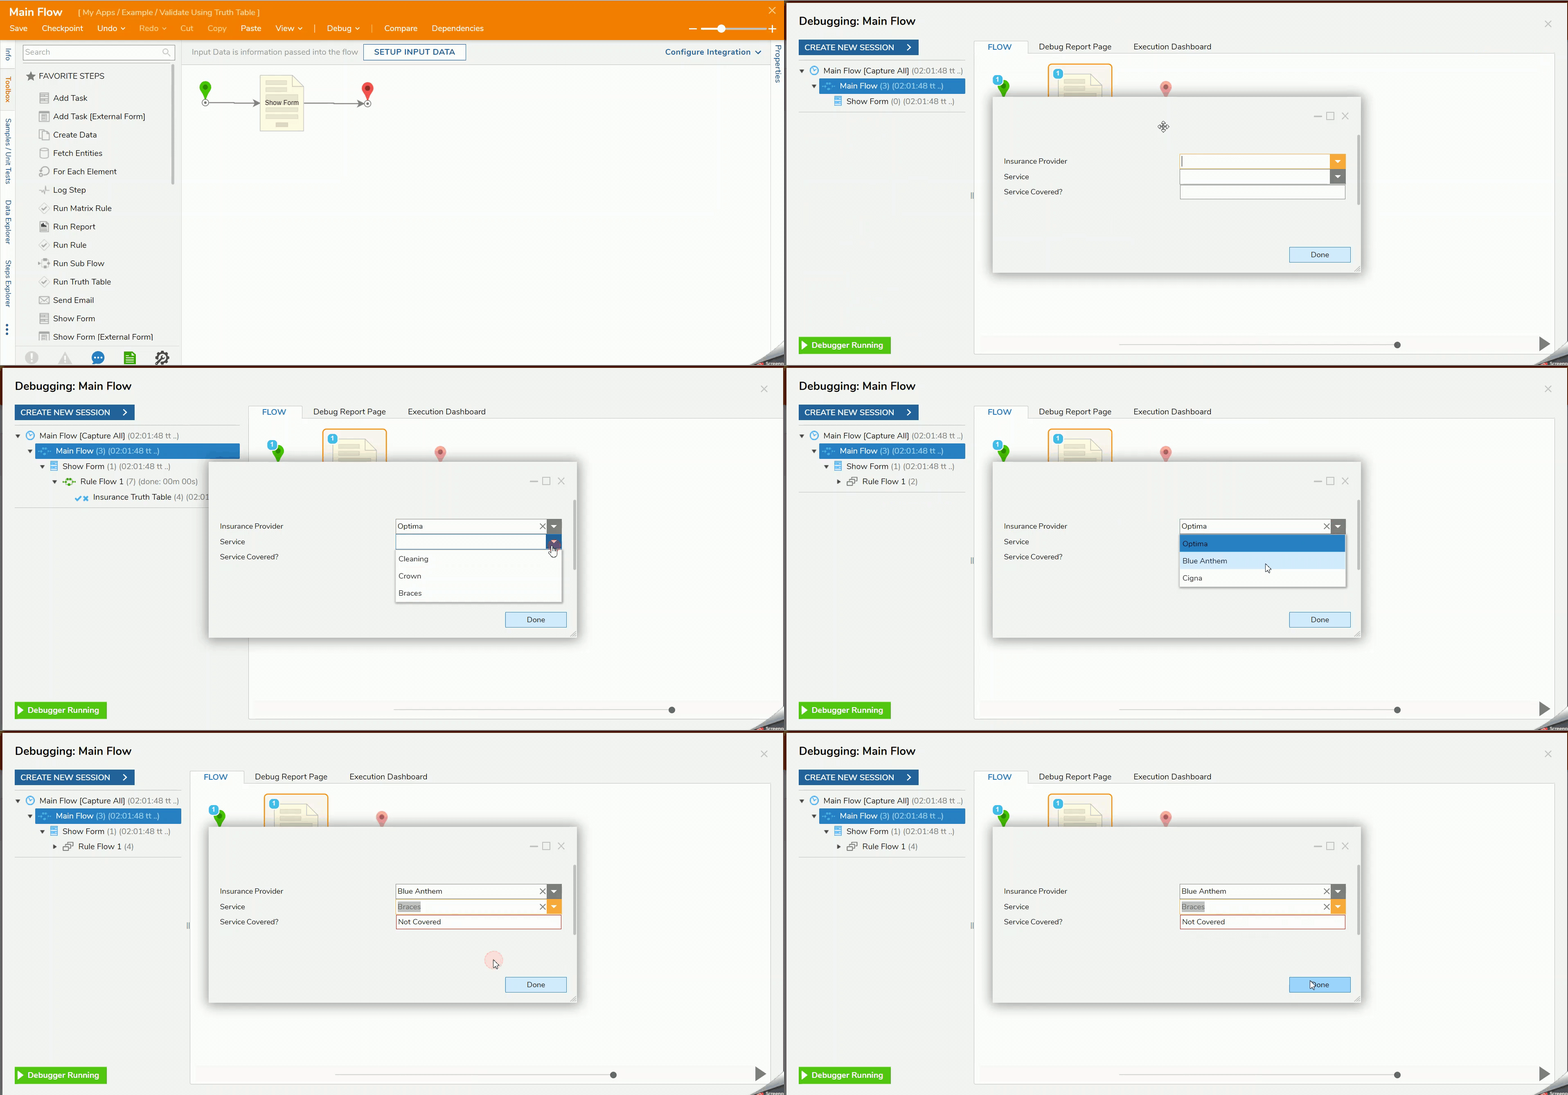
Overview
Truth Tables can be used to validate data on a Form
Example
This example will display a Form that will ask the user to enter an animal type and the age. The Form will be validated using a Truth Table and display the correct outcome on the Form based on the input provided.
- In a Designer Project, click CREATE FLOW and select Flow. Name the Flow (Main Flow) and click CREATE.
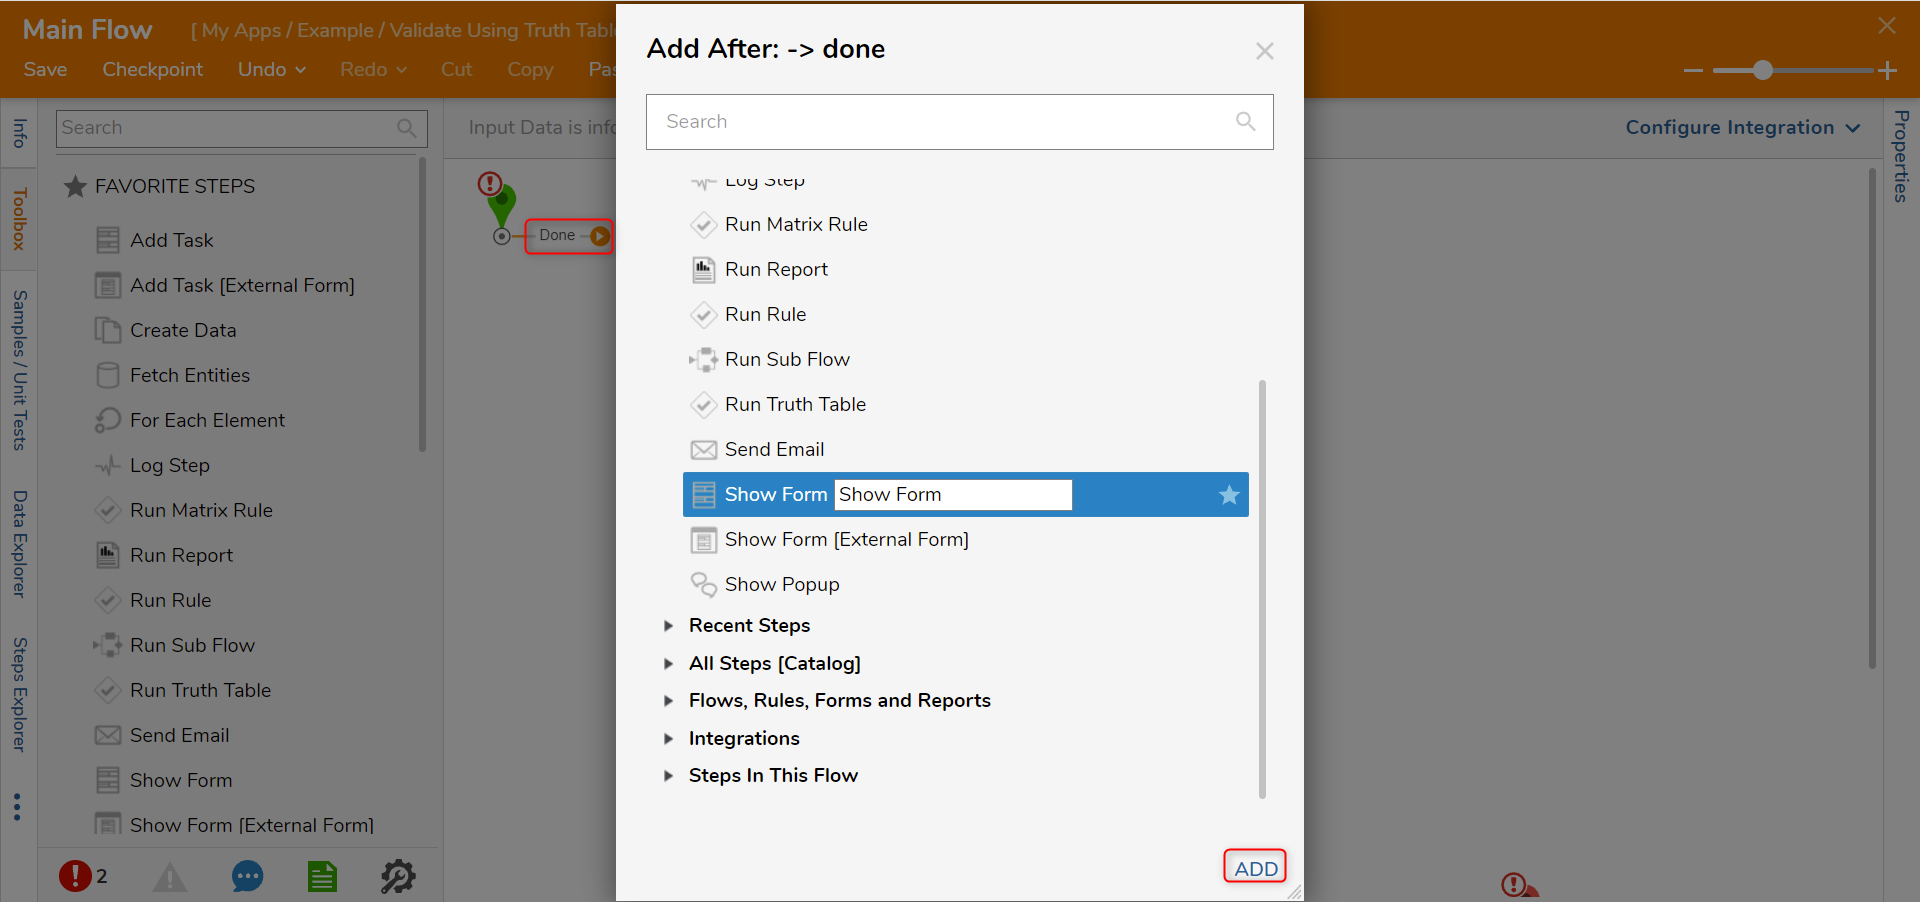
- Click the Done path on the Start step. Select the Show Form step and click ADD.
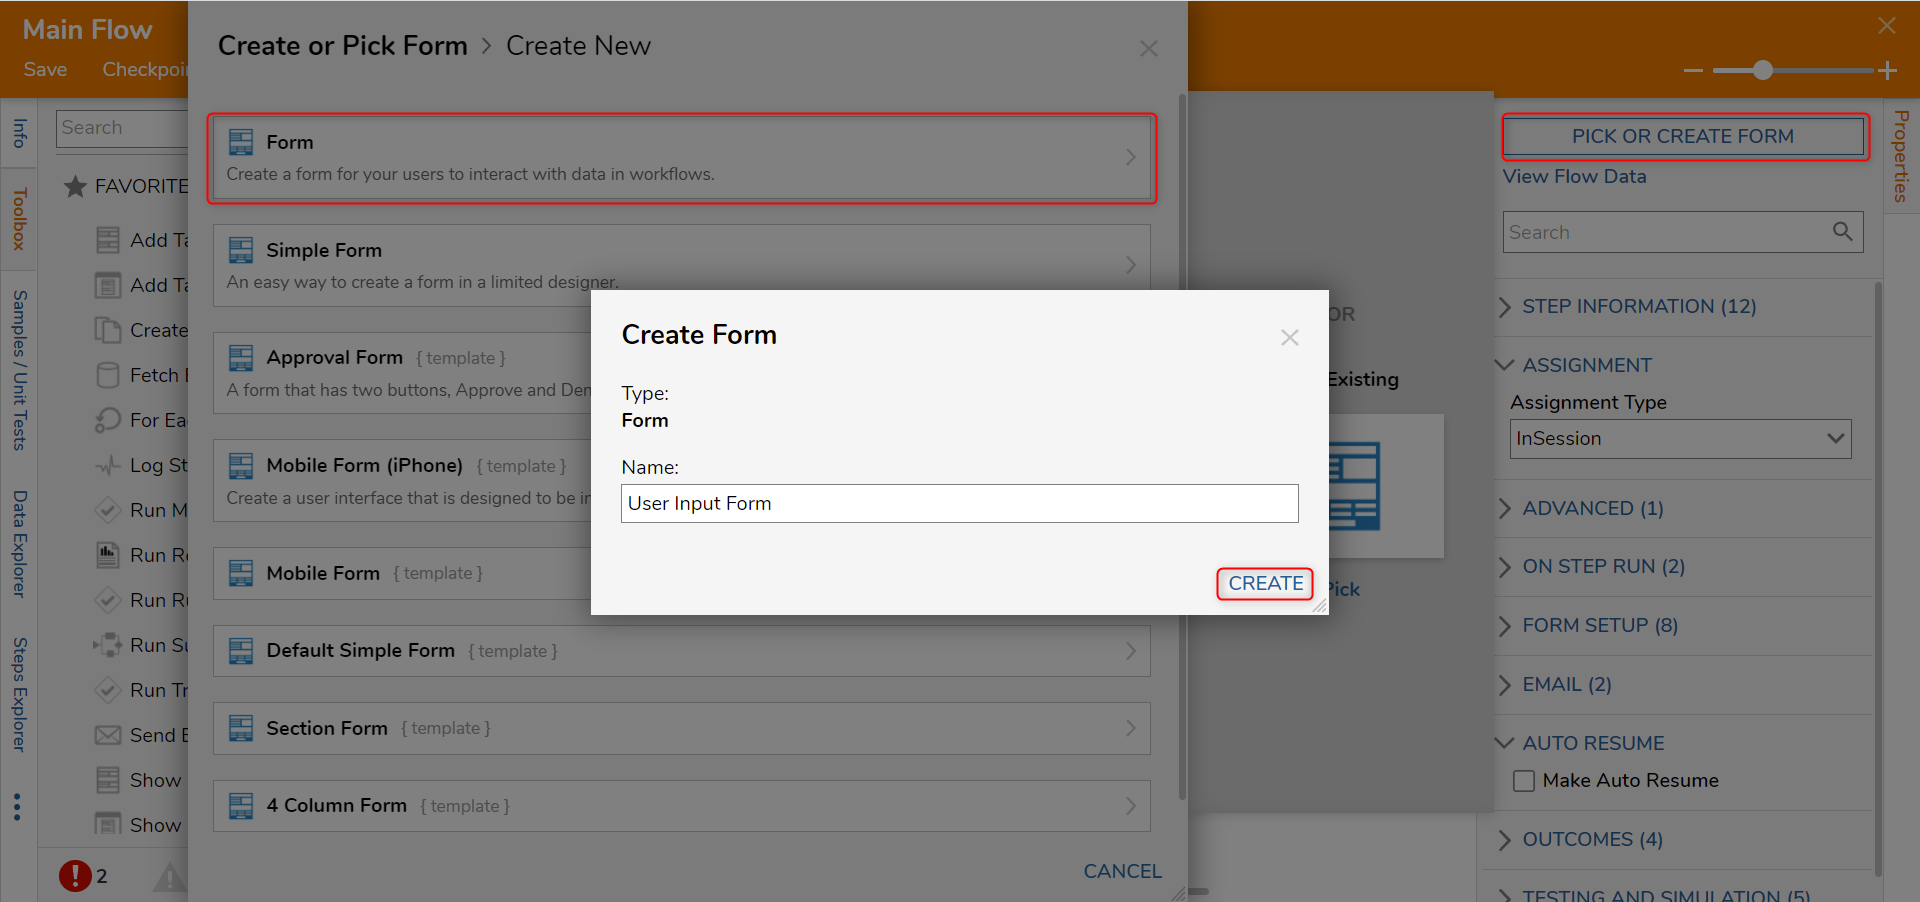
- Click PICK OR CREATE FORM and click CREATE. Select Form, name the Form and click CREATE.
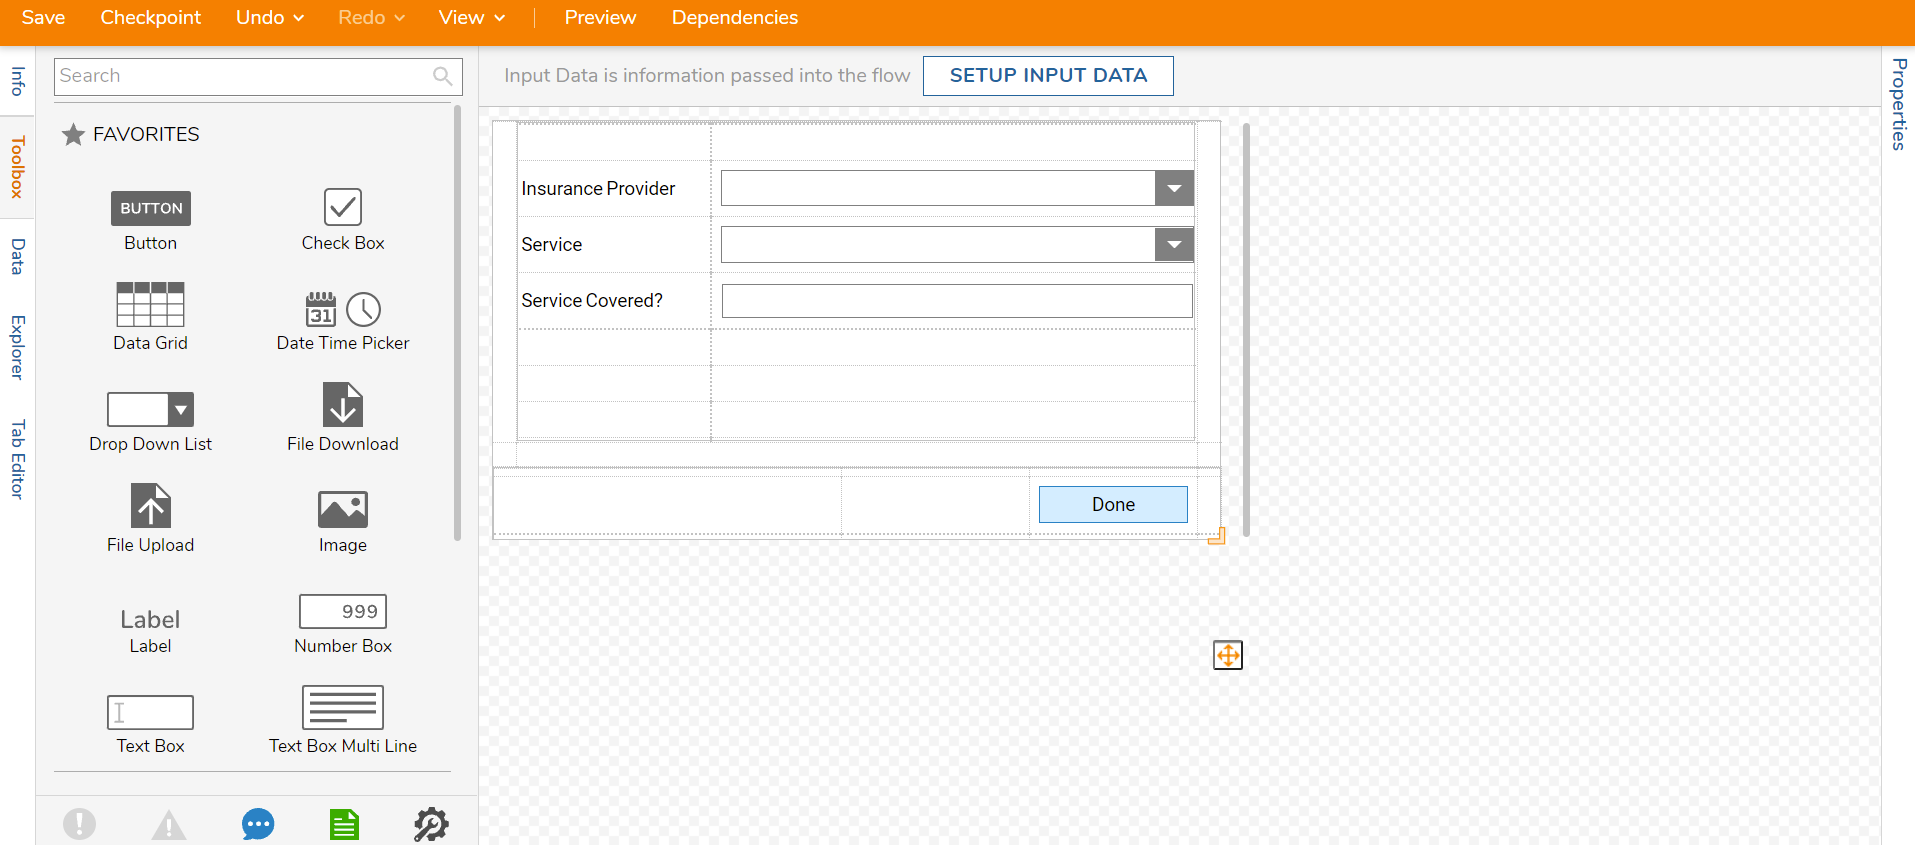
- Configure the Form with Labels (Insurance Provider, Service, Is Service Covered?), Text Box components (UserInsurance, ServicePerformed), and a Button component (Done). Add "Optima, Blue Anthem, Cigna" as String Static inputs for the InsuranceProvider list and "Cleaning, Crown, Braces" for ServicePerformed list.
- On the Properties panel, navigate to the FORM RULES category and click ADD under Active Form Flows.
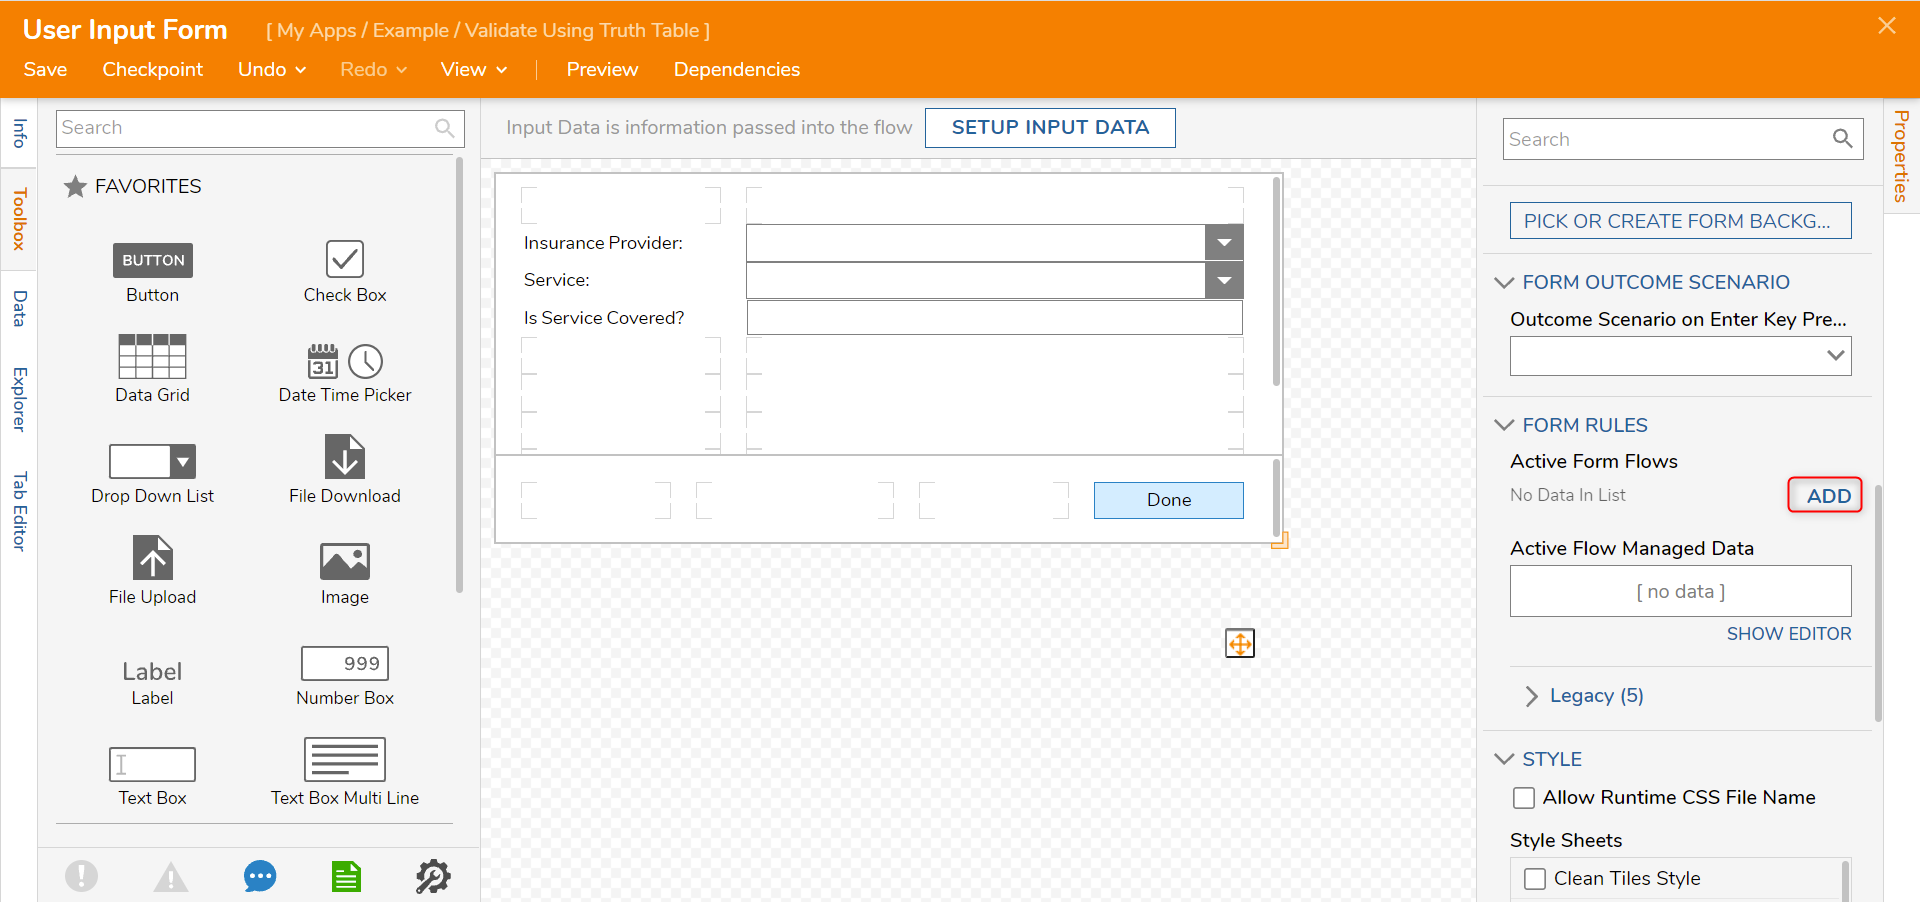
- Enter a Name and click EDIT RULE FLOW.
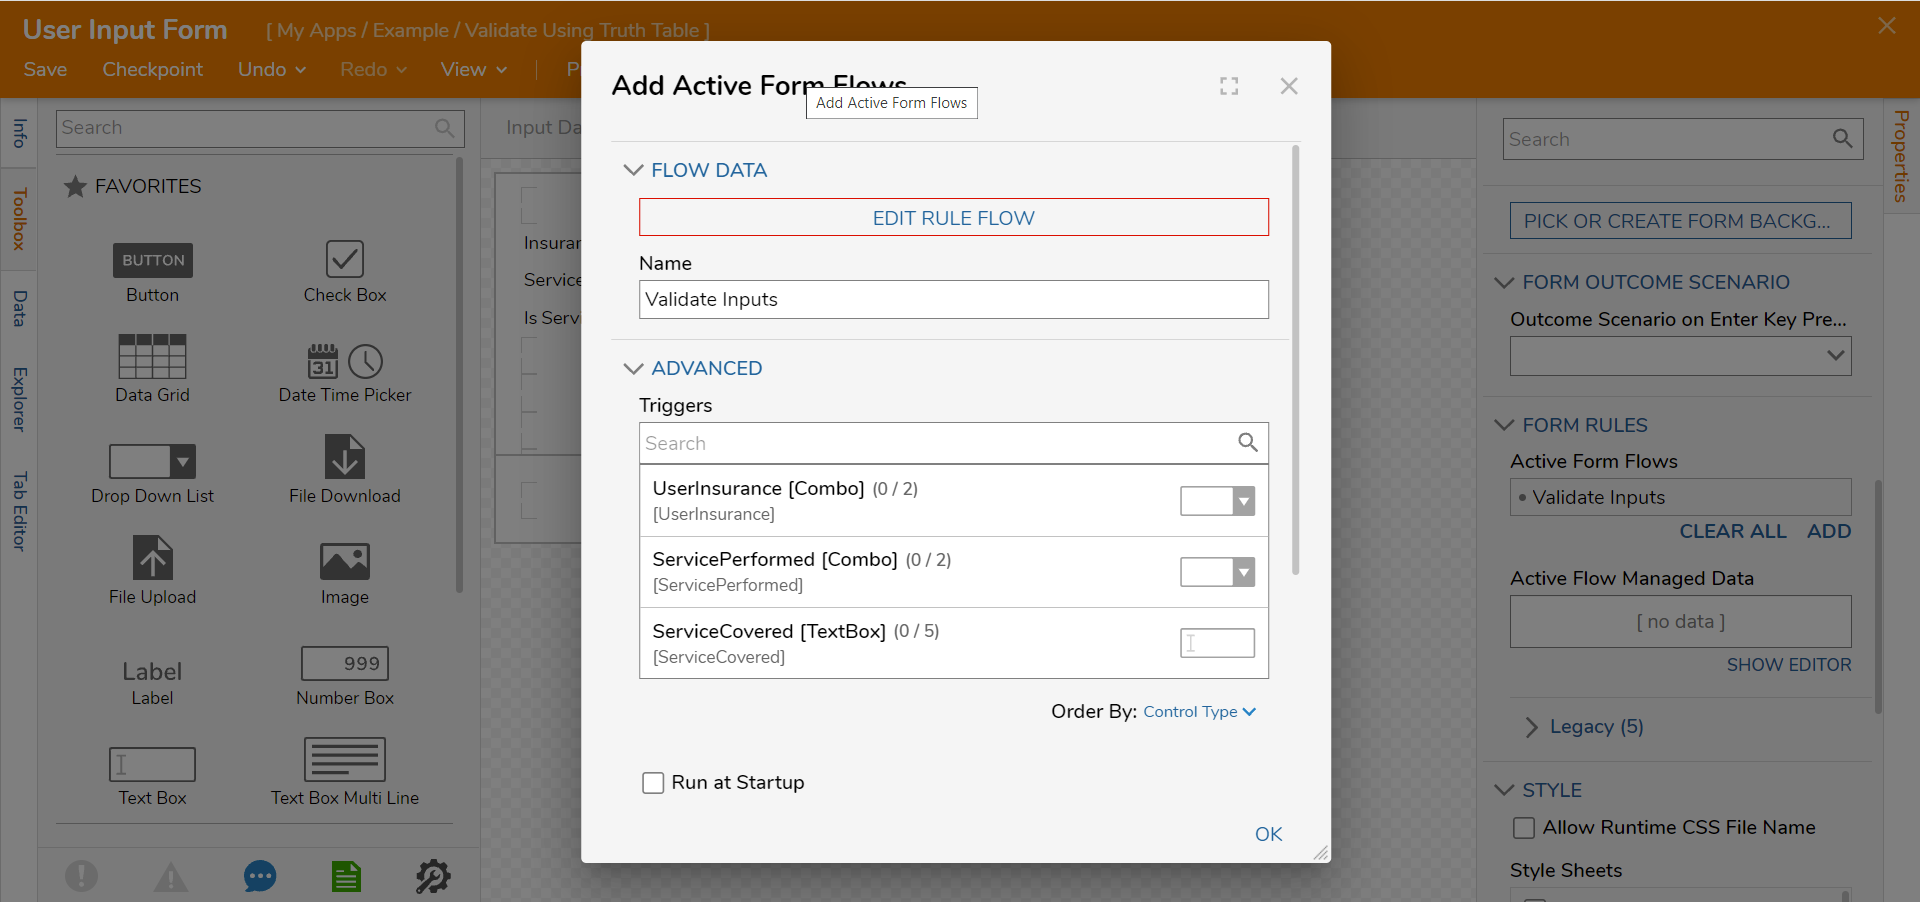
- Click the Done path on the Start step. Select Run Truth Table and click ADD.
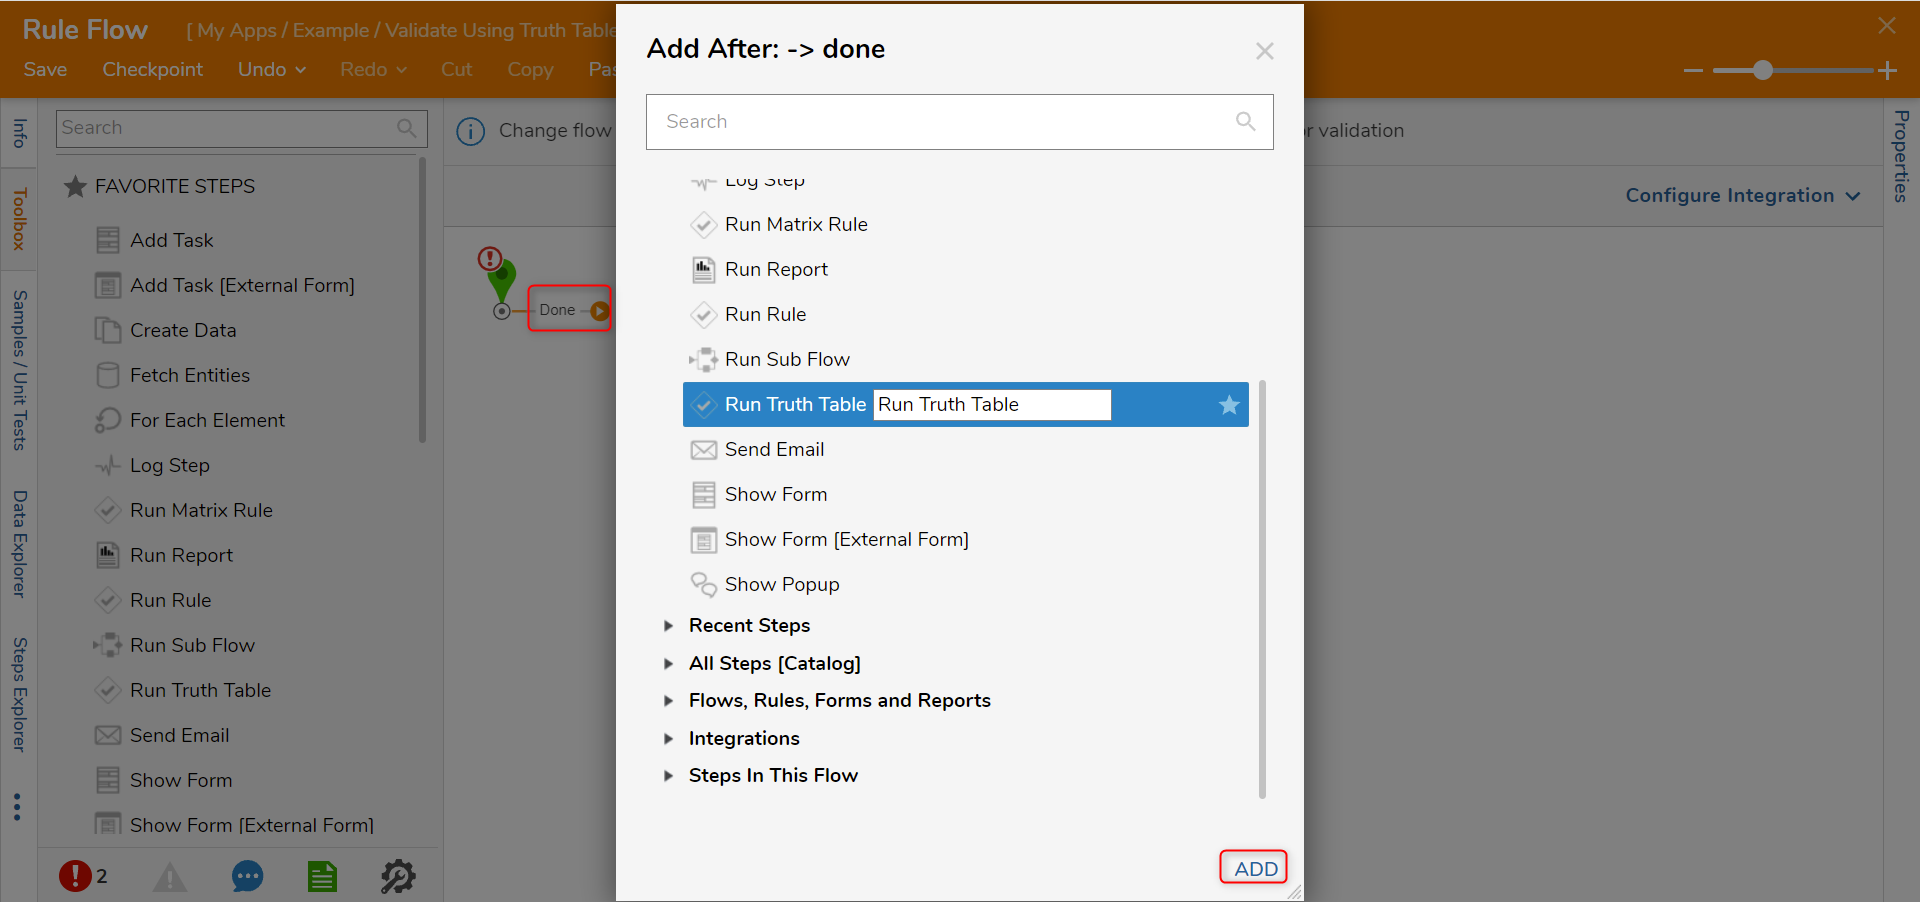
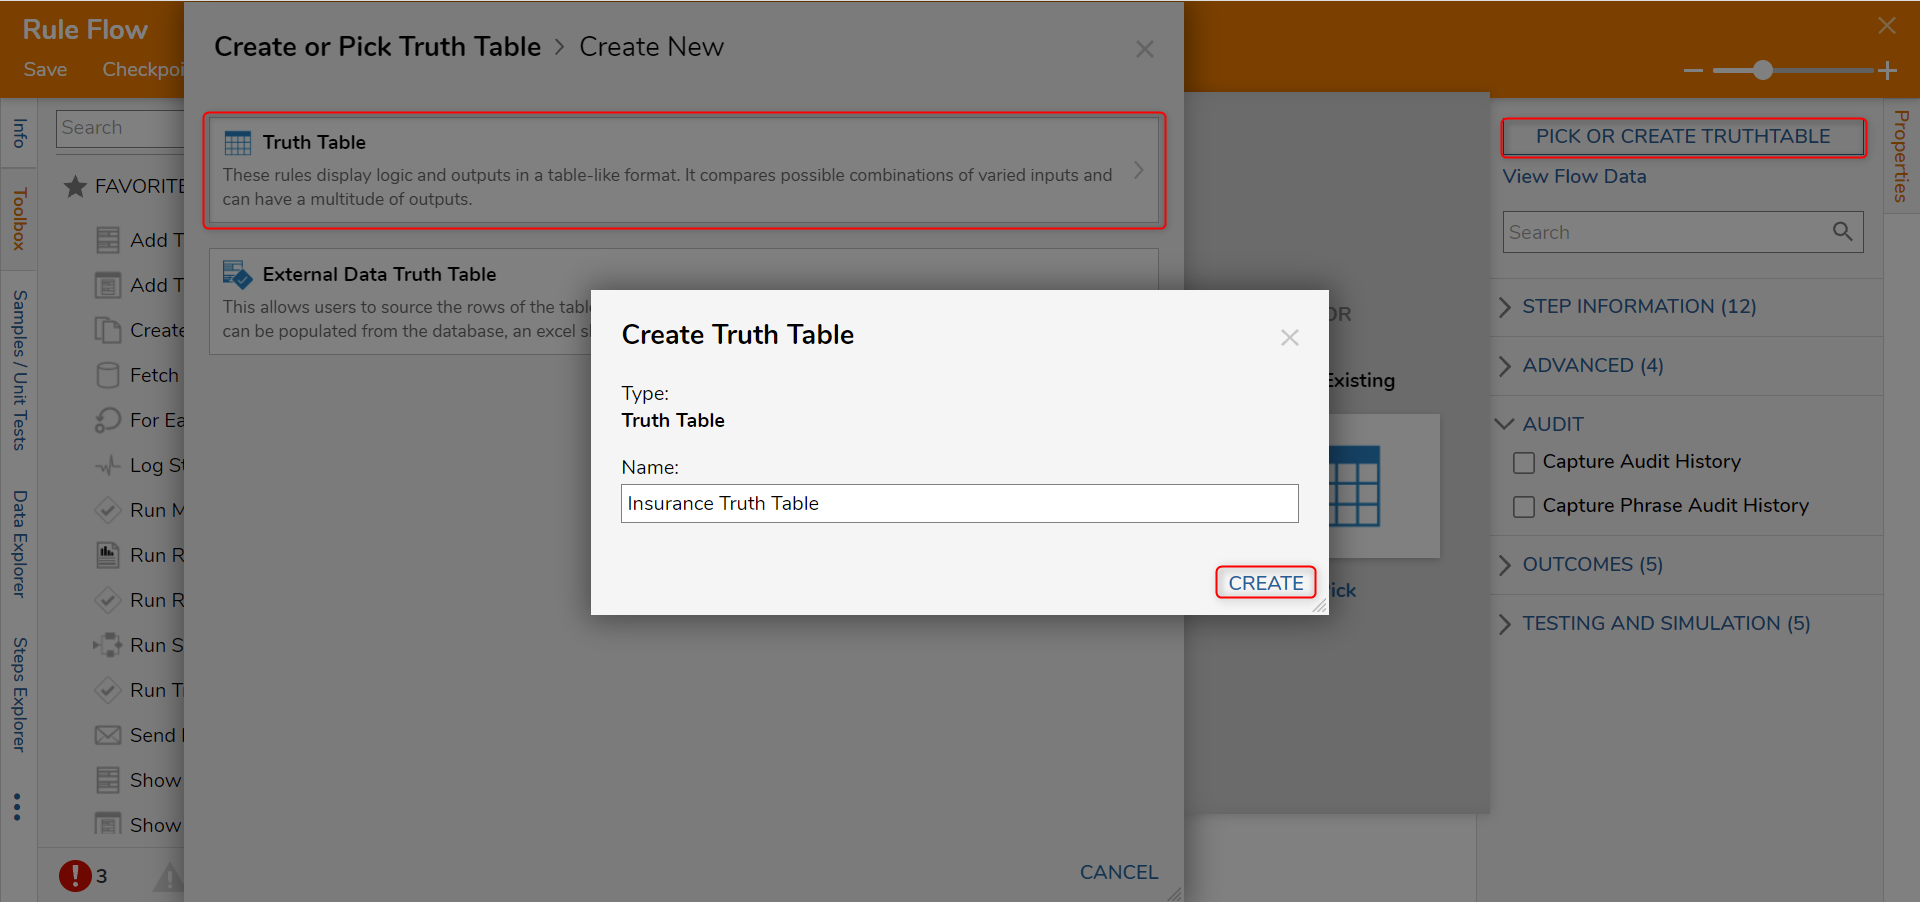
- Click PICK OR CREATE TRUTHTABLE and click CREATE. Select Truth Table and click CREATE.
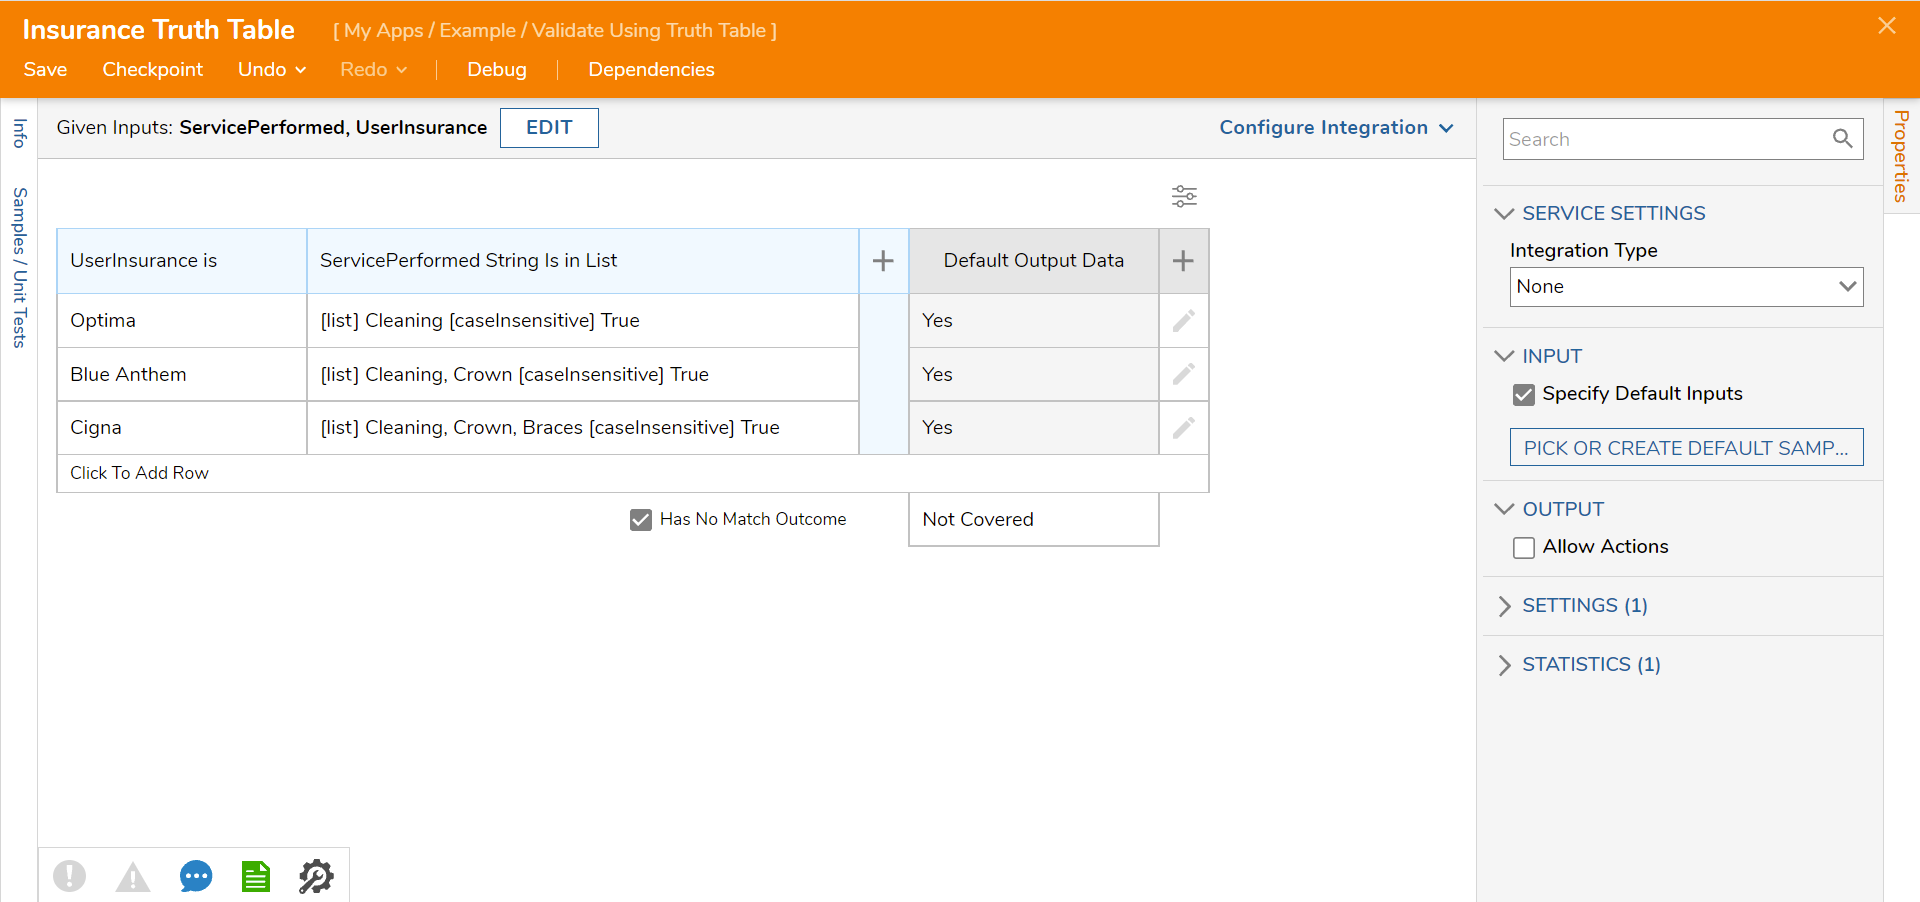
- Click SETUP INPUT DATA and click DEFINE.
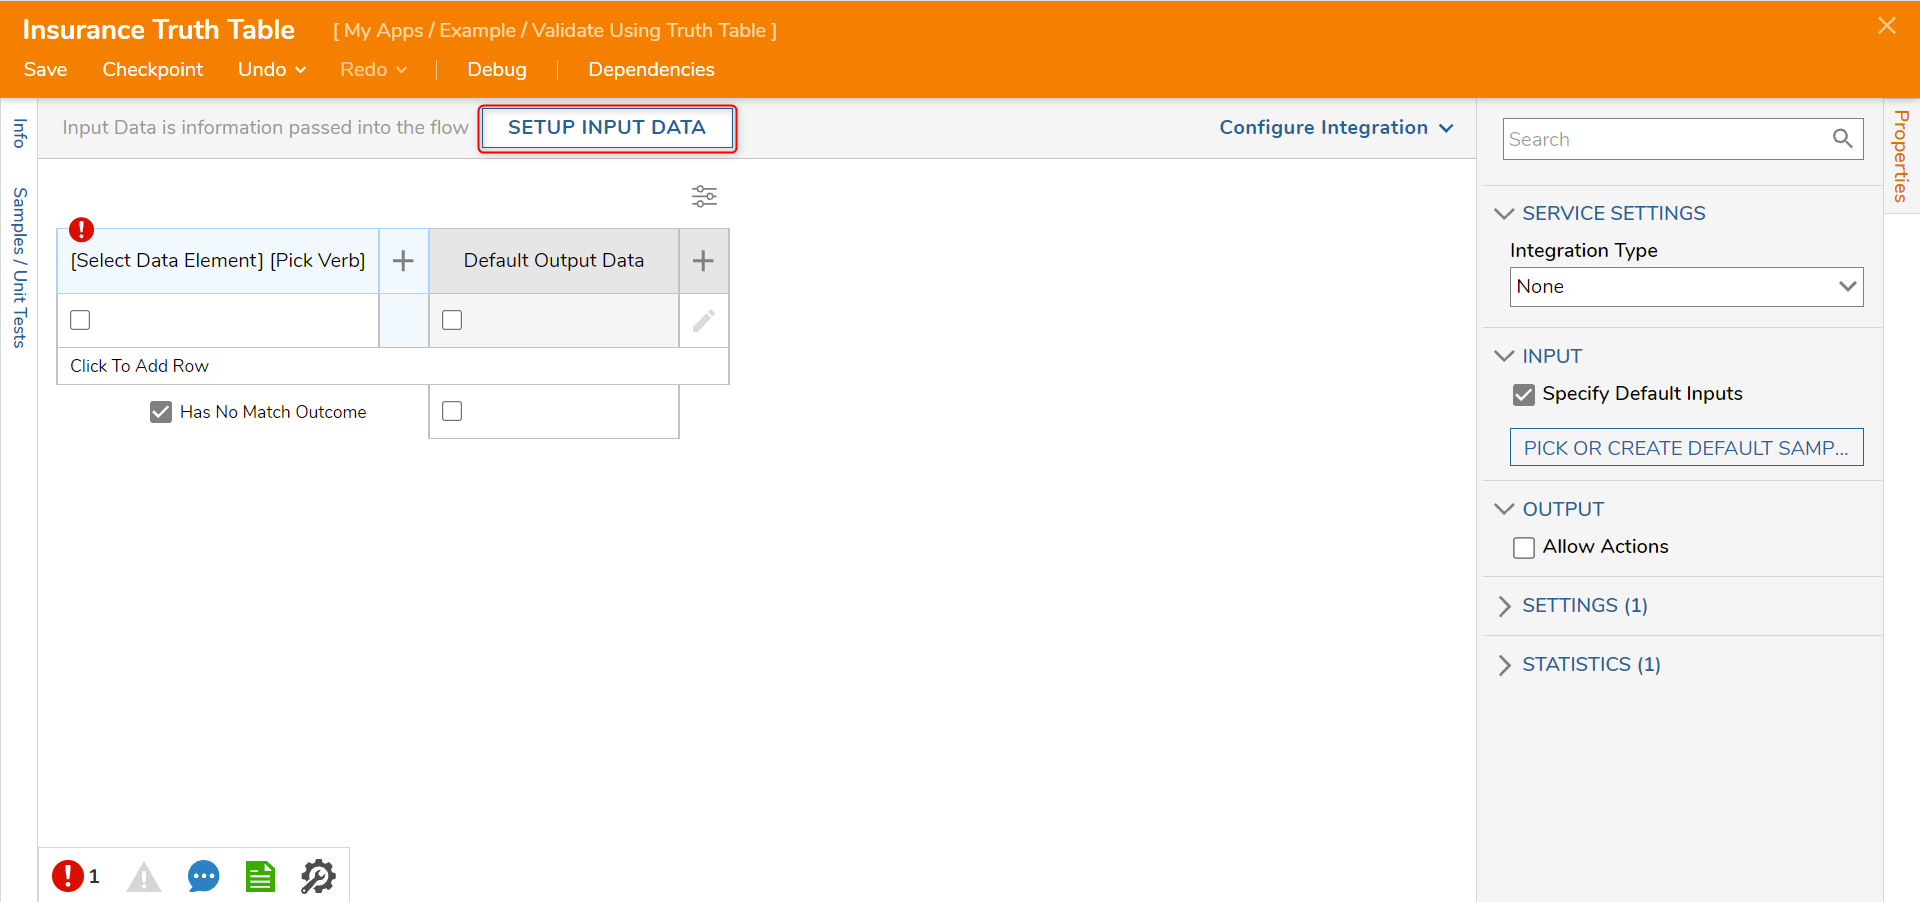
- Enter "ServicePerformed" and "UserInsurance" under NAME as a String [Text] TYPE. Click Save and close the Input Data window.
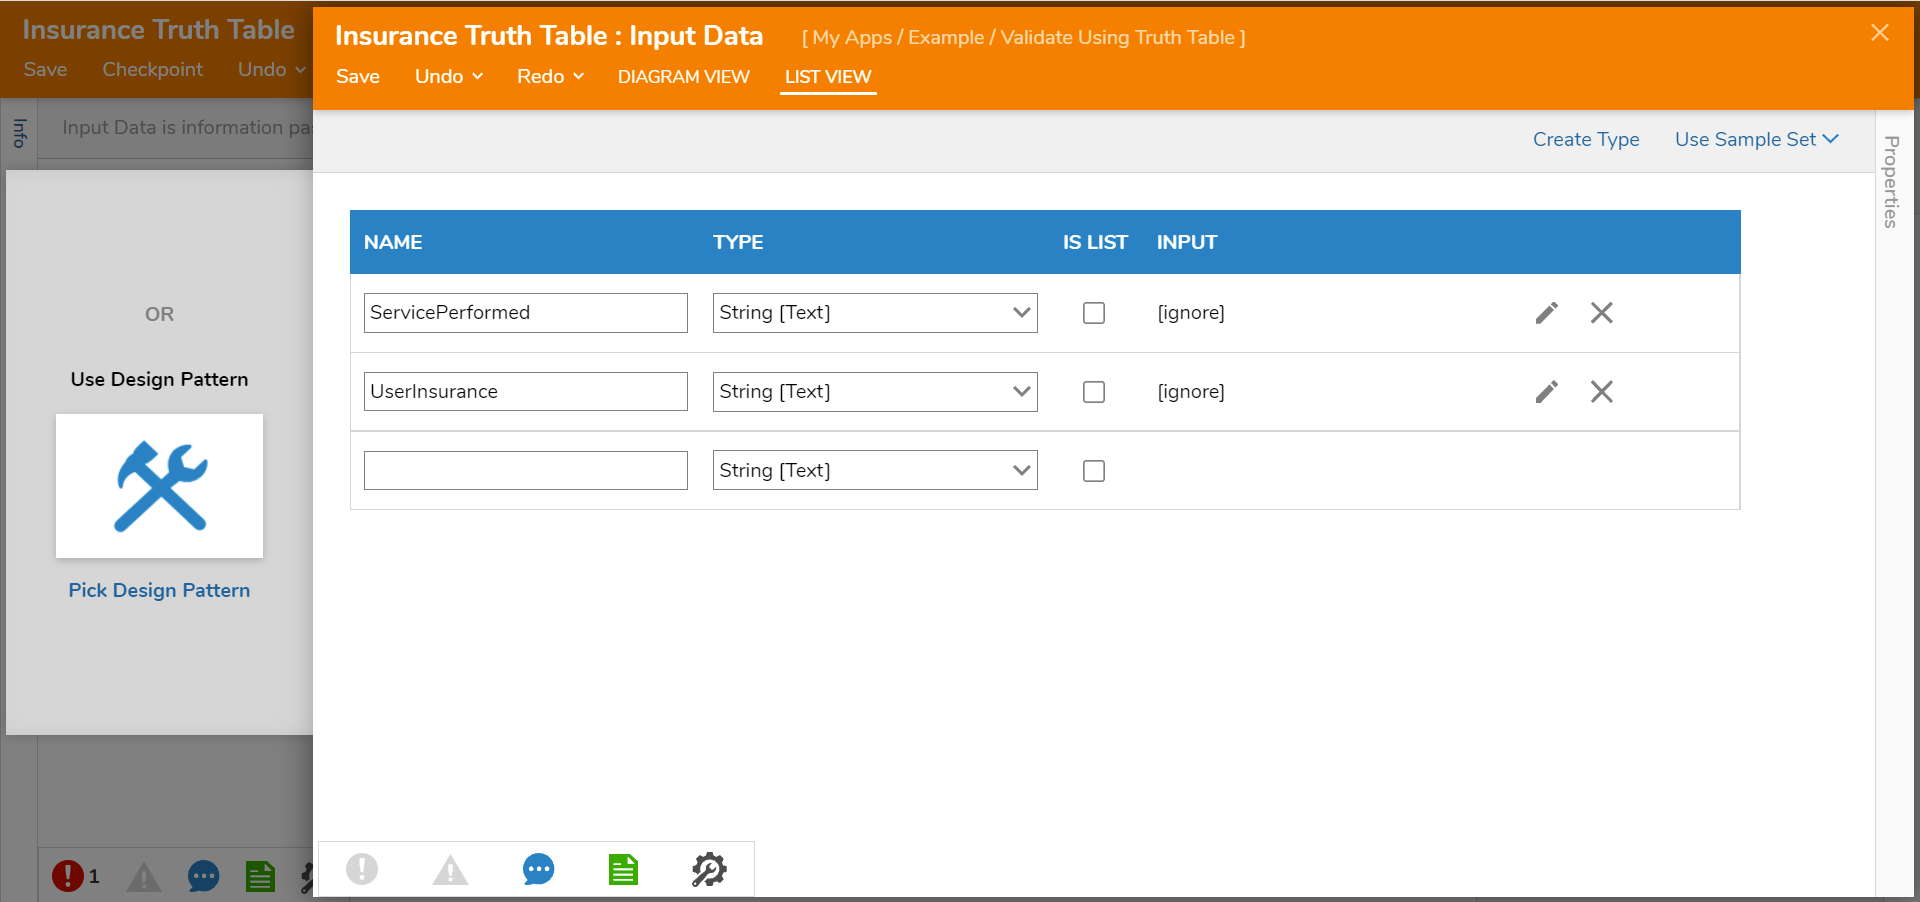
- Click Select Data Element and select User Insurance. Click CLOSE.
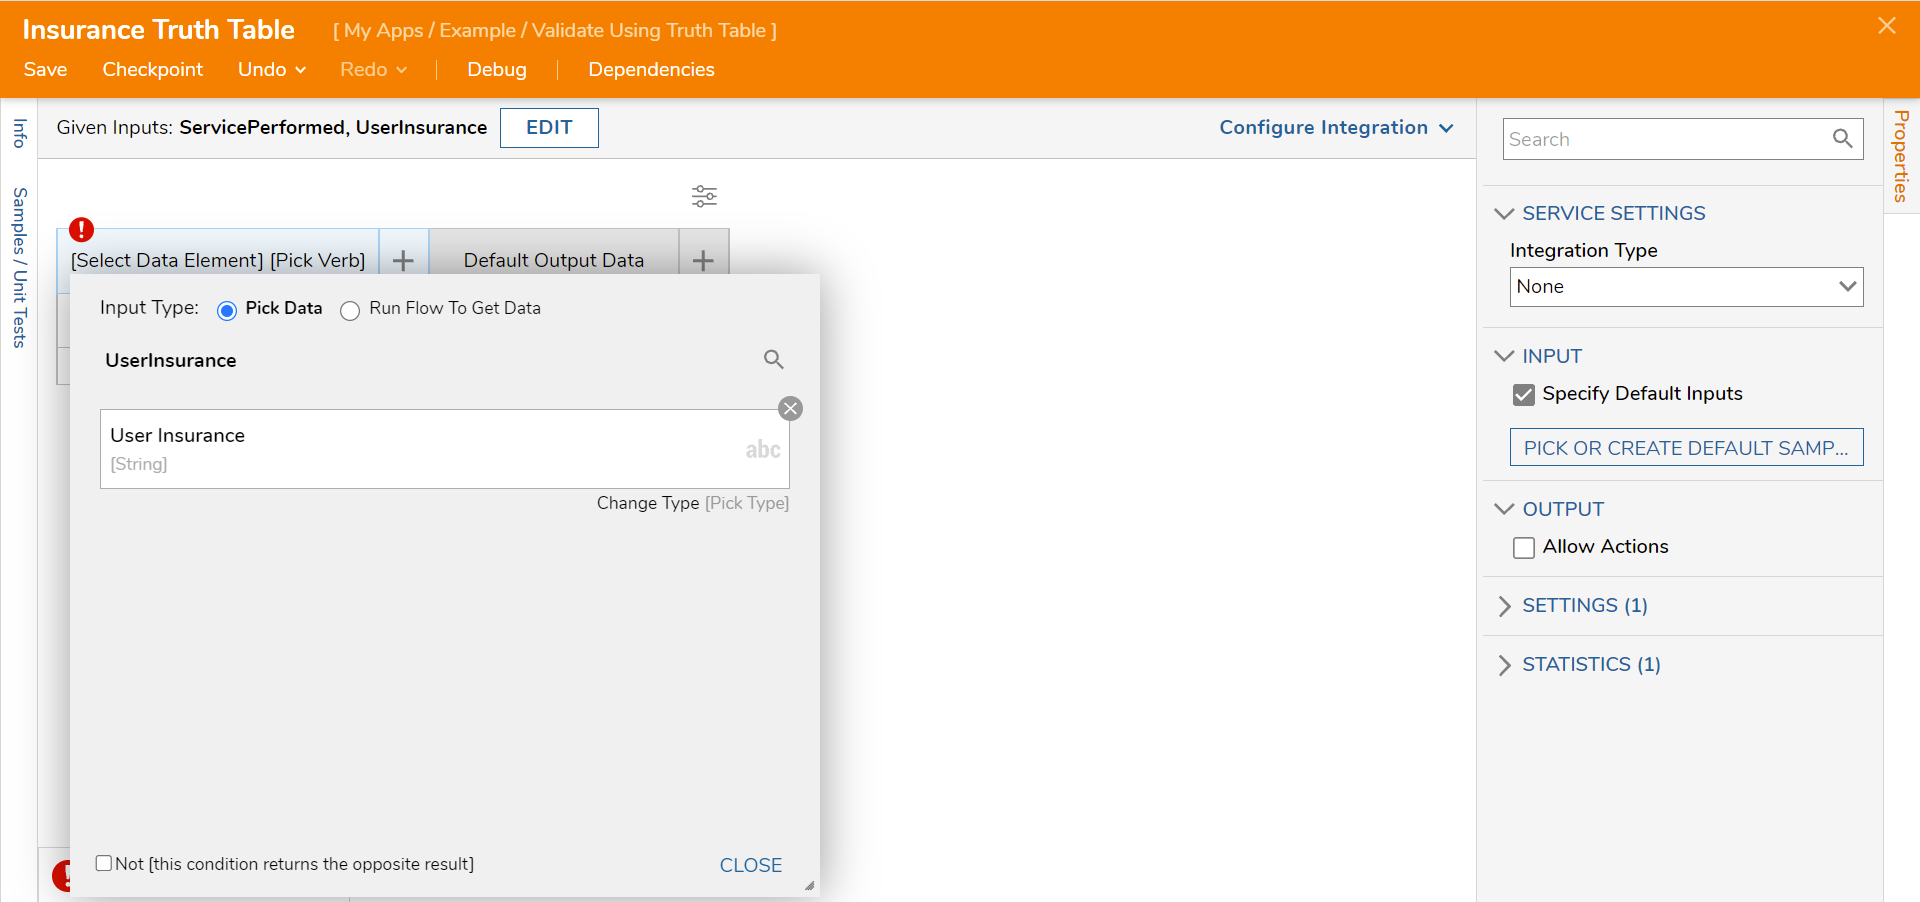
- On the Pick Verb window, select Is and click CLOSE.
- Click the plus sign next to the UserInsurance Is column. Select Service Performed and select String Is In List for the verb.
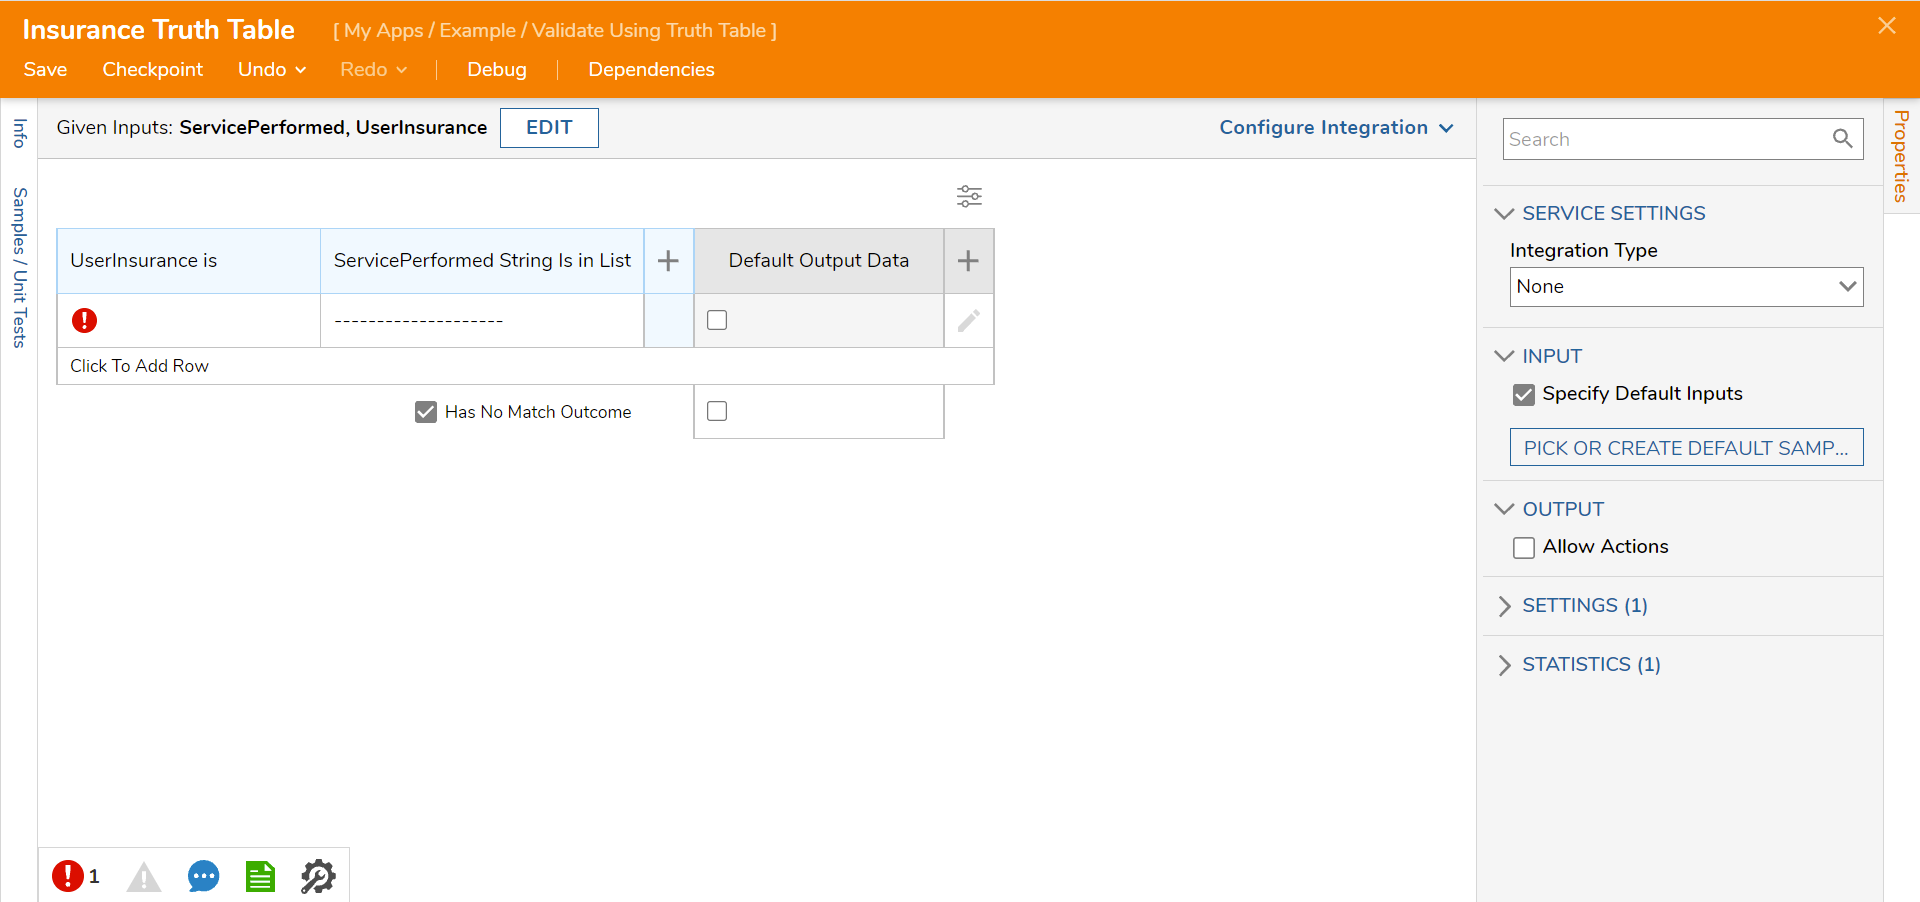
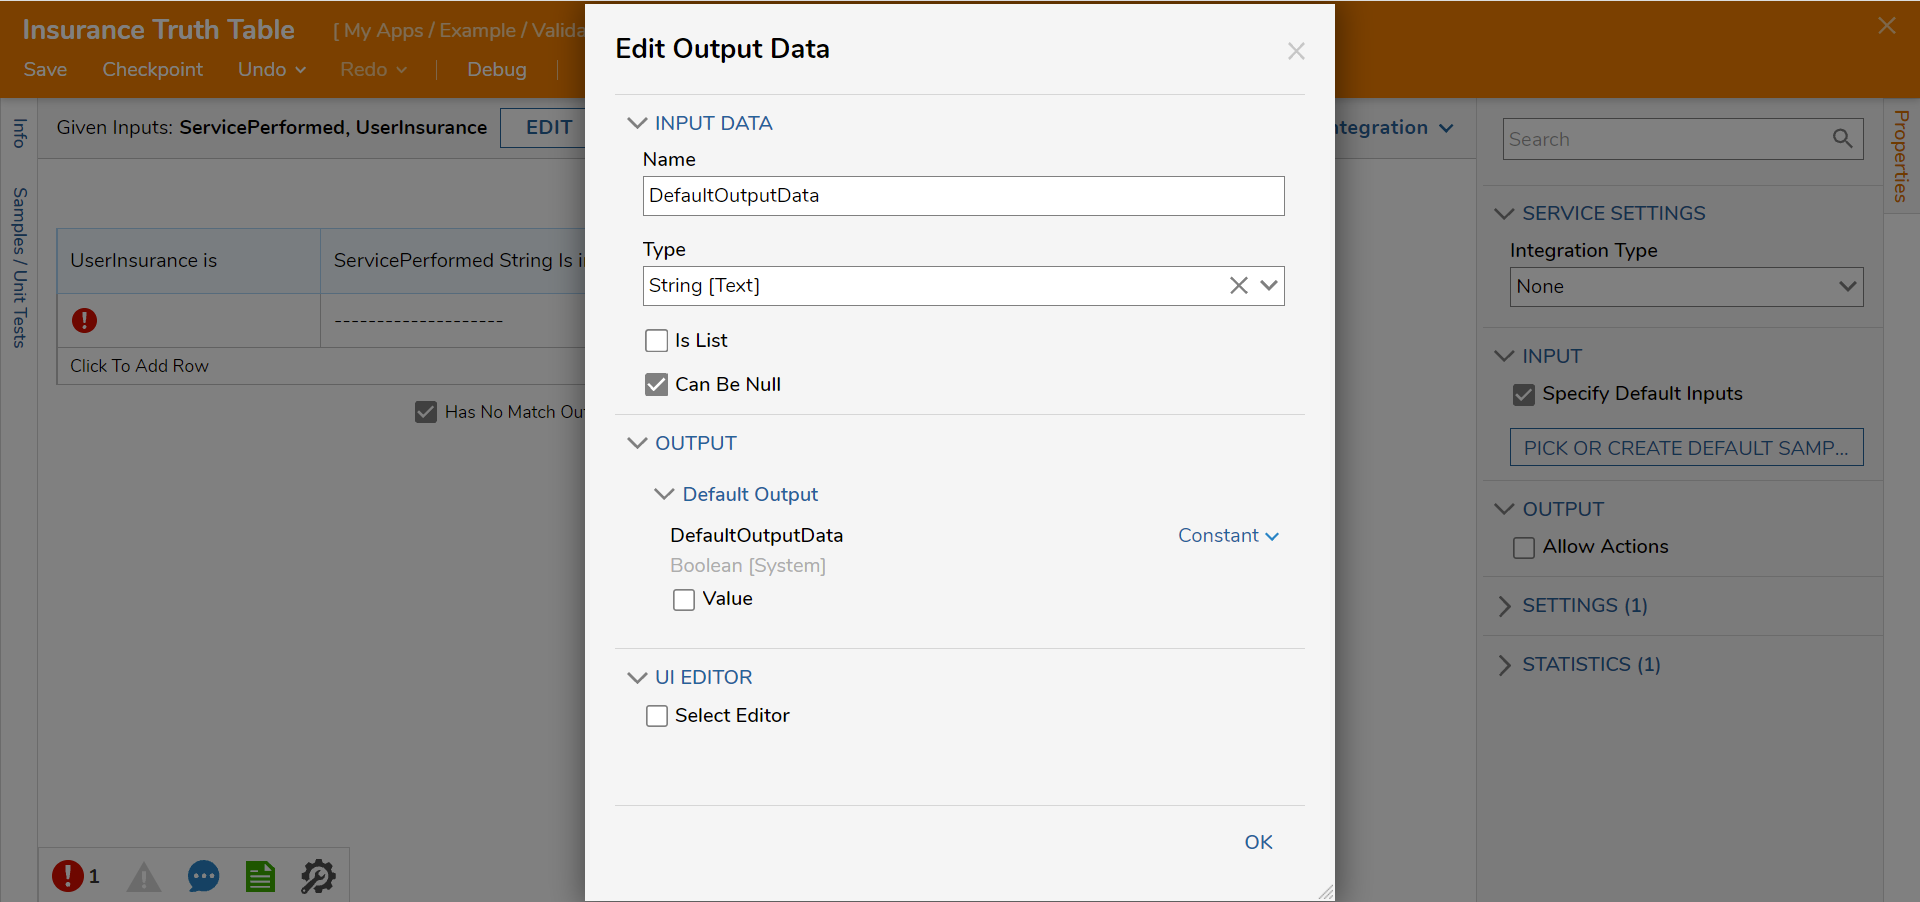
- Hover over the Default Output Data column and click the pencil icon. Change the Type to String [Text] and select the Can Be Null option. Click OK.
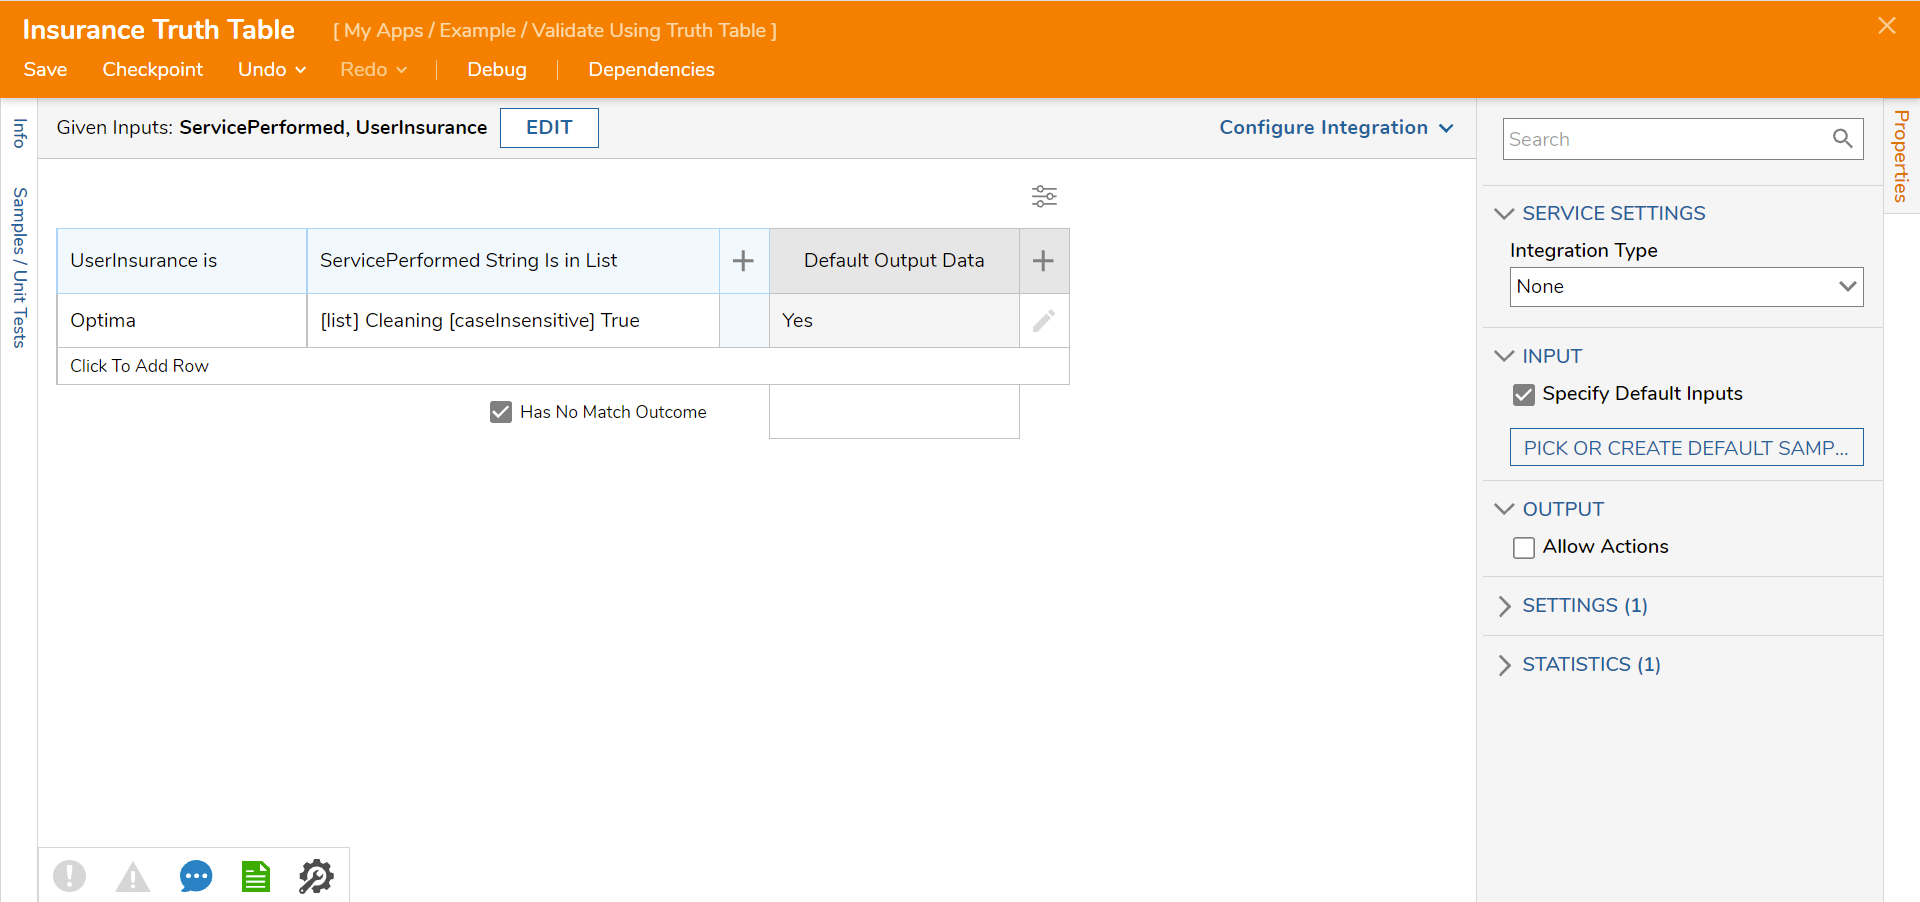
- In the first row, enter "Optima" as a UserInsurance, enter "Cleaning" as a String for Service performed with the case Insensitive option checked, and enter "Yes" as the Default Output Data.
- Click Click To Add Row to add another row. In the second row, enter "Blue Anthem" as a Provider, "Cleaning, Crow" as String list items with the case Insensitive checked, and "Yes" as the Output Data.
- Add another row with "Cigna" as the Provider, "Cleaning, Crown, Braces" as the String List items with case Insensitive checked, and enter "Yes" as the Output Data.
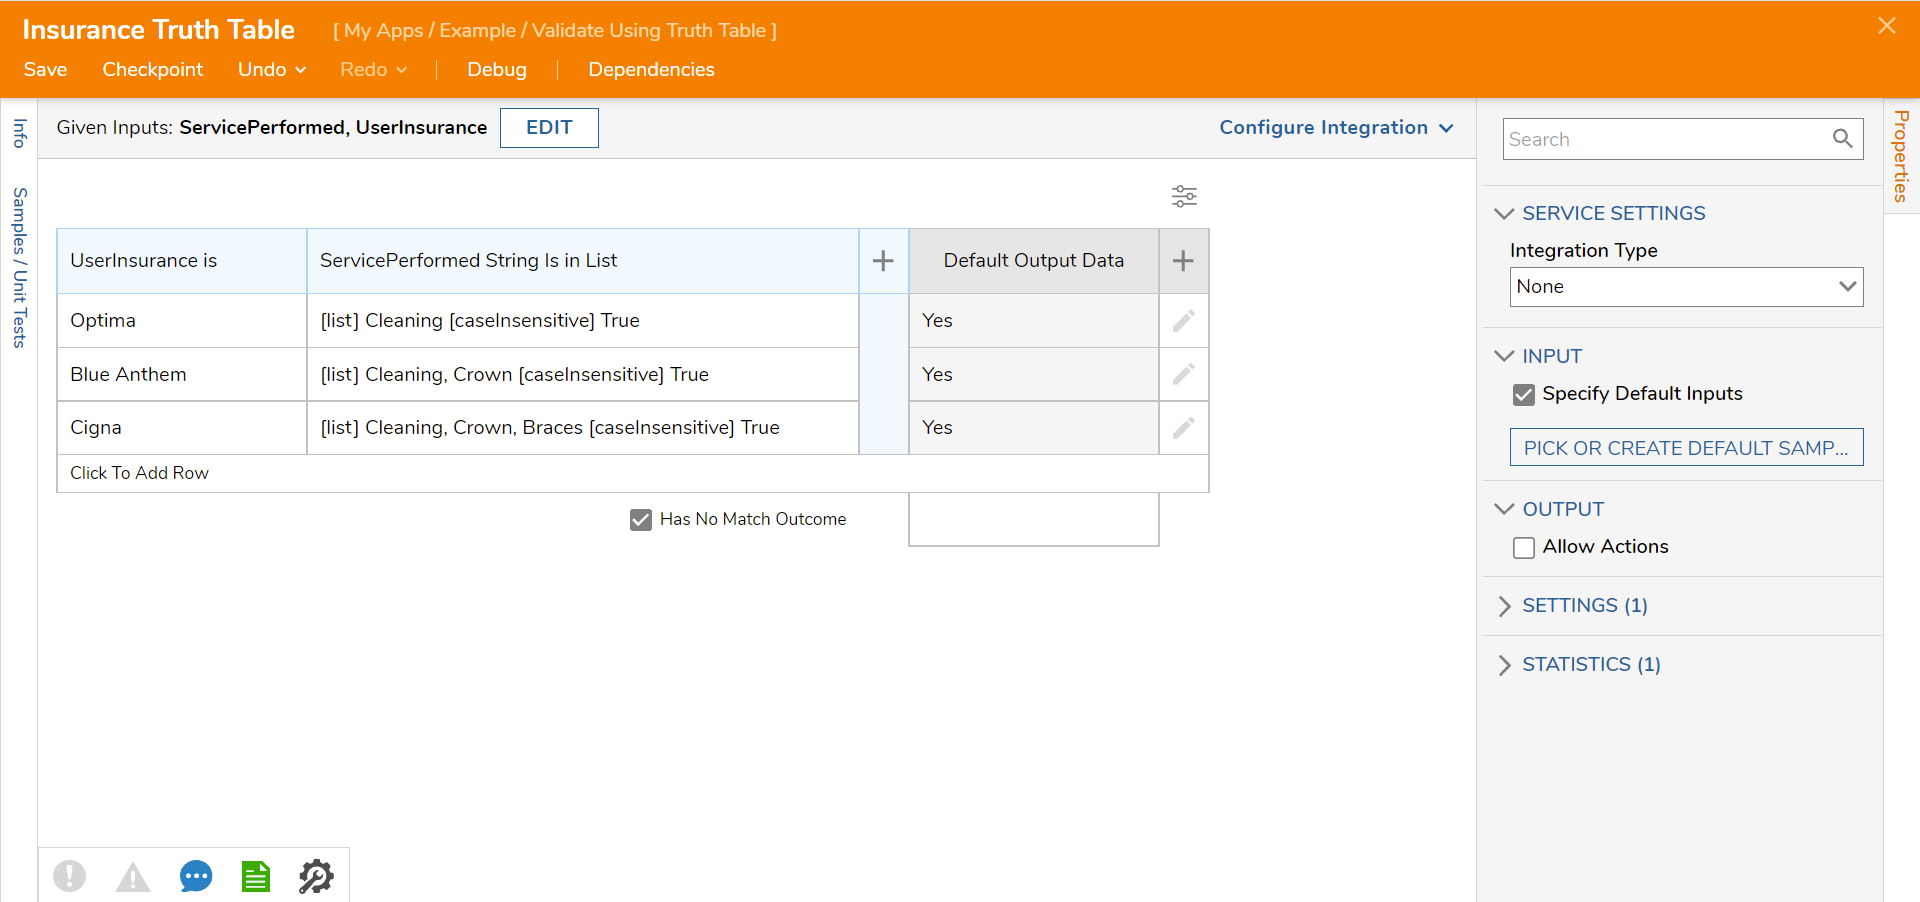
- In the cell next to the Has No Match Outcome option enter "Not Covered". Click Save and close the Truth Table.
- Click Edit Input Mappings.
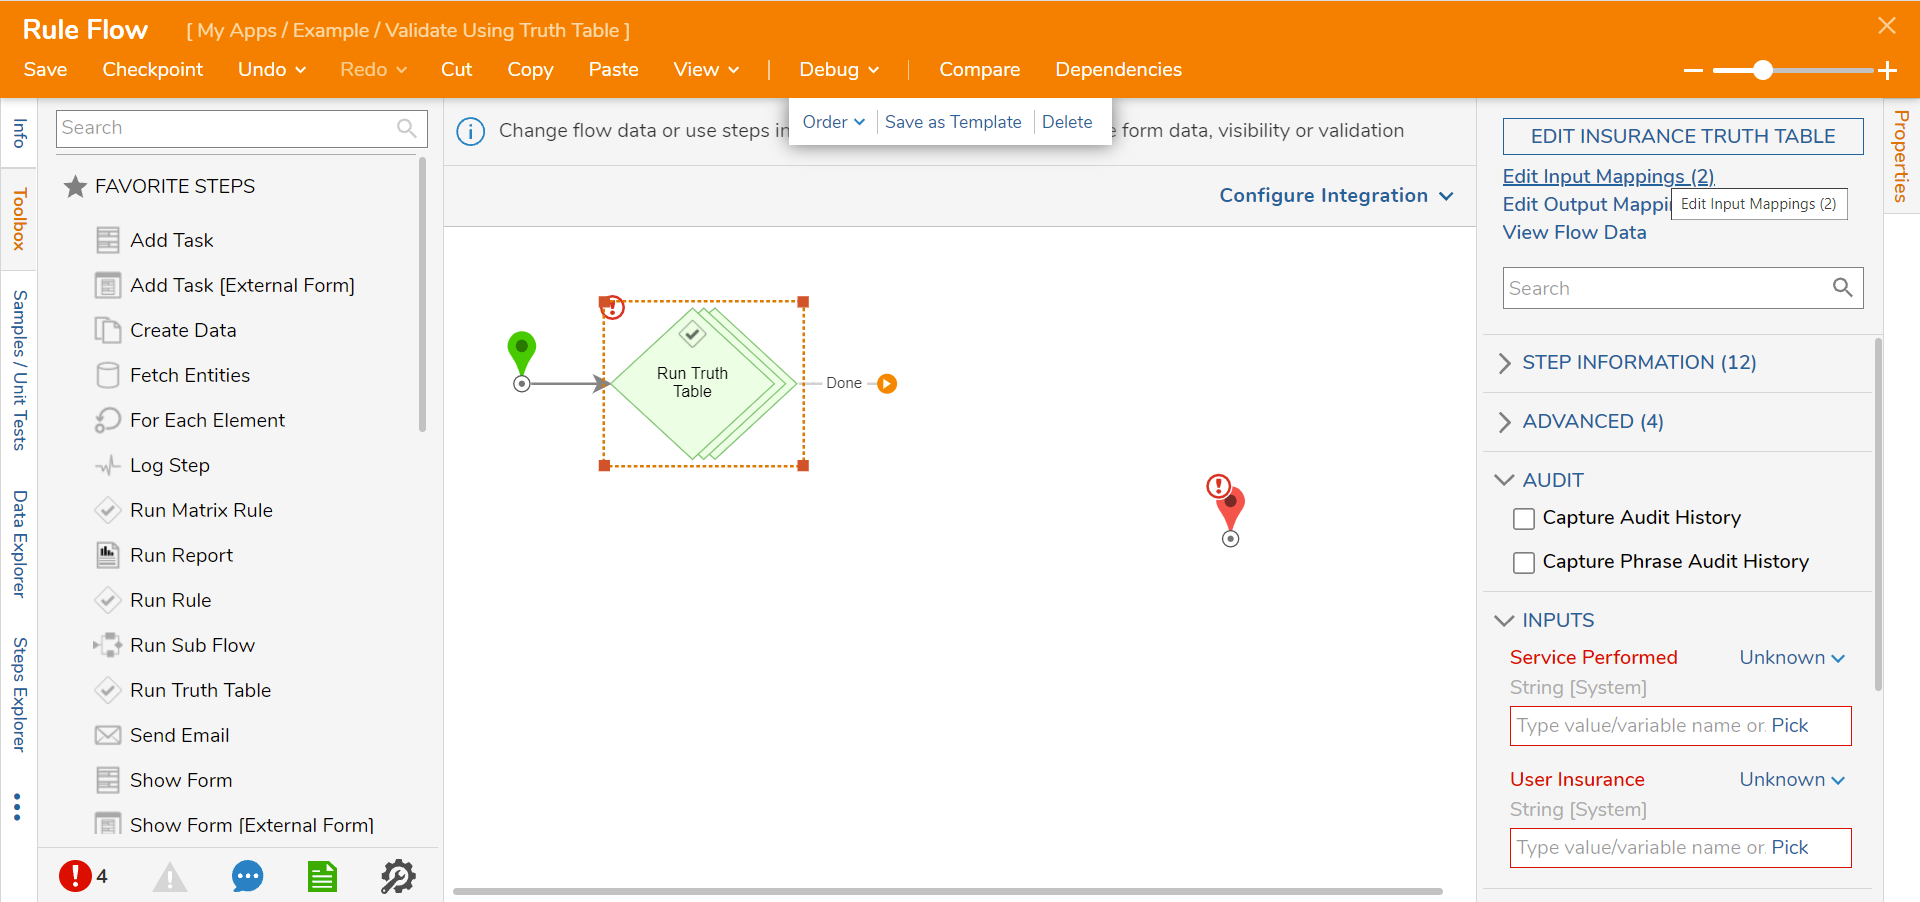
- Under the Form Data category, map ServicePerformed [Combo] SelectedItem to Service Performed and UserInsurance [Combo] SelectedItem to User Insurance. Click OK.
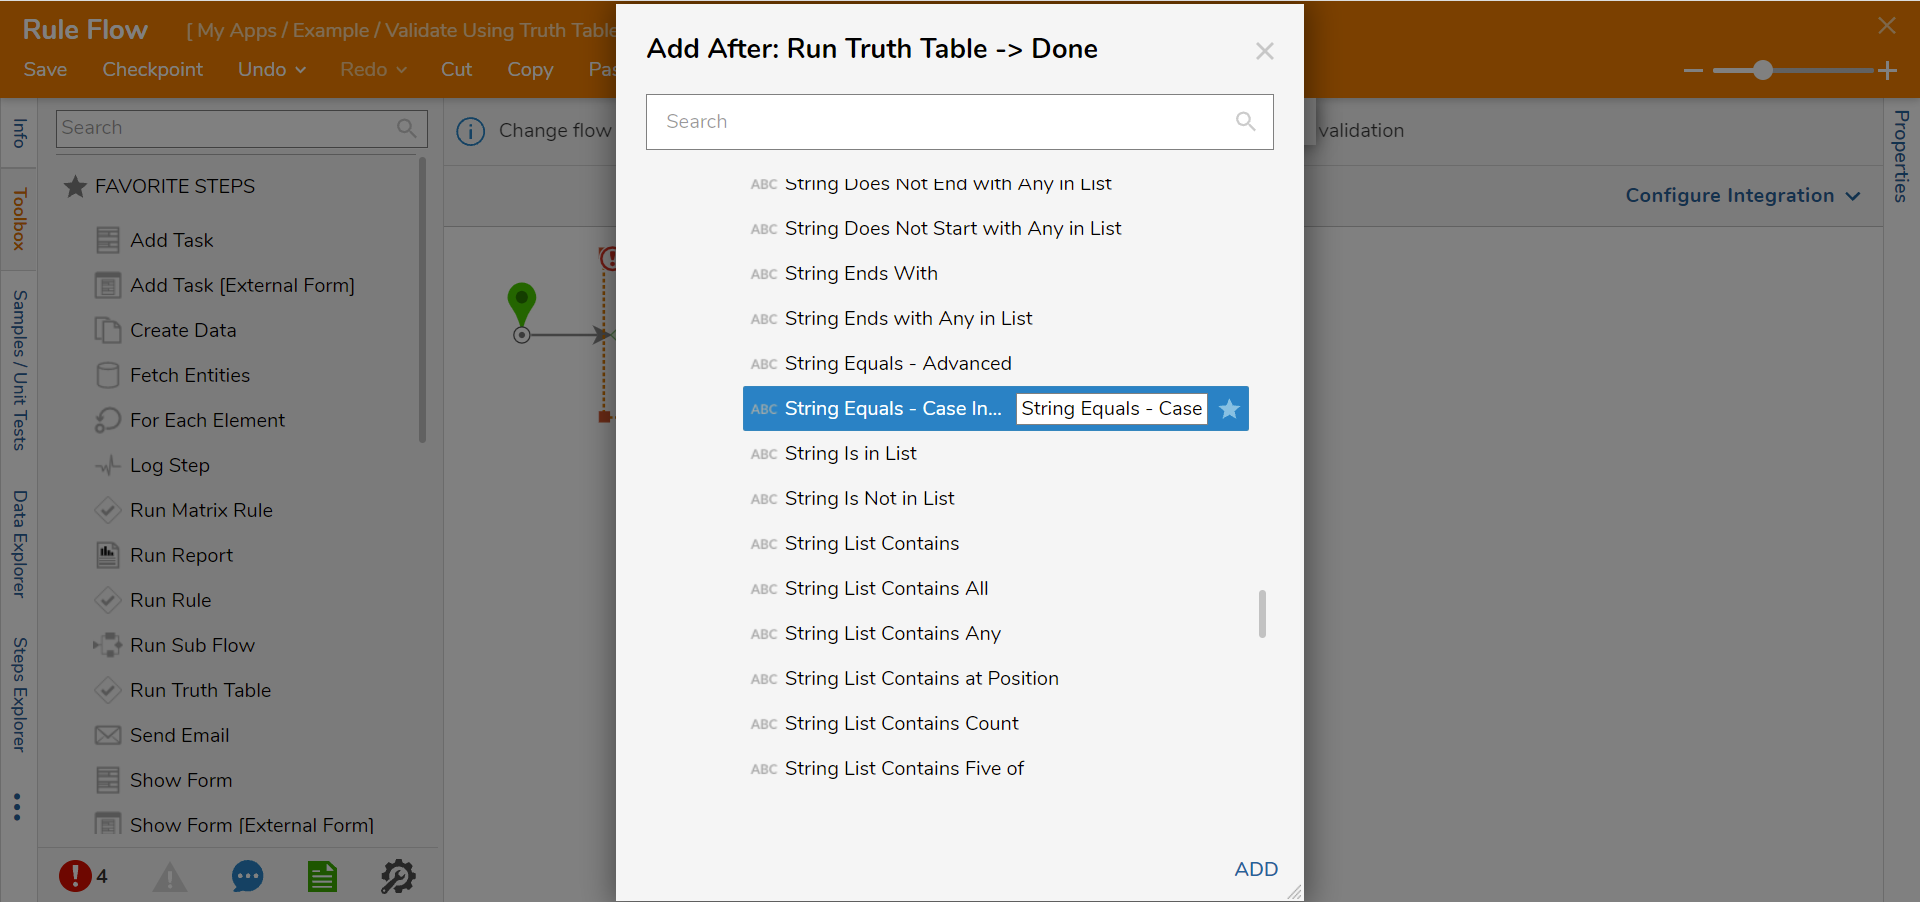
- Click the Done path and navigate to All Steps [Catalog] > Data > Text. Select the String Equals - Case Insensitive step and click ADD.
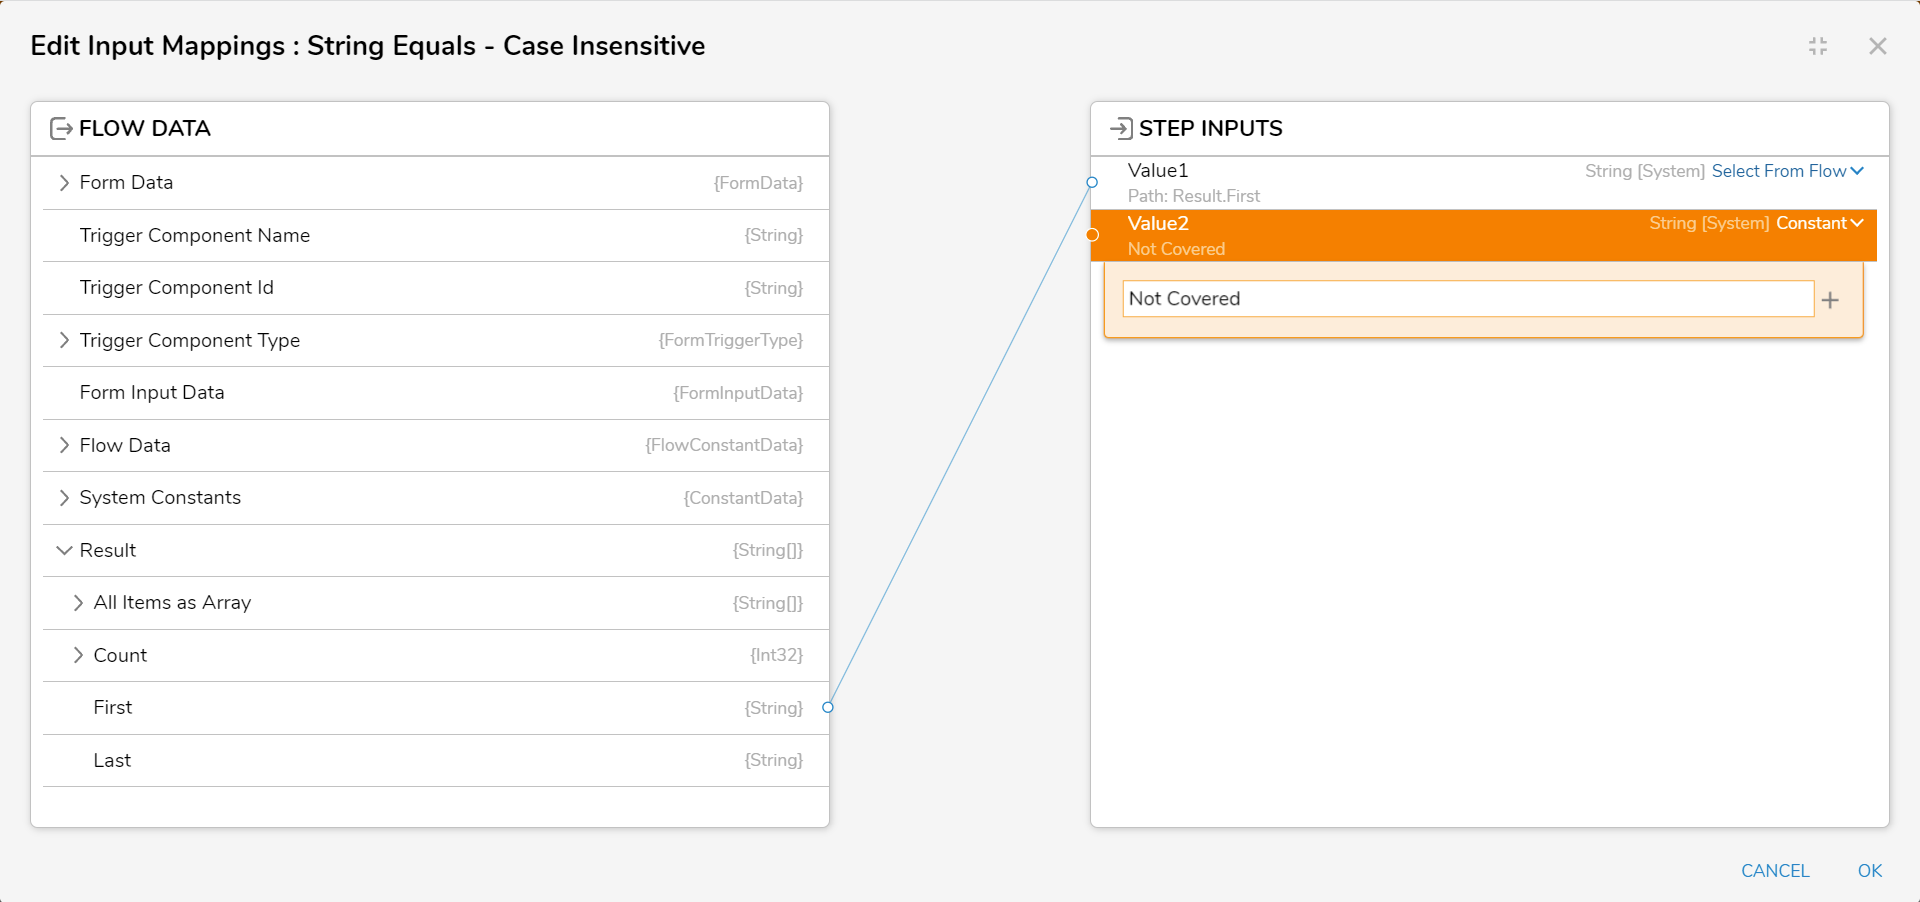
- Click Edit Input Mappings and map Result.First to Value1 and enter "Not Covered" as a Constant value for Value2. Click OK.
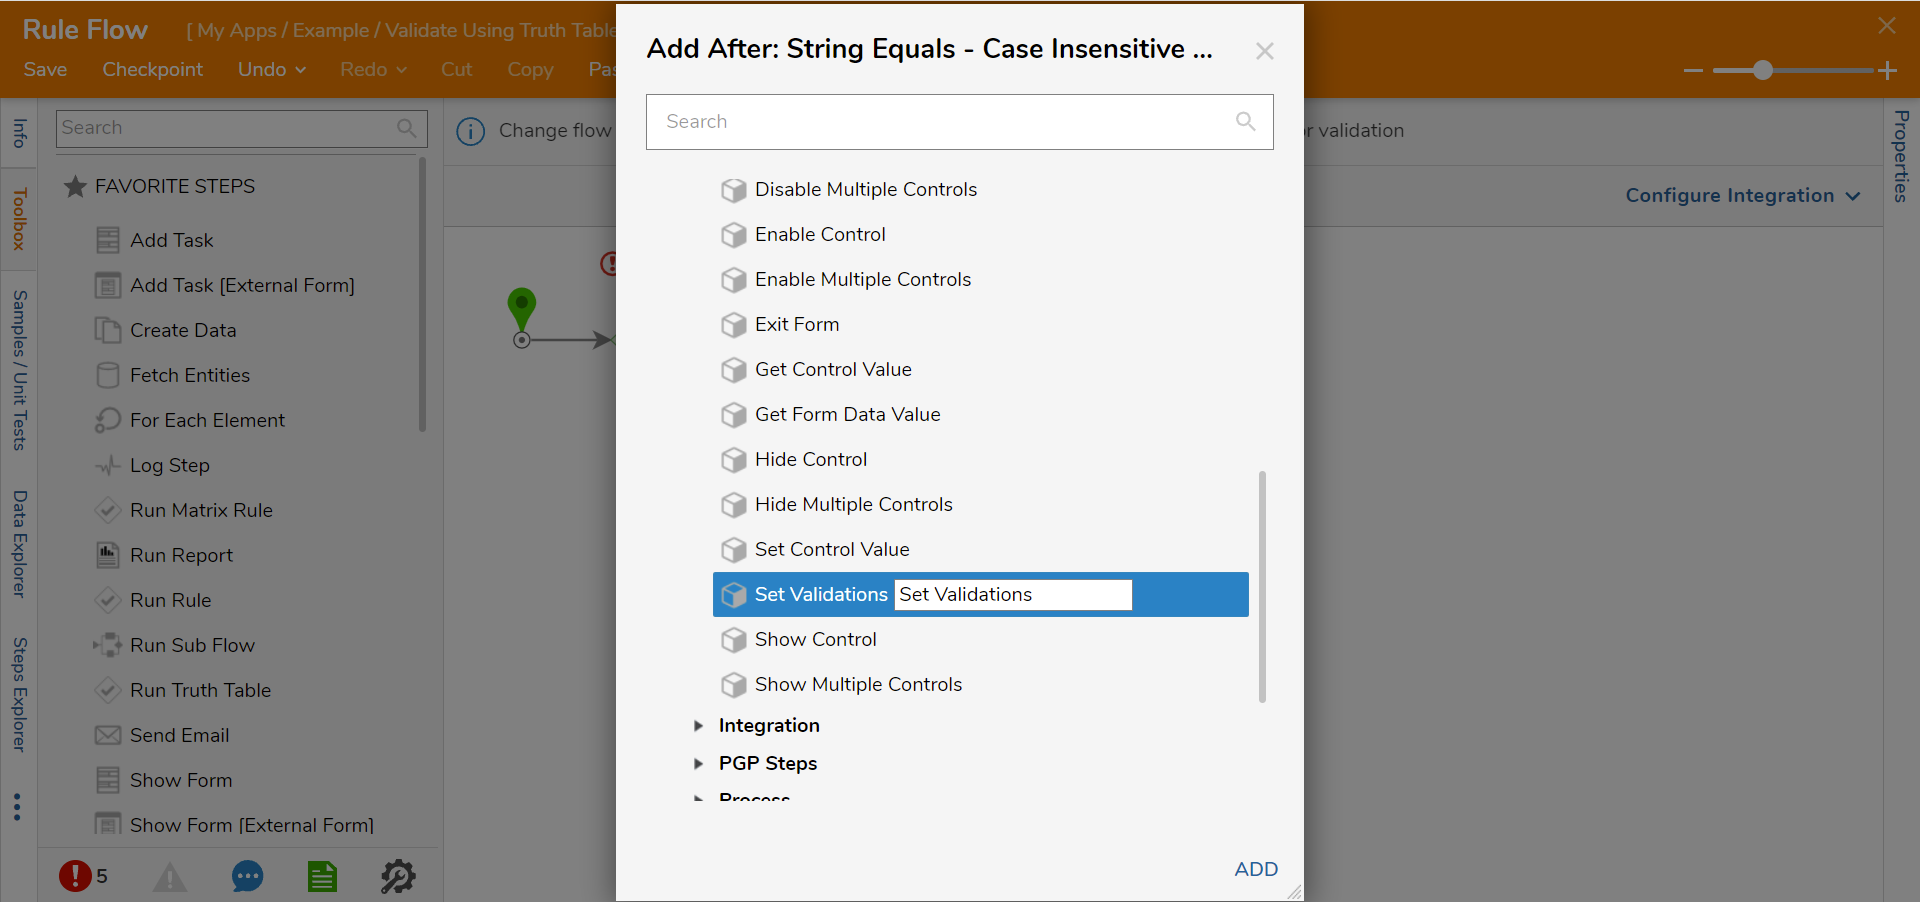
- Click the True path and navigate to All Steps [Catalog] > Form Rules. Select the Set Validations step and click ADD.
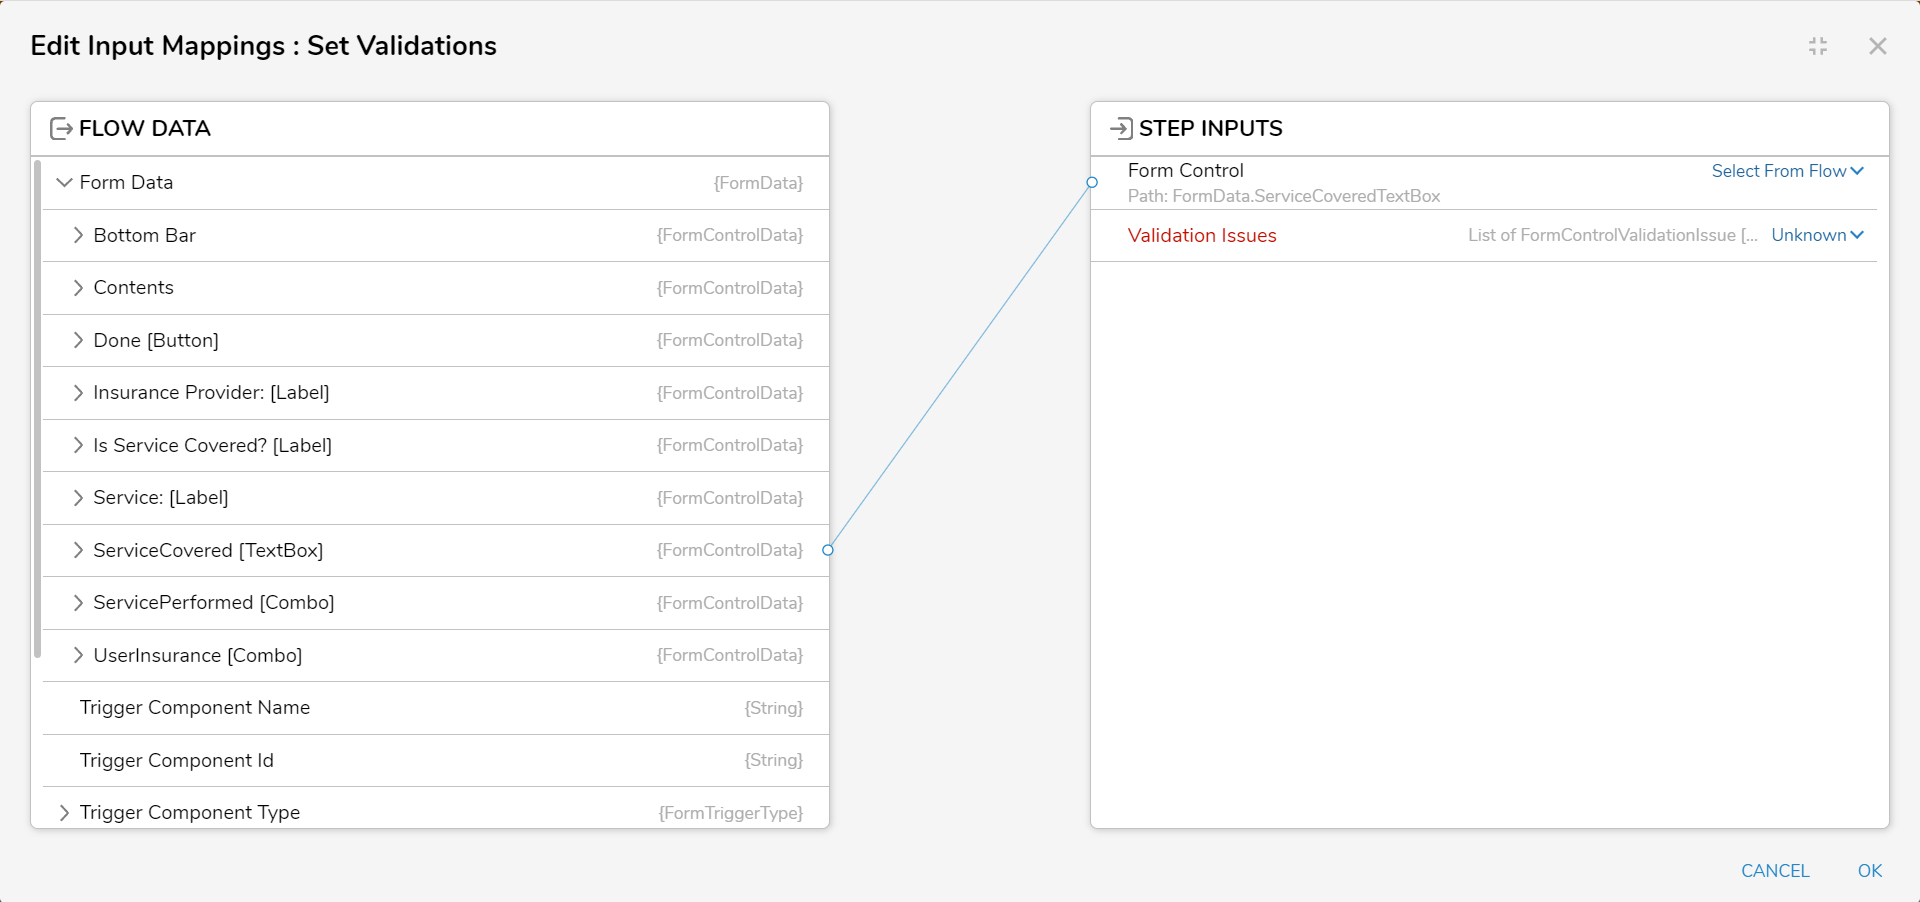
- Click Edit Input Mappings. Map FormData.ServiceCoveredTextBox to Form Control.
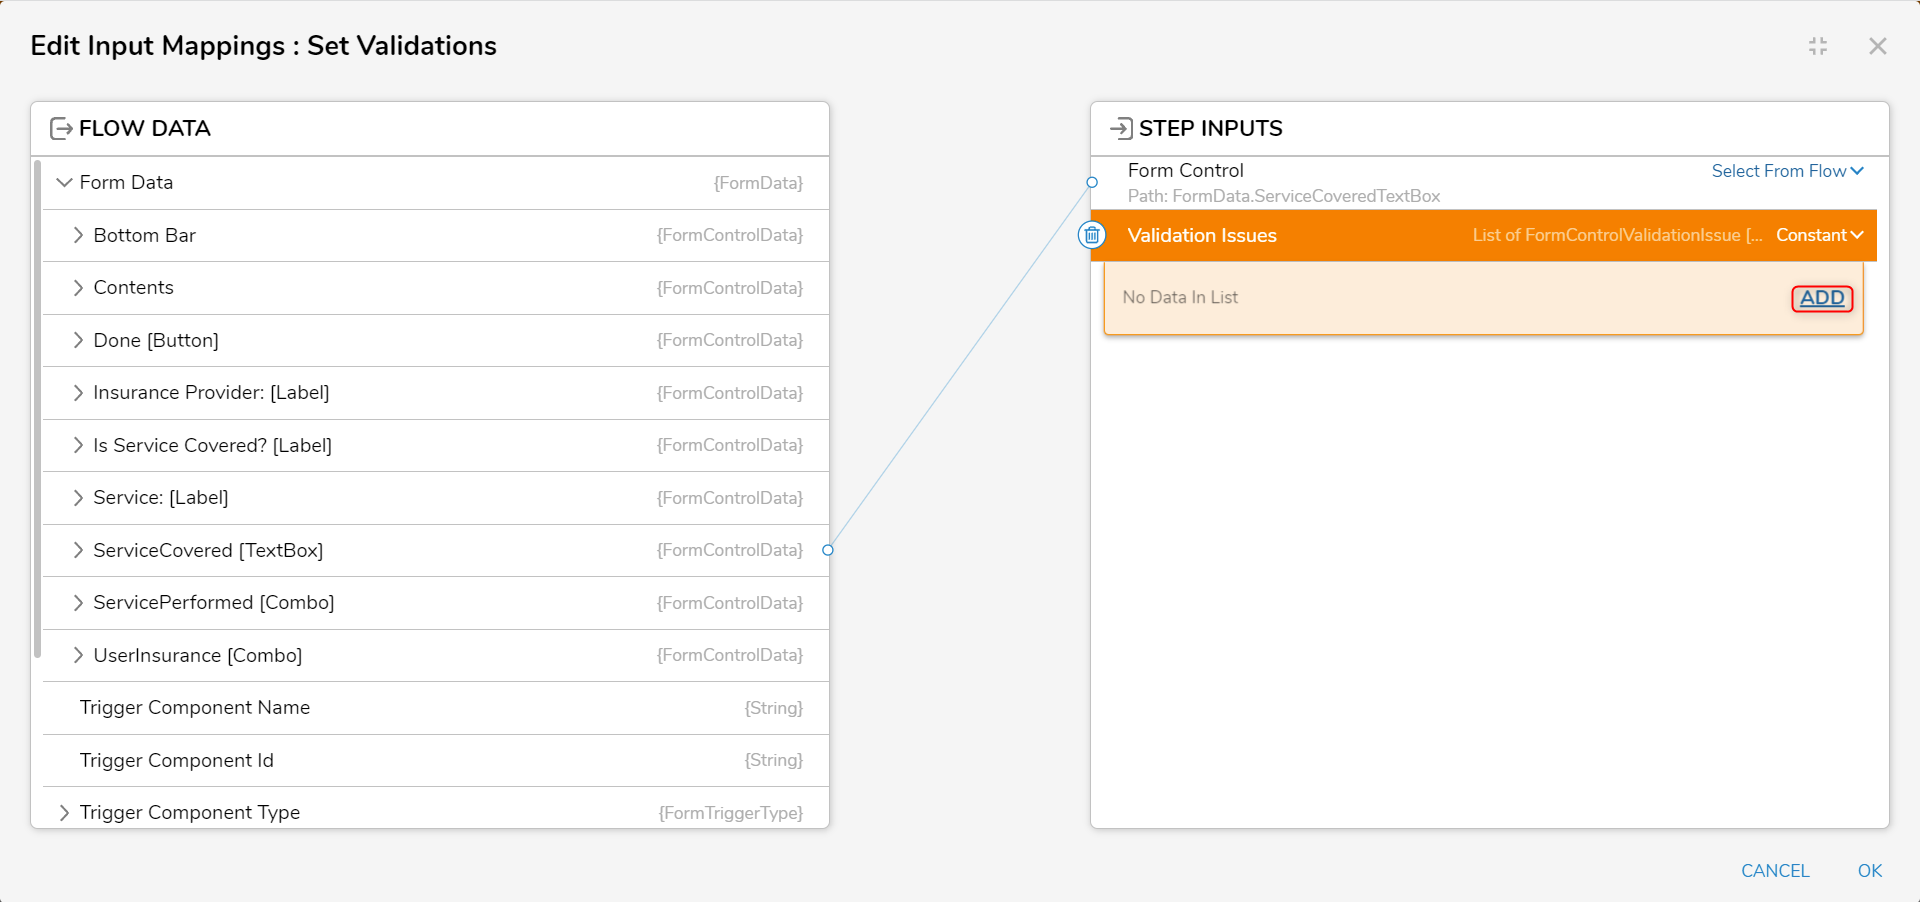
- Change Validation Issues to Constant and click ADD.
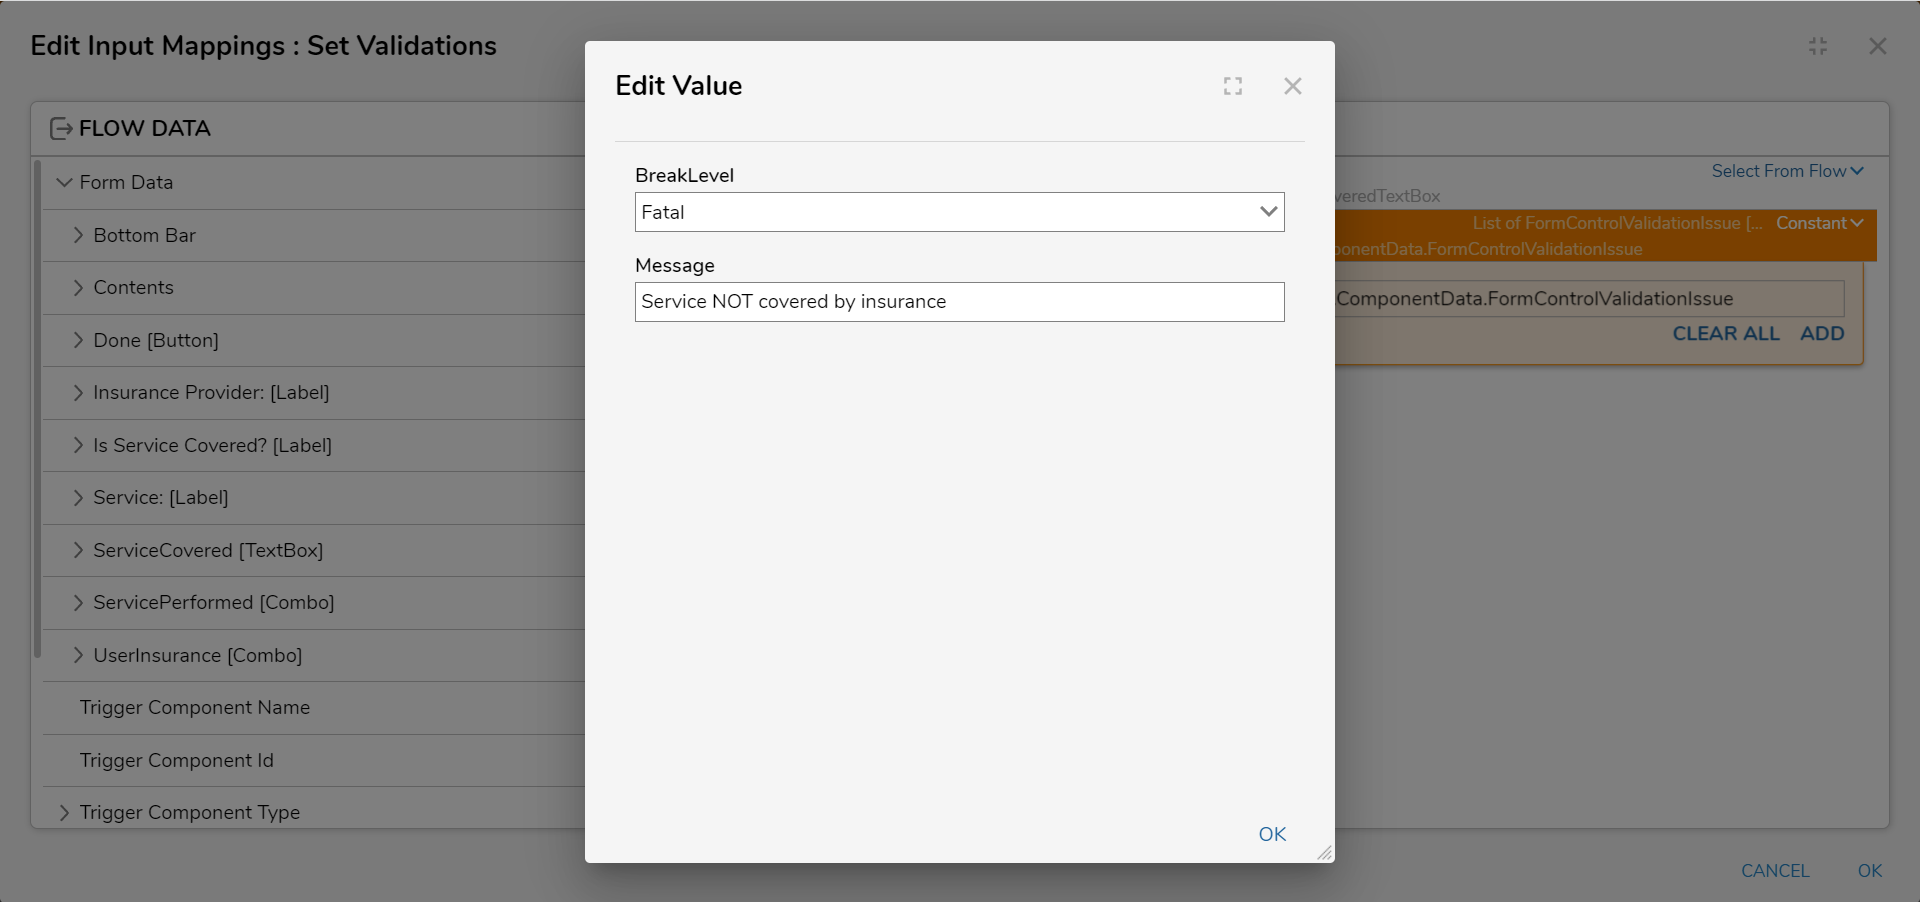
- Click the drop-down list under BreakLevel and select Fatal and enter "Service NOT covered by insurance" in the Message field. Click OK. Click OK to close the Input Mappings window.
- Click the Done path and navigate to All Steps [Catalog] > Form Rules. Select Set Control Value and click ADD.
- Click Unknown and select Select From Flow. Click Form Data, select ServiceCovered [TextBox], and click DONE.
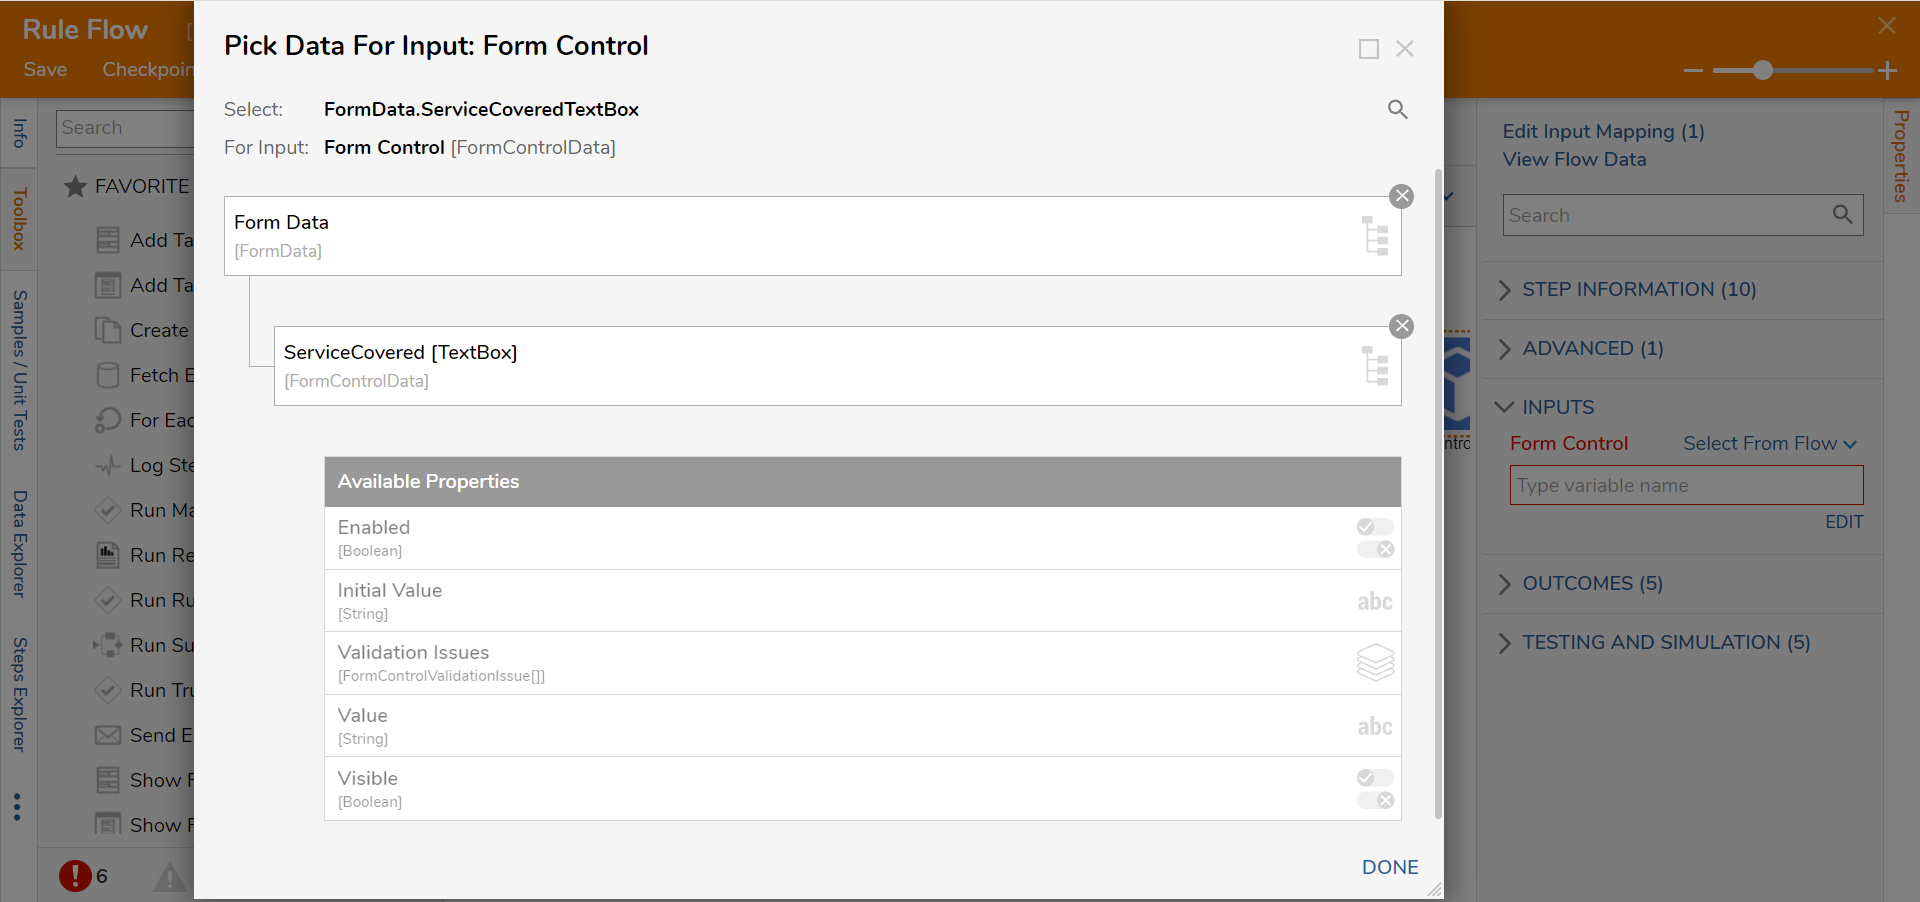
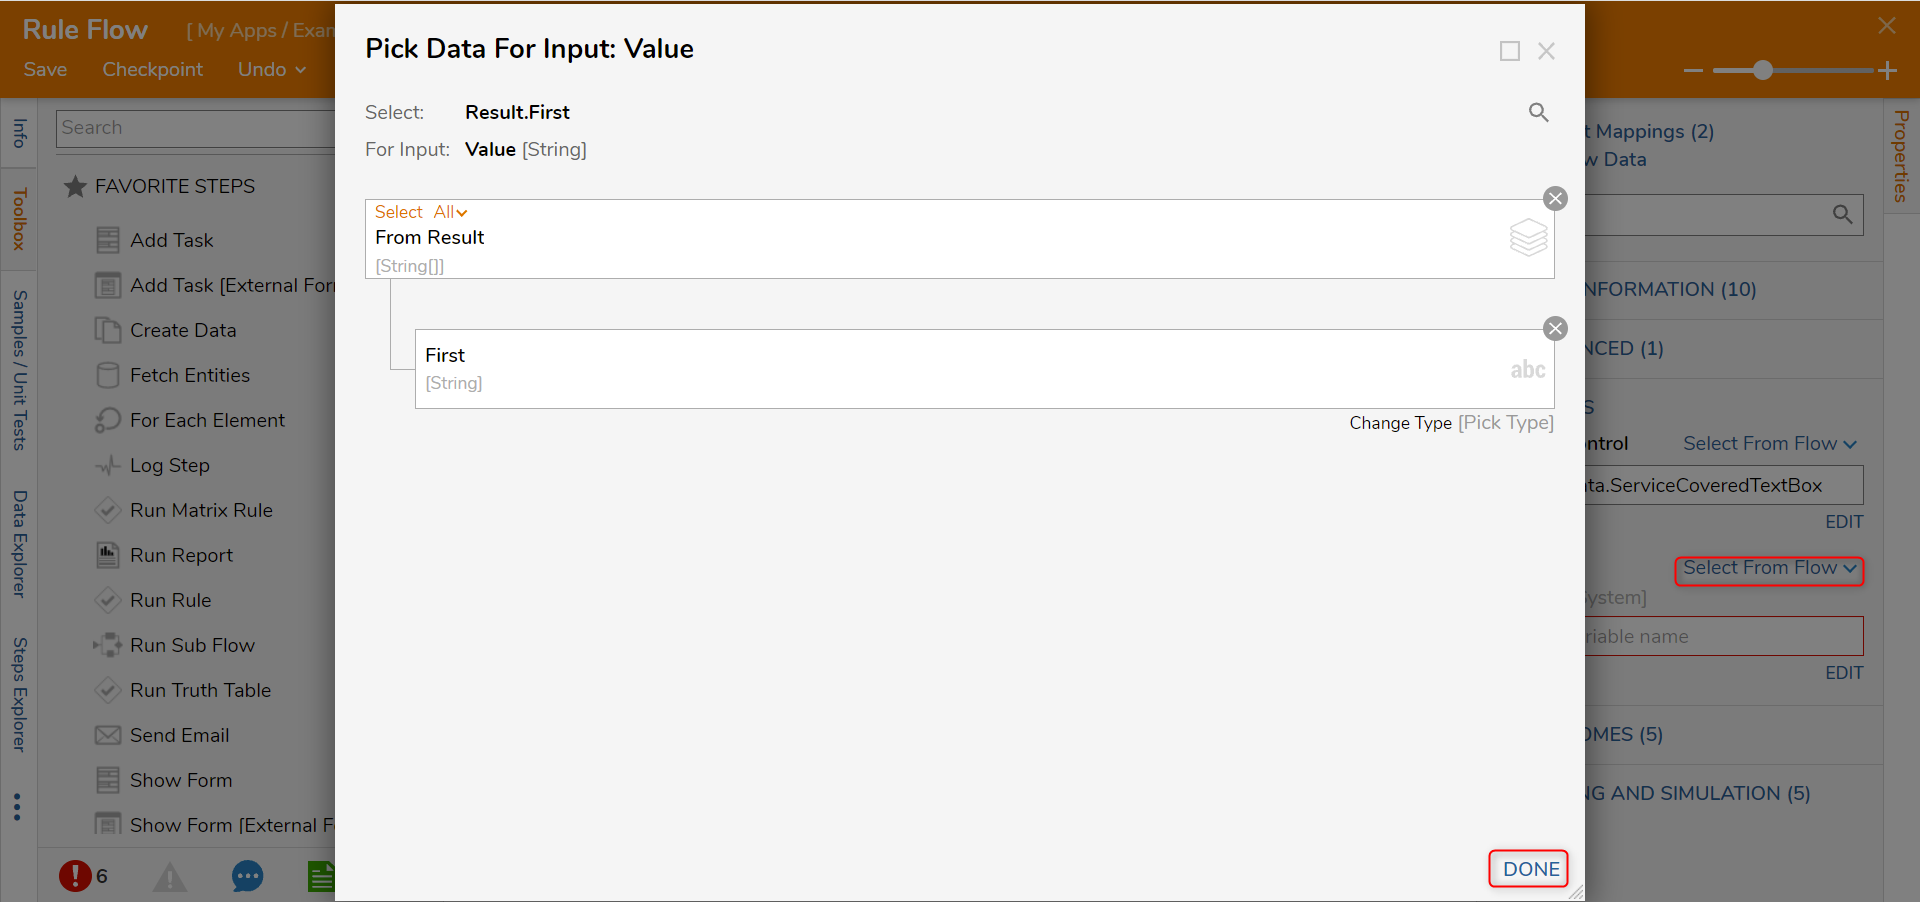
- Click Select From Flow for the Value field and map Result.First. Connect the Done path to the End step.
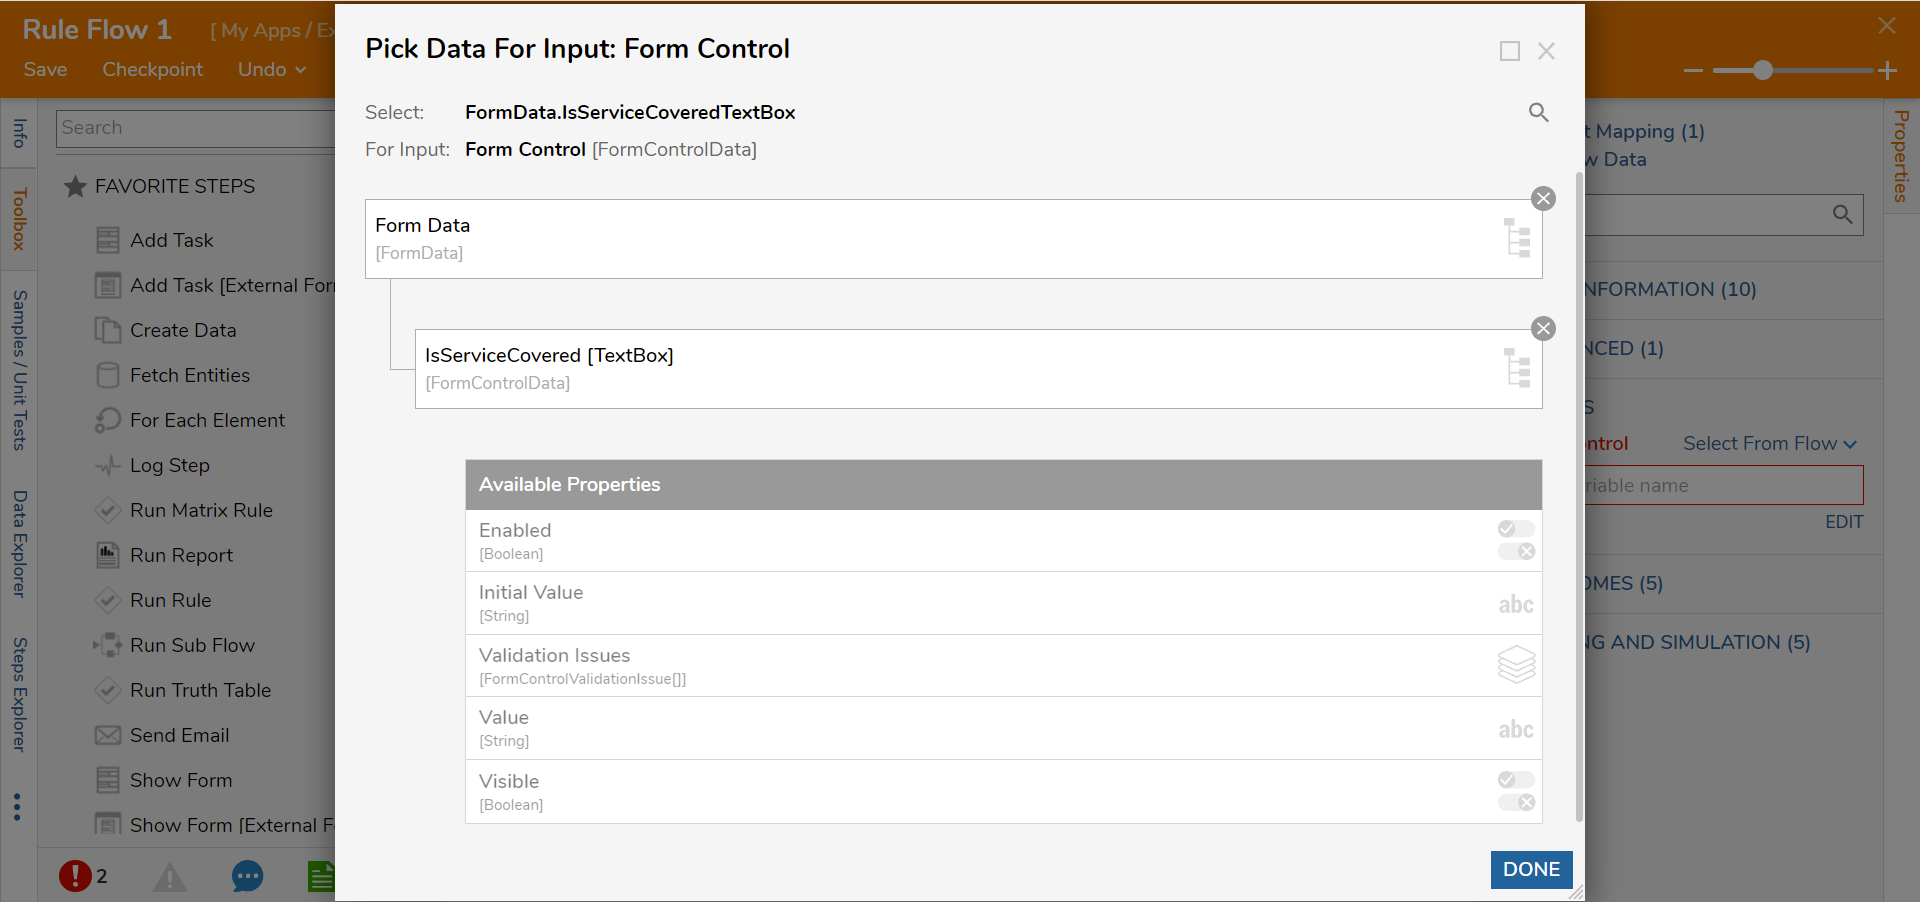
- Click the False path and navigate to All Steps [Catalog] > Form Rules. Select the Clear Validation step and click ADD. Map FormData.ServiceCoveredTextBox to the Form Control.
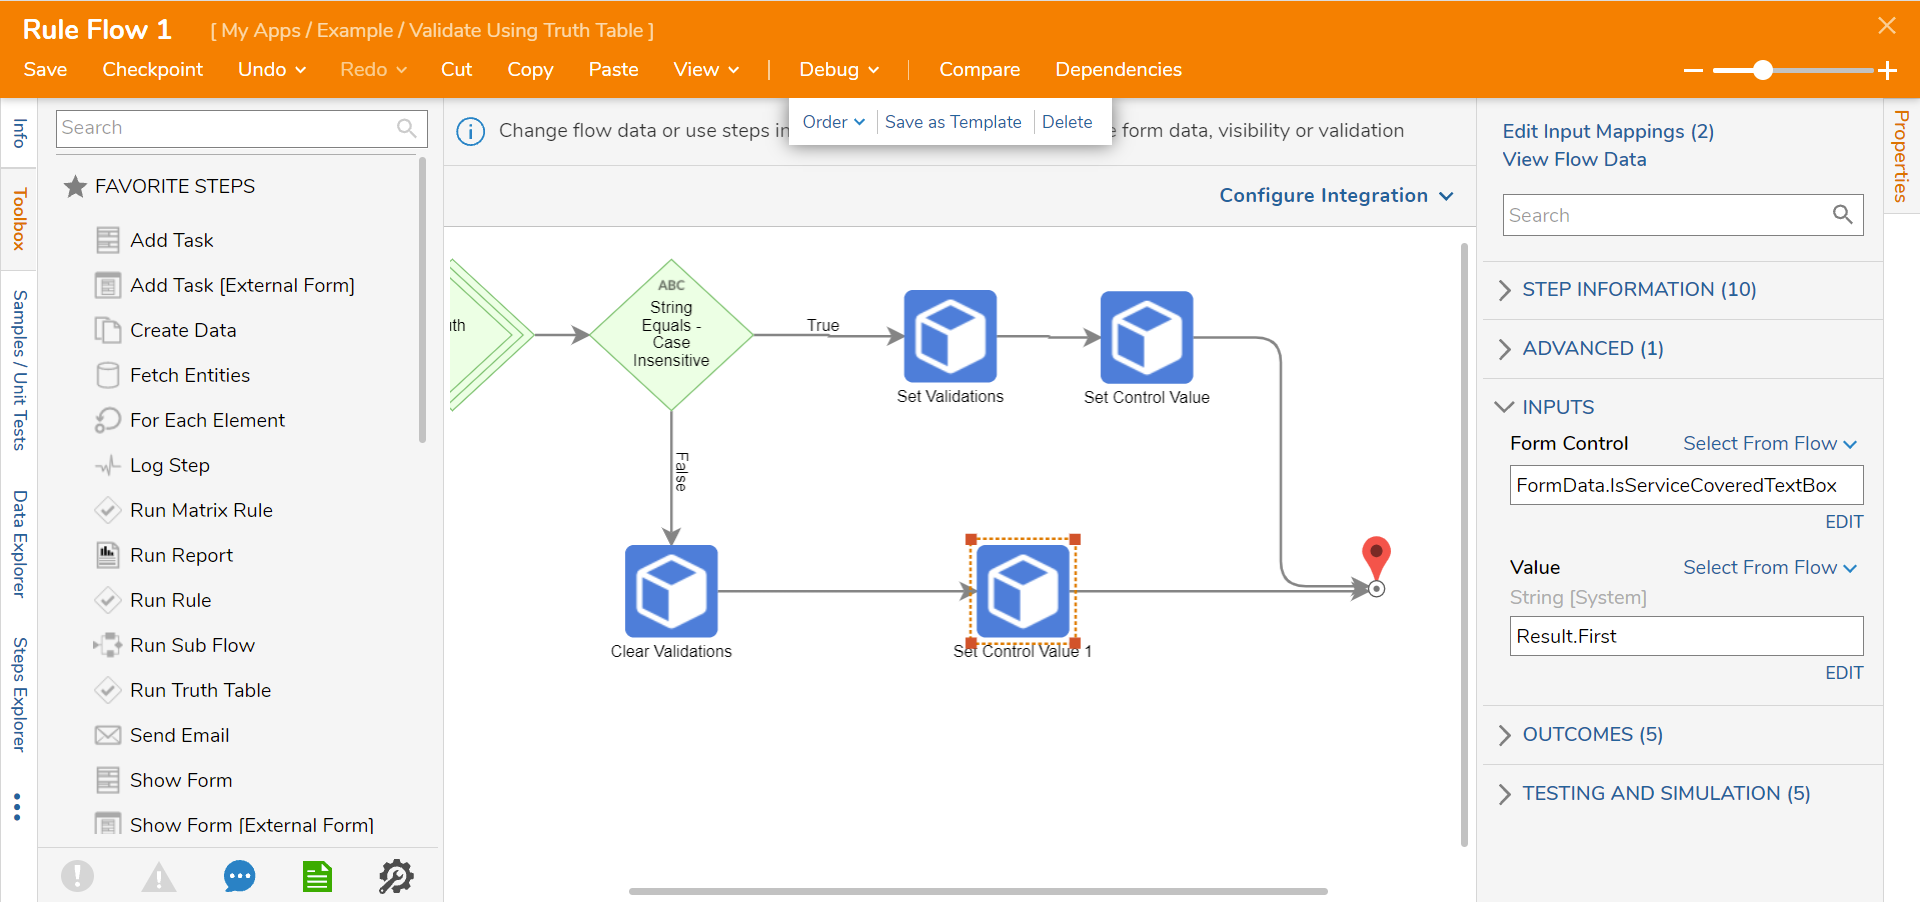
- Add a Set Control Value step to the Done path. Map FormData.ServiceCoveredTextBox to the Form Control and Result.First to Value. Connect the Done path to the End step. Click Save and close the Rule Flow.
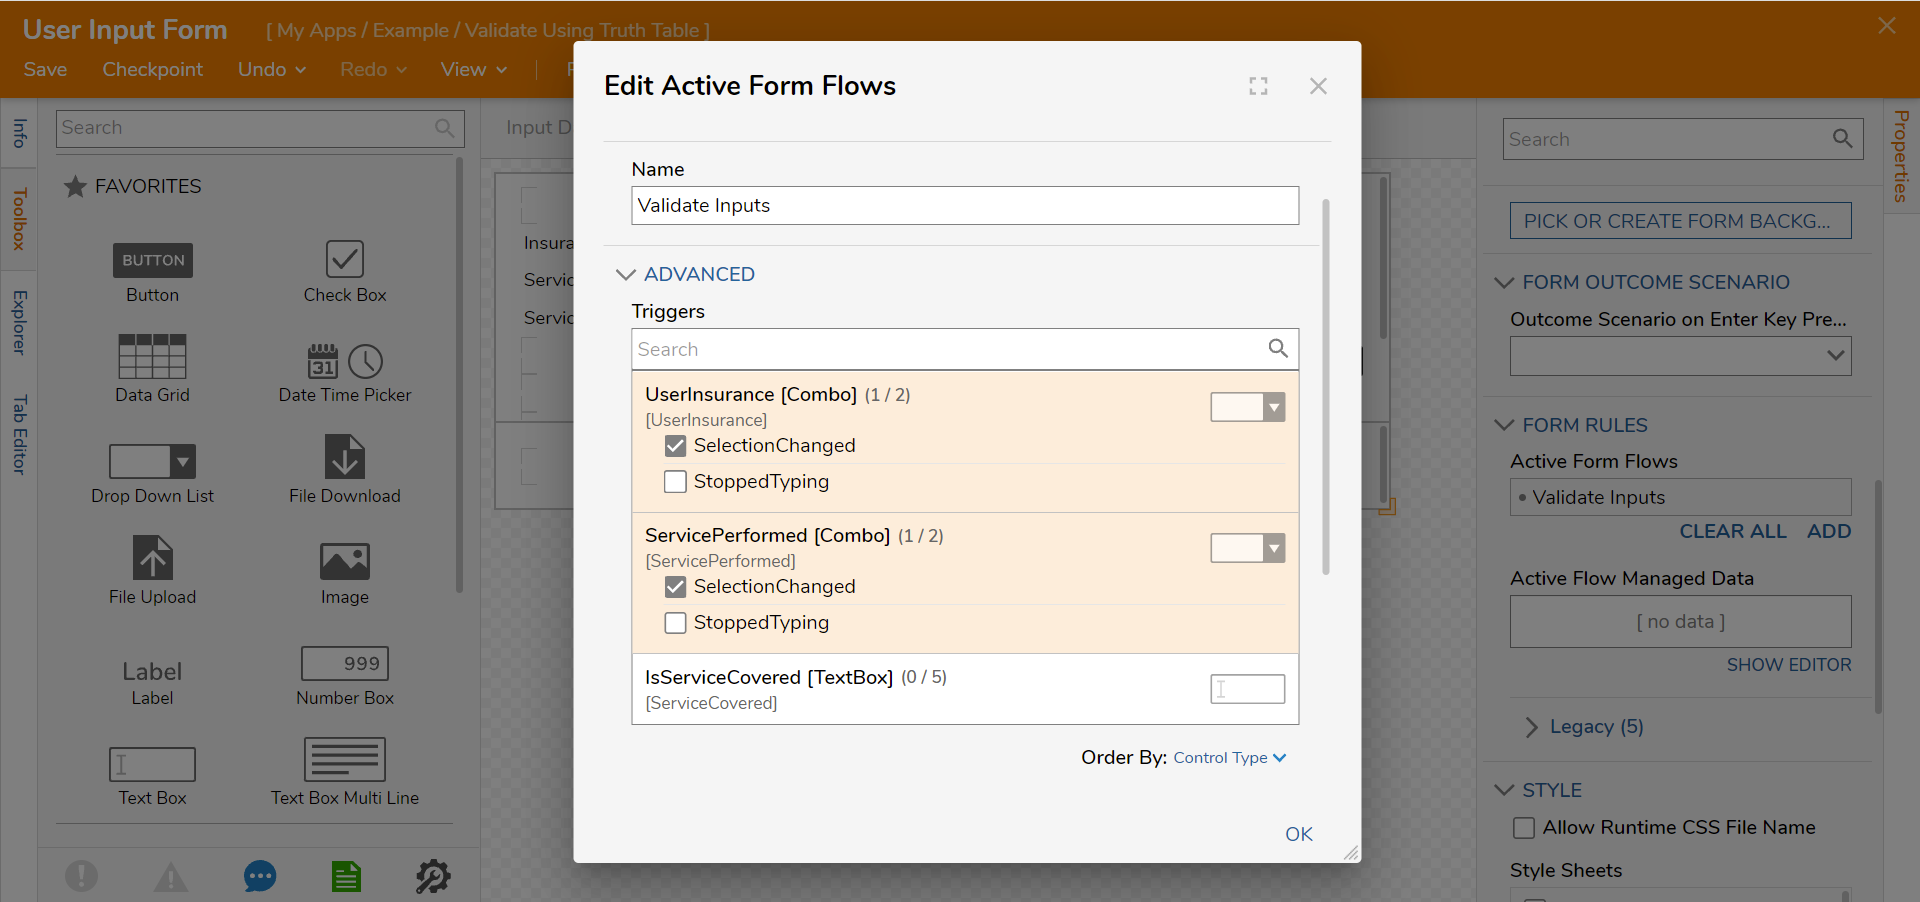
- Select the SelectionChanged option for ServicePerformed and UserInsurance drop-down lists. Click OK.
- Save the Form and close the Form Designer. Connect the Form step to the End step. Click Save.
Debug
- On the top action panel, click Debug. Click START DEBUGGING.
- Select Optima and then select Cleaning to see that the Service Covered Text Box changes to Yes. Selecting a different Insurance Provider and selecting a different Service will result in Not Covered with a validation on the Text box.
