Overview
When creating or editing a Group, the Linked Groups setting is an option to associate one Group with another. All of the Accounts in the selected Linked Group will have access to the same Assignments and objects as the Group it is being associated with.
This example consists of an Account titled developer@example.com that will belong to the Developer Team Group and the Designers Group, and an Account titled sales@example.com that only belongs to the Designer Group. In the example, the Developer Team will be linked to the Designers Group. This will allow all Accounts within the Designers Group to see and access Folders available to the Developer Team.
Prerequisites:
Learn how to create an Account by reading the article Create a User Account.
Learn how to create a Group by reading the article Create a Group.
Learn how to create a Group by reading the article Create a Group.
Example
- Add the developer@example.com Account to the Developer Team Group.
- Then add both sales@example.com and developer@example.com to the Designer Group.Accessing the Decisions StudioOnly Accounts that are members of the Administrators Group or the Designers Group can access the Decisions Studio.
- Create a new Designer Folder by clicking the "+" sign next to FOLDERS on the top left of the screen.
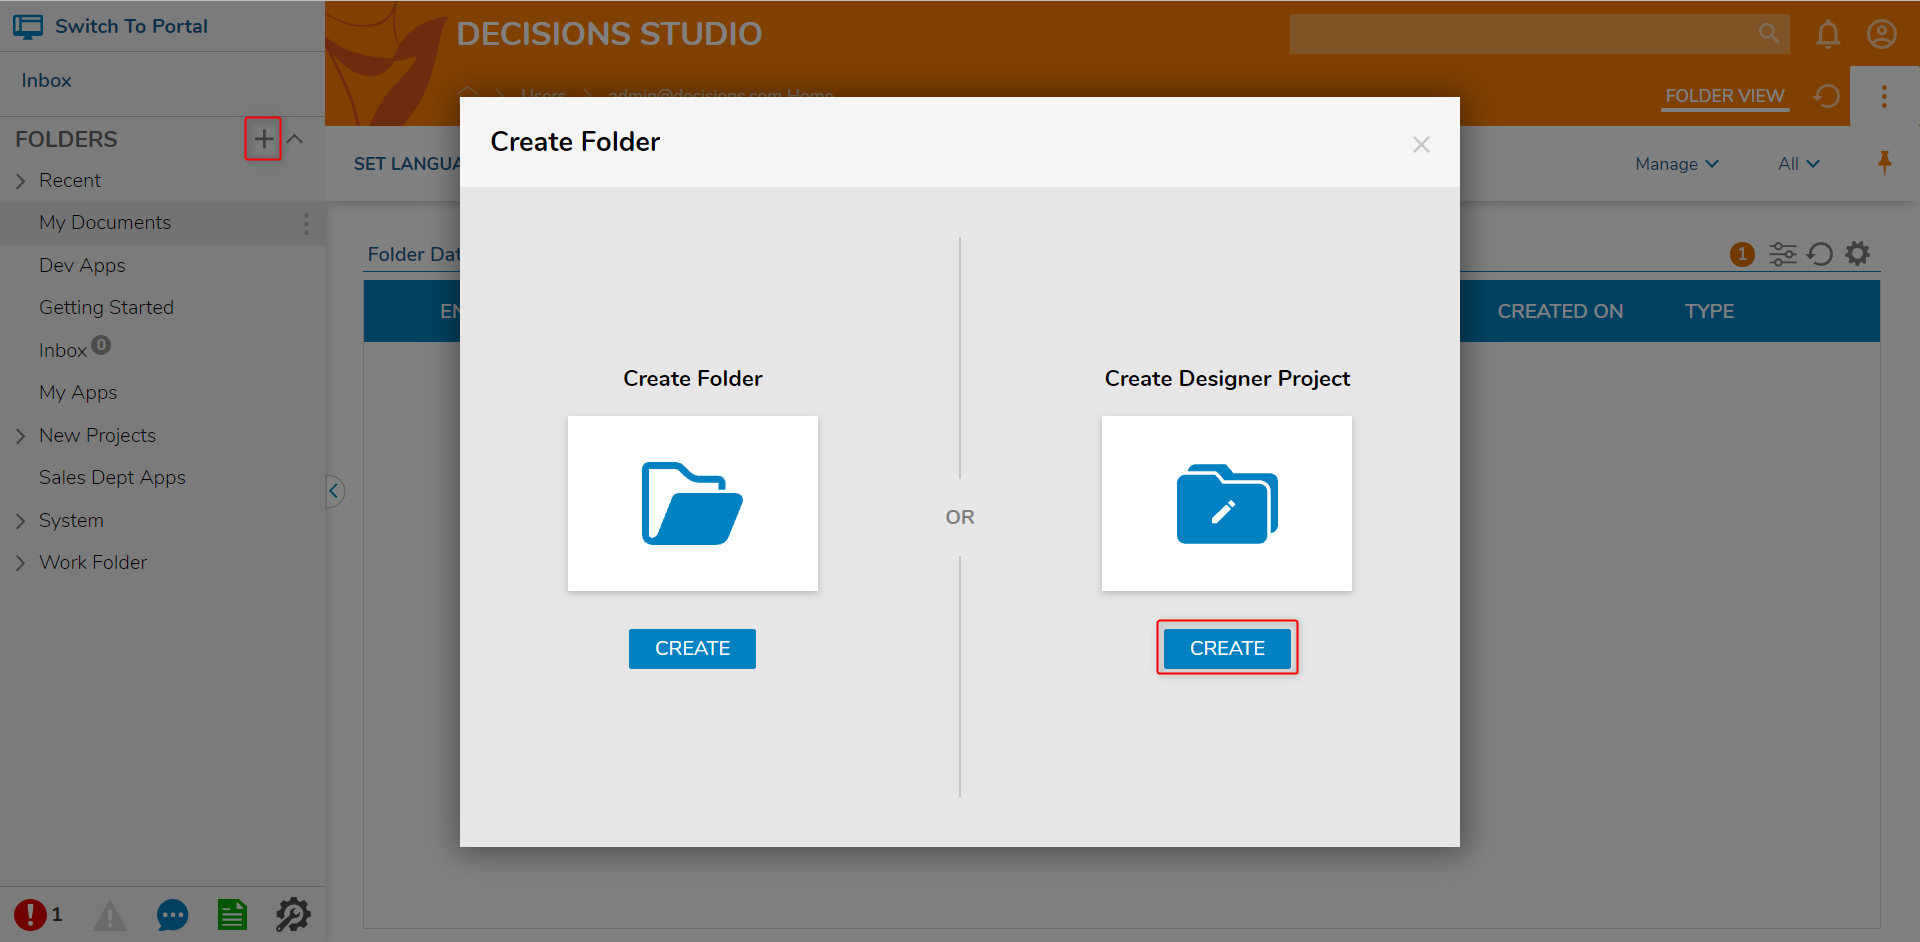
- Name the Folder Dev Apps, select the At Root checkbox, and then click CREATE.
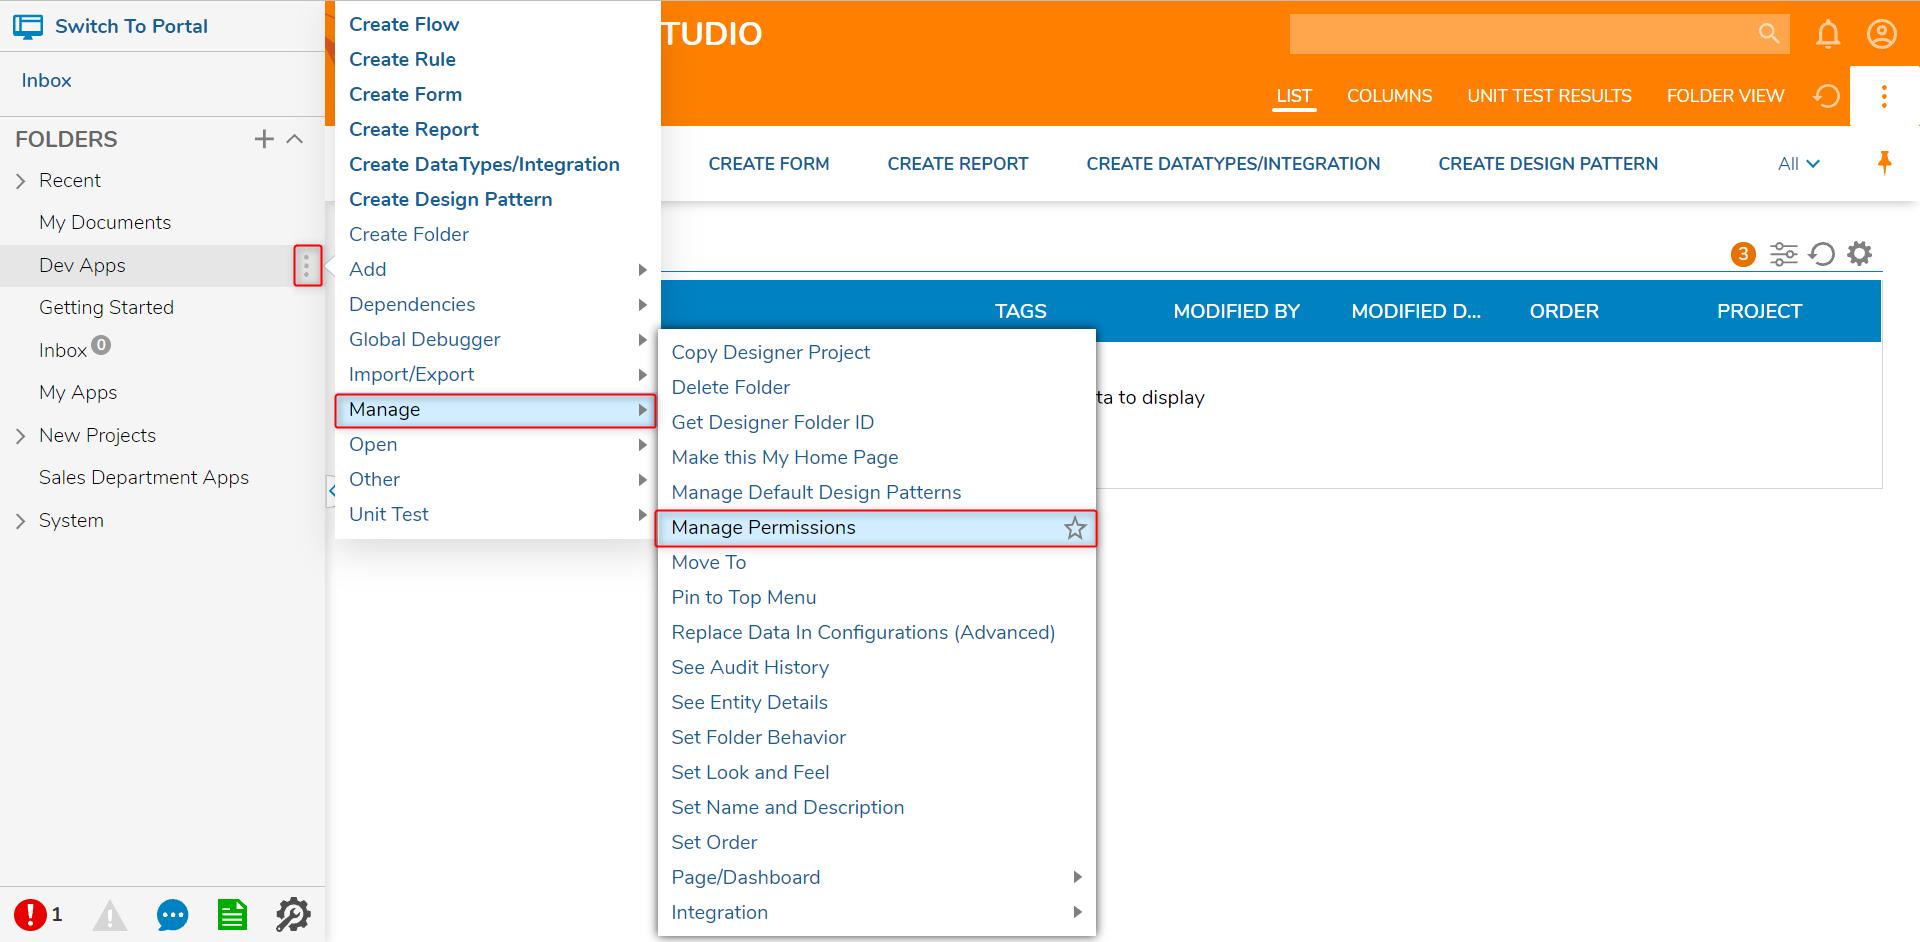
- Navigate to the new Dev Apps Folder.
- Once the Folder is selected, click the three dots to the right of the Folder name and go to Manage > Manage Permissions.
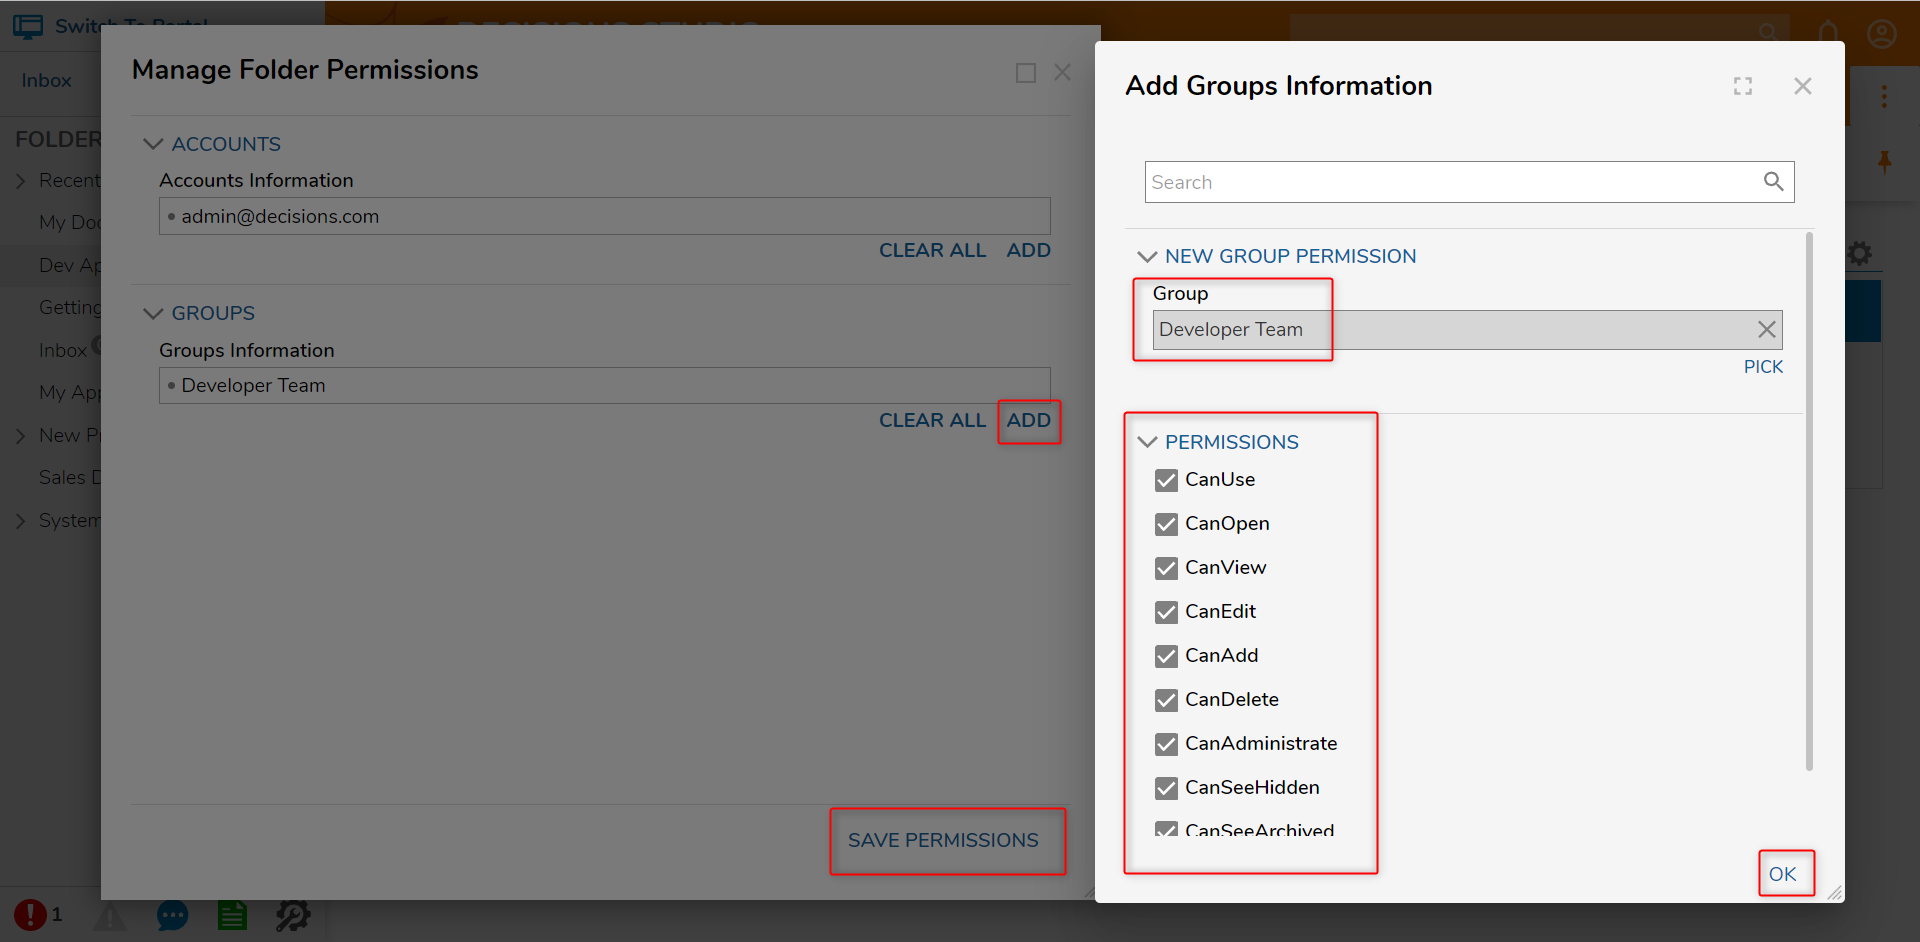
- In the new window, under the GROUPS section, select ADD.
- Click PICK to select the Developer Team Group.
- Under PERMISSIONS, select all the necessary permissions for the Developer Team to have access to.
- Select OK and then SAVE PERMISSIONS.
- Now, navigate to System > Security > Groups.
- Right-click on the Developer Team Group and select Edit Group.
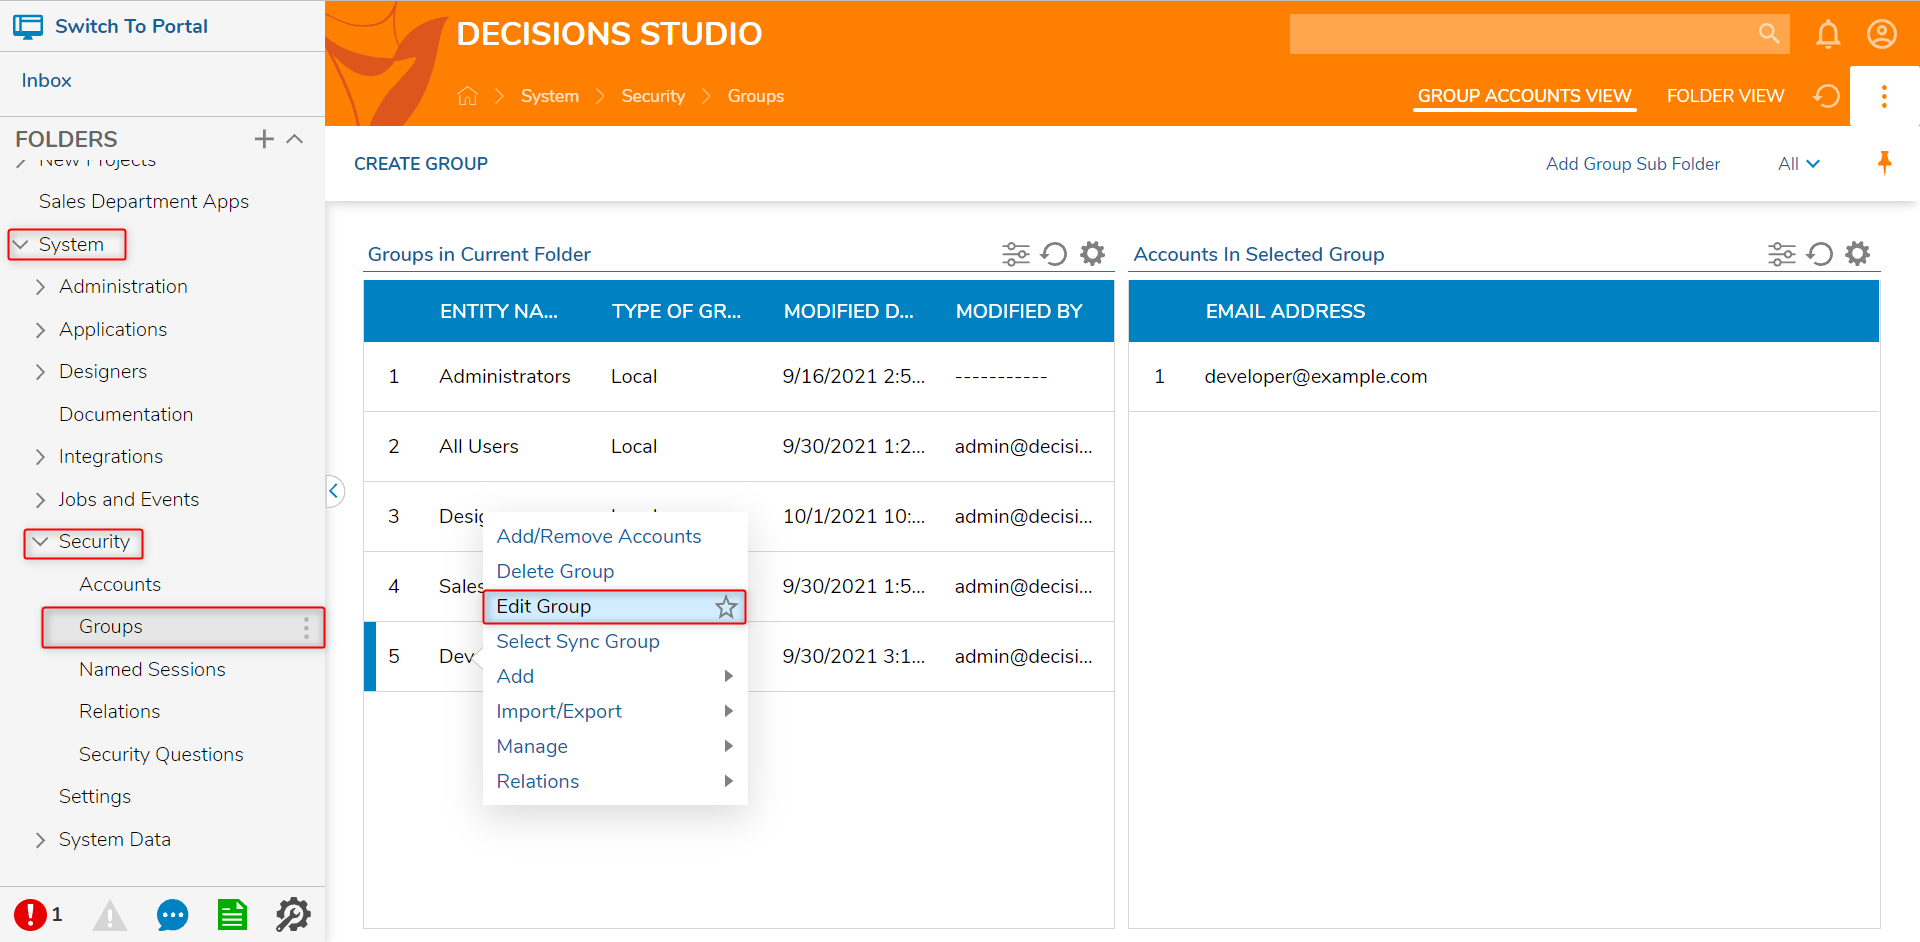
- Scroll down and select the Specify Linked Groups checkbox.
- Under the new LINKED GROUPS section, select ADD.
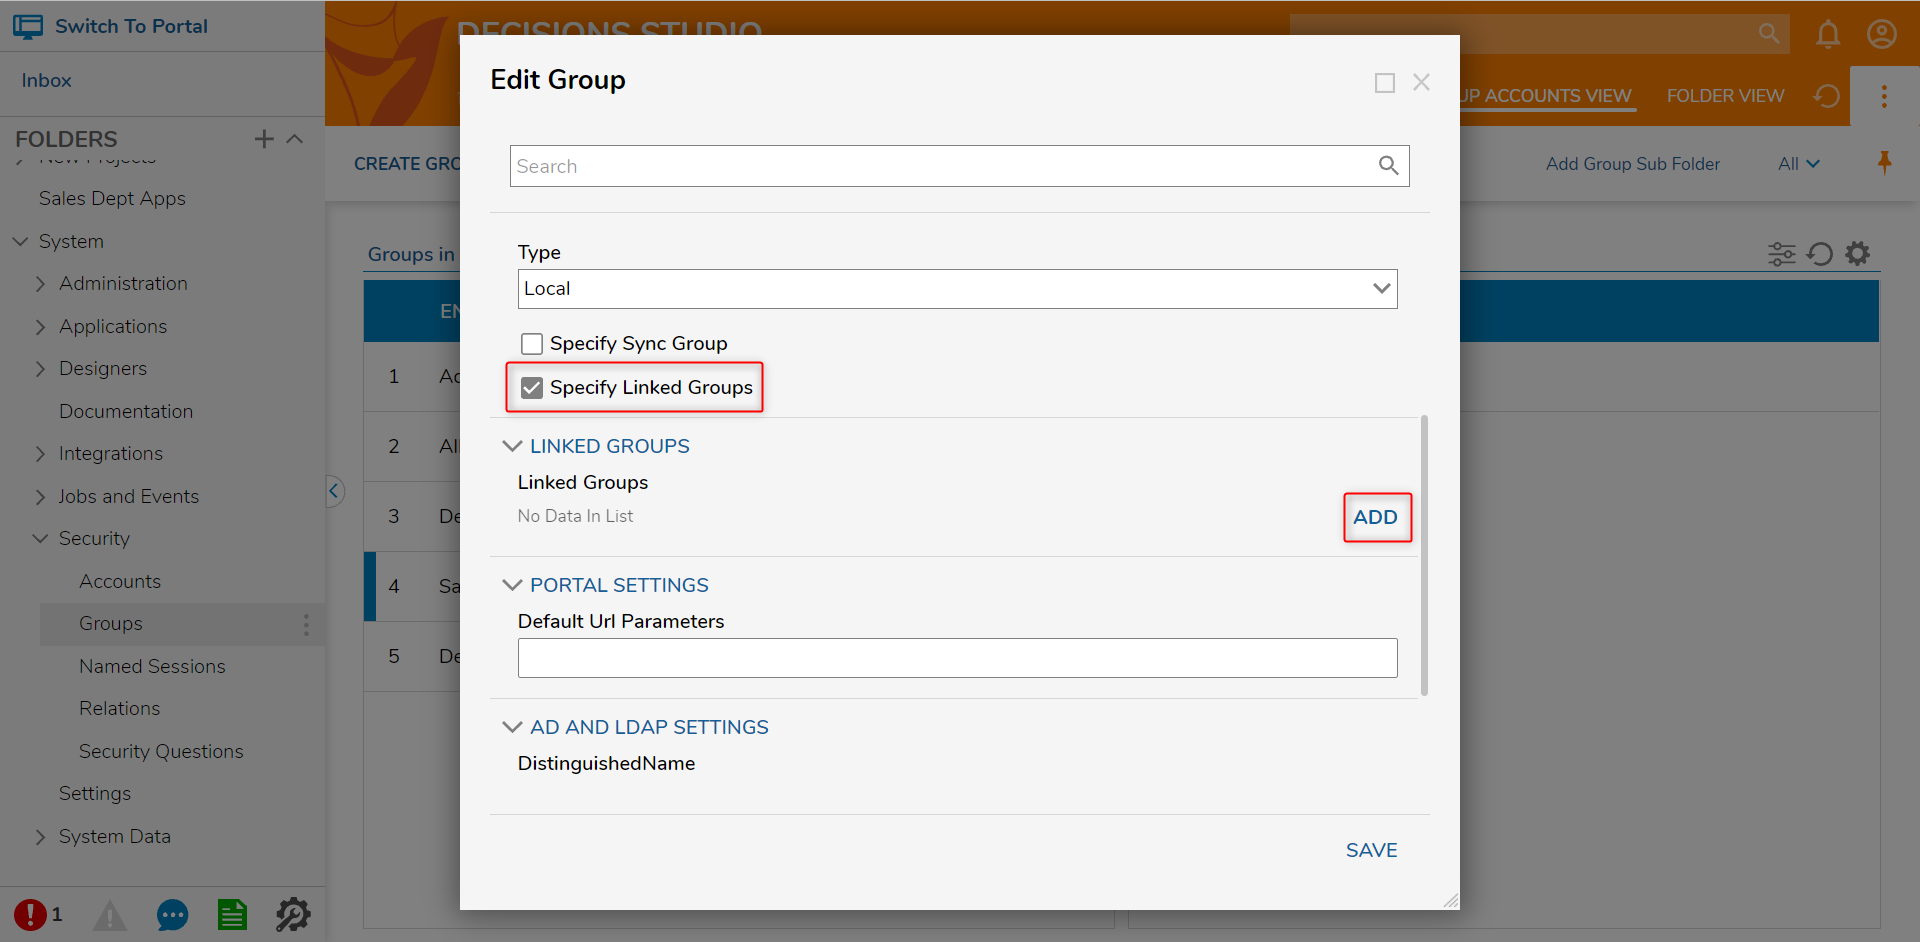
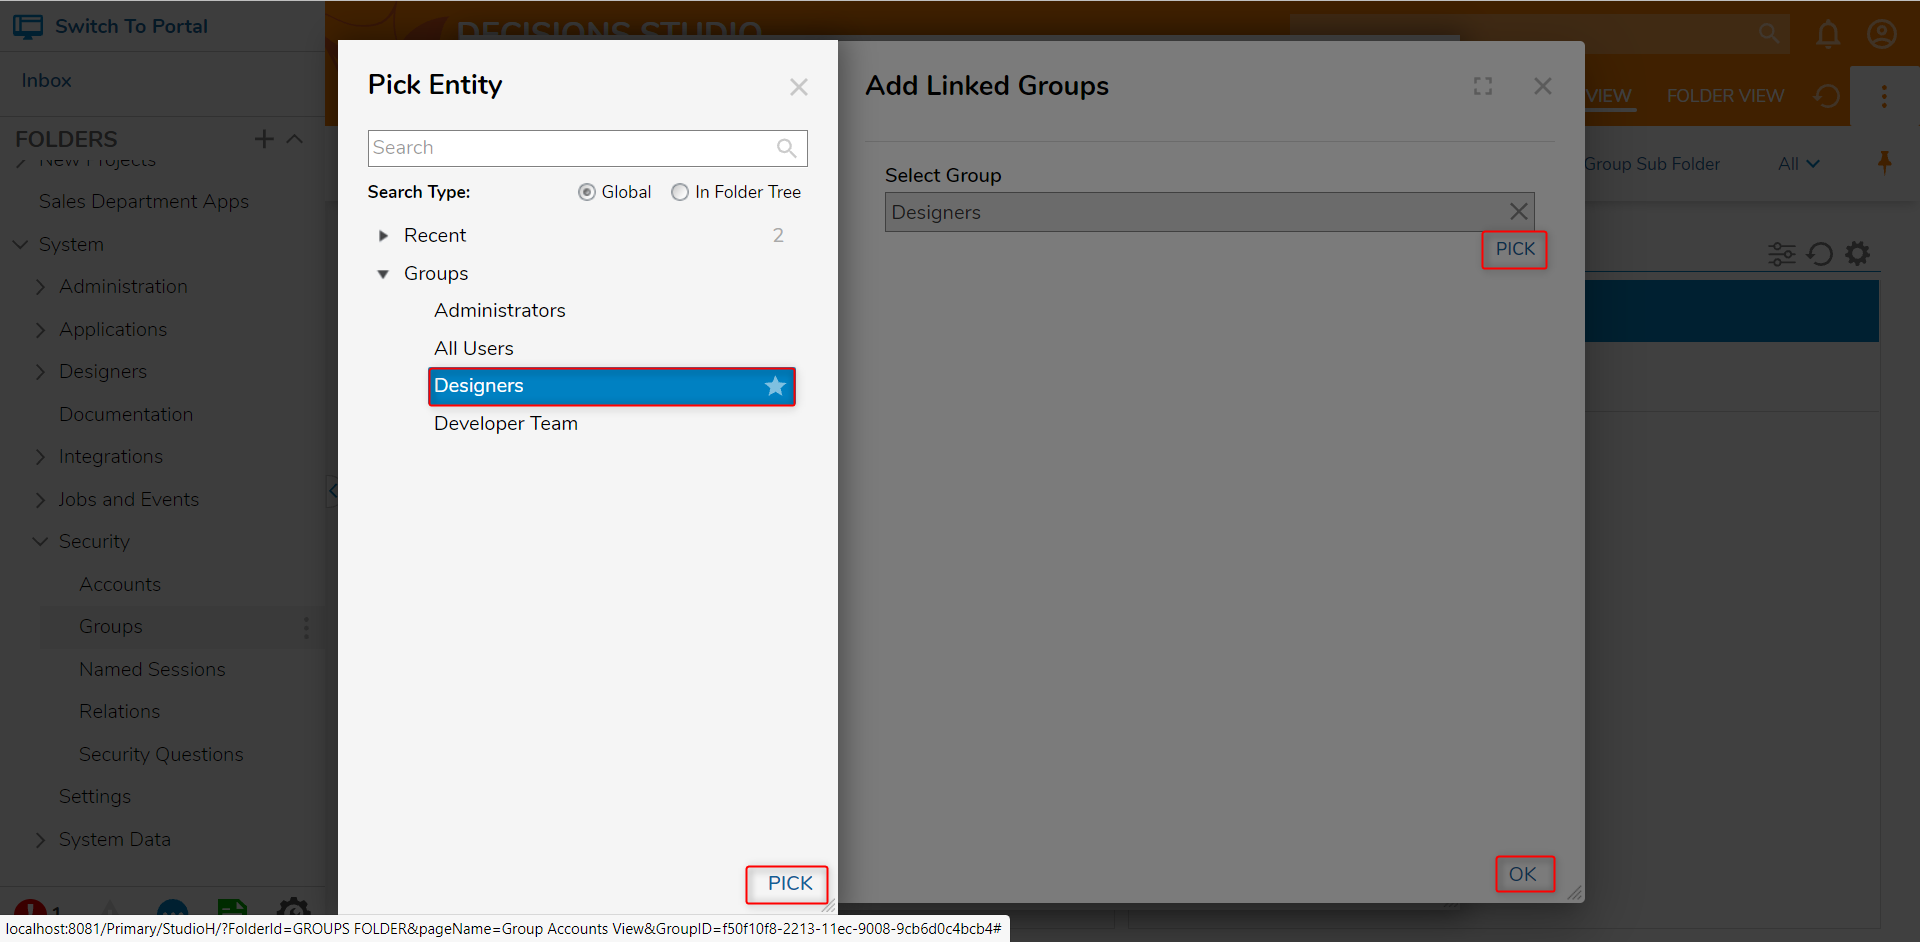
- Click PICK and then select the desired Group to link the Developer Team with.
- For this example, link the Developer Team with the Designers, then select OK and SAVE.
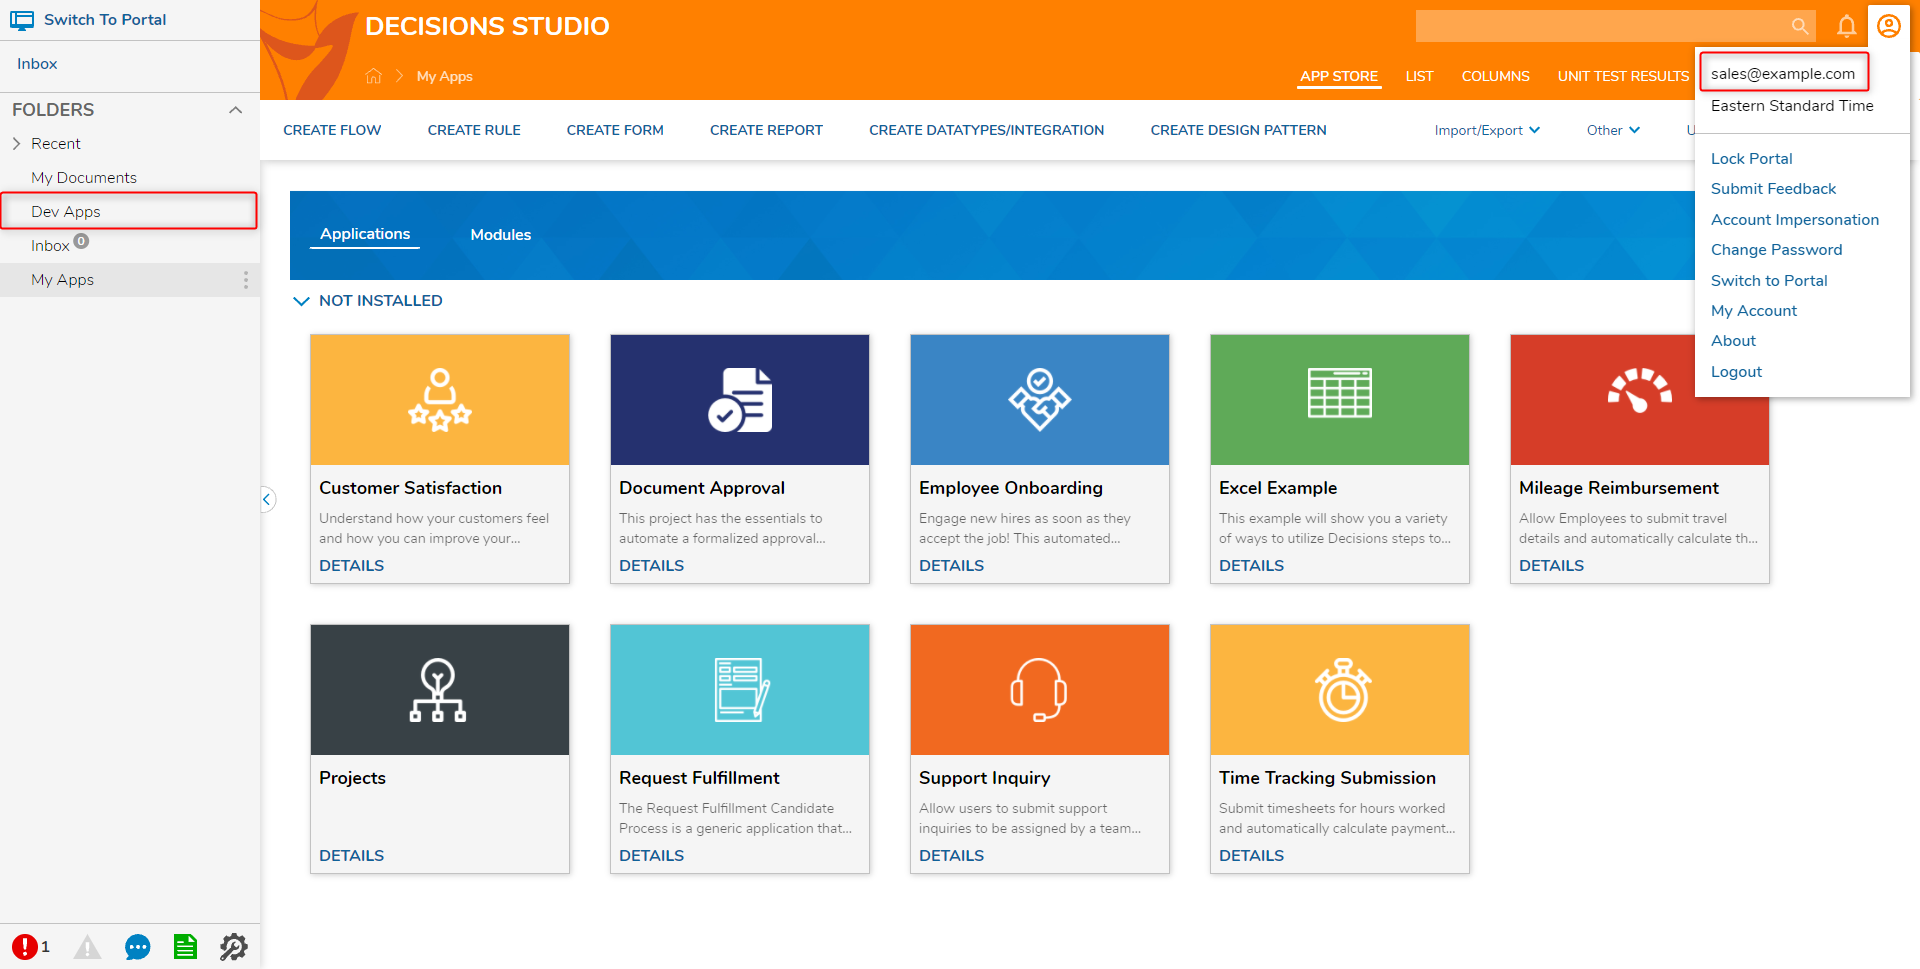
- When the sales@example.com Account logs into the Decisions environment, it is now able to access the Dev Apps Folder as well. If an assignment were sent to the Developer Team Accounts, the Designers Accounts would also receive the Assignment. All of the permissions, access, and task actions associated with one Group will remain present in the other while the Groups are linked.
