Overview
Groups are collections of User Accounts with similar responsibilities or system access Permissions. Groups allow Admins to better organize Accounts in an environment by a designated role or administrative hierarchy.
For example, an environment may contain four Groups of users; Tests, Developers, Marketing, and Admins. By sorting these users into Groups, applying for specified permissions, and creating Group specific Pages and Dashboards, Admins can create a more uniform and specified work environment. The following document demonstrates Create a Group and how to Add/Remove Accounts from them.
Create Group
To create a Group:
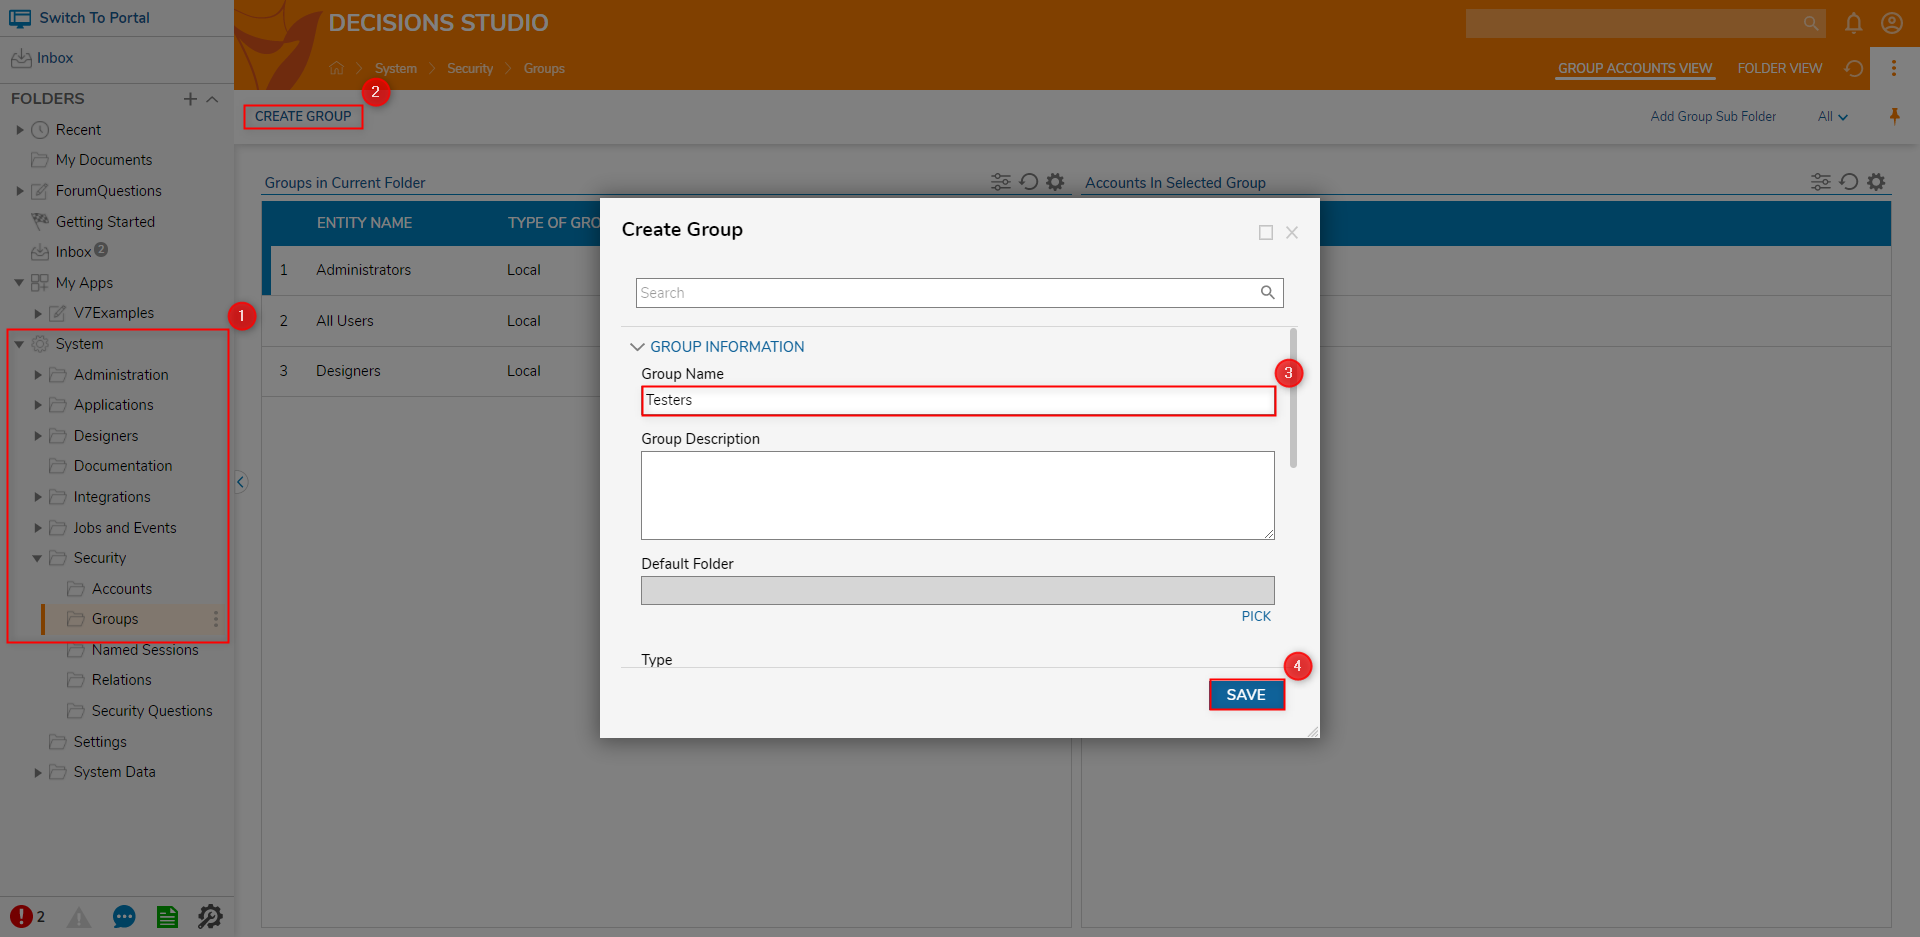
- From the Decisions Studio, navigate to System > Security > Groups.
- Click CREATE GROUP on the Global Action Bar.
- In the Create Group window, provide a Group Name, then click SAVE.
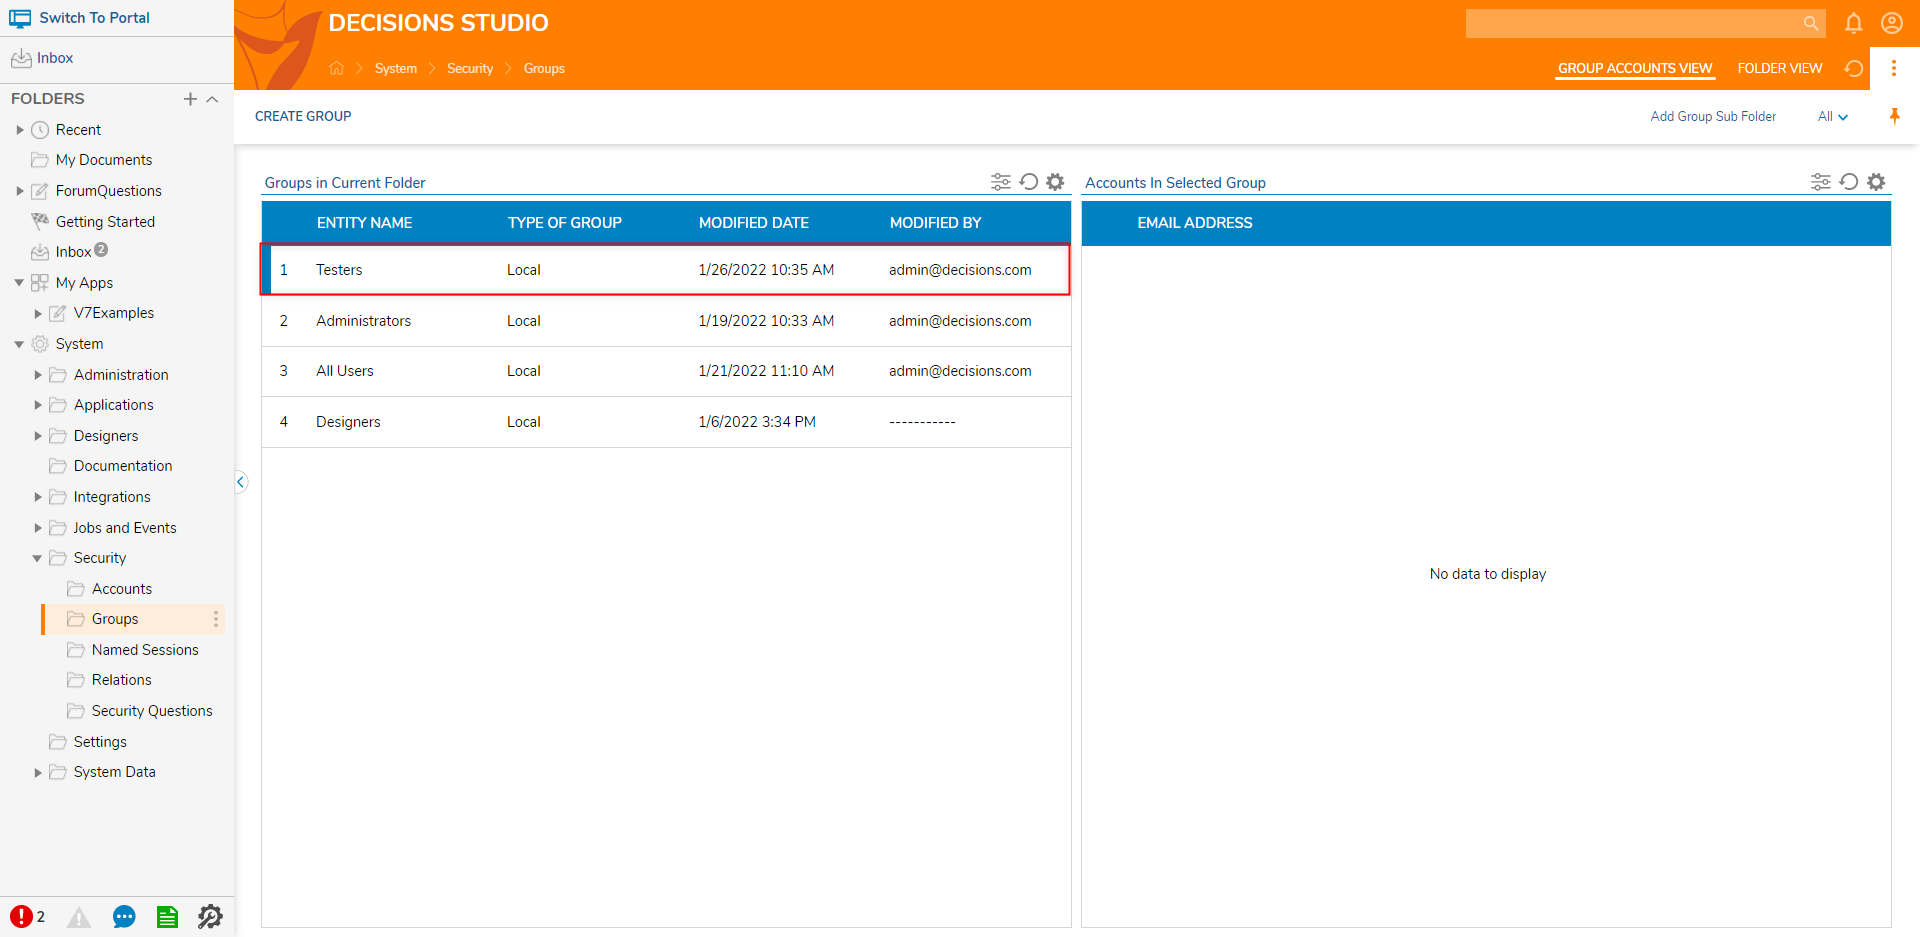
- Confirm that the new Group appears in the Groups in Current Folder Report; selecting it will display any associated Accounts under Accounts In Selected Group Report.
Add Accounts to a Group
To add an Account (or multiple Accounts) to a Group:
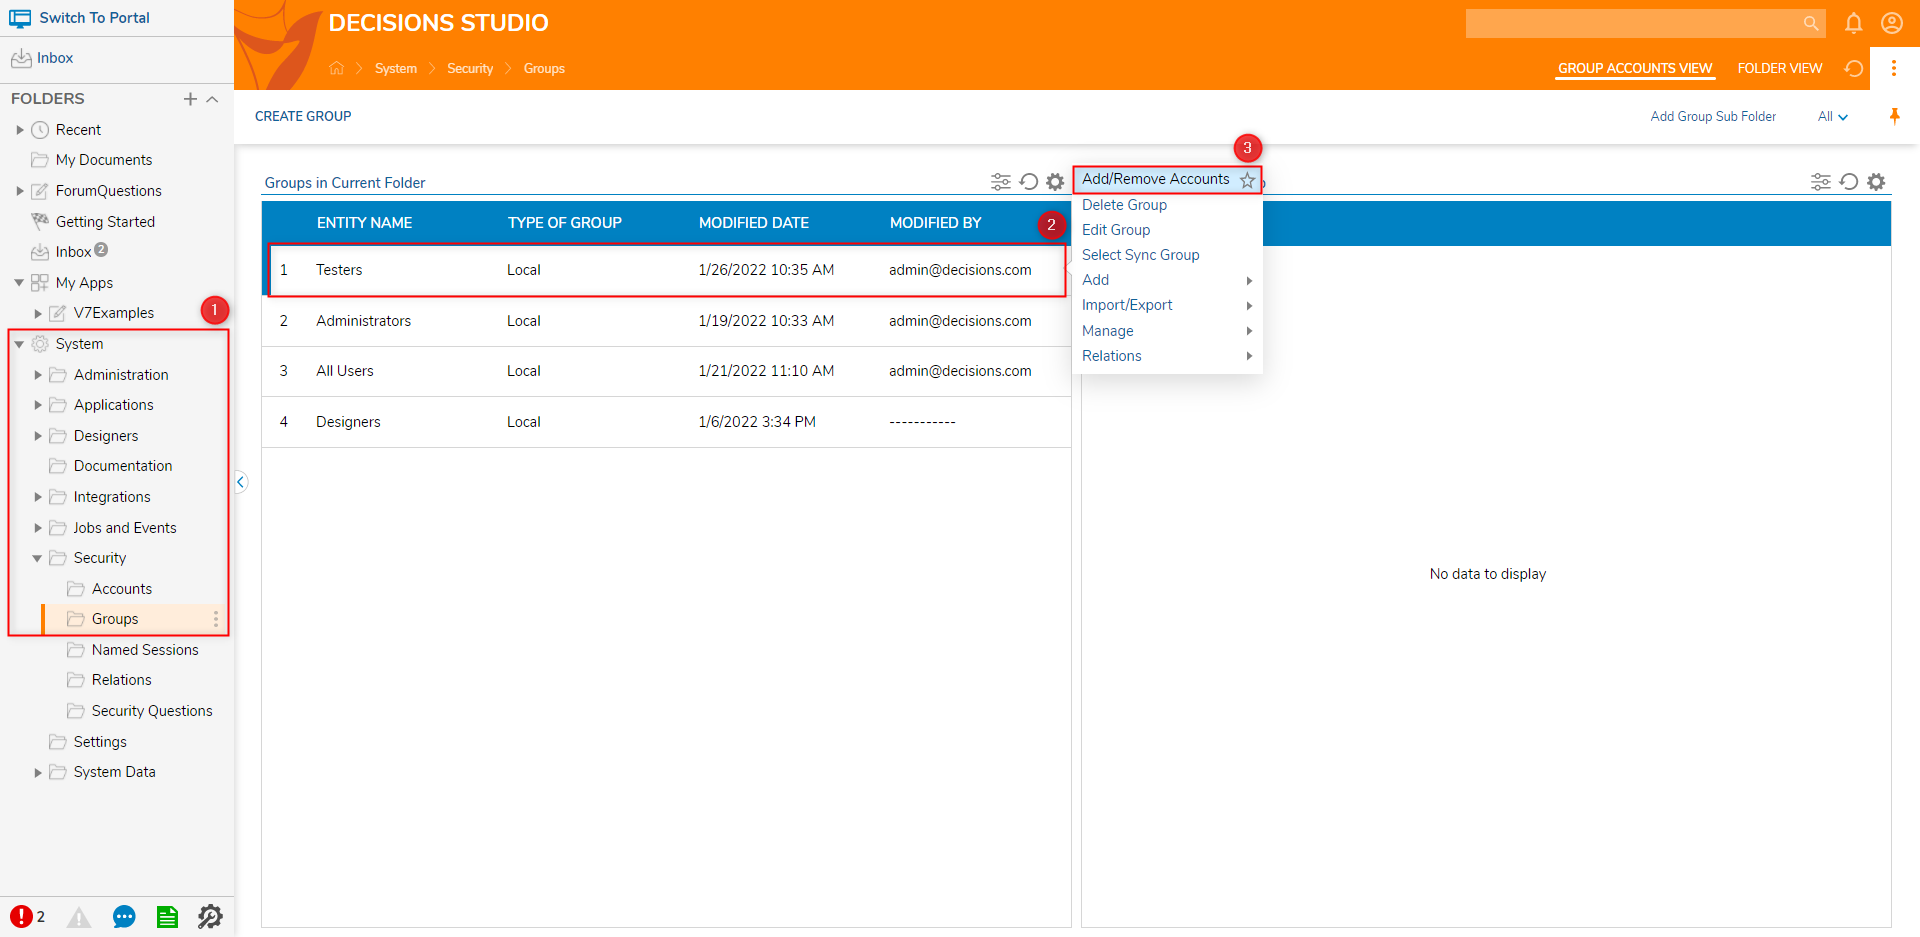
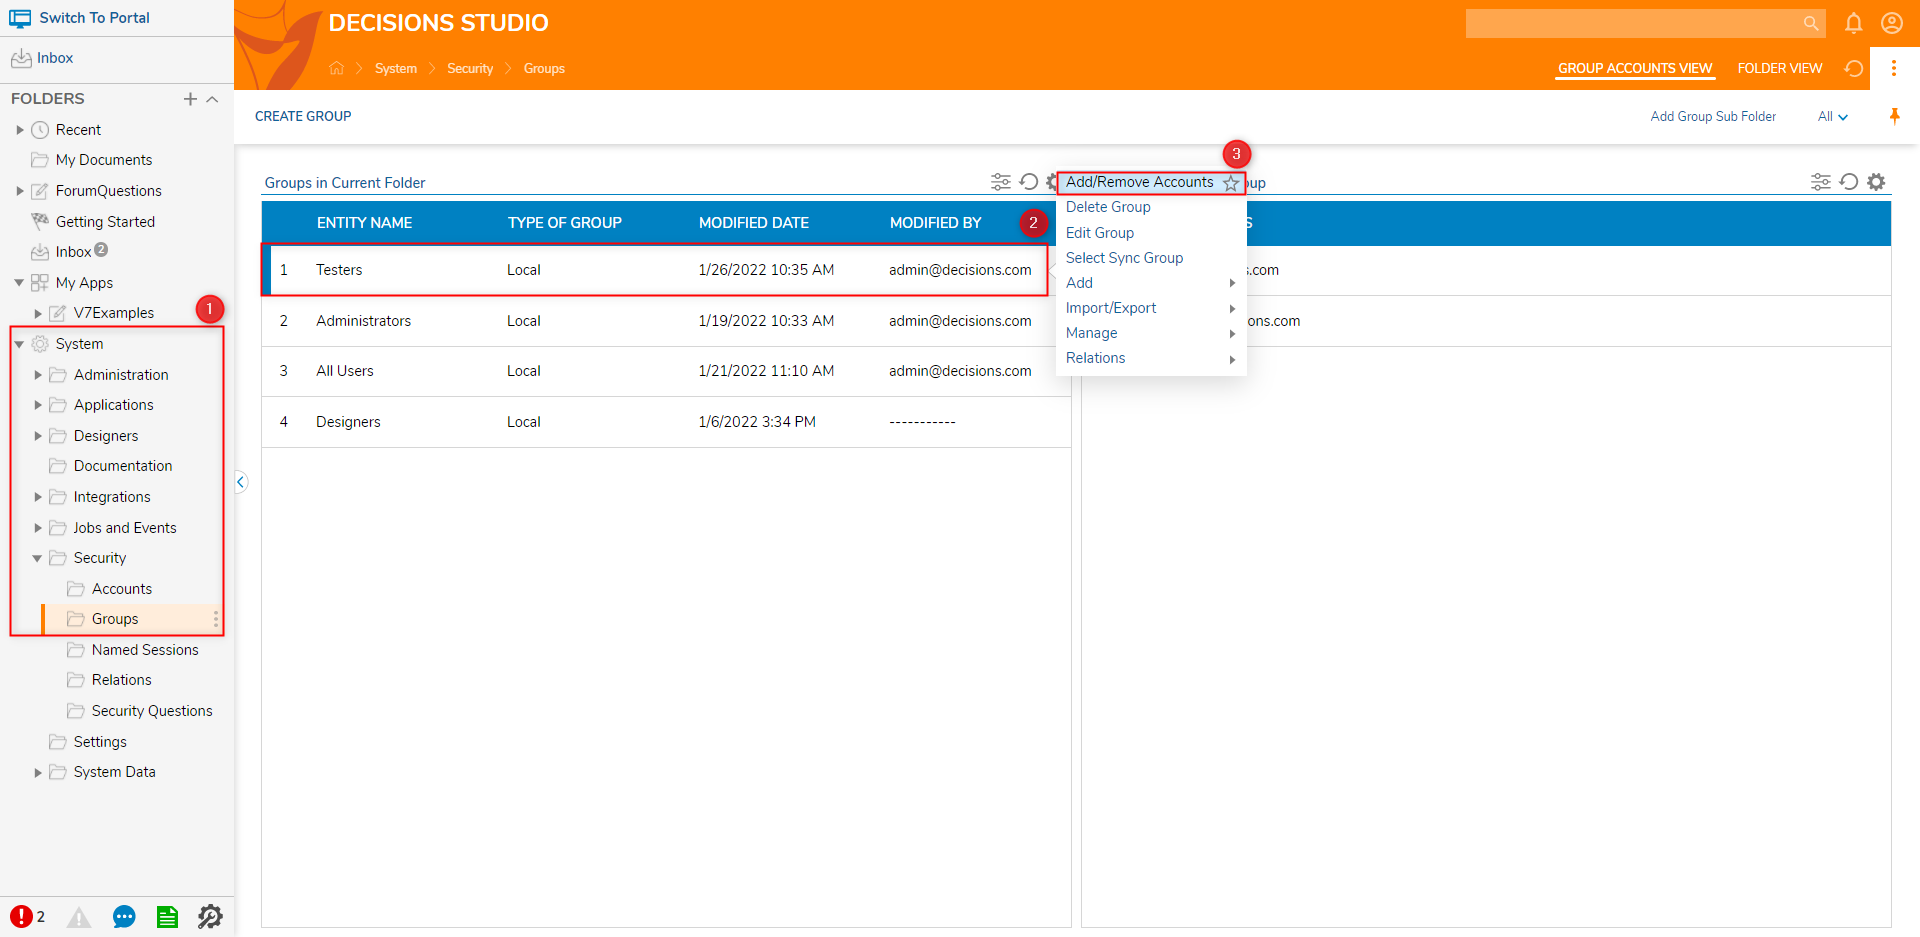
- From System > Security > Groups, right-click the desired Group, then select Add/Remove Accounts.
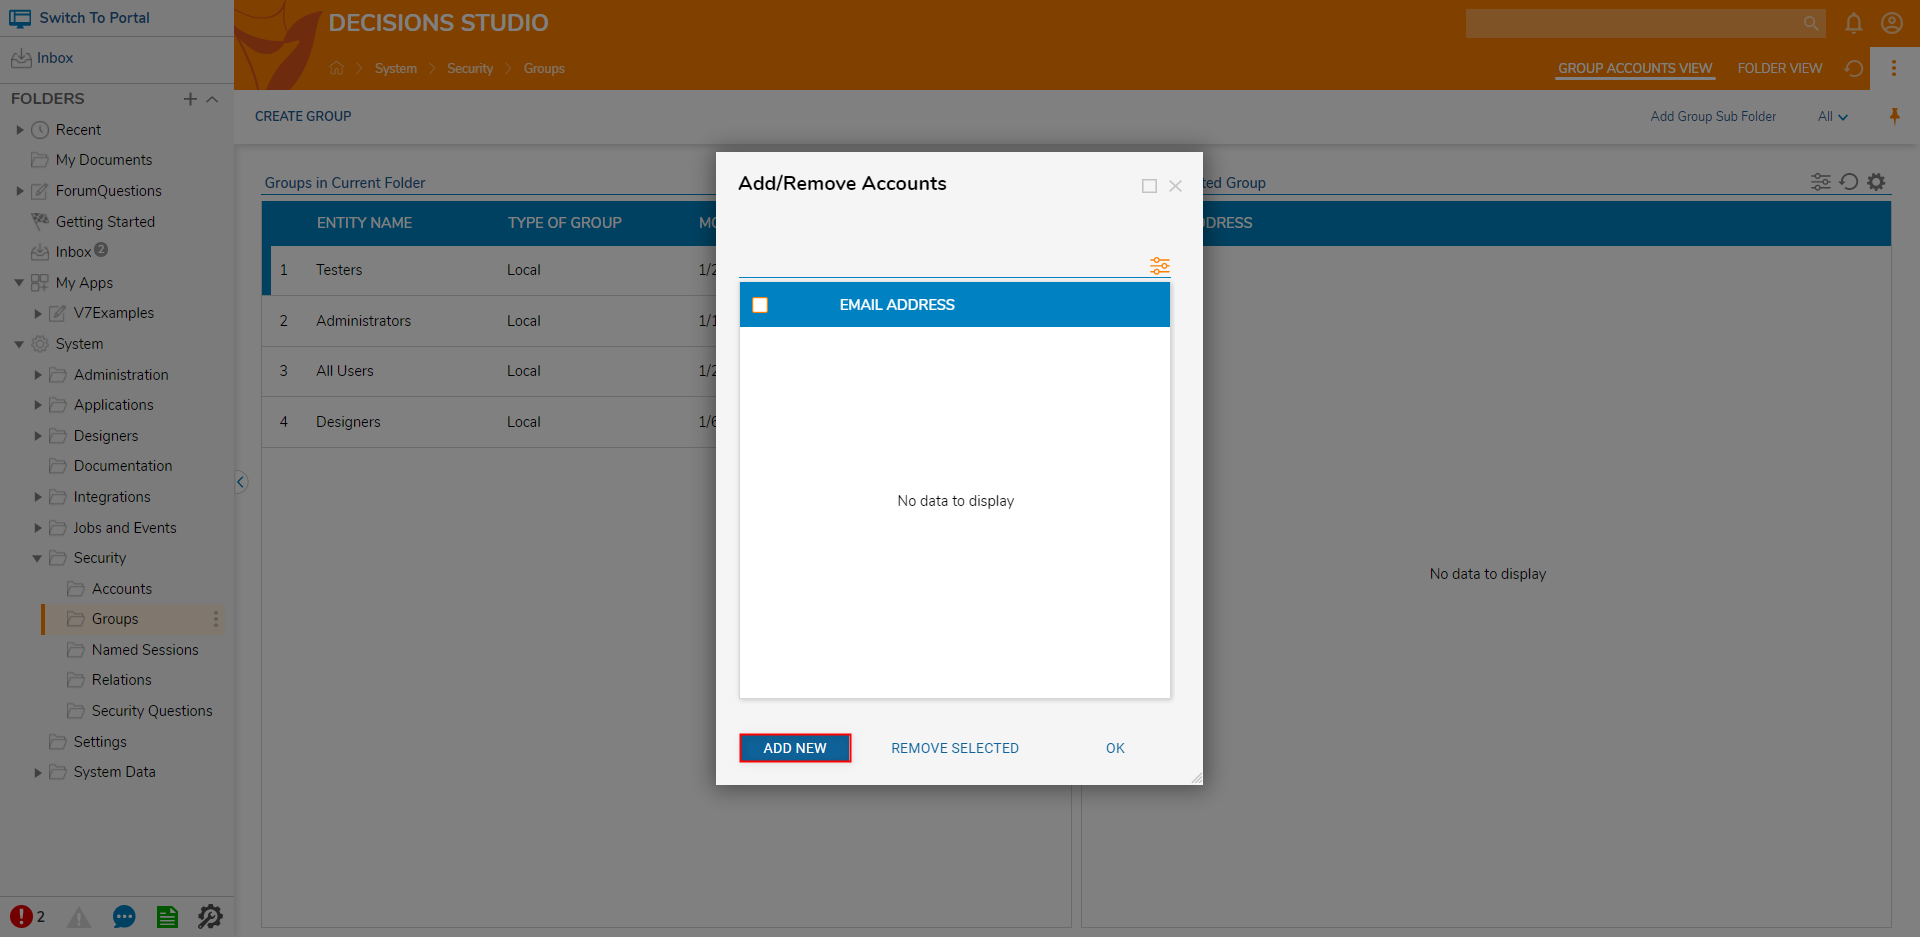
- From the resulting Add/Remove Accounts window, click ADD NEW.
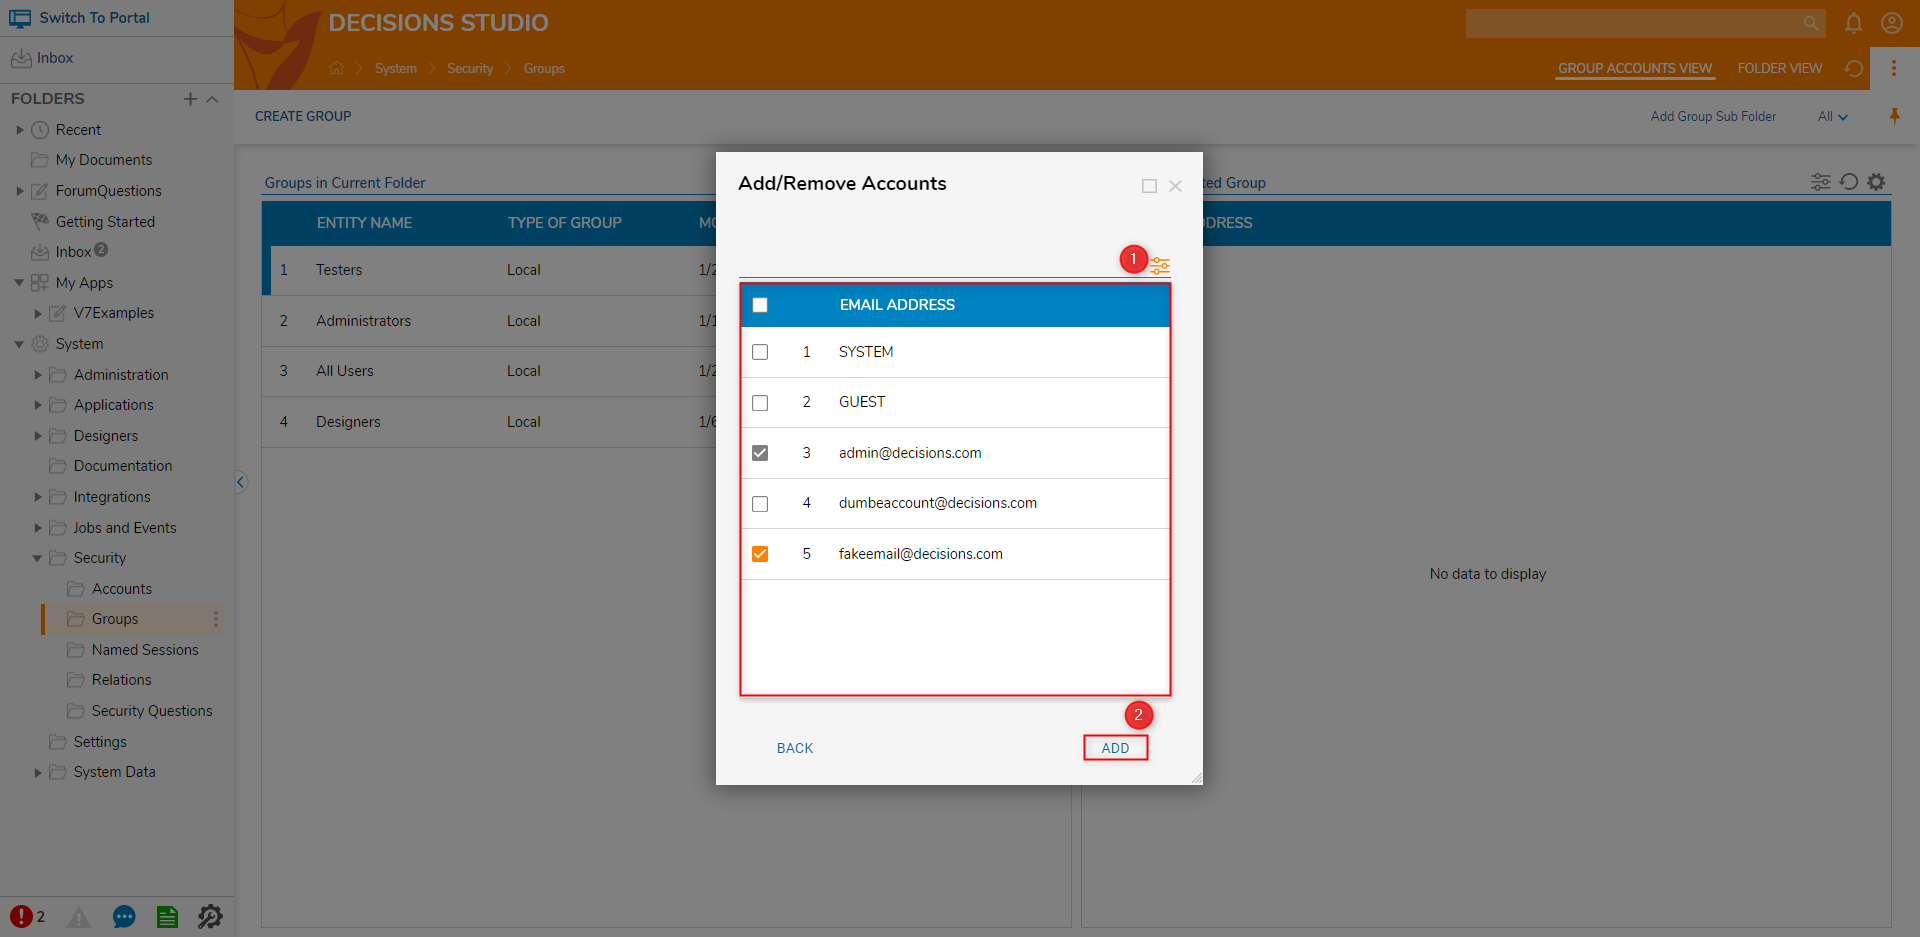
- From the resulting dialog, select the desired Account(s) by toggling the checkbox beside each one. Then, click ADD.
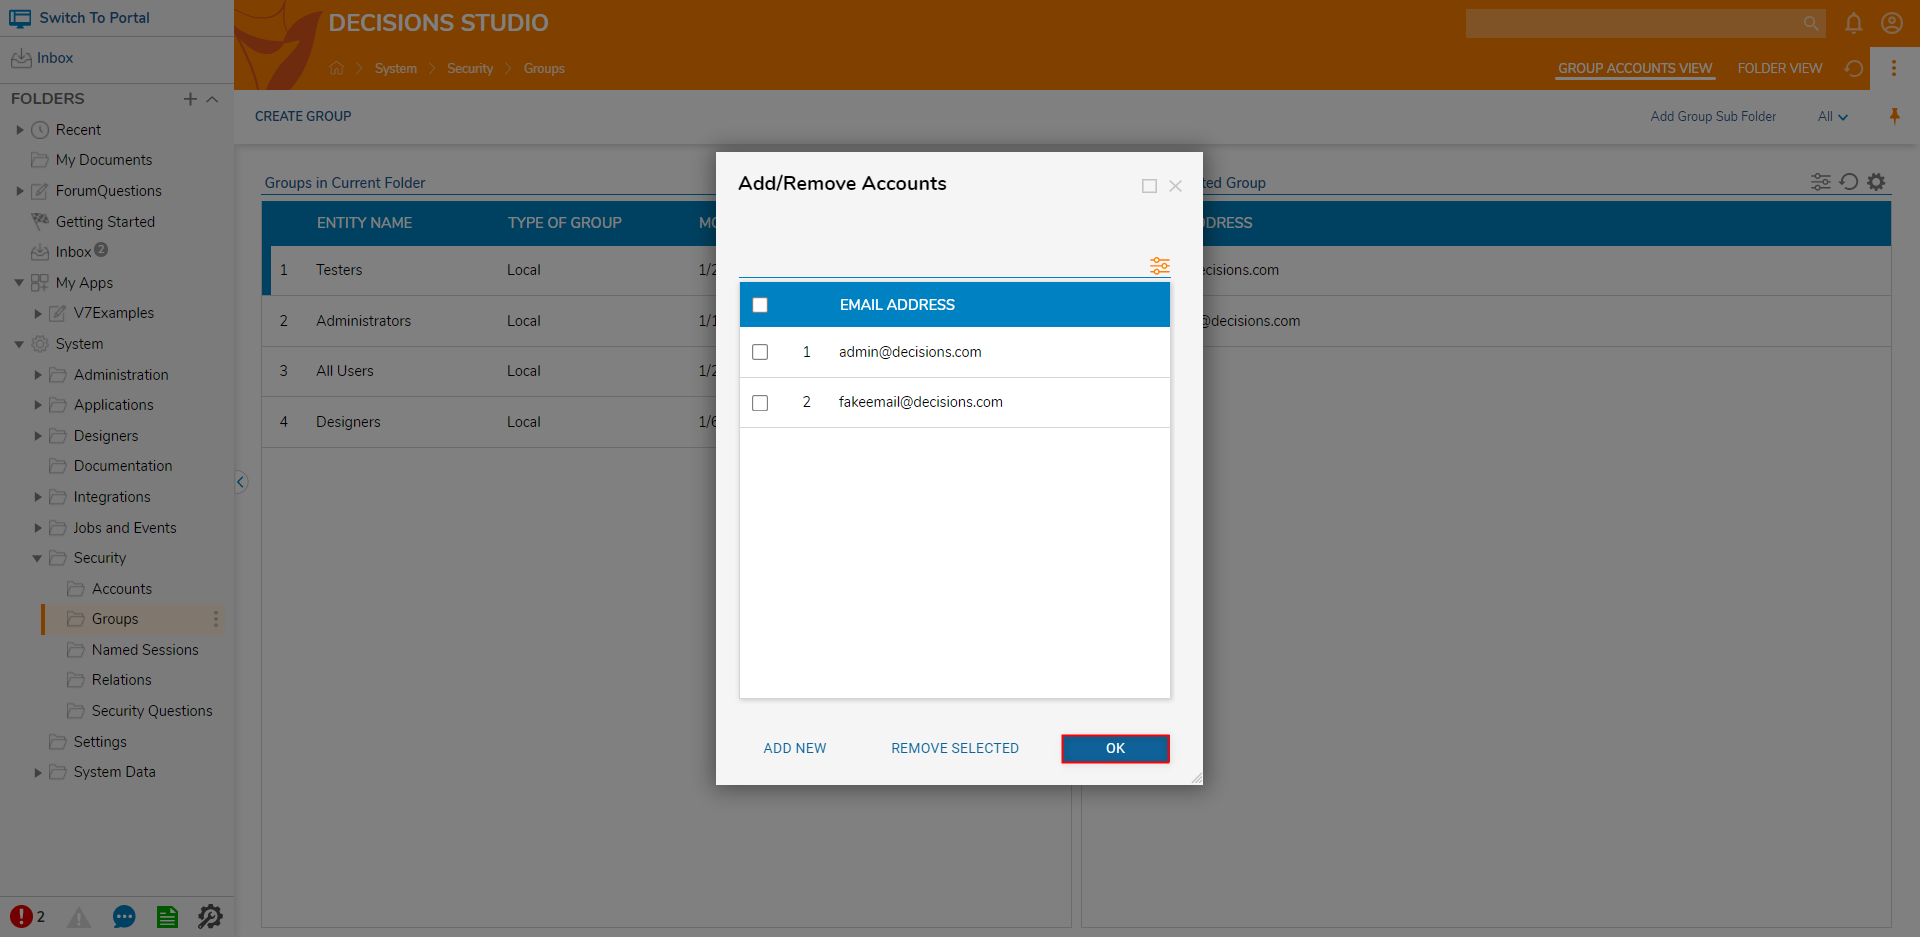
- Back in the primary Add/Remove Accounts window, confirm that the desired Accounts are displayed in the list, then click OK.
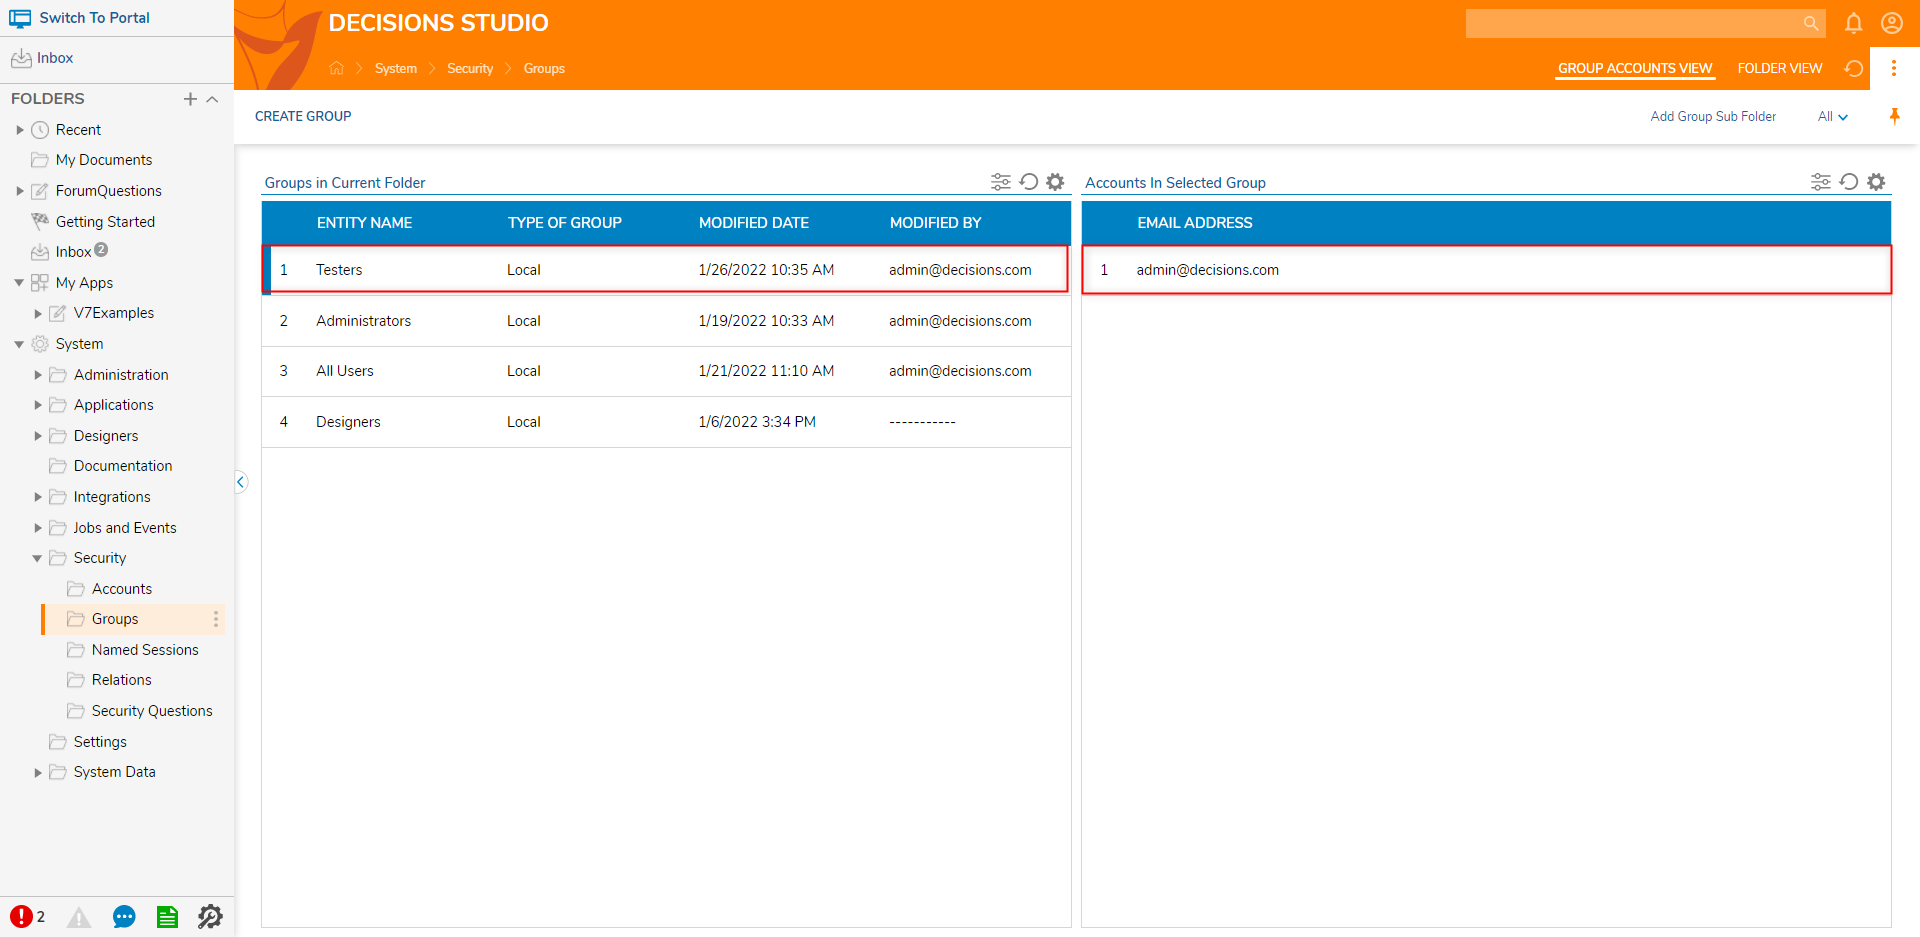
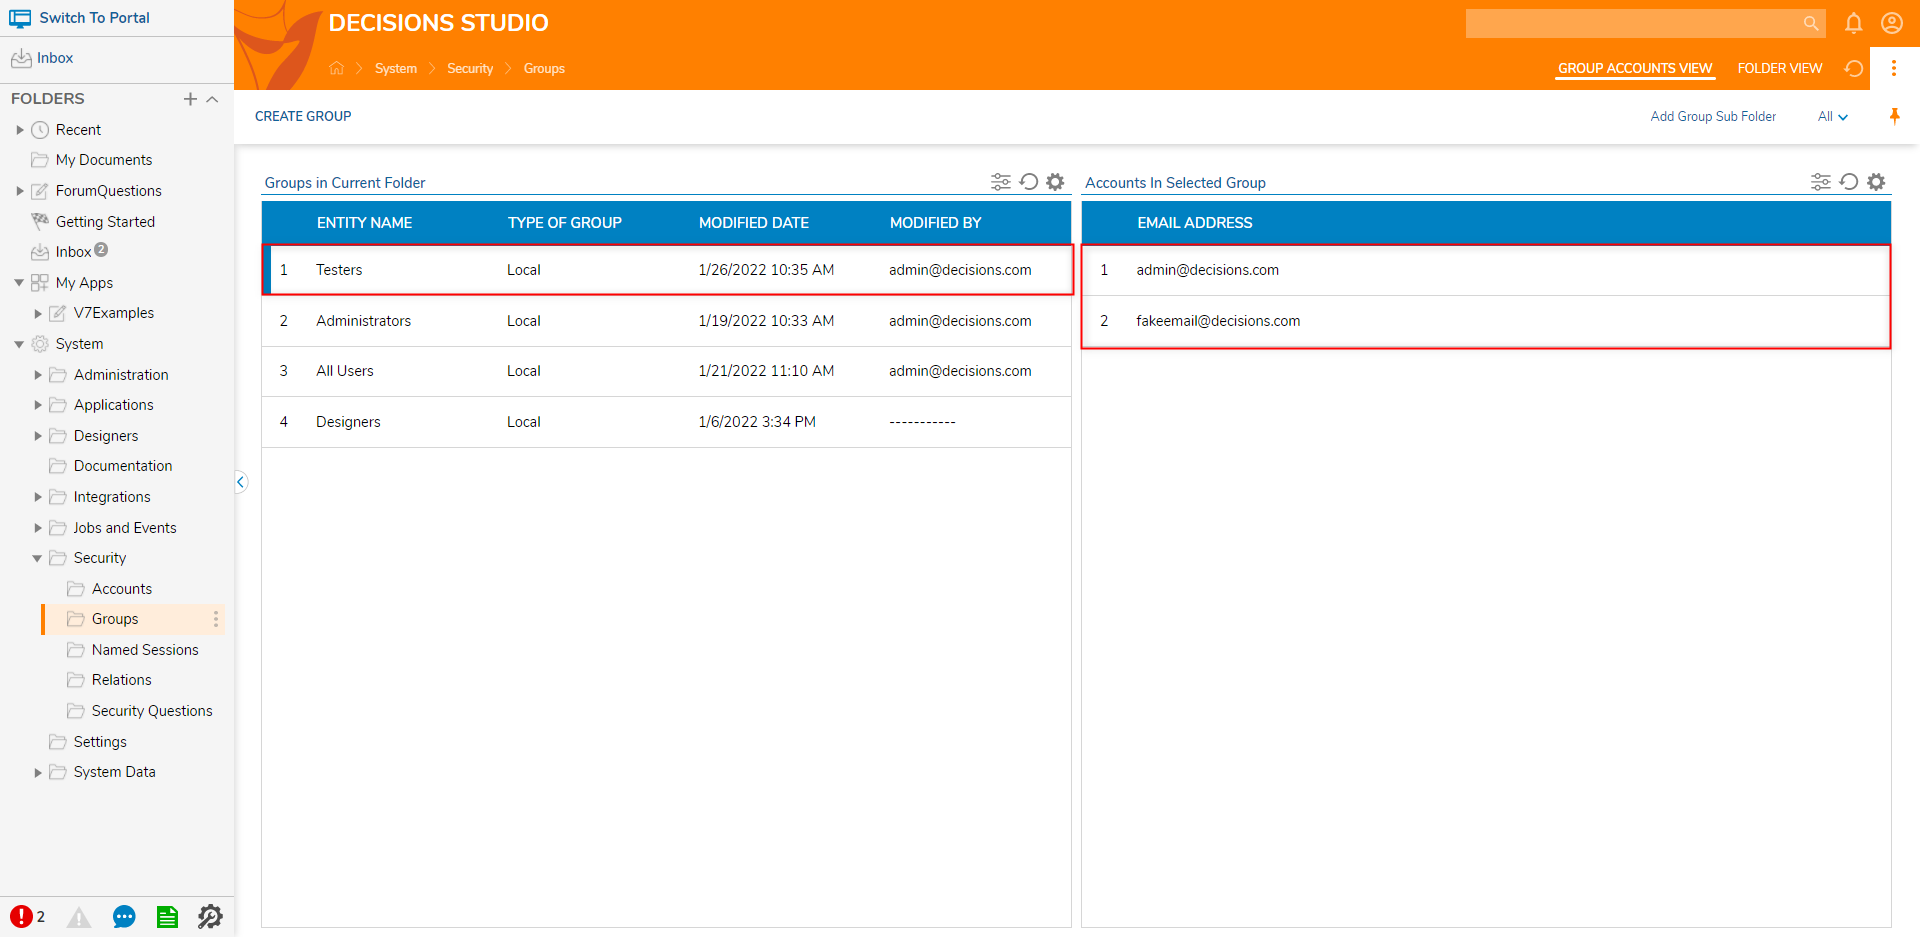
- With the newly configured Group selected, confirm the User Account(s) added appears under Accounts In Selected Group.
Remove Accounts from a Group
To Remove an Account from a Group:
- Navigate to System > Security > Groups.
- Right-click the desired Group and select Add/Remove Accounts.
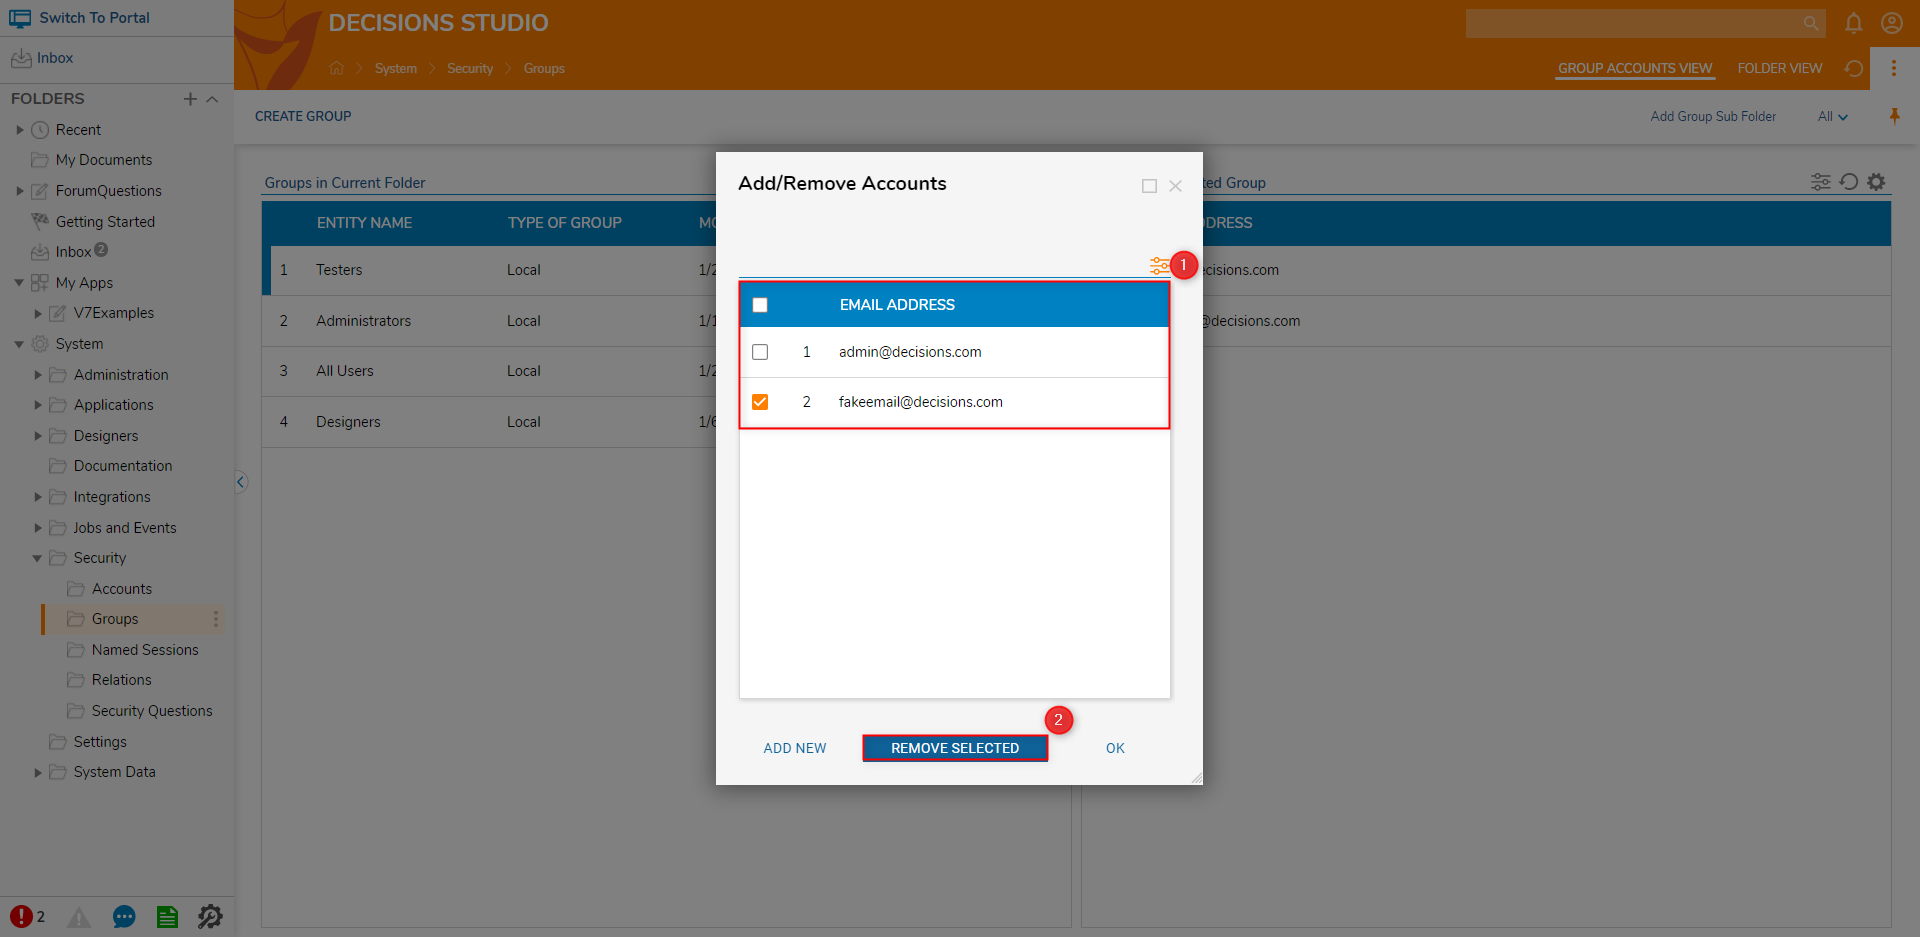
- From the resulting Add/Remove Accounts window, select the desired Account(s) by toggling the checkbox beside each one; then, click REMOVE SELECTED.
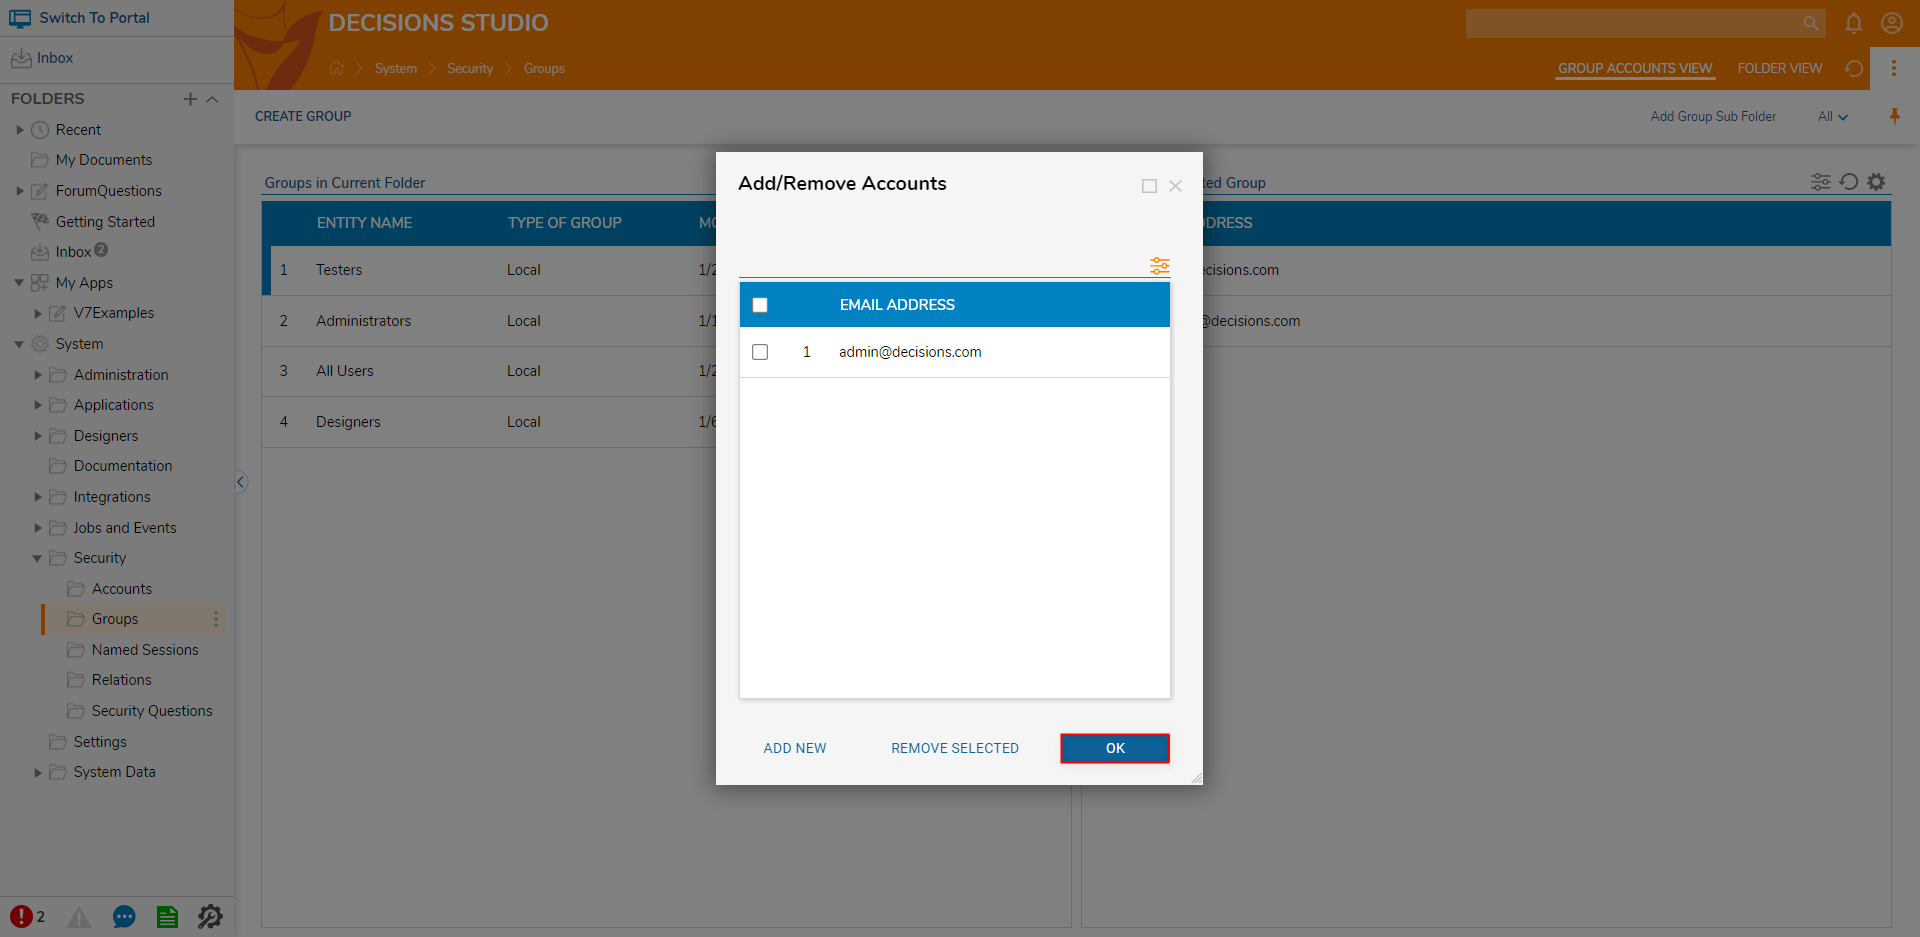
- Once the desired Account(s) has been removed, click OK.
- With the Group selected, verify that the User Account(s) has been removed under Accounts In Selected Group.
