Overview
When creating a Flow in Decisions, users may need to replicate a step configuration in another Flow. This can be achieved easily by saving the configuration of the needed step as a Template. The ability to save a configuration as a Template can be implemented in any instance wherein the user needs to replicate a step configuration.
To access where Templates are stored in your Decisions instance, from the Studio navigate to System > Designers > Catalog and open the Templates Folder.
Use Case
The ability to save a configuration as a Template can be implemented in any instance wherein the user needs to replicate a step configuration.
Example
The following example Flow is used to send an Email composed of a few static variables via use of a Flow Step Template.
- Navigate to a Designer Folder and select the CREATE FLOW button from the Global Action Bar on the bottom of the screen. Give the Flow a name and click CREATE.
- From the Flow Designer, add a Send Email step from the Communication category of the Steps tab, to the workspace.NoteTo properly utilize a Send Email step users must have their SMTP settings properly configured to send and/or receive Emails. For more information regarding proper setup of these settings see Modifying an Application Servers SMTP Settings.
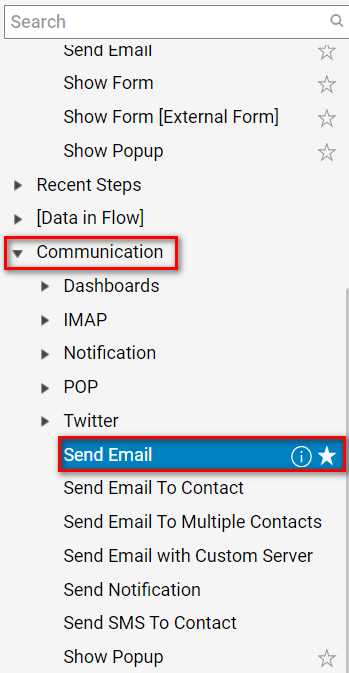
- Connect the outcome path of the Start step to the Send Email step, and the Output path of the Send Email step to the End step. Then navigate to the step's Properties tab.
- Select the Send Email component and configure it via the Properties panel.
- Map the Email Address of the sender to the From Input via Select From Flow mapping or by Constant mapping the desired Email.
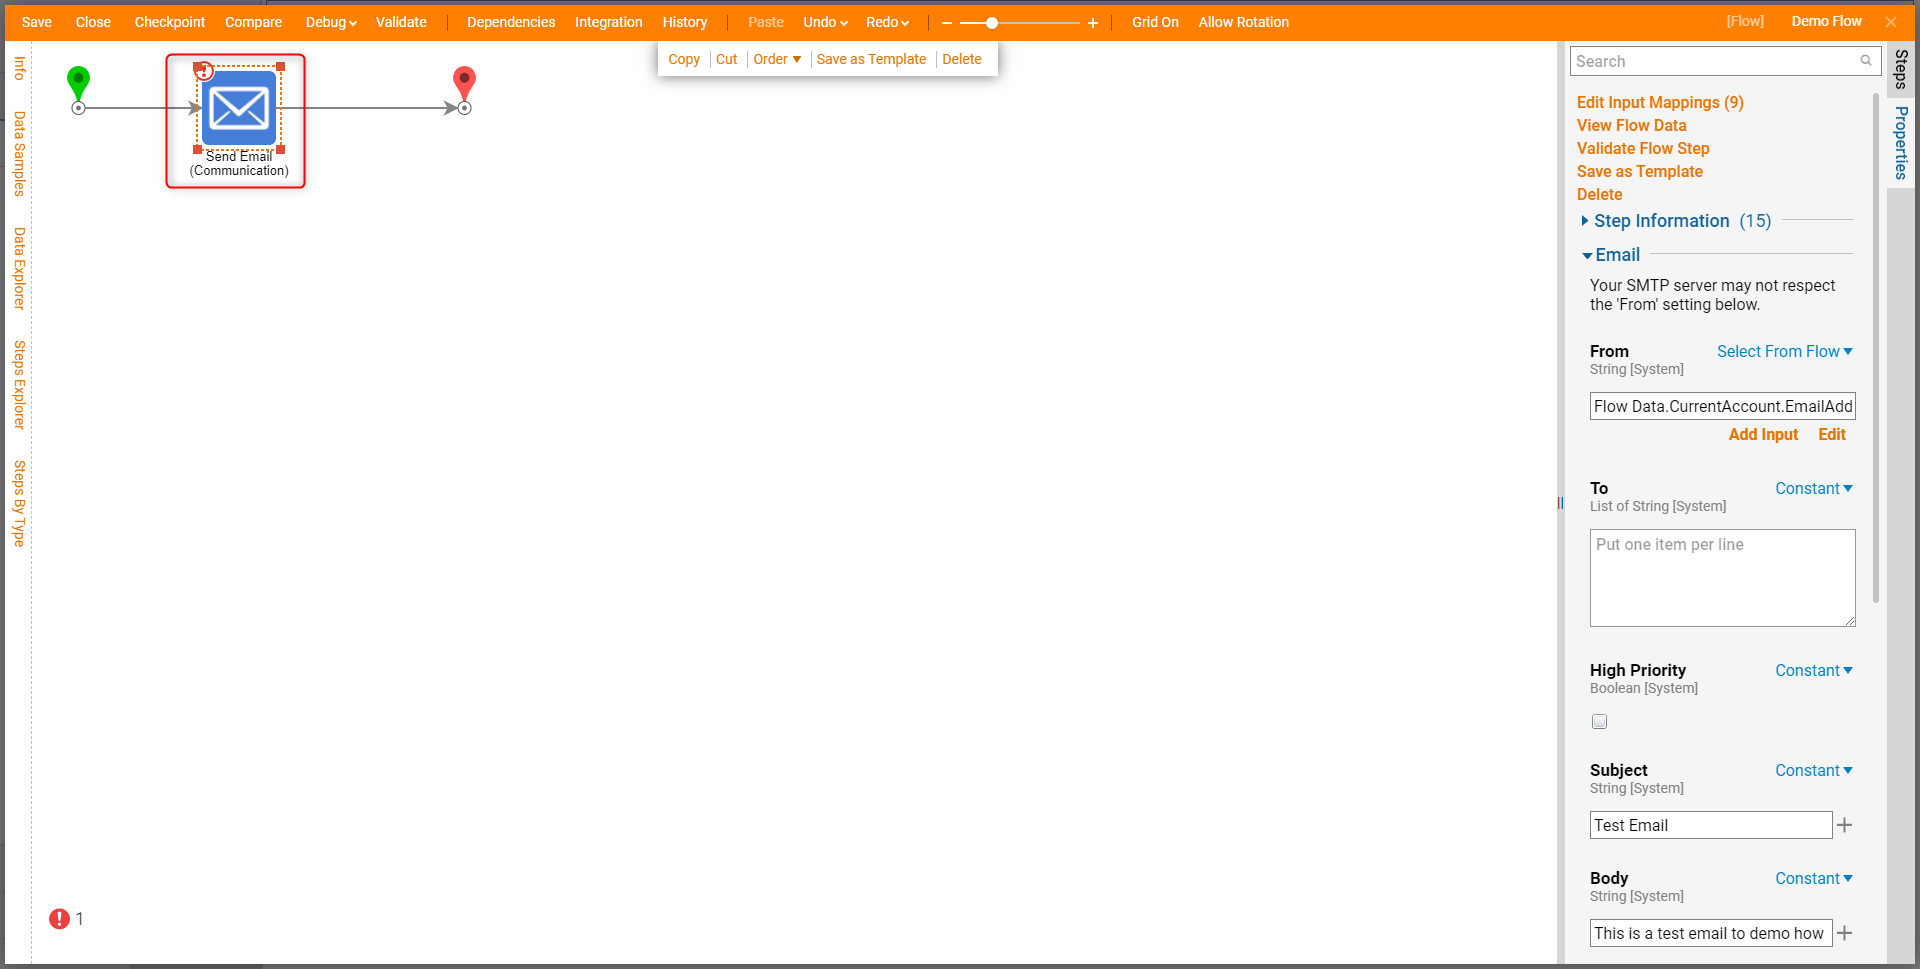
- Scroll down to and map the desired Input for Subject either statically or dynamically via Select From Flow. Then map the Email's Body Input.
- After configuring the component, save the configuration by selecting the Save As Template link from the small white toolbar underneath the top Action Bar.

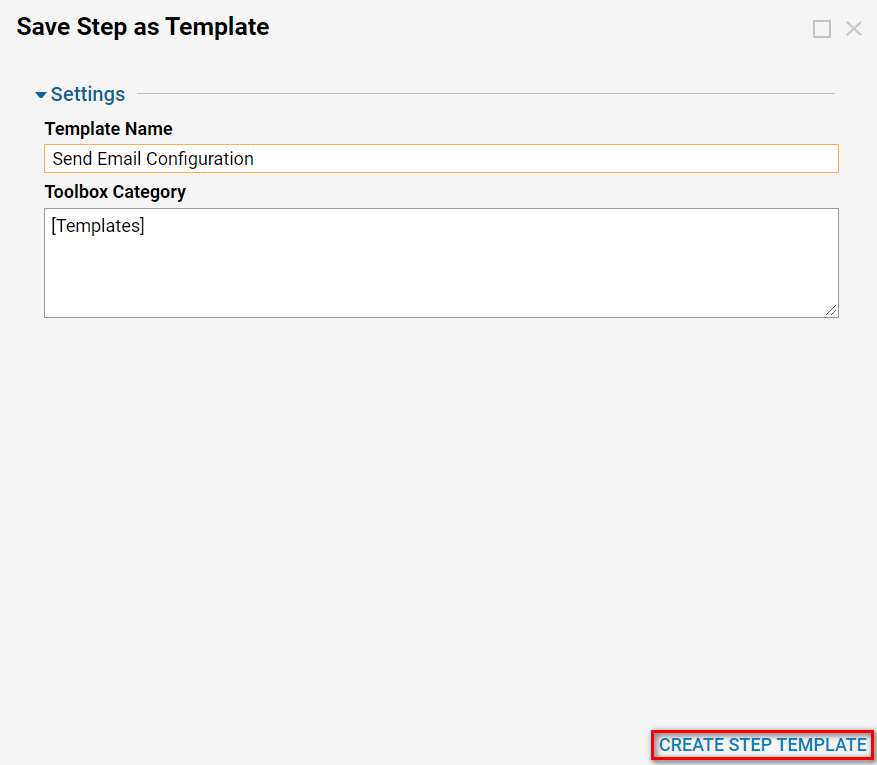
- On the Save Step as Template window, give the Template a Name and confirm the Toolbox Category; then, click Create Step Template to define the template. Additional Information on Toolbox CategoryThe Toolbox Category input box is used to determine where the newly saved Step Template will reside within the Flow Designer. Providing a value on the first row defines the Primary Category. By default this value is set to save the Template to the Templates Category.
If a Category does not already exist, a new one will be created.
Adding values to any line underneath the first one will establish a new Subcategory of the previous line's Category.
For example, the screenshot below represents a Template that will exist in the Test Subcategory of the Template Category in the Steps tab.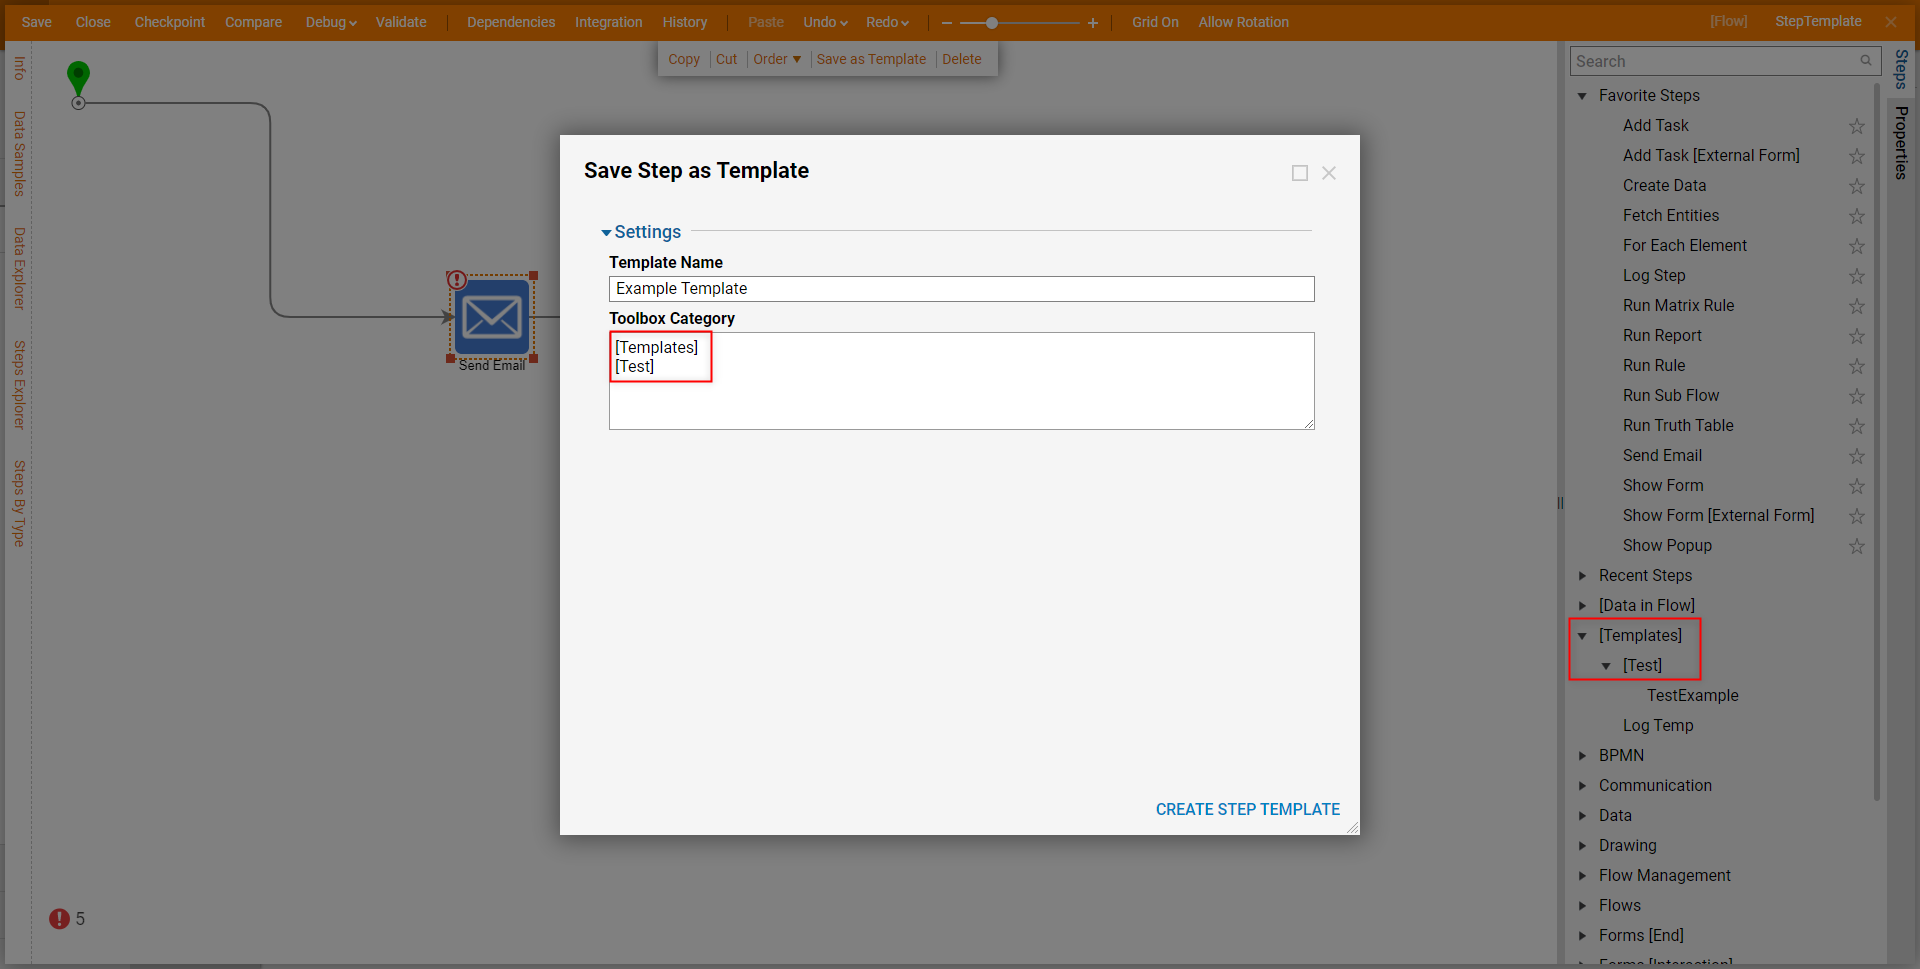
- Save and Close the Flow.
Testing
To use the Step Template:
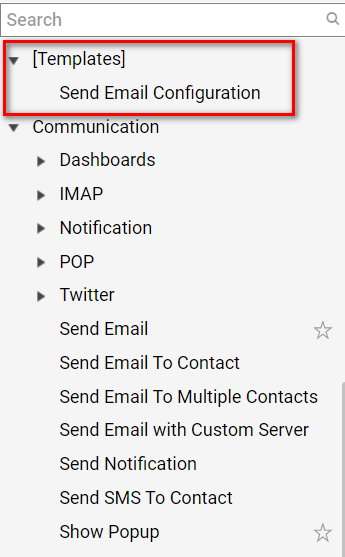
- Open or CREATE a Flow and navigate to the [Templates] folder in the Steps tab.
- Locate and drag the Step Configuration Template into the Flow.
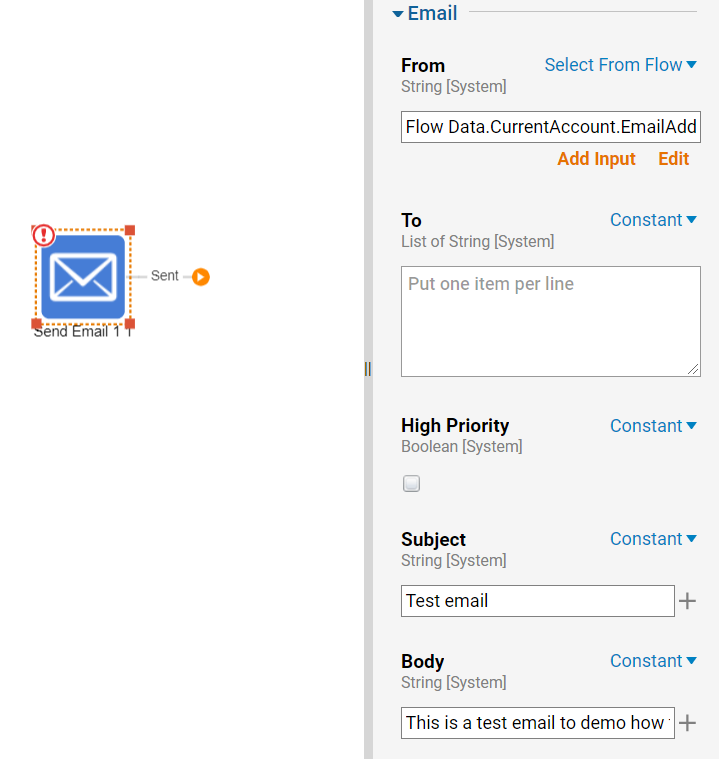
- Open the Properties panel for the step to verify that the template configuration is available.
Deleting a Template
To delete a Step Configuration Template:
- From the Decisions Studio, navigate to System > Designers > Catalog.
- Locate and open the Folder that corresponds with the established Toolbox Category (for this example [Templates]).
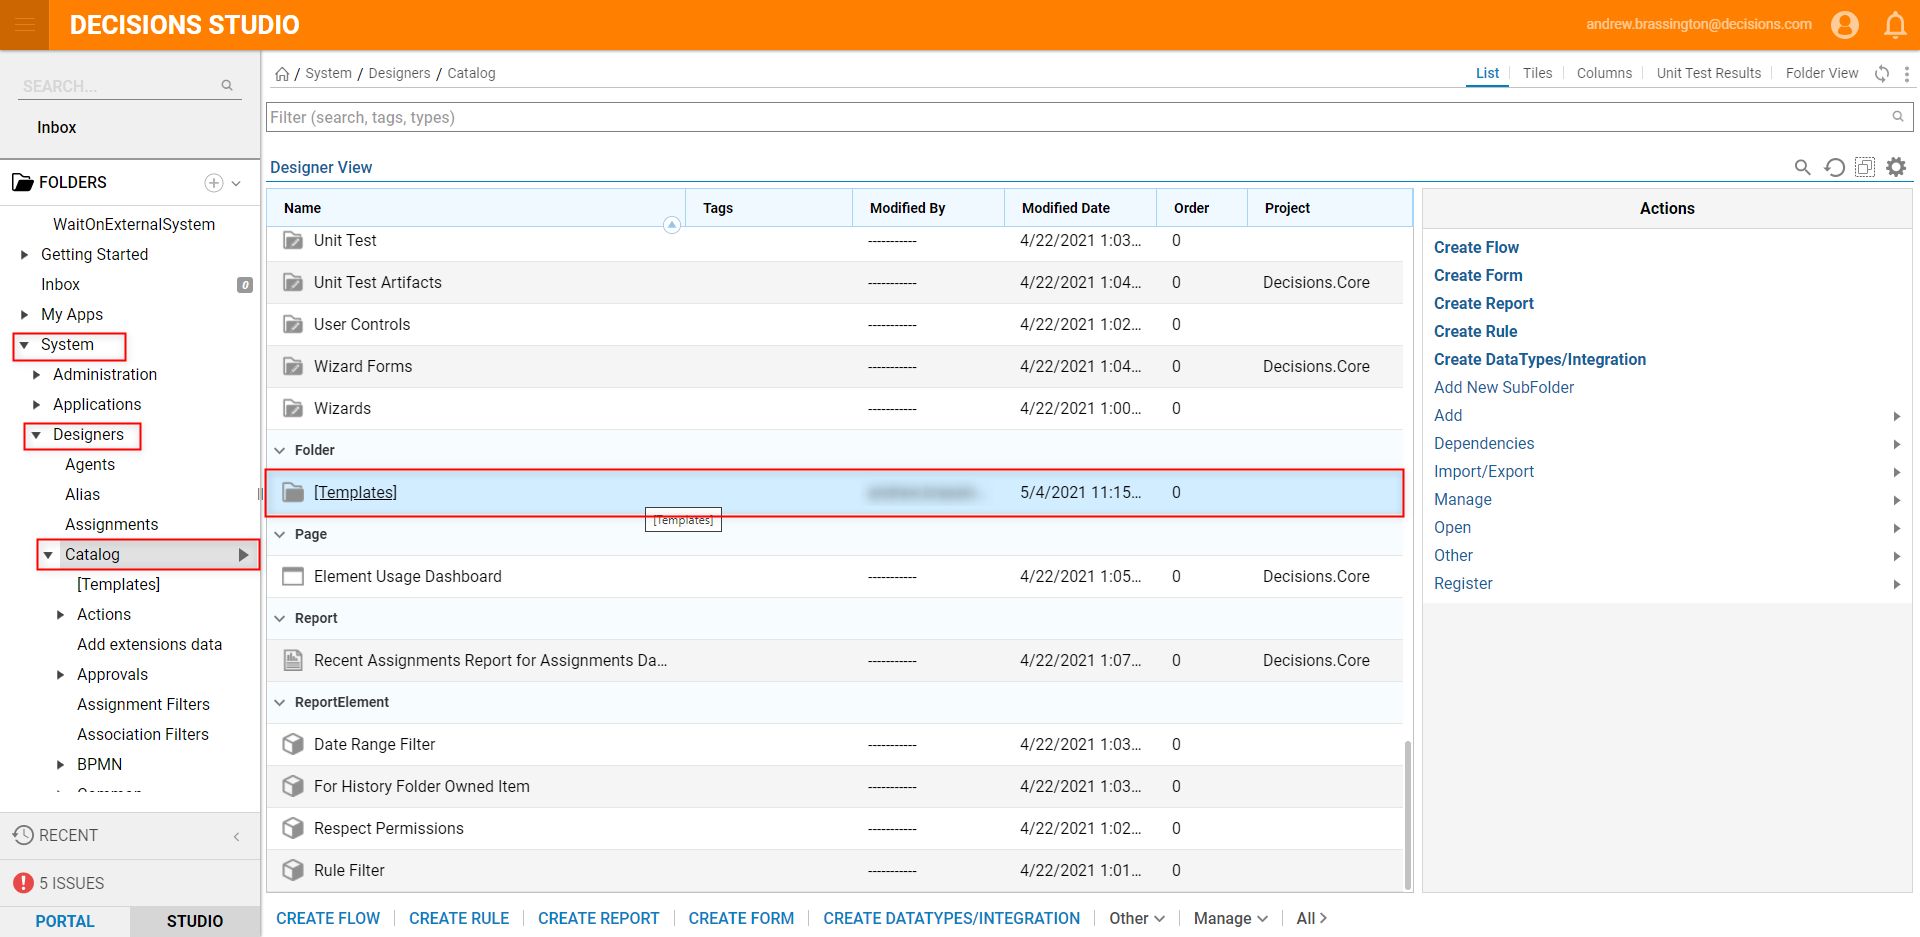
- Locate and right-click the Step Template, then select Delete Designer Element [FlowElement].
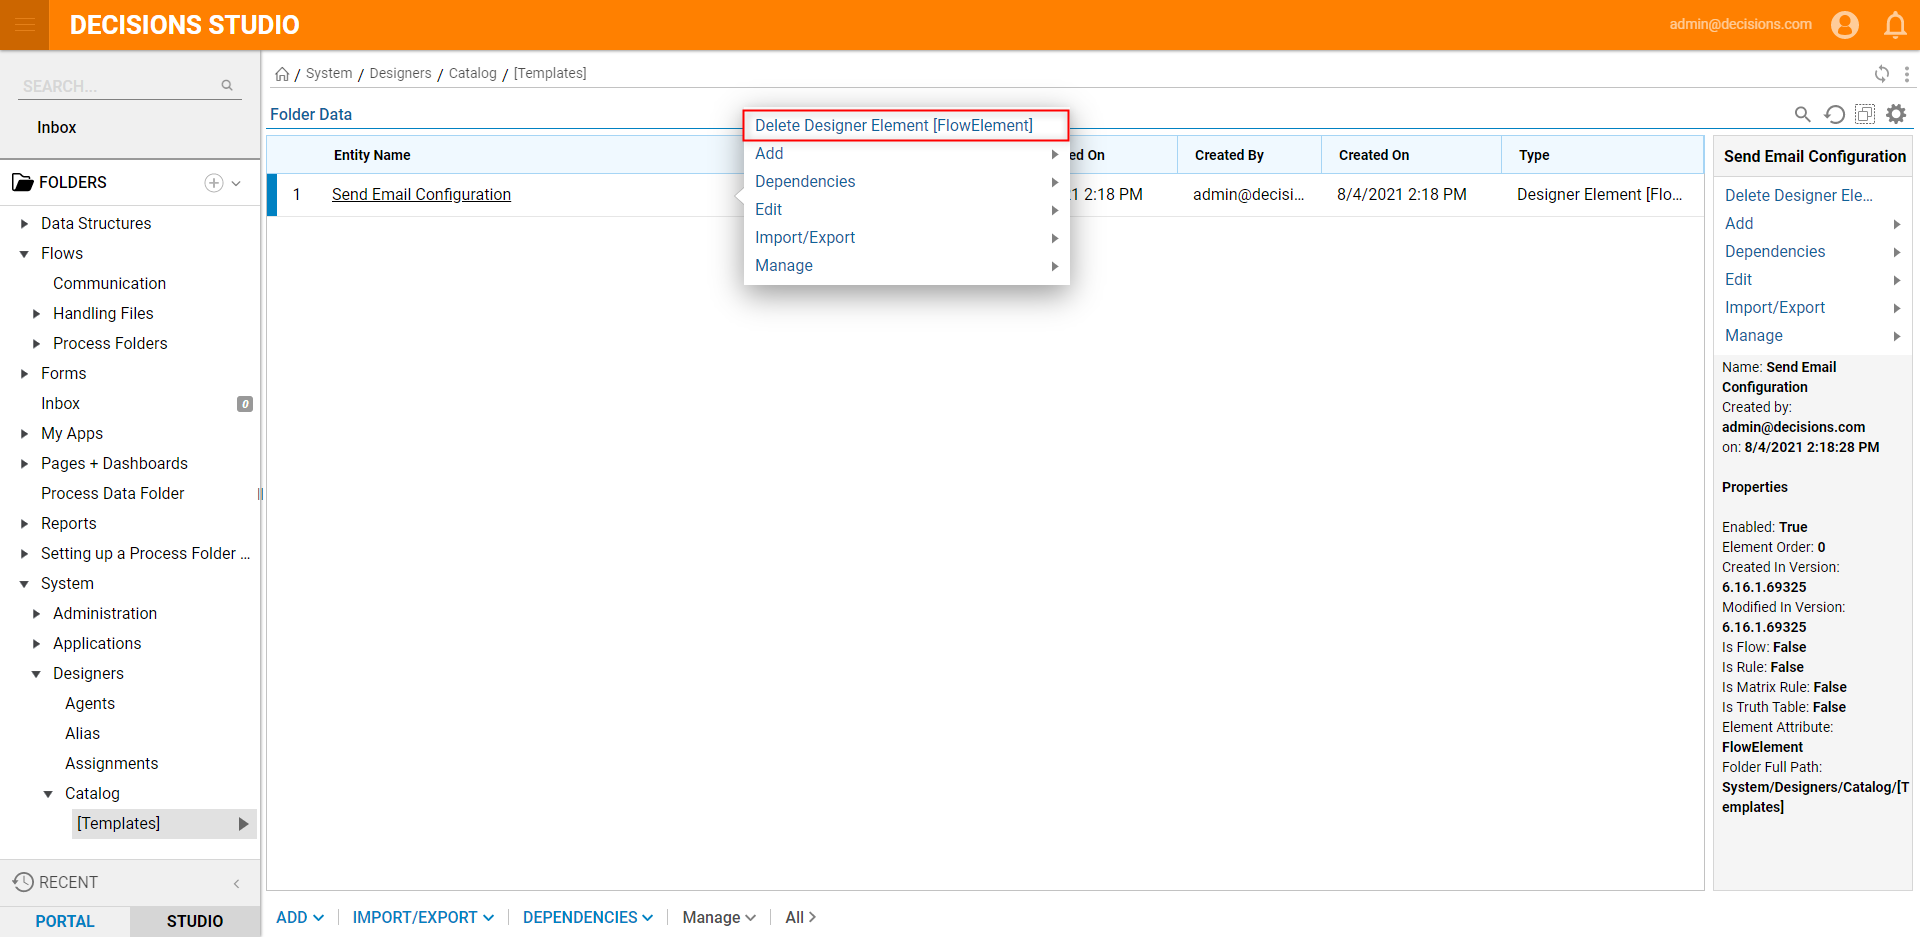
- From the Confirm Delete prompt, click OK.
