Overview
A Flow can be made into a REST web service that supports either HTTP GET or POST methods. REST calls to a Flow require either a valid user session ID, or valid user authentication ID. The REST Service API shows instructions for calling the Flow, as well as the Output. The Actions menu for the Flow provides REST service call URLs that are already populated with the necessary parameters.
Example
Creating the Flow
In this example, use the POST method to pass data into the Flow using the REST service call.
- Begin in the Designer Folder by clicking CREATE FLOW to create a new Flow.
- Next, Name the Flow and click CREATE to proceed to the Flow Designer.
- Create variables or Data Structures for the Flow input to hold data that will be Posted to the Flow.
- In the Flow Designer, select the Start Step on the workspace.
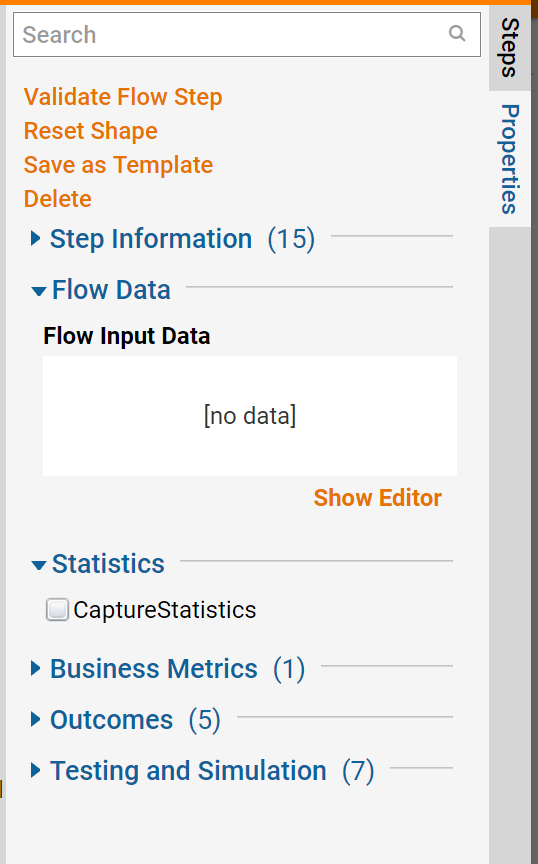
- In the Properties panel, locate the Flow Input Data box and click the Add New link to add new Input Data to the Flow.
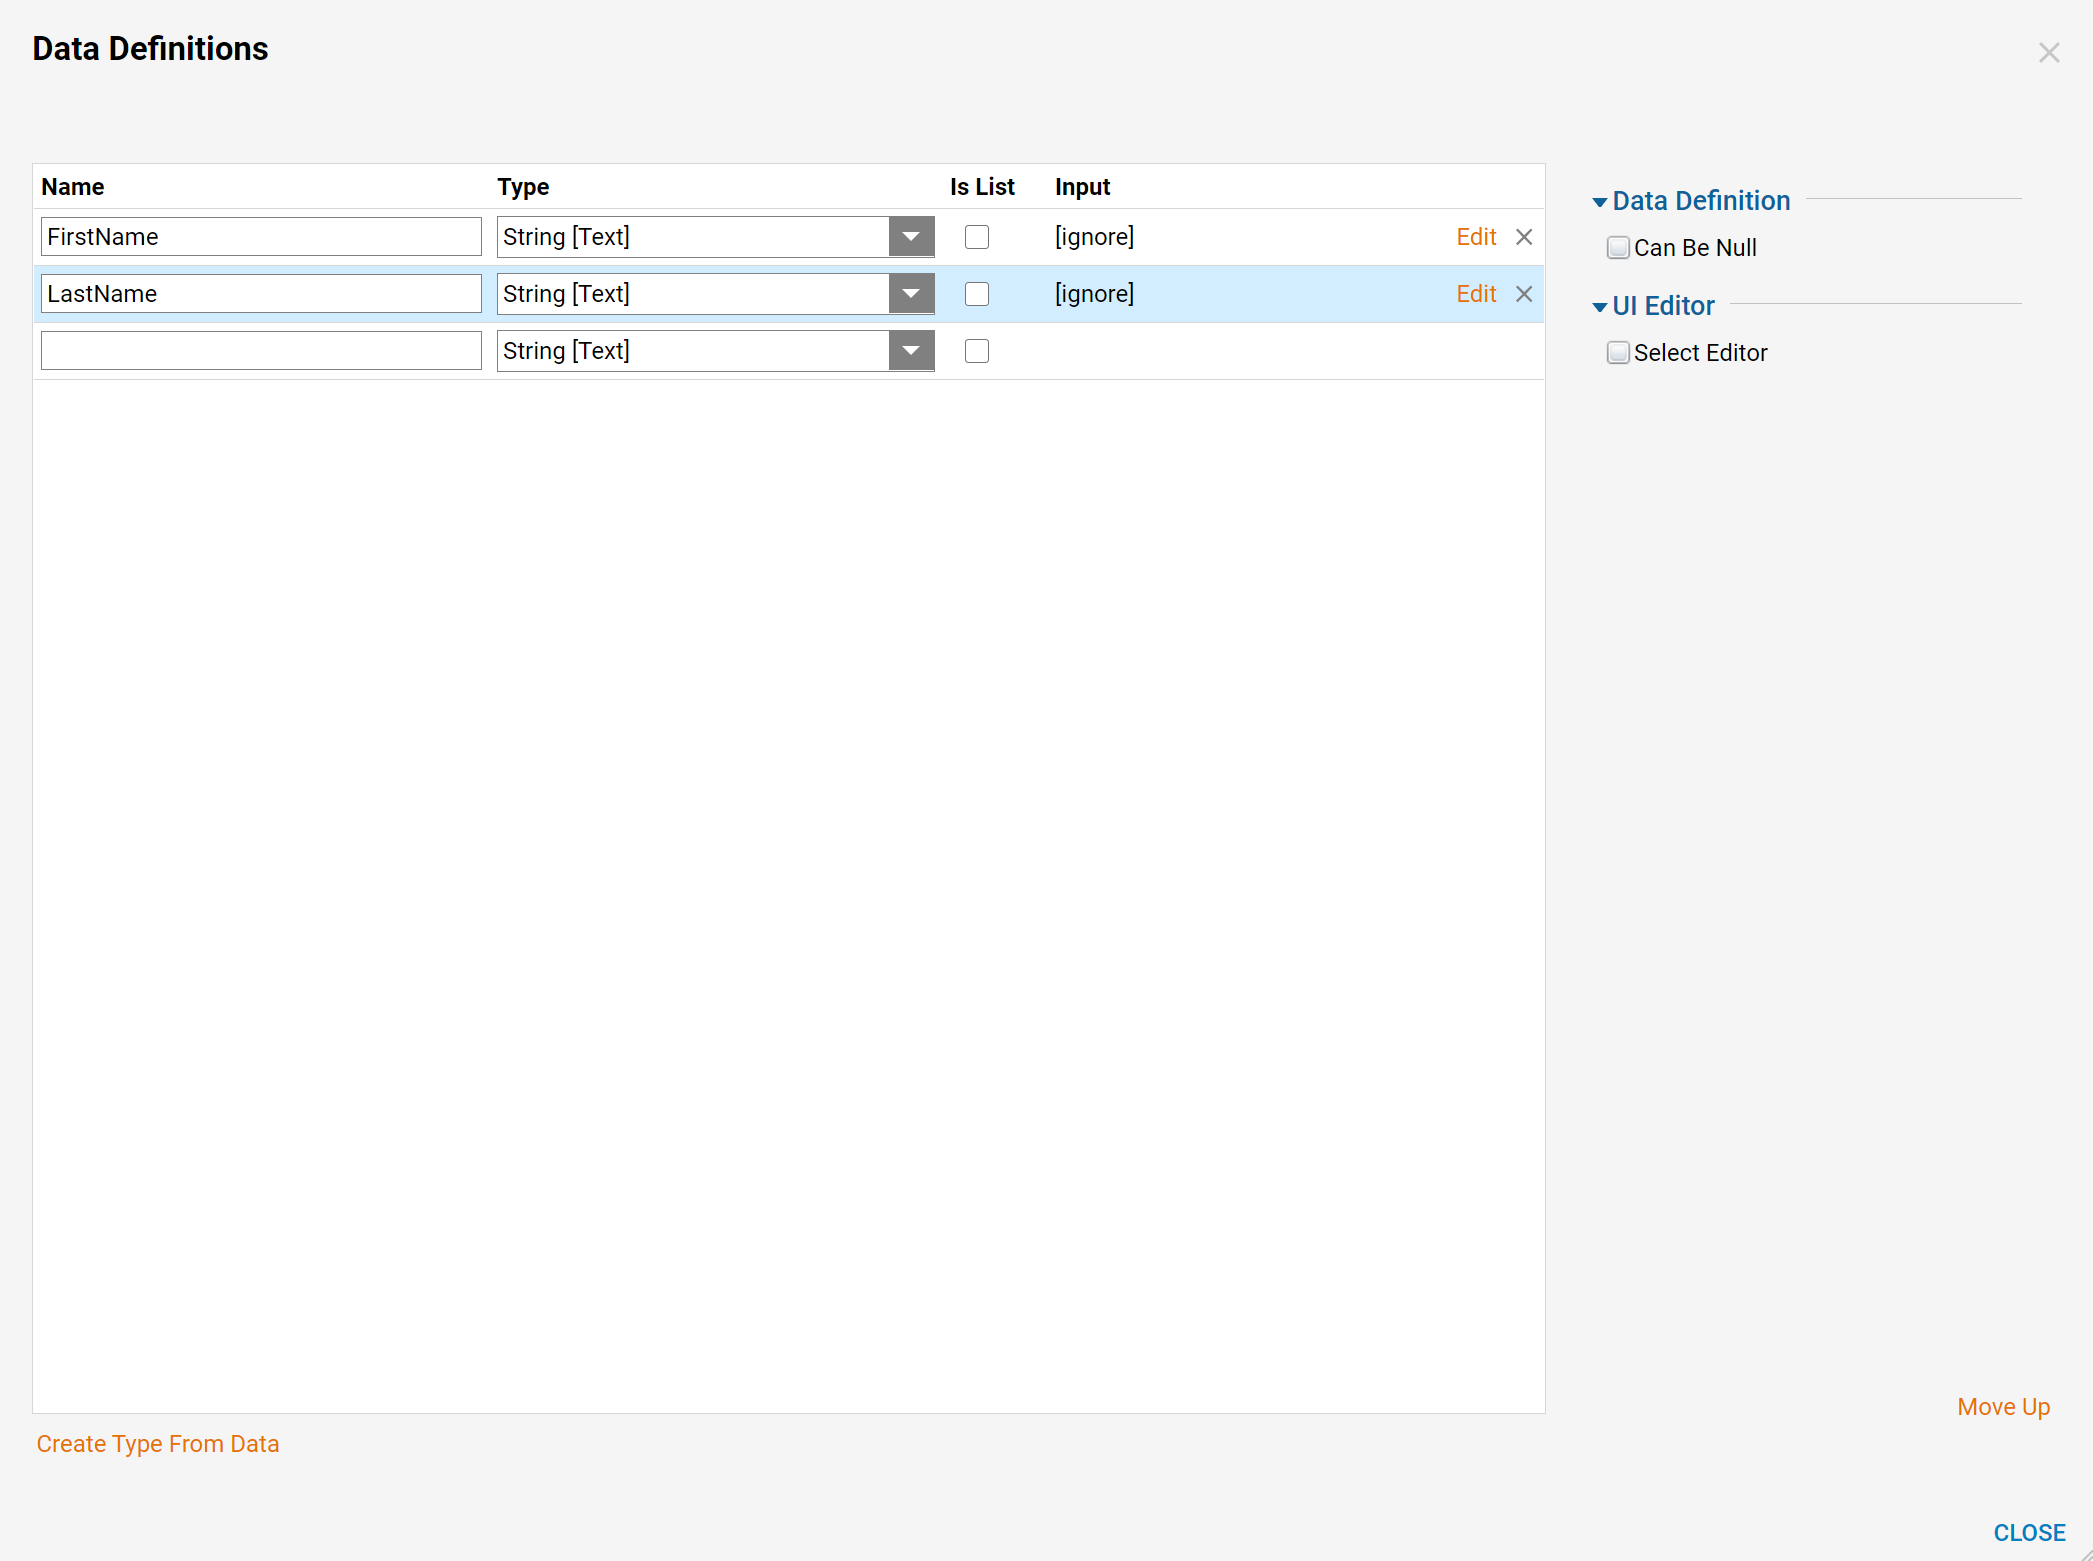
- Name the first Input FirstName and select String as its Type.
- Add a second Input and name it LastName. This will allow the Flow to pass in two String Inputs.
- In the workspace, connect the Flow's Start Step to the End Step.
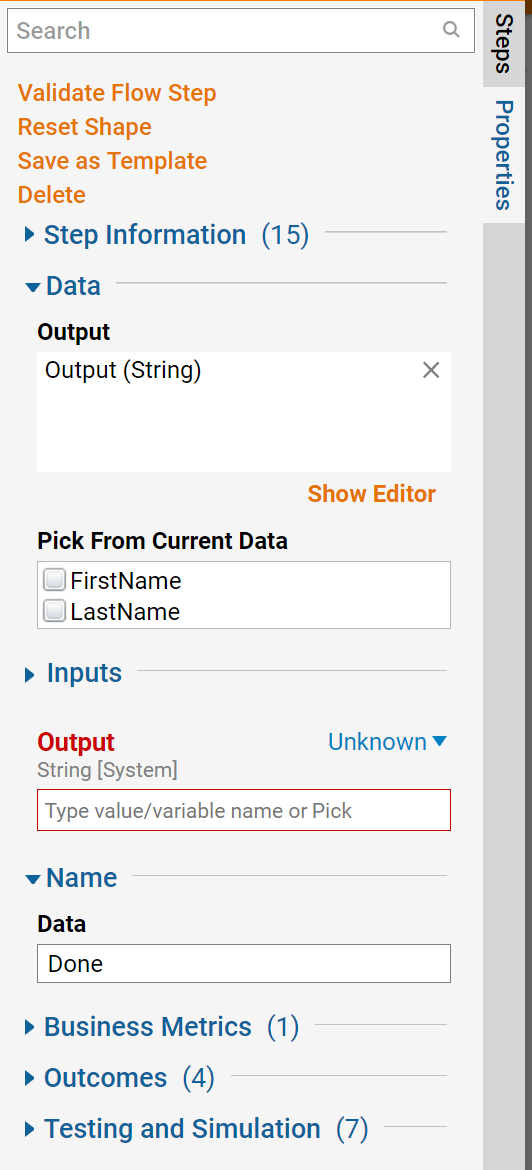
- Select the End Step to configure the Output.
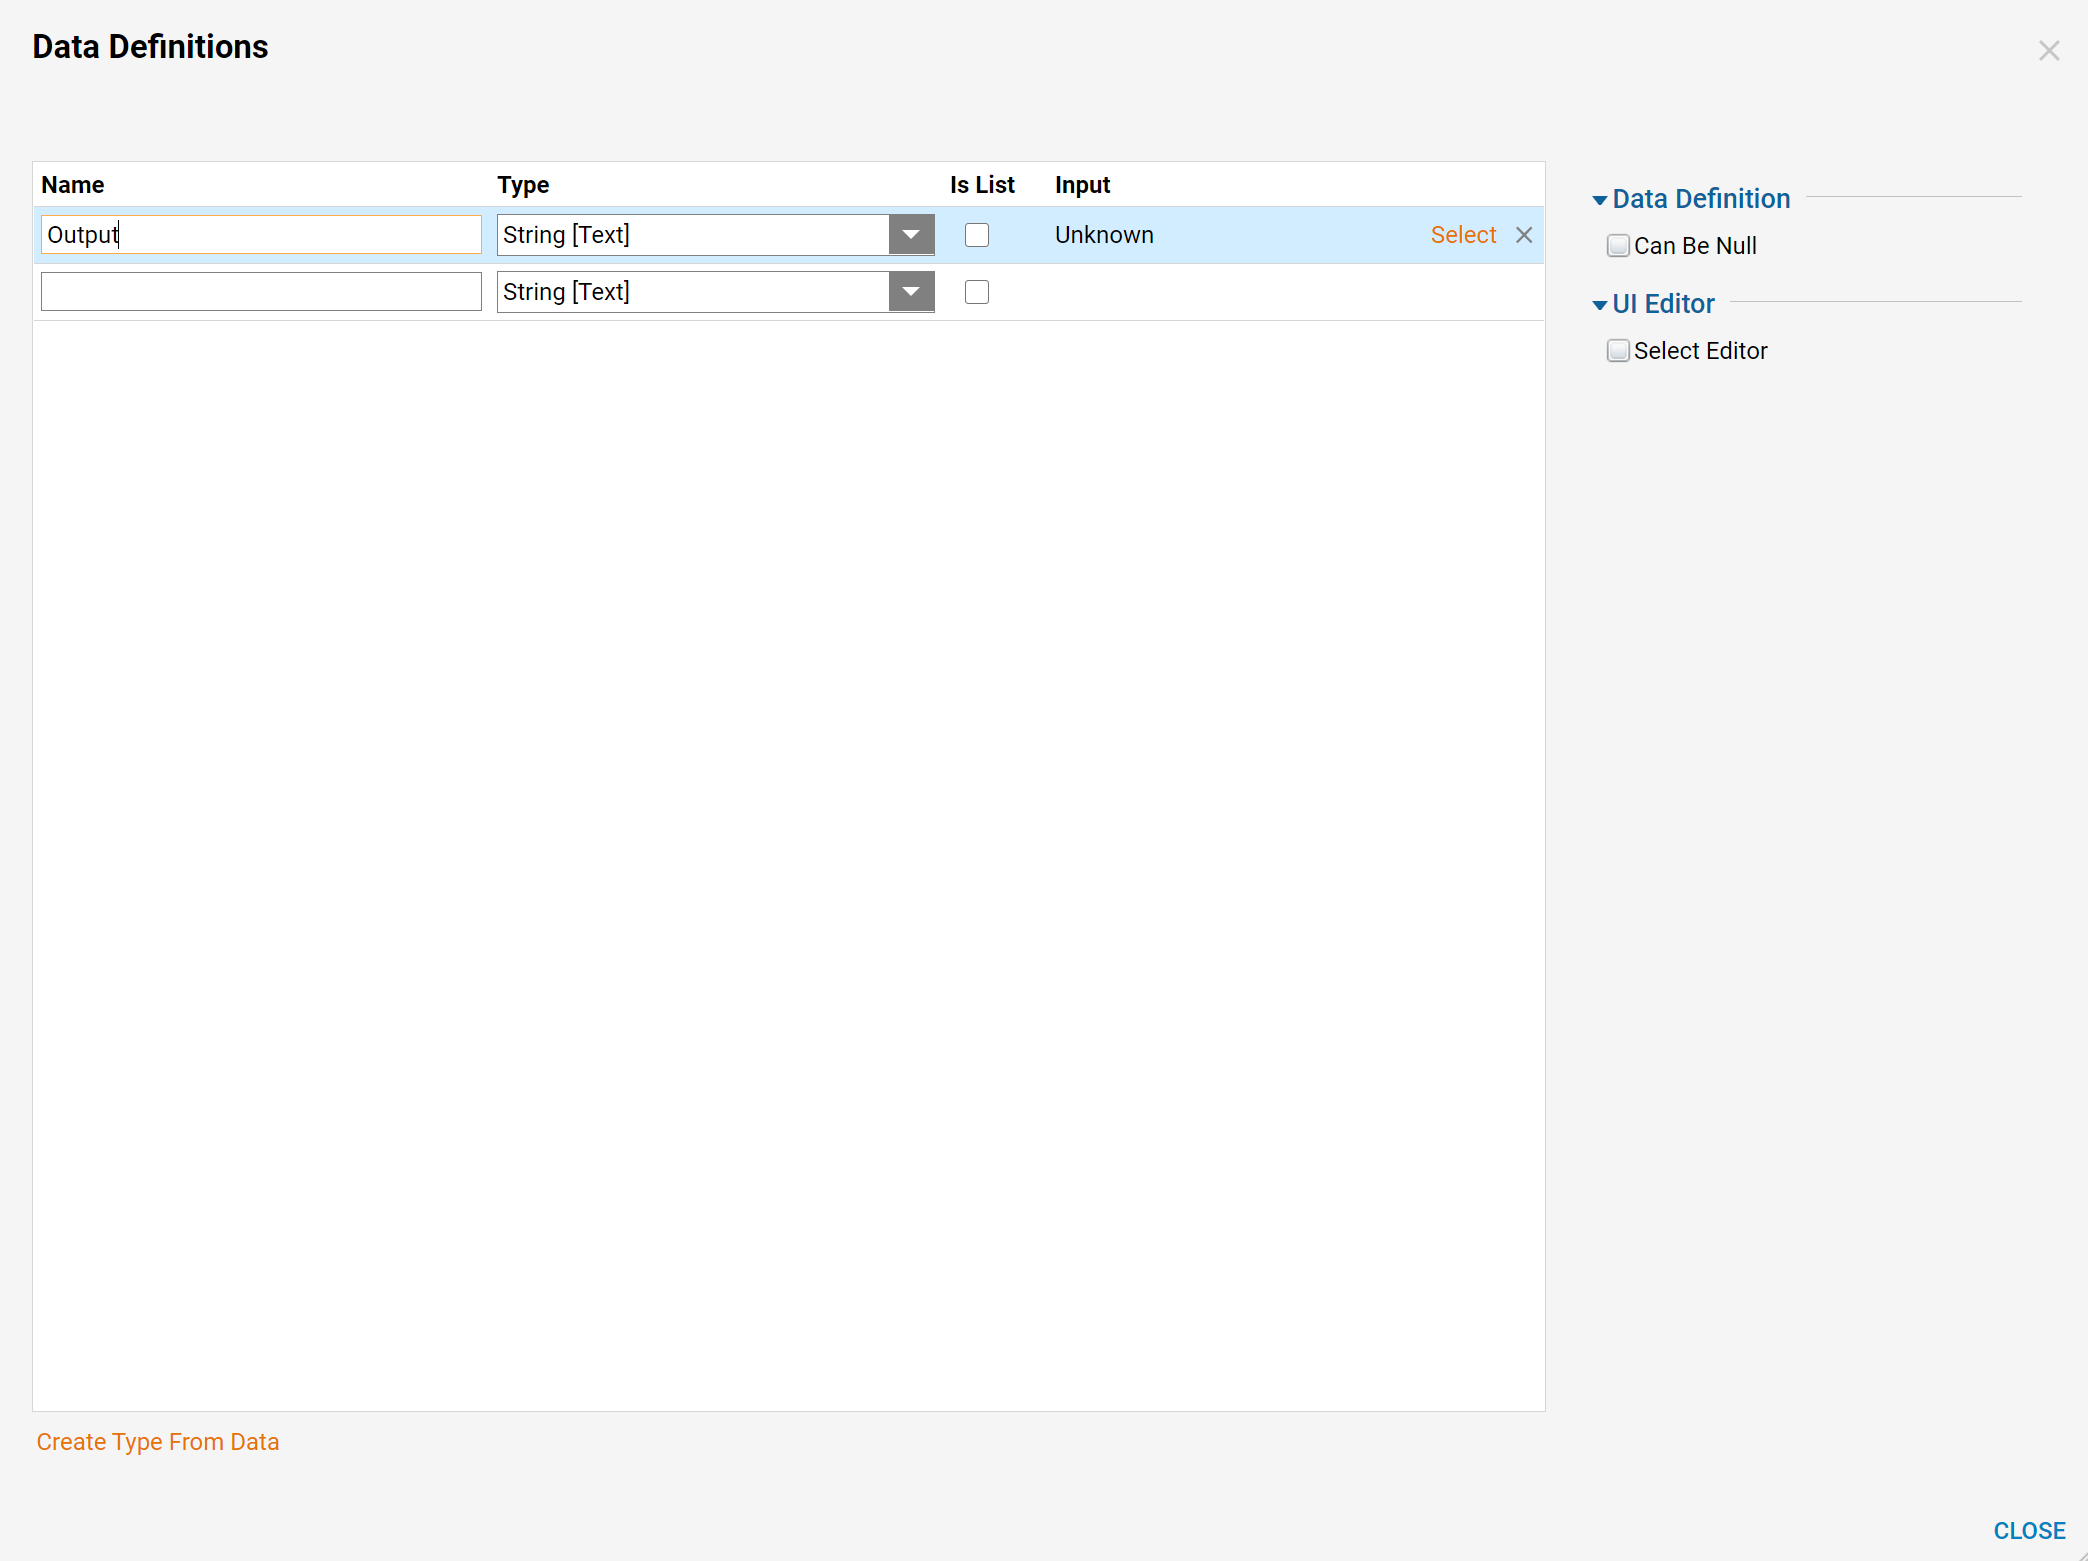
- Under the Output options, Click the Show Editor link to add a new Output Data Structure.
- Name the Output and select String for its Type.
- From the Mapping Type drop down menu, select Merge Plain Text.
- Next, click Show Editor to configure the Output.
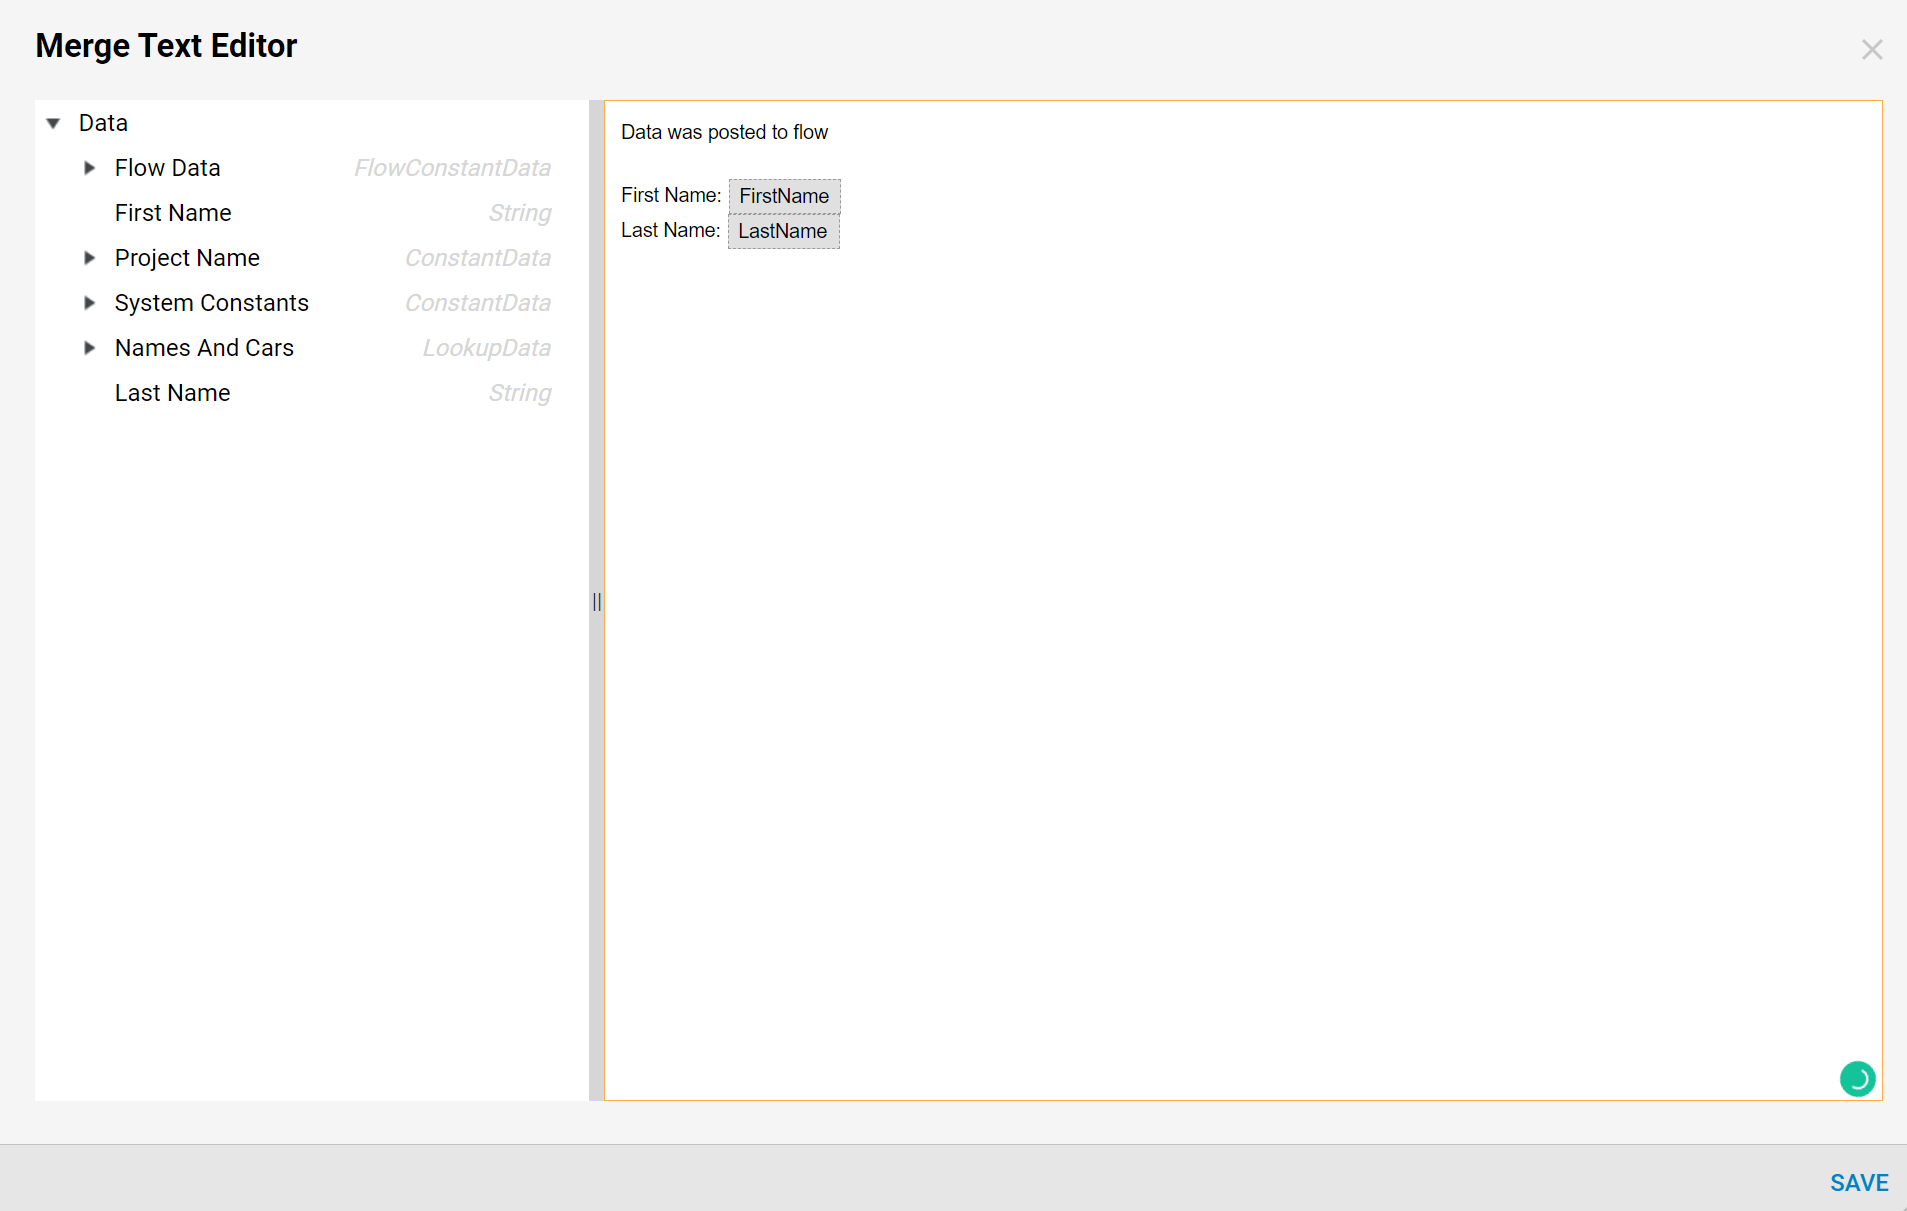
- Configure the Merged Text.
- Click SAVE when finished to save and close the Editor for Merged Text.
- This completes the Flow. Save and Close it.
Integration
- Back in the Designer Folder locate the Thumbnail for the Flow.
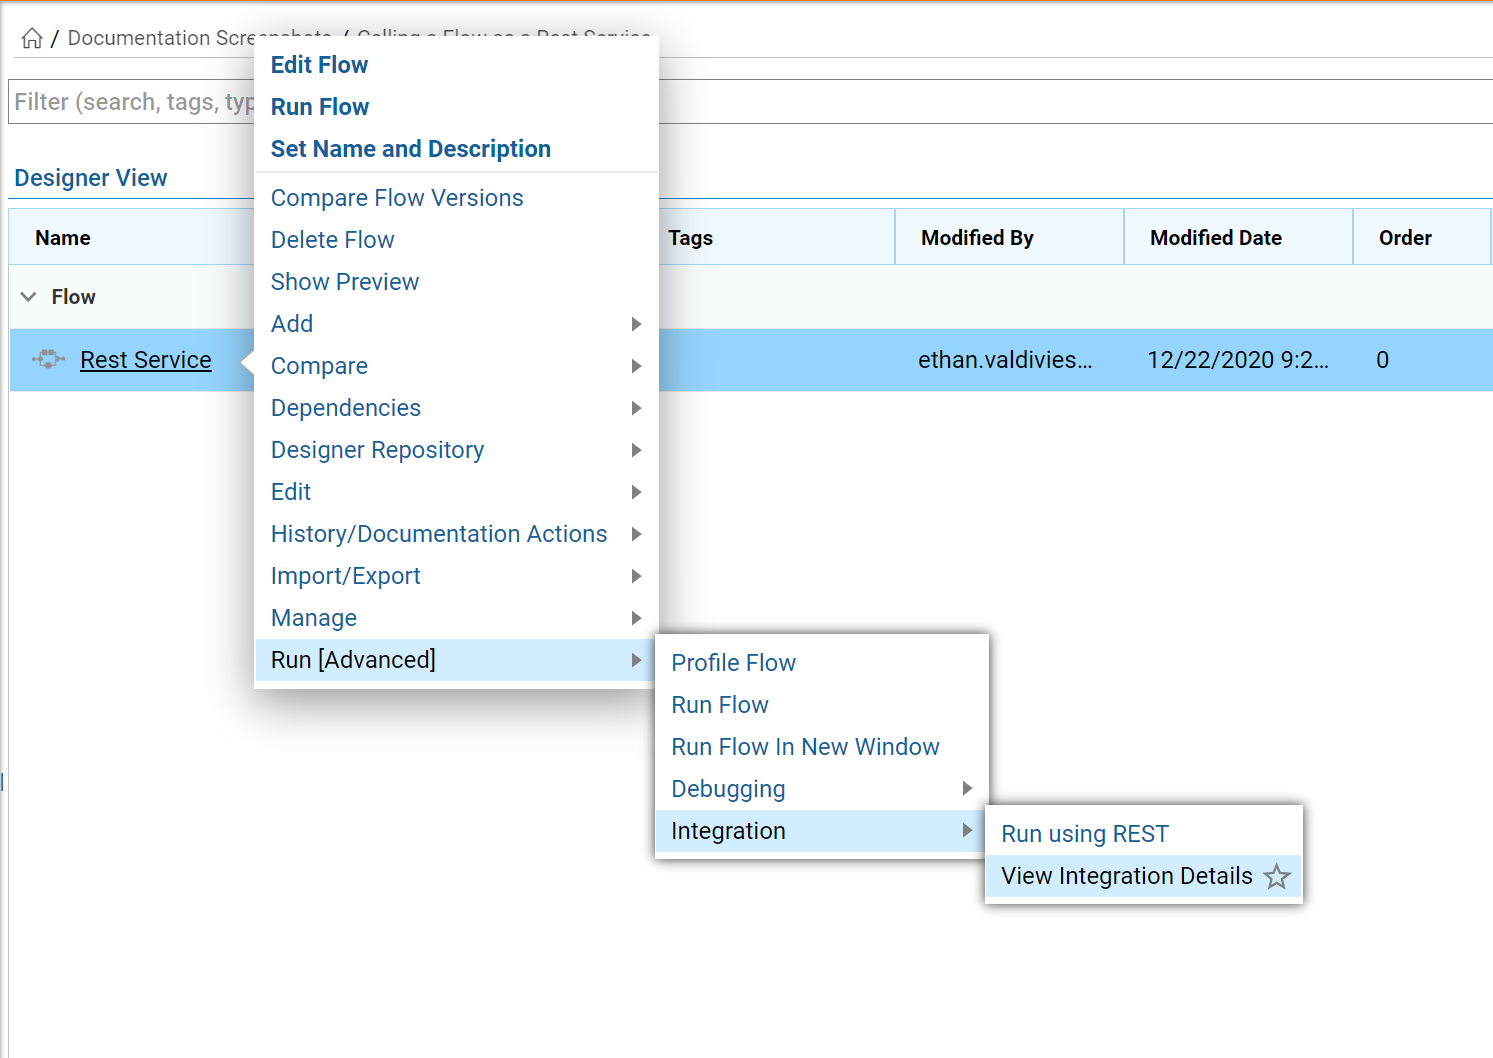
- On the thumbnail, click Action > Run [Advanced] > Integration > View Integration Details.
If a user calls a Flow that may go \Async (assigning a task to someone or running a Fire and Forget Flow) this result will be a Flow tracking id instead of the expected result.
If a user calls the Flow as a SOAP service, they will ALWAYS receive a Flow tracking id which is different behavior than REST.
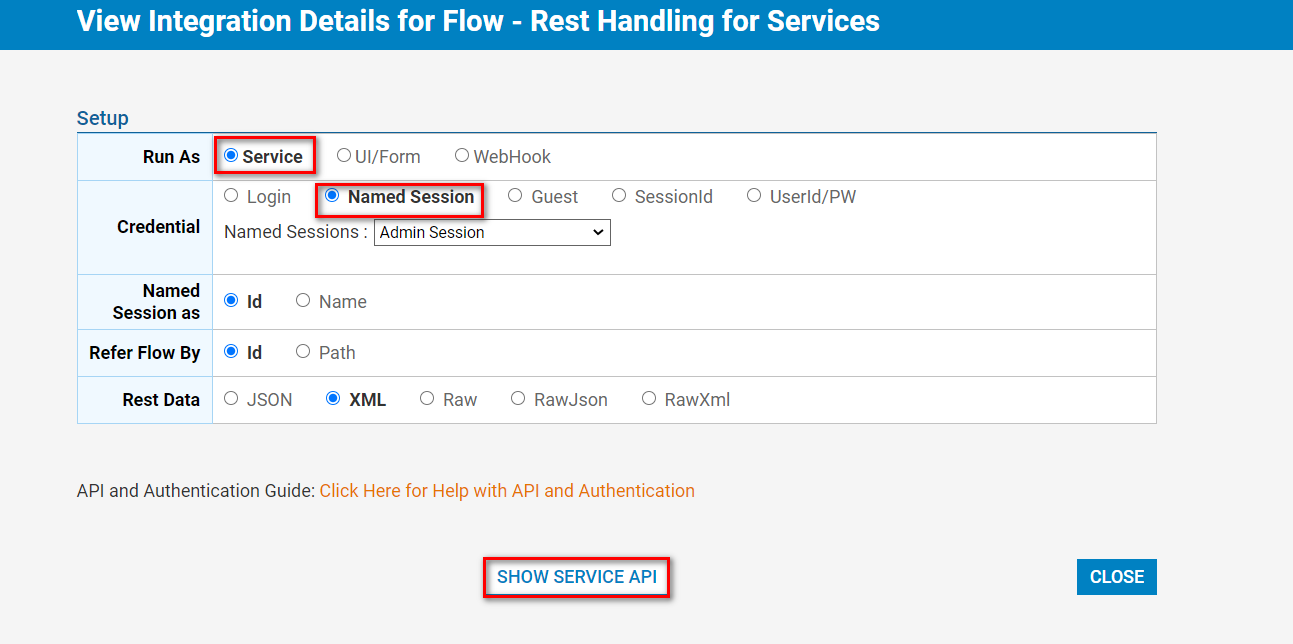
- This opens the View Integration Details page. From this page, select Named Session for the Credentials.
- Then, click the Show Service API button to view settings that are needed to make a successful call to the service.
- Use POST method to look at the Call via POST section.
- Users will require the URL and also need to pass the parameters provided in this section to set up and execute a POST call.
- Set the Rest Data type to XML to allow for XML Serialized Input and set the Expected Output as XML as well.
- This Flow will accept the parameters only in this structured way or will return a service error.
- In this example, users are expecting an outcome named Done with a variable named Output; this variable will hold the String that was built in the Merge Text Editor.Note:
Reference the table below for further information on Authentication Credentials.Authentication Credentials:
UserId/PW Username and Password Credentials Guest A special Guest Account that can be enabled and access to Folders can be granted to this user, Login This will present a Login Screen to the user and not recommended for API. SessionId/Named Sessions The most recommended approach for API calls; see Creating a Named Session. 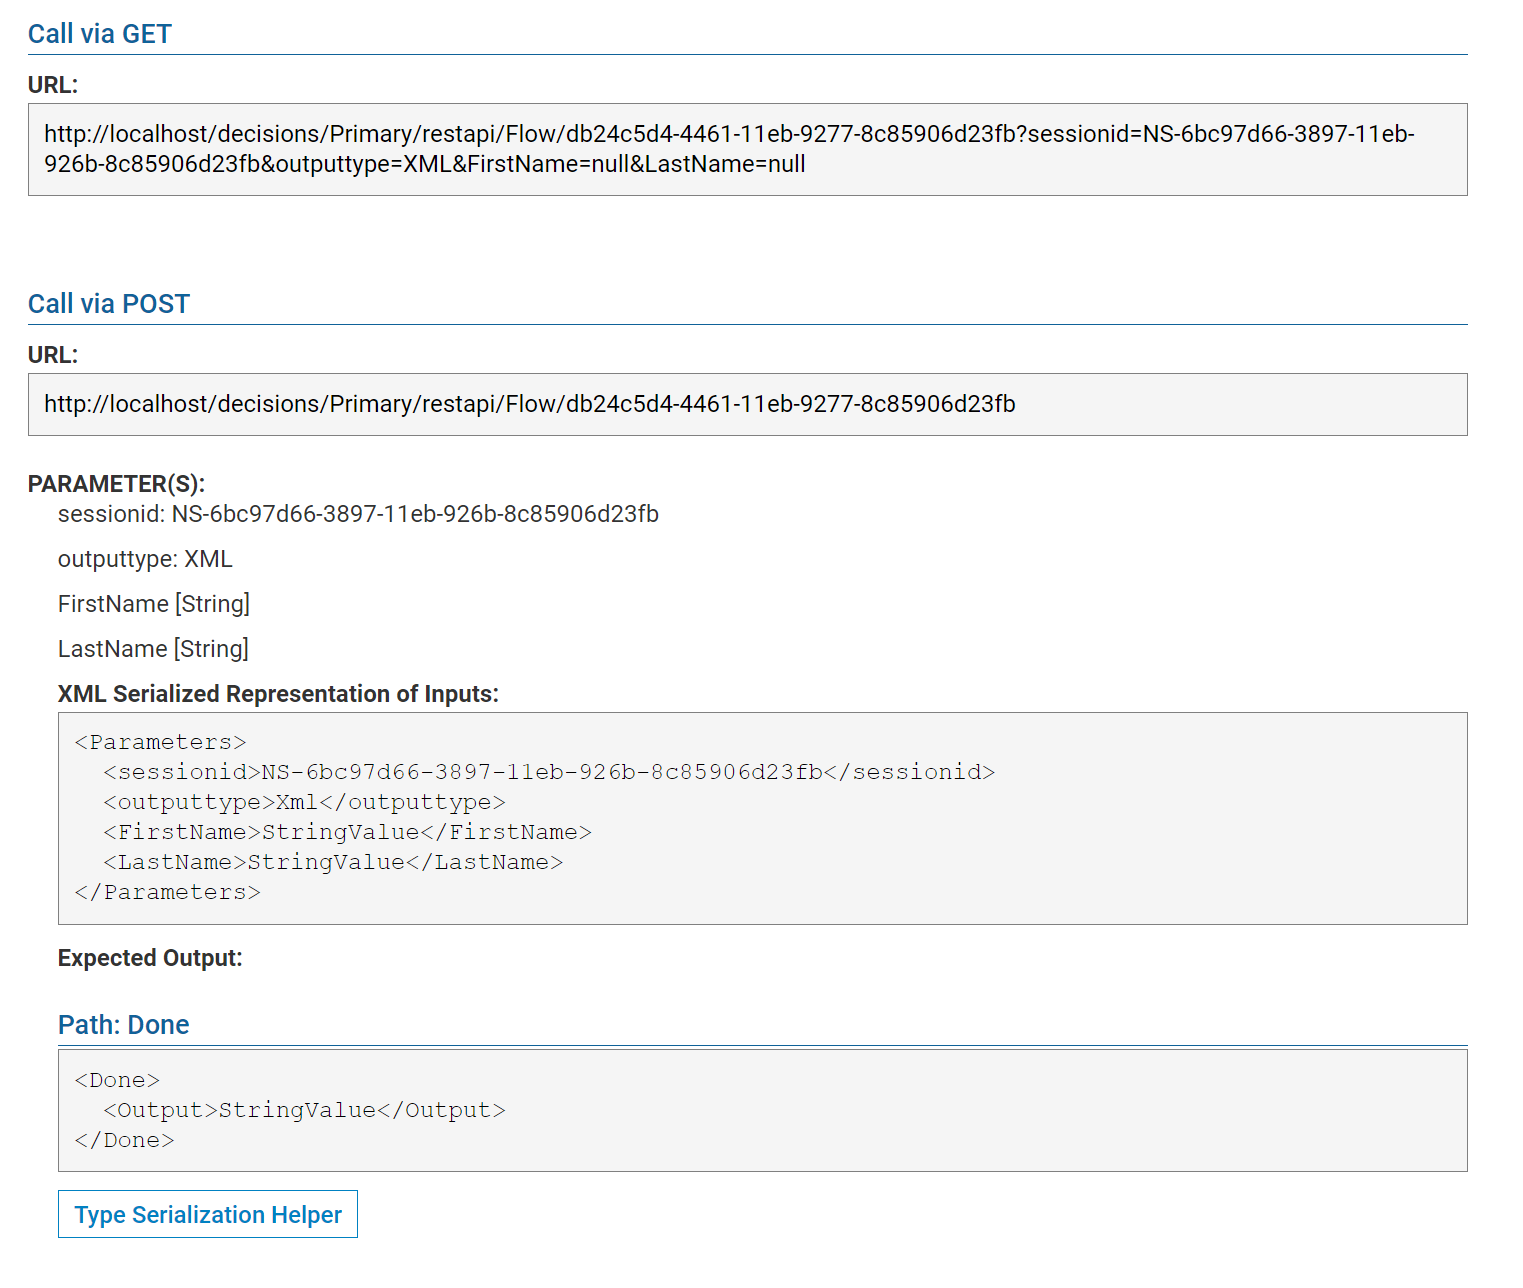
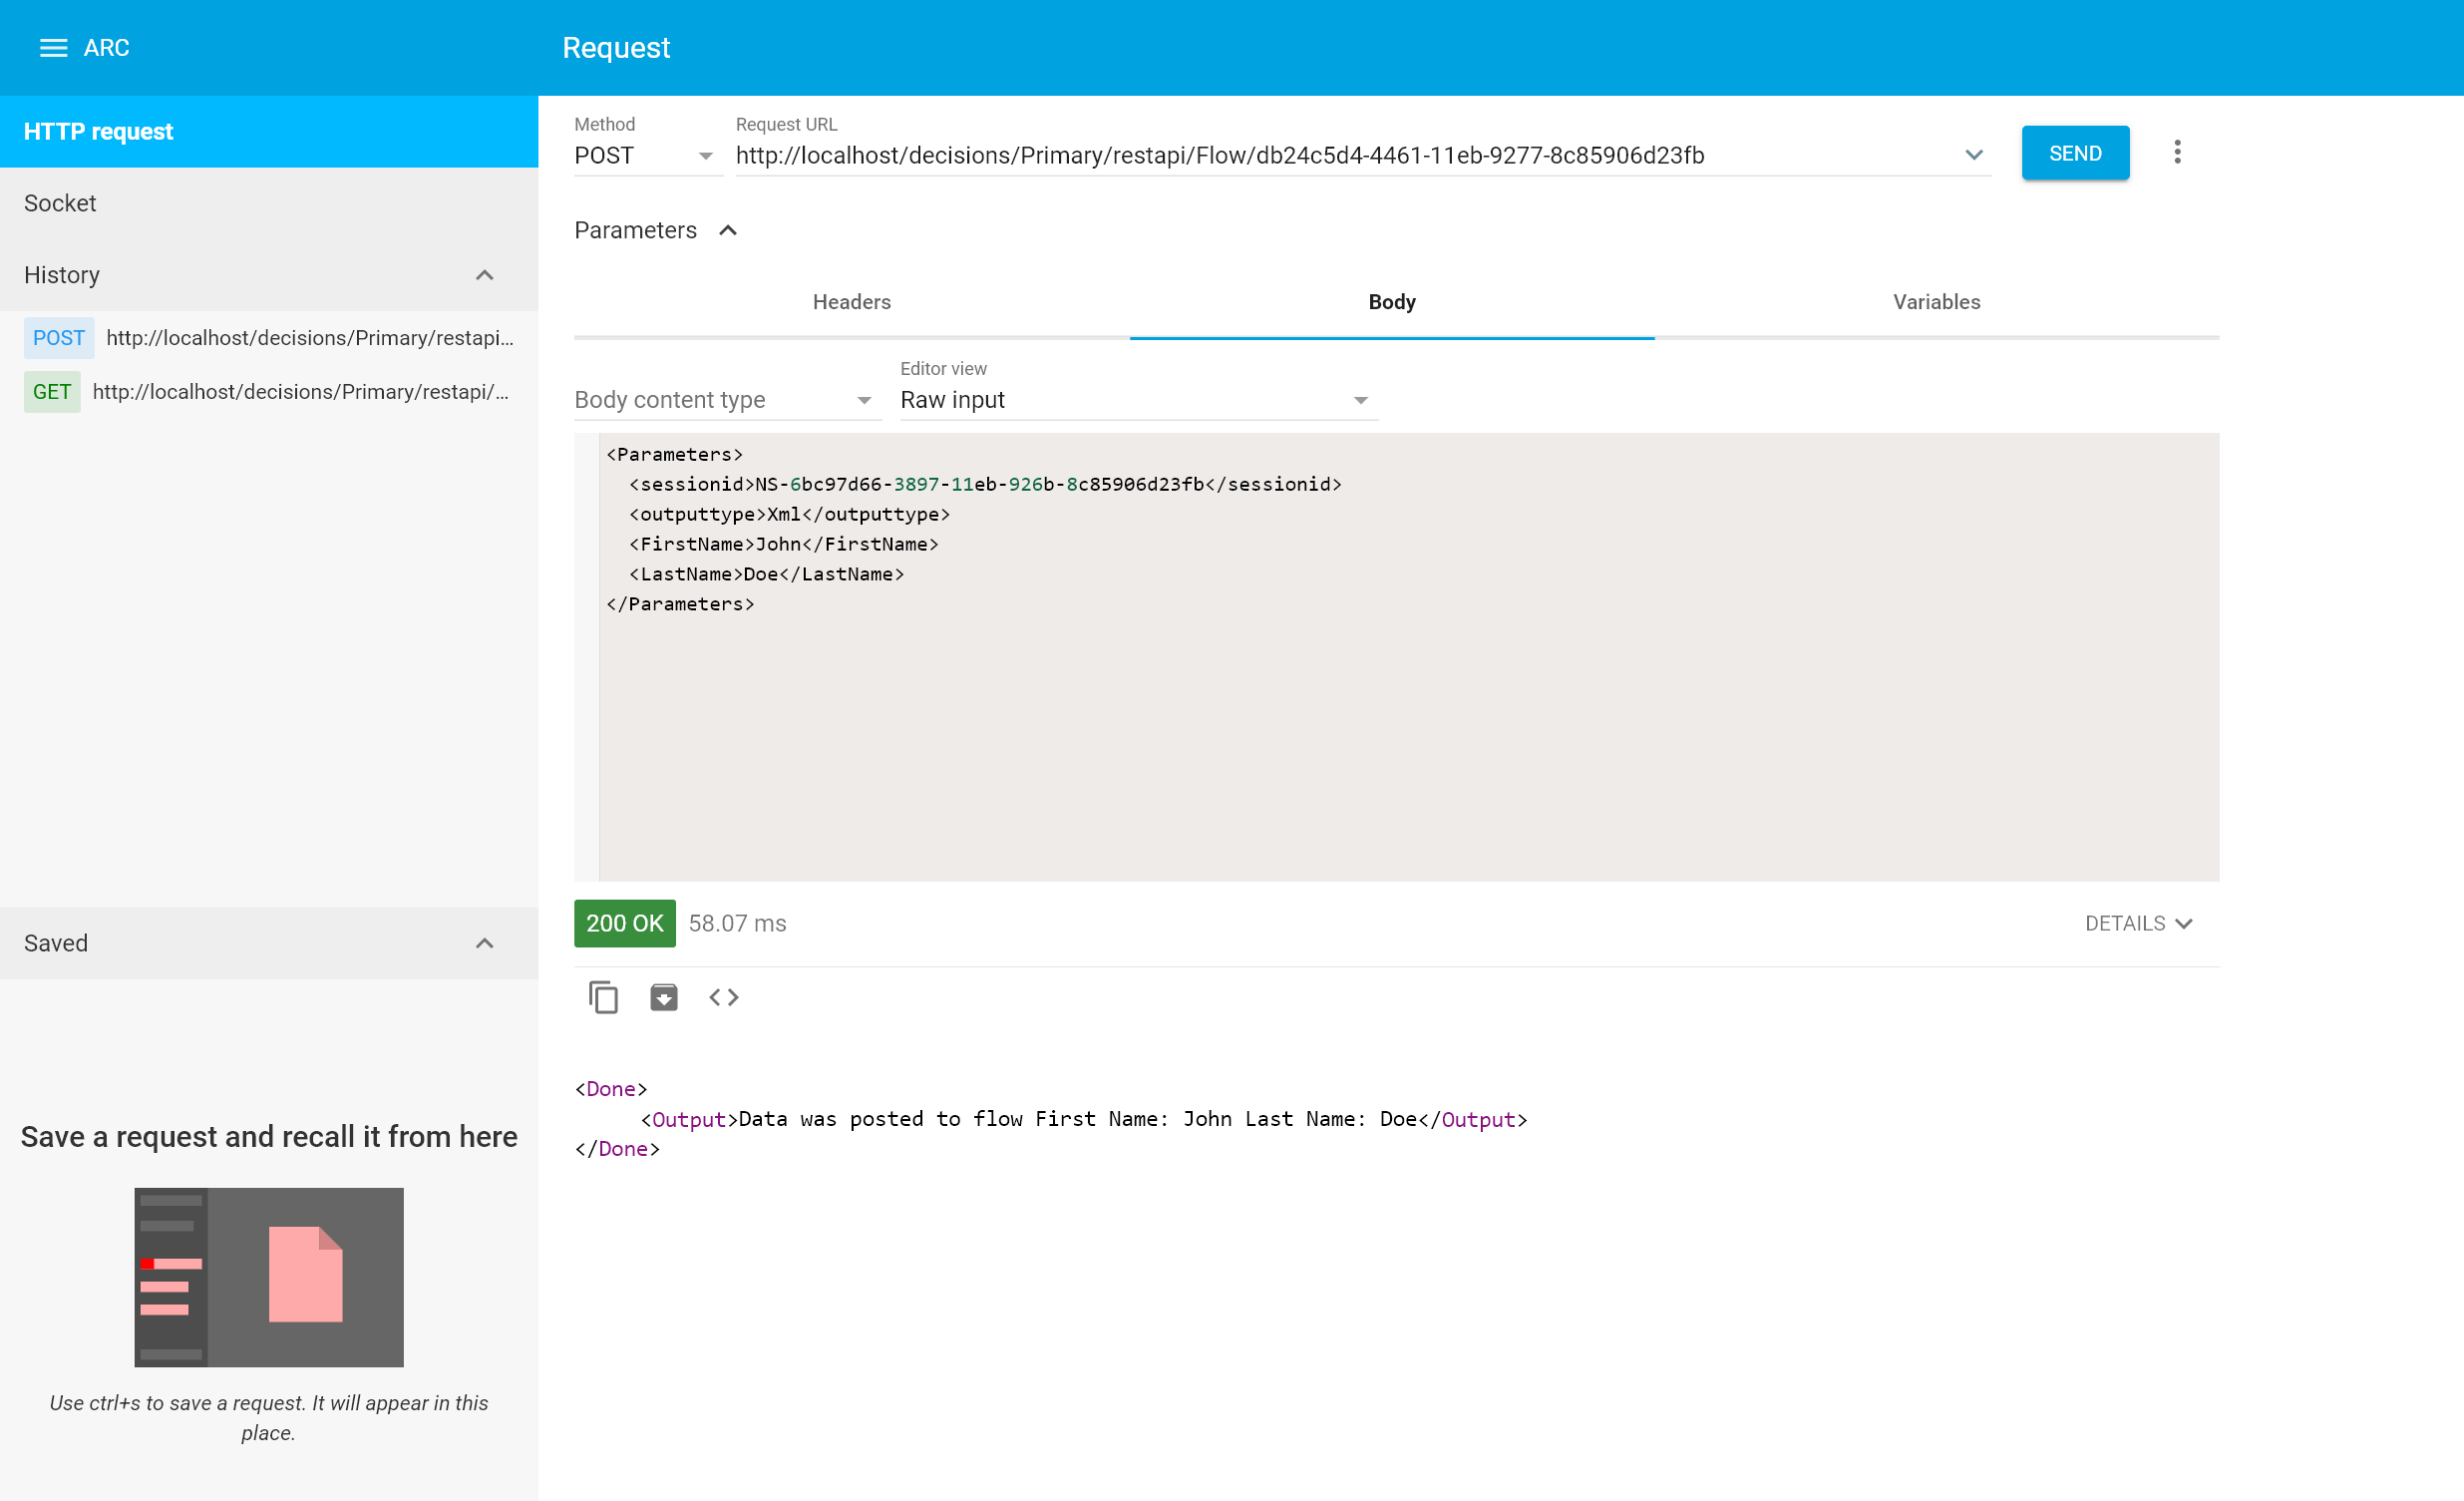
- Next, test the call. Mention passing desirable values in the parameters. This Flow will use those values after they are posted into Flow.
- This screenshot demonstrates a successful Response from the service with the desirable output.
