Overview
The Decisions portal can integrate with web services that return JSON formatted data.
The steps for retrieving and using the JSON data are as follows:
- Integrate the service within the Decisions portal
- Create a Flow to make the service call and handle the results
- Generate a data type to deserialize the JSON data, so it is usable and introduces that type into the Flow.
In this example, a web service that retrieves the weather is integrated with the Decisions portal. An XML data type is generated against the web service's return data structure, and a Flow is created to make the service call and handle the results.
This method is deprecated. Please refer to the Using GET Method with REST Service Integration and Using POST Method with REST Service Integration articles to learn the new way to integrate with a REST Service introduced in versions 6.10.0.
Integrating the Web Service
- Log in to the portal (with an administrator account).
- Navigate to System > Integrations > External Services.
- Select Add REST Service Integration.
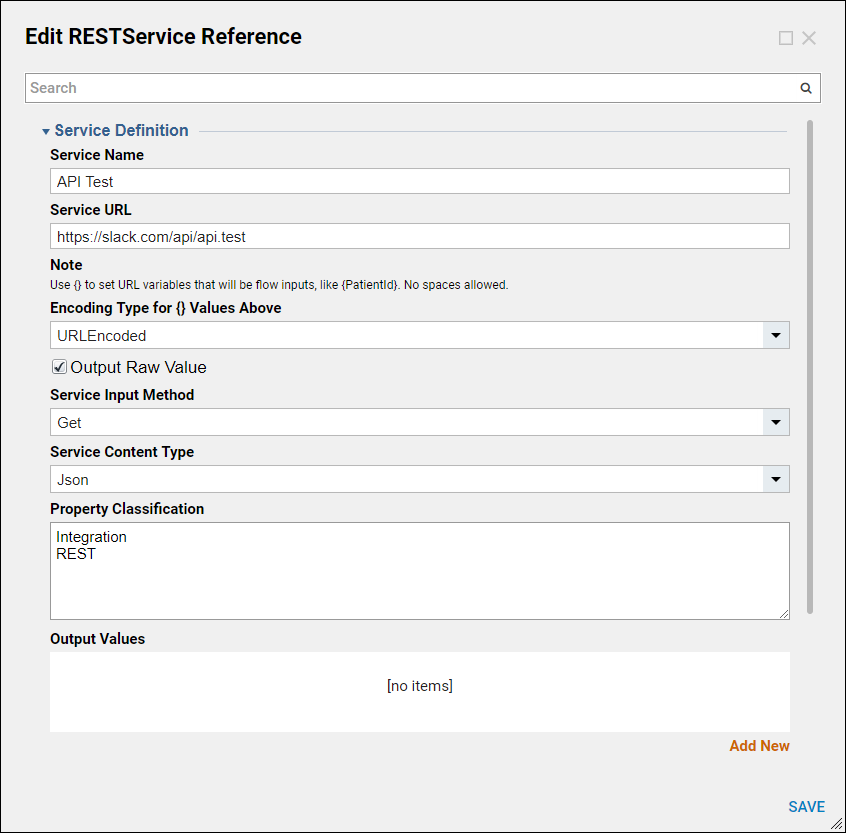
- In the Service Name field, type the name of the web service.
- Then, in the Service URL field, paste in the URL. The URL will most likely contain variables to pass in; those will be moved to a new field after the following settings are established. For example purposes, use: https://slack.com/api/api.test.
- For this example, change the Service Input Method field value to Get.
- Change Service Content Type to JSON.
- Select SAVE to complete setting up the RESTService Reference.
In other scenarios:
When the Service Input Method value is Post, a Data To Send field will add parameters for data to be passed in. If using this method: From the URL, cut the list of parameters, which starts after the question mark (?) in the URL. Paste that string into the Data to Send field and remove the question mark that starts the string.
Using the Web Service Call in a Flow
- Create a new Flow that will make the call to the web service and ingest the return data.
- From the Designer Folder, select CREATE FLOW.
- Name the new Flow and select OK.
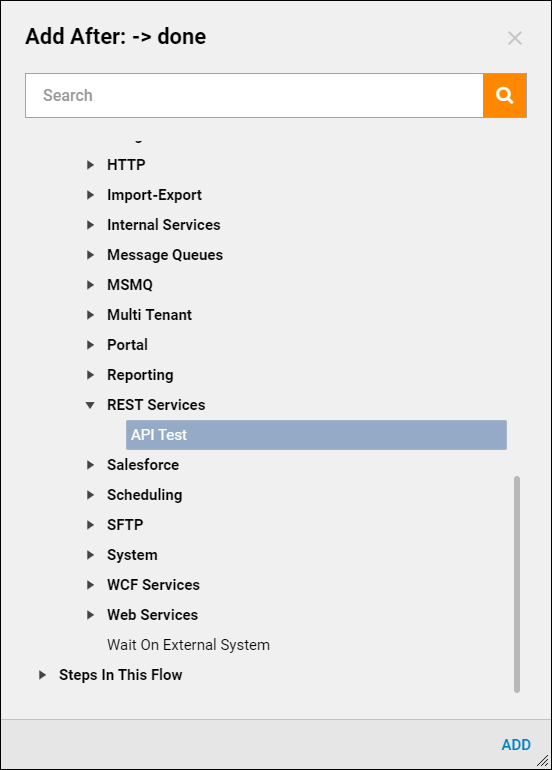
- From the Steps panel, expand Integrations > All Integrations > Rest Service category and select the API Test component.
- Select ADD to add it to the workspace.
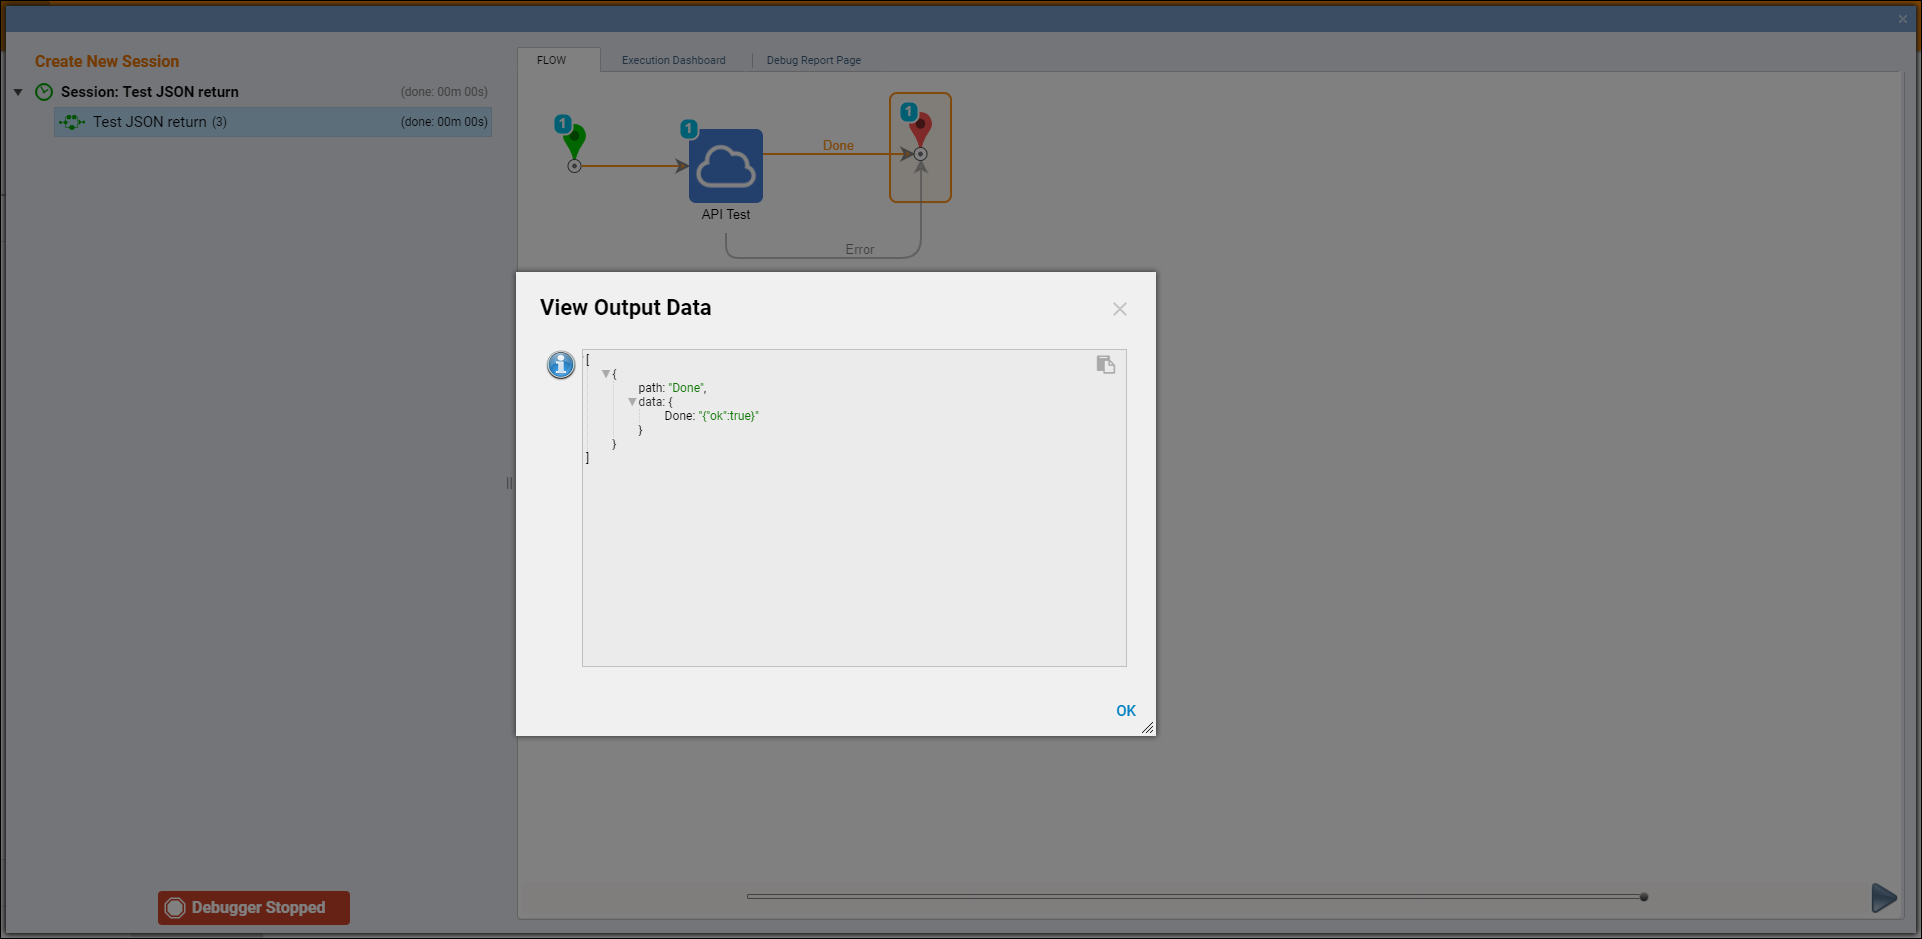
- The output of this web service call will be a string of serialized JSON data.
- To use the data returned in a more meaningful way, it is necessary to create a Data Structure.
- Save and close the Flow.
Create Data Structure From JSON
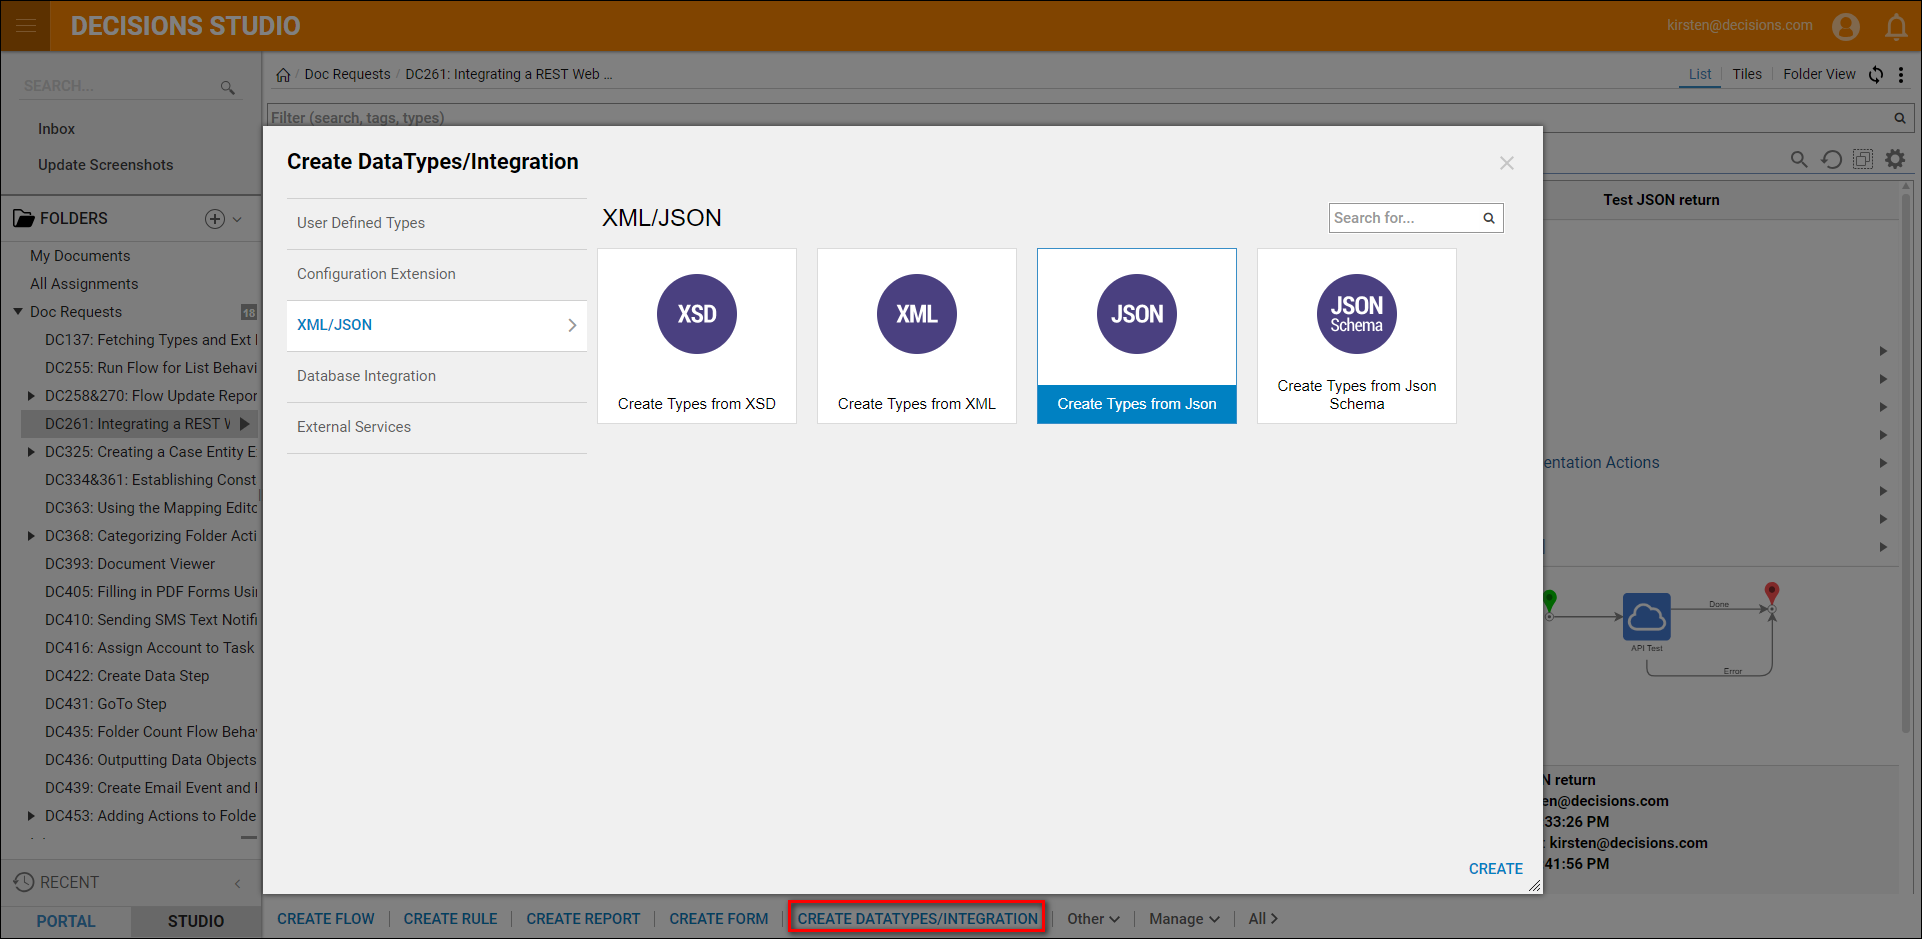
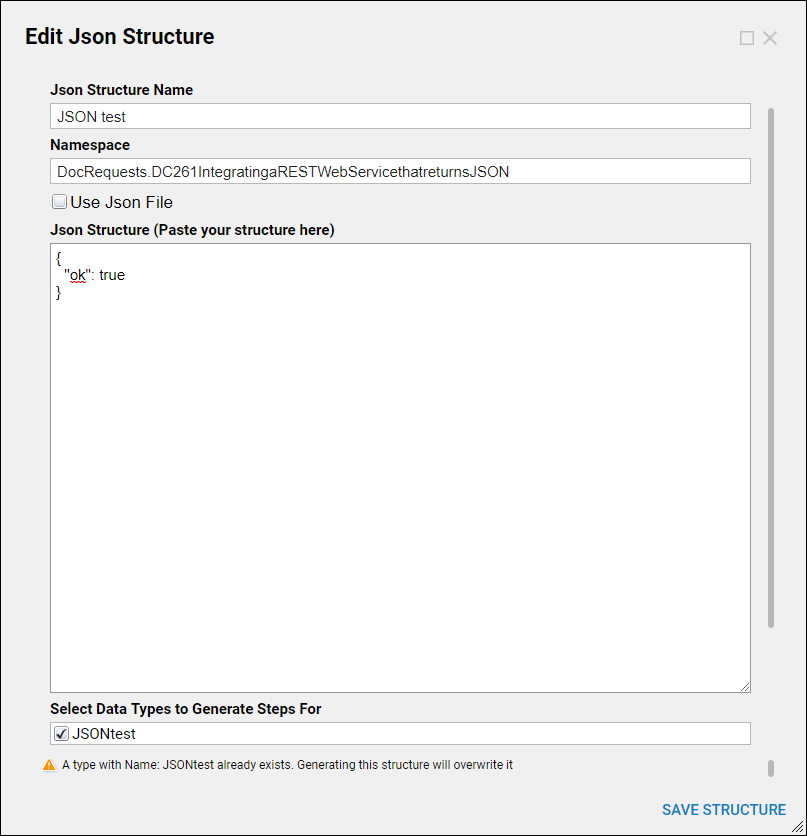
- From the Designer Folder, select CREATE DATATYPES/INTEGRATION > Create Types from JSON.
- Paste in the structure when creating the data type. There is also the potential to upload the structure through a JSON file.
- Enter a name for the service in the JSON Structure Name field and upload a file for the structure or paste in the Data Structure.
- In the list of recognized data types from the structure, select the desired types.
- Select SAVE STRUCTURE. The Data Structure is generated for the JSON data, as well as components for deserializing and serializing that data.
Deserialize JSON Data
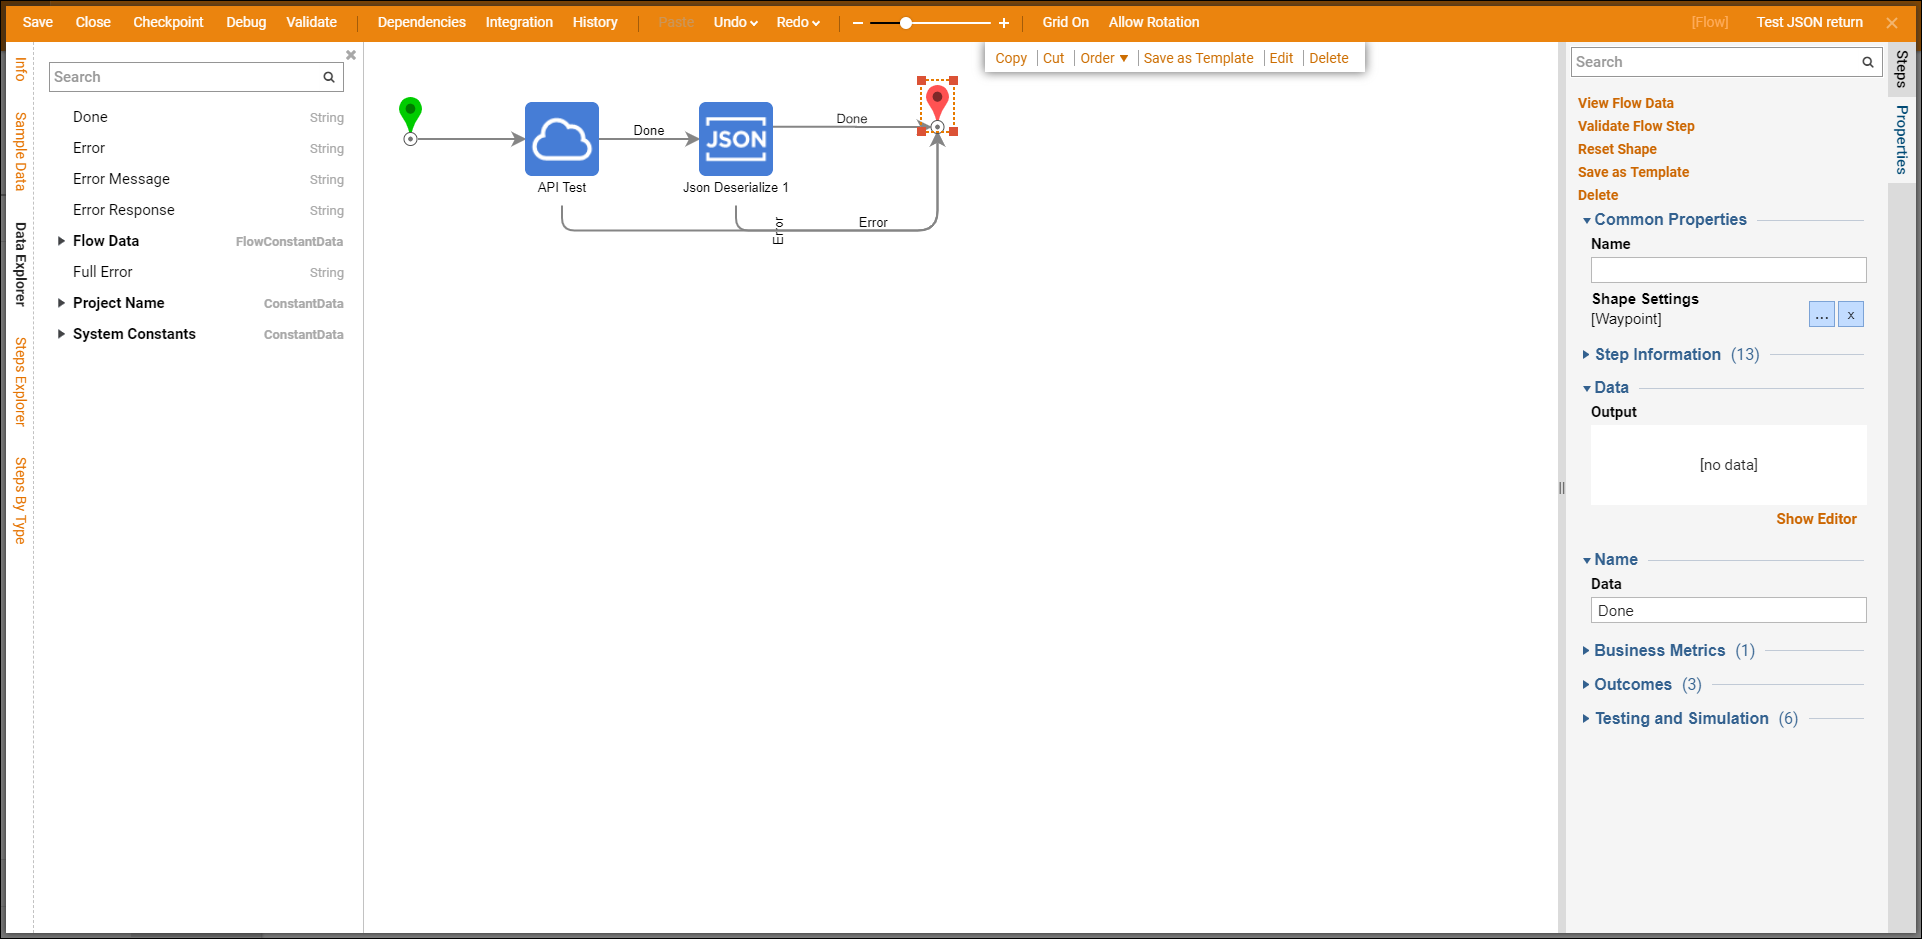
- Next, introduce the Deserialization step into the Flow to break down the JSON string into meaningful data.
- From the Designer Projects Folder, open the Flow that contains the API Test service step.
- From the Steps panel, expand the Data > JSON category.
- Drag and drop the JSON Deserializer step following the API Test step.
- Connect the outcome paths, as pictured below.
- Select the JSON Deserializer step.
- In the Properties panel under Input, change the mapping type for String to Deserialize to Select from Flow.
- Choose Select from Flow in the Pick Data dialog and chose Done, and select Pick. This is the output from the API Test step.
- Expand the Data Explorer on the left side of the studio, notice how the deserialized output is available.
