Overview
A Named Session allows for a specific user account to pass in when executing a Flow via REST, without exposing the user account information. To relay the data properly, a Session ID is automatically applied to the generated URL when the Named Session is selected. Named Sessions do not expire, if expiration is desired, use JWT.
Example
This example will demonstrate how to create a Named Session and how to generate the appropriate REST URL from the Flow.
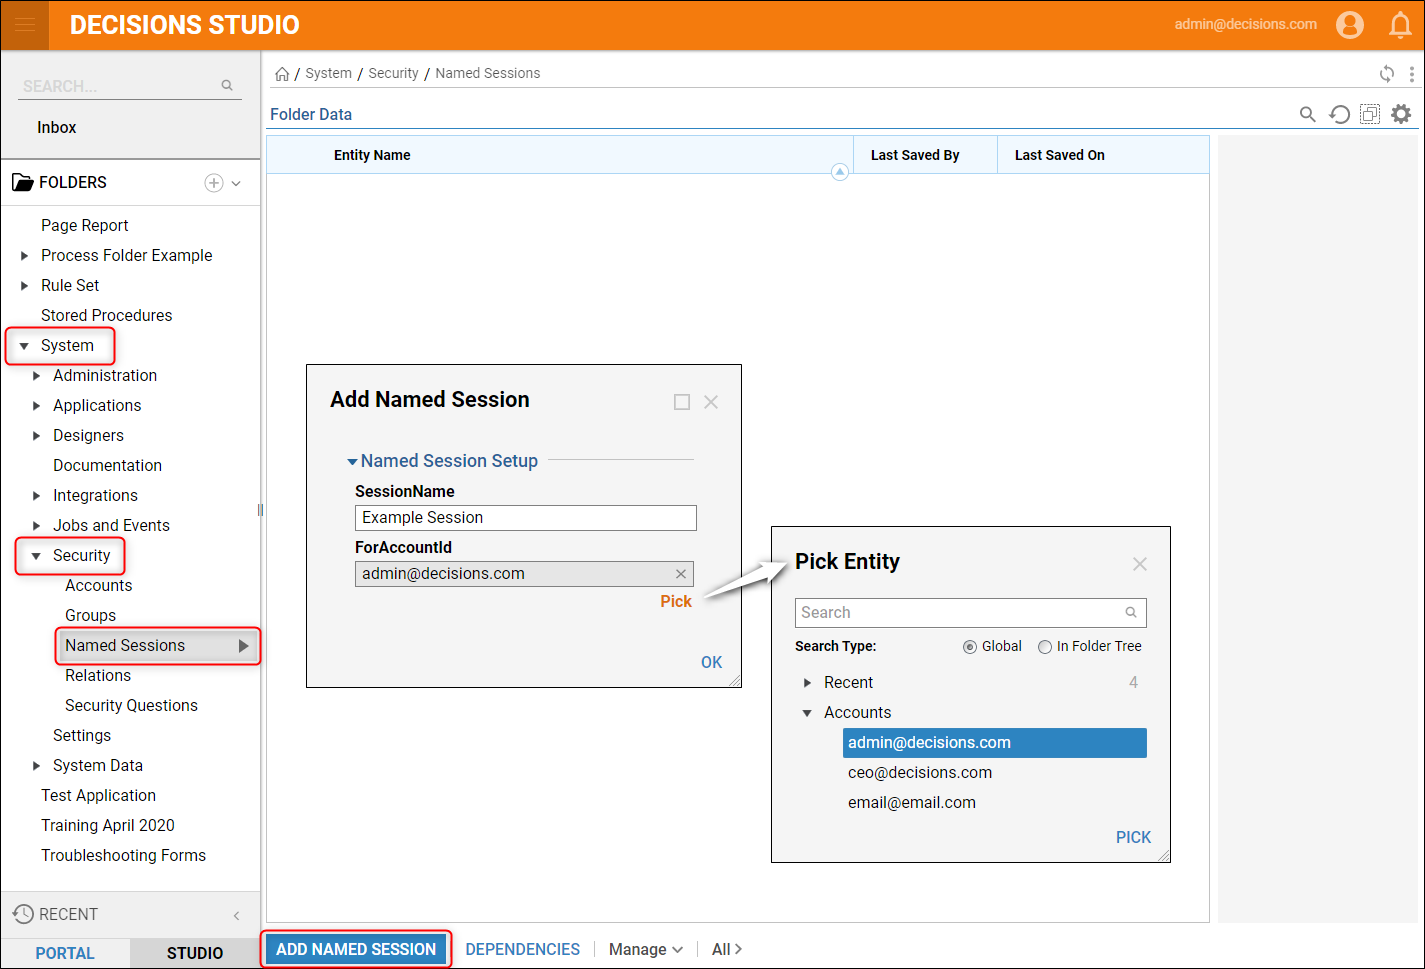
- In the Decisions Studio, navigate to System > Security > Named Sessions and select Add Named Session from the bottom Action Bar.
- When the 'Add Named Session' window appears, enter a name and use the 'Pick' button under ForAccountId to select the user account for this Session.
- Click 'OK' once complete and refresh the Folder Data to confirm the Named Session appears.

- Right-click the name of the Flow that this Named Session will be applied to, then navigate to Run [Advanced] > Integration > View Integration Details in the Action Menu.

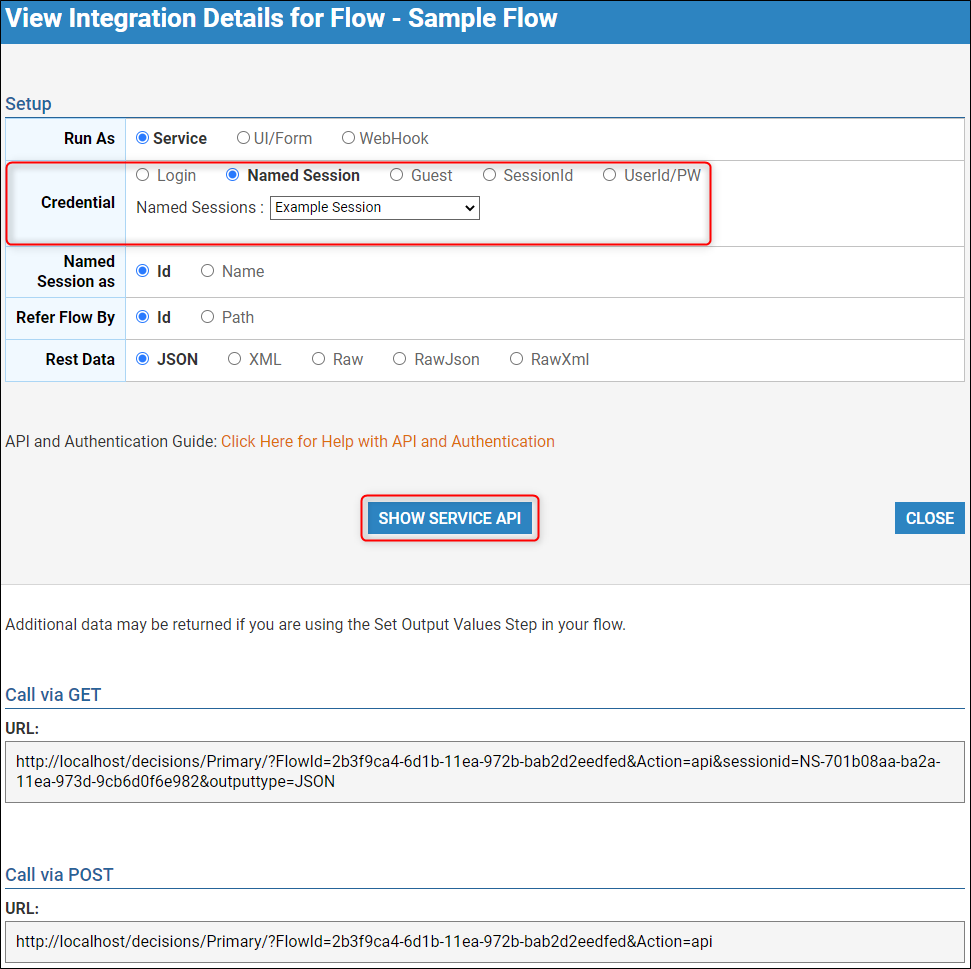
- In the View Integration Details window for the selected Flow, change Credential to Named Session, then choose the respective Named Session from the dropdown.
- Select SHOW SERVICE API for a REST URL via GET/POST with the Named Session ID attached to the URL automatically. Clear Session URL ExtensionAdd &clearsession=true to the end of the URL to ensure that each time the user exits the browser after completing the Named Session Flow/Form, the session is cleared. This will allow another user to run the same Flow/Form on the same machine with a different Named Session.
