Creating a Project
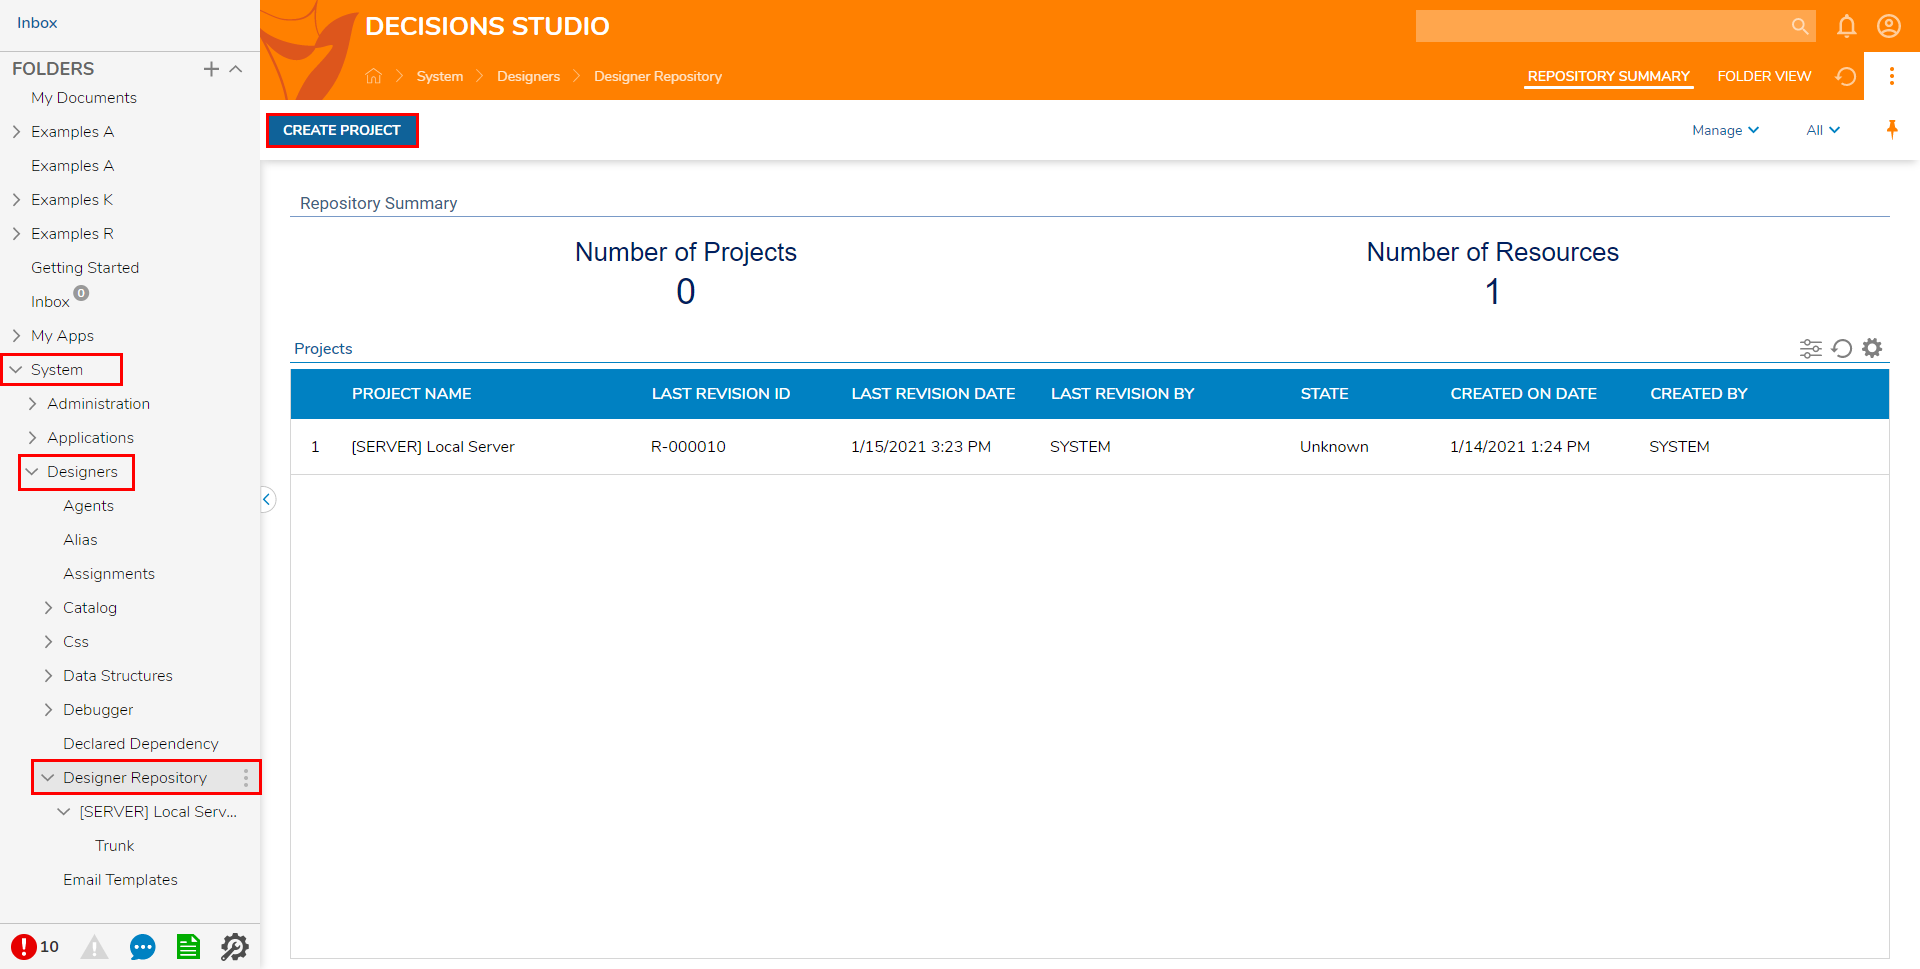
- From the Designer Studio navigate to System > Designers > Designer Repository and click CREATE PROJECT. The Designer Repository Folder shows a Dashboard of created Projects that exist in the Repository.
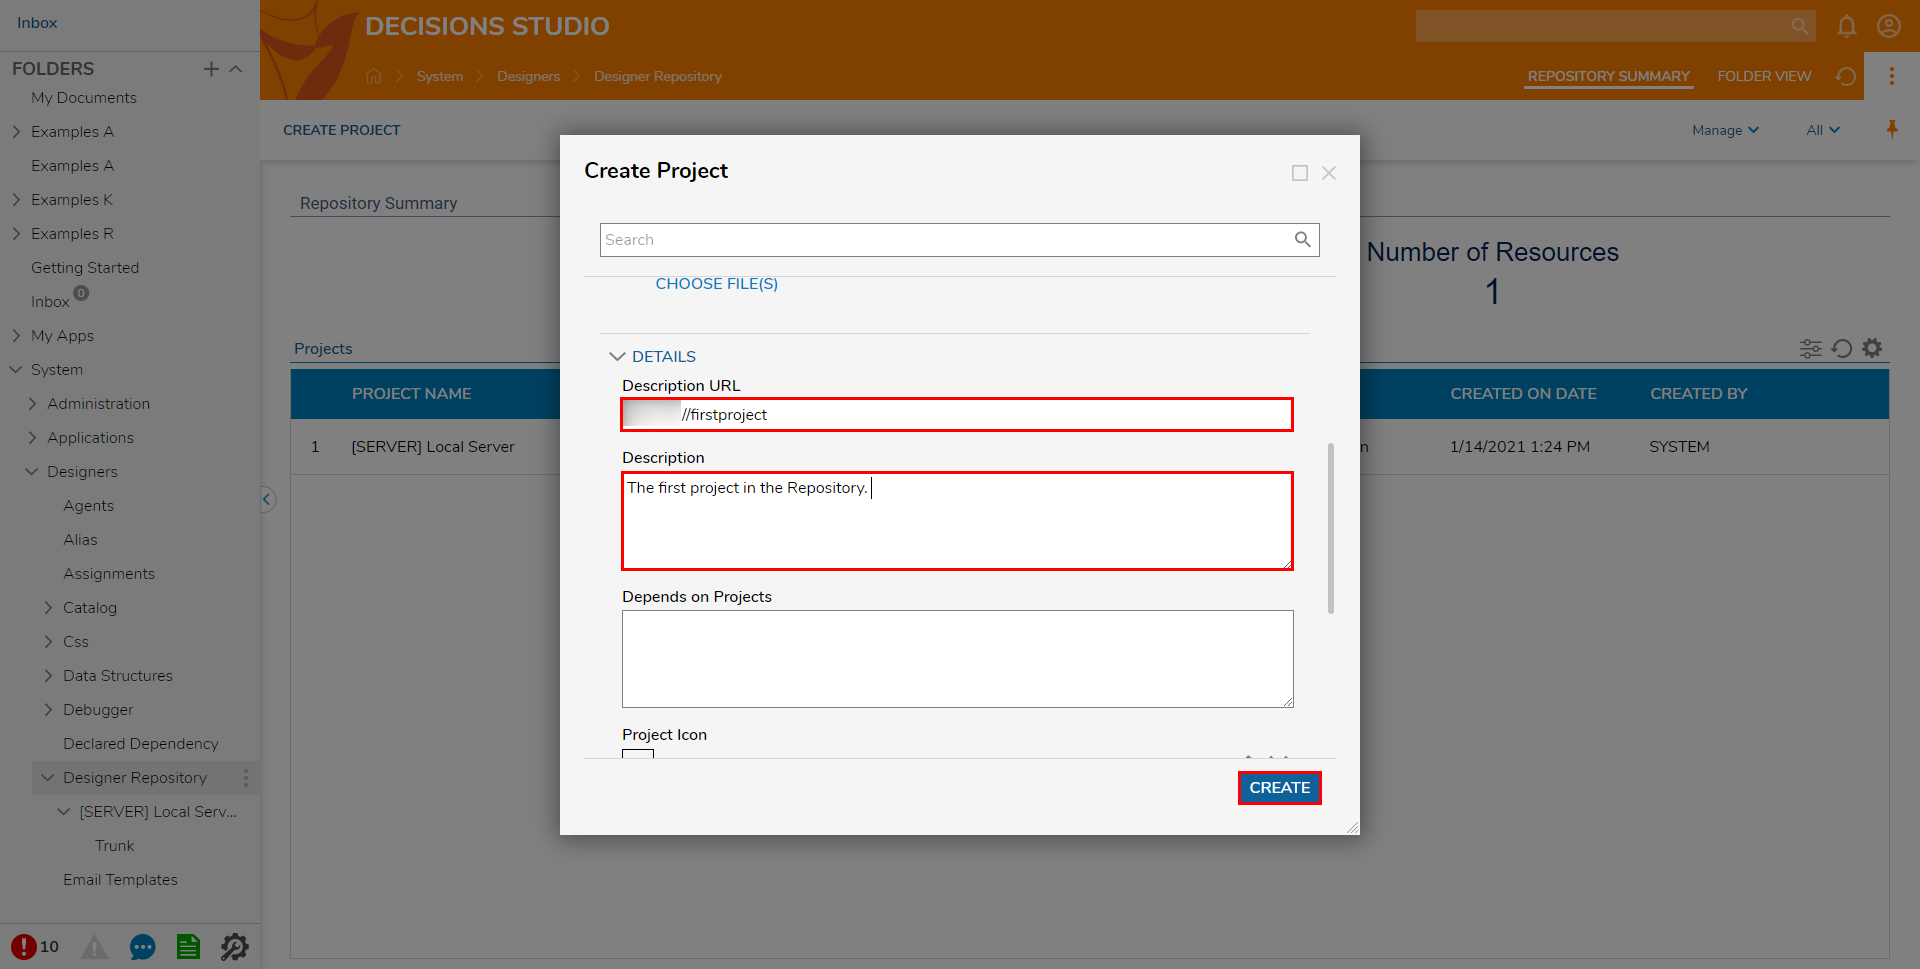
- Provide a Project Name, Description URL, and Description, then click CREATE. Note that the Description URL needs to be in a typical web address format.
- Open the Project and view the Project Dashboard.
- Right-click a Project to enact a number of Actions on the selected Project: Create Branch, Create Sub Project, Delete, Download, Manage, Open, and Rollback.Each Project has a single Trunk Branch by default. Additional Branches of the Project can be created with the purpose of being able to manage and build two different versions of the Project itself. This feature is especially useful when recreating Development and Production environments.
.png)
Create Branch
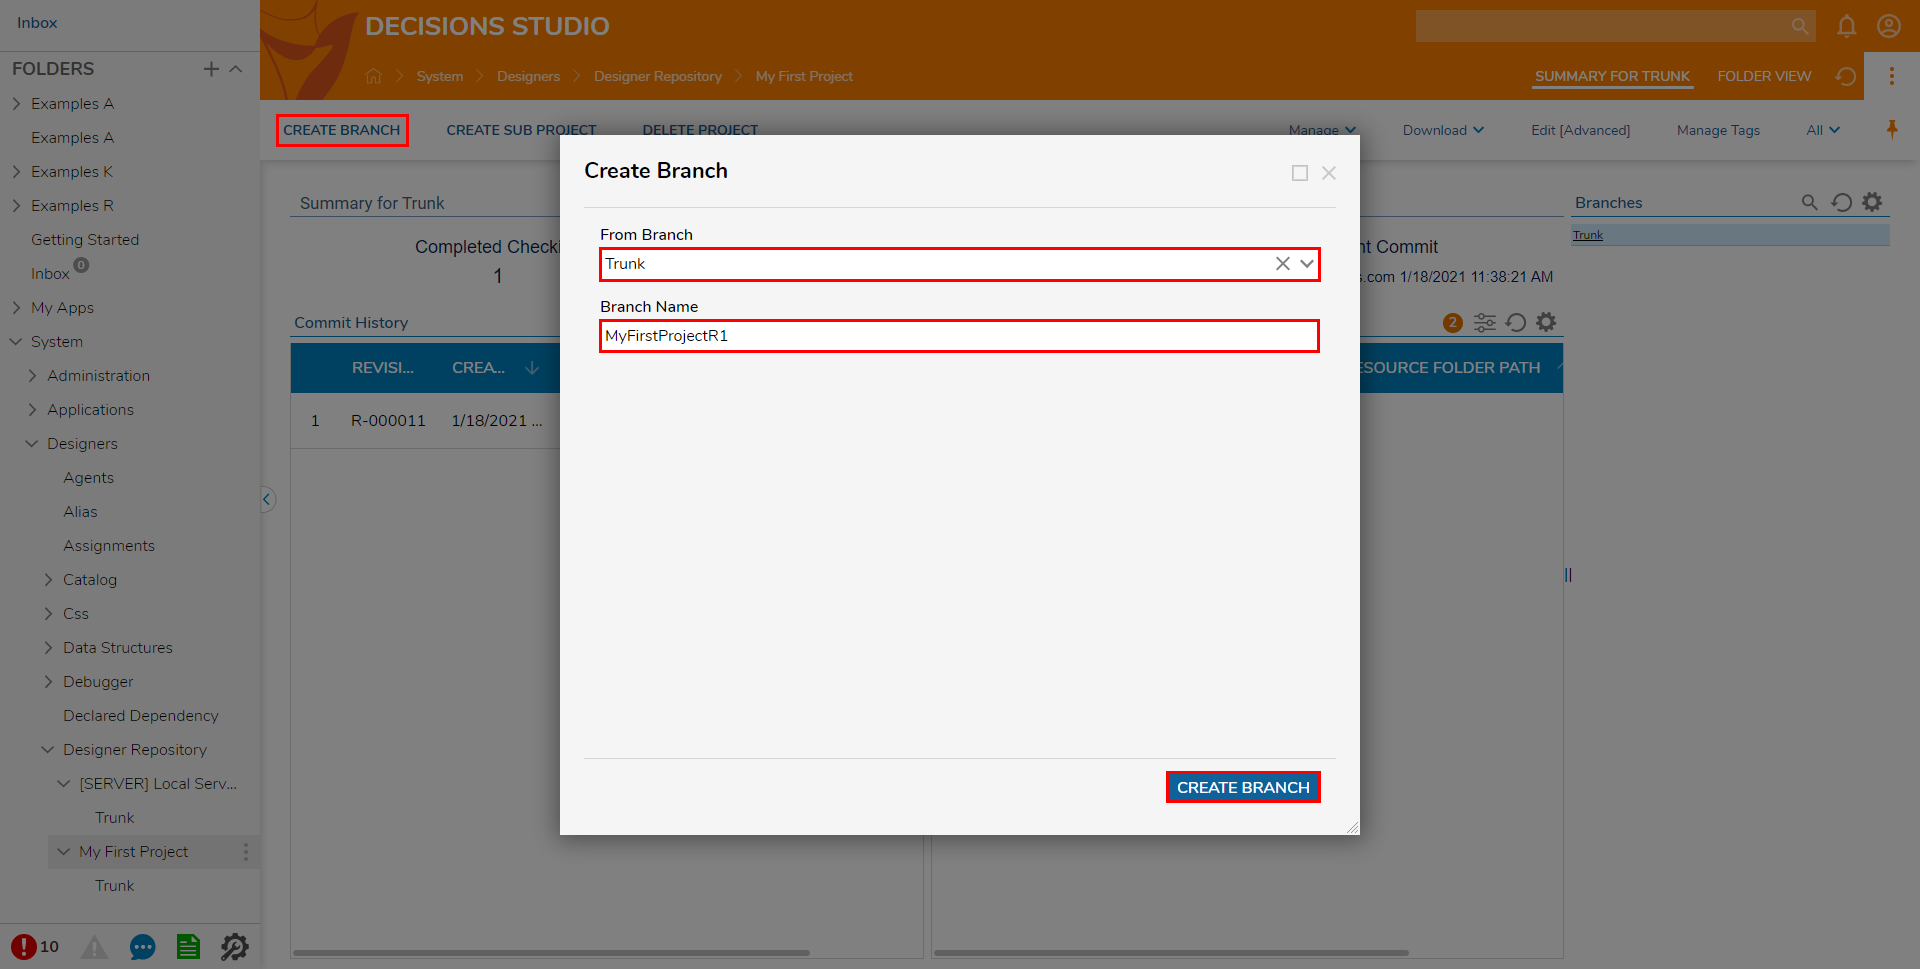
- From the Project Folder, click the CREATE BRANCH button in the top Action bar.
- Select an option (in this case Trunk) from the From Branch drop down menu.
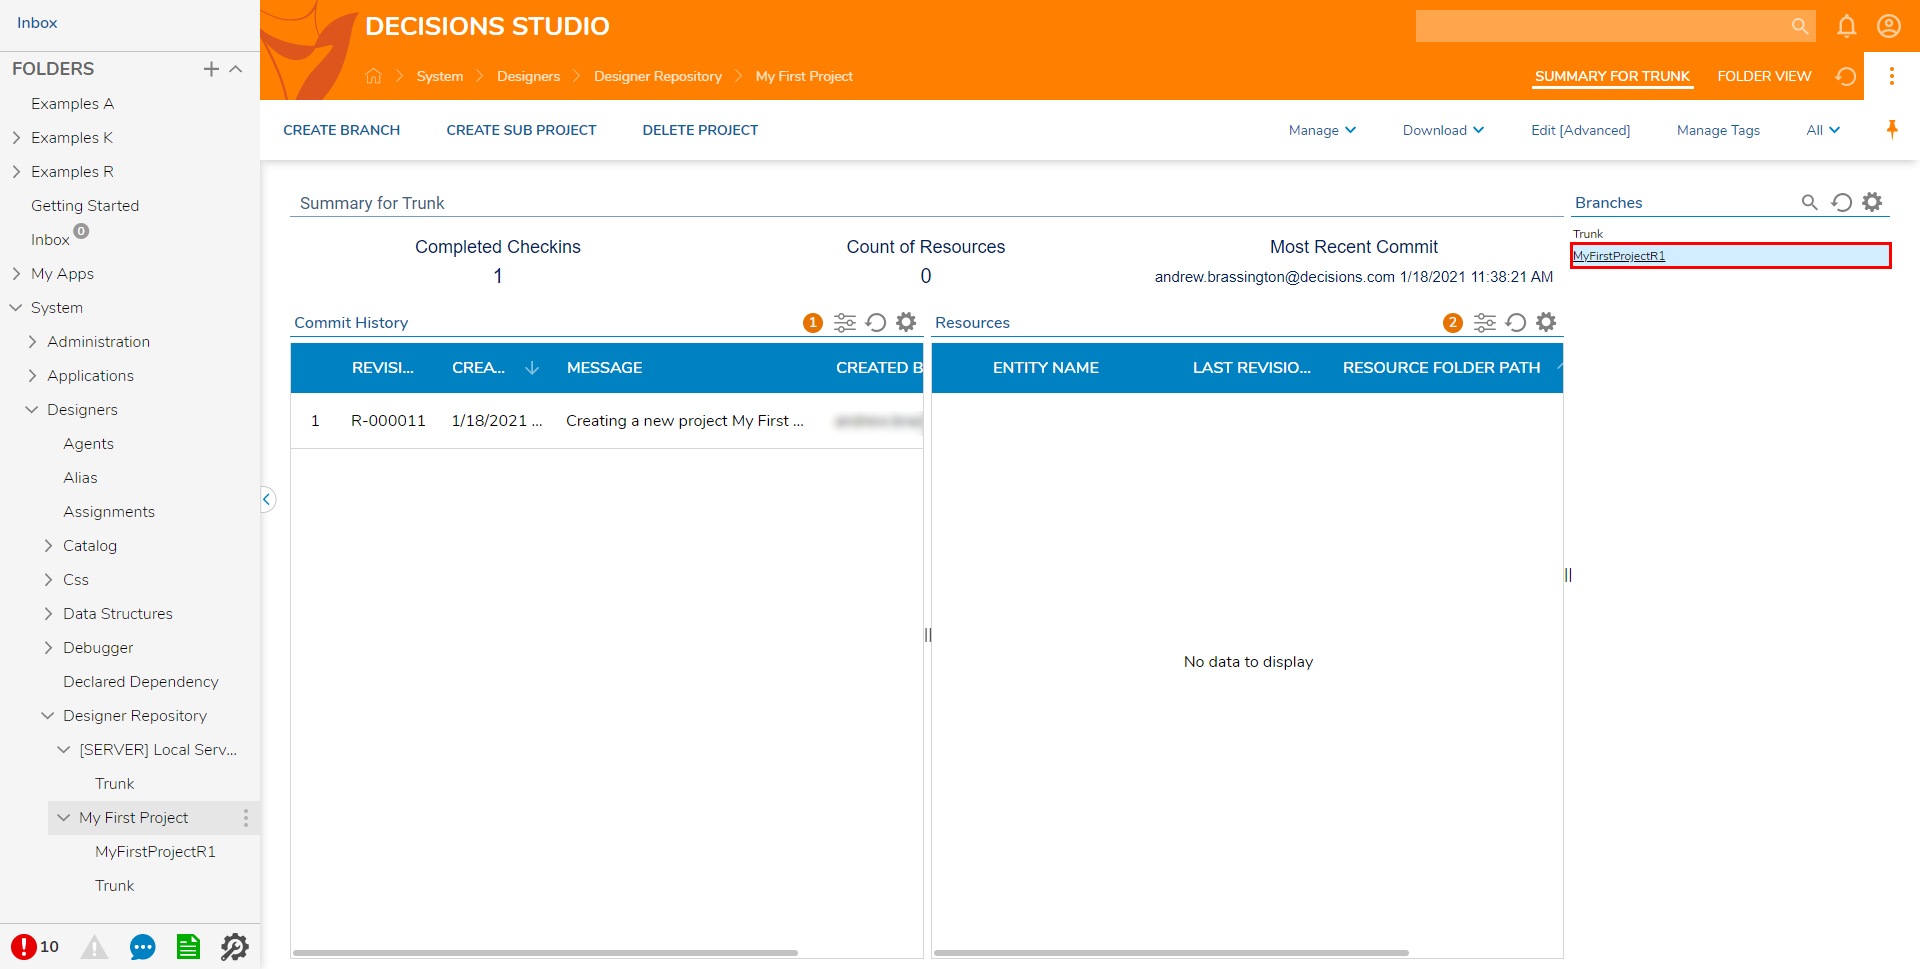
- Define the Branch Name (in this example MyFirstProjectR1), then click CREATE BRANCH.
Change Branches
Branches can be easily changed from the Repository Dashboard on the App Server.
- Navigate to System > Designers > Repository. The Repository Dashboard shows all module names available, along with which Branch the user is currently in under Branch Name.
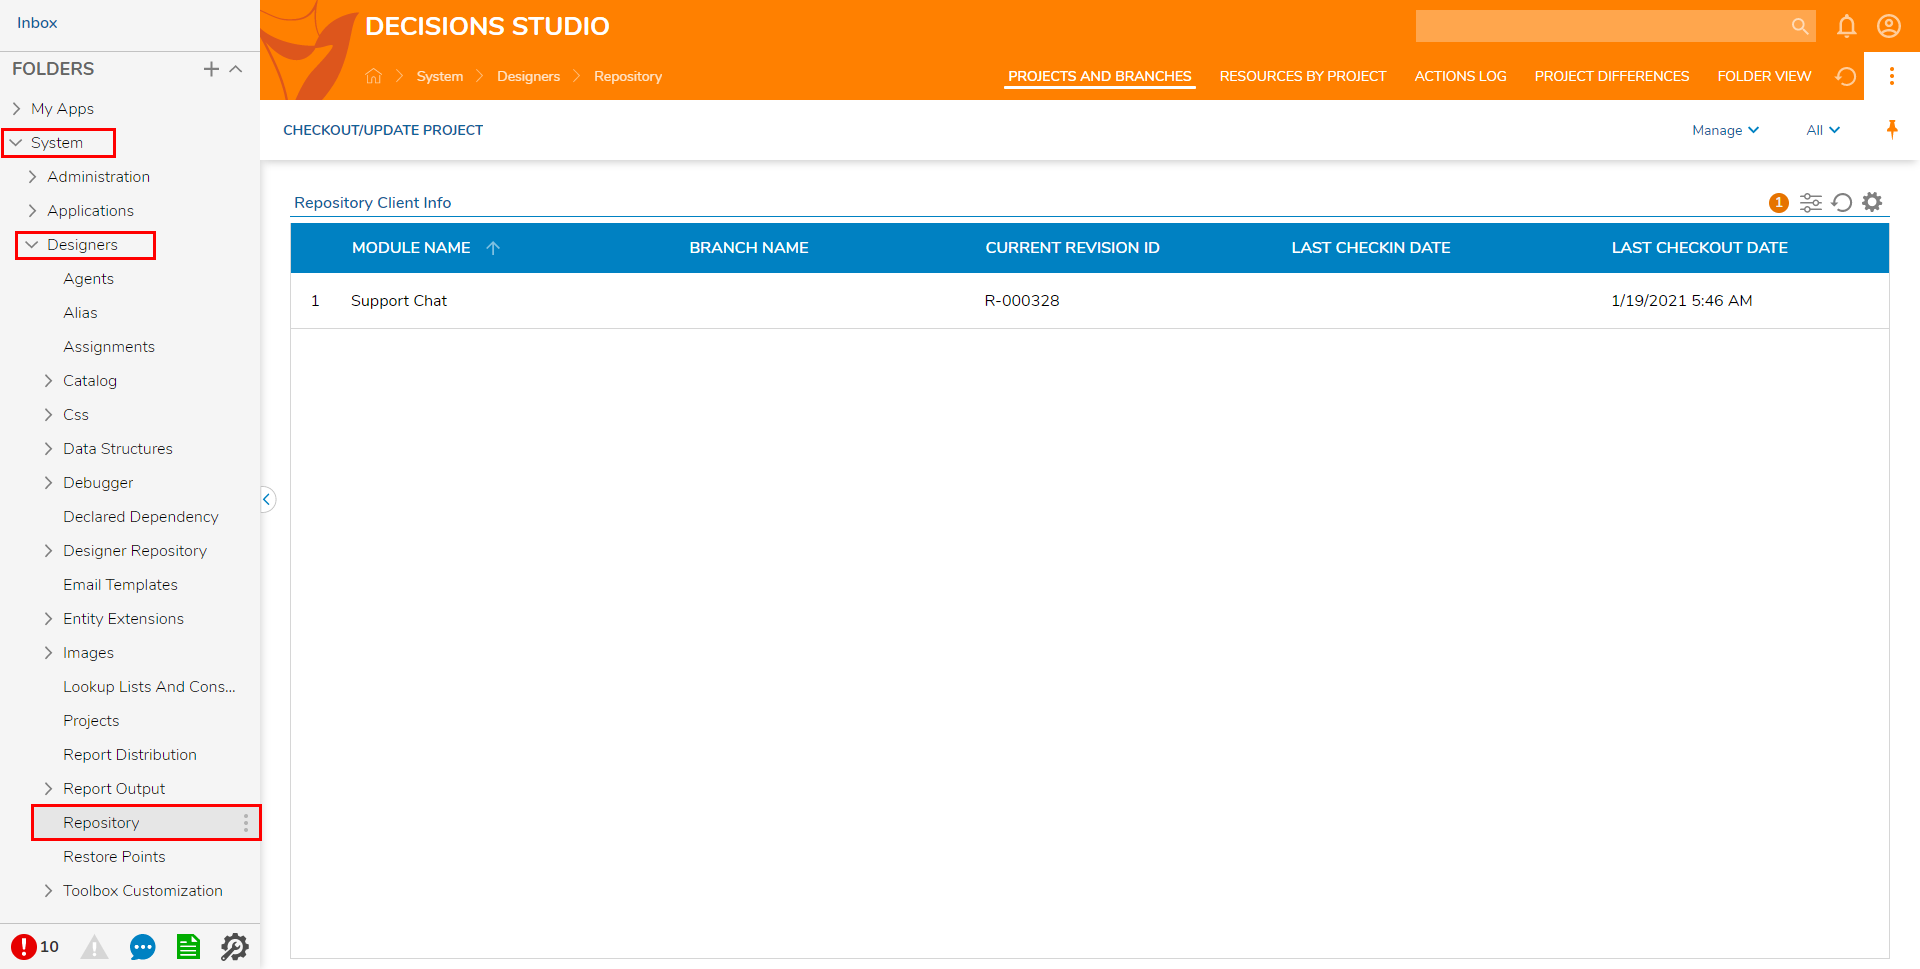
- Right-click the Module that contains the Branch that is being switched to, then select Change Branch.

- Select the appropriate Branch then click CHANGE BRANCH to apply the change.
.png)
Create Sub Project
Creating Sub Projects is useful when specific Designer Elements need to be included in multiple projects.
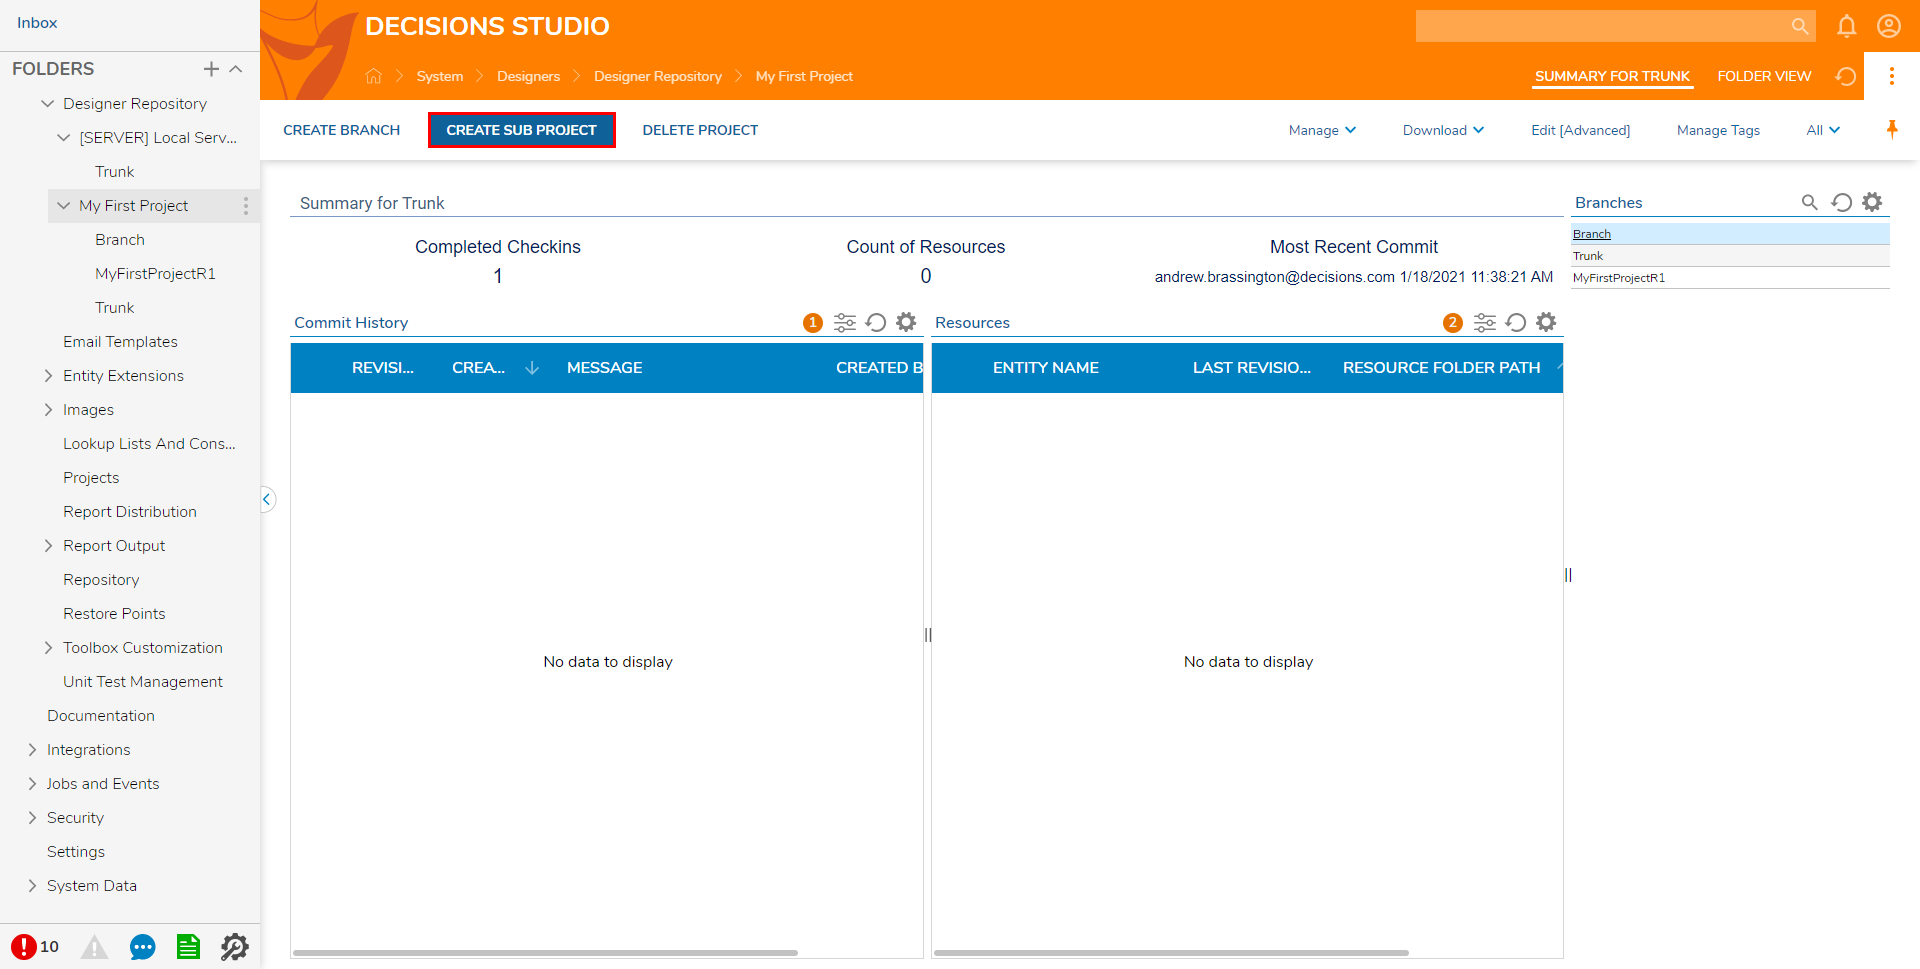
- From the Project Folder for the main Project, select CREATE SUB PROJECT from the top Action bar.
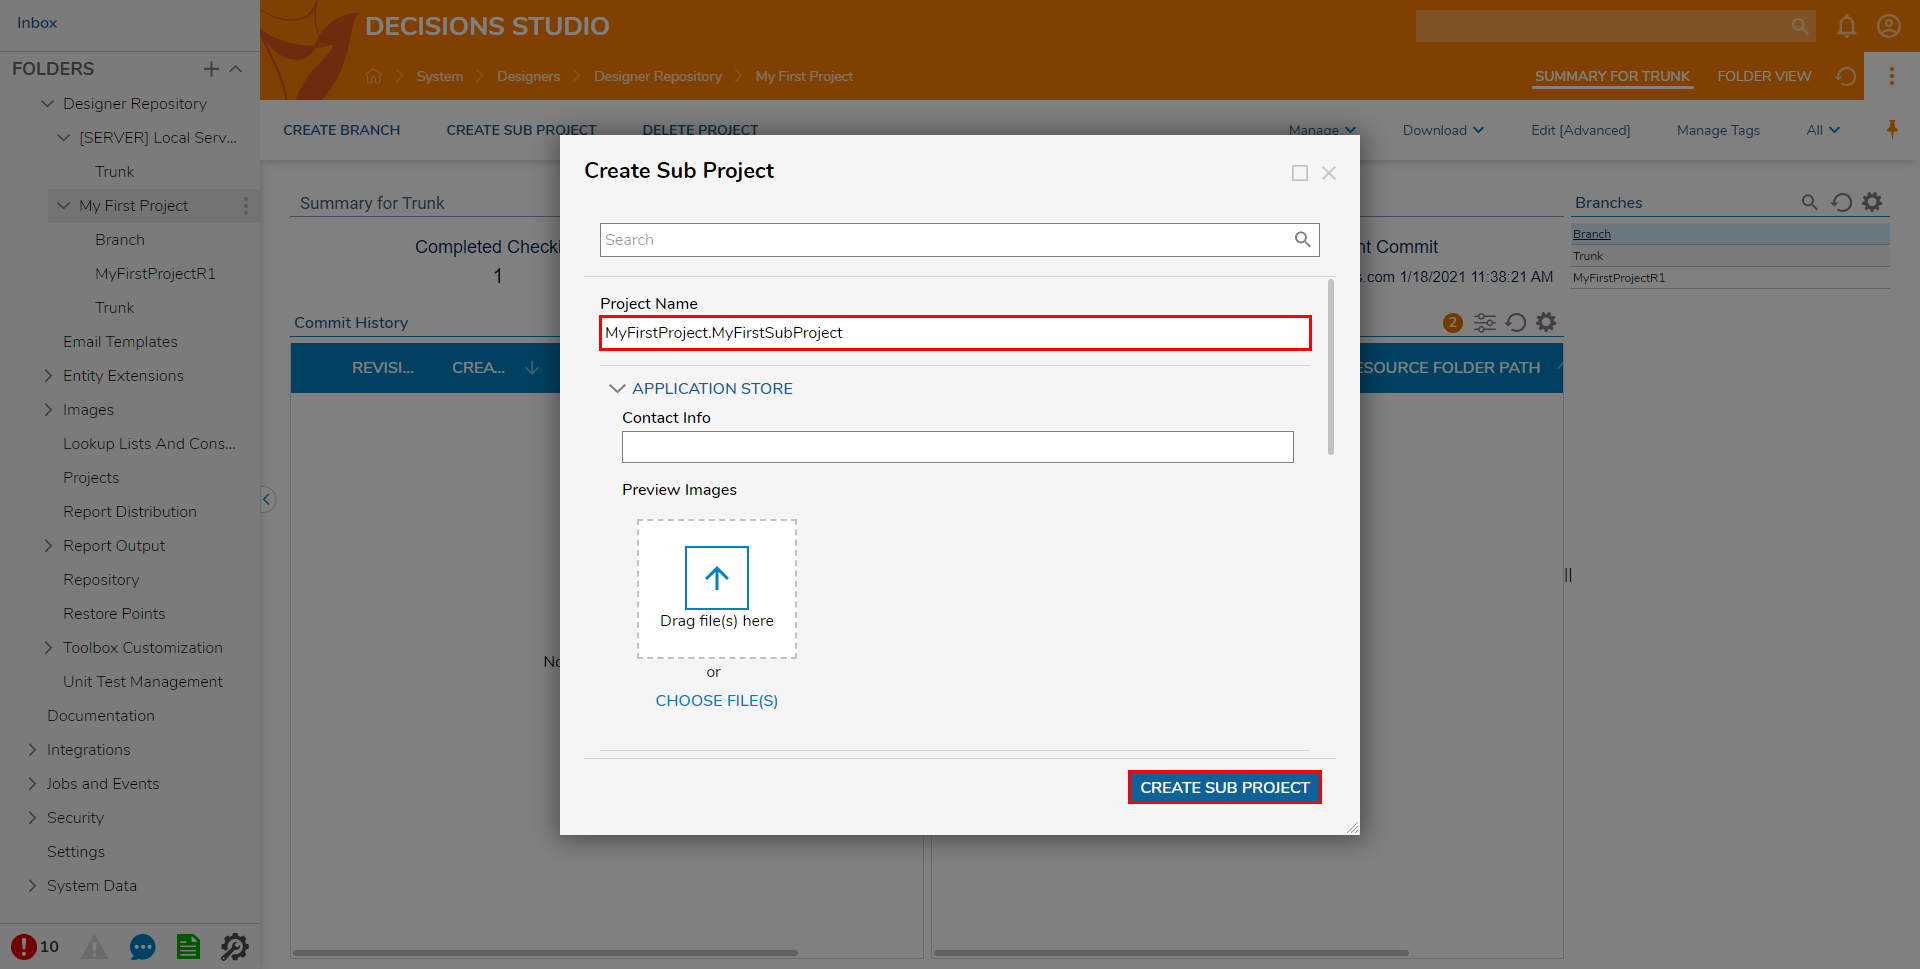
- Similar to creating a regular Project, provide a Project Name and Description URL.Use dot notation when Naming the Sub Project. For example, ParentProject.SubProject. The Description URL should be the URL to a website explaining the Project, use this method if pictures and other resources are desired for the description.
Delete
Projects can be deleted and removed from the Repository.
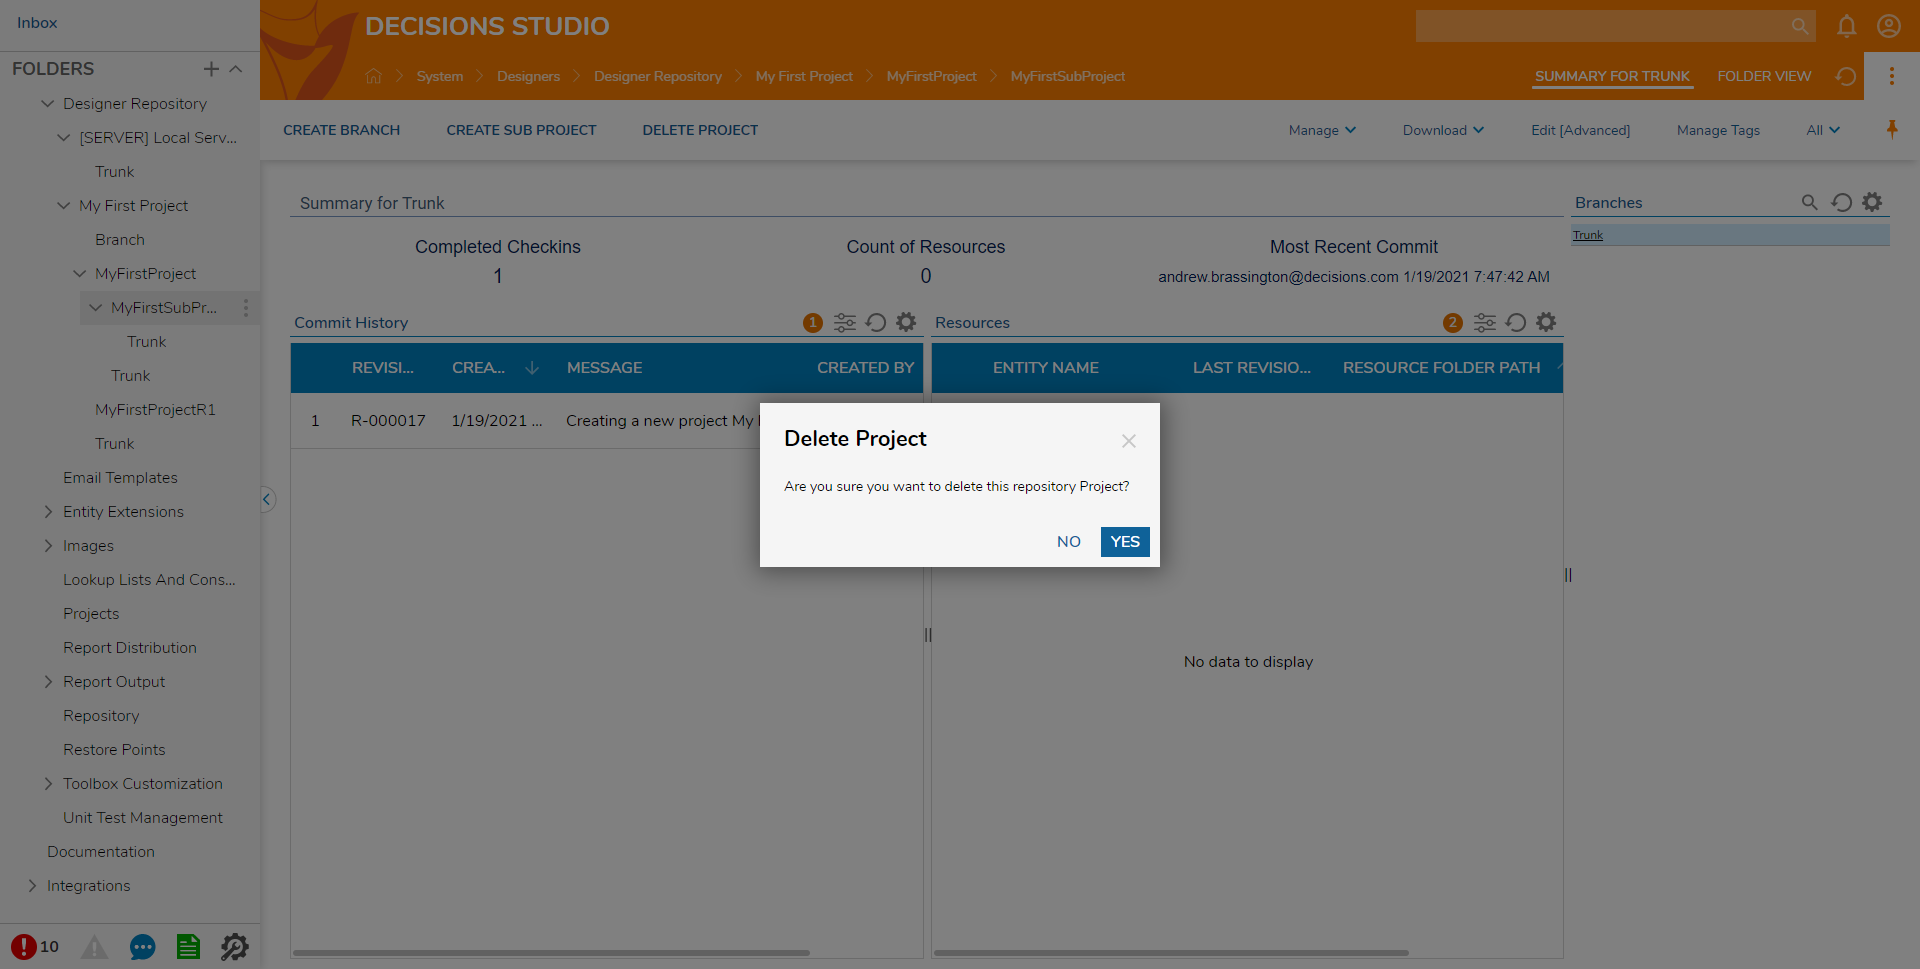
- Right-click the Project and select Delete Project.
- Click YES to Delete the Project.
Download
Users can Download a Project to store it for later use or as a backup copy to restore back to. To do so:
- Navigate to the Project Folder.
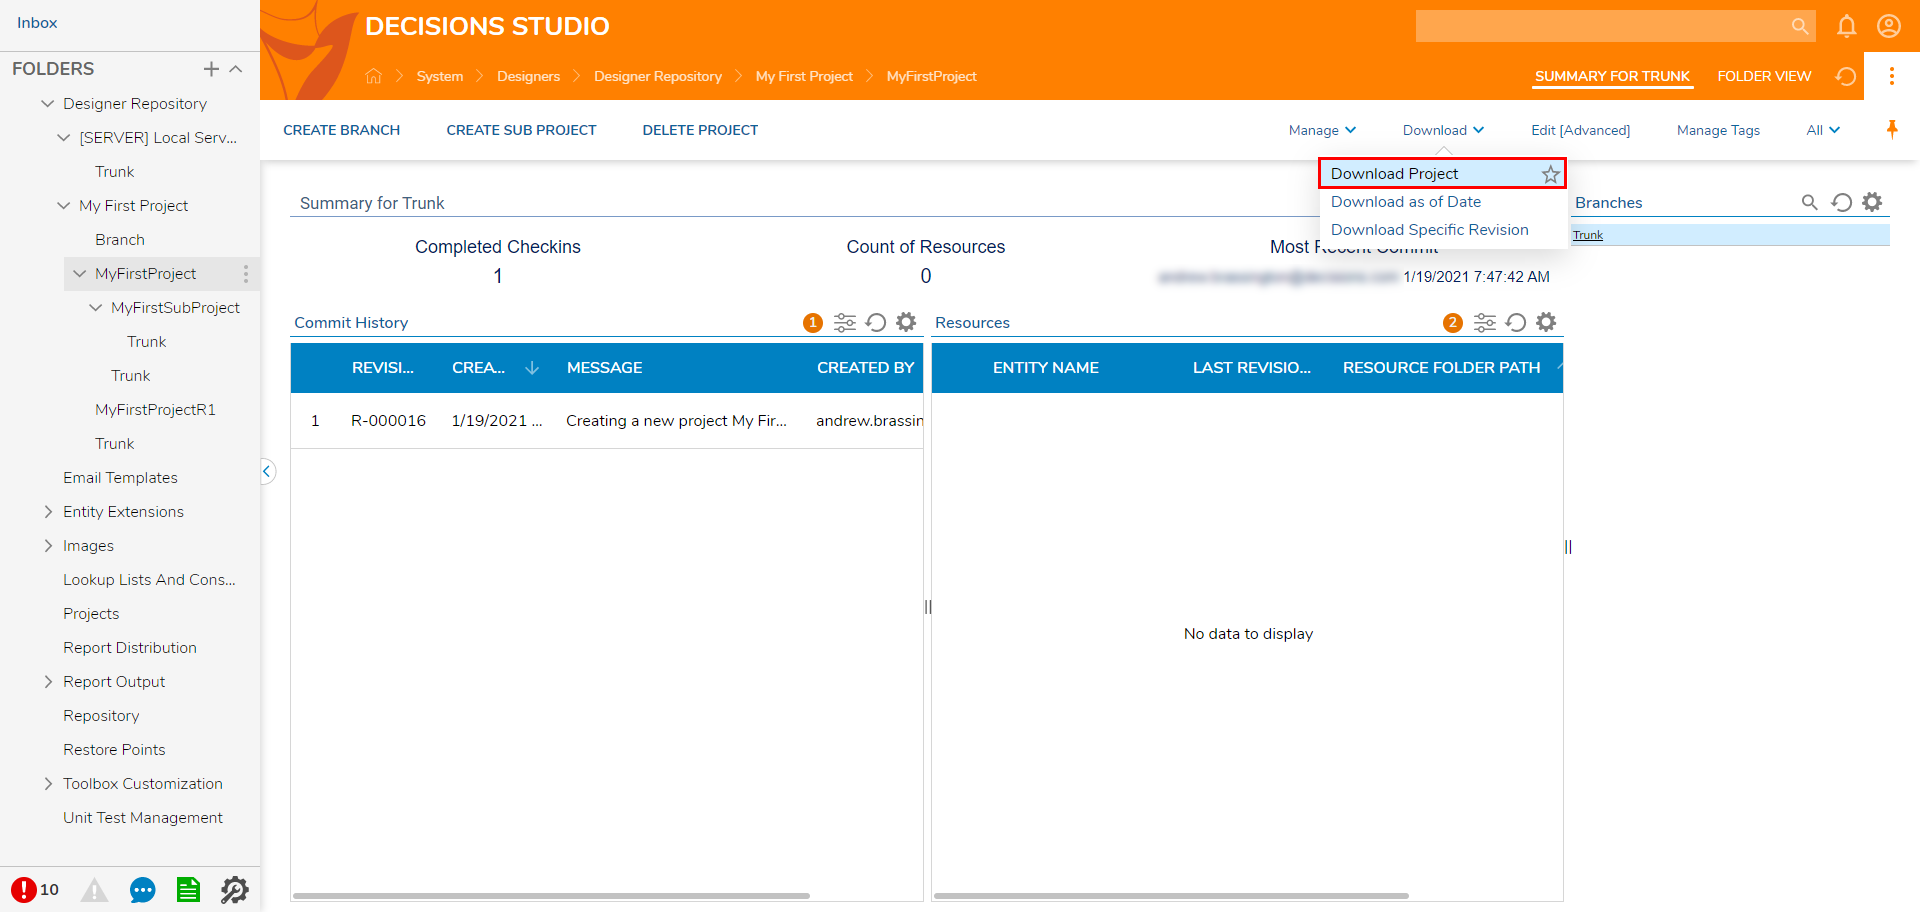
- Select Download > Download Project from the top Action Bar.
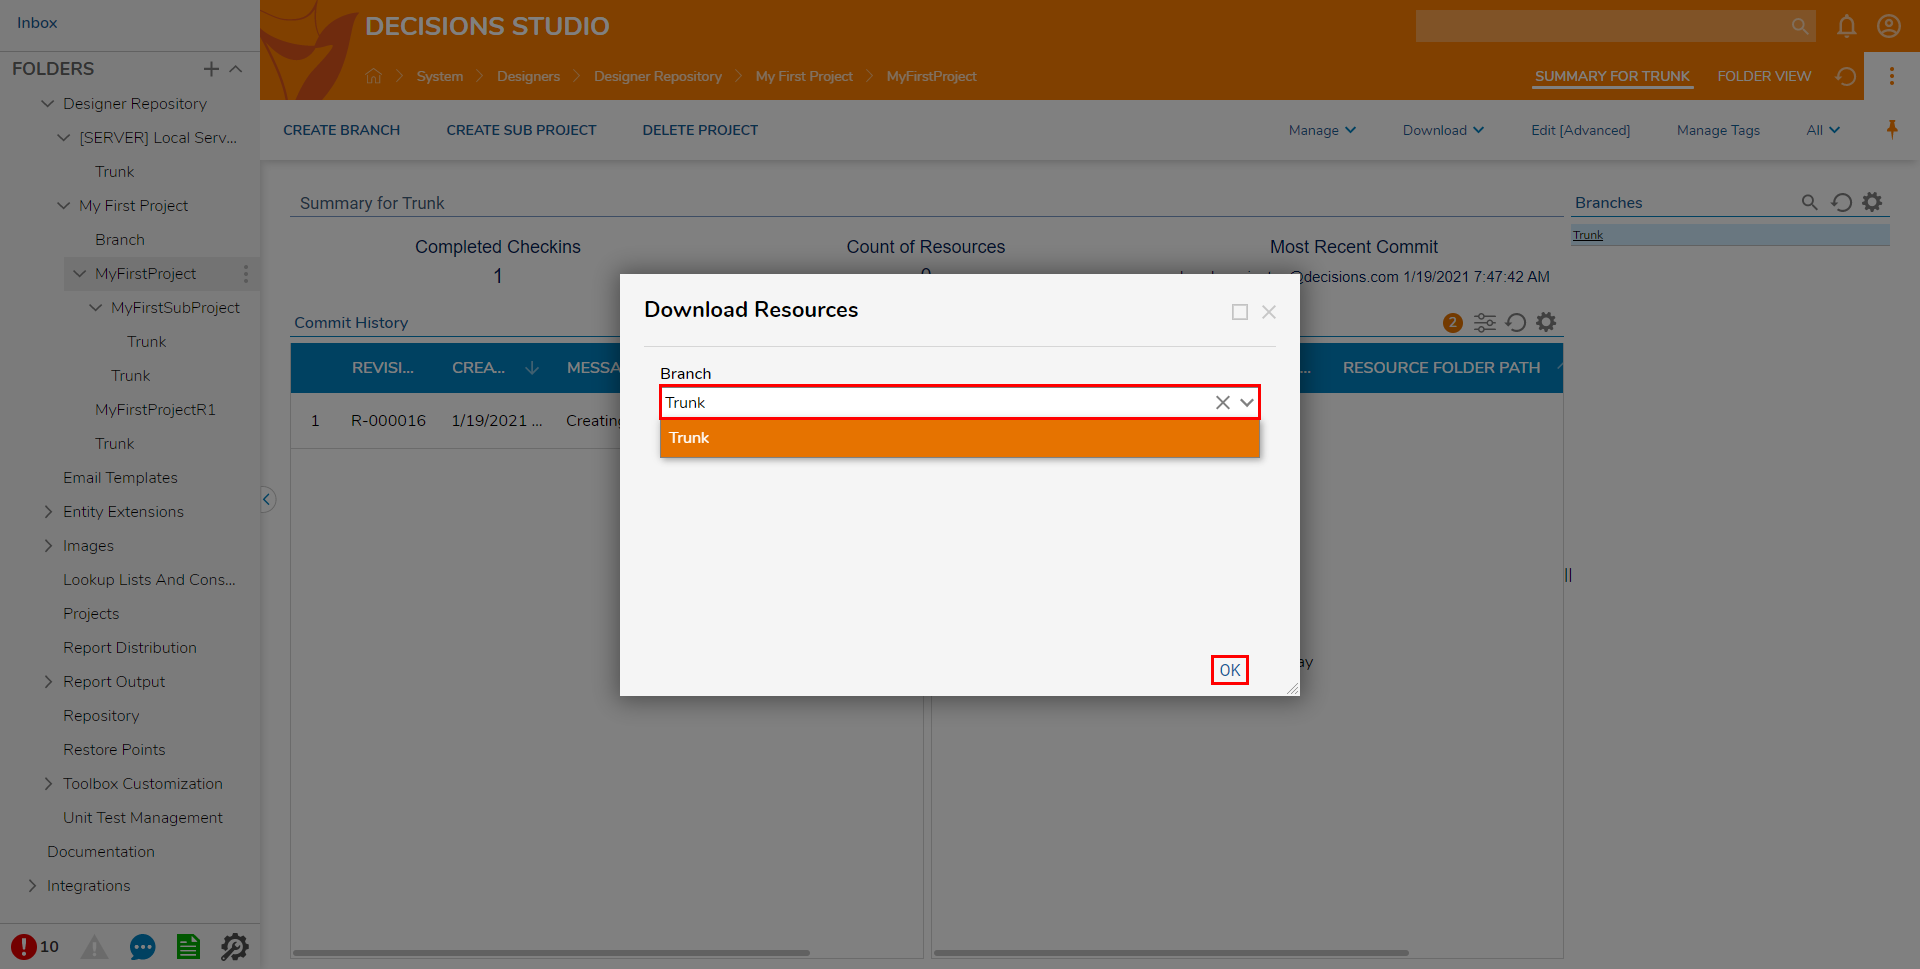
- From the Download Resources dialog, select the desired Branch then click OK.
- Click the Download link. The Download Resources box then displays the file path and name for the configured download. (for example: C:\Program Files\Decisions\Decisions Services Manager\Instances\Control\Repository\Downloads\MyFirstProject-MyFirstProjectDevelopment-12102018-050634.zip)
Selecting the Download link proceeds with the download process by downloading the Project in .zip file to the displayed file path. From here, the .zip file is saved and acts as a version of the Project that can be referenced/rolled back to at any point.
Manage
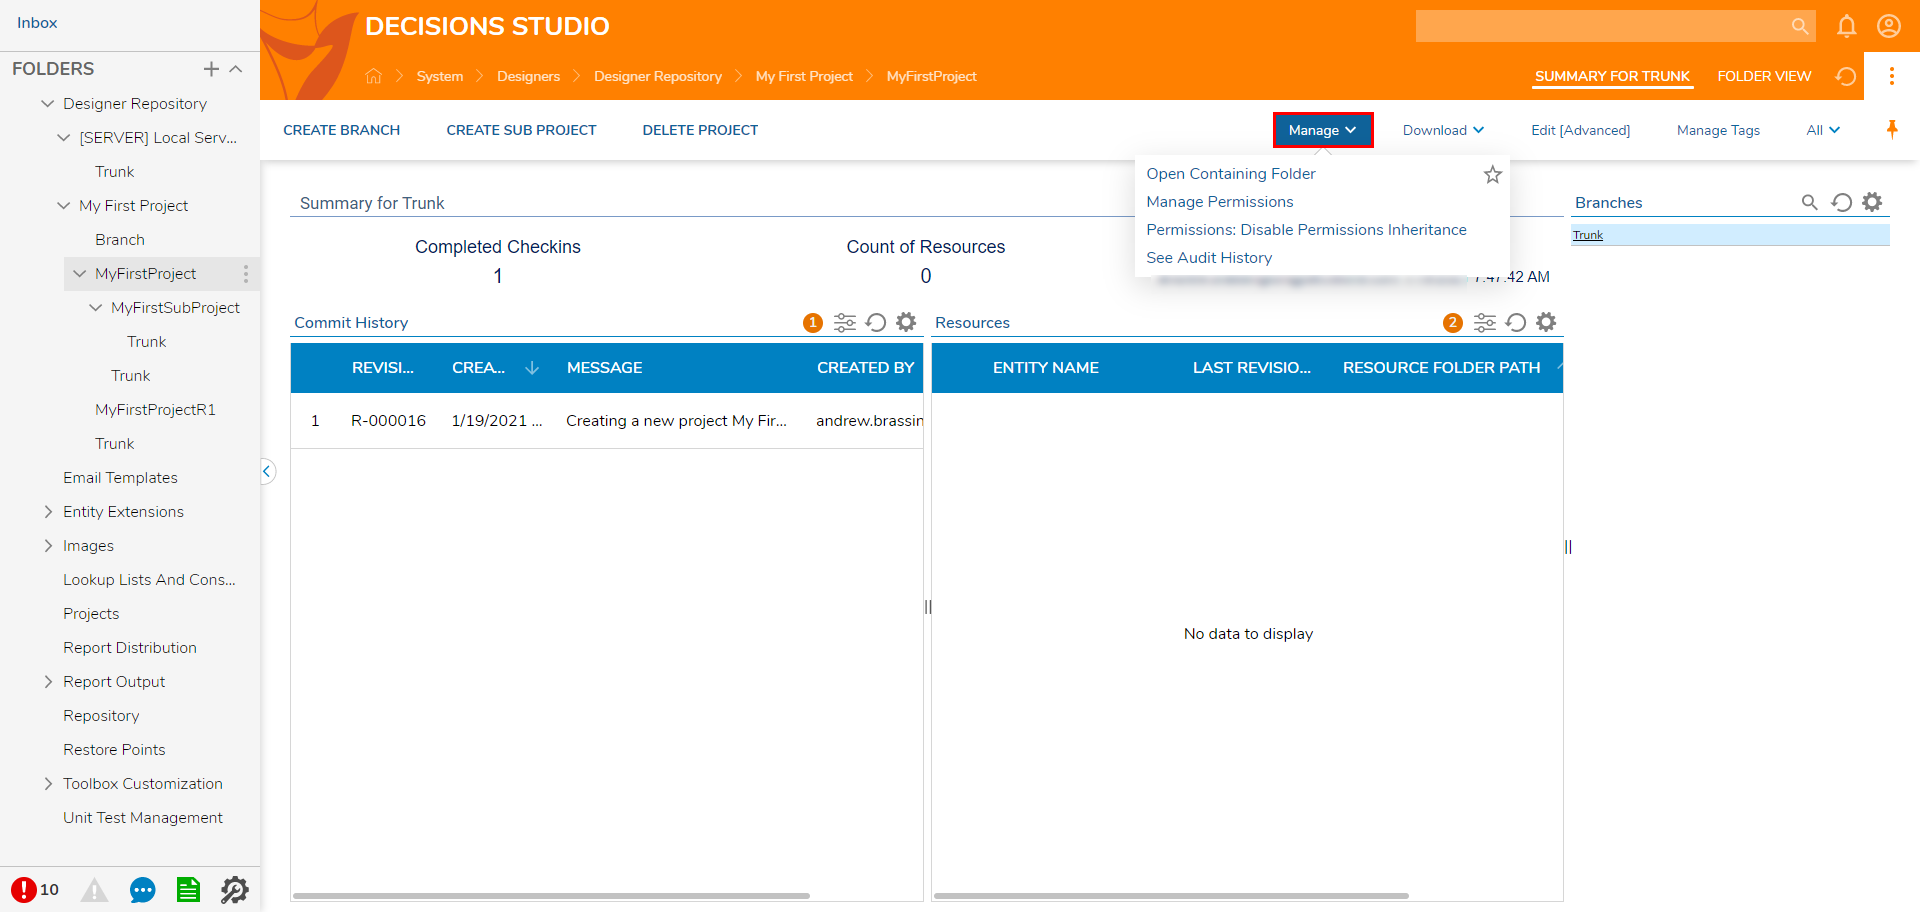
Under the Manage options, configurations are available to manage the Permissions related to the Project. Different User groups can be given access to a Project here or have their access revoked. The Permissions Inheritance or See Audit History actions are also available.
Open
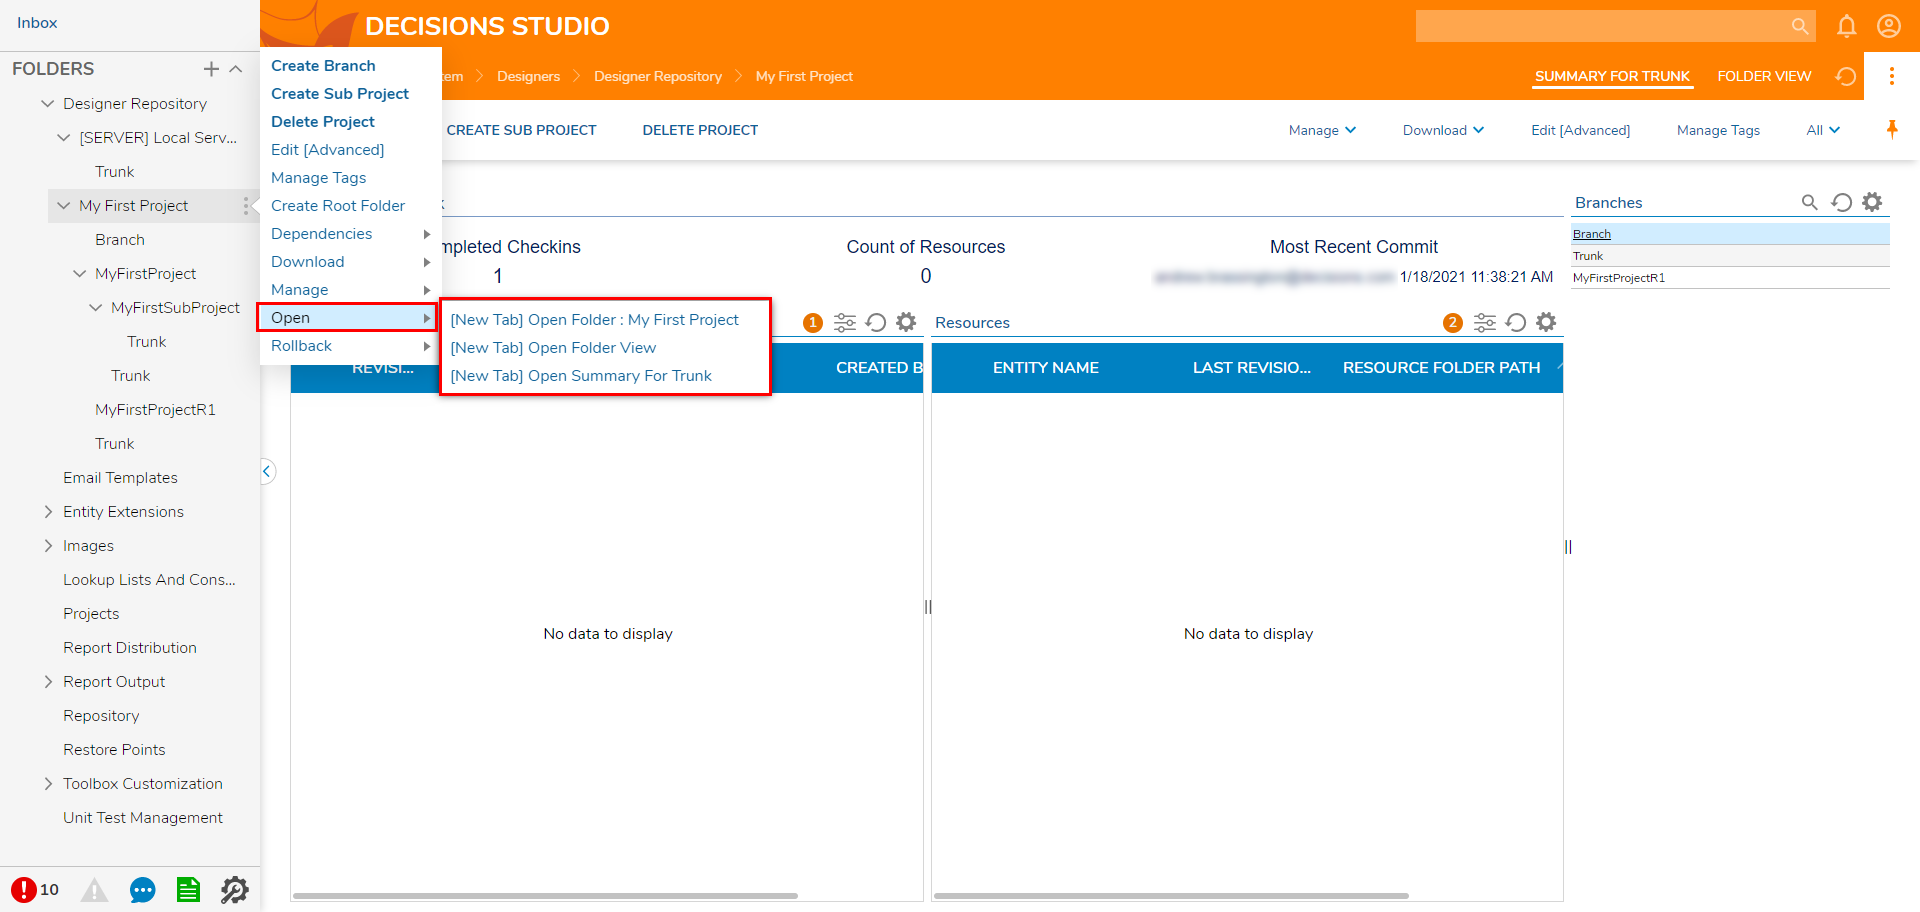
Under the Open options (found by right-clicking the Designer Repository or a Project Folder), there are a few different ways to open & view the Project. Via Open, users can:
- Open The Folder View
- Open the Project Folder
- Open Summary For Trunk.
Rollback
The Rollback menu provides users with two options; Rollback to Revision (version) of the Project or Rollback to Date, which Rollback to whatever state the Project was at based on a specified moment in time.
.png)
Permissions
The Permissions that are set on the Folders in a Project are hidden items, which are not added to Projects by default.
To add these permissions to the Project:
- Navigate to the Folder View of the Folder with the desired Permissions.
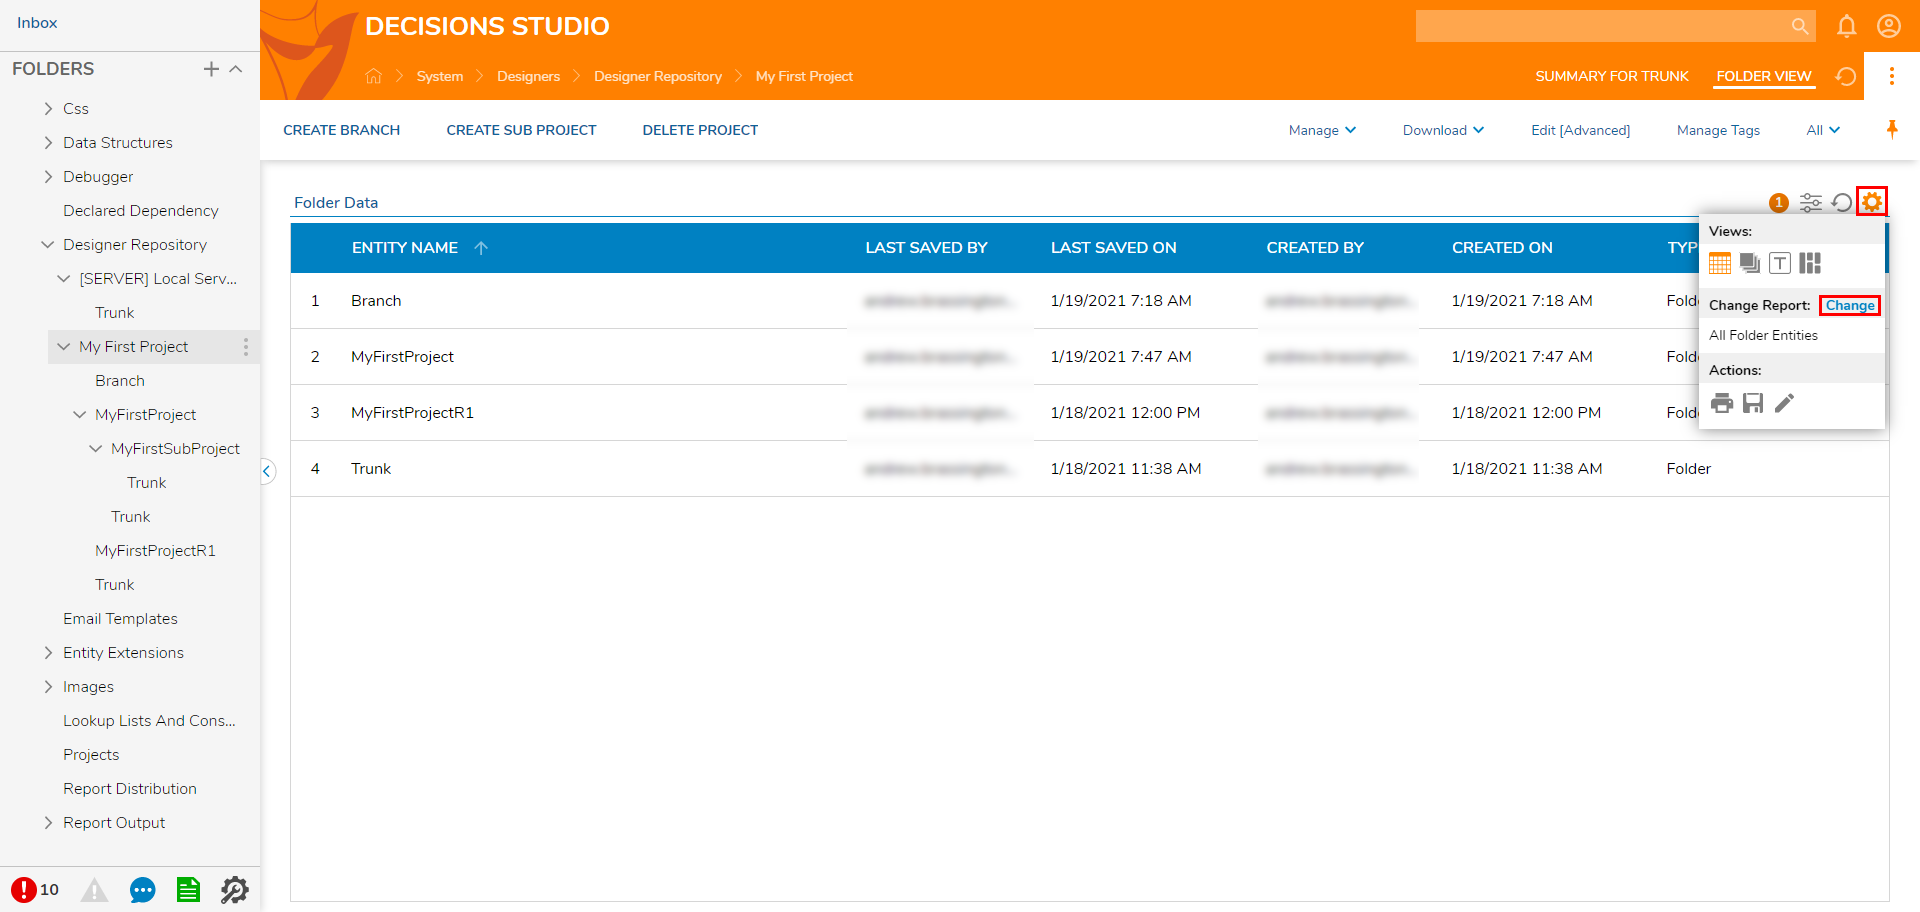
- Navigate to the Settings icon in the top-right corner, select Change by Change Report.
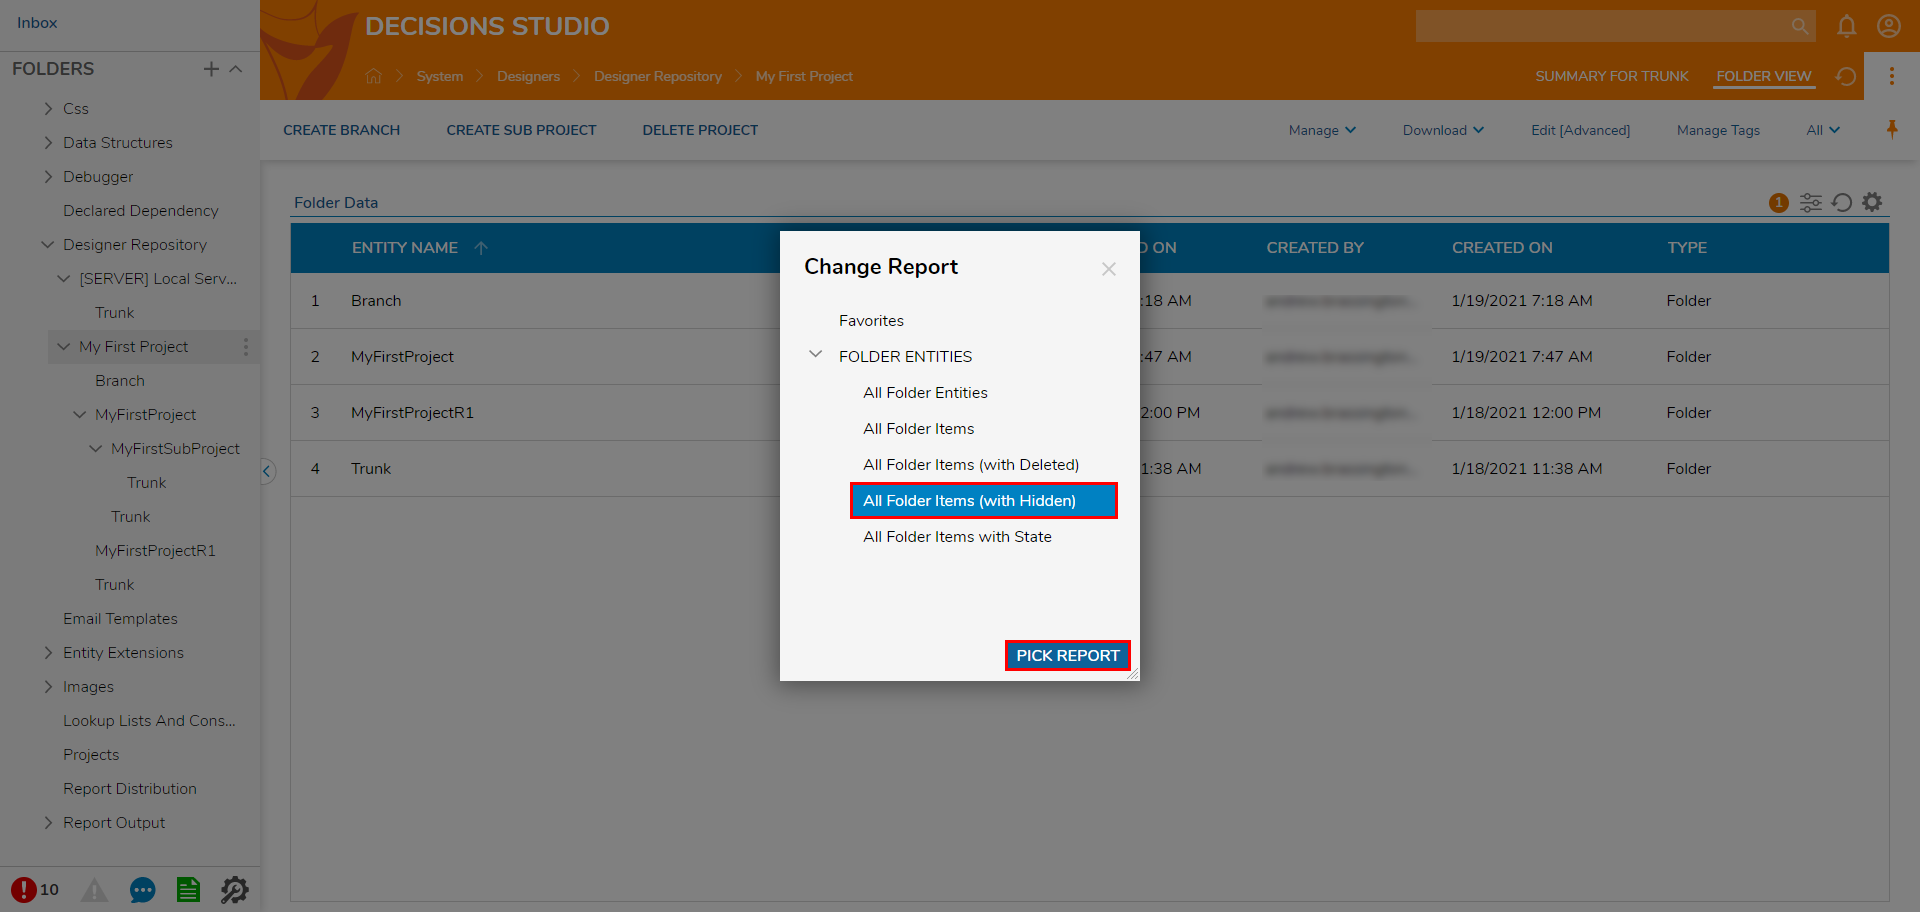
- Select All Folder Items (with Hidden), then click PICK REPORT. Doing so will reveal the Permissions for that Folder.
- After finding the necessary Permissions in the Folder Data list, right-click on the Entity and select Designer Repository > Add to Project.
.png)
Repository Settings
The Repository Settings can be accessed by navigating to System > Settings > Designer Repository Settings.
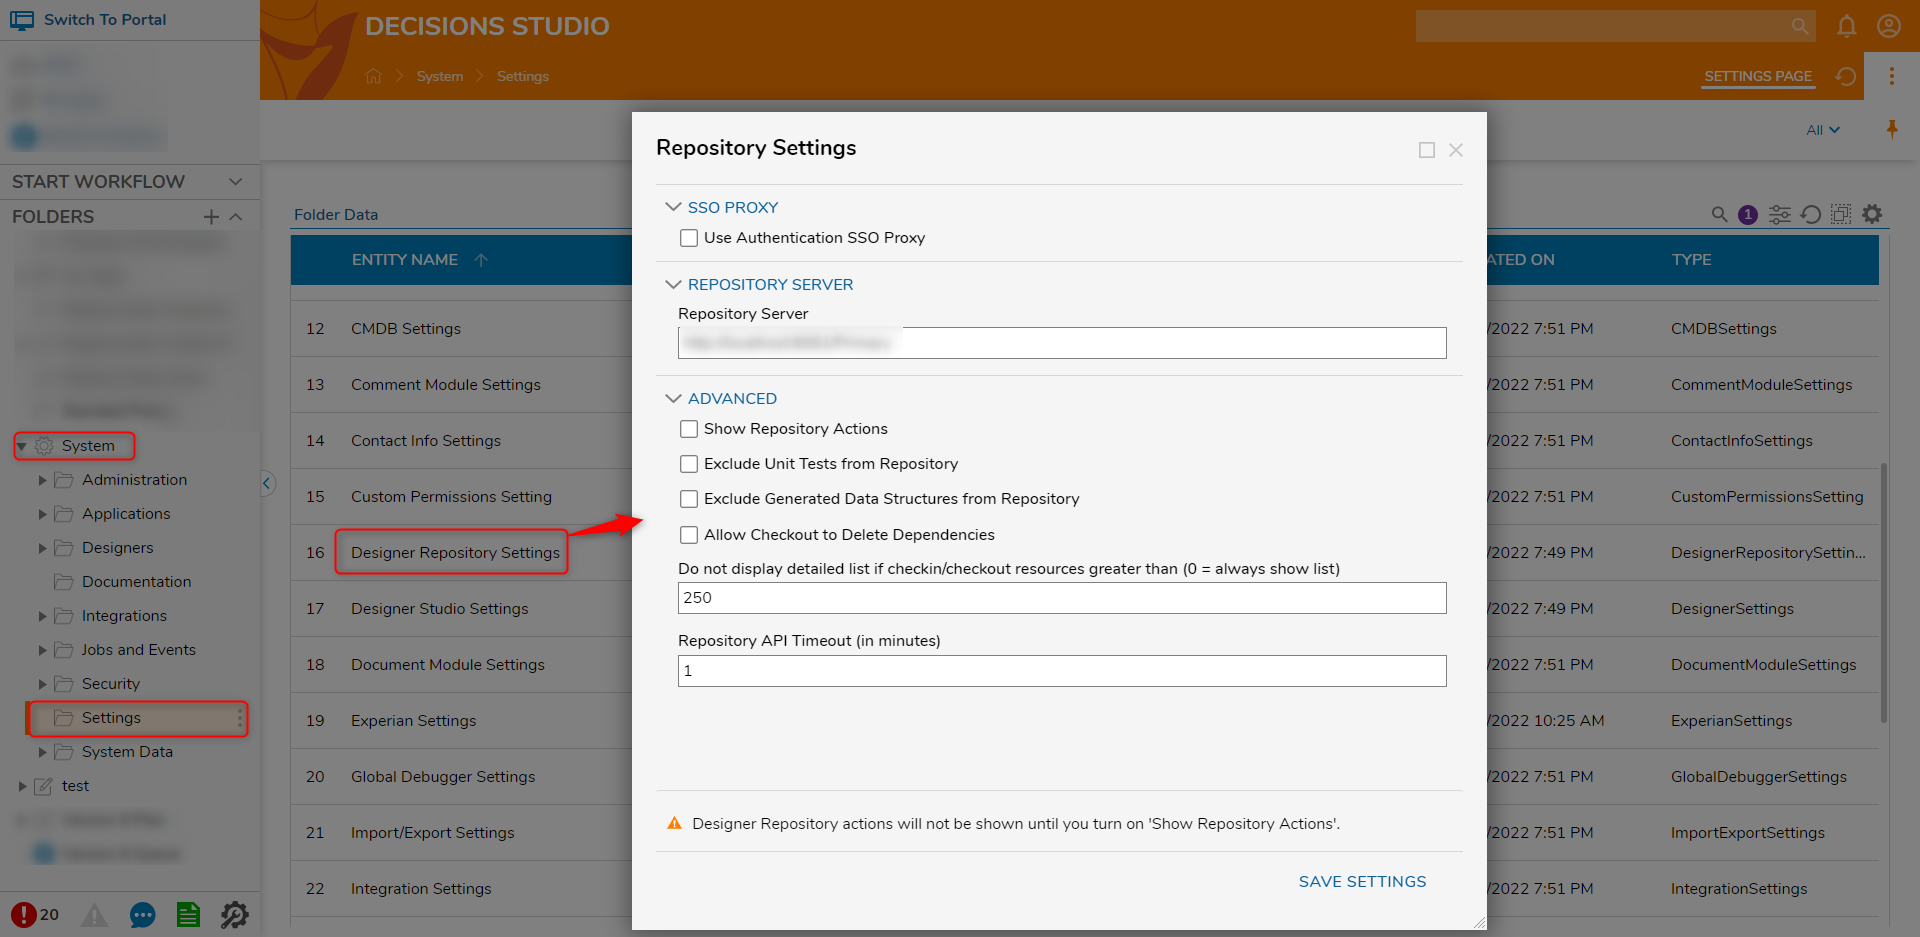
Below is a brief overview of the settings:
| Setting Name | Description |
|---|---|
| Use Authentication SSO Proxy | Enables the use of Single Sign-On when committing changes to the Repository. |
| Repository Server | This setting is used to store the URL address of the Designer Repository. /Primary will need to be appended to the end of the address in order to use the Repository. |
| Show Repository Actions | Shows the Repository Actions when right clicking Designer Elements |
| Exclude Unit Tests from Repository | Excludes Unit Tests from being included during check-in or checkout of a Project |
| Exclude Generated Data Structures from Repository | Prevents generated instances of a Data Structure from being included when checking in a Project. |
| Allow Checkout to Delete Dependencies | Allows the Checkout action to remove deleted dependencies from an environment. |
| Do not display detailed list if checkin/checkout resources greater than (0 = always show list) | Prevents individual items from being displayed when checking in/out a Project. By default, the items will appear if there are less than 250 items to be displayed. |
| Repository API Timeout | Determines the length of time before a request to a Repository environment times out. |