Overview
The Raw SQL Step executes arbitrary SQL and should only be used when other methods of integrating with a database are not viable, including:
WARNING!!!
The Raw SQL Step requires an advanced ability to write and understand SQL Queries. It does NOT sanitize inputs which introduces the potential for SQL injection vulnerabilities.
Each use of this step is treated as a separate call and could impact performance on systems with large volume SQL Queries/calls.
To learn how to hide this step in the Flow Designer toolbox, visit Toolbox Visibility Rules.
Each use of this step is treated as a separate call and could impact performance on systems with large volume SQL Queries/calls.
To learn how to hide this step in the Flow Designer toolbox, visit Toolbox Visibility Rules.
Example
The following example utilizes the Raw SQL Step to pass a SQL Query made against the Account database onto a CSV Editor within a Form.
Additional Information/Prerequisites
The example below assumes the Northwind database has already been integrated with Decisions. Users may use their own default Decisions database or they may integrate with another database.
For more information on integrating a database, see Integrating an External Database with a Flow.
For more information on integrating a database, see Integrating an External Database with a Flow.
- From a Designer Folder, select CREATE FLOW from the Global Action Bar. Then, CREATE a new Flow.
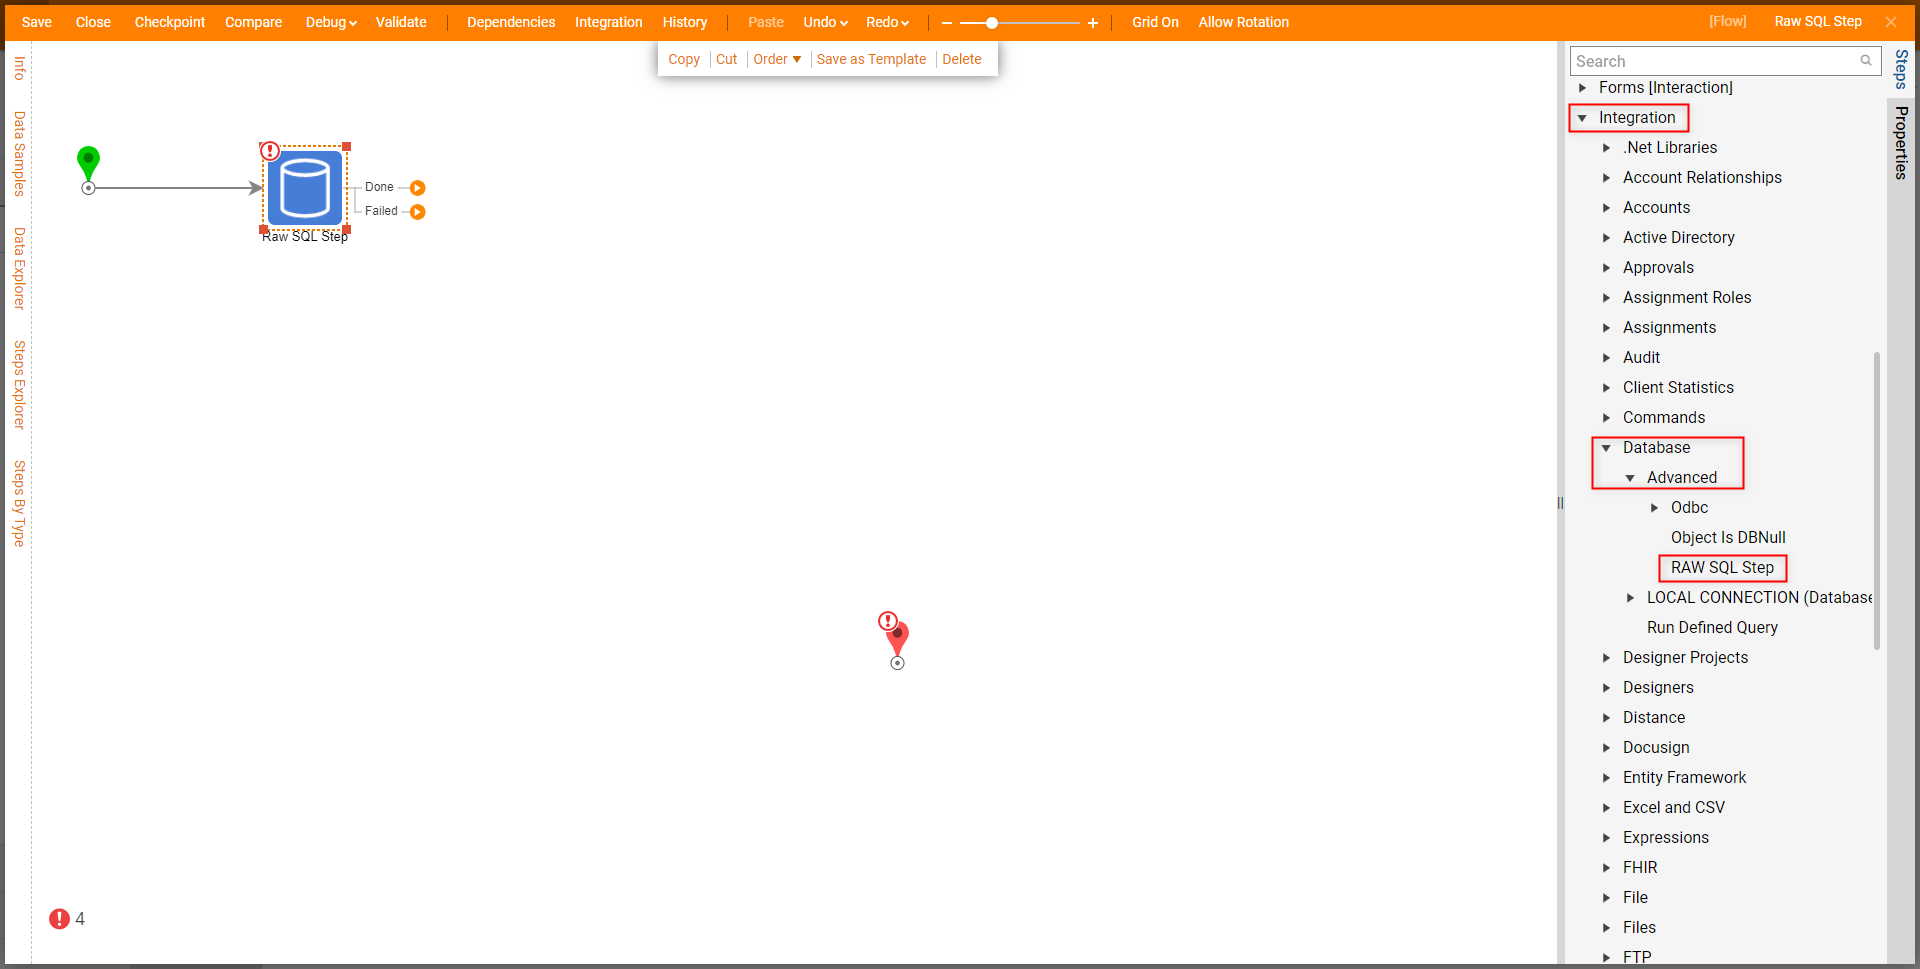
- From the Flow Designer, attach a Raw SQL Step from Steps >Integration > Database > Advanced, to the Start step.
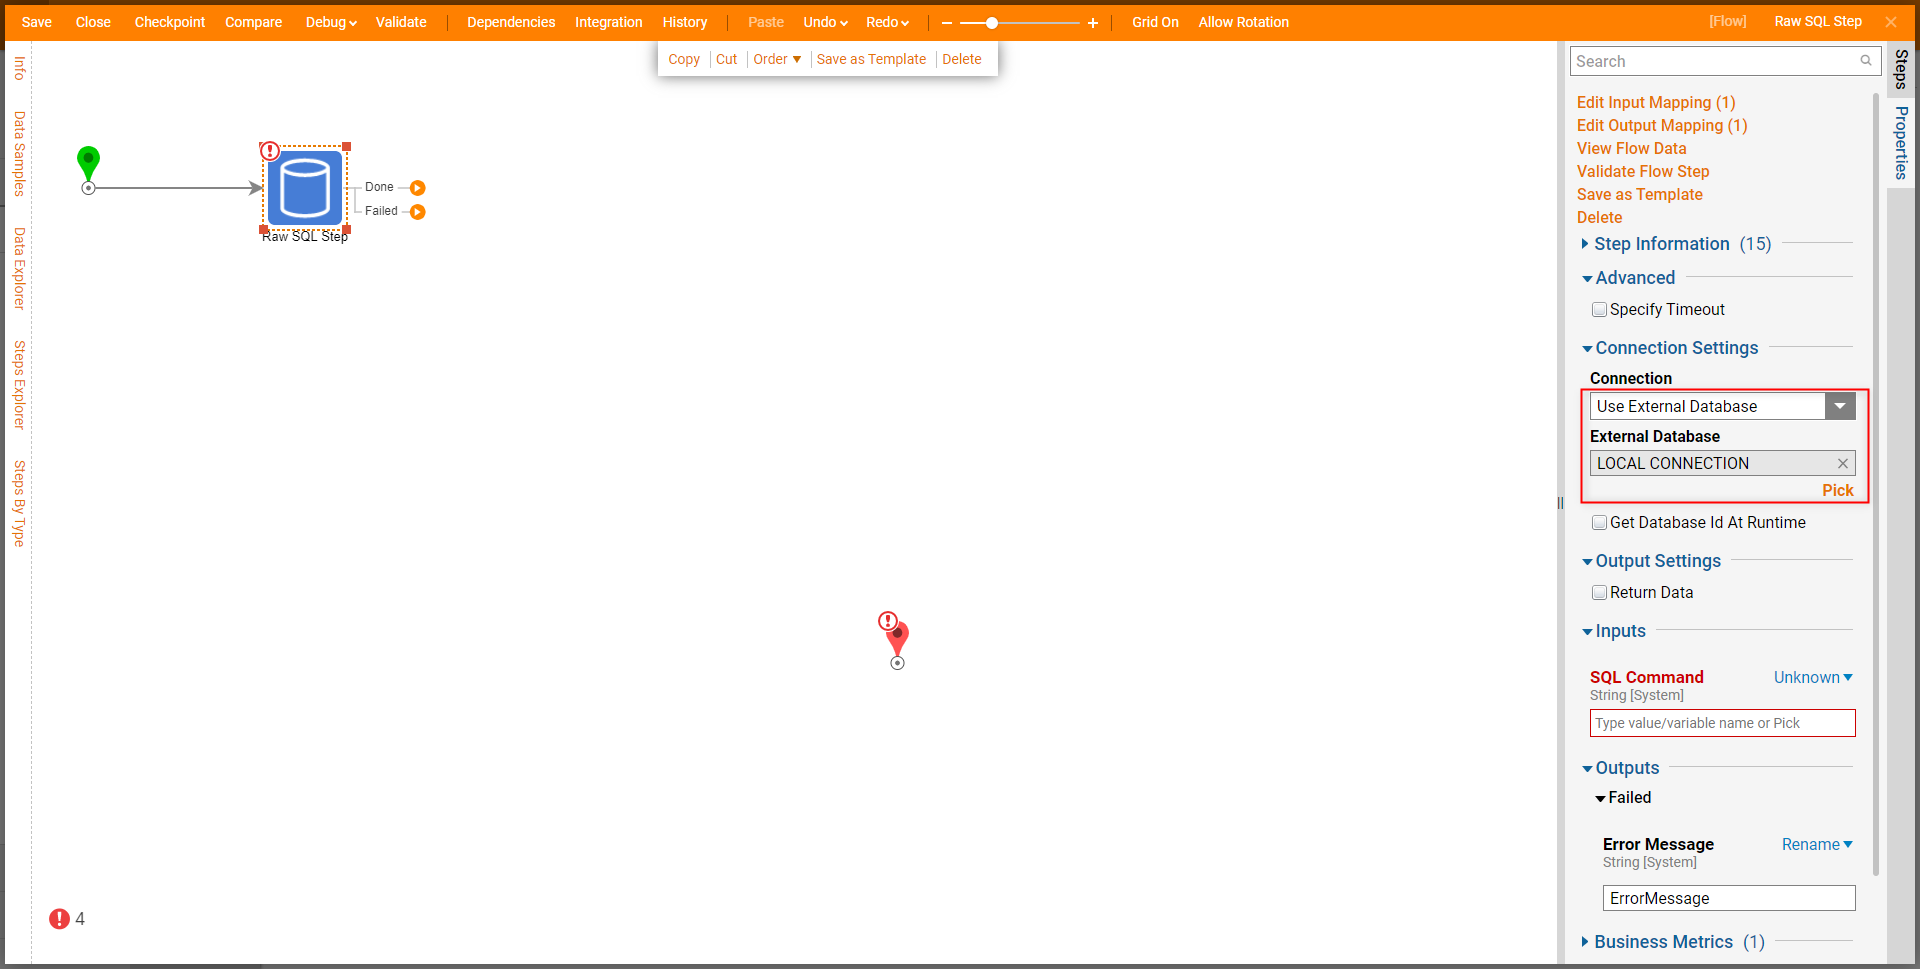
- From the Properties tab of the Raw SQL Step, under Connection, select the desired Connection type (for this example External Database), then Pick the desired Database(LOCAL CONNECTION). Additional Connection OptionsIf desired/required, users may select one the following options instead of the External Database option:
- Use Current Connection (to query Decisions tables)
- Use Custom Connection *(to define a connection to the database)*
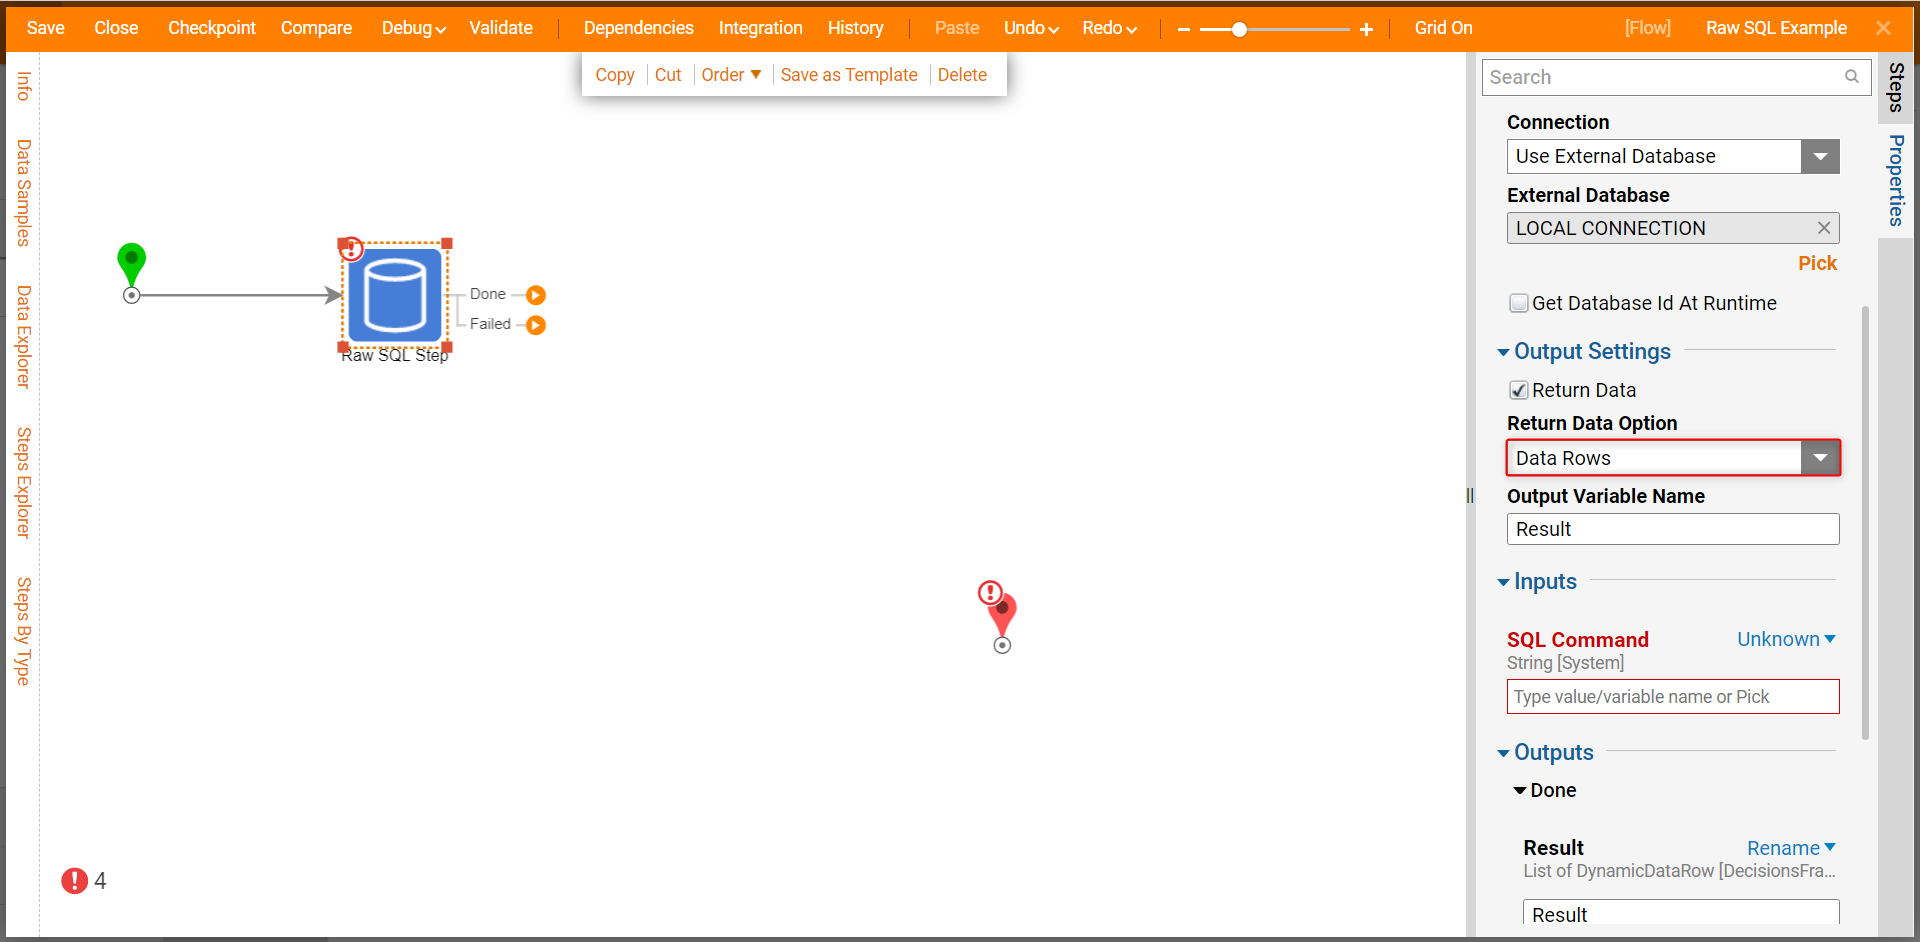
- Under Output Settings, determine if the query will Return Data.
- In the case of this example, check the Return Data box.
- Then under Return Data, select Data Rows.Additional Return Data OptionsThe following represents a list of all the available Return Data Options on the Raw SQL Step:
- Select Type (if have a defined type that matches query output)
- Data Rows (output will be represented as a collection of Rows with generic Columns)
- CSV File (data represented in FileData format CSV File)
- All Report Data (outputs Report Data type)
- Excel File (data represented in FileData format Excel File)
- PDF File (data represented in FileData format PDF File)
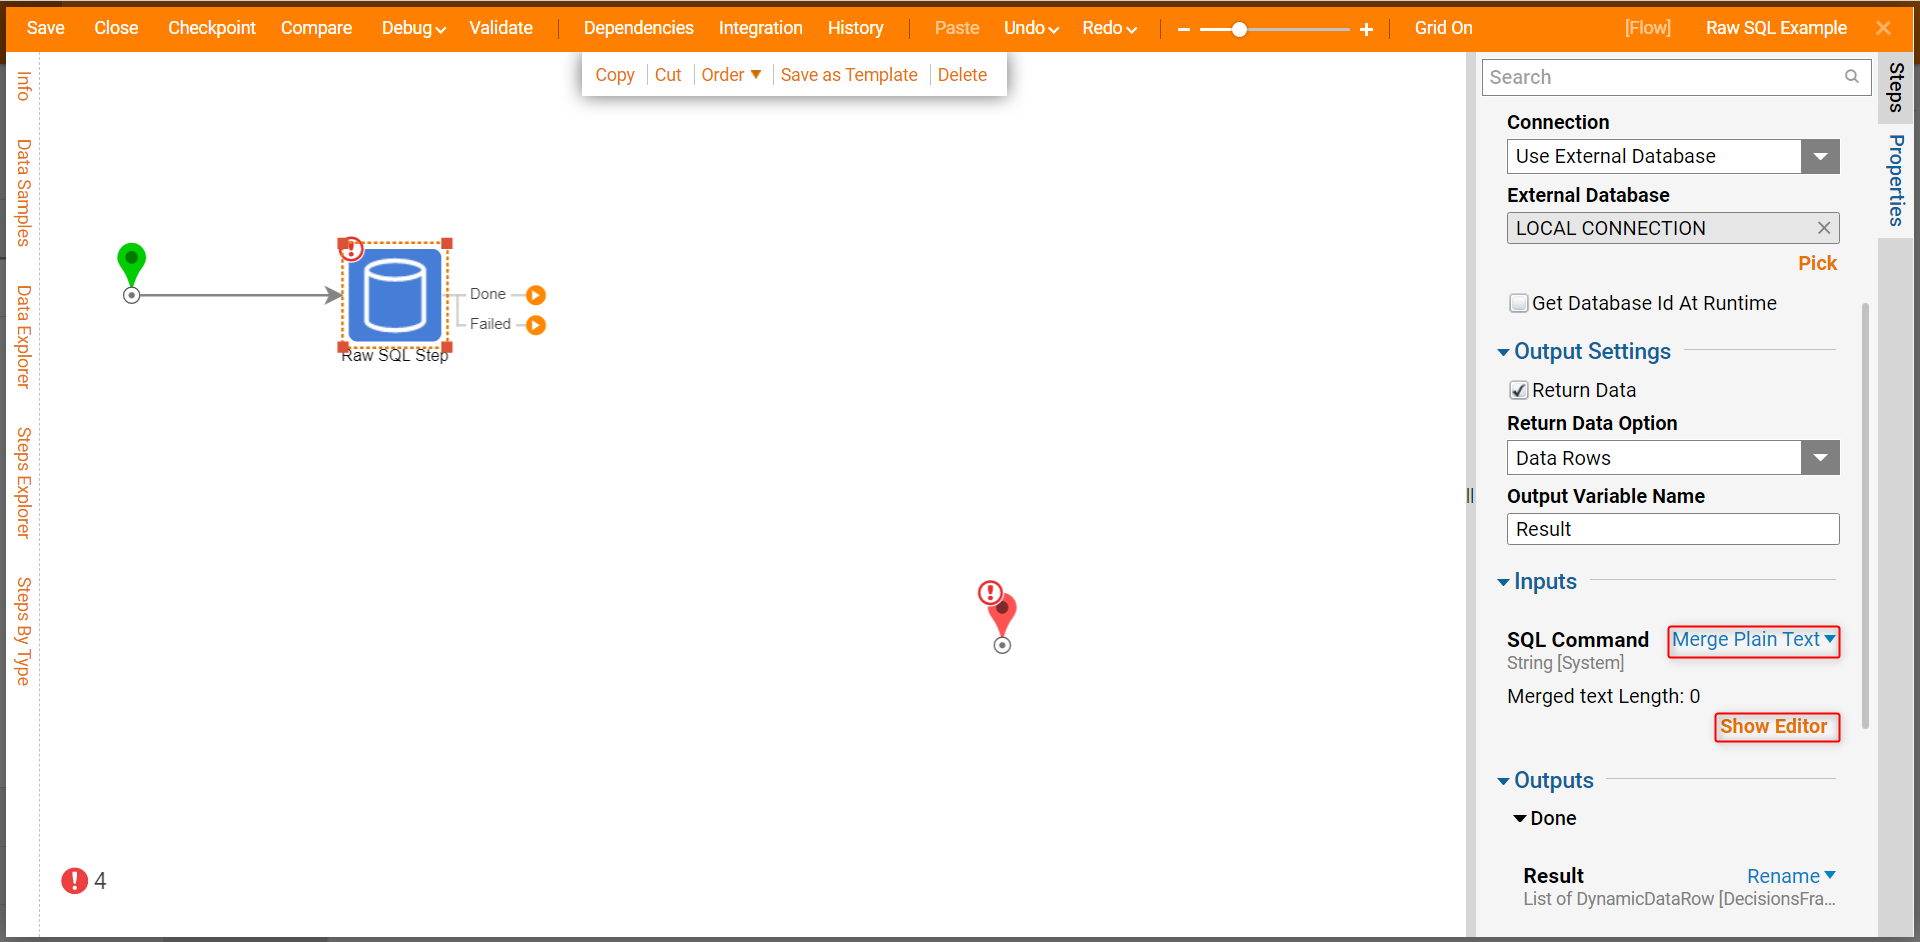
- Under Inputs, set the Mapping Type for SQL Command to Merge Plain Text, then click Show Editor.
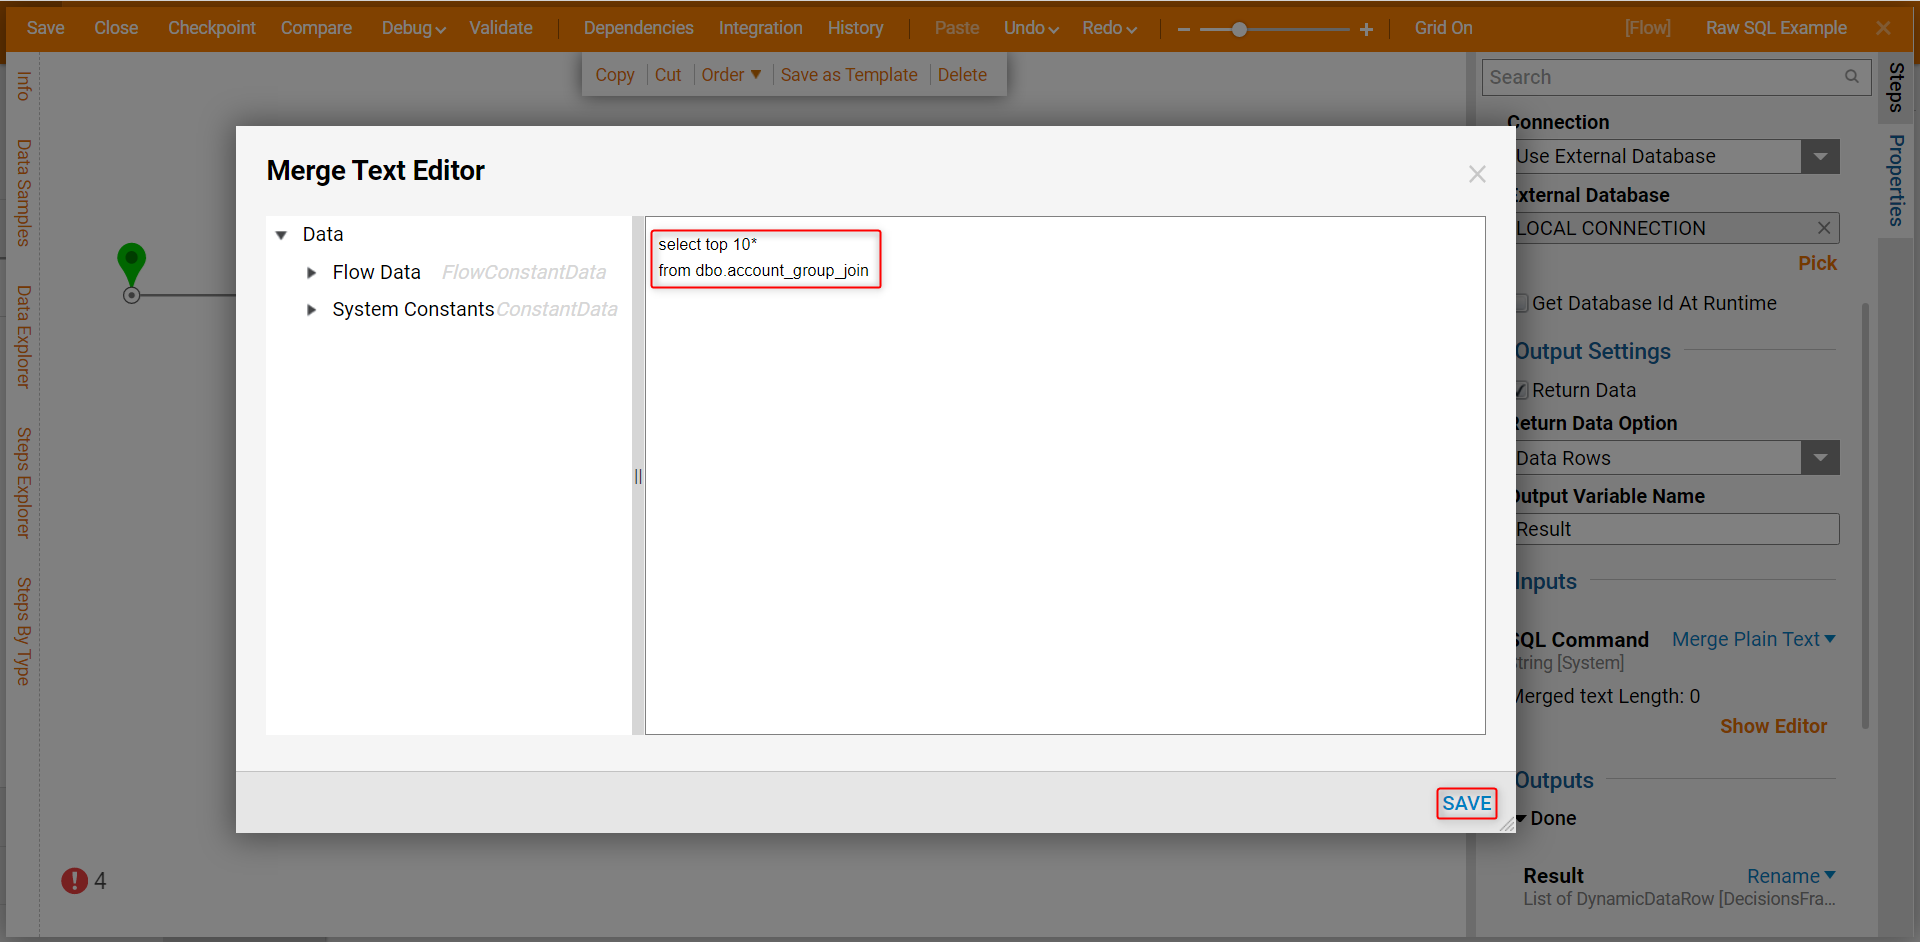
- From the Merge Text Editor, define a SQL Query, then click SAVE.
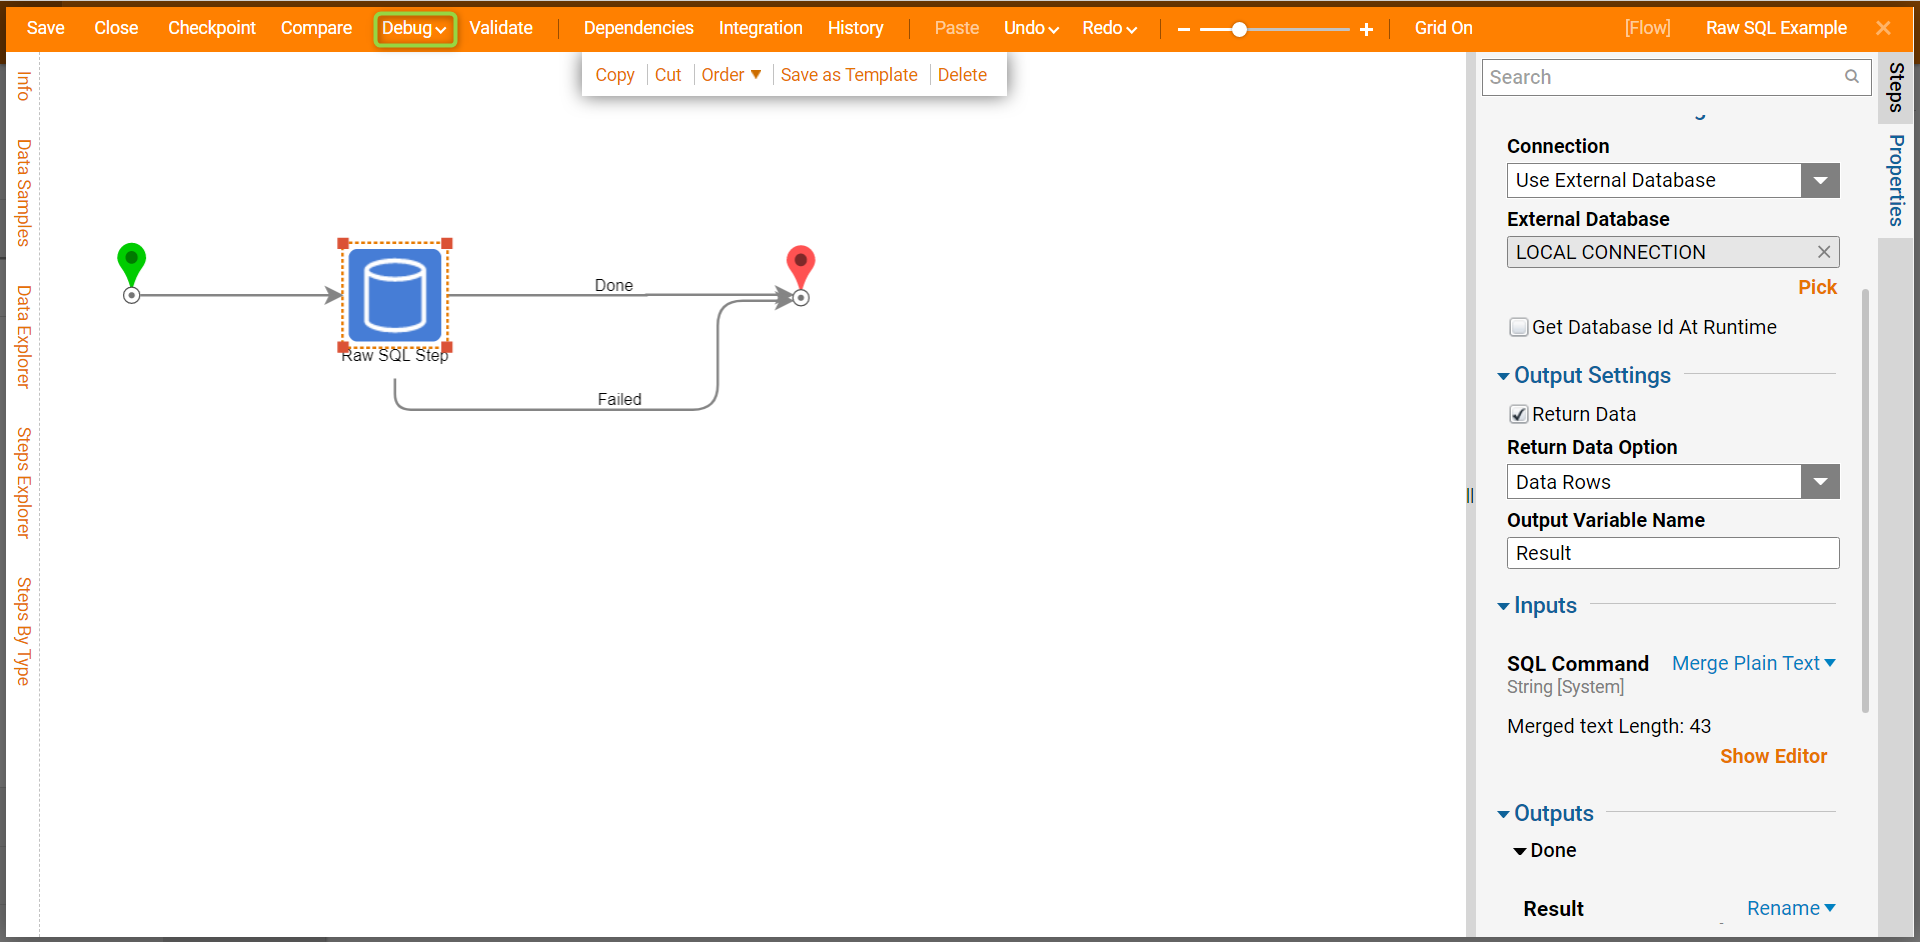
- Connect the Done and Failed paths to the End step.
- Select Debug from the Top Action Bar, and run the Debugger in Full.
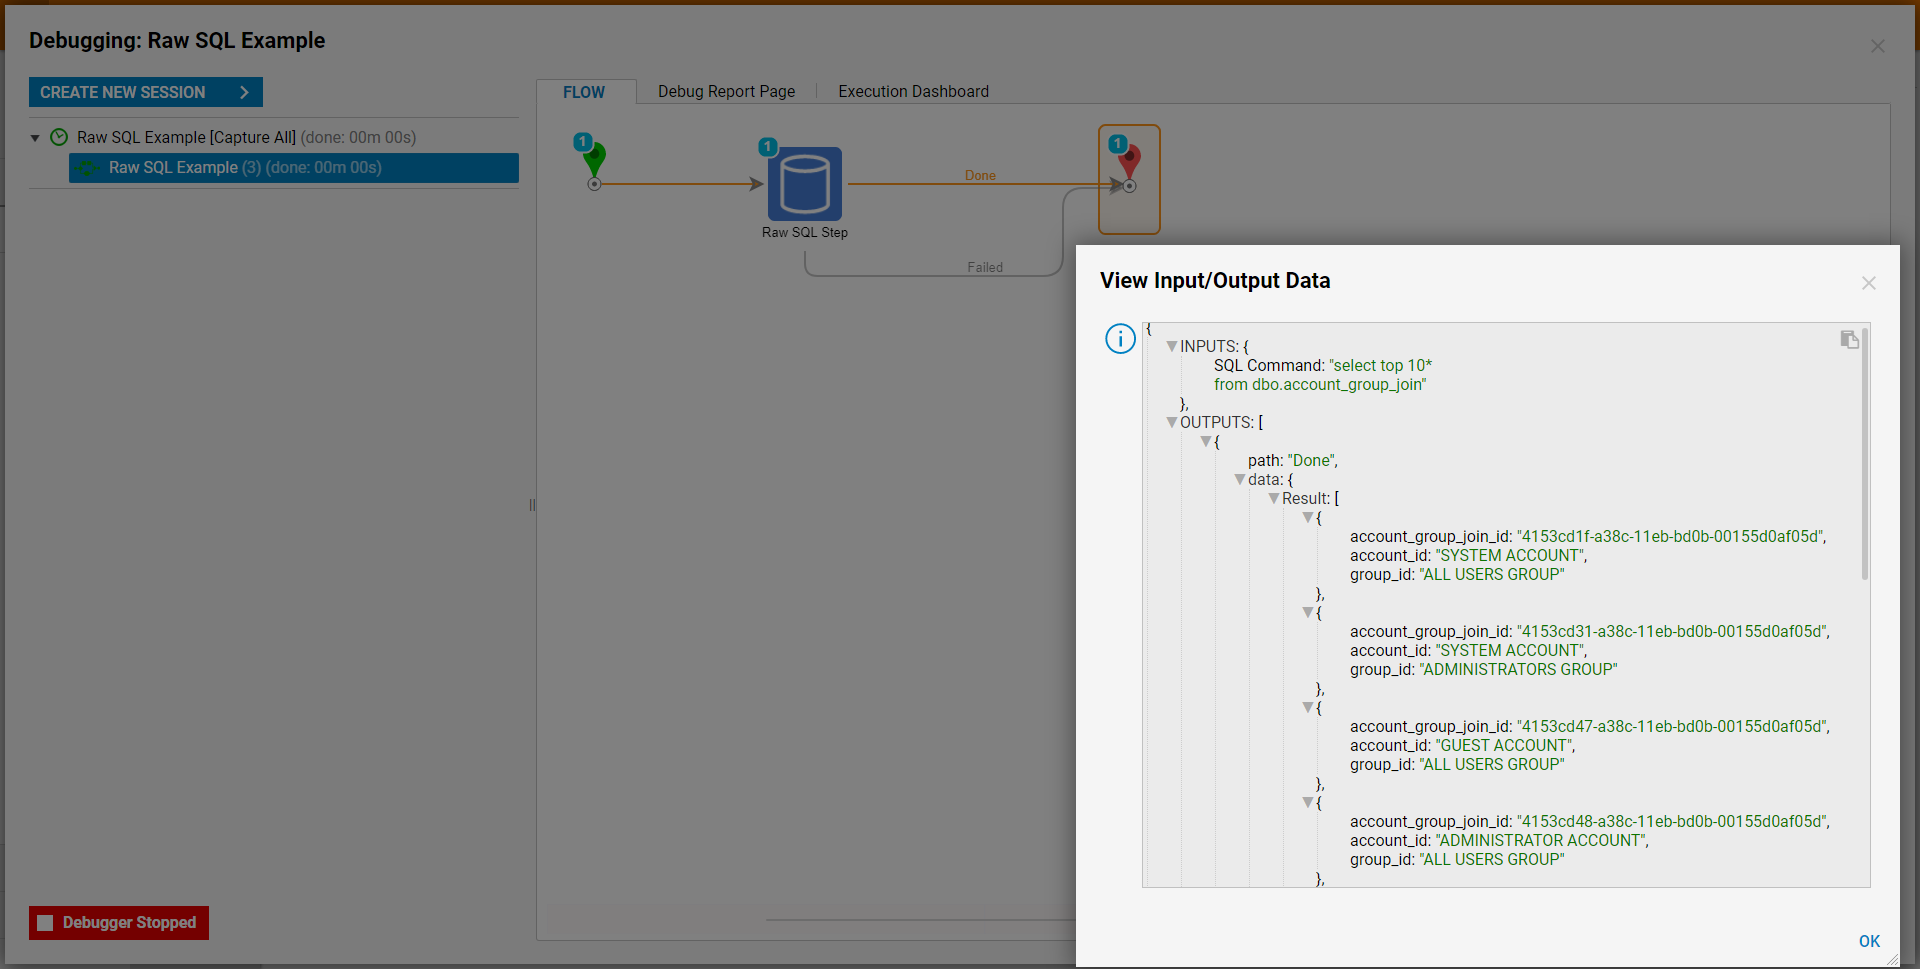
- When the Debugger runs, click on the Raw SQL Step, and select Execution 1 > View Input/Output Data.
- The resulting window will show a user their top 10 listed Account and Group IDs.
Use Transaction Data
As a way to further the ability to integrate with Database Tables, Decisions installations v.6.19+ (or 7.5+ in 7x) offer the ability to use Transaction Data from Transaction steps as the Connection Settings for the Raw SQL Step. By doing so, users may update or add a value to a Database.
Additional Information Regarding Transaction Steps
The following example involves the configuration of Transaction steps. For more information on Transaction steps, see Using Transaction Steps.
To utilize this feature to update an entry in the Address Database Table:
- From the Flow Designer, attach a Start Transaction step from Steps > Integration > [NAMEOFDATBASE} (this example utilizes Steps > Integration > LOCAL CONNECTION (Database), to the Start step.
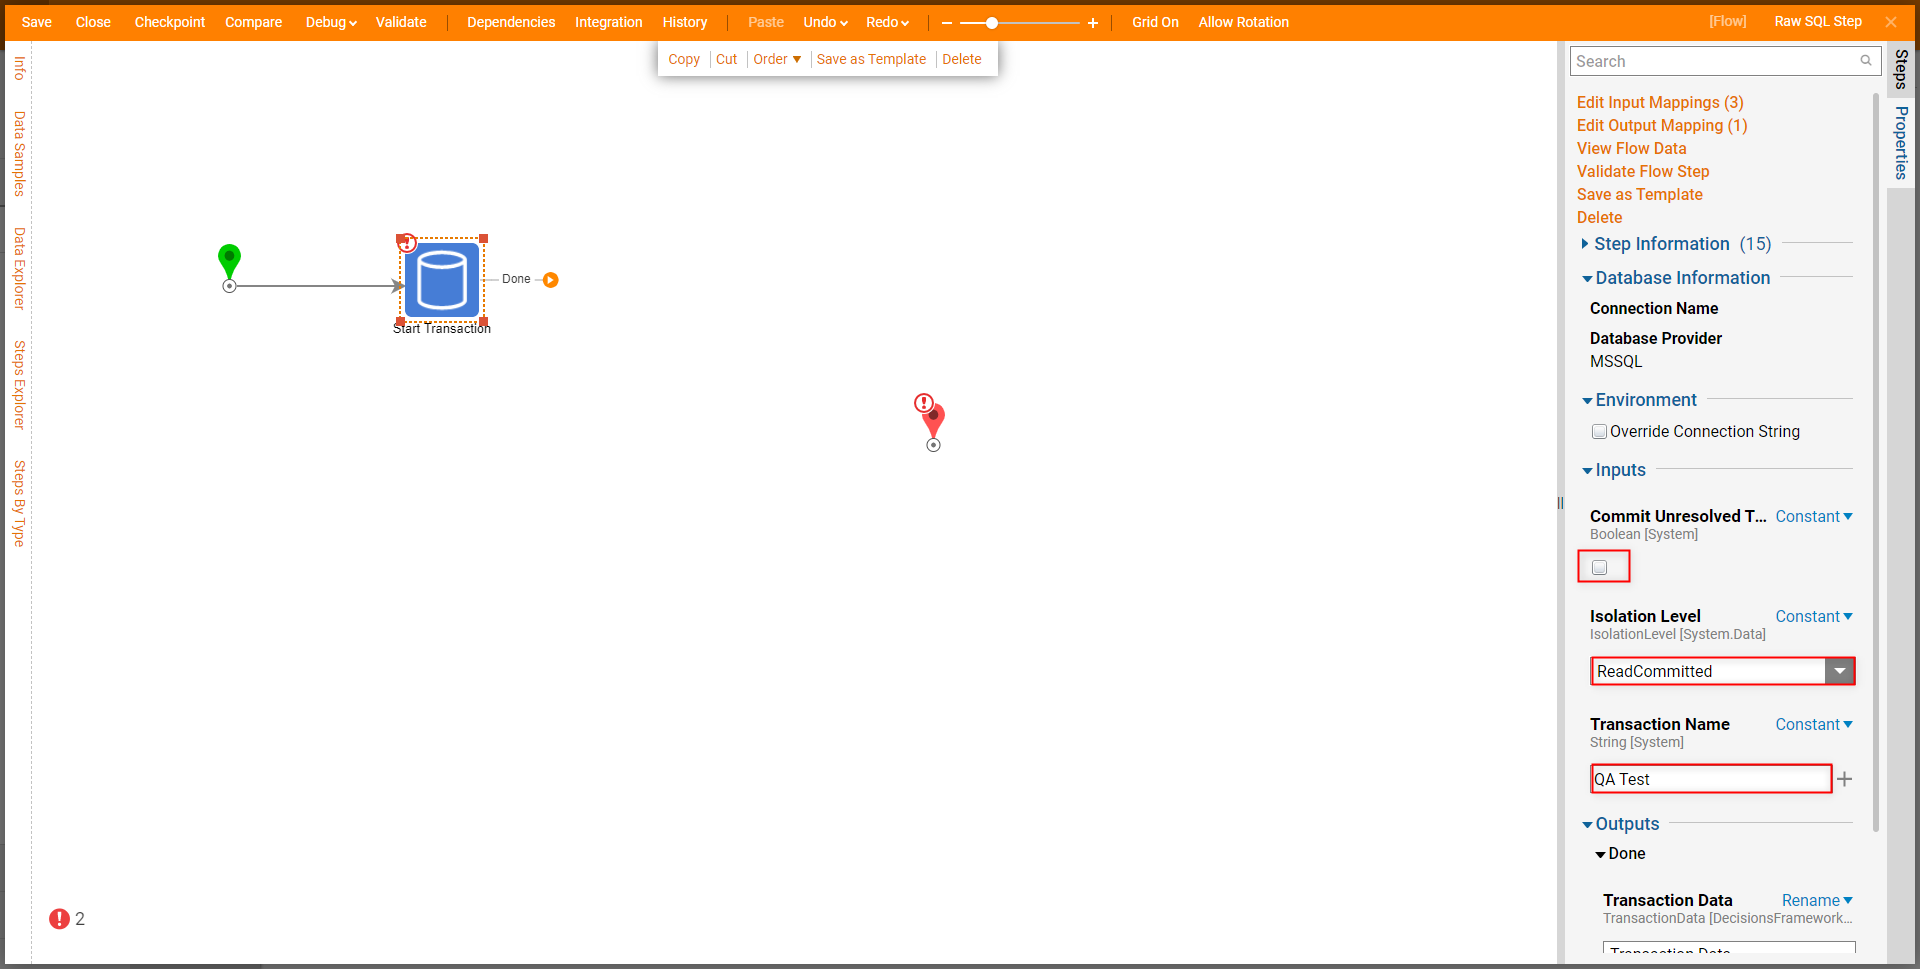
- Select the Start Transaction step to navigate to its Properties and configure its Inputs; set Commit Unresolved Transactions to False, set Isolation Level to ReadCommitted, and provide a Transaction Name.
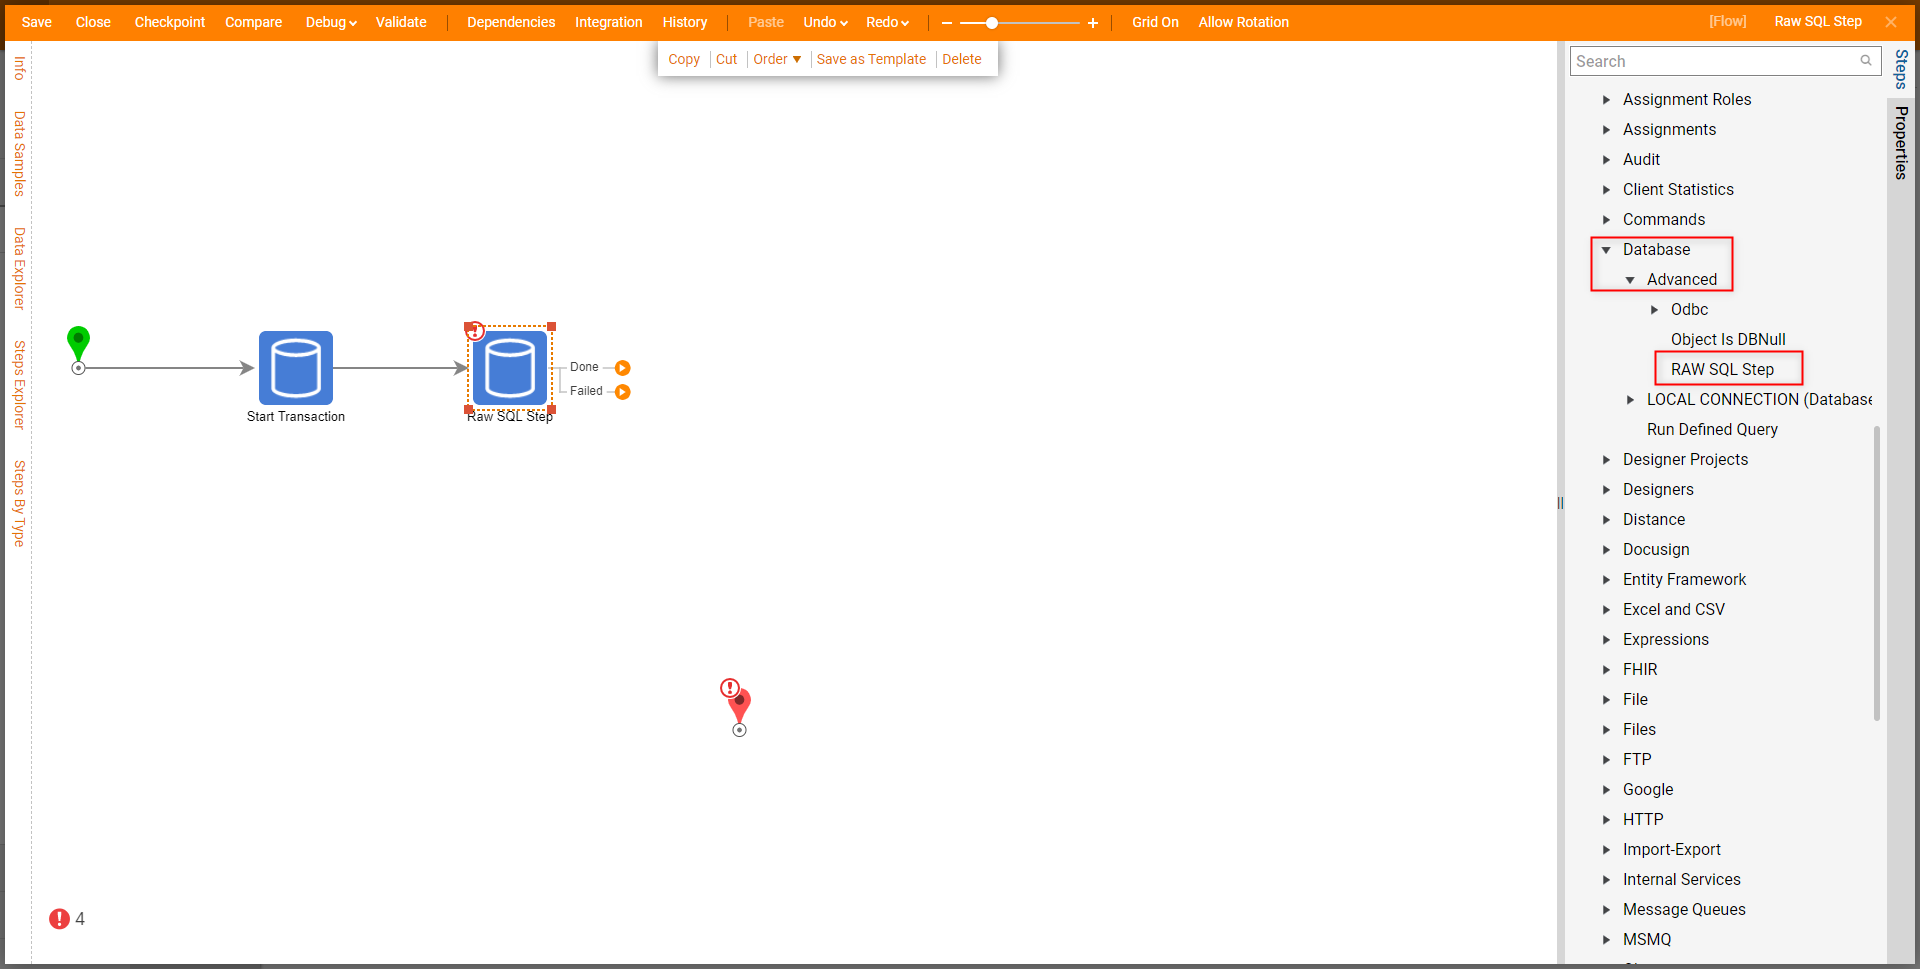
- From Steps > Integration > Database > Advanced, attach a Raw SQL Step to the Start Transaction step.
- From the Properties of the Raw SQL Step, under Connection Settings, check the Use Transaction Data box.
- Under Output Settings, check Return Data. Under Output Type, select the desired Output; for the sake of this example select Account.
.png)
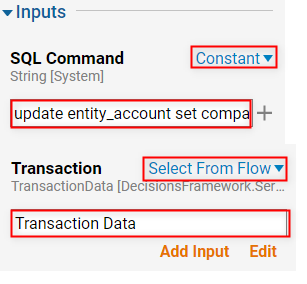
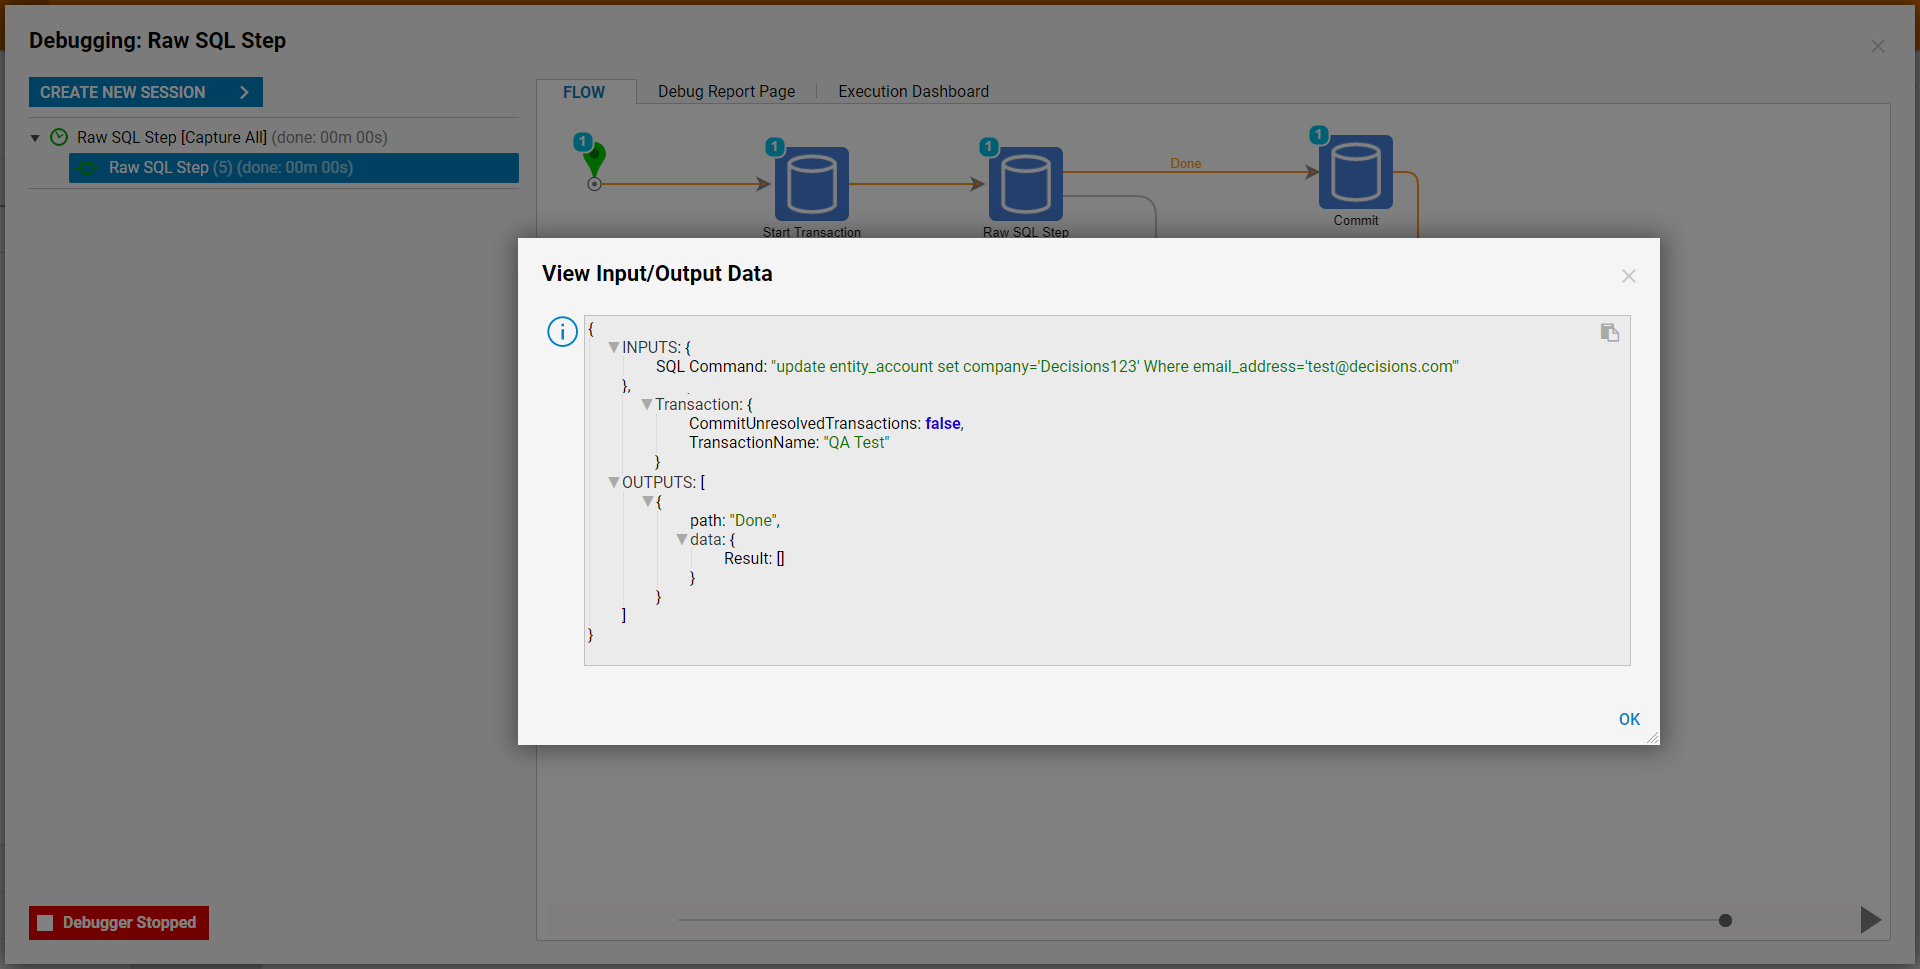
- Under Inputs > SQL Command, Constant map the desired message. Then, still under the Inputs section, Select From Flow map Transaction Data to Transaction. Additional Information on SQL CommandThe SQL Command should be a line of text in SQL Query format. This example, uses update entity_account set company='Decisions123' Where email_address='test@decisions.com'.
- From the same category as the Start Transaction step, attach a Commit Transaction step to the Done path of the Raw SQL Step.
- From the newly added step's Properties tab, map Transaction Data to Inputs > Transaction.
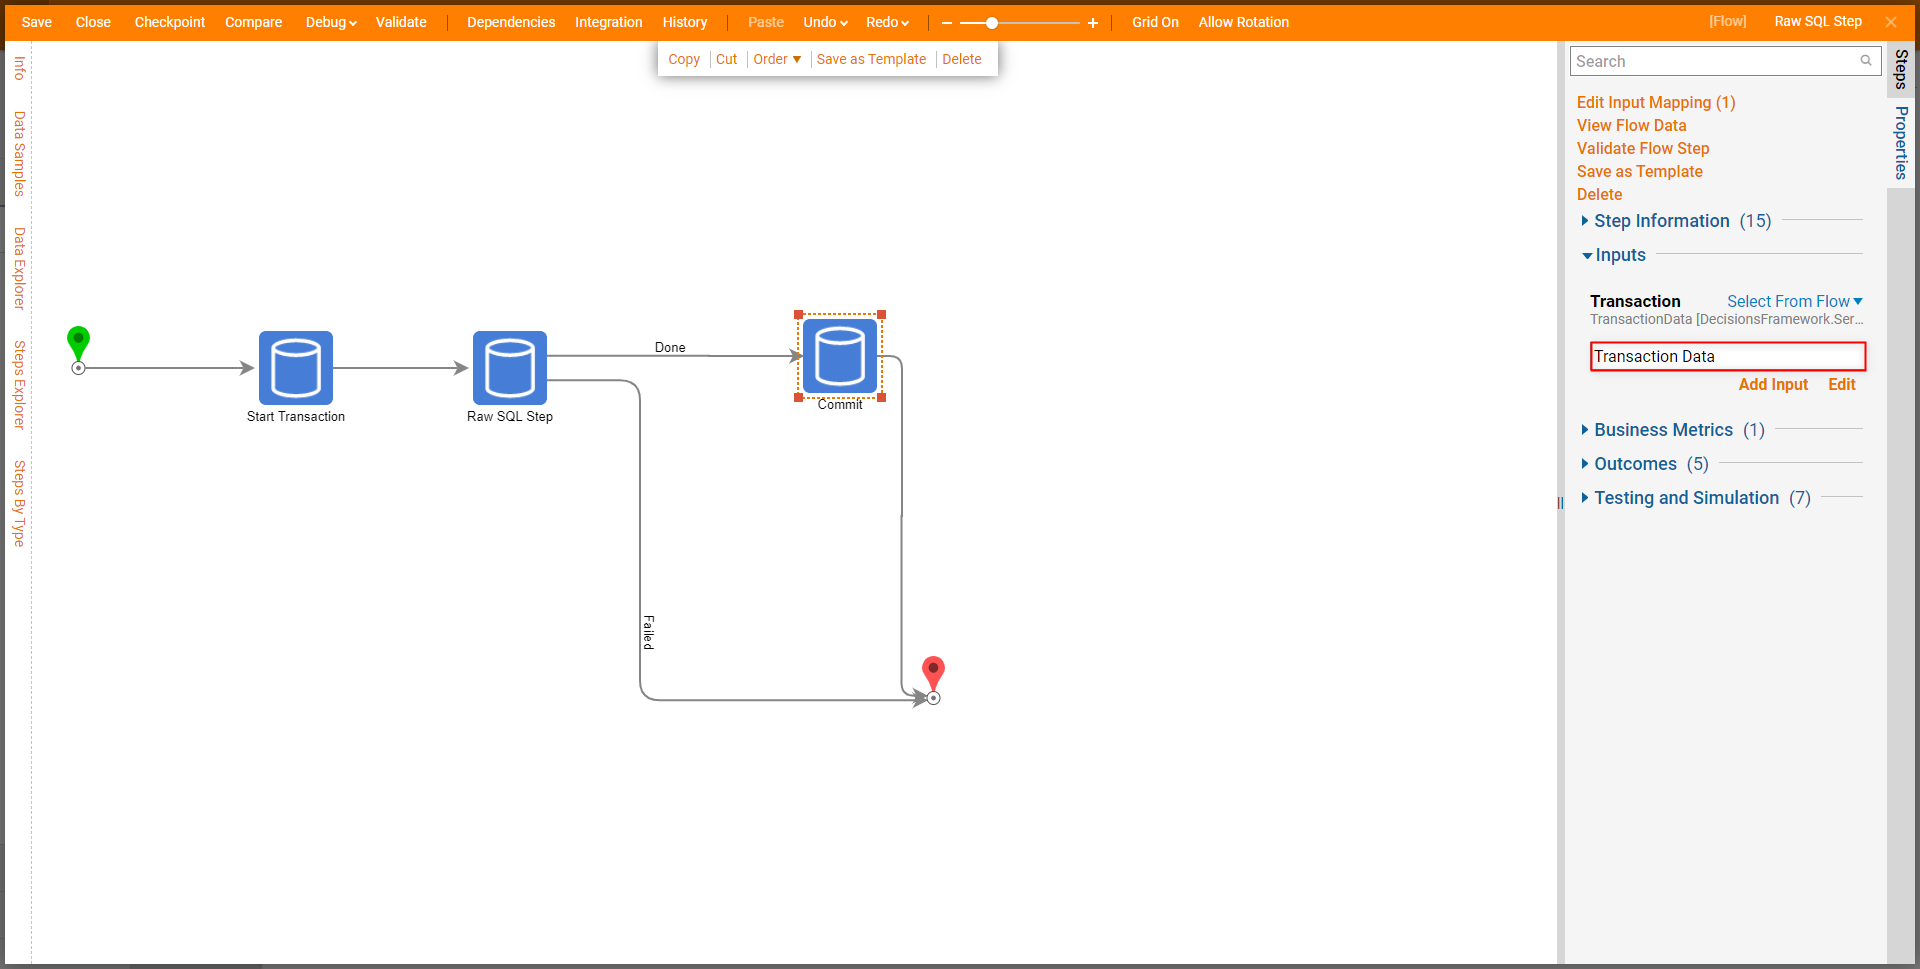
- Connect the Done path of the Commit Transaction and the Failed path of the Raw SQL step, to the End step. Save the Flow.
- From the Flow Designer, select the Debug link from the top Action bar. Then, click FULL.
- After the Flow runs, verify the data running in and out of the Raw SQL step by selecting Raw SQL Step > Execution 1 > View Input/Output Data. Then close out of the Debugger.
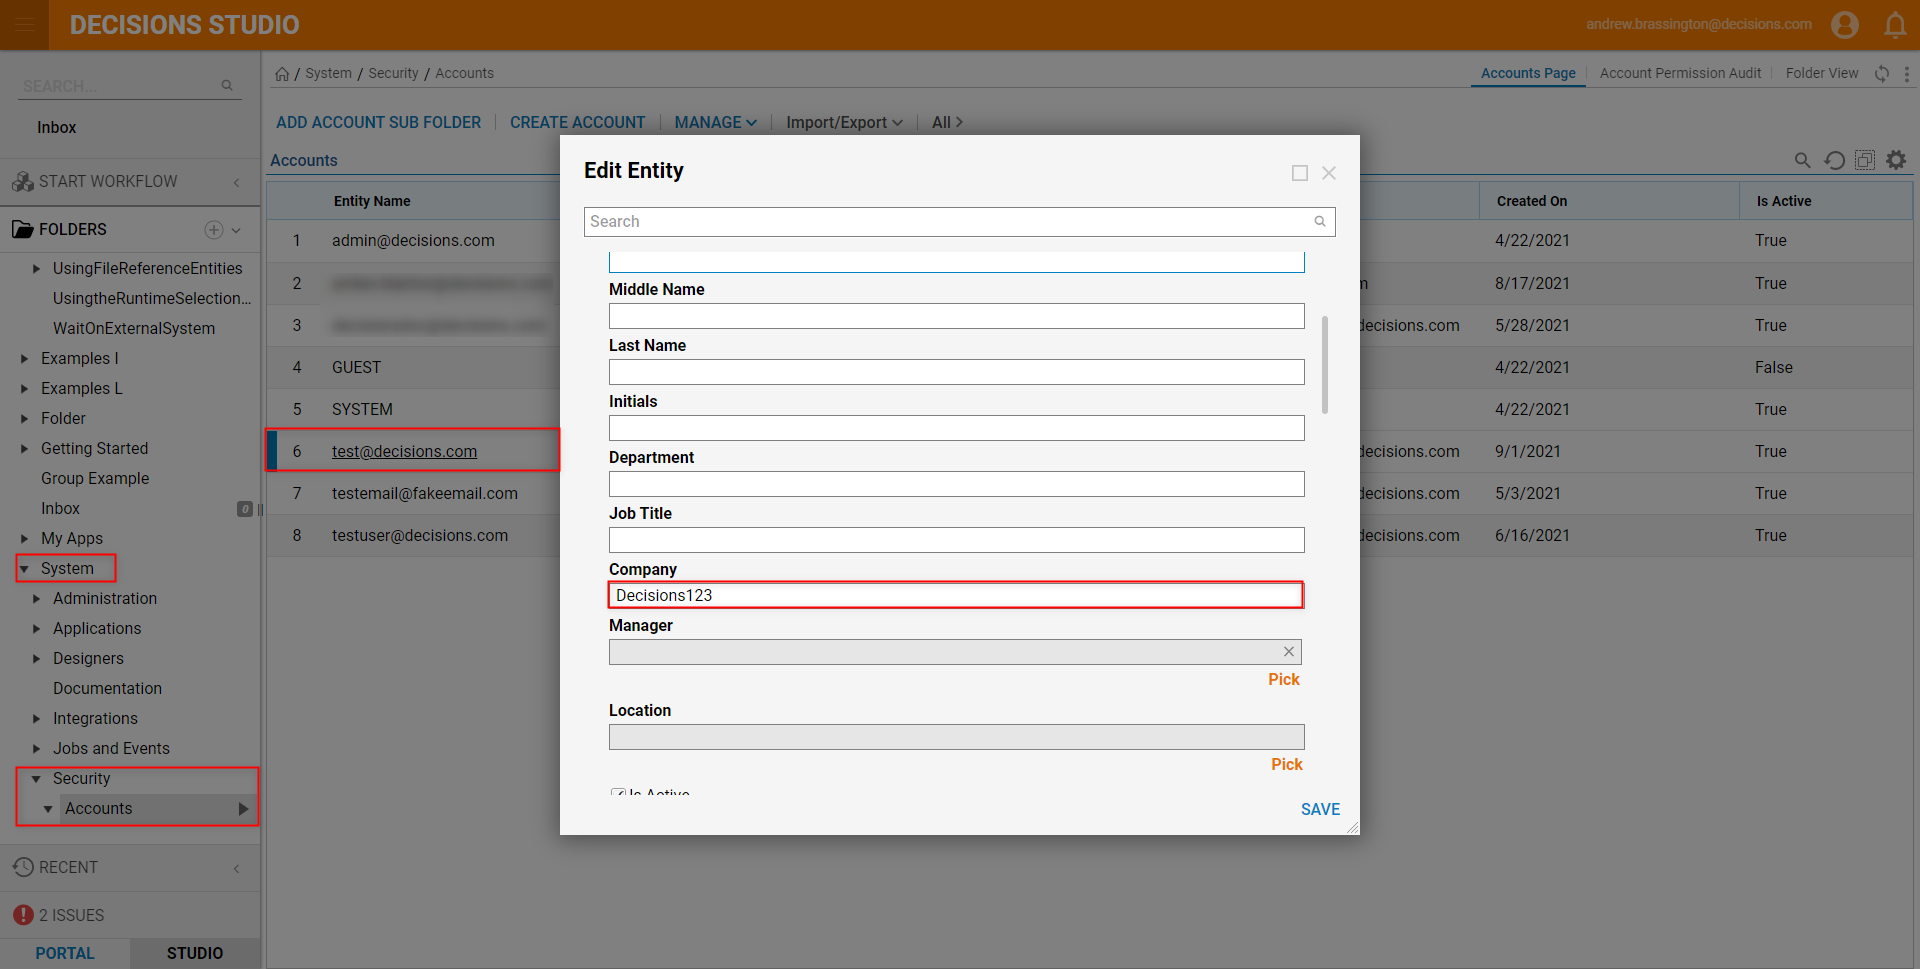
- From the Decisions Studio, navigate to Security > Accounts, and right-click test@decisions.com and select Edit Account. Confirm that the Company is defined as Decisions123.
Additional Information on Debug Results
The changed Company information under the test@decisions.com Account confirms that the Raw SQL step utilized the Transaction info, in addition to the defined SQL Query, to pass the desired changes to the Commit Transaction step.
